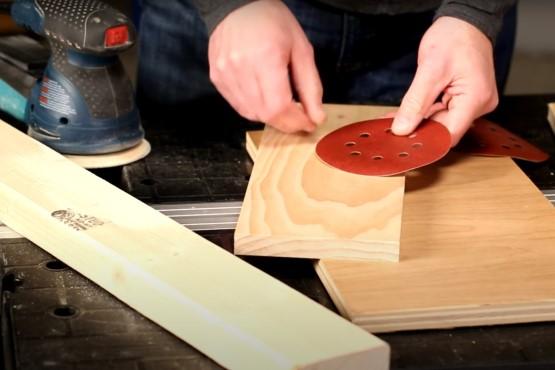
(Updated September 2025) There’s plenty to love about building your own projects, but there’s one part of the process almost nobody likes: sanding. Sanding is tedious and it makes one heck of a mess. But sanding is also a necessary part of building wood projects. We may not be able to make it less tiresome, but we can make it a lot easier by helping you minimize the mess. Here are six ideas to keep sanding dust under control.
1. Maximize your sander’s collecting capability
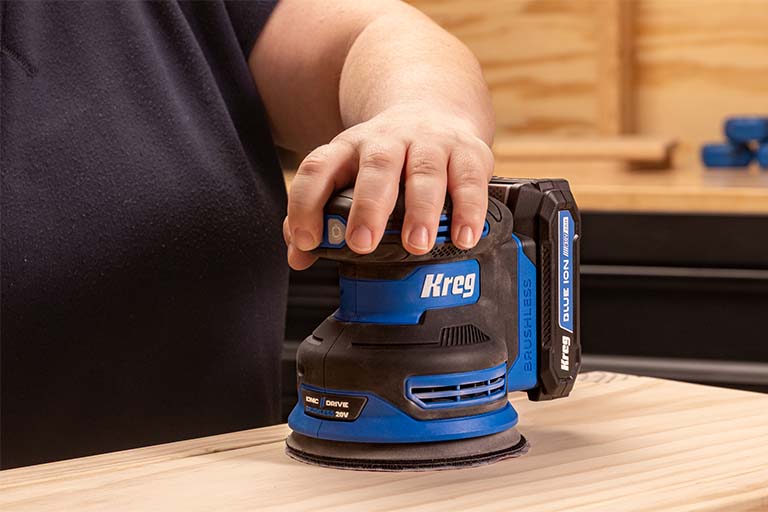
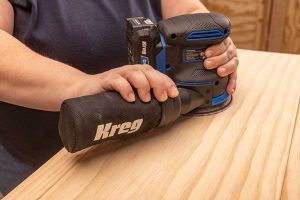
One of the best ways to minimize the sanding mess is to capture the dust right at your sander. Sanders all come with some sort of built-in dust collection. On inexpensive models, it may just be a plastic canister that needs to be emptied regularly. Higher-end sanders often have a canister with a built-in filter, or they use a cloth bag that lets air through while still stopping dust. Over time the filter or fabric becomes clogged with dust.
To keep them operating effectively, blow out the filter or fabric with compressed air after you empty the dust. You’ll be surprised by how much trapped dust comes out. Plus, you’ll get a good boost in dust collection efficiency. If you don’t have an air compressor, stick the port end of the canister into a shop vacuum hose, turn on the vacuum, and then tap the canister repeatedly.
![]()
 2. Connect your sander to a shop vacuum
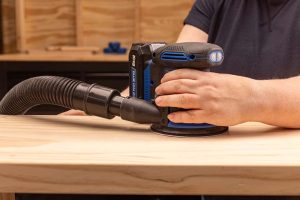
An even better solution is to connect your shop vacuum hose to your sander in place of the dust canister. But most vac hoses are bulky, and they rarely fit well on the sander’s port.
A great option is to get a hose and adapter kit. Available from woodworking specialty retailers like Rockler.com, these kits come with a smaller-diameter hose and several flexible tips so you’re almost sure to be able to fit one to your sander. Plus, you might be able to attach the hose to other tools, such as a circular saw, to minimize the mess they make, too.
Why Connect a Shop Vac to Your Sander?
Connecting a shop vac to your sander is more than just a smart cleanup strategy — it’s a game changer for your workspace. Not only does it reduce dust and debris, but it also improves air quality, keeps your project surface smooth and visible, and helps tools work more efficiently. Here’s why pairing these two tools can make your sanding projects cleaner, easier, and more efficient.
Improved air quality
By capturing dust at the source, you significantly reduce the amount of airborne particles in your workshop, making it safer to breathe.
Cleaner workspace
Less dust means less cleanup time after your project, allowing you to focus more on woodworking and less on tidying up.
Better visibility
With less dust floating around, you’ll have a clearer view of your work, leading to more precise results.
Extended tool life
Dust can accumulate inside power tools, potentially causing damage over time. By collecting dust efficiently, you help prolong the life of your sander and other equipment.
Improved finish quality
Less dust on your workpiece means fewer imperfections, resulting in a smoother, more professional finish.
Tools and materials you need
-
Shop vac
-
Orbital sander (or other type of sander)
-
Vacuum hose
-
Hose adapter (if necessary)
-
Hose clamps or tape (for securing connections)
-
Dust collection bag (optional, for added filtration)
Step-by-step guide to attaching a shop vac to an orbital sander
Now that you understand the benefits and have gathered your materials, let’s walk through the process of connecting your shop vac to your orbital sander.
Step 1: Identify the dust port on your orbital sander
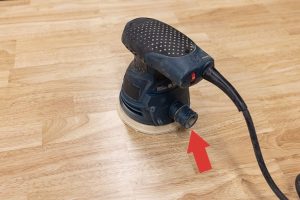
Most modern orbital sanders come with a dust port, which is typically a small opening at the rear or side of the tool and designed to eject dust during operation. Locate this port on your sander; this is where you’ll attach the vacuum hose.
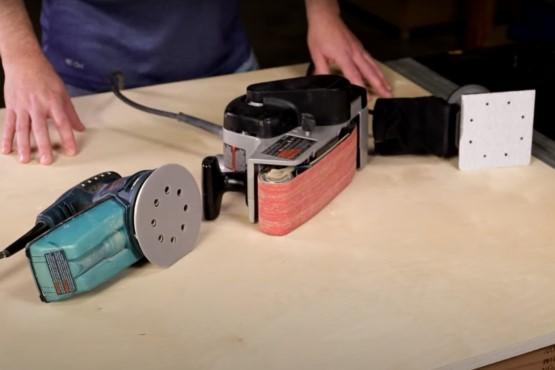
Learn the difference between orbital sanders vs sheet sanders and orbital sanders vs belt sanders.
Step 2: Choose the right vacuum hose and adapter
Hose diameter
Ensure the hose diameter matches — or can be adapted to fit — both your shop vac and the sander’s dust port.
Hose length
Pick a length that allows comfortable movement while working but isn’t so long that it becomes unwieldy.
Adapter
If the hose doesn’t fit directly onto the sander’s dust port, you’ll need an adapter. Many sanders come with adapters, or you can usually find universal adapters that fit various tool brands.
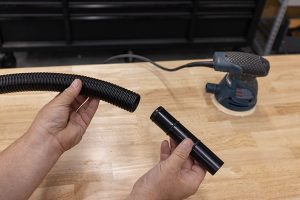
Step 3: Secure the hose to the dust port
If using an adapter, attach it to the sander’s dust port first. Connect the hose to the adapter or directly to the dust port if no adapter is needed.
Ensure a snug fit all around. You may need to use a hose clamp or strong tape to secure the connection and prevent it from coming loose.
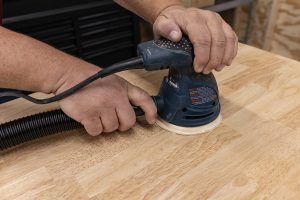
Step 4: Connect the hose to the shop vac
Connect the other end of the hose to your shop vac’s intake port. Again, double-check the fit, and use a hose clamp if necessary.
If your shop vac has variable suction settings, start on medium. You can adjust this later based on performance.
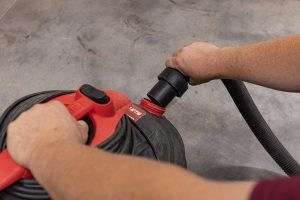
Step 5: Test the connection
Turn on both the shop vac and the sander, then run the sander over a scrap piece of wood. Check for dust escaping from any connection points and make sure the shop vac is effectively collecting the dust.
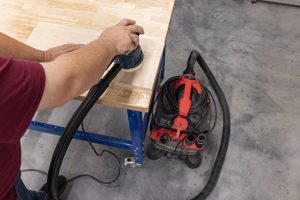
Troubleshooting common issues
Even with careful setup, you might encounter problems. Here are some things to try if you find your setup isn’t doing a good job.
Loose connections
If you notice dust escaping from connection points, double-check all connections and tighten them.
Use hose clamps or strong tape to secure loose areas.
Consider replacing worn-out adapters or hoses that no longer maintain a tight seal.
Poor suction
Check for clogs, leaks, cracks, and kinks in the hose or blockages in the sander’s dust port.
Ensure your shop vac’s filter isn’t clogged.
Try increasing the suction power on your shop vac, if it has variable suction.
Adapter doesn’t fit
Look for a universal adapter that’s compatible with your sander model.
Consider using plumber’s tape to create a tighter seal.
As a last resort, you might need to modify the adapter slightly, but be cautious not to damage your tools.
Other dust collection methods for sanders
While connecting a shop vac to your sander is an excellent dust collection method, it’s not the only option available. Let’s take a look at some alternatives.
Built-in dust collection systems
Many modern sanders come with built-in dust collection features, like:
Dust bags
These attach directly to the sander and collect dust as you work. Onboard dust storage bags are convenient, but usually have limited capacity and need frequent emptying.
Onboard canisters
Similar to dust bags but with larger capacity. Some models have transparent canisters, allowing you to easily see when they need emptying.
Pros
No additional equipment needed
Compact and portable
Cons
Limited capacity
May not be as effective as a shop vac setup
Dust extractors
Dust extractors are specialized vacuum systems designed specifically for woodworking. They often feature more powerful motors than typical shop vacs, and many include advanced filtration systems, including HEPA filters.
Some models even offer automatic tool activation, turning on when you start your sander.
Pros
Highly effective dust collection
Advanced filtration options
Often quieter than shop vacs
Cons
More expensive than shop vacs
Can be less versatile for general shop cleanup
Central dust collection systems
For larger workshops, a central dust collection system might be worth considering. These systems use a network of pipes to connect multiple tools to a central collector. They offer powerful suction and large capacity.
Pros
Efficient for multiple tools
Large collection capacity
Can improve overall workshop air quality
Cons
Expensive to install
Requires significant space
Less portable than other options
Choosing the right dust collection equipment
With several options available, how do you choose the right dust collection method for your needs? Consider these factors:
Factors to Consider:
Workshop size
Smaller spaces will naturally limit how large you make your dust collection system. Larger spaces often benefit from more powerful systems, as the distance from the vacuum to the tool may be large.
Frequency of use
Occasional hobbyists might be fine with simpler setups, while frequent users may want bigger systems that need less emptying and have better filtration and suction.
Budget
From small dust separators that attach to a 5-gallon bucket, to large systems with a central vac and large diameter hoses, dust collection systems range from affordable to quite expensive.
Mobility
Consider whether you need to move your setup frequently, or if you want to be able to move freely around projects without worrying about tipping over vacuum or collector.
Noise
Sound levels can vary quite a bit, as some dust collection methods are quieter than others.
Comparing different options:
Shop vac connection
Versatile, affordable, and effective for most hobbyists.
Built-in bag or cannister
Convenient but limited capacity.
Dust extractors
Powerful and effective, but more expensive.
Central systems
Ideal for large, permanent workshops with multiple tools.
Additional dust control measures
While connecting your sander to a dust collection system is crucial, it’s just one part of a comprehensive dust control strategy. Consider implementing additional measures for a cleaner, safer workshop
Personal protective equipment (PPE)
Even with excellent dust collection, using sufficient PPE is essential.
Dust mask or respirator
Choose one rated for fine wood dust particles.
Safety glasses
Protect your eyes from both dust and flying debris.
Hearing protection
Sanders can be loud, especially when combined with a vacuum system.
Air filtration systems
In addition to point-of-use dust collection, think about installing an overhead air filtration system. These systems continuously clean the air in your workshop, capturing fine particles that might escape your primary dust collection. Look for models with multiple filtration stages and easily replaceable filters.
Proper ventilation
Good airflow is crucial for maintaining air quality, so ensure your workshop has adequate ventilation, either through windows, doors, or a dedicated ventilation system.
Using fans improves air circulation, especially when working with particularly dusty materials.
Regular cleaning and maintenance
To maximize the effectiveness of your dust collection efforts, clean filters and empty collection bags or canisters regularly. Also regularly check and clean your tools’ dust ports and hoses.
![]()
3. Power up your vac automatically
Connecting your sander to a shop vacuum works great—as long as you remember to turn the vacuum on. To make sure you never forget, pick up a tool activated outlet for around $40. It automatically turns on your shop vac anytime your sander is operating.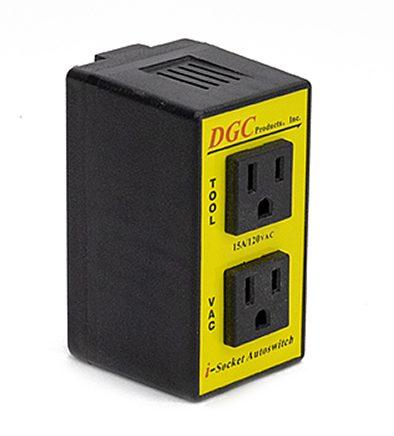
Just plug your sander into one socket, and your vacuum into the other. Then leave the vacuum power switch on. Every time you turn on your sander, the vacuum will turn on, too. When you shut the sander off, the vacuum will run for a few seconds to pull in the dust, and then shut down.
![]()
4. Upgrade your shop vacuum
FREE Plan!
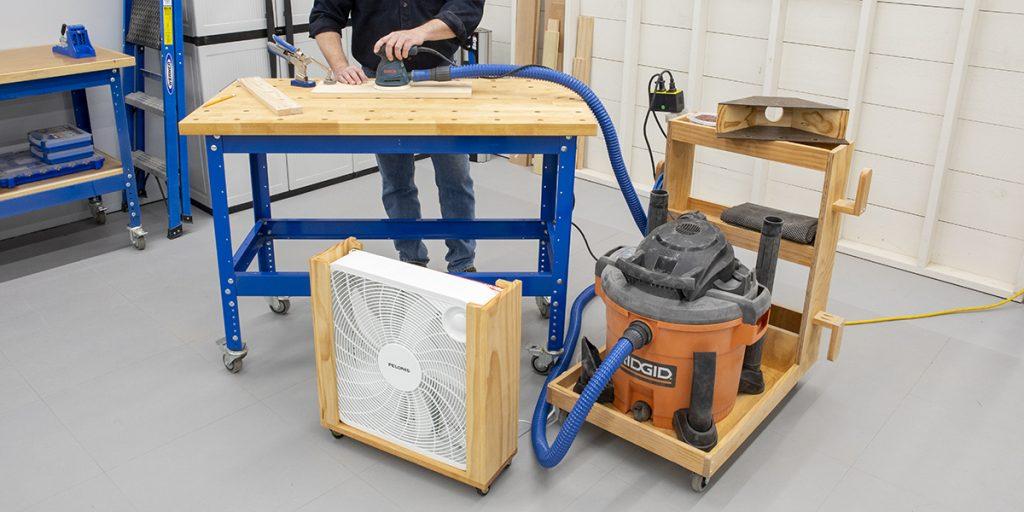
Make your shop vacuum easier to move with this handy vacuum cart. It’s sized to hold a 16-gallon shop vacuum, and it offers lots of additional storage space.
You can build one easily using a couple of 1×3 boards, a half-sheet of plywood, and this FREE project plan.
![]()
 5. Make a benchtop dust pickup
FREE Plan!
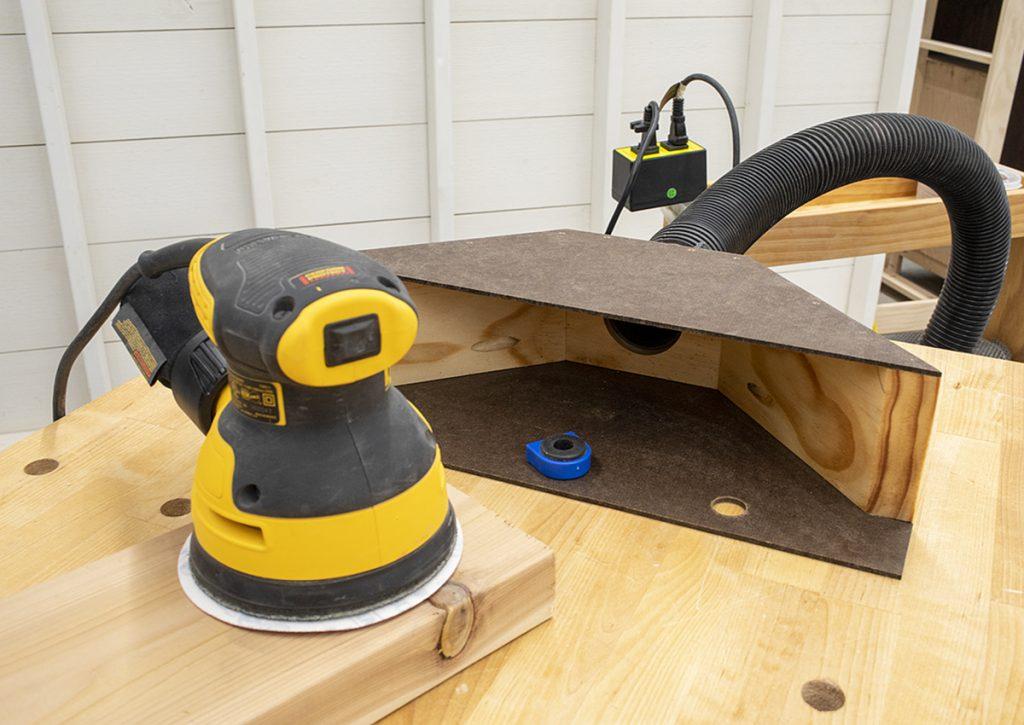
Sometimes, you need to sand by hand, or you may have a power sander that doesn’t have dust collection built in. For those times, make yourself this handy dust pickup.
Just clamp it in place on your work surface—or hold it in place with bench dogs if your work center has them—and then connect your vacuum hose. As you work, dust will get sucked in to keep it under control.
You can build this dust pickup from a few scrap pieces of lumber, a piece of hardboard or plywood, and a Kreg® Pocket-Hole Jig. Just follow the simple steps in our FREE project plan.
![]()
 6. Clear the air with a DIY air filter
FREE Plan!
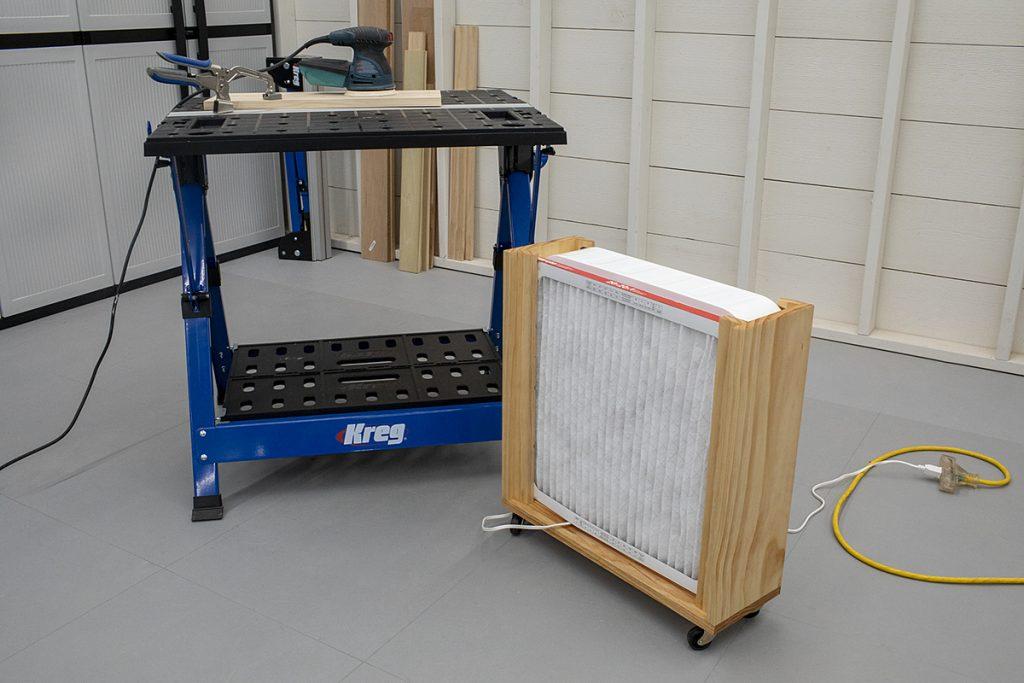
No matter how hard you work to keep sanding dust under control, you’ll have dust floating around in your work space. You can help clear the air by building a simple DIY air filter.
It’s made with an inexpensive box fan, and it has a furnace filter that’s held in place behind the fan with a simple wood frame. This one even has casters to make it easy to move around.
You can build yourself an air filter for about $50, including the fan and filter. It goes together easily using a Kreg® Pocket-Hole Jig and our FREE project plan.
You can make your air filter work even harder for you by using a simple light timer. When you’re done working, just plug the fan into the timer and set it to shut off in an hour or two, so it can catch the dust that would settle after you walk away.


