

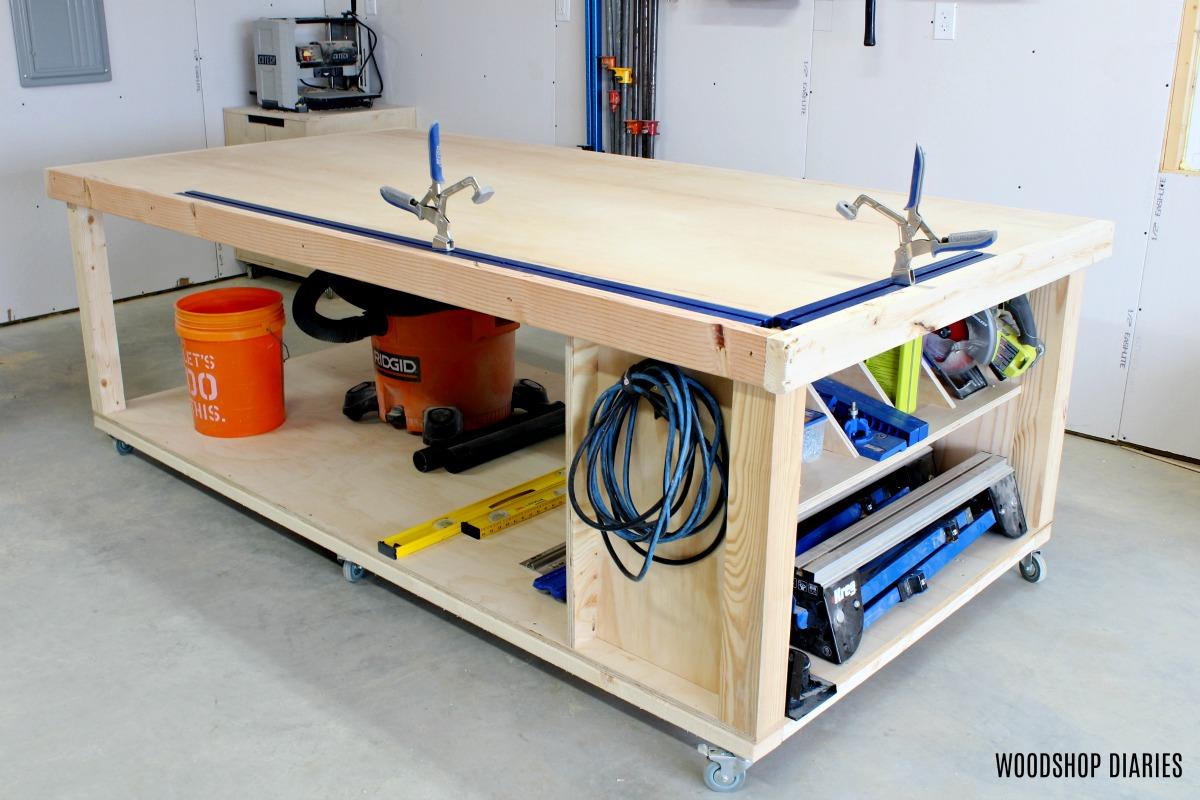
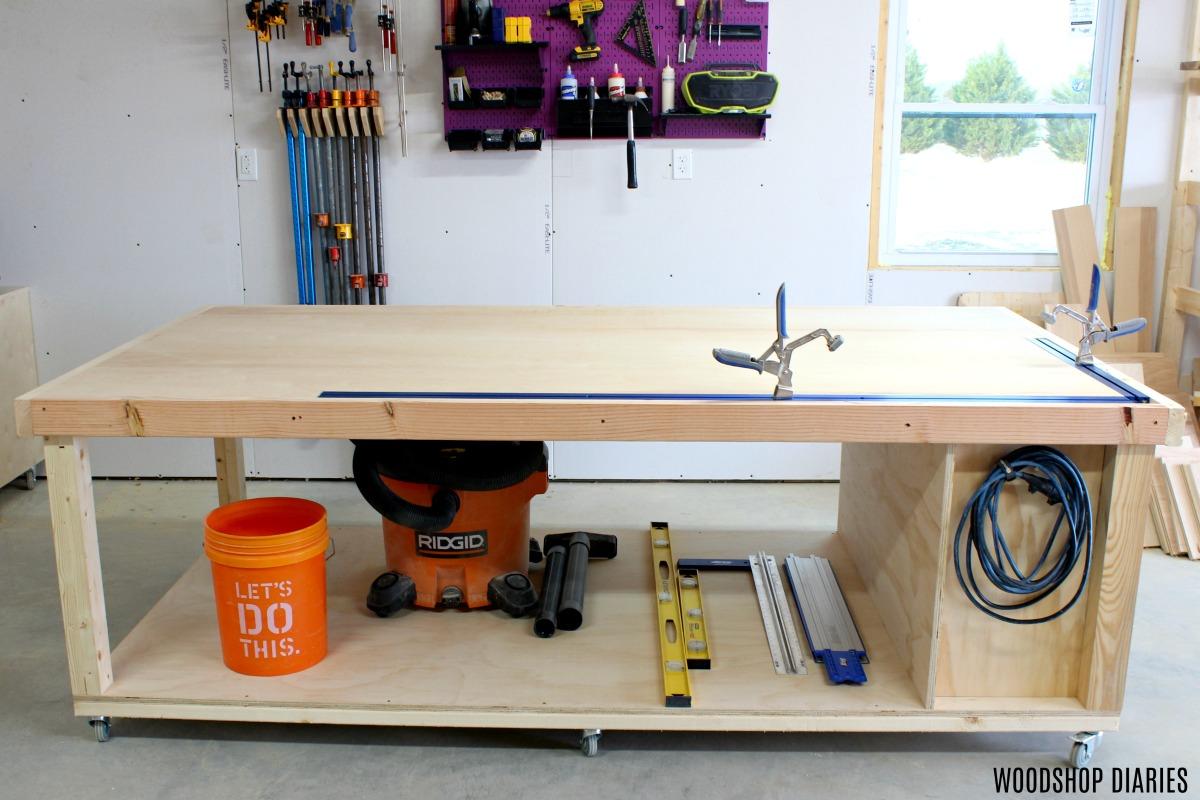
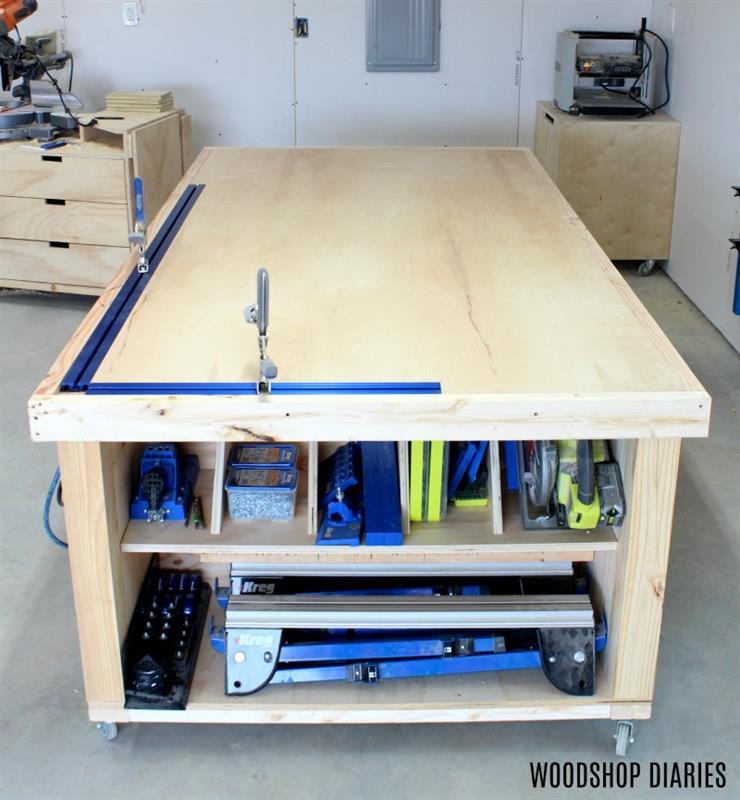
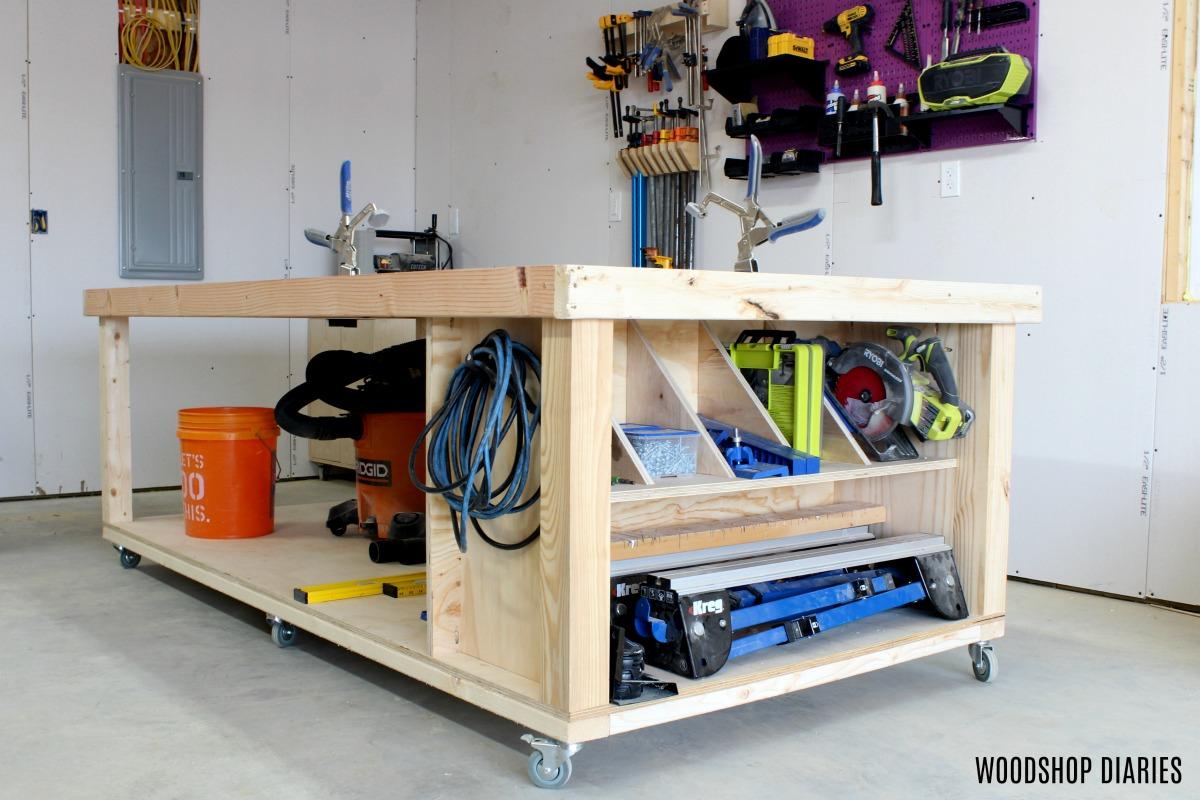


This mobile workbench is the perfect solution for a 3-in-1 assembly table, outfeed table and storage area for your shop. With Kreg Clamp Traks on top and a storage cubby on the side, you’ll be ready to Build Something in no time. This bench is easily customizable to whatever size your shop needs.
Tools
Kreg Tools


Other Tools
-
Miter Saw

-
Materials
Wood Products
- 3 Plywood , 3/4" Thick , Full Sheet
- 2 Board , 4x4 , 72"
- 9 Board , 2x4 , 96"
Hardware & Supplies
- 48 2 1/2" Kreg Pocket Hole Screws
- 54 1 1/4" wood screws
- 8 3" wood screws
- 30 2 1/2" wood screws
- 20 2" wood screws
- 22 1 1/4" Kreg Pocket Hole Screws
- 6 3" Casters
- 1 Set Kreg Clamp Traks
Directions
-
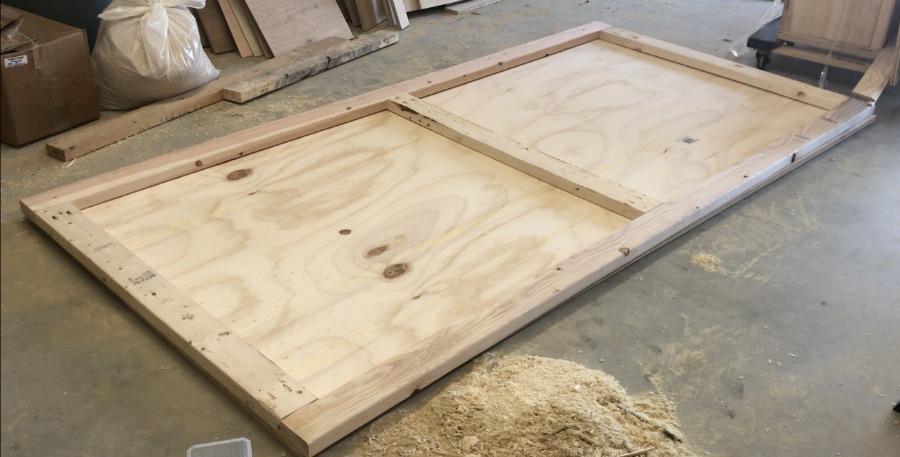
Build Top and Bottom Frame
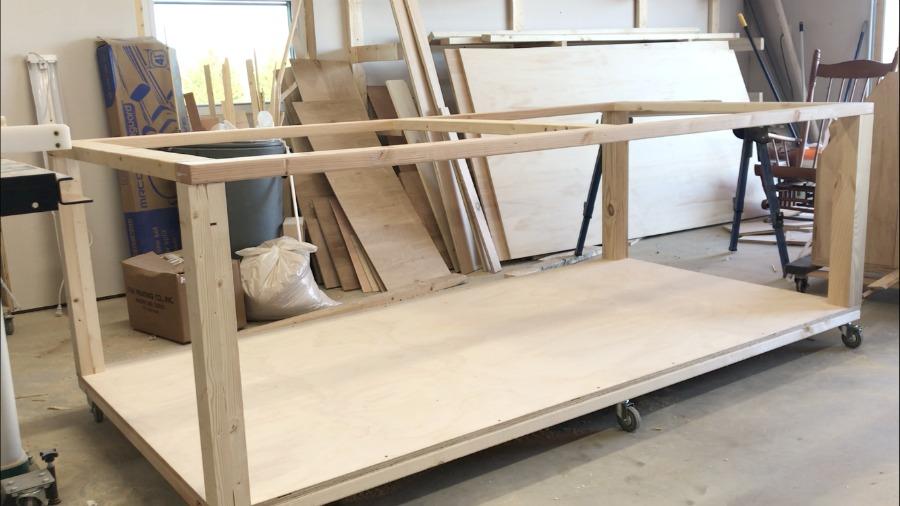
Cut the frame pieces according to the cut list and assemble two frames using 1 1/2" pocket holes and 2 1/2" pocket hole screws like shown. These frames should be 4'x8' overall. However, if you want a smaller workbench, simply adjust the size of this frame and cut your plywood in the next steps to fit the size you made your frame.
-
Attach Bottom Shelf to Frame
Screw a 4x8 sheet of 3/4" plywood onto the frame using 1 1/4" wood screws like shown around the outside edge. If you wanted a smaller workbench, just adjust your frame size from step 1 and cut your plywood here to fit your new frame.

-
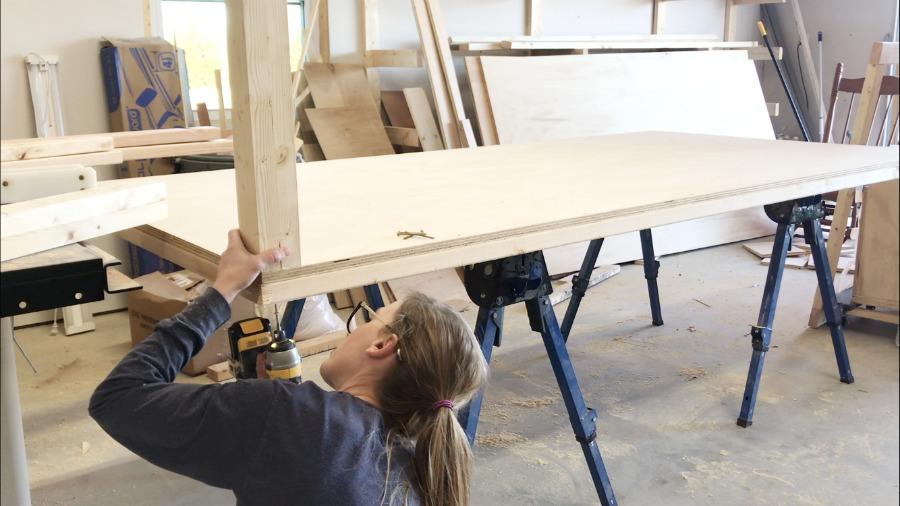
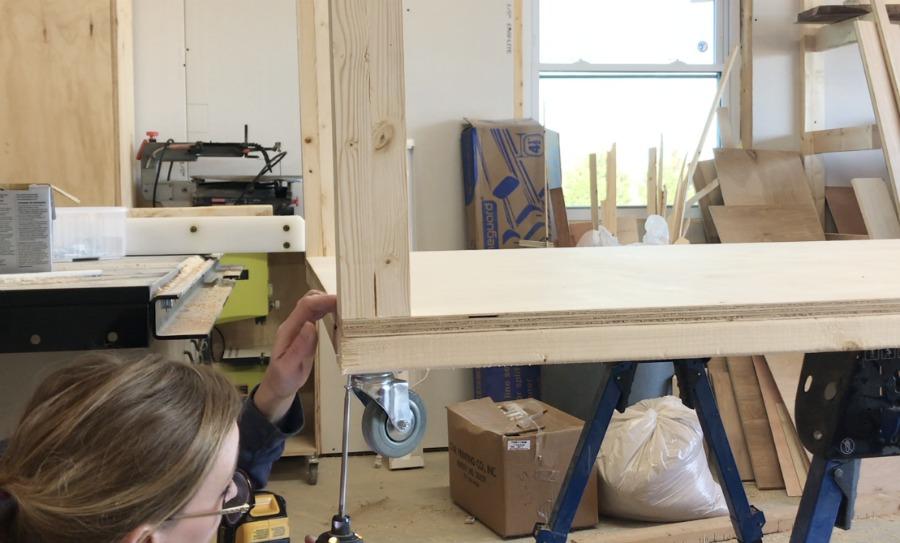
Attach Legs to Bottom Shelf
In hindsight, it might have been easier to attach these legs from the top by drilling 1 1/2" pocket holes into the 4x4 posts and screwing into the bottom shelf and frame using 2 1/2" pocket hole screws. But, that didn't cross my mind until after the fact. So you can do it that way (recommended), or you can place your bottom shelf up on a pair of Kreg Track Horses and screw the legs in on the corners from the bottom using 3" wood screws like shown here. Either way you attach, cut four 4x4 legs according to the cut list and attach them at the corners of the bottom shelf. Also, the total bench height is 34 1/2" to match my table saw height. If you wish for a shorter bench, adjust the length of your legs in this step.
-
Attach Casters to Bottom Shelf
Next, to make this workbench mobile, I attached six 3" casters along the bottom of the bottom shelf using 1 1/4" wood screws. Attach one caster on each corner and two in the middle to prevent it from sagging.
-
Add Top Frame
Remember that second frame you made from step 1? Now attach that to the top of the legs using 2 1/2" wood screws like shown.
-
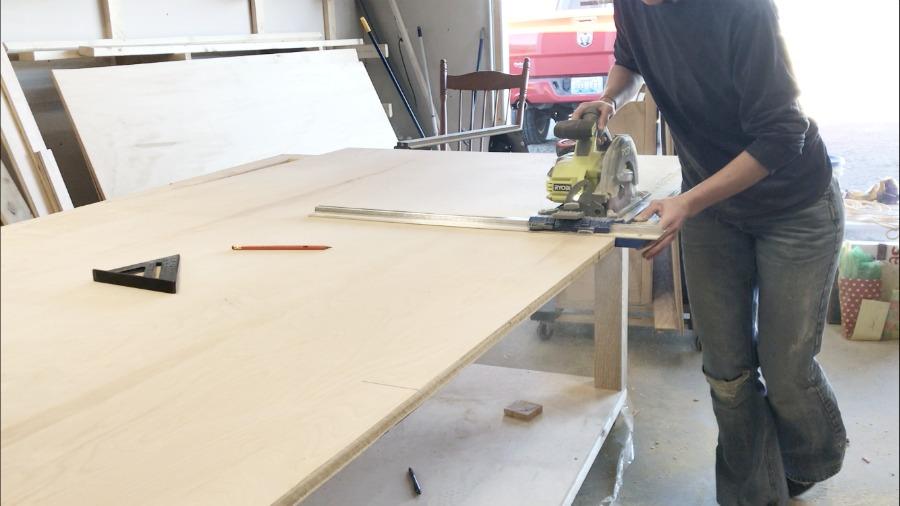
Trim Top for Kreg Clamp Traks
Next, place your workbench top onto the frame you just installed. This piece of 3/4" plywood should be the same size as the bottom shelf from step 2. Mine was a full sheet-4x8. But if you made any adjustments to your size earlier, you will need to now also. Place this piece on top, but don't install yet. First, you will need to trim it to accommodate the Kreg Trak Clamps. Trim your top according to the directions on the traks based on the size you order. I used a Kreg Rip Cut with my circular saw and a jig saw to trim out the pieces or the Traks.
-
Attach Workbench Top
Now that your top is cut for the Traks, attach the top to the frame with 2" wood screws from the bottom side. Place screws along each outside edge and in the top middle support piece.
-
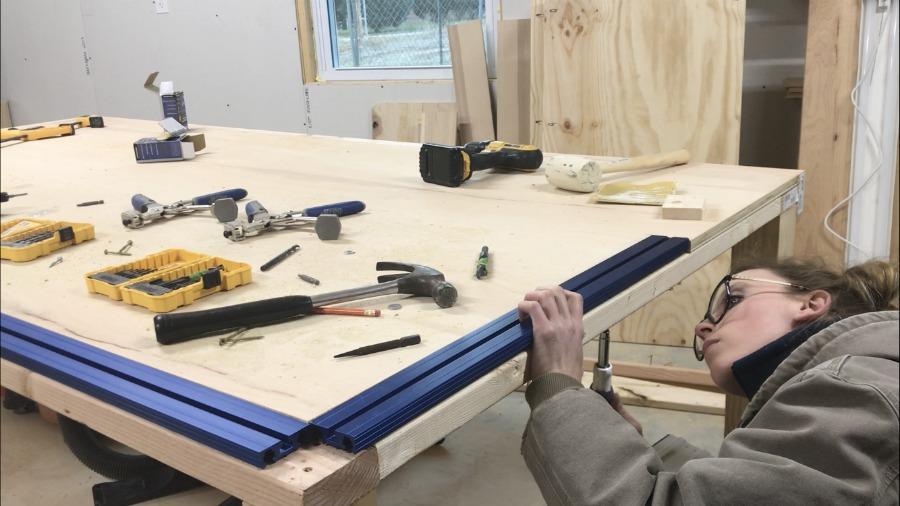
Install Kreg Clamp Traks
Install the traks per instructions. The instructions call for installing into 3/4" material. However, the frames are 1 1/2" thick. To accomodate, drill your holes according to the instructions through the frame, then drill larger holes (large enough to fit the bolt head) 3/4" up into the bottom side. Check out the video in the extras tab and the blog post for more details. The bolts should fit through the holes so that there are enough threads sticking out on the top to hold a nut. Once you have all the bolts and nuts in place, you can slide your Trak on and tighten. Or, I actually found it easier to place the nuts inside the trak so that they are lined up with where your bolts are and place the track on top of the bolts and tighten.
-
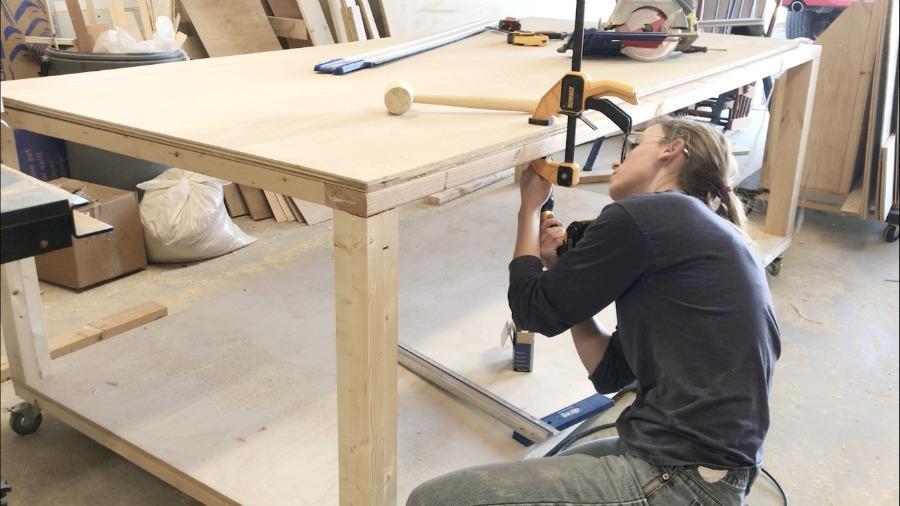
Add Top Trim Support Boards
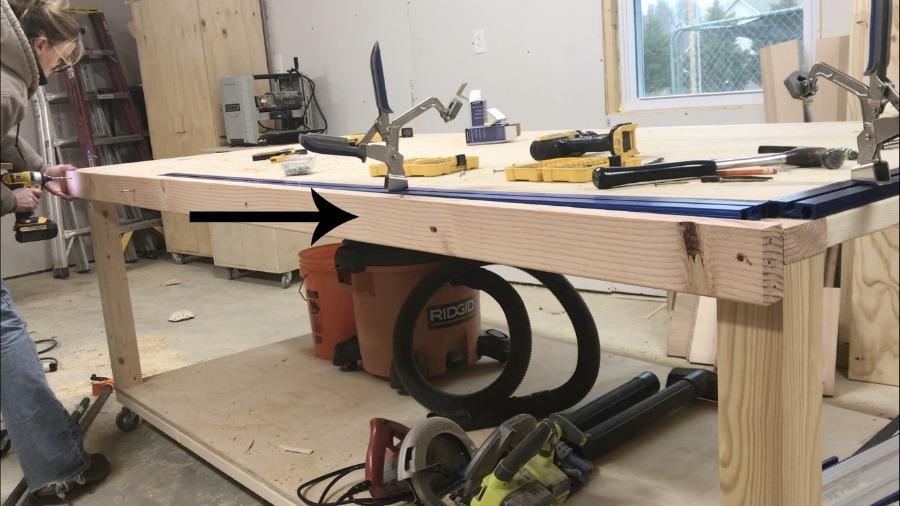
Now that the Traks and top are in place, cut 2x4 boards to fit around the top in order to "trim it out" and cover the plywood edges and the edges of the Clamp Traks. This will help protect the top edges, but also provide more support to keep the top from sagging in the middle. Screw the 2x4 trim support pieces around the edges of the top frame using 2 1/2" wood screws.
-
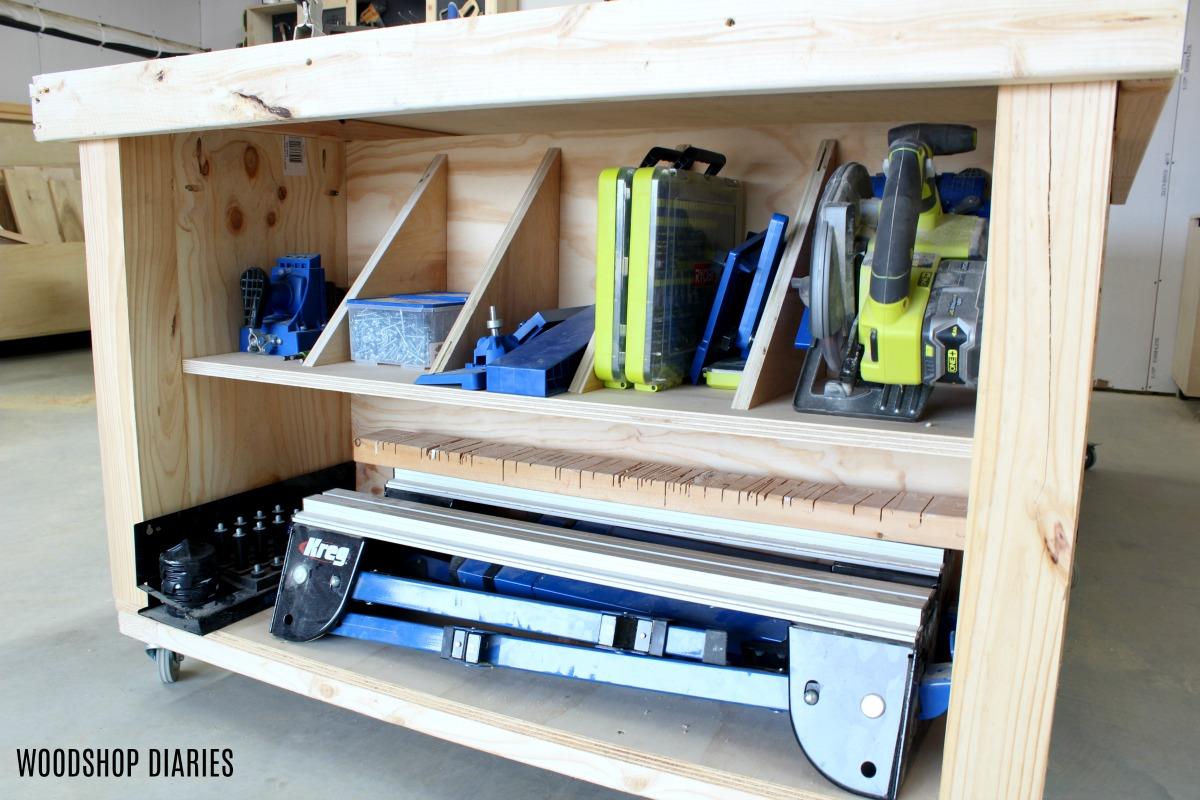
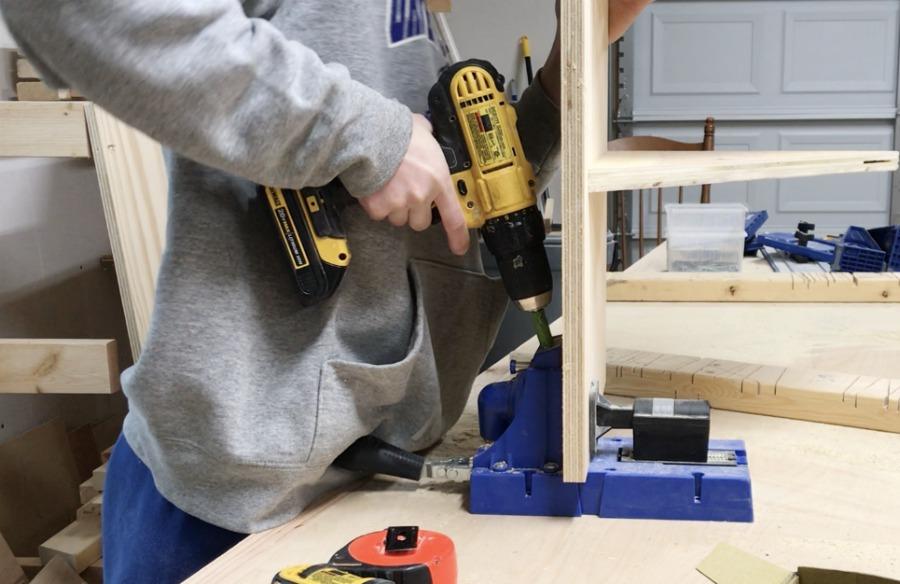
Install Divider Panel
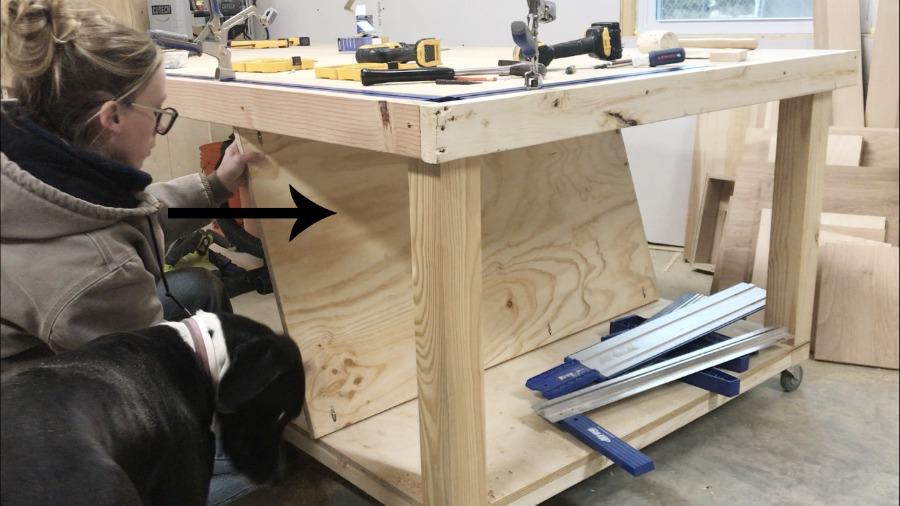
If you wish, you can actually stop at this point with your workbench. But, if you like the extra storage and organization the "cubby" at the end of the workbench in the photos provides, then let's keep going. Using a Kreg Rip Cut and/or AccuCut, cut a "divider panel" from 3/4" plywood according to the cut list, or, if you made your bench smaller, cut this piece so that it fits across the entire bottom shelf and is tall enough to reach between the bottom shelf and top frame. Drill pocket holes along the bottom side and at the top corners to attach later. Place this panel onto the workbench like shown, but don't attach yet.
-
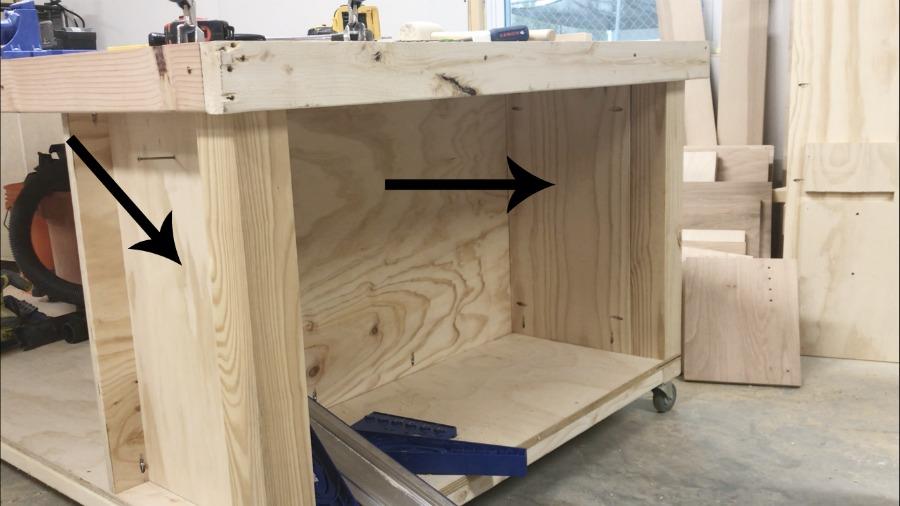
Install Side Panels
Cut two more pieces to serve as the side panels of the cubby according to the cut list and drill pocket holes along all sides. Place these panels between the legs and the divider panel from step 10 and attach using 1 1/4" Kreg pocket hole screws. Once the side panels are attached, then proceed to attaching the divider panel by screwing 1 1/4" pocket hole screws through the pocket holes you drilled in step 10. It's just easier to attach the side panels before screwing in the divider. That way you don't have to worry about trimming anything to fit if it's a little off.
-
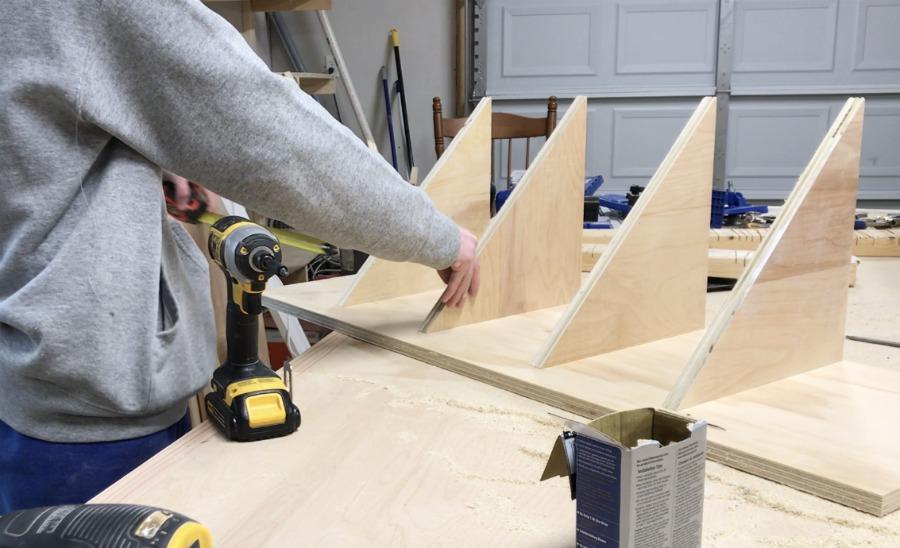
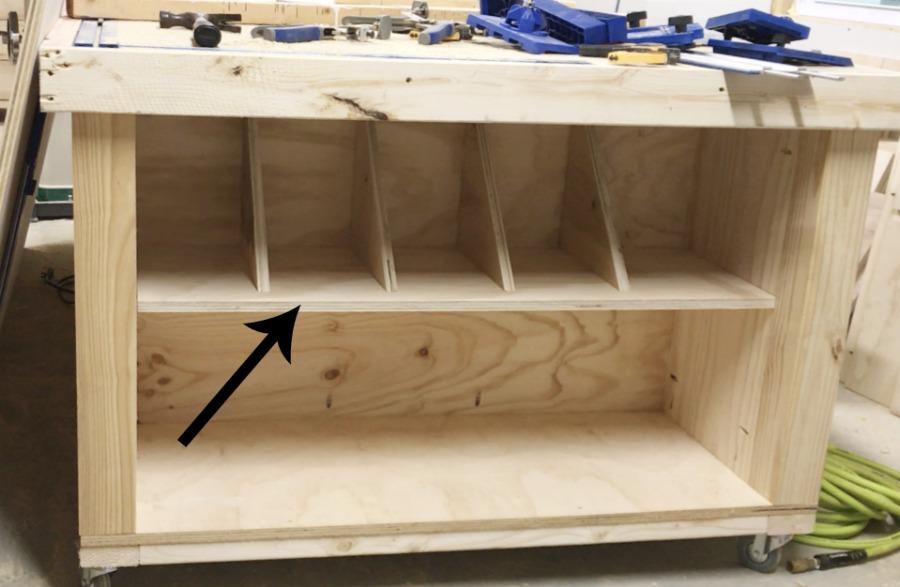
Construct Cubby Shelf
You can finish out your cubby however you want. You can add drawers or adjustable shelves using a Kreg Shelf Pin Jig, leave it open, or a combination of all of it. I added a stationary shelf with dividers for all my drill bits and jigs. For this, cut a shelf piece first according to the cut list, then screw in the dividers from scrap wood.
-
Drill Pocket Holes to Attach Shelf
Then drill 3/4" pocket holes into the ends of your shelf and attach in place using 1 1/4" pocket hole screws. You can see more details of this in the video.
-
Install Cubby Shelf
Now attach the shelf into the cubby using 1 1/4" Kreg Pocket Hole Screws. You can attach however high you want to accommodate whatever you wish to store below and on top of your shelf.
-
Load it up!
Once your shelf is attached, load it up with your favorite Kreg Jigs, Kreg Trak Horses, and Kreg Screws. Then get out there and Build Something ;)
