

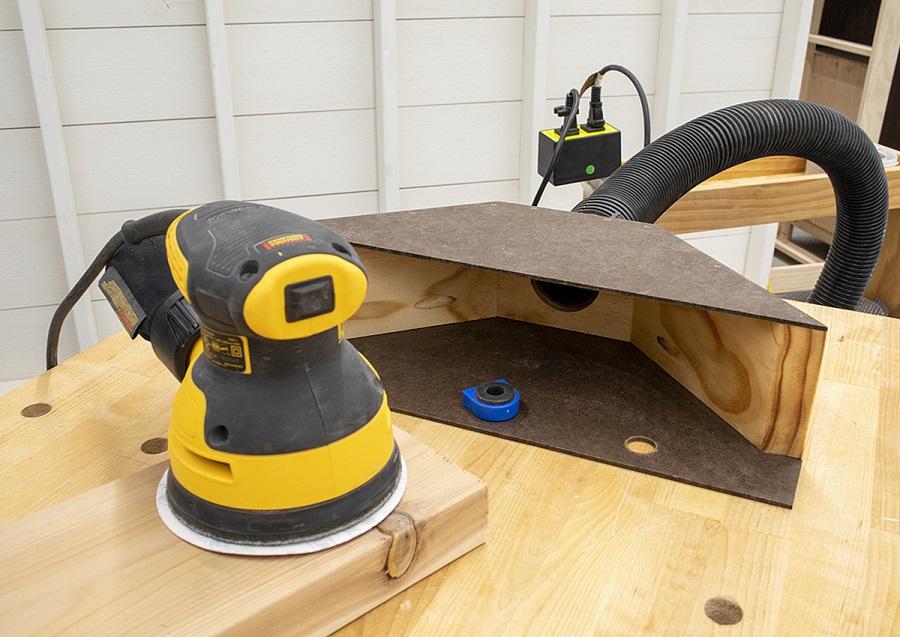


Control sanding mess at the source with this benchtop dust pickup. It connects to your shop vacuum and can be easily positioned on almost any work surface.
Tools
Kreg Tools


Other Tools
-
miter saw

-
hammer
-
hole saw (diameter of your vacuum hose)
Materials
Wood Products
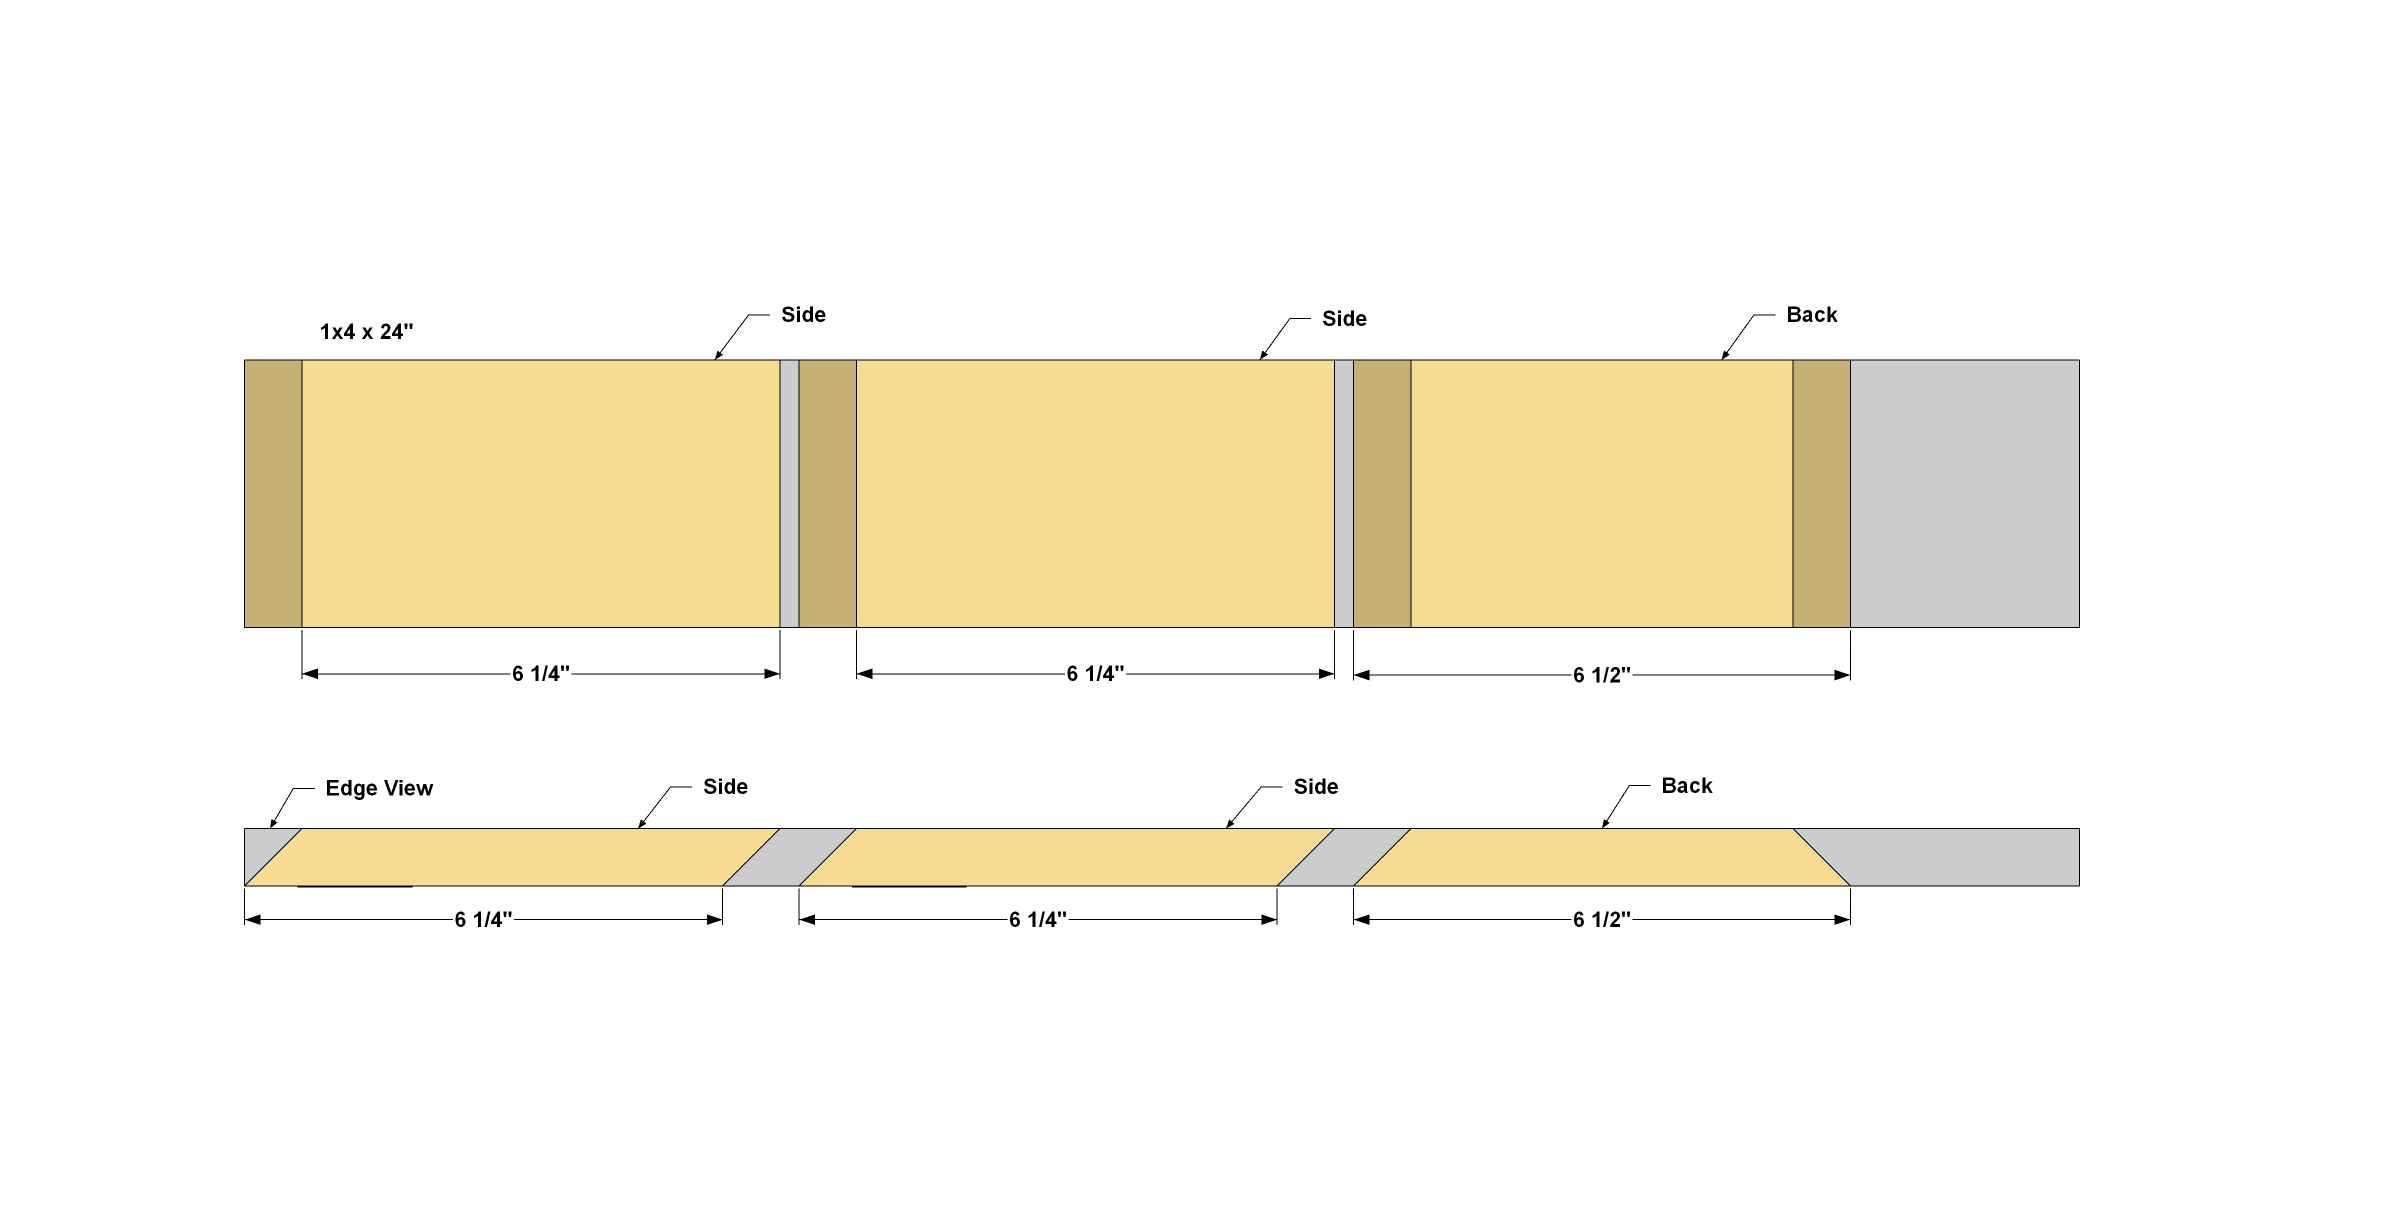
- 1 Pine board , 1x4 x 24"
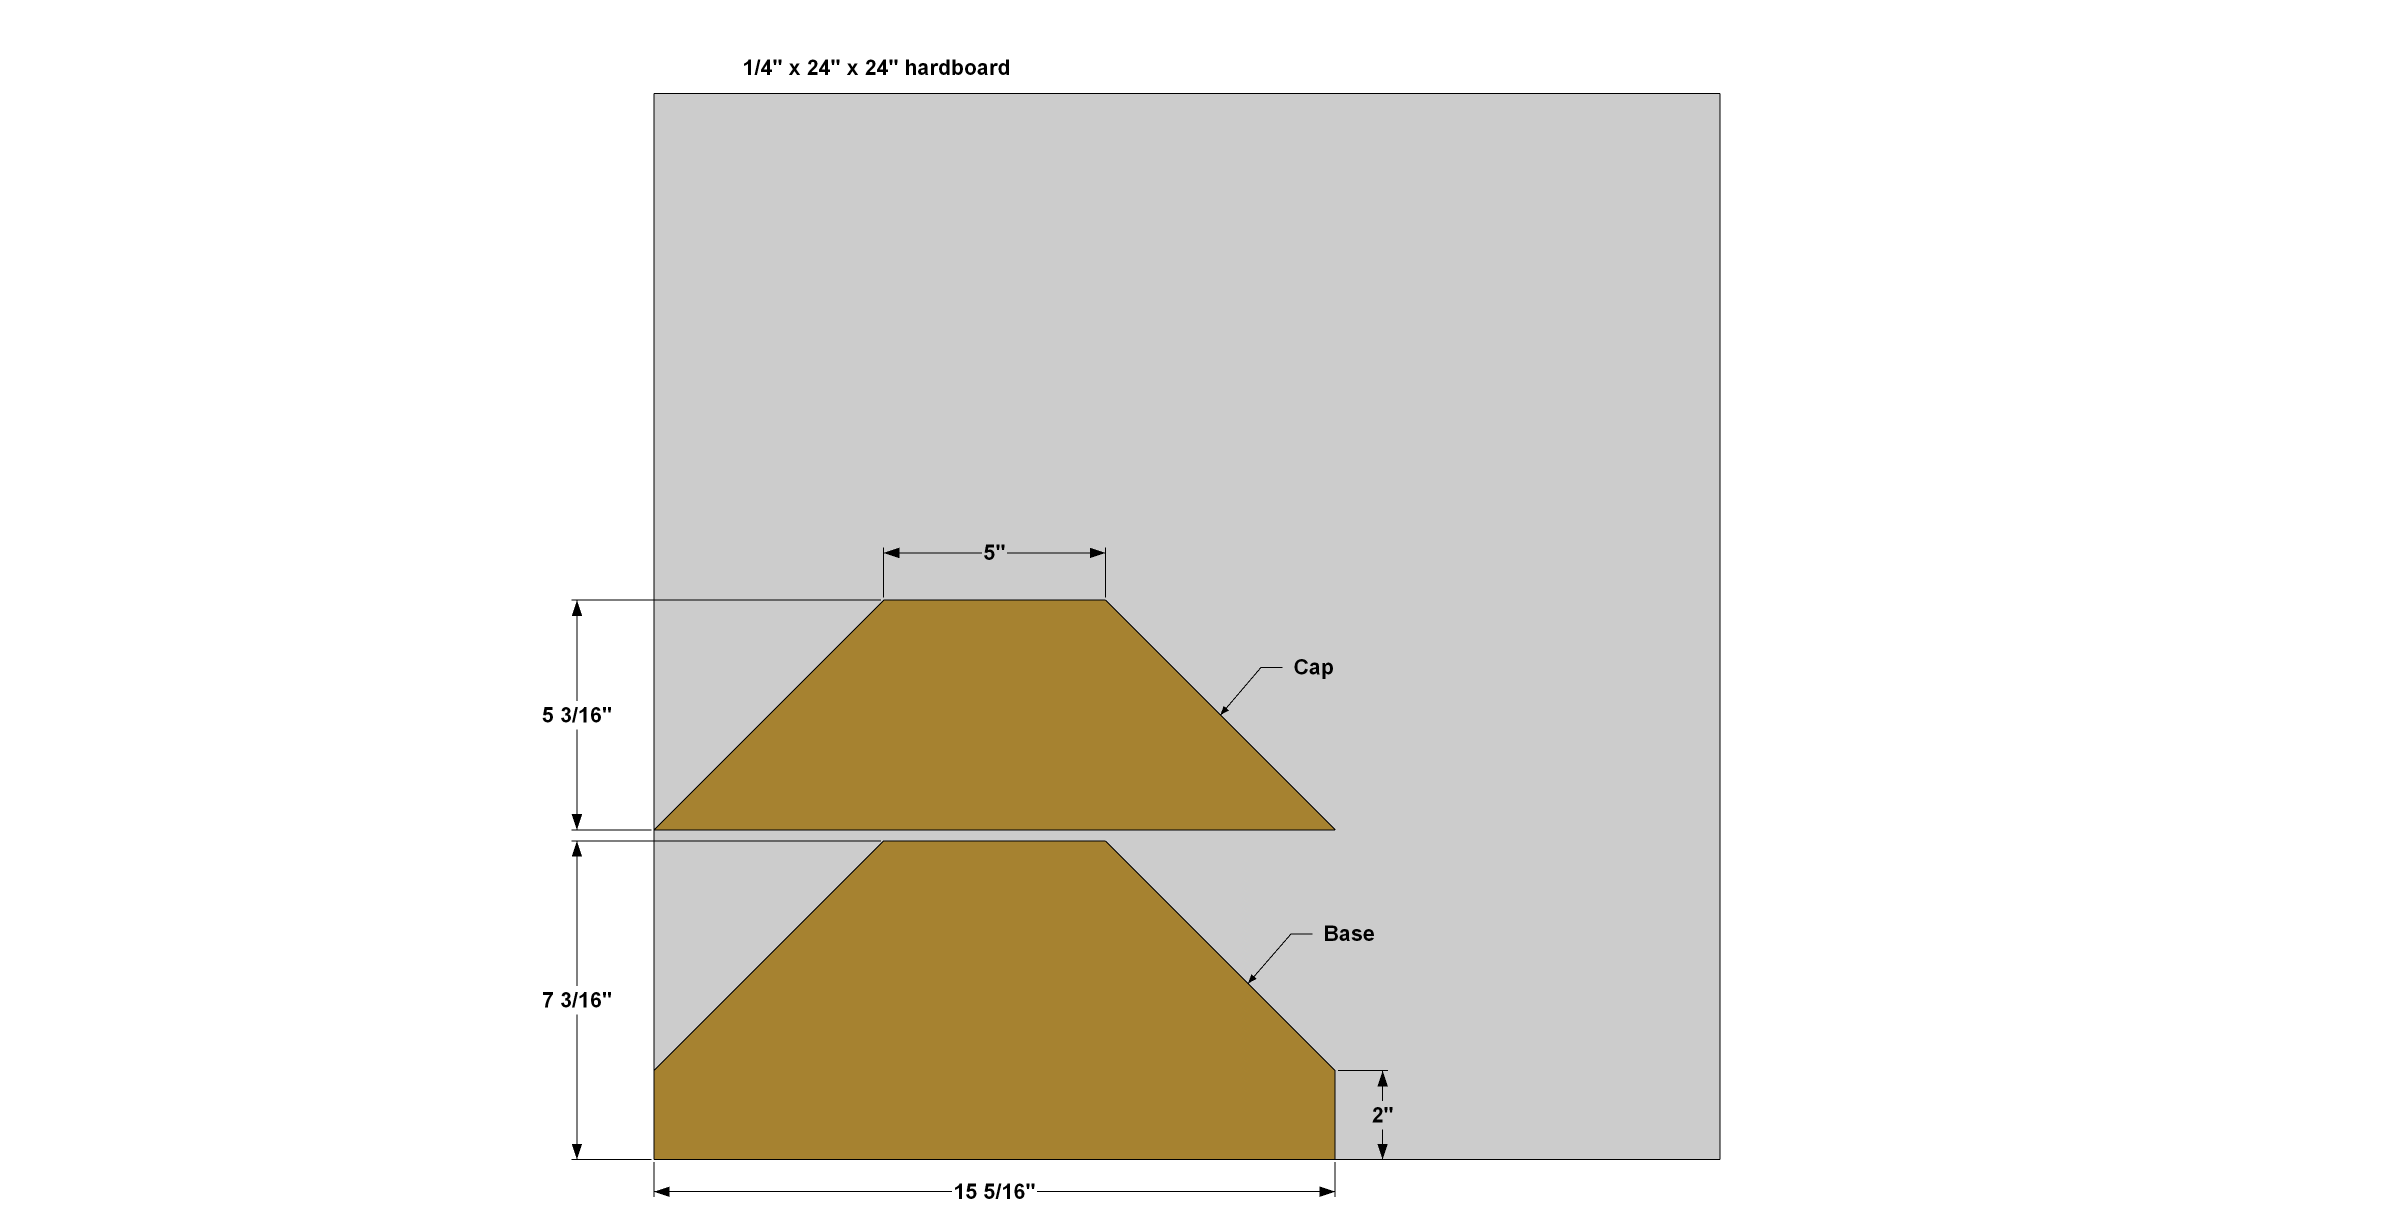
- 1 Hardboard , 1/4" x 24" x 24"
Hardware & Supplies
- 4 1 1/4" coarse-thread Kreg Pocket-Hole Screws
- 8 3/4" brad nails
- 1 Wood glue
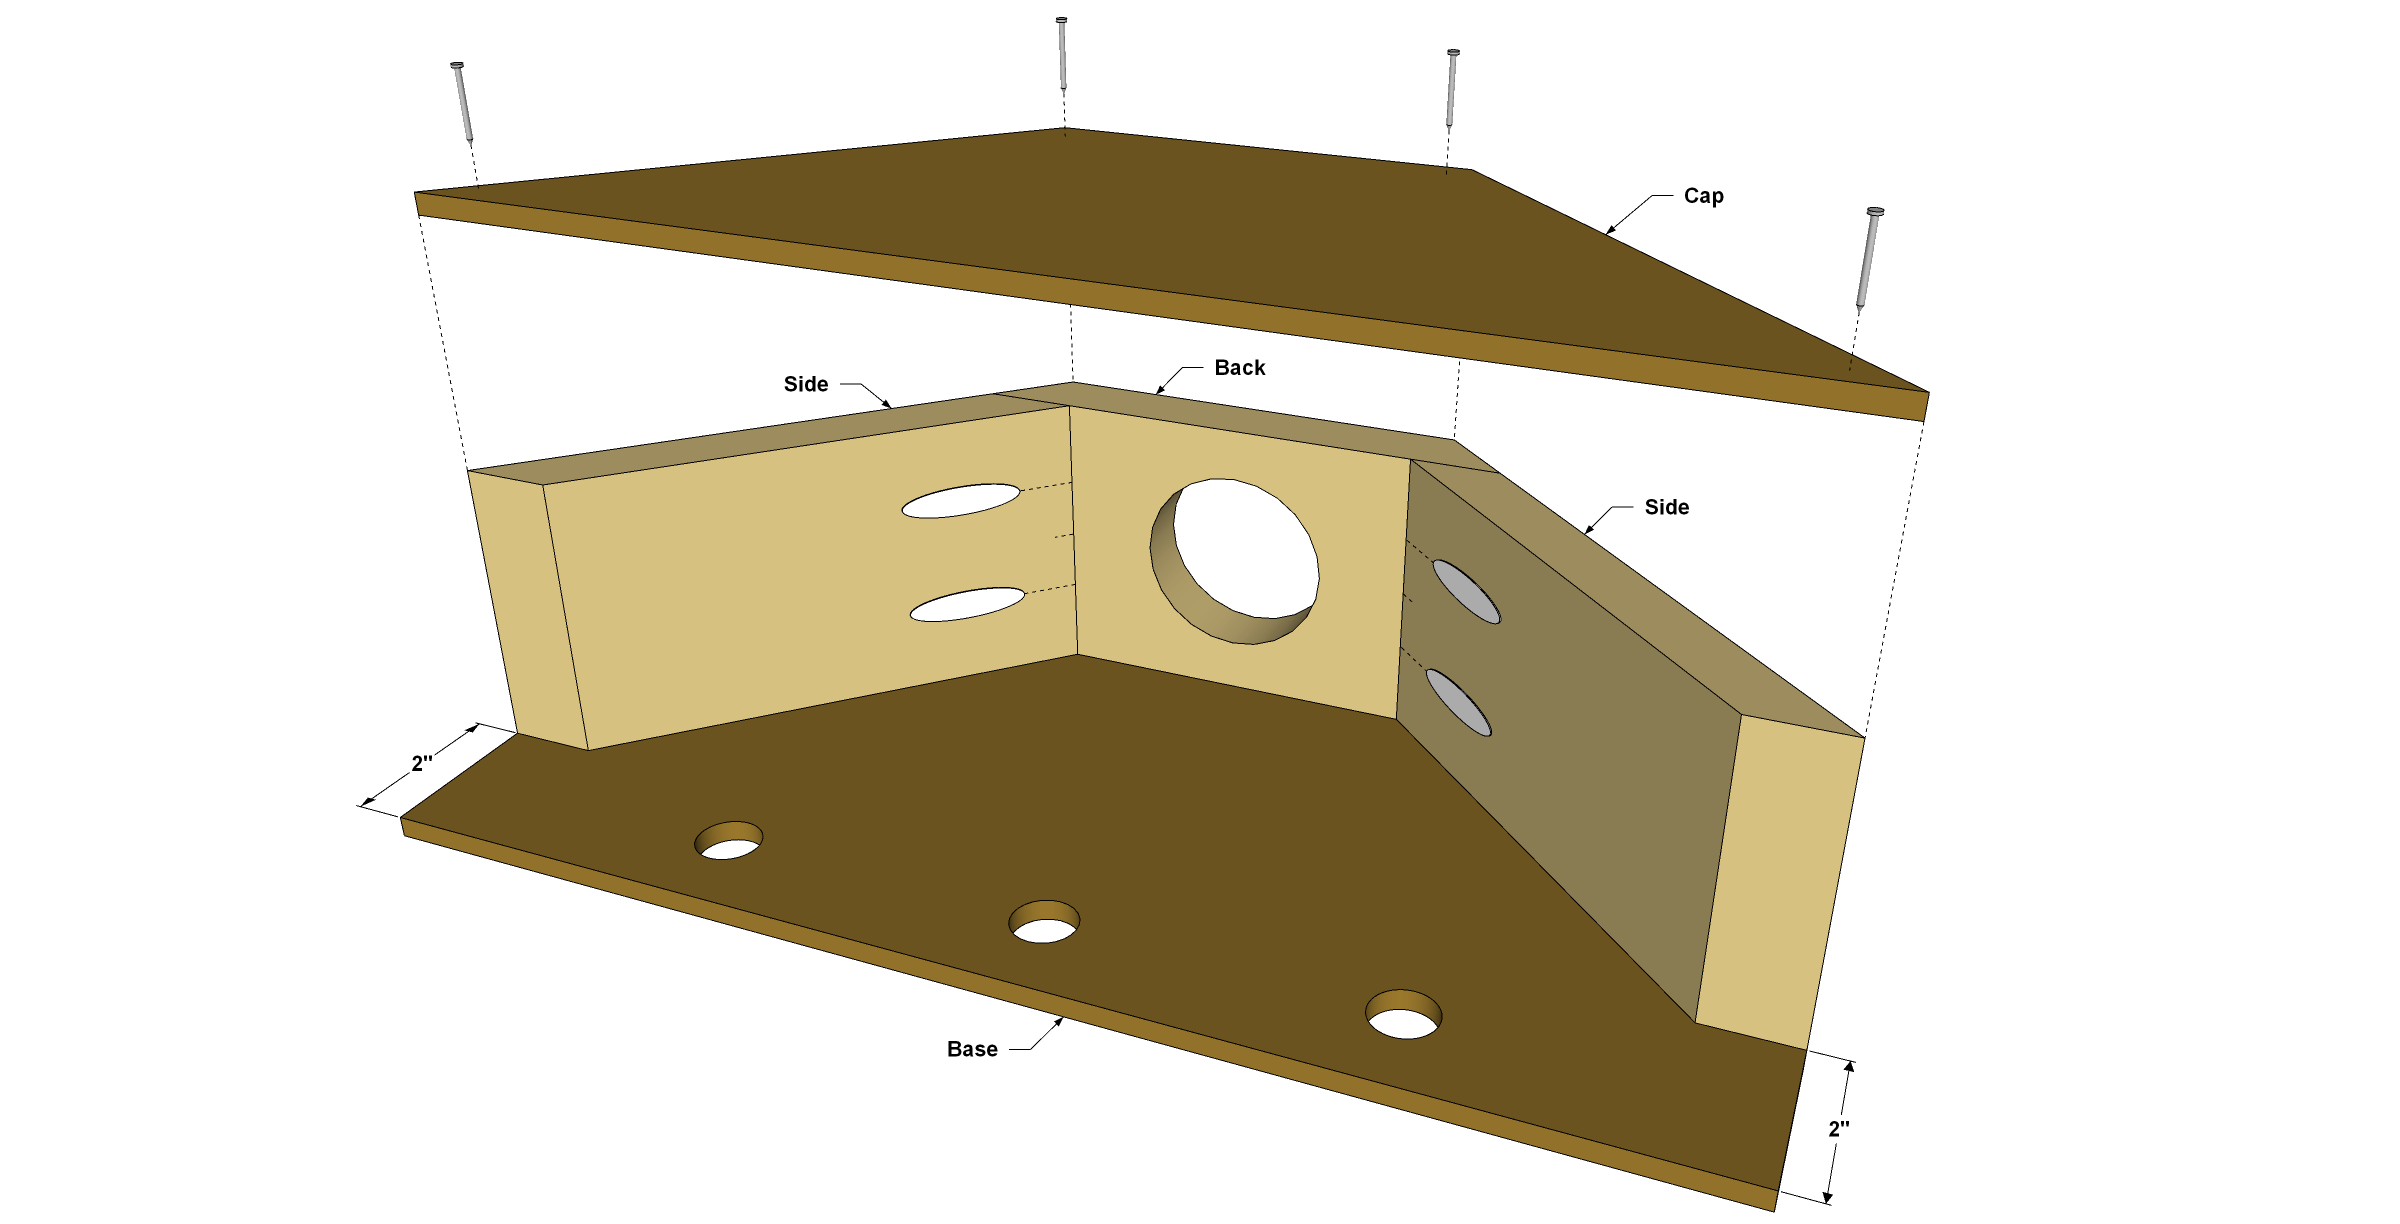
Cut List & Parts
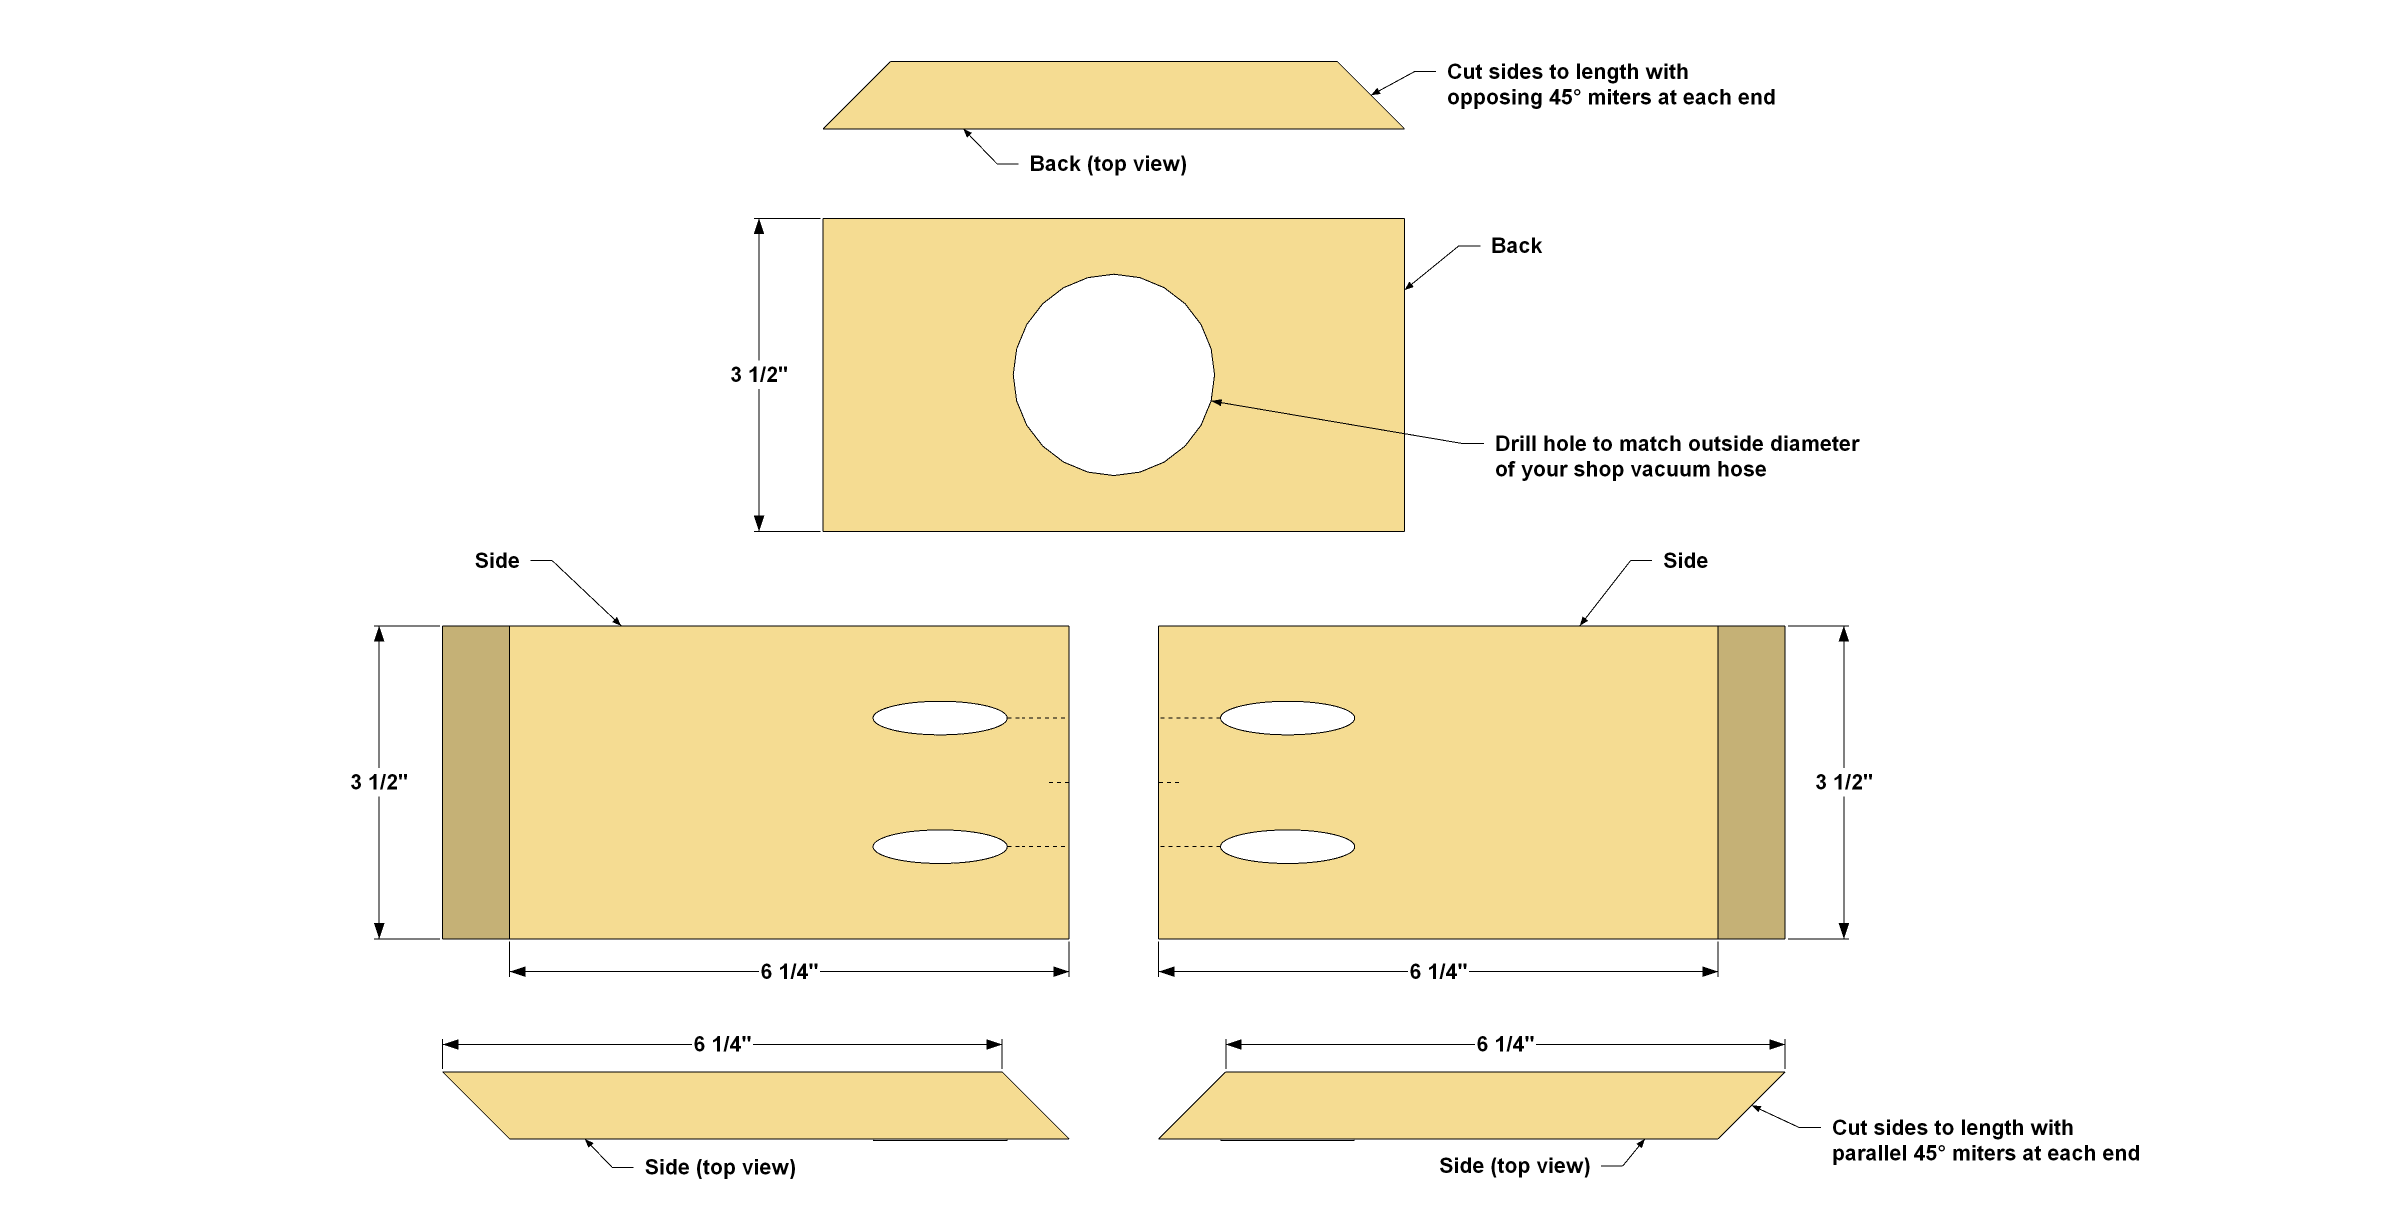
- 2 Side , 3/4" x 3 1/2" x 6 1/4"
- 1 Back , 3/4" x 3 1/2" x 6 1/2"
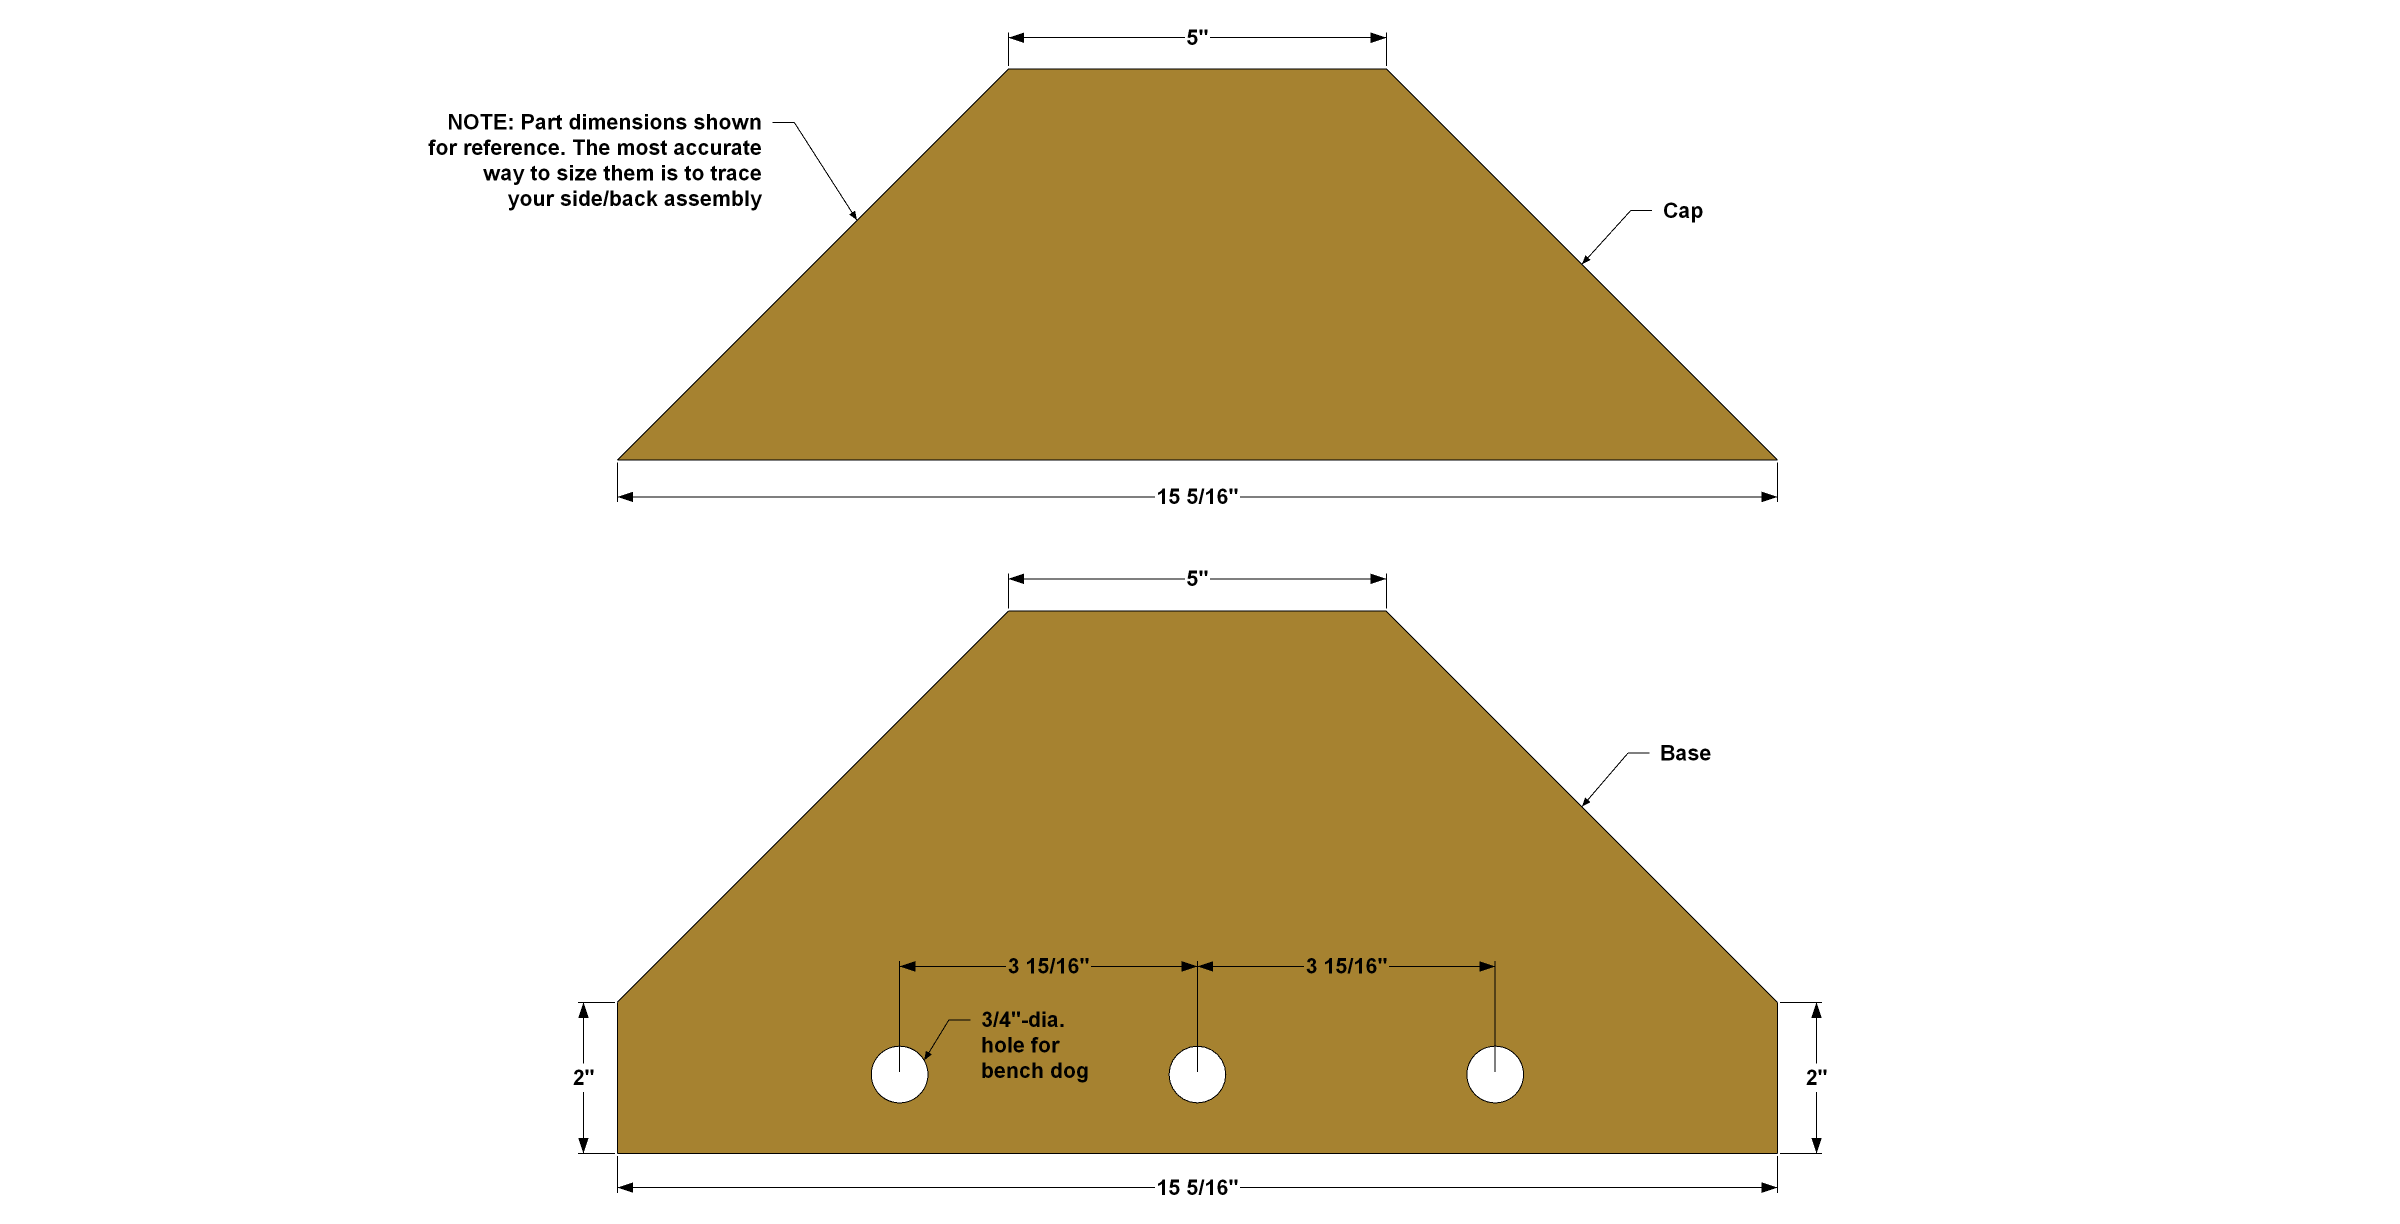
- 1 Cap , 1/4" x 5 3/16" x 15 5/16" *cut to fit
- 1 Base , 1/4" x 7 3/16" x 15 5/16" *cut to fit
Directions
-
Make the Sides and Back
Using a miter saw, cut two Sides and one Back to size, as shown in the cutting diagram and the parts view. Note that the ends of all the pieces are beveled at 45°. On the sides, the bevels are parallel. On the Back, the bevels are opposing.
-
Drill Pocket Holes and a Vacuum Hole
With the pieces cut to size, you can drill pocket holes in the Sides. The setup for this is a bit different than usual, though, because of the beveled ends. If you just set your jig to the 3/4" thickness of the material, the holes will poke through the beveled ends. Instead, set your Pocket-Hole Jig to the 11/8" setting. With the drill bit set for 3/4" material, drill pocket holes in both Sides, as shown. Sand the faces smooth.
Next, drill a hole that’s centered in the Back to receive your vacuum hose. You’ll need a hole saw in the same diameter as the outside diameter of your vacuum hose—which is usually 21/4" or 21/2". Place the Back on a piece of scrap lumber while you drill, and be sure to clamp the Back down so the hole saw doesn’t grab and spin the piece. Sand the faces smooth.
-
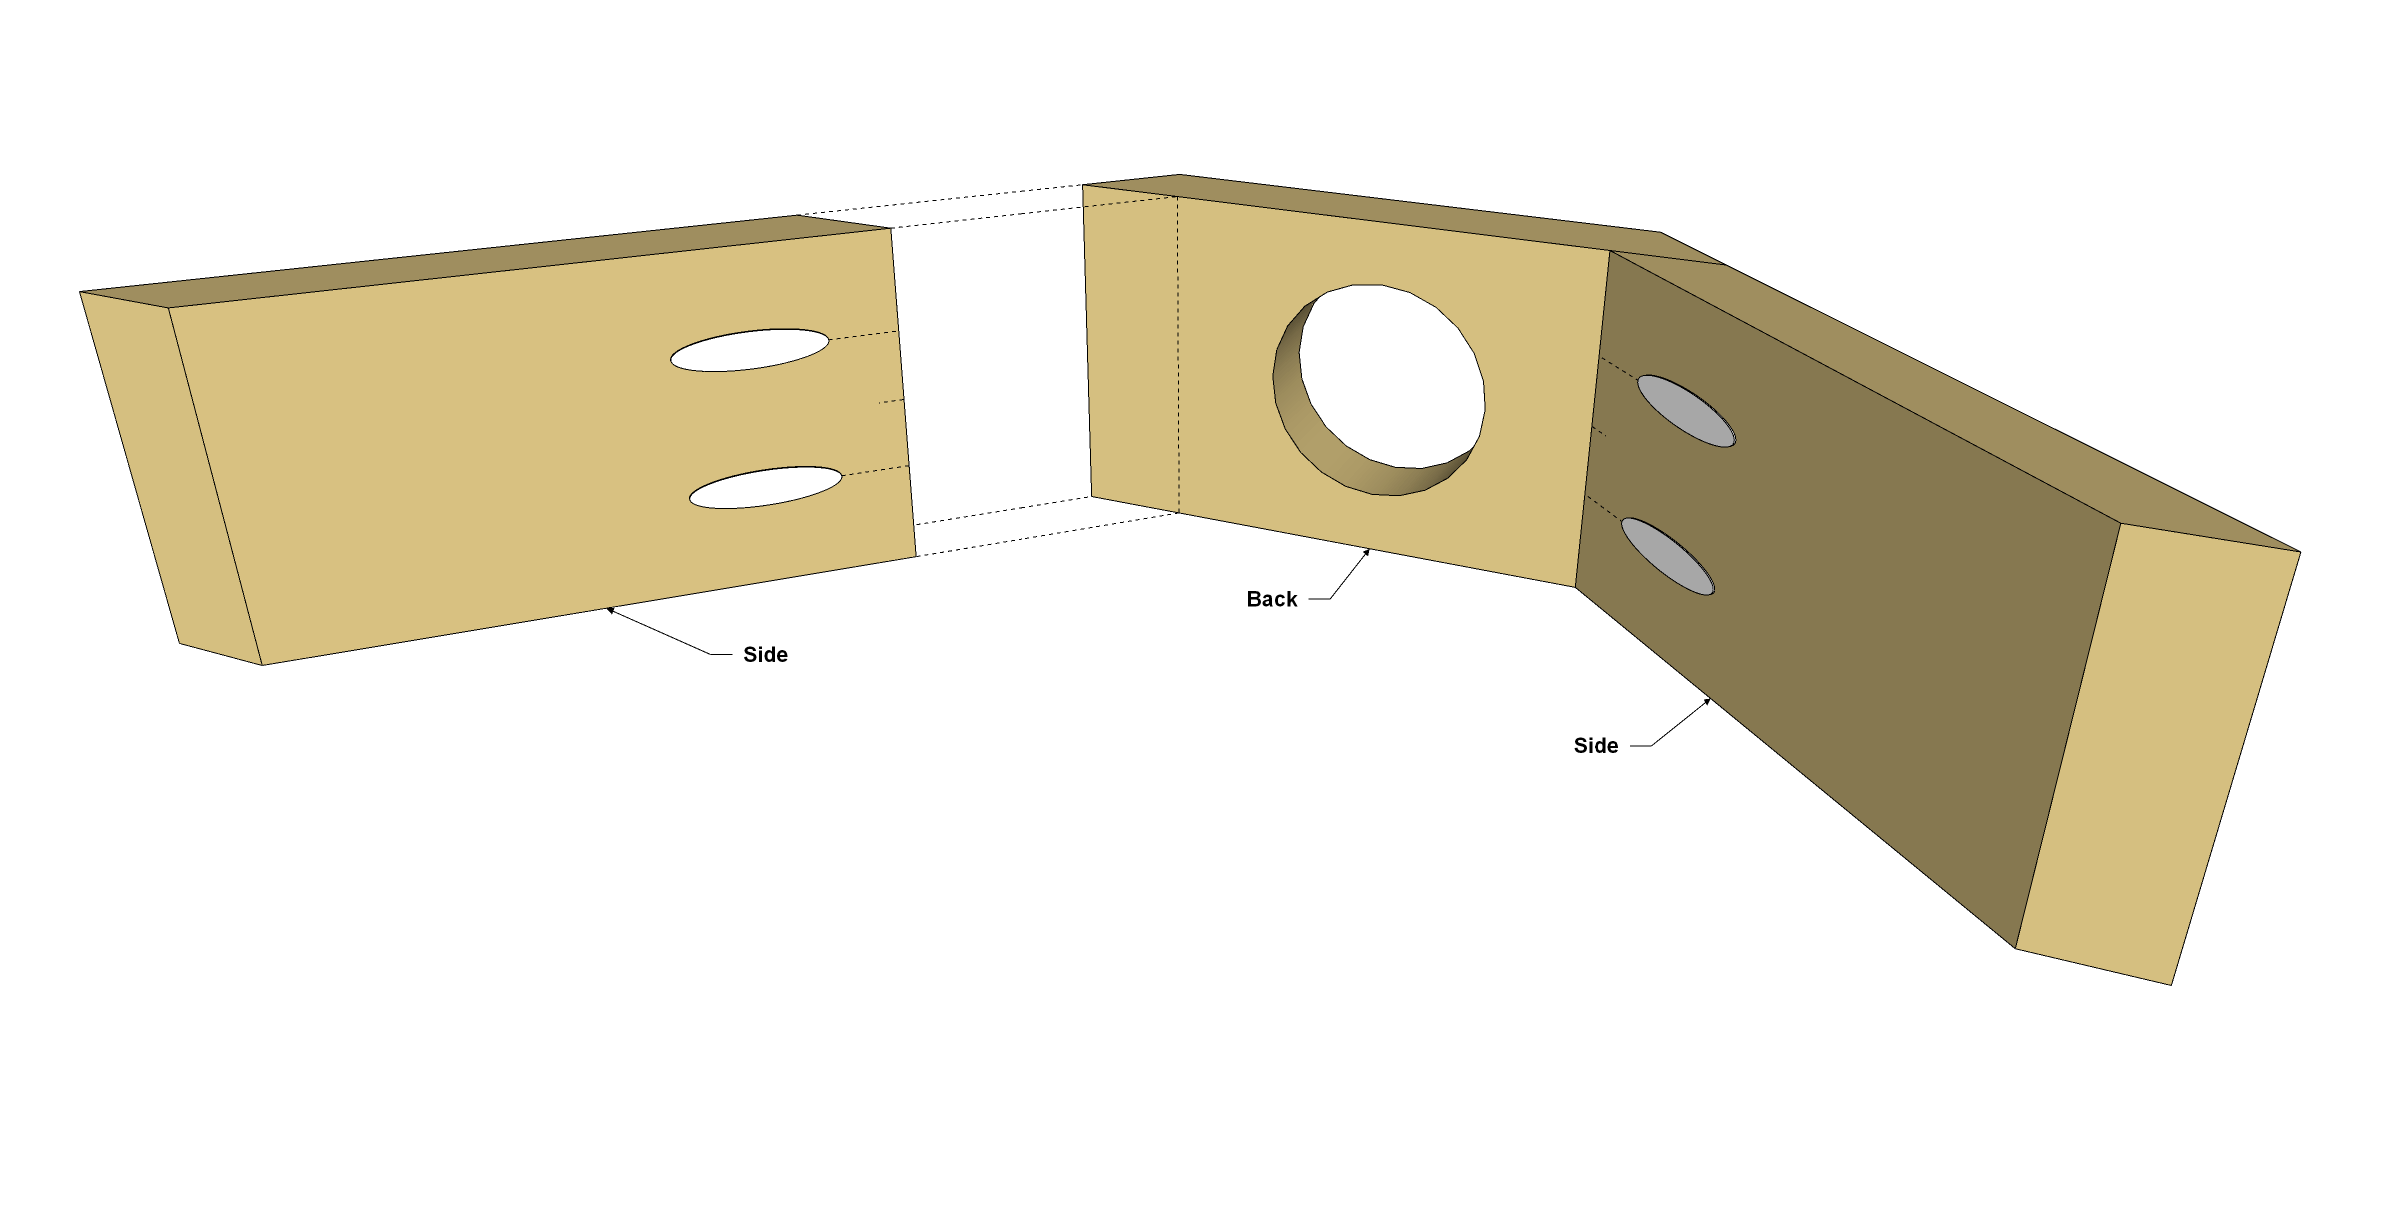
Attach the Sides to the Back
Now you can attach the Sides to the Back using glue and 11/4" coarse-thread pocket-hole screws. Because of the angles, getting things lined up perfectly can be a bit of a challenge. So, it’s a good idea to apply glue to the beveled end of the Side, then position it against the back and clamp it in place, as shown. Then drive in the screws. Repeat this to attach the second Side.
-
Make and Attach the Cap and Base
Now you can trace the Side/Back assembly to create the top, as shown. Then cut it out with a jigsaw, cutting just slightly outside your traced line. You’ll trim it to size later. To make the Base, trace the cap, but add a 2" lip along the front edge. This creates a surface you can use to clamp the dust pickup in place. If you have a workbench with dog holes, you can use the dogs to hold the dust pickup in place by drilling holes in the base, as we did, that are spaced to fit your bench.
-
Attach the Cap and Base
To complete your dust pickup, attach the Cap and Base using glue and a few small brads. Then sand the edges of the Base and Cap flush with the Sides and Back.