
Organize your space with DIY closet system plans. From shelves to hanging racks, these projects cater to various skill levels. Transform clutter into order with detailed, step-by-step instructions and customizable designs.
28 Results
28 Results
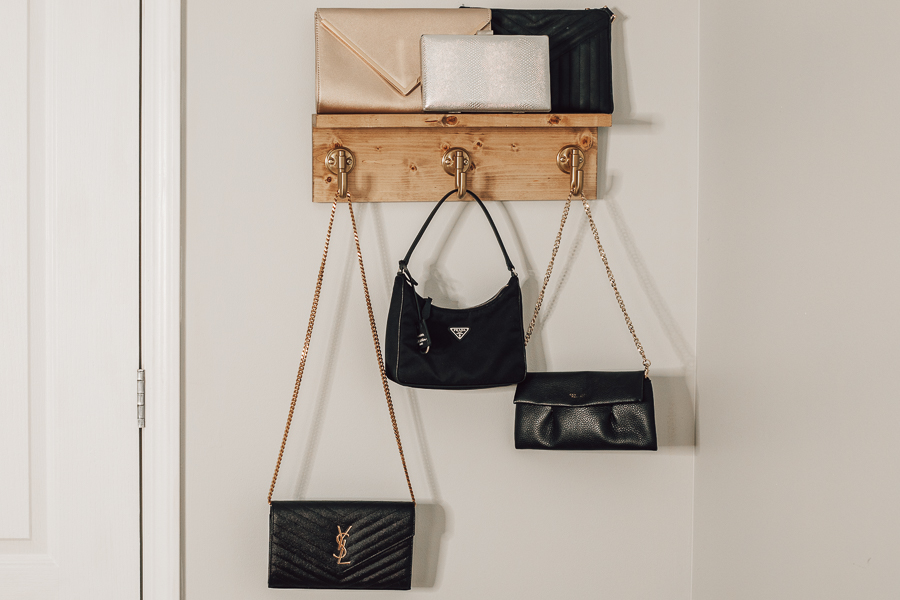
DIY Purse Rack
Difficulty
easy
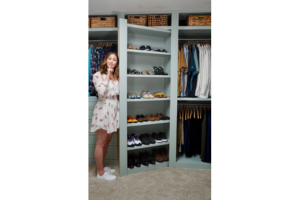
Hidden Door Shelf
Difficulty
advanced

DIY Closet Cubbies
Difficulty
easy

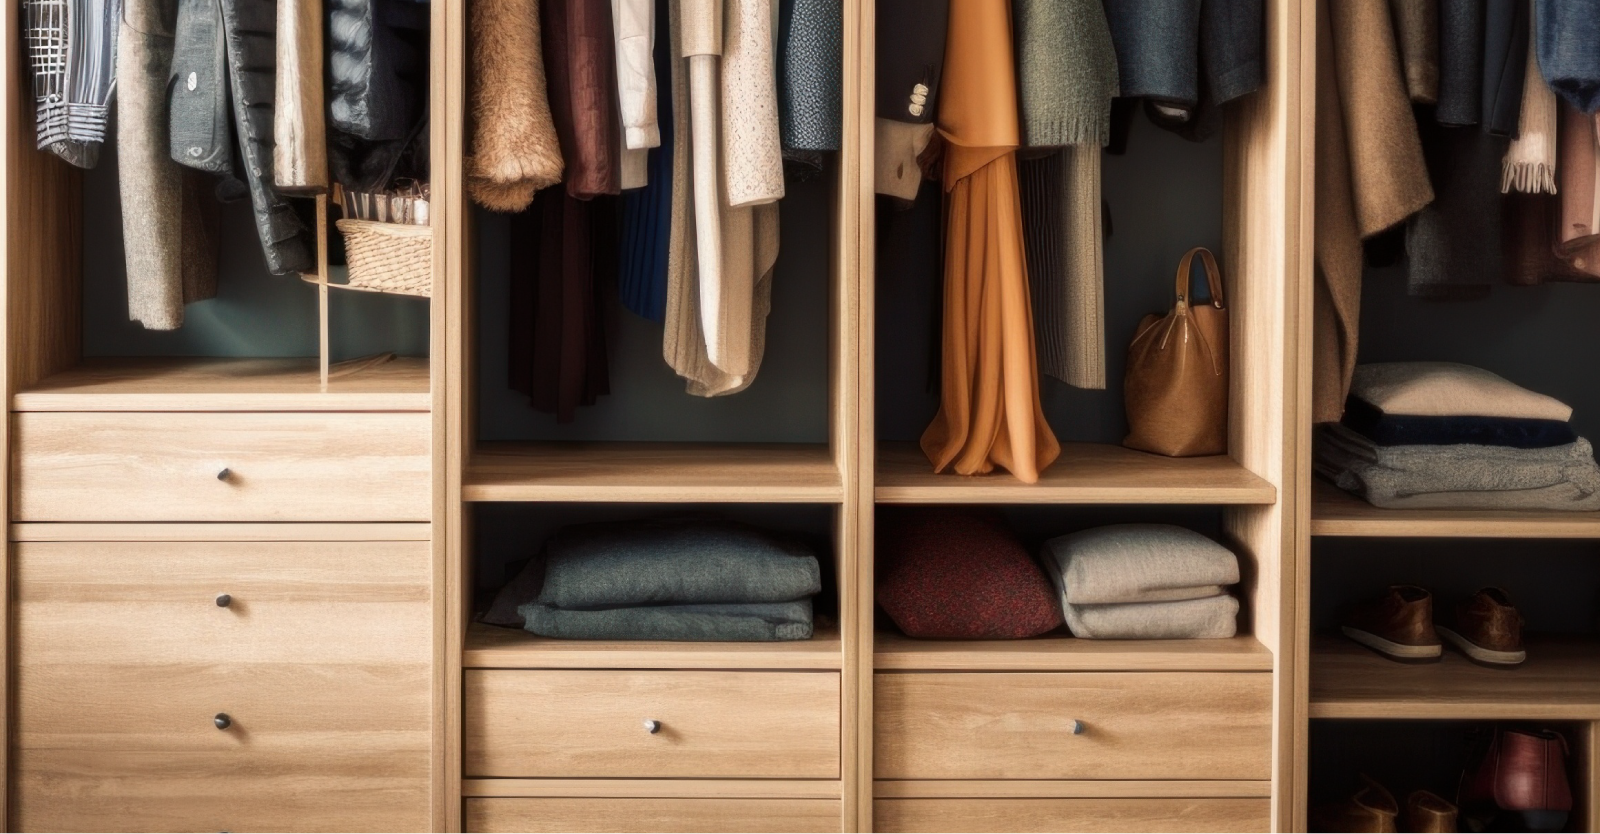
DIY Closet Organizer with Drawers
Difficulty
easy
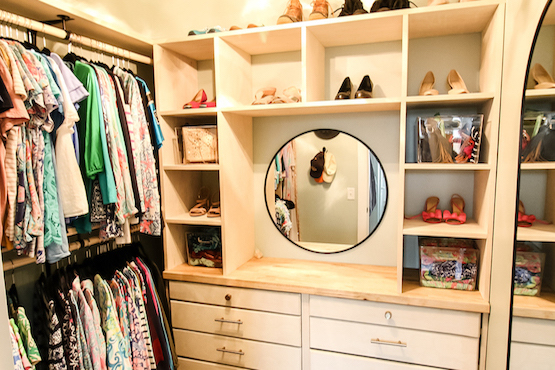
Built-In Dresser with Cubbies
Difficulty
advanced
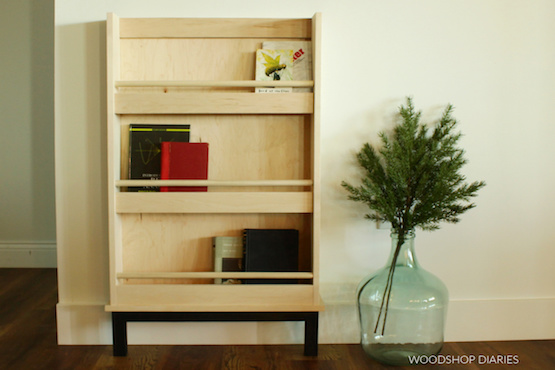
DIY Book or Shoe Rack Plans
Difficulty
moderate
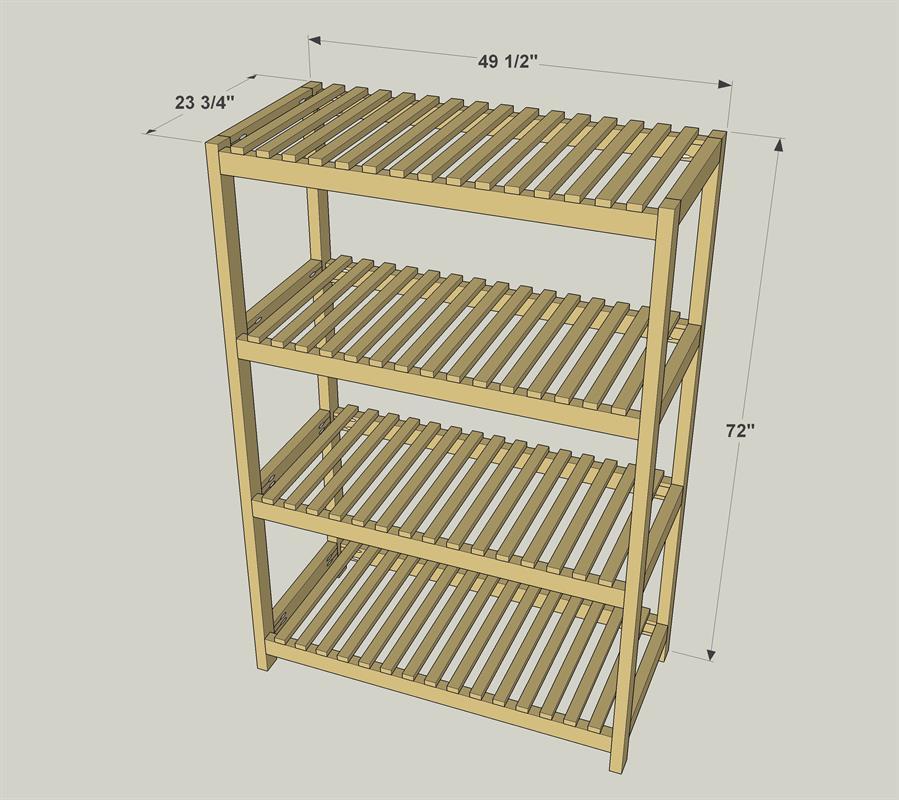
Slatted Storage Shelves
Difficulty
moderate
Simple shoe storage rack
Difficulty
easy
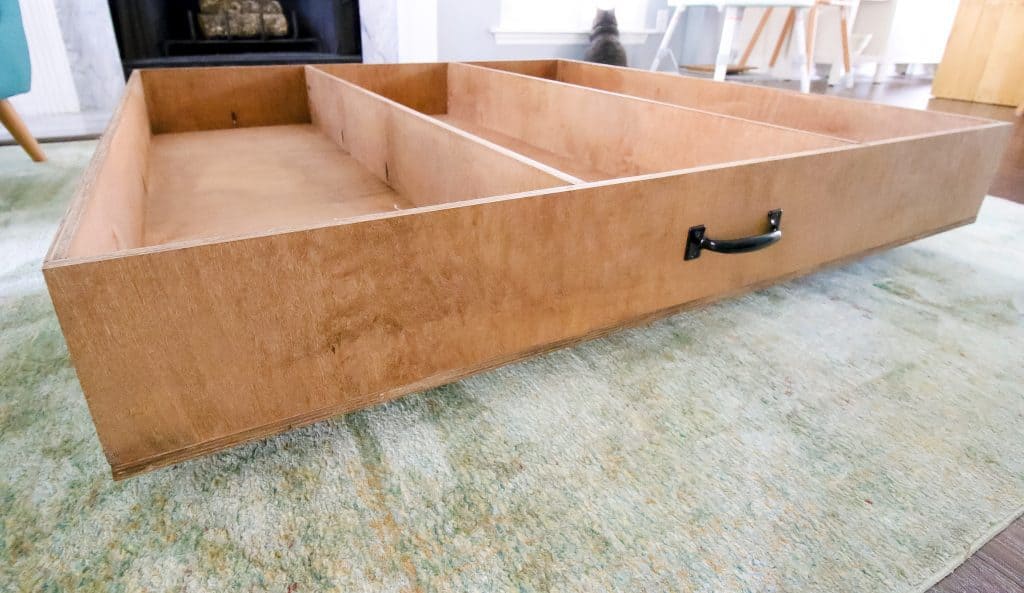
Under Bed Rolling Storage
Difficulty
easy
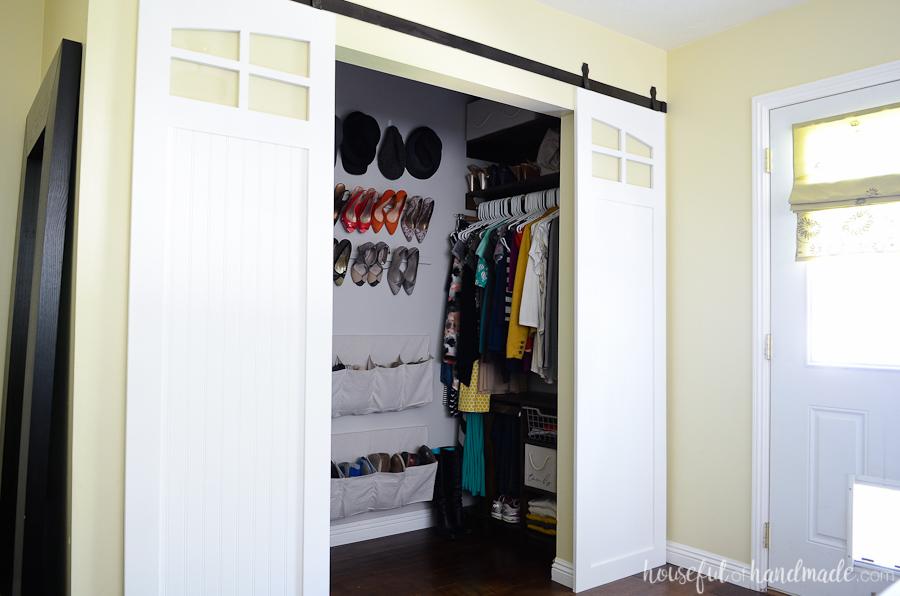
Sliding Closet Doors with Windows
Difficulty
advanced
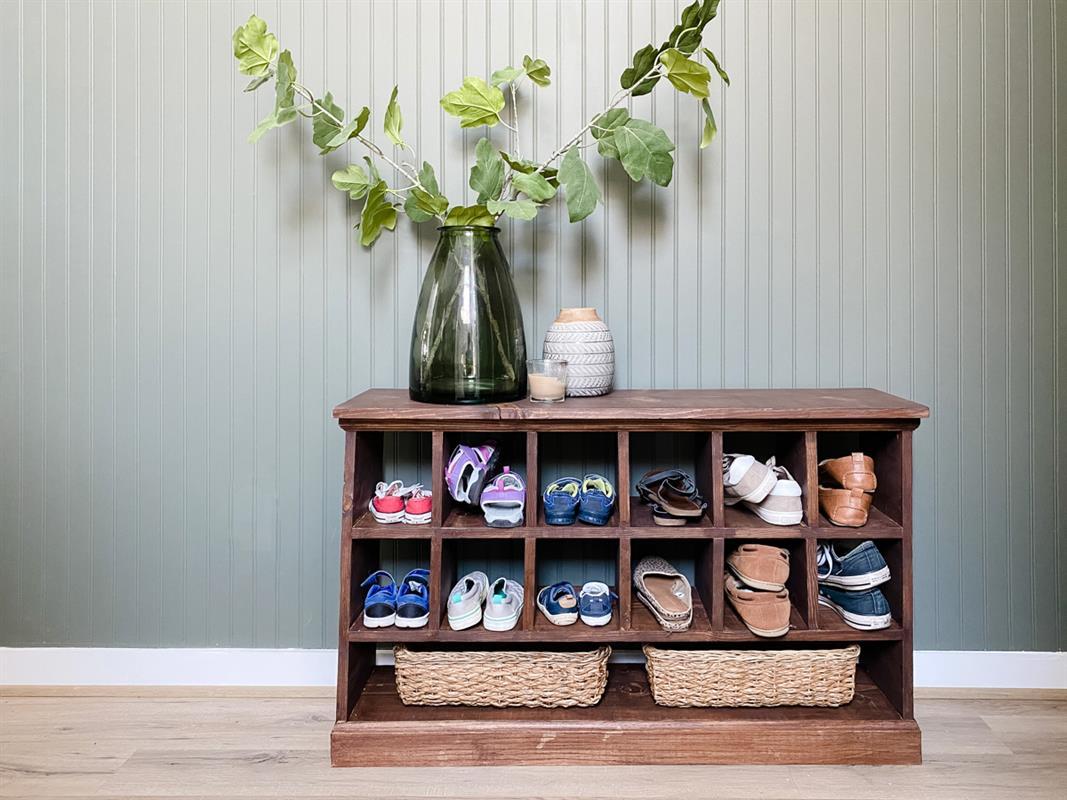
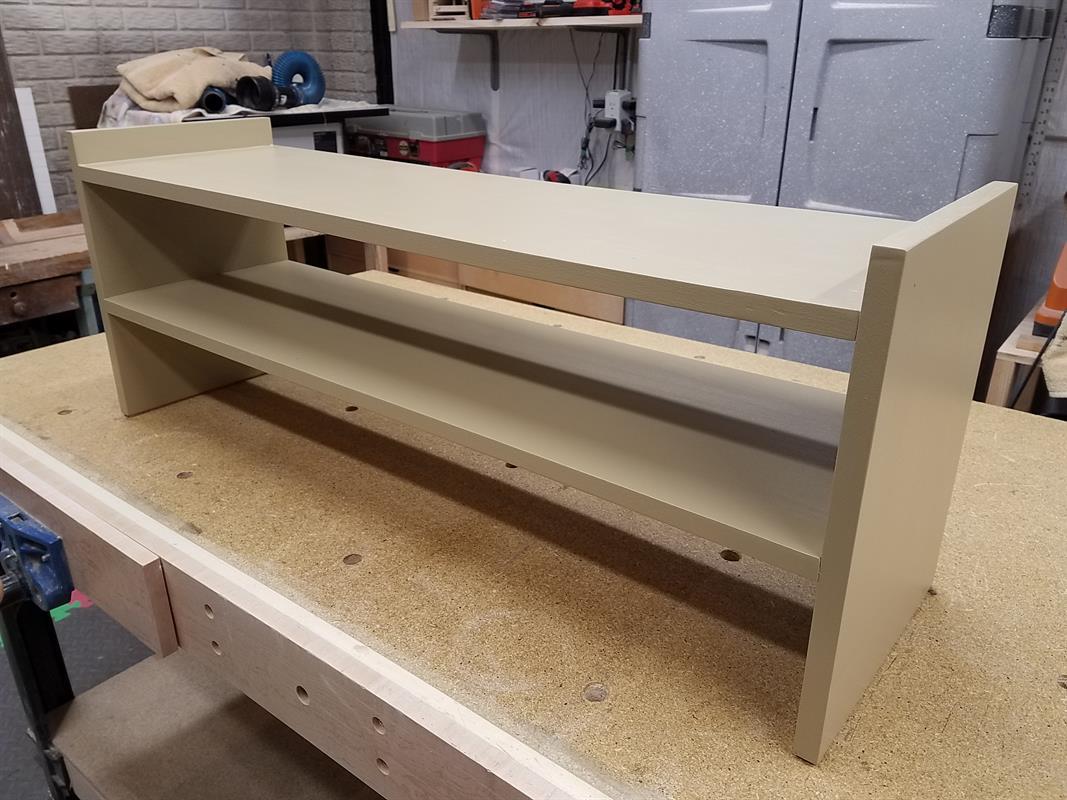
Simple Shoe Cubby
Difficulty
moderate
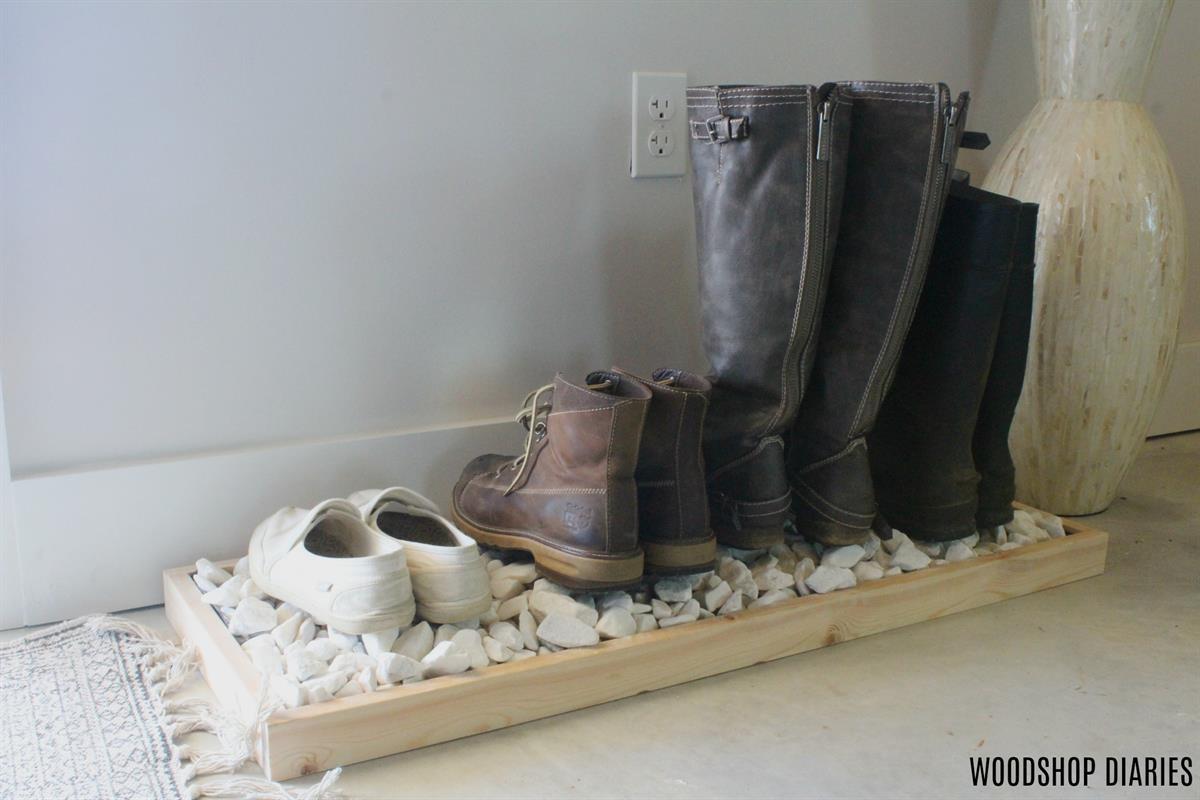
Simple Modern Boot Tray
Difficulty
easy
Creating Your Own DIY Closet Organizers
Closets, despite being designed for organization, often become spaces of chaos and frustration. Finding an item can feel like navigating a labyrinth, and the lack of efficient storage solutions can lead to clutter and disarray. Enter DIY closet organizers — a practical and creative solution to address common challenges and transform chaotic closets into efficient, personalized spaces tailored to individual needs.
The need for DIY closet organizers arises from the desire for a system that not only organizes but also reflects personal style and optimizes available space. This guide aims to explore the world of crafting personalized closet organizers, providing valuable insights and step-by-step instructions to turn a cluttered closet into a well-organized haven.
Benefits of DIY Closet Projects
Embarking on a DIY closet project offers a multitude of benefits beyond the evident cost-effectiveness. Customization is at the forefront, allowing individuals to create a storage solution that suits their specific needs and complements their unique style. Unlike store-bought organizers that may not perfectly align with personal preferences, a DIY approach ensures that every inch of space is utilized efficiently and reflects the individual’s lifestyle.
The satisfaction derived from crafting a closet organizer from scratch goes beyond the tangible benefits. It becomes a creative expression, a personalized project that transforms a mundane space into a functional work of art. Whether you’re a seasoned DIY enthusiast or a novice eager to try your hand at woodworking, the benefits of a DIY closet project are undeniable.
Assessing Your Closet Needs
Understanding Your Storage Requirements
Before diving into the construction phase, it’s crucial to assess the items that will inhabit the closet. Evaluate clothing, accessories, and other belongings to determine the most effective organizational strategies. Considerations such as the types of clothing, storage priorities, and the frequency of use will guide the design process, ensuring the final product meets practical needs.
For example, if you have an extensive collection of shoes, incorporating specialized shelving for footwear becomes a priority. Similarly, if your closet is home to a mix of clothing items, from formal wear to casual attire, a versatile design with different storage sections is essential.
Analyzing Closet Space
Closet dimensions and layout significantly impact the design of your organizer. Measure the available space meticulously, considering the height, width, and depth of the closet. Understanding the layout helps in determining the best configuration for shelving, drawers, and other storage elements.
Accessibility is another critical factor. Analyze how easily you can reach different areas of the closet. The goal is to create a system where items are easily visible and accessible, reducing the time spent searching for specific pieces. Consider the ergonomic aspects of your closet design to ensure that daily interactions are seamless and efficient.
DIY Closet Organizer Design Options
Shelf and Rod Systems
One of the fundamental design options for DIY closet organizers is the incorporation of shelf and rod systems. Basic yet highly efficient, these systems provide a foundation for organizing clothes, shoes, and accessories. Utilize basic shelving for efficient storage, ensuring that each shelf is strategically placed based on the items it will hold.
Hanging rods offer a practical solution for clothing items that are best stored on hangers. The inclusion of rods at varying heights accommodates different garment lengths, promoting a visually pleasing and organized appearance. This design option is particularly effective for closets with a mix of short and long garments.
Cubbies and Storage Bins
For a more segmented and visually appealing approach, consider the addition of cubbies and storage bins. Cubbies create designated spaces for different categories of items, offering a versatile solution for organized storage. From shoes and handbags to folded clothes, each cubby becomes a dedicated space for specific belongings.
Maximizing vertical space with cubbies is a key strategy in smaller closets. The vertical arrangement allows you to make the most of limited square footage while maintaining a neat and organized aesthetic. Incorporating bins within the cubbies provides concealed storage, keeping the overall look of the closet clean and streamlined.
Built-in Drawers and Cabinets
To achieve a seamless and sophisticated look, the integration of built-in drawers and cabinets is a natural progression. Drawers offer a practical solution for folded clothes, undergarments, and accessories, keeping them neatly tucked away and easily accessible. Similarly, cabinets provide concealed storage for items that don’t require constant visibility.
The construction of drawers and cabinets involves careful consideration of materials and dimensions. Choose durable materials for the drawer fronts and cabinet doors, ensuring they can withstand frequent use. The addition of hardware, such as handles or knobs, contributes to the overall aesthetic and functionality of the organizer.
Essential Tools and Materials
Before diving into the hands-on aspect of the project, familiarize yourself with the essential woodworking tools required for constructing a DIY closet organizer. These tools are integral to measuring, cutting, and assembling the various components of the organizer.
Measuring Tools
Accurate measurements are the foundation of a successful project. Invest in a quality tape measure and a combination square for precise dimensions.
Cutting Tools
A reliable saw is essential for cutting wood to the desired lengths. Circular saws and miter saws are common choices for DIY woodworking projects.
Assembling Tools
To join the different components of the organizer, you’ll need tools such as a drill and screws. Pocket hole jigs are useful for creating strong joints, particularly in areas that may not be visible in the final product.
Safety Precautions
Don’t overlook safety gear, including safety glasses and hearing protection. Depending on the complexity of the project, consider additional safety measures such as dust masks and gloves.
Choosing the Right Wood and Materials
The choice of materials significantly influences the durability, aesthetics, and overall quality of your DIY closet organizer. Optimal wood types for durability and visual appeal vary based on personal preferences and the intended style of the organizer.
Plywood
A versatile and cost-effective option, plywood is suitable for various components of the organizer. Choose a plywood grade that balances affordability with durability.
Hardwood
For a more refined look and enhanced durability, consider hardwood options such as oak, maple, or birch. Hardwoods are ideal for visible components like drawer fronts and cabinet doors.
Additional Materials
Beyond wood, consider the materials needed to assemble and enhance the organizer. Screws, brackets, and finishing options such as paint or stain contribute to the overall aesthetic and functionality.
Troubleshooting Common Issues
Limited closet space is a common challenge, especially in smaller homes or apartments. Fortunately, there are several space-saving solutions tailored for small closets.
Vertical Storage
Maximize vertical space with floor-to-ceiling shelving. Utilize the height of the closet to create additional storage without taking up valuable floor space.
Slimline Organizers
Try slimline organizers that make the most of narrow spaces. These organizers are designed to fit into tight areas while providing efficient storage for clothing and accessories.
Addressing Stability and Durability Concerns
Ensuring the stability and durability of your DIY closet organizer is paramount for its long-term functionality.
Reinforcing Joints
Periodically check and reinforce joints, especially in areas that experience frequent use. Tighten screws or add additional support as needed to maintain stability.
Choosing Durable Materials
When constructing the organizer, prioritize durable materials that withstand the demands of daily use. Hardwoods and high-quality plywood contribute to the overall stability and longevity of the organizer.