

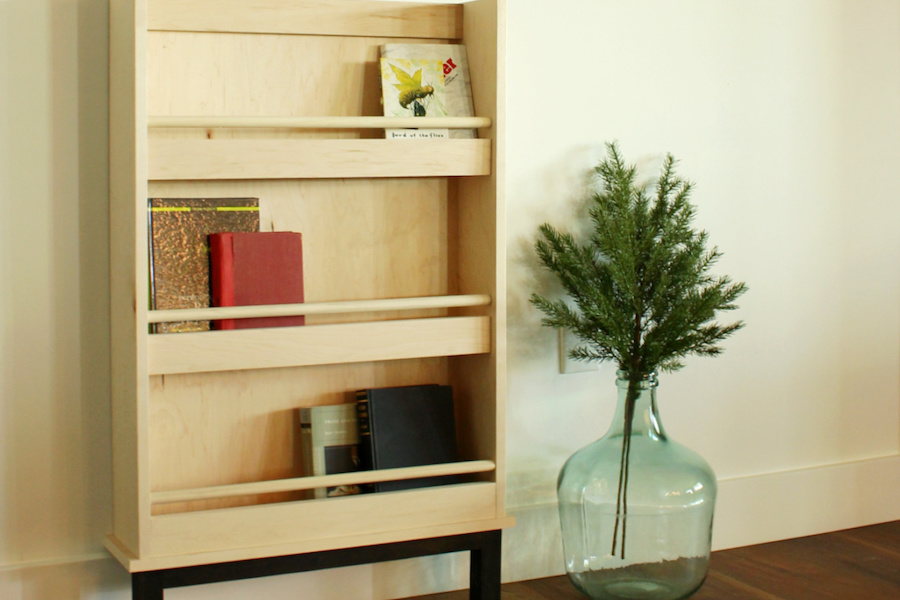
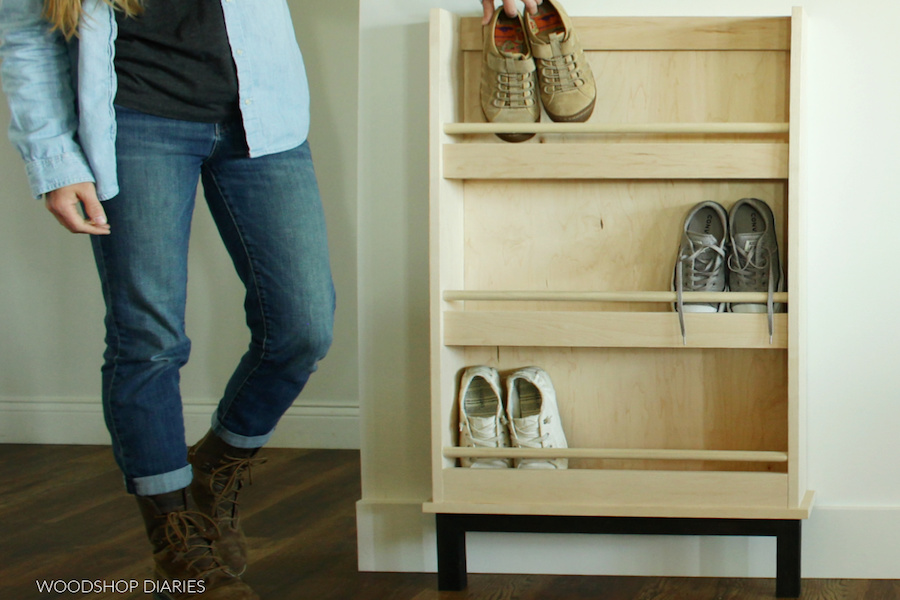
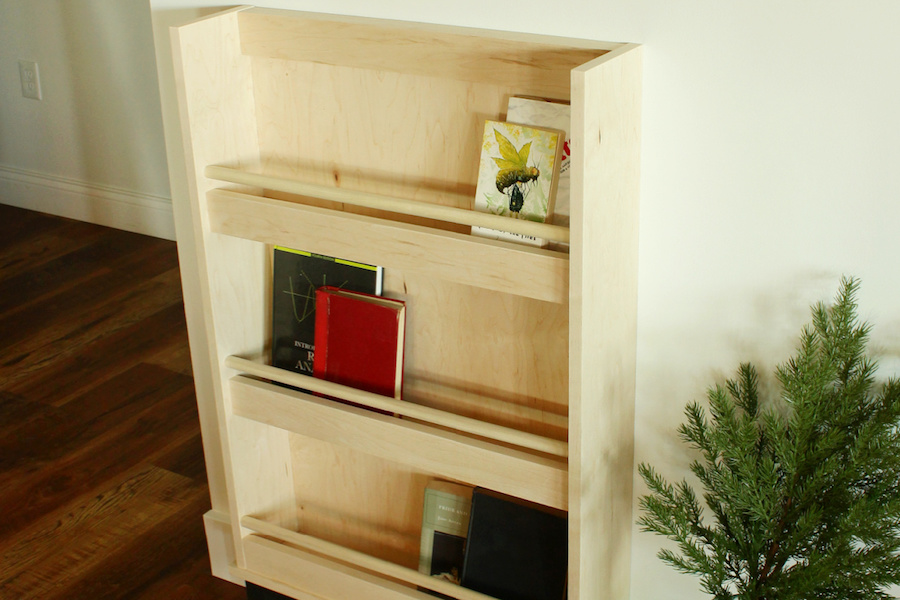


This adorable compact shelf would be great as a book rack in a kid’s room, a plate rack in a kitchen, a shoe rack in an entryway, or even as towel storage in a bathroom. It’s a fun and versatile build you can customize to any size you need!
Tools
Kreg Tools


Other Tools
-
Miter saw (optional)

-
Brad nailer
Materials
Wood Products
- 1 Half Sheet of Plywood , ¾”
- 1 Board , 2x2x8
- 1 Dowel rod (optional) , ¾” x 72”
Hardware & Supplies
- 1 Box of 1 ¼” pocket hole screws (see tools list)
- 1 Box of 2 ½” pocket hole screw (see tools list)
- 1 Box of 1 ¼” wood screws
- 1 Box of 2” wood screws
- 1 Box of 1 ¼” brad nails
- 1 Wood glue
- 1 Edge banding (optional)
Directions
-
Cut and Prepare Book Rack Pieces
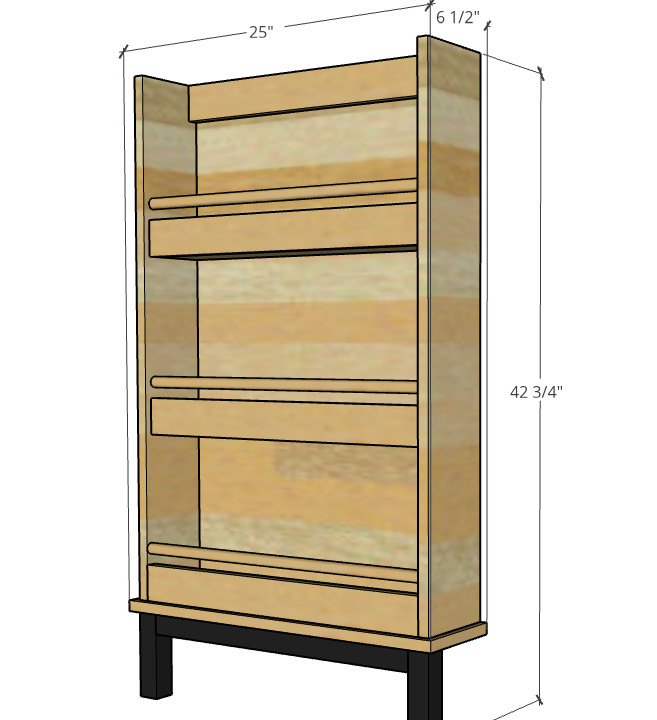
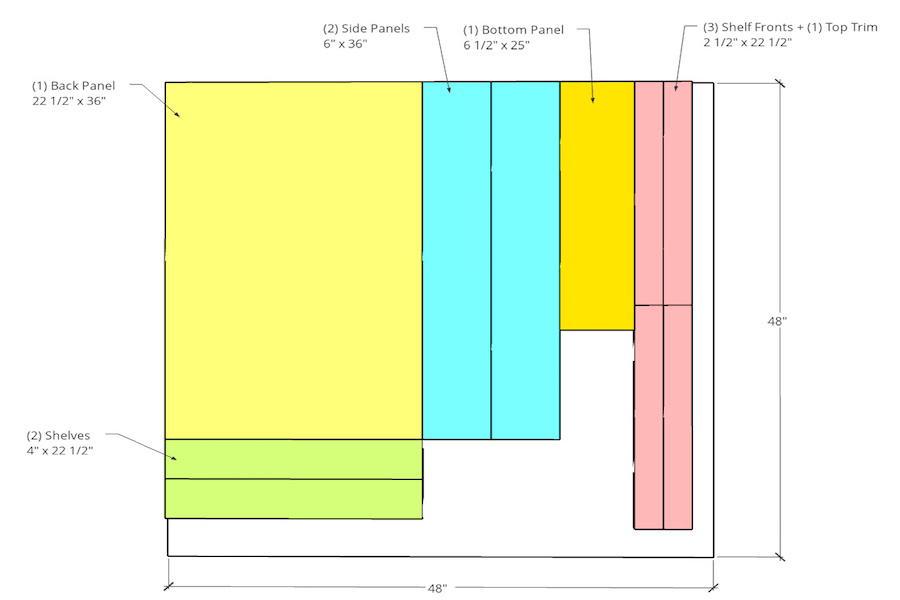
Cut a back, two sides, a bottom, two shelves, three shelf fronts, and a top trim piece from ¾” plywood according to the cut diagram. Apply iron on edge banding to the parts of the plywood pieces that will be exposed (if desired—edge banding is optional). Sand each piece before assembling.
-
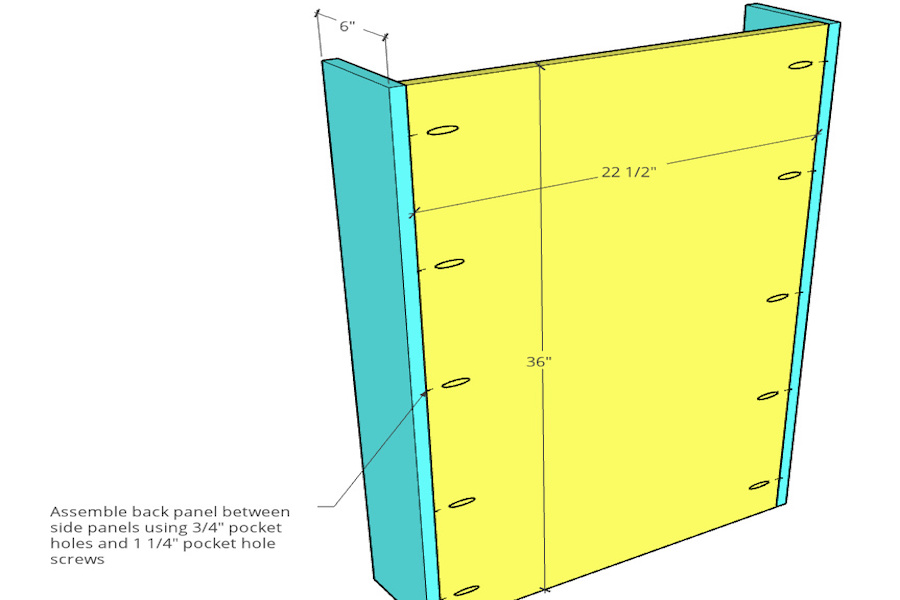
Attach Back and Sides
Drill ¾” pocket holes along the long sides of the back panel. Drill these holes on the BACK side. Then, assemble between the two side panels like shown using 1 ¼” pocket hole screws.
-
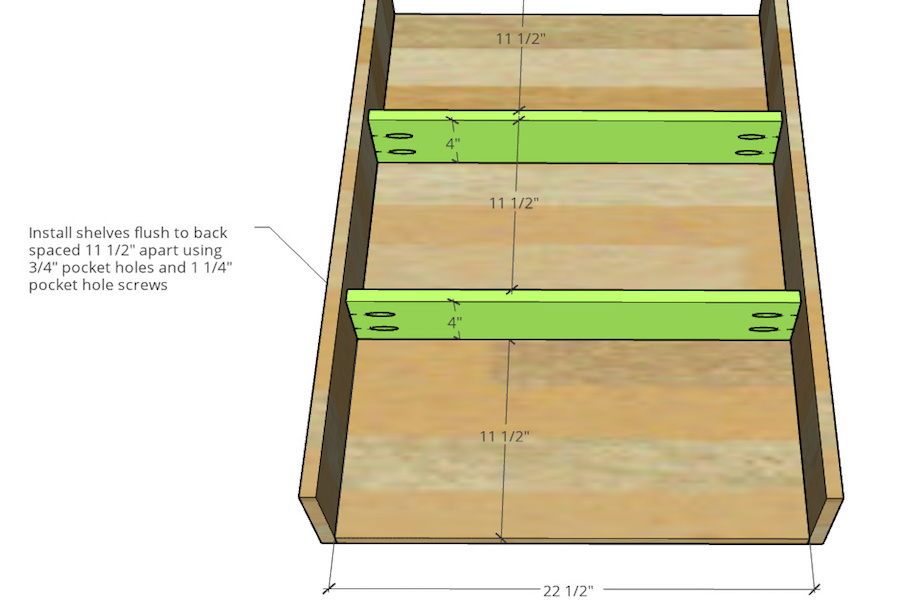
Install Shelves
Drill ¾” pocket holes into the ends of the two shelves and install between the side panels like shown using 1 ¼” pocket hole screws. Make sure these shelves are touching the back panel and square to it (not tilted) before securing.
-
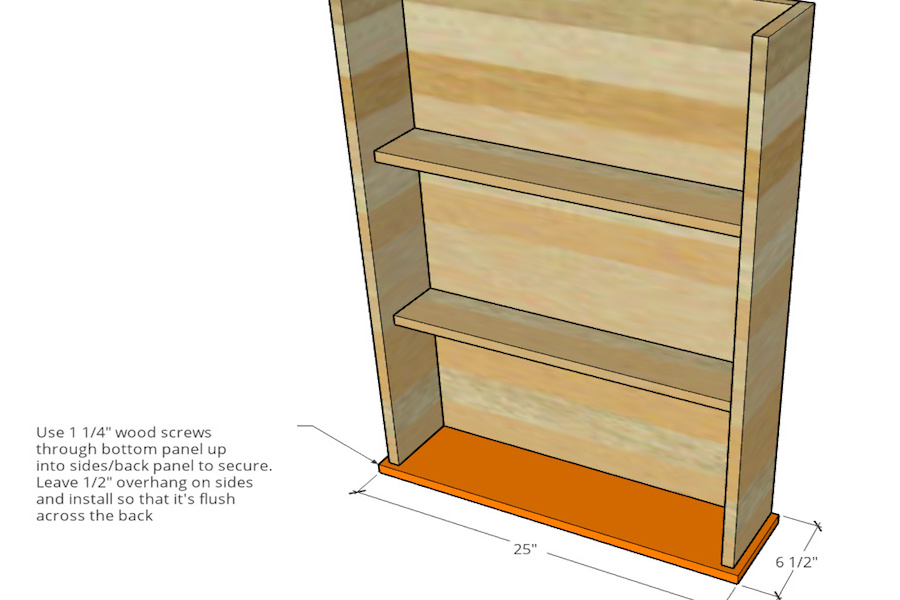
Install Bottom
Use 1 ¼” wood screws to secure the bottom panel to the bottom of the book rack. Use at least two screws on each side and leave ½” overhang on the front and sides. It should be flush across the back.
-
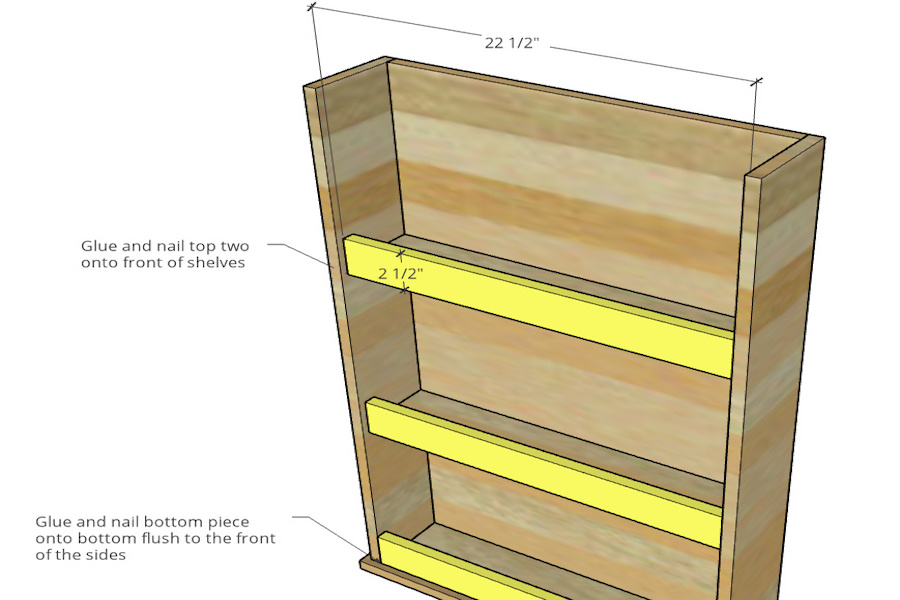
Install Shelf Fronts
Use wood glue and brad nails to secure the shelf fronts onto the front the two shelves. Keep these pieces flush to the BOTTOM of the shelves and use a couple nails in the front, and add a couple through the sides to hold it in place. For the bottom piece, add glue on the bottom edge, and place it between the sides flush along the front. Use brad nails through the bottom panel and the side panels to secure it in place.
Tip:
These pieces are just there to prevent things from sliding off the shelf.
-
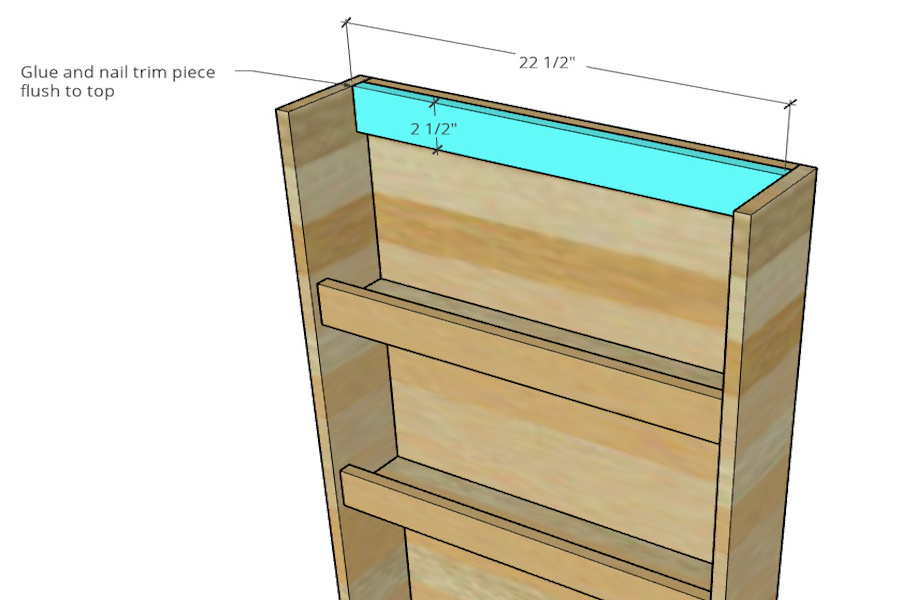
Add Top Trim
This step is optional, but I think it looked better with this piece here, so I glued and nailed a plywood trim piece along the top edge between the sides.
-
Add Dowels
This step is also optional, but I cut a ¾” dowel rod into three pieces 22 ½” (double check your measurements—this needs to be a tight fit, so measure and cut these to fit exactly). I applied some wood glue on the ends (this will be messy, so be prepared) and place above the shelf fronts between the sides. I spaced mine out ¾” from the top, but you can space yours however you’d like. Then, CAREFULLY shoot a brad nail into each end through the sides. The nail will help hold it until the glue dries. Putty and sand all nail holes and finish the shelf as desired.

-
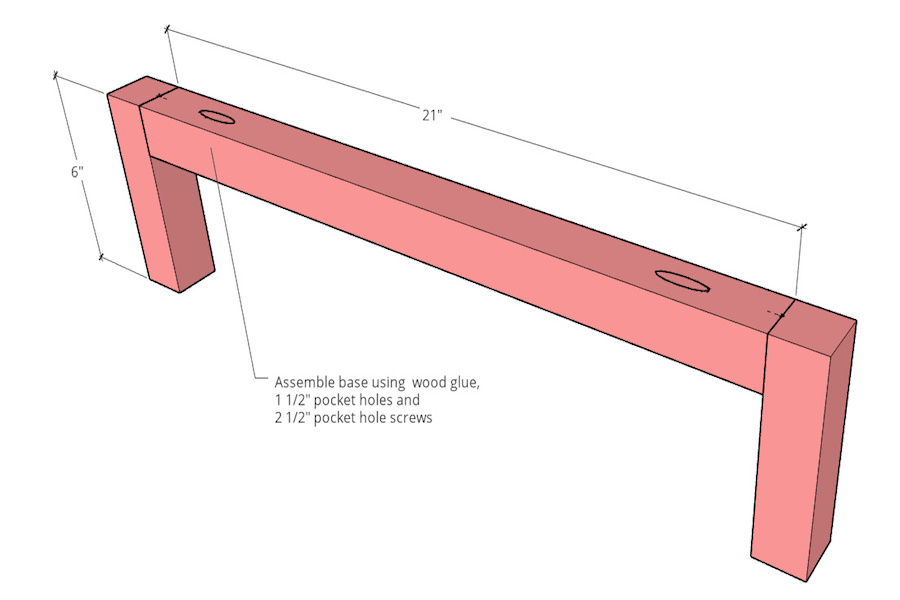
Build Base
Assemble a simple base using 2x2s like shown. Use 1 ½” pocket holes, some wood glue, and 2 ½” pocket hole screws to assemble. Take note that the base is only two legs and a piece between. This shelf should sit flush against the wall and secure to a wall stud. To avoid interfering with baseboards, the base here is just the “front half.” It will support the weight of the shelf while allowing the back to go above the baseboard and flush against the wall.
Tip:
Finish base as desired before attaching.
-
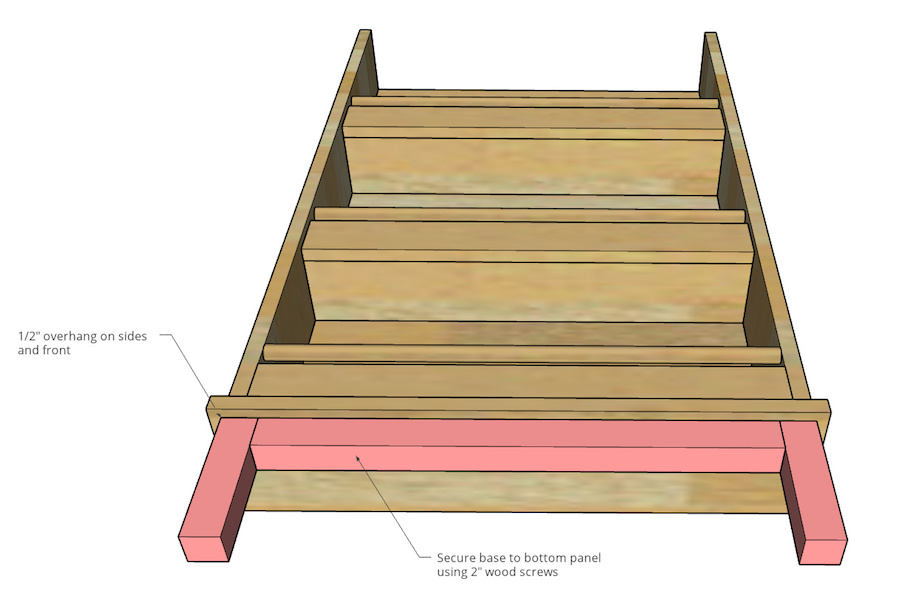
Attach Base to Rack
Use 2” wood screws to secure the base into the bottom of the rack leaving ½” overhang on each side and the front.
-
Secure Rack to Wall Stud
Place the rack where you’d like and make sure it’s flush against the wall. Secure the shelf to a wall stud through the back panel with screws or another anchoring option. Since this is so narrow, this will prevent it from toppling over if knocked, overloaded, or climbed on.