

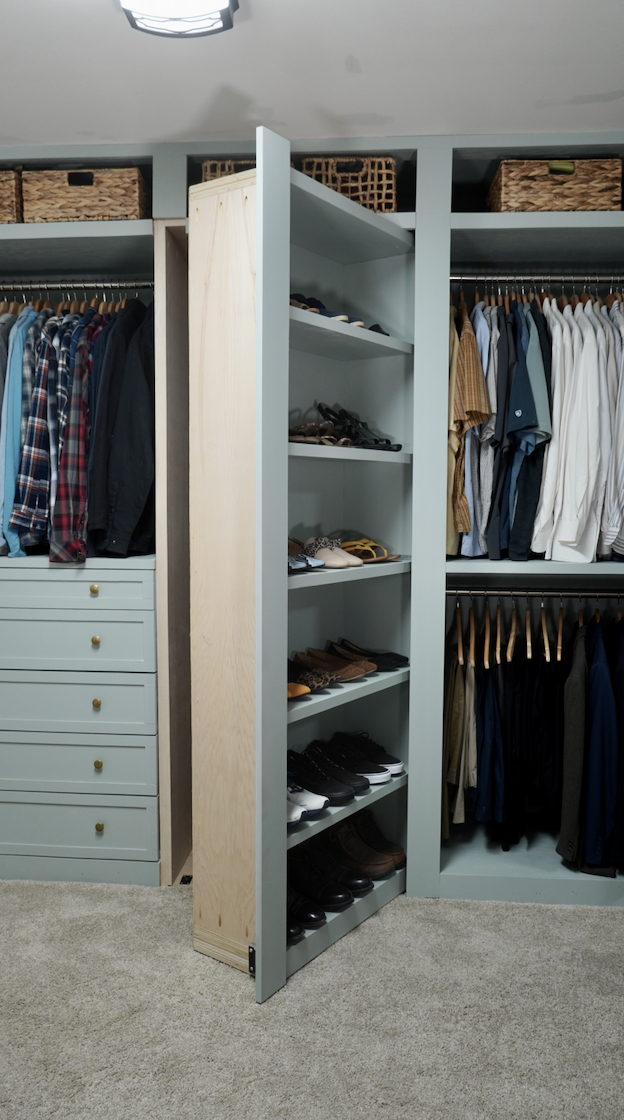


Have you always wanted a secret room? Well here is your chance with this custom hidden door. Perfect for a shoe shelf or book shelf! This is not a one size fits all project. Don't worry, I'll show you step by step how to get the perfect measurements for your specific space.
Tools
Kreg Tools


Other Tools
-
Table Saw

-
Nail Gun
-
3/4" Hole Saw
-
Level
-
Pull Saw
-
Clamps
Materials
Wood Products
- 2 Plywood (I used Oak) , 4' x 8' x 3/4"
- 1 Plywood , 4' x 8' x 1/8"
- 2 Pine Lumber , 1" x 4" x 8'
- 1 MDF Hardboard , 2' x 4' x 1/8"
Hardware & Supplies
- -- Trim Tape
- 4 L Shaped Brackets
- -- Primer and Paint
- -- Wood Glue
- -- 1" Wood Screws
- -- 2 1/2" Wood Screws
- -- Brad Nails
- -- Plaster or Wood Filler
- -- Caulk
- 1 Murphy Hidden Hinge Kit (Amazon)
Directions
-
Figuring Out Measurements for Door Jamb
Measure the height, width, and depth of rough opening.
Note: I was building my secret door for a closet so mine went between two closet units. I had to make my door jamb the depth of the units which was 22". Most standard door jambs are 6" to 8".
-
Cut Pieces For Door Jamb
Cut 2 pieces for the top and bottom of the door jamb. The pieces should be the complete width and depth of the rough opening.
For example, the rough opening for my project was 37 1/2" by 22" so I cut 2 pieces to those measurements.
The next step is to cut 2 pieces for the sides of the jamb. These pieces should be 1 1/2" less than the rough opening.
For example the door jamb height for my project was 80 7/8" so I cut the 2 side pieces to 79 3/8" by 22" deep.
-
Installing Door Jamb
Drill out pocket holes on each side of the side pieces. Then use the pocket holes, pocket hole screws, and wood glue to attach the 4 pieces together. Next, screw the door jamb into place in the rough opening.
Leveling Door Jamb
Make sure your door jamb is level. Use shims if needed.
-
Figure Out Secret Door Measurements
This is the trickiest part but you got it! Get new measurement for the door jamb opening.
Width of Door: Width of jamb minus 2 3/4"
Height of Door: Height of jamb minus 1 5/8"
Depth of Door: 12" (most secret doors are 8" deep)For example, my door jamb width was 37 1/2" and my secret door width was 34 3/4". My door jamb height was 80 7/8" and my secret door height was 79 1/4”.
-
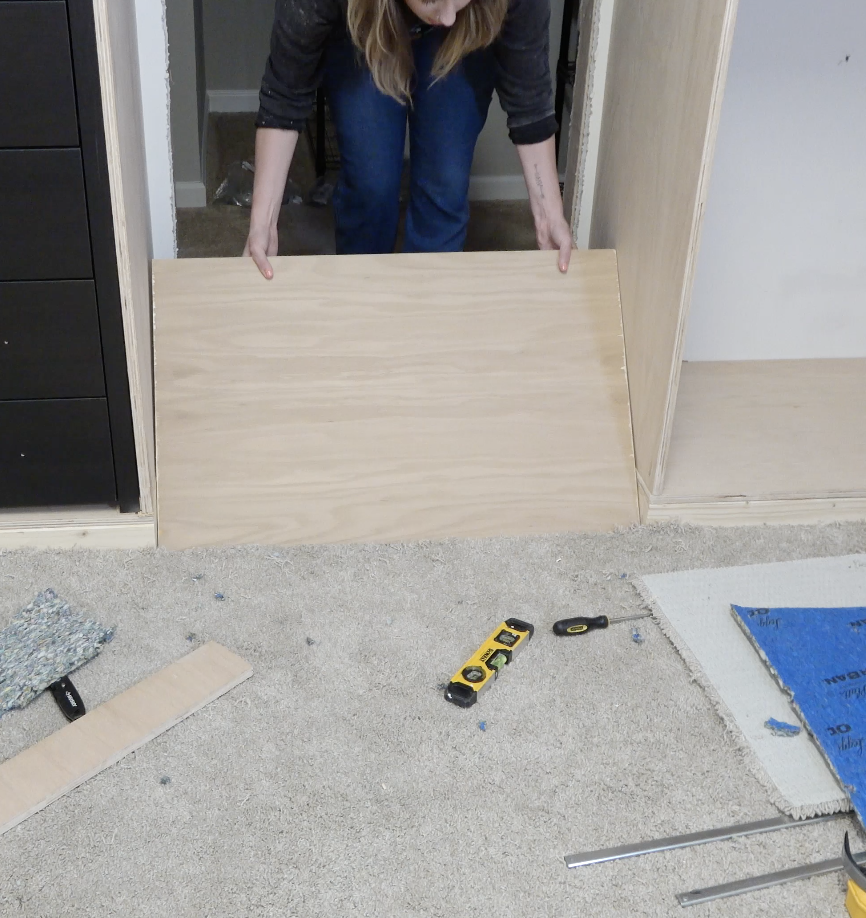
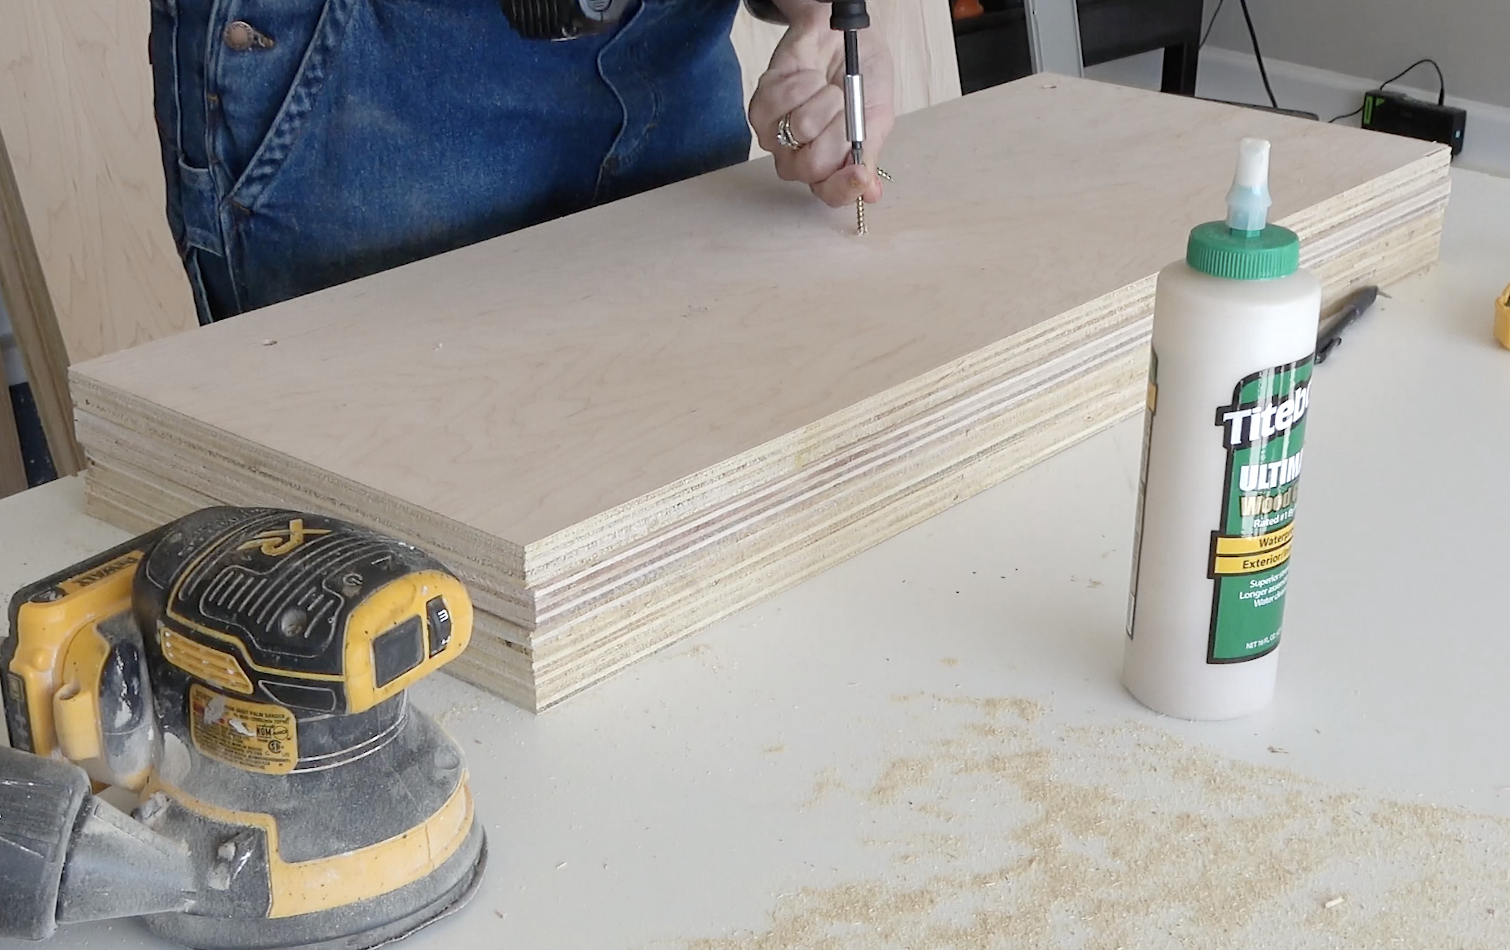
Making the Base/ Top of Secret Door
Cut 6 pieces of plywood: 12" deep by the width of what your secret door needs to be.
For example, I cut 6 pieces that were 12" by 34 3/4".
Next stack 4 of the pieces on top of each other. Glue and screw the pieces together for the base. Stack the last 2 pieces together and use glue and screws to attach them for the top.
-
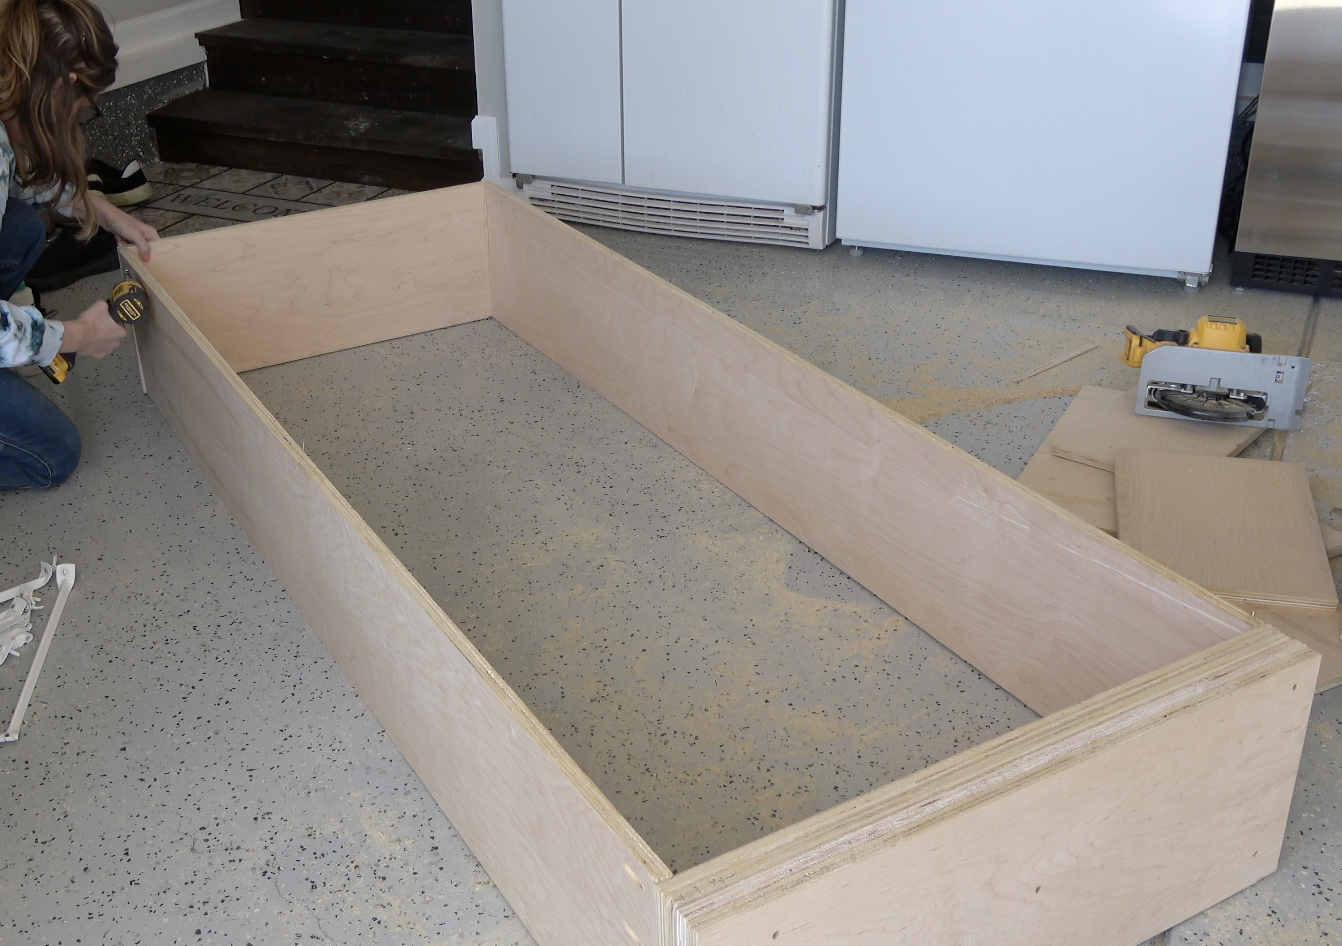
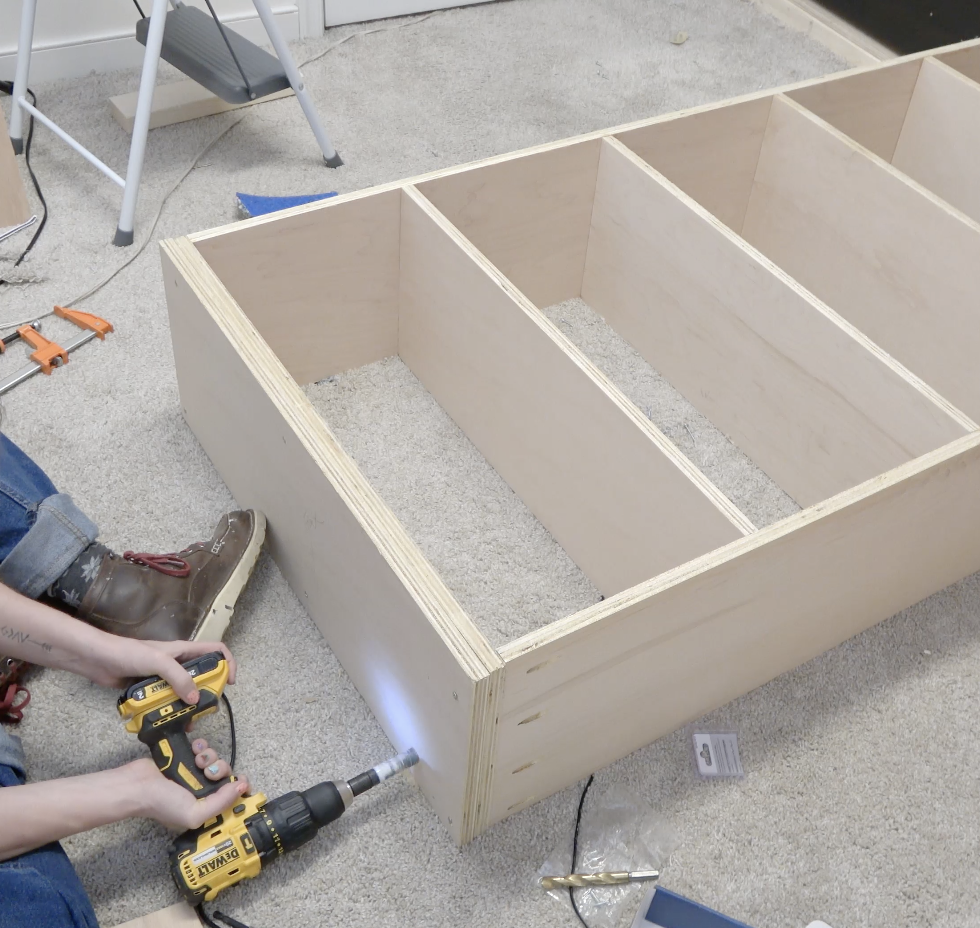
Putting Together the Door Frame
Cut 2 side pieces 12" deep by the height of the door minus 4 1/2".
For example, my secret door was 79 1/4" tall so my side pieces were cut to 12" by 74 3/4".
Drill 4 pocket holes on each side of the side pieces. Use the pocket holes, pocket holes screws, and wood glue to attach the bottom, top, and sides of the secret door.
-
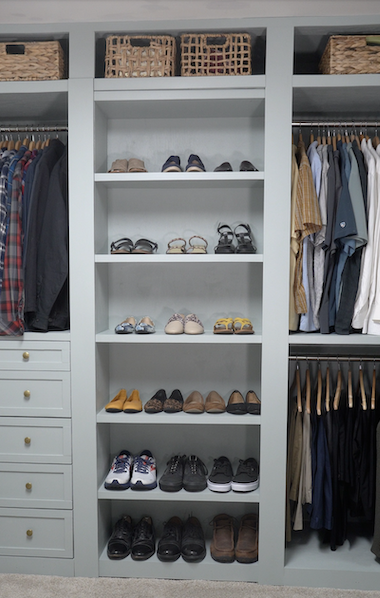
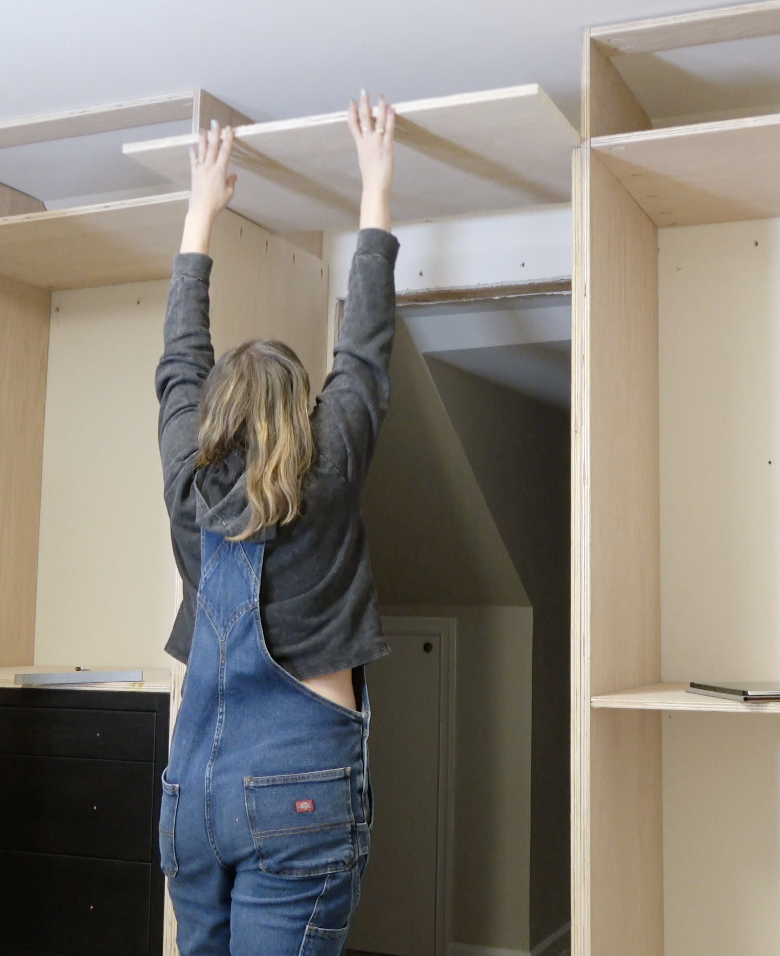
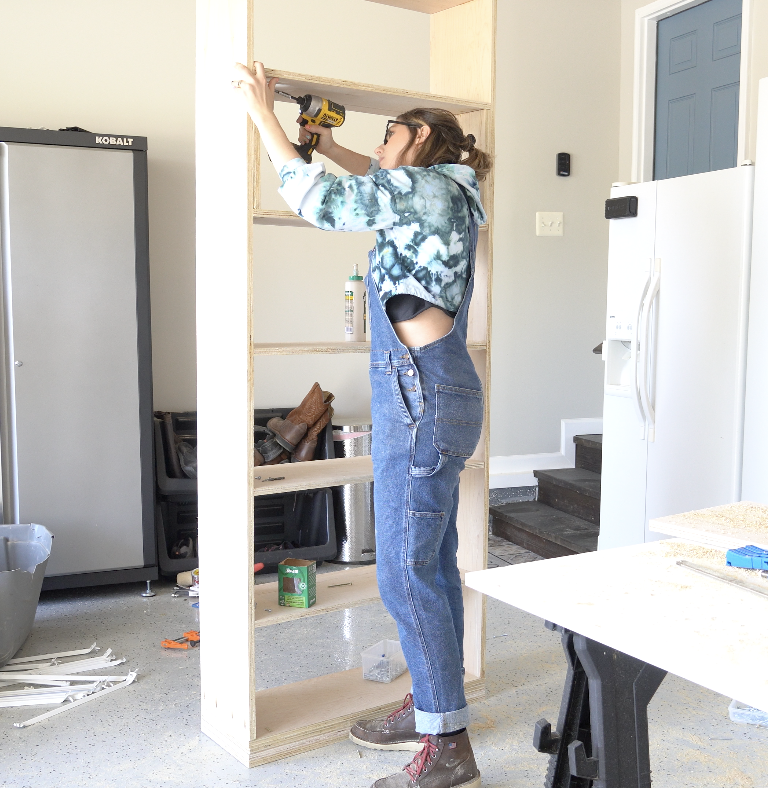
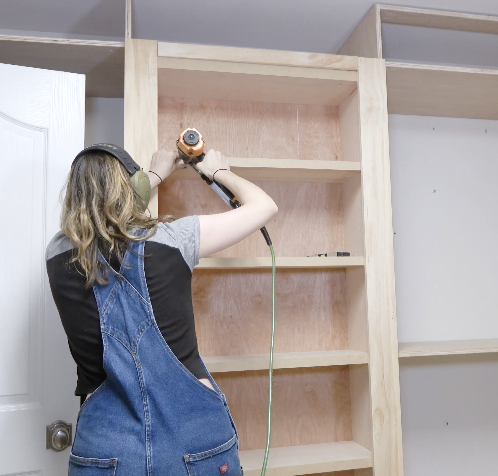
Cutting and Installing Shelves
Now that the frame is together, cut as many shelves as you need. I had 5 shelf pieces set about 10" apart since I was putting shoes on the shelf. If you're making a book shelf I recommend 12" to 14" apart for shelves.
Shelf Depth: 12"
Shelf Width: secret door width minus 1 1/2".Drill 4 pocket holes on each side of the shelf pieces. Use pocket holes, pocket hole screws, and wood glue to attach the shelf pieces.
Leveling Shelves
Cut scrap pieces to shelf height. Use the scrap pieces to hold up the shelves while screwing them into place.
-
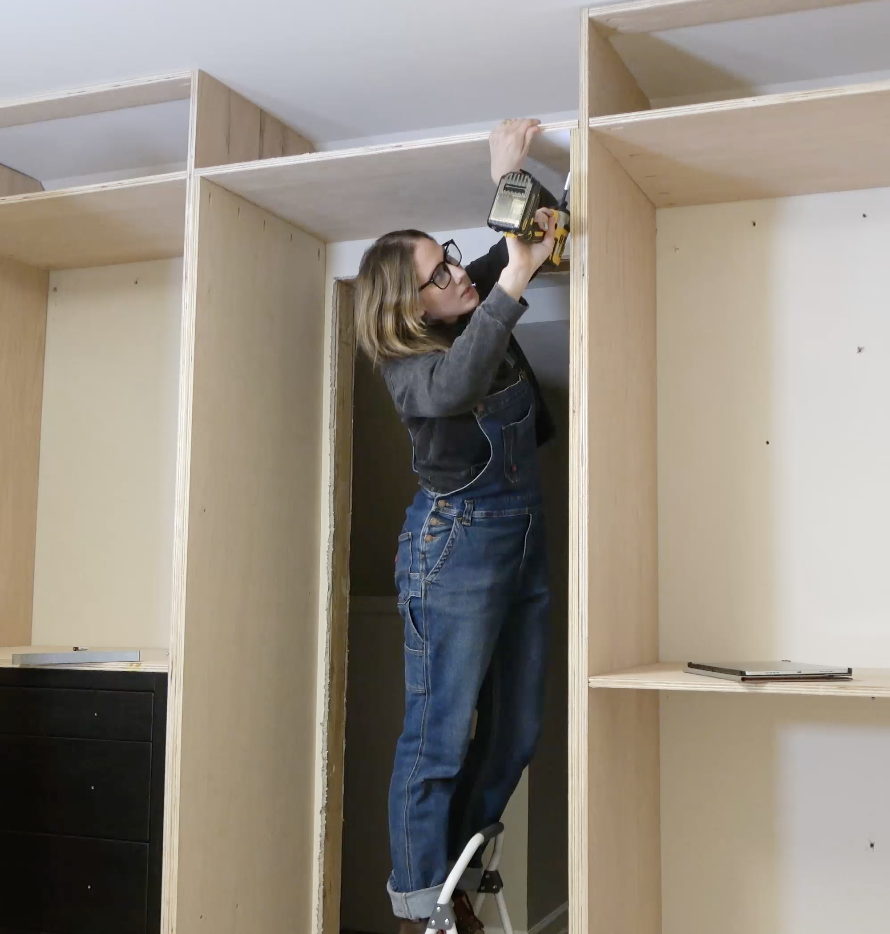
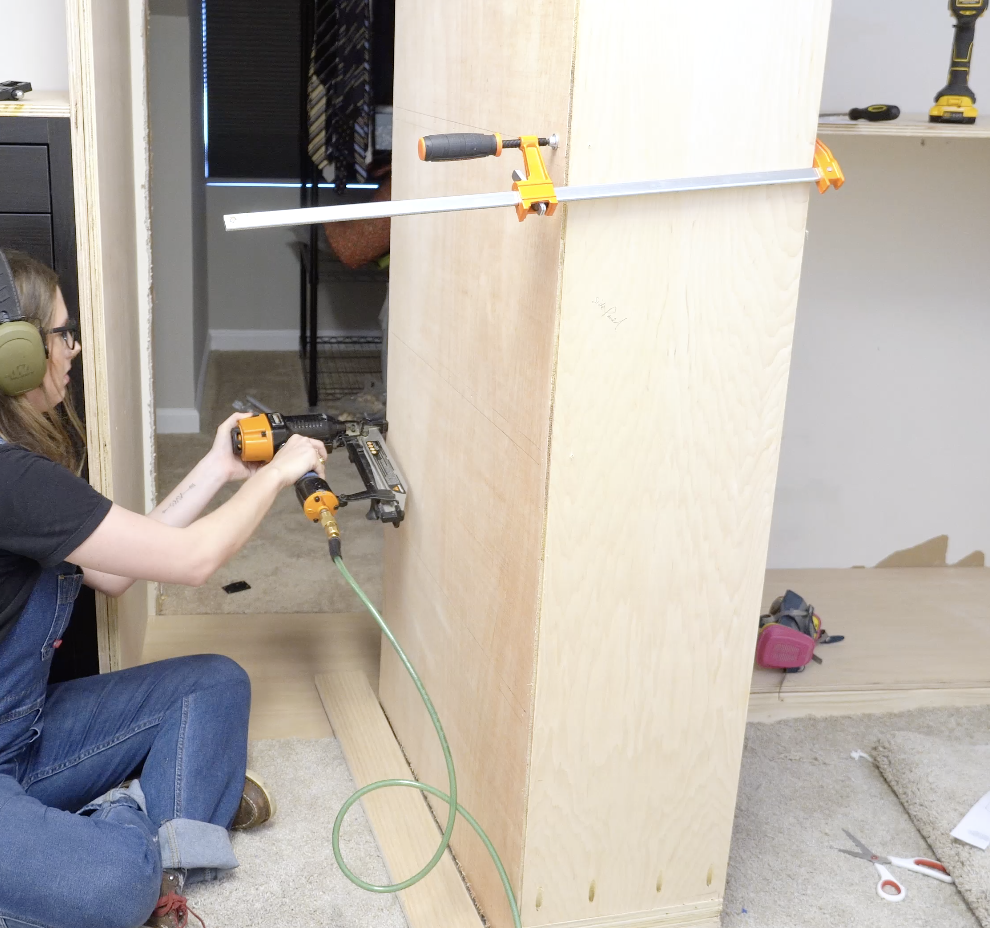
Installing Hinges On the Door Jamb
Use Murphy Hidden Hinge Hardware and the provided template to install the hinges on the door jamb. Use the swing out template for this step.
-
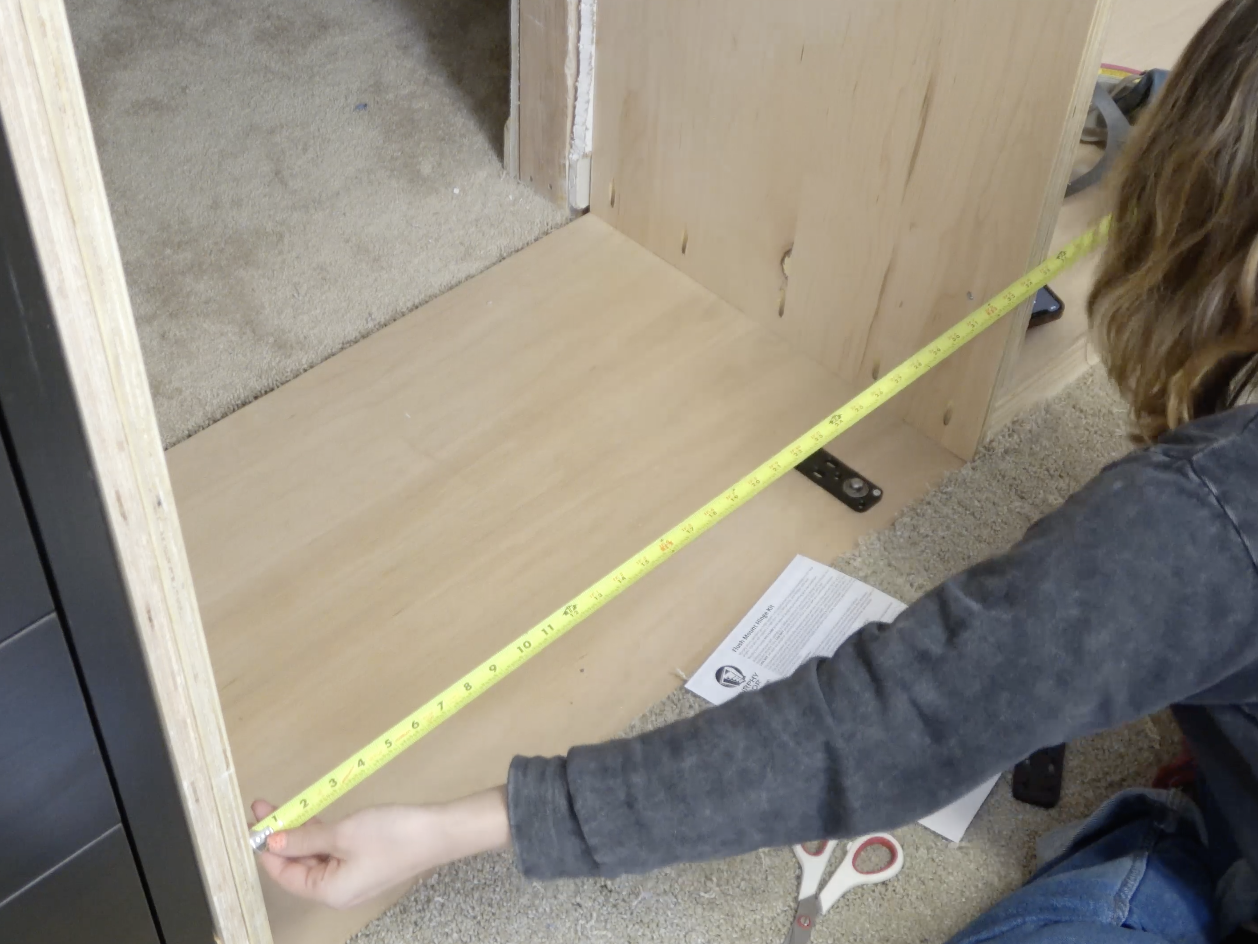
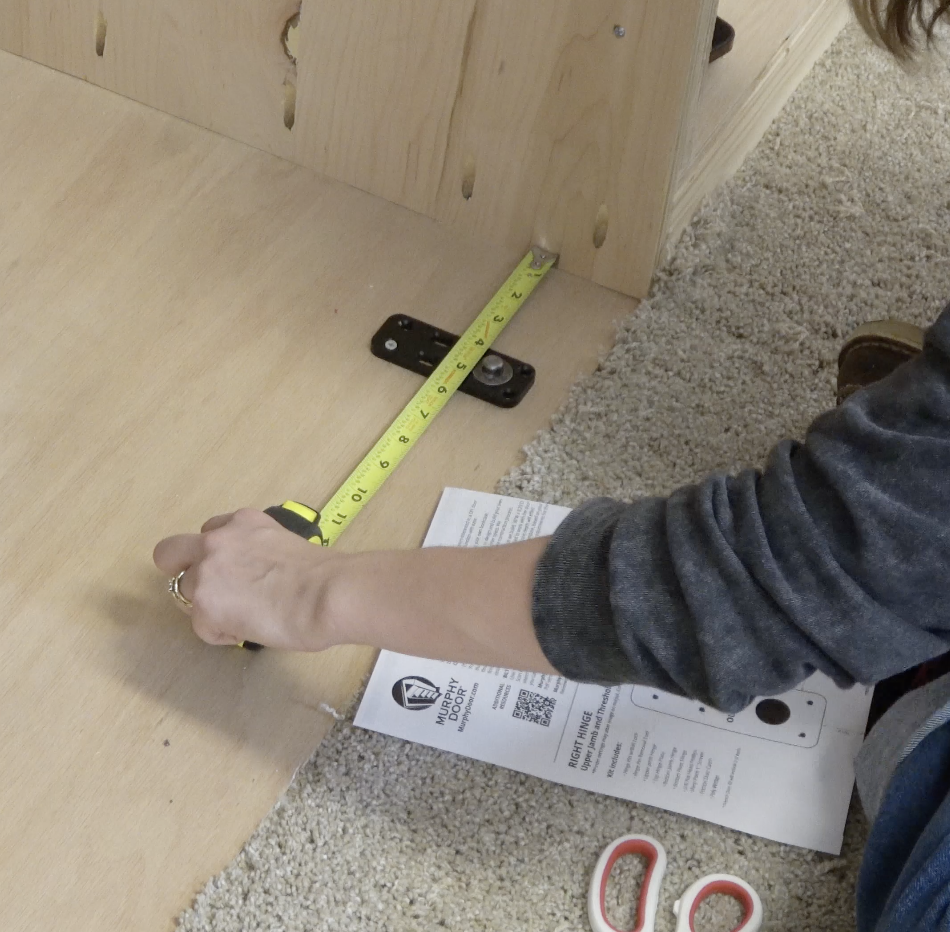
Installing Hinges on Secret Door
Since this is an extra deep secret door you can't follow Murphy's instructions for the installation. The new placement of the hinges is 3 1/8" from the side of door and 15/16" from the front of the door.
Template
If you do make the door only 8" deep you can use the template.

-
Cutting the Hole for the Top Hinge
Use a 3/4" hole saw to cut a hole in the top of the door that lines up with the hinge hole. This hole is for the pin that locks the top hinge in place.
-
Installing the Door and Backing the Shelf
Slide the hinge on the bottom of the door onto the hinge on the door jamb. Then use the pin to lock the top hinge into place.
Cut 1/8" thick piece of plywood that is the height and width of the secret door. Use a nail gun to attach the back to the shelf.
Note: I waited to do this step until the shelf was installed in case I had to make any adjustments to the shelves.
Leveling Door
Make sure your secret door is propped up and level when attaching the back.
-
Installing the Door Stop
The final step in installing the secret door is adding the provided door stop. This helps lock the secret door into place when closed.

-
Install Outside Trim Pieces
These outside trim pieces cover up the gap between the door and jamb. Cut a 1x4 to the height of the door jamb minus 3/4". Cut a 1x4 to the width of the door jamb plus 8".
Note: My outside trim looks a little different since I had a shelf above my door. So my top trim piece was 2" thick but if installing in a normal doorway you can use 1x4 for top piece.
Ensuring Your Secret Door Opens
Attach the trim piece on the hinge side to the door jamb and not to the door.
Attach the trim piece on the swing out side to the door and not to the door jamb.
Attach the top trim piece to the jamb and not to the door. The top trim piece should hover right above the door.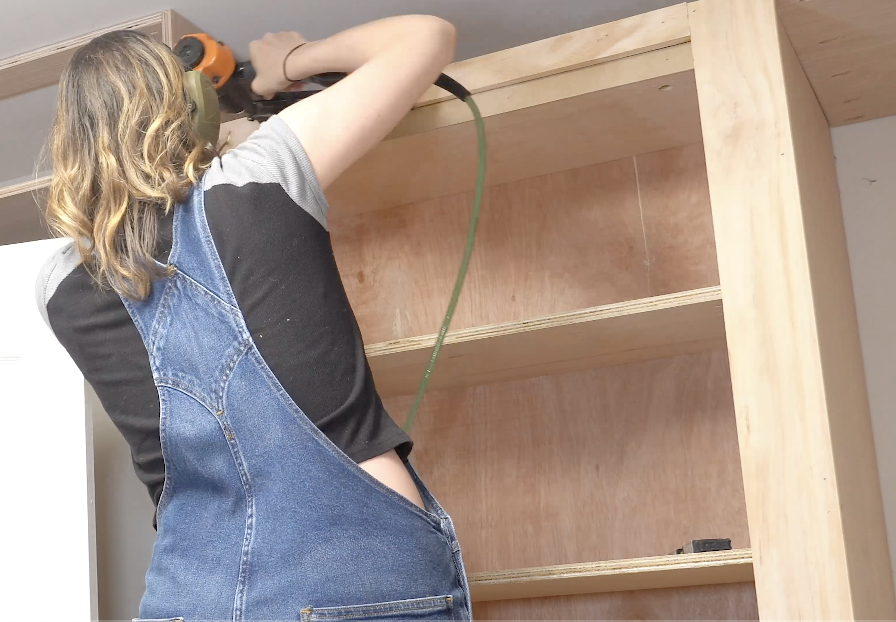
-
Installing Trim on Door
Use a 1/8" thick hard MDF board and cut a strip 3" thick for the bottom, 1 1/2" thick for the top 1" thick for the shelves.
Cut the strips to the width of the door minus 3/4”.Installing Shelving the Trim
Slide this trim behind the trim on the hinges side and butt it up against the trim on the swing out side.
-
Final Touches
-Use pocket hole plugs and wood glue to fill in all the pocket holes. Allow the glue to dry. Trim back the plugs.
-Caulk any areas needed on the shelf.
-Fill in nail holes
-Use small 2" "L" shaped brackets and attach them behind the trim on the swing out side. This will add stability to that trim piece when opening and closing the door.
- Prime and paint the door.
-Add trim tape to the edge of door jamb.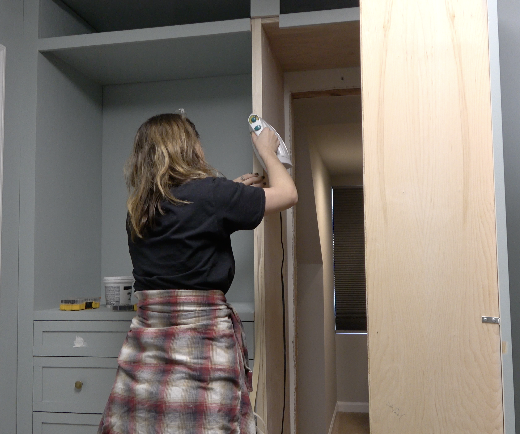
-
All Done
Stand back and admire your secret door! Shhh! Nobody needs to know.