

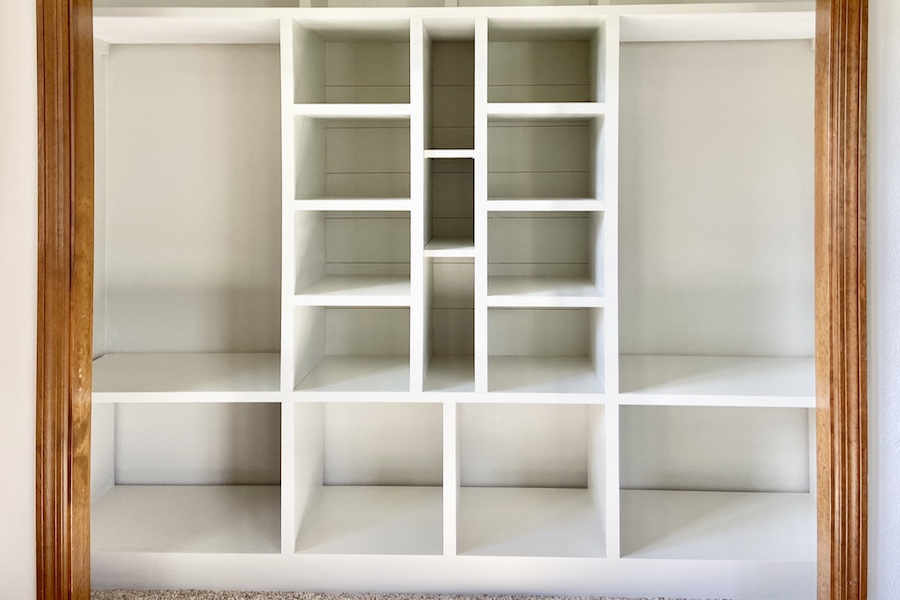


Customize these cubbies to fit whatever space you want to organize! Using the 720PRO to make storage cubbies for a closet or a kitchen pantry is easy and functional.
Tools
Kreg Tools


Other Tools
-
Combination square

-
18g Brad nailer (optional)
Materials
Wood Products
- 1 Sheet of Plywood , 3/4”x4x8
Hardware & Supplies
- 1 Box of 1 ¼” pocket hole screws (see tools list)
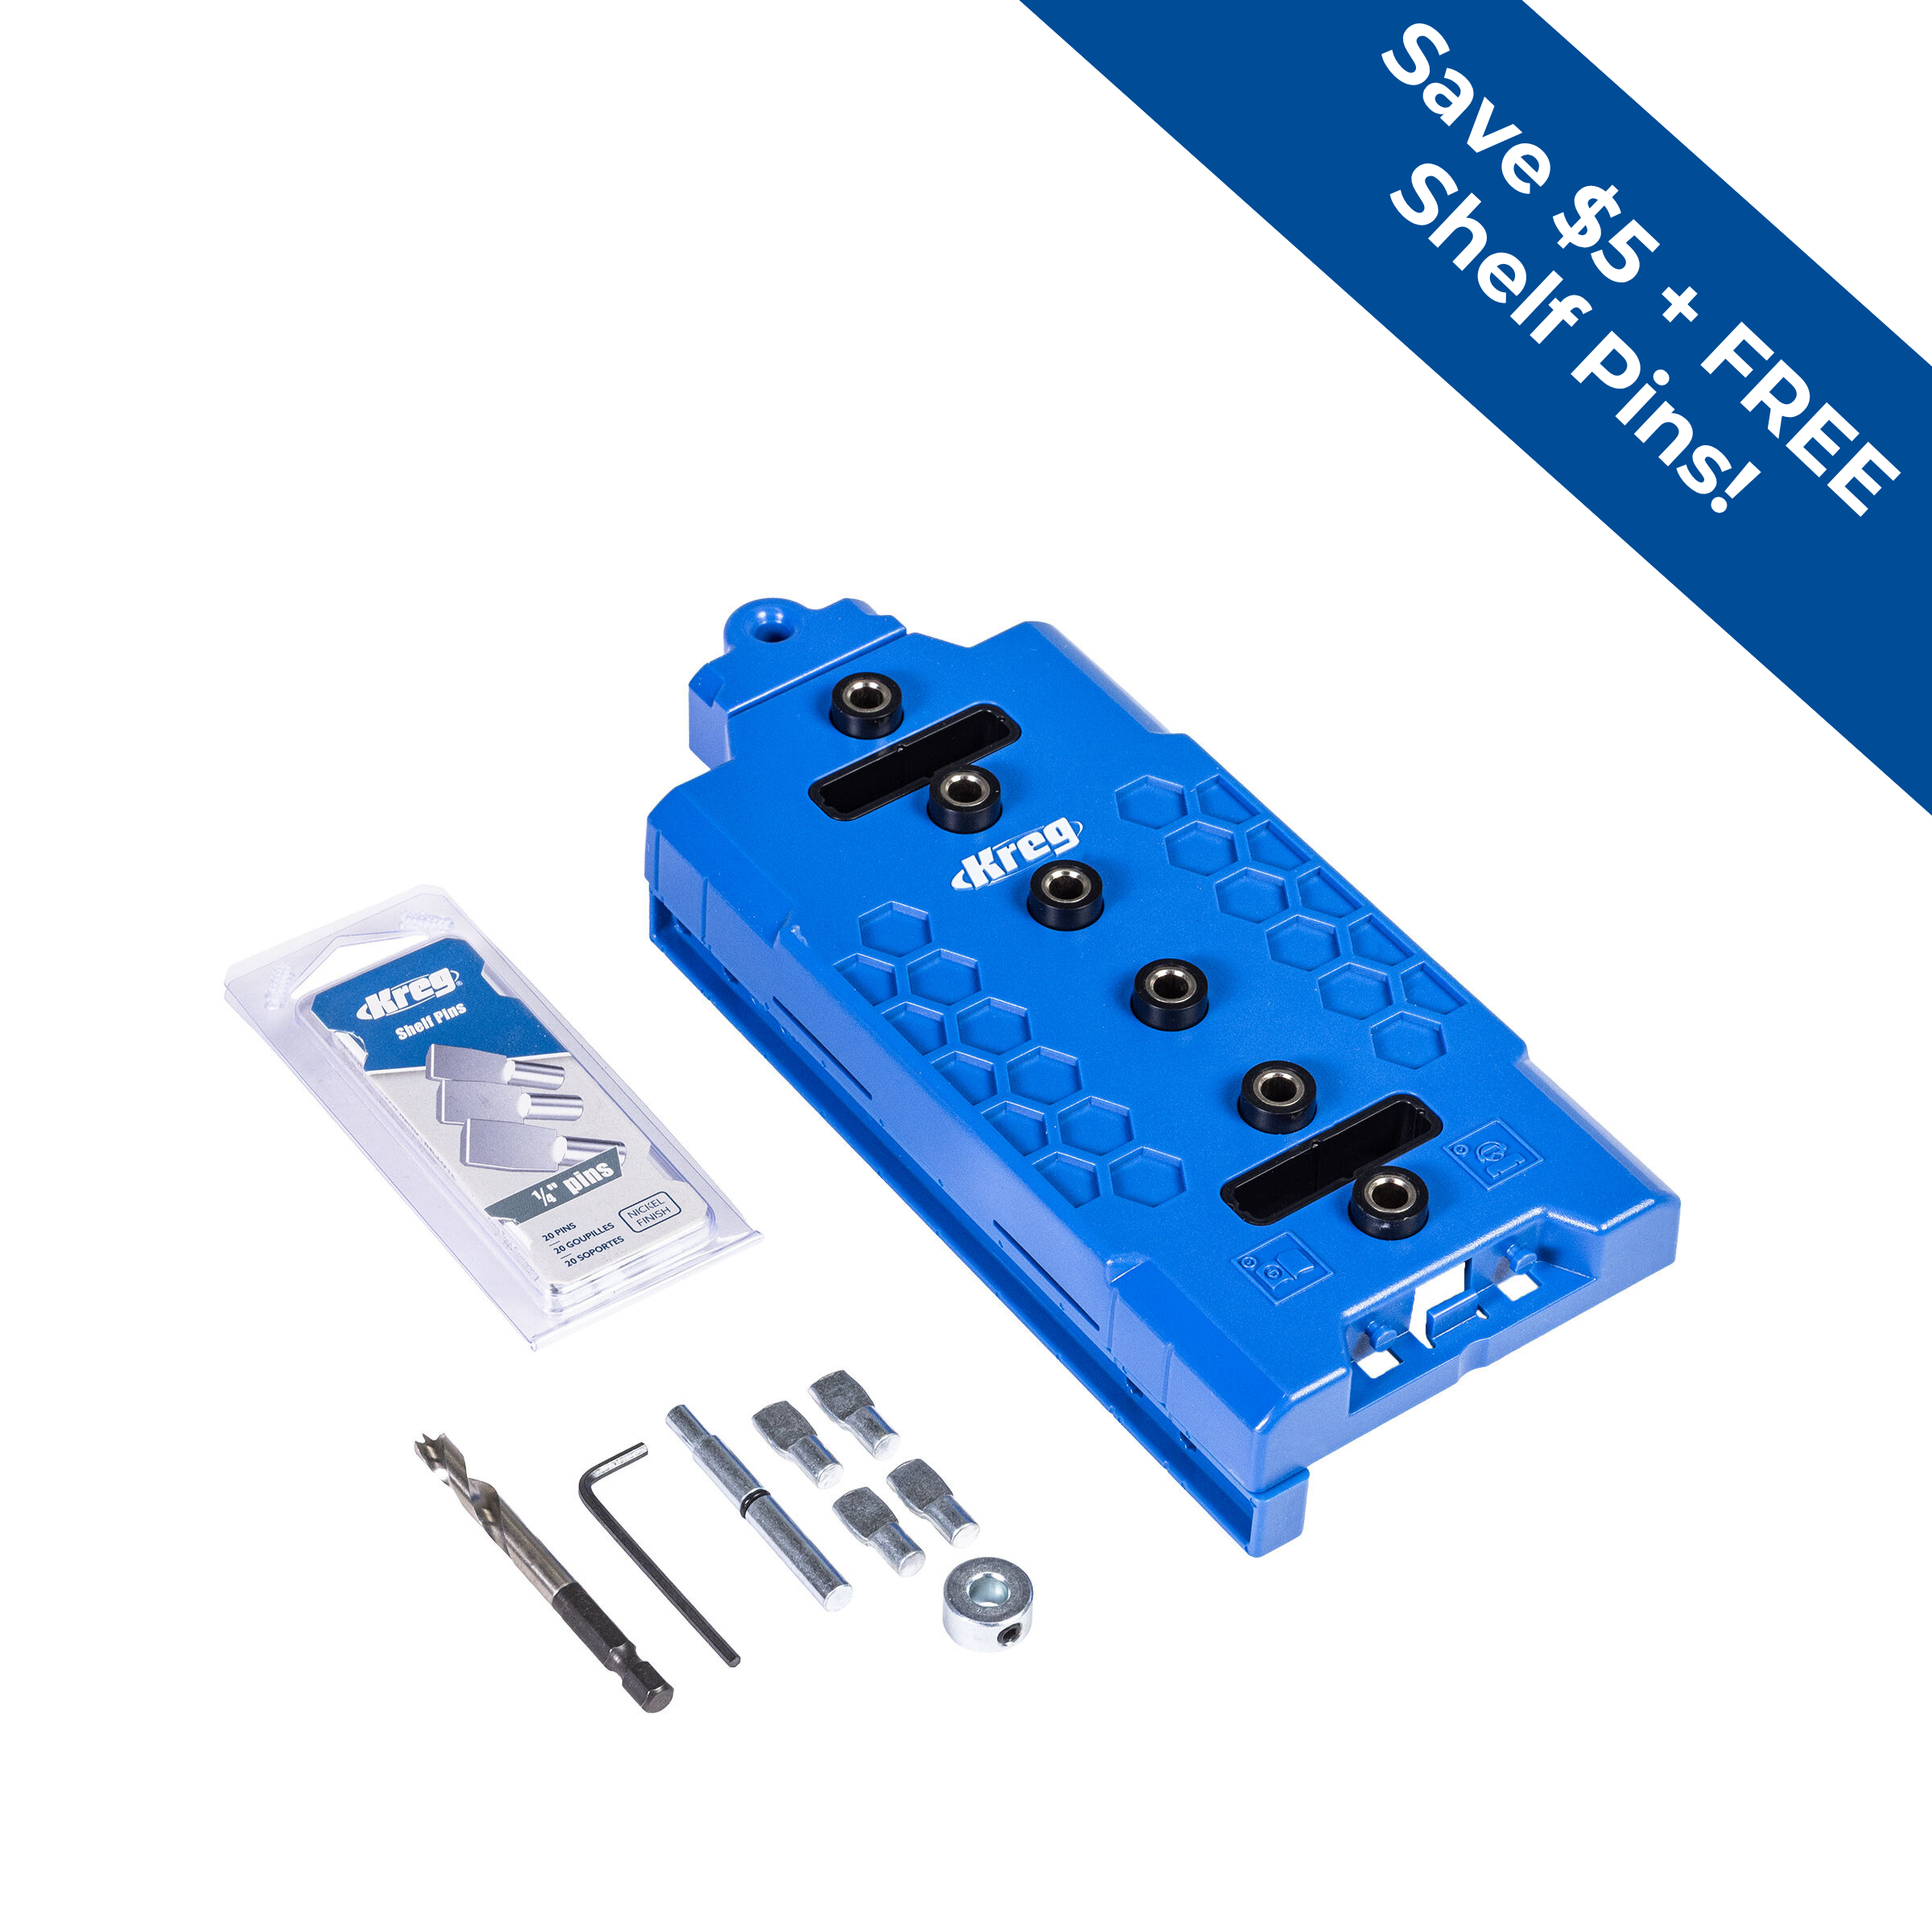
- 1 Pack of Kreg shelf pins (see tools list)
- 1 Wood glue
- 1 Pair of safety glasses/ PPE
- 1 Paint or stain of choice
- 2 Clamps
- 1 Measuring tape
- 1 Level
Directions
-
Watch the YouTube video
Check it out to see the process of the steps described here, PLUS see how I take this basic plan for building cubbies and create my own custom closet organization system with a base structure and face frames.
Tip:
-The workers at the store will be more than happy to cut your plywood down to size for you. This is a great way to get a jump start on your project by having them cut some of your pieces down to size! Just make sure you ask them to go slowly on the panel saw to avoid getting a rough edge on the wood.
-Make sure the collar on your drill bit for drilling pocket holes is set to 3/4” to match the thickness of your panels
-Read the full instructions before attempting the project so you can foresee what is needed and when. Happy building! -
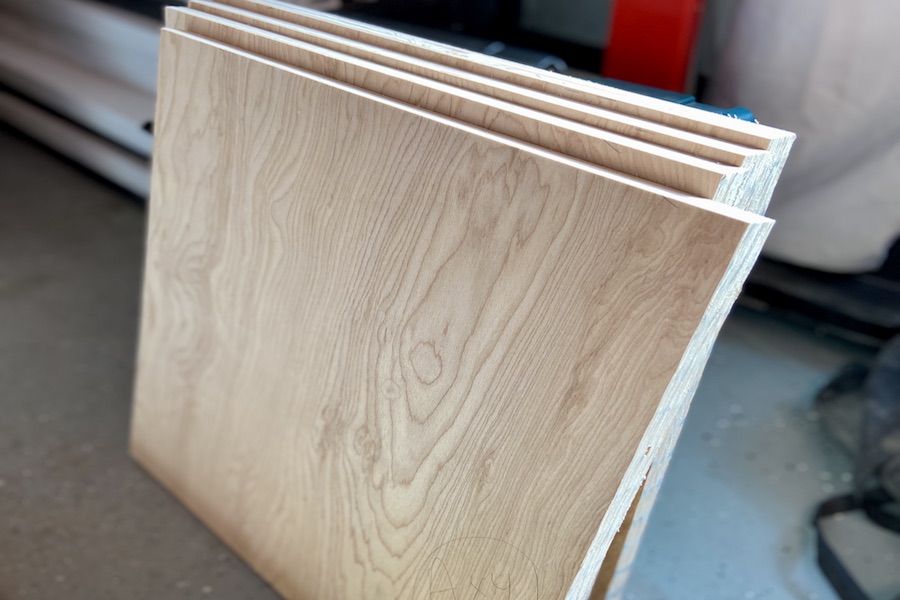
Cut
all your components to size. — I used a track saw but you can use a circular saw with a straight edge, the Kreg Rip Cut Circular Saw Guide or the Kreg ACS Plunge Saw, or take advantage of the free cuts at the store!
-
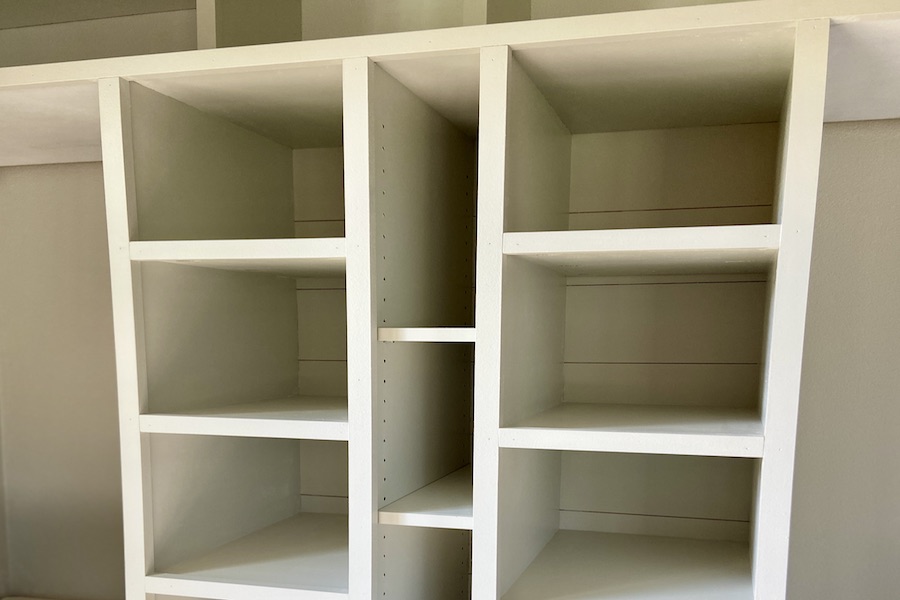
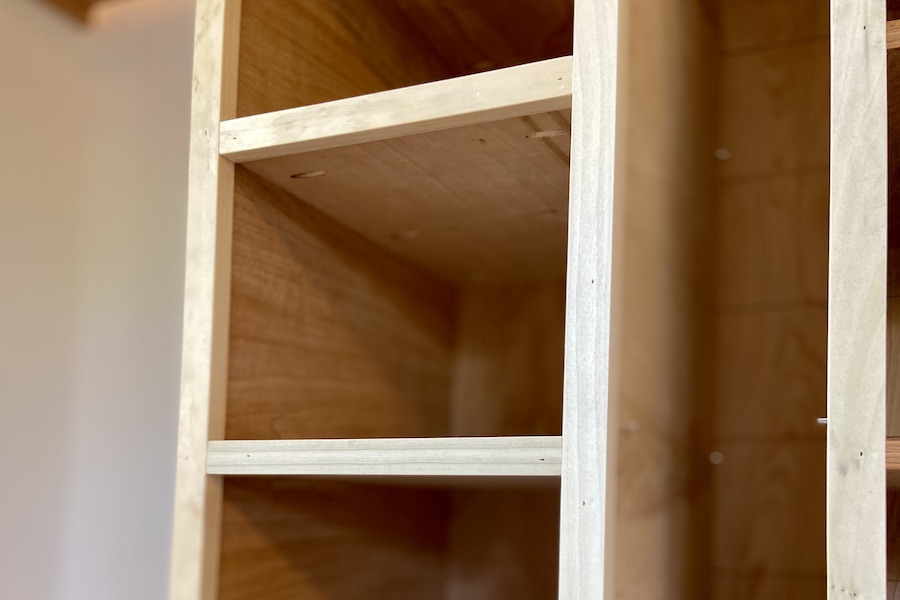
Drill
pocket holes using the Kreg 720PRO into 6 of the 8 shelves on both the left and right sides. We’ll make 2 of the shelves adjustable so they won’t need pocket holes. Do each pocket hole about 2” away from the edges and add 1 in the middle for extra insurance.
-
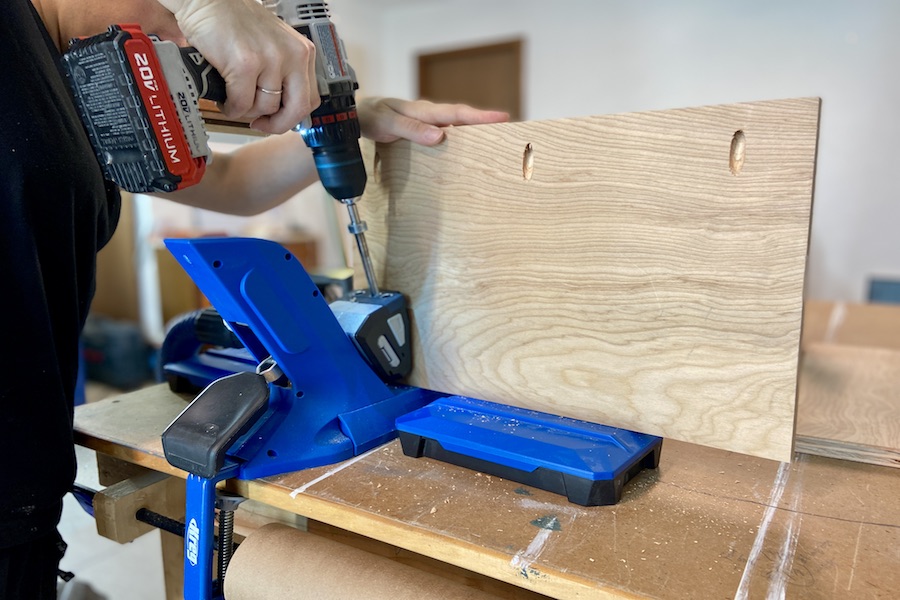
Drill
holes using the Kreg Shelf Pin Jig on 2 of the 4 side panels. These will face each other for the center cubby shelves. Depending on how much adjustability you want, you can skip every other hole.

-
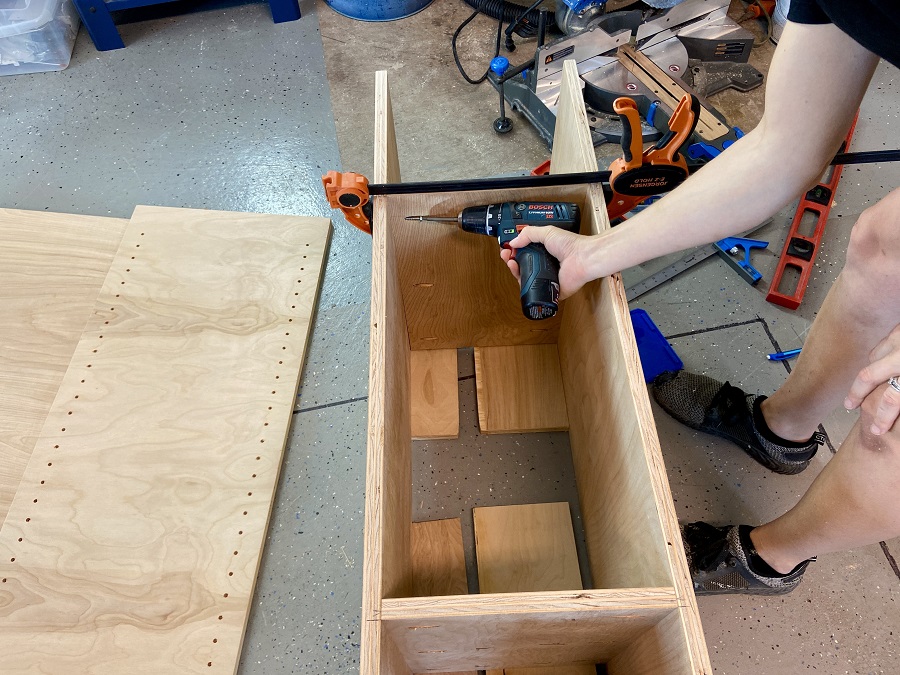
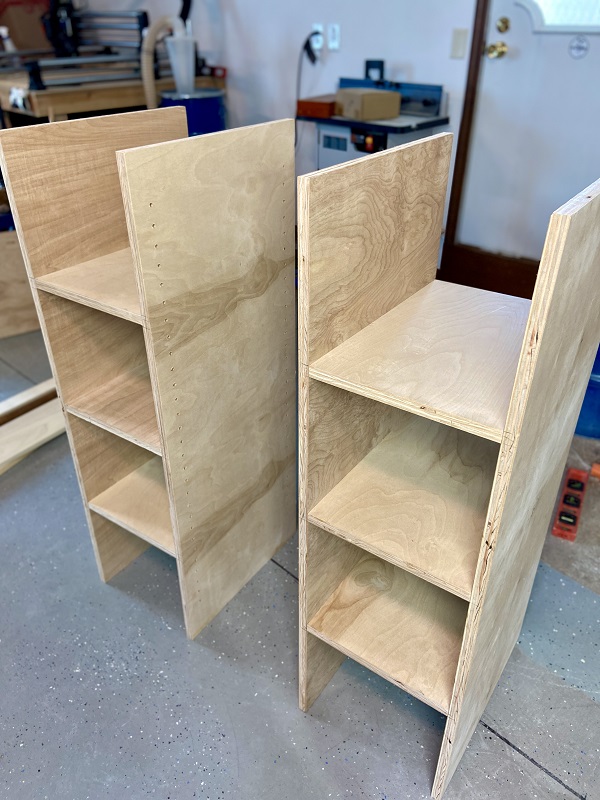
Assemble
the cubbies by first marking where you want the shelves to go. I like to place everything where I think it looks good or use a measuring tape to evenly space shelves. Use a square and a level to make sure shelves aren’t going to be uneven. Using a pencil, mark where you plan to secure them to the sides. You can apply wood glue here if you have it but it isn’t 100% necessary. Finally, clamp your shelf where you want it between the side pieces and fasten together using Kreg screws.
-
Repeat
this process for each shelf. I fastened my top piece down into the cubbies with screws but you can opt for pocket hole joinery instead if that’s easier for your space. Consider using wall cleats to support the ends of your top piece to avoid sag over time.
-
Finish
(optional) your project with face framing to hide the plywood edges. This can be done using 1x2 material and cutting it to the same lengths you chose for your side pieces and shelves. Center it evenly on the plywood parts. You can simply glue and brad nail these decorative pieces to the front of your cubbies. Paint or stain your project and then install! Make sure to take a picture in front of your build and tag @oakhillmillworks and @kregjig on Instagram so we can see!
Tip:
*As I mentioned in Step 1, I continued to build another cubby that ran horizontally for my closet and I put these smaller vertical cubbies on top. It is the same exact process if you would like to just keep building more cubbies and see how you can fit them together for your own custom organization project! Check out the video for more ideas!

Thanks for checking out these plans! If you want to connect with me on other platforms, check me out on:
http://www.oakhillmillworks.com/
oak-hill-millworks-closet-cubbies-plans
Video for this plan: https://youtu.be/HBHVYATxC1o