

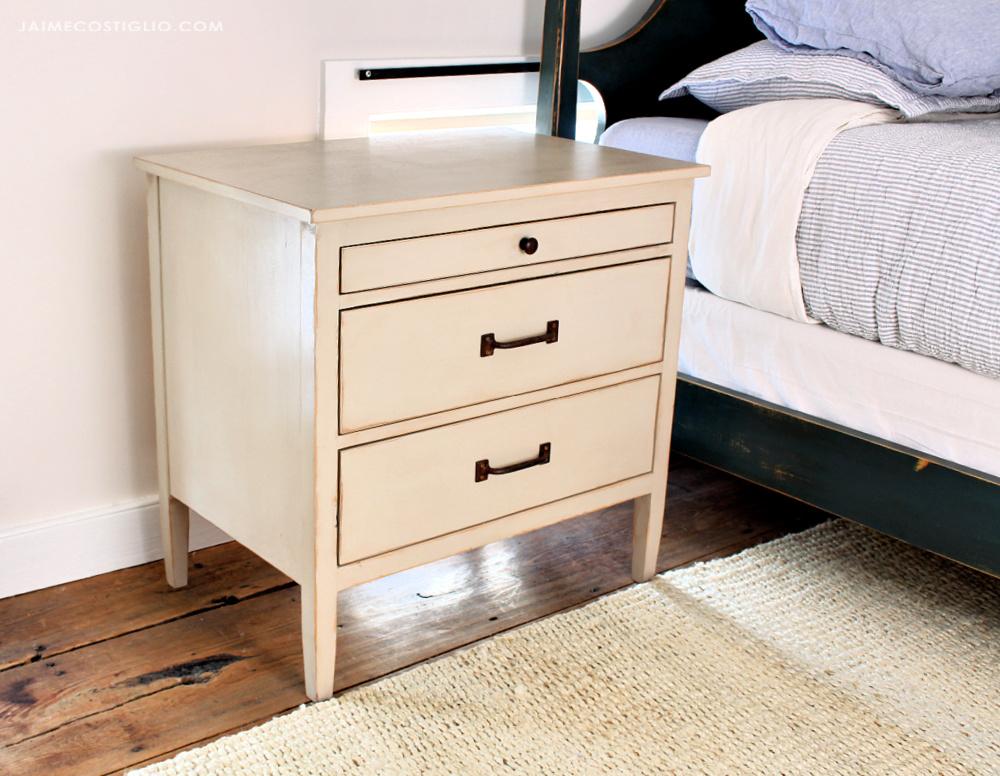
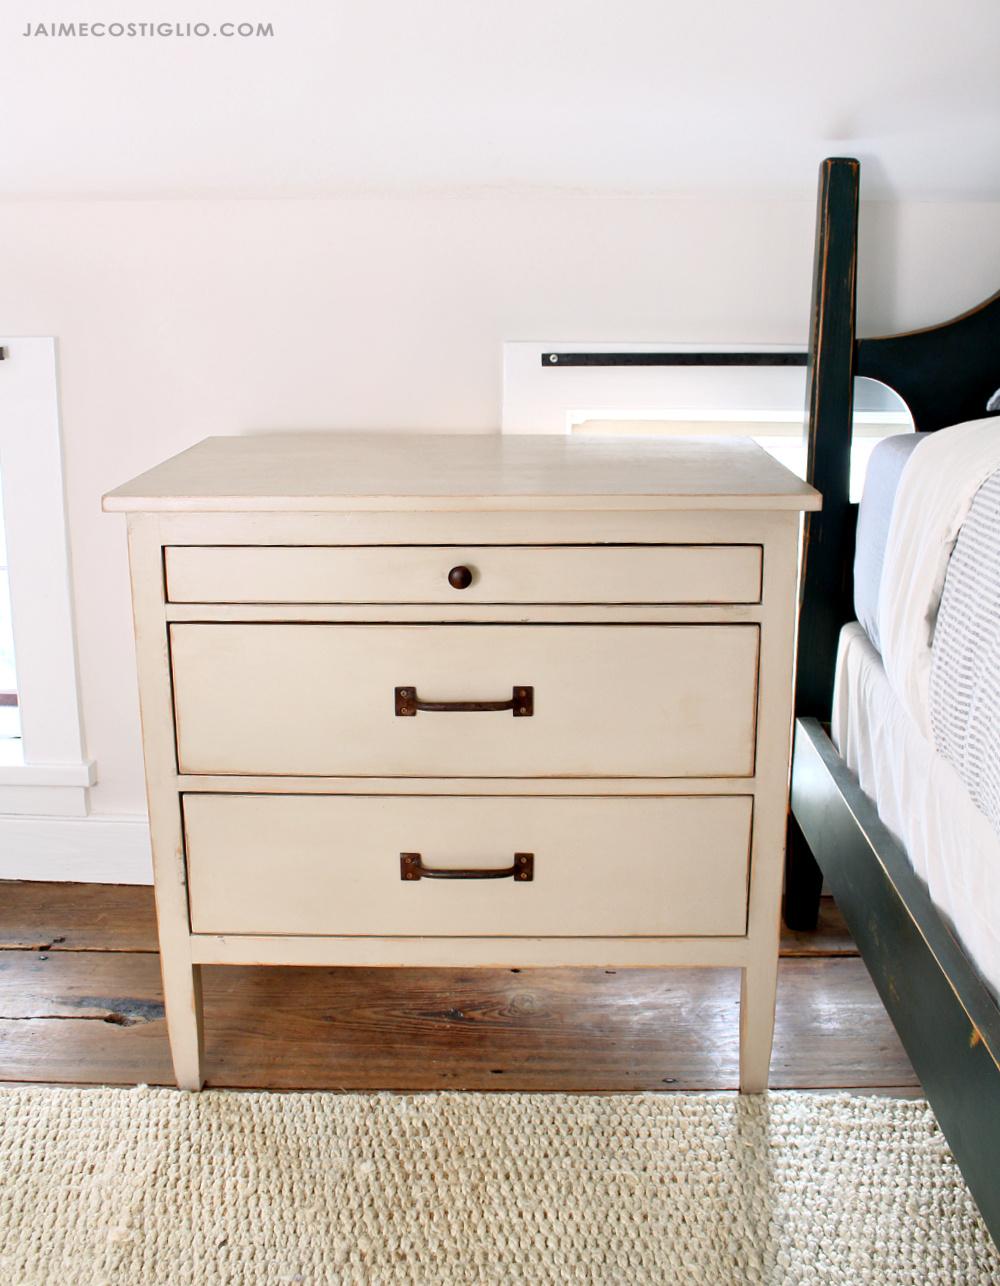

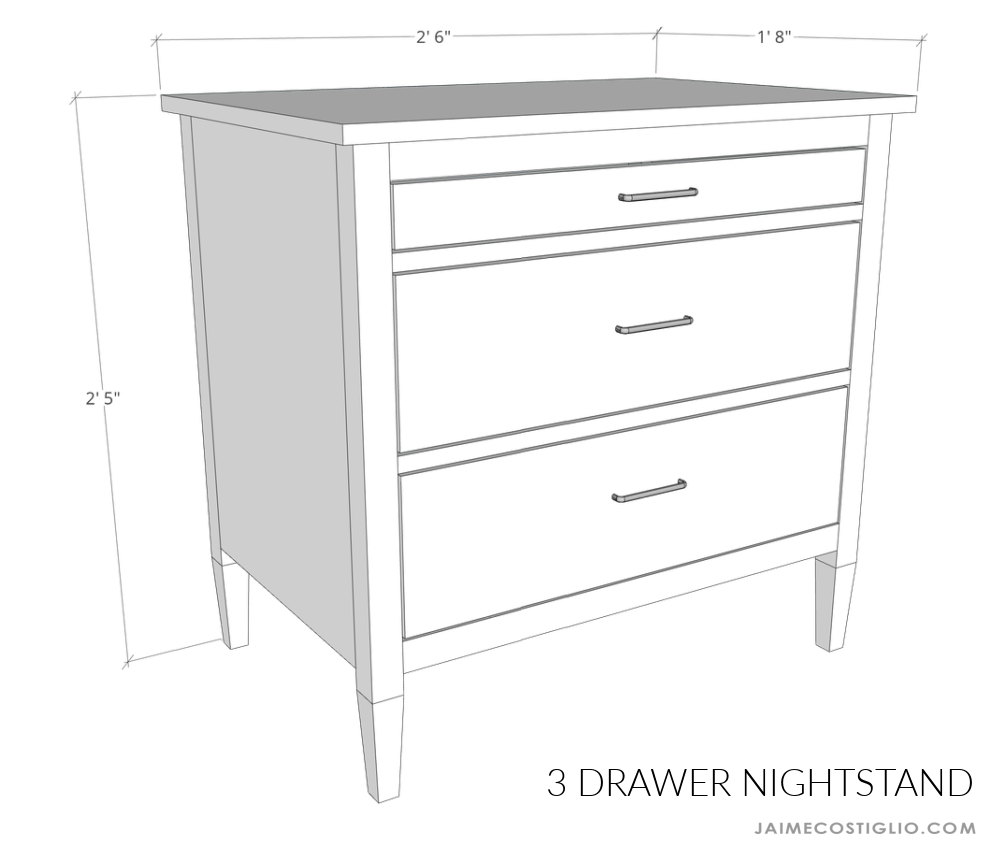


A classic three drawer nightstand with simple lines and generous storage. This nightstand is the perfect blend of ample surface area at your bedside and lots of hidden storage space in the drawers below.
Tools
Kreg Tools


Other Tools
-
Miter Saw

-
Tape Measure
Materials
Wood Products
- 2 Select pine board , 2x2x96"
- 3 Select pine board , 1x2x96"
- 1 Select pine board , 1x8x72"
- 1 Select pine board , 1x3x72"
- 2 Select pine board , 1x6x96"
- 1 3/4" plywood full sheet , 4' x 8'
- 1 1/4" plywood full sheet , 4' x 8'
Hardware & Supplies
- 8 2 1/2" pocket-hole screws
- 70 1 1/4" pocket-hole screws
- 6 #8 x 2" wood screws
- 32 #8 x 3/4" wood screws
- 20 #8 x 1 1/4" wood screws
- 12 18 gauge 3/4" brad nails
- 1 Wood glue
- 3 Sets of 16" soft close side mount drawer glides
- 3 Drawer pulls
Directions
-
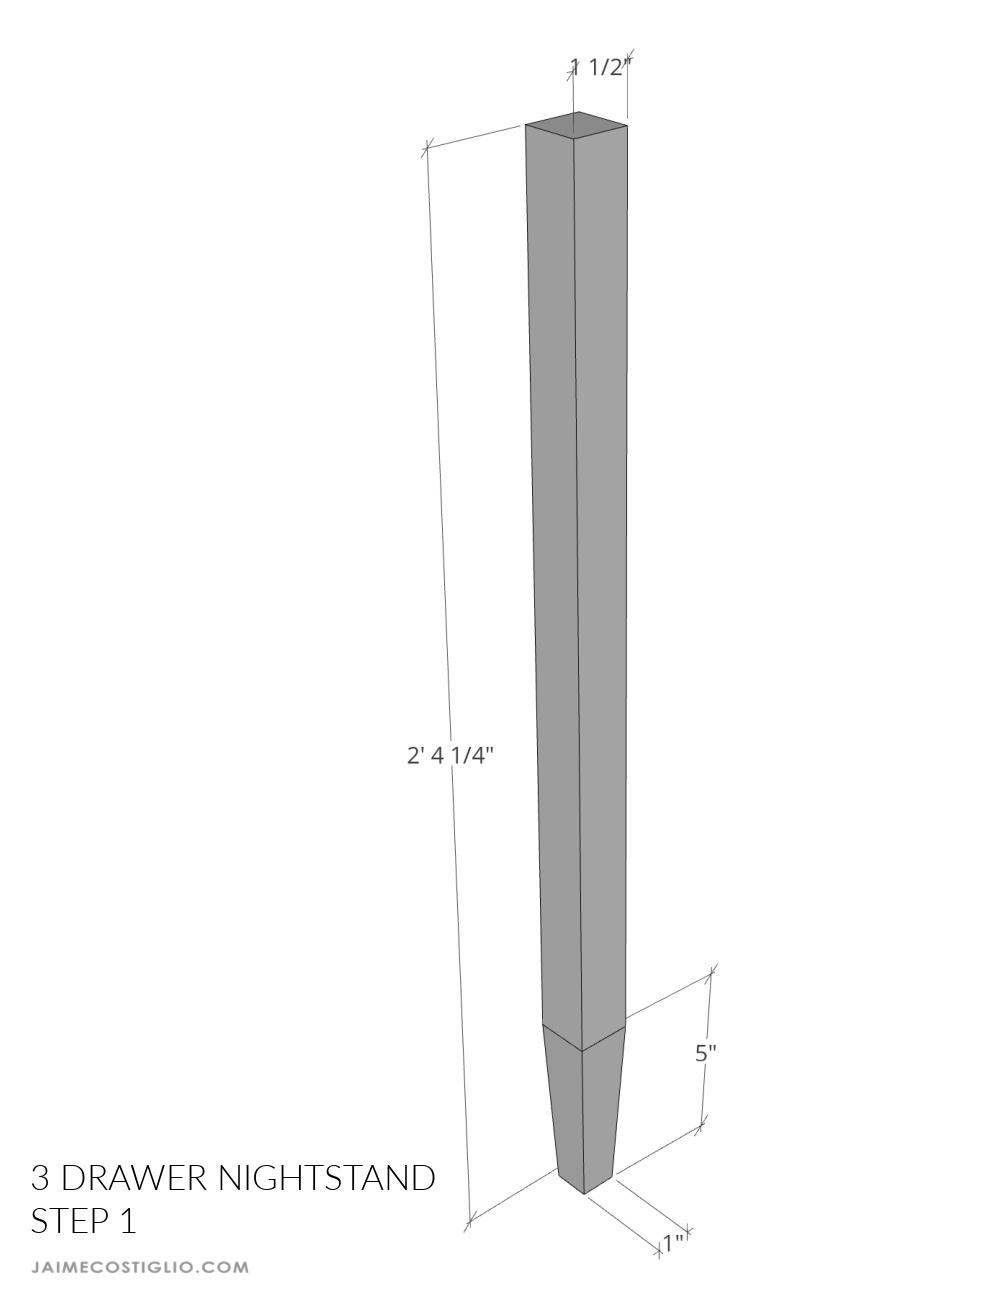
Taper legs
If desired use a tapering jig to make bottom portion of legs tapered.
-
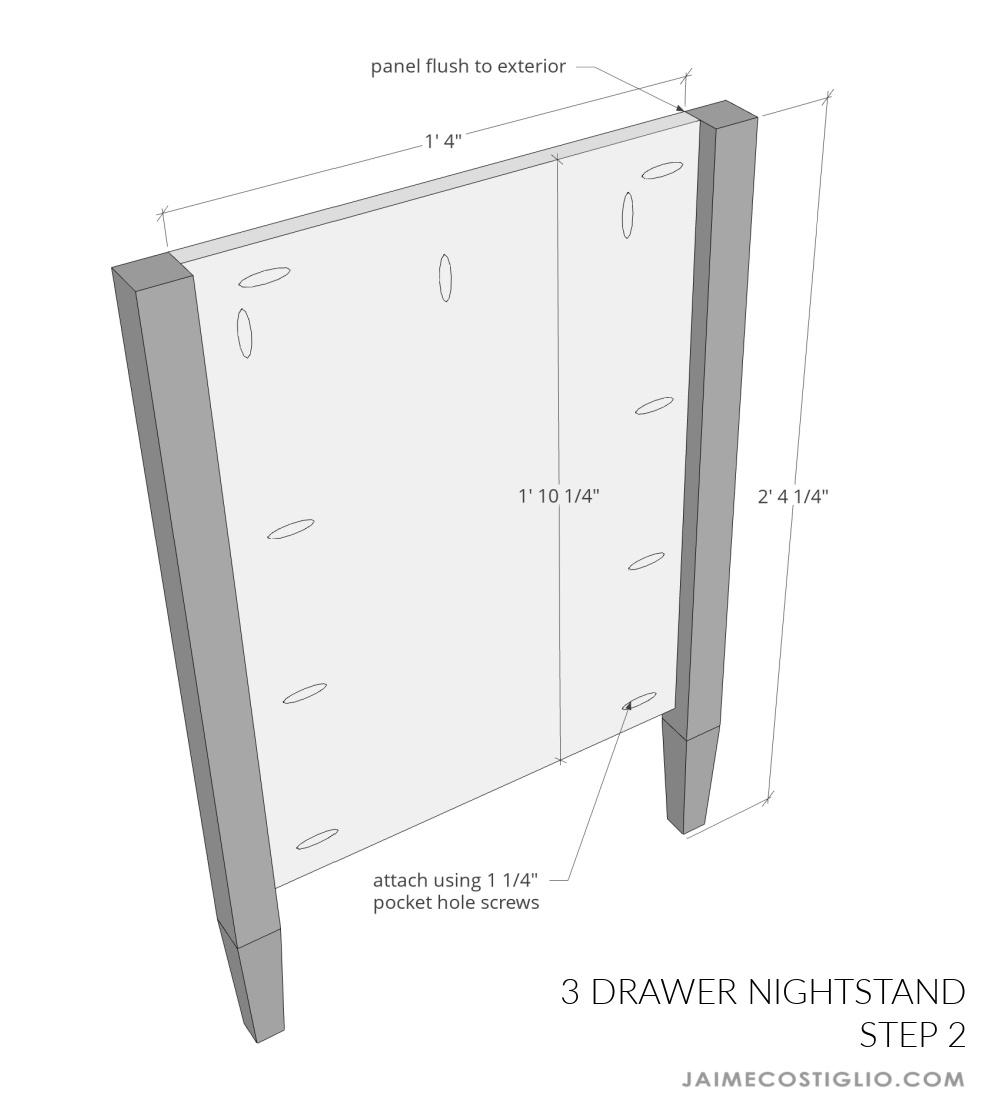
Attach legs to side panels
Attach legs to side panels using 1 ¼” pocket hole screws. Keep side panel flush to leg at exterior.
Make 2.
-
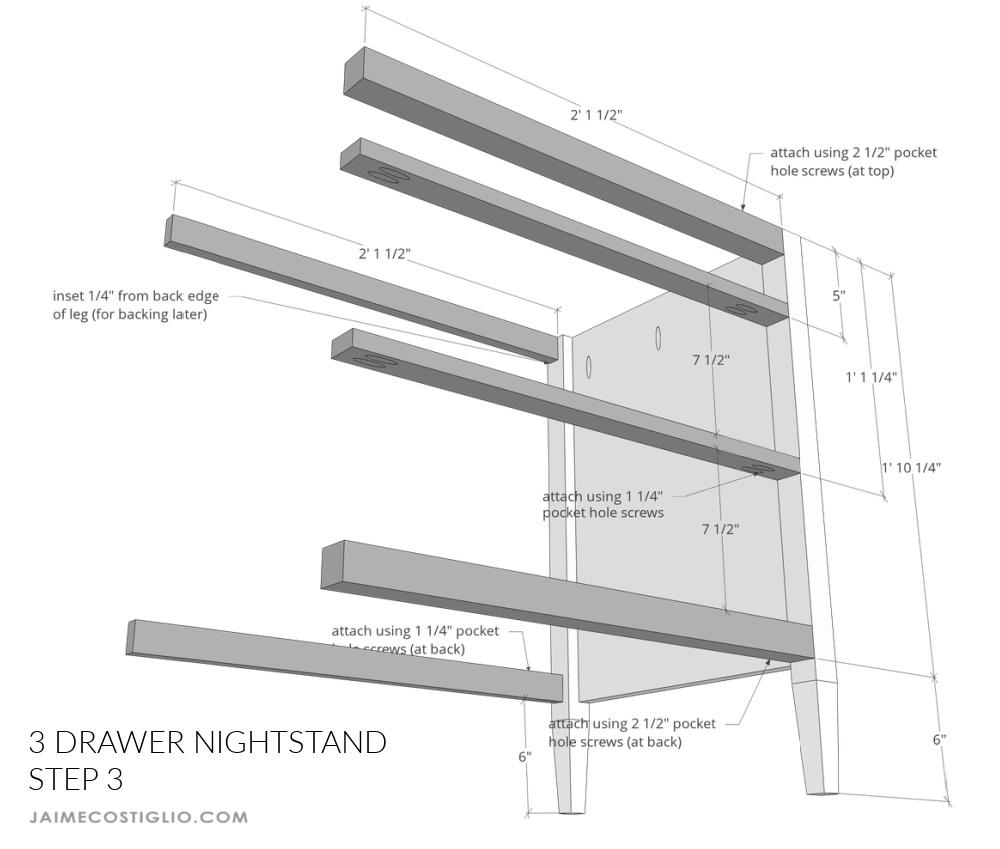
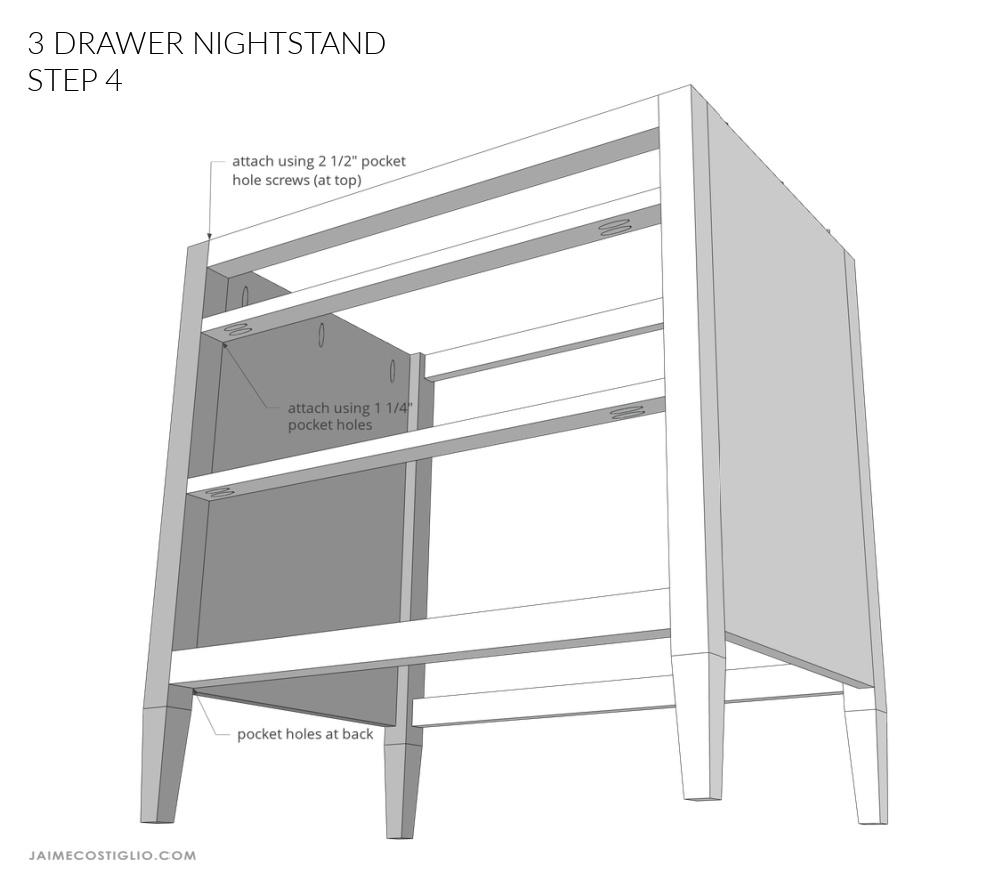
Attach cross supports
Attach cross supports to side panel. Use wood glue and corresponding pocket hole screws. Keep pocket holes at back, top or underside when possible.
-
Attach opposite side to supports
Attach other side panel to cross supports, same as Step 3.
-
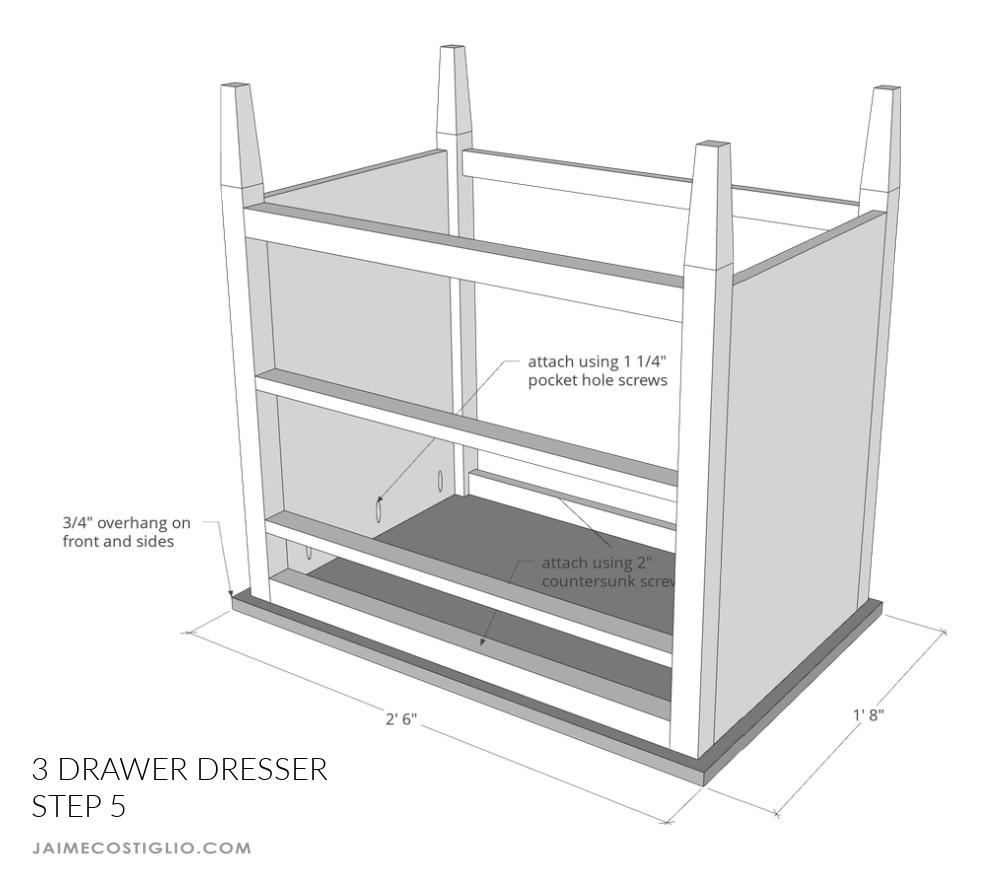
Attach top
Attach top to body using 1 ¼” pocket hole screws. Keep ¾” overhang at front and sides. Secure front and back cross supports to top using 2” countersunk wood screws.
-
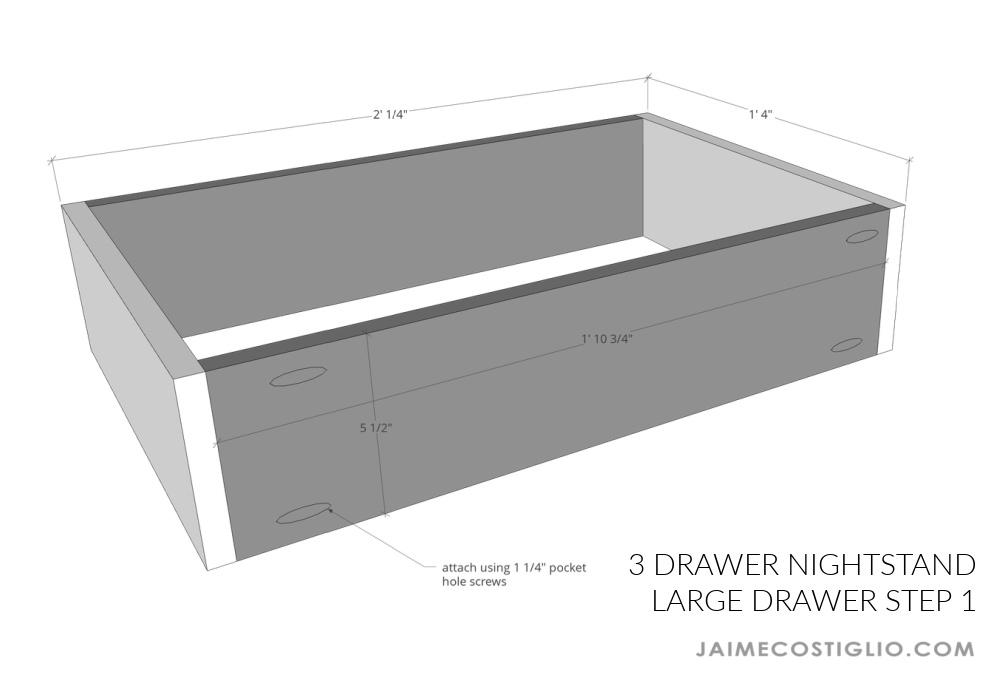
Assemble large drawers
Attach long sides to short sides using wood glue and 1 ¼” pocket hole screws.
-
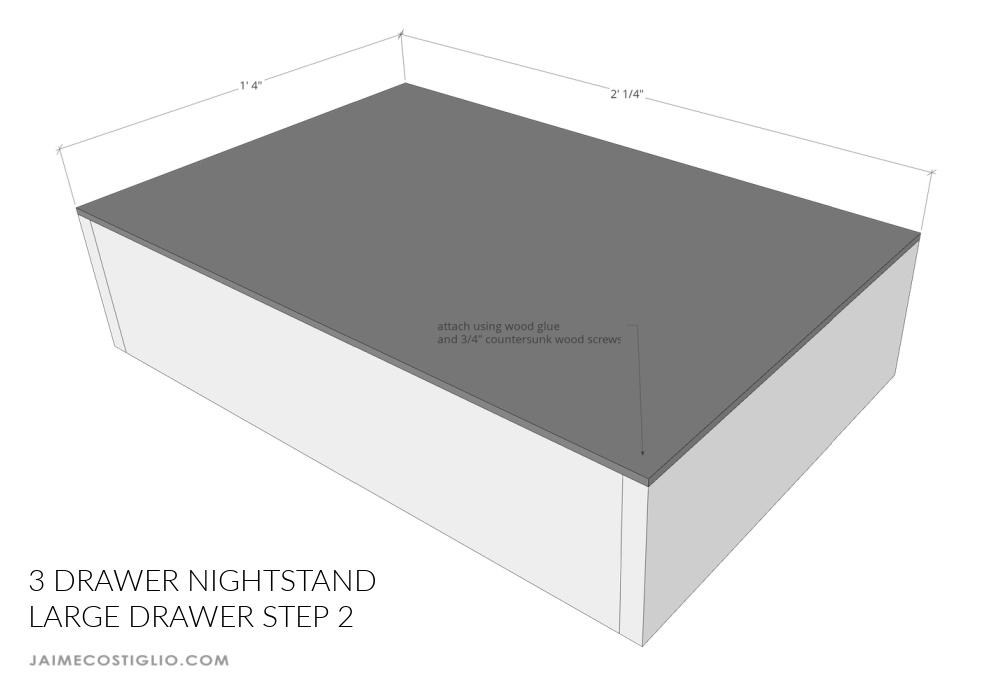
Attach drawer bottom to large drawers
Attach drawer bottom to box using wood glue and ¾” countersunk wood screws.
-
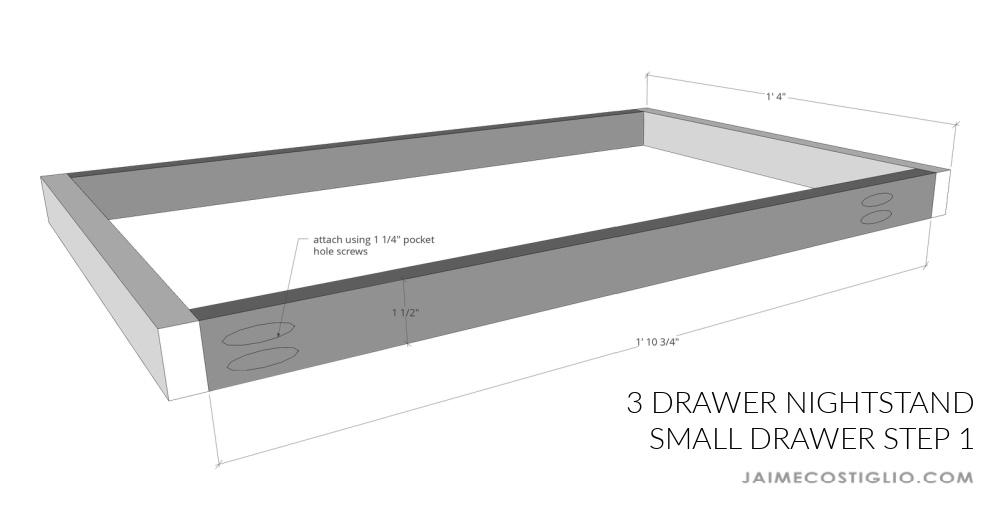
Assemble small drawer
Attach long sides to short sides using wood glue and 1 ¼” pocket hole screws.
-
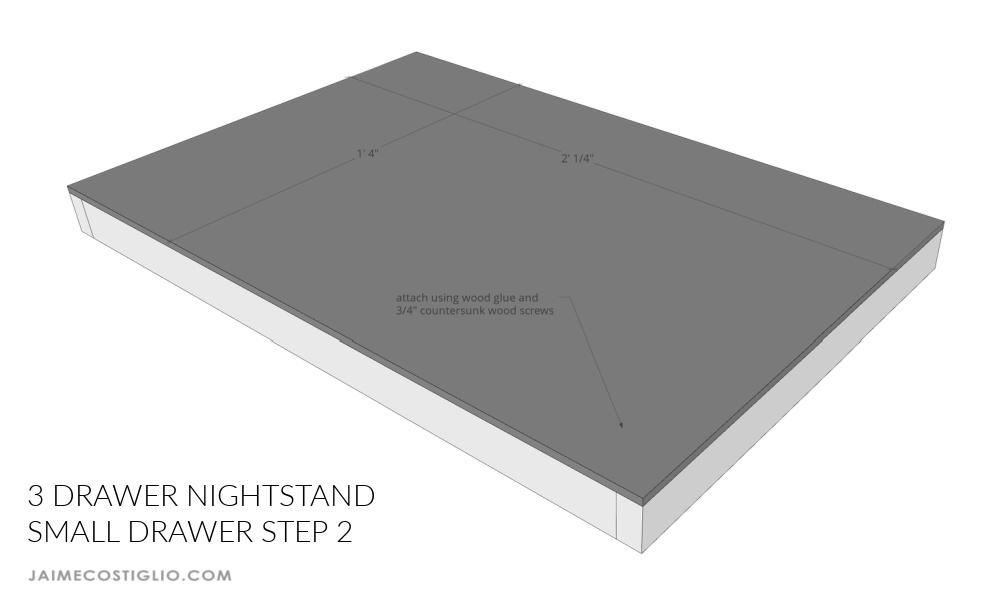
Attach drawer bottom to small drawer
Attach drawer bottom to box using wood glue and ¾” countersunk wood screws.
-
Attach drawer glide supports
Before installing drawer glides attach supports to interior side panels using wood glue and 1 ¼” countersunk wood screws.

-
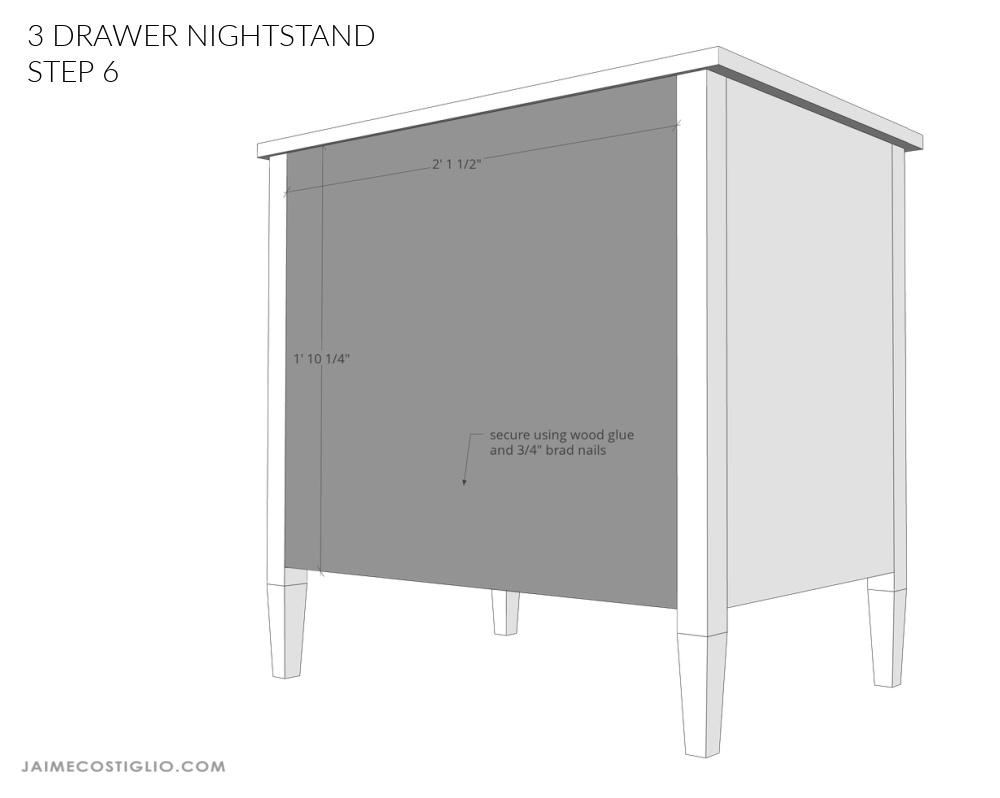
Attach backing
Attach backing to cross supports using wood glue and ¾” brad nails.
Check out more from Jaime here:
JaimeCostiglio.com
Instagram
Facebook