Do you know the answers to these frequently asked questions about pocket holes? We’ve compiled the answers to some of the questions we’re asked about most often so you can confidently build projects using pocket-hole joinery.
Quick Links
Jump to a specific question by clicking the links below:
- Question 1: Can you disassemble and reassemble pocket-hole joints?
- Question 2: Can I really assemble pocket-hole joints without glue?
- Question 3: Which way should pocket holes face? Should pocket holes be on the inside or outside?
- Question 4: Can you use pocket holes on 45 degree joints?
- Question 5: Can you pocket hole a miter joint?
- Question 6: How many pocket holes do you need?
- Question 7: How far apart should pocket holes be?
- Question 8: How far from the edge should the pocket-hole be?
- Question 9: Does a pocket hole go all the way through?
- Question 10: How deep should a pocket hole be?
- Question 11: Do I need to use pocket hole screws in pocket holes?
- Question 12: How do you prevent over-drilling and over-driving pocket holes?
- Question 13: How do you prevent joints from shifting while driving screws?
- Question 14: How do you select the correct screw size?
- Question 15: Can you use pocket holes with 1/2 inch plywood?
- Question 16: Can you use pocket holes in 2×4?
- Question 17: Can you use pocket holes on MDF?
- Question 18: Why are pocket holes so strong?
Can you disassemble and reassemble pocket-hole joints?
The ability to put a joint together more than once is one of the great things about pocket-hole joinery. You can assemble and reassemble a pocket-hole joint multiple times.
That’s great for test-fitting assemblies, and for times when you want to disassemble a project to simplify finishing. The ability to disassemble and reassemble pocket-hole joints is also great when you want to build a project in your workspace, and then disassemble it to make it easier to move into its final location.
Here are a few tips to make it easier.
Don’t install all the screws
If you’re planning to take your project apart later, you may be able to just use enough Pocket-Hole Screws to “hold it together.” Then, you can drive the rest of the screws in during final assembly.
Don’t overdrive
Any time you drive the screw too forcefully, you can potentially strip the hole that the screw threads into. That’s especially true when you’re installing a screw for the second or third time. Be sure you have your drill clutch set correctly. During reassembly, you can back the clutch setting down pretty low because the screw will thread in easily. You can learn more about how your drill clutch works in this short video.
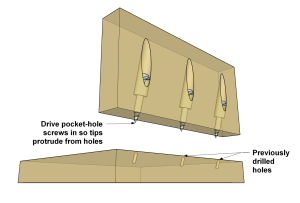
Use the screw tip as a guide
Getting everything lined up correctly can be one of the hardest parts of project assembly. But when you’re reassembling with pocket-hole screws, you can make it easier. Just drive the screw into the pocket hole so that the tip sticks out of that piece a little bit. Then, when you position the project part, the screw tip will fit into the hole it already made to make realignment easy.
![]()
Can I really assemble pocket-hole joints without glue?
The simple answer to this question is yes. You can assemble pocket-hole joints without glue. We’ve always said that a joint made with Kreg Pocket-Hole Screws is so strong that glue is optional. That means you can use glue if you want, but it’s not necessary in order to create a strong, lasting joint. There are a few types of joints that can benefit from adding of glue in order to minimize wood movement.
Solid-wood panels
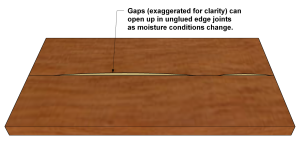
One time glue can be beneficial is when you’re joining solid wood boards together edge to edge to form a large panel, such as for a table top. That’s because boards expand and contract in width, and a bit in thickness, as humidity changes from season to season. This happens even after finish and paint are applied.
As the boards expand and contract, it can cause small gaps between the boards that you may see or feel. Though the screws will still hold the boards strongly together, these changes caused by natural wood movement can hurt the appearance of your project. By adding glue to these joints, you can bond the wood fibers together where the boards meet, which will prevent those gaps from forming.
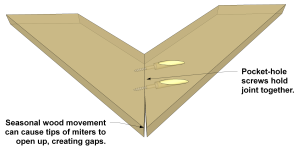
Miter joints
Mitered corners, like you’d use when building a picture frame, can also benefit from glue. We talked about that in another article. You’ll find a link at the end of this article. Once again, seasonal wood movement is the reason. It can cause the miter joint, especially at the tips, to open up. Adding glue to a mitered pocket-hole joint can help prevent this.
If you’d like to learn more about choosing and using wood glue, check out this short video.
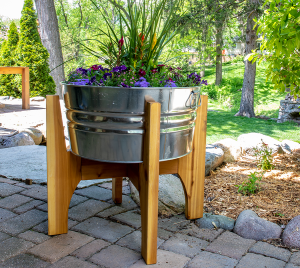
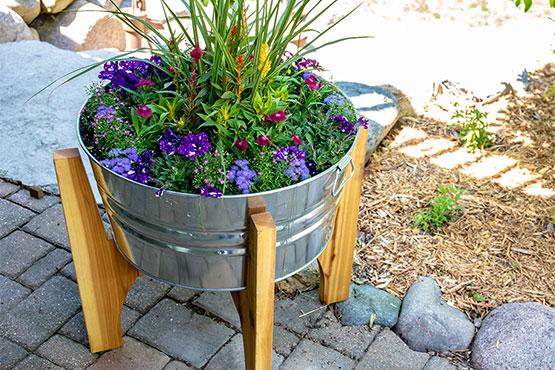
Outdoor projects
Projects that live outdoors face much harsher conditions. Humidity and temperature vary a lot more, and many projects get rained and snowed on. This all makes seasonal wood movement more extreme. Plus, water will find its way into the joints and accelerate deterioration of the wood. Using exterior wood glue in the pocket-hole joints of your outdoor projects will help seal them up, so the joints will stay tight and strong in harsh outdoor conditions.
![]()
Which way should pocket holes face? Should pocket holes be on the inside or outside?
This is a question a lot of people ask about building bookcases, cabinets, and other “box” projects. The simple answer is that either way works. Strength is really equal in both orientations, because the screw still enters the wood the same way, and is surrounded by wood in either orientation. The biggest determiner of where the pocket-hole should be located is still where they’ll be the least visible. Here are a few guidelines.

Inside for cases
On a bookcase or a display case, for example, the outside faces of the case are much more visible. So, it makes sense to put the pocket holes on the inside. Chances are the pocket holes will be hidden even more by whatever sits on the shelves.
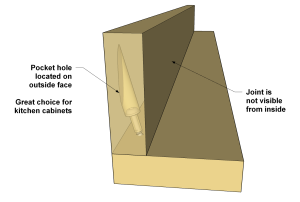
Outside for cabinets
On a kitchen cabinet, though, the outside is usually hidden by adjacent cabinets or by a cover panel. So it makes more sense to put the pocket-holes on the outside, so that you won’t see them when you open the cabinet doors.
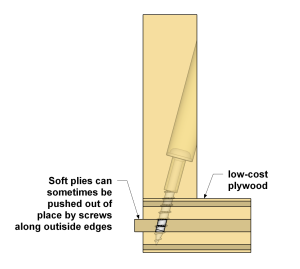
Outside for low-cost plywood
If you’re building with low-cost plywood, though, you’ll probably want to have the pocket holes on the outside facing in. That’s because low-cost plywood can have voids in the plies, or plies that are brittle or soft.
When you drive pocket-hole screws from the inside, the screw tip may actually break away those soft plies and push them out the edge of the plywood. With inexpensive plywood, if the pocket holes are on the outside, the pressure pushes in the opposite direction, and there’s more material to support the inner plies as the screw drives in.
![]()
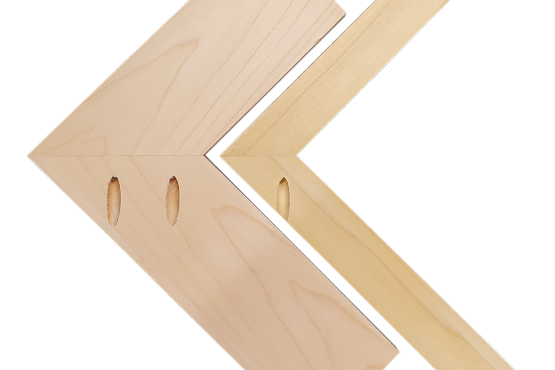
Can you use pocket holes on 45 degree joints?
Yes, pocket holes can be used on 45-degree joints, and they are particularly effective for mitered frames and picture frames, providing strong, secure joints.
![]()
Can you pocket hole a miter joint?
Yes, pocket holes work well on miter joints, especially when you need to join two pieces of wood at an angle, and they help reinforce the joint without needing clamps or additional hardware.
When using pocket holes on miter joints, place the pocket hole on the inside of the joint where it won’t be visible.
Check out this article on creating miter joints with pocket holes.
![]()
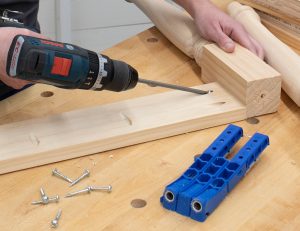
How many pocket holes do you need?
The number of pocket holes you need depends on the width of the board and the length of the joint, but a general rule is to place pocket holes every 6 to 8 inches along the joint for optimal strength.
As a general rule:
– For boards up to 3″ wide, use one pocket hole.
– For boards 3″ to 5″ wide, use two pocket holes.
– For boards wider than 5″, use three or more pocket holes.
Remember, it’s better to err on the side of caution and use more pocket holes for added strength, especially in load-bearing applications.
![]()
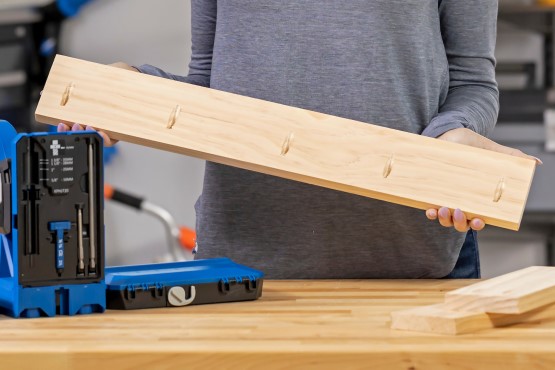
How far apart should pocket holes be?
For panels or boards up to 10 inches wide, use 3 pocket holes – one 1 inch from each end and one in the center. For larger panels, start with a pocket hole 1 inch from each end, then space the remaining holes 6 to 8 inches apart.
Check out of this article and video on how to space your pocket holes.
![]()
How far from the edge should the pocket-hole be?
Pocket holes should be drilled approximately 1 inch from the edge of the board to provide enough material for the screw to bite into without splitting the wood.
![]()
Does a pocket hole go all the way through?
No, a properly drilled pocket hole should not go all the way through the workpiece. The pocket hole is designed to create an angled pocket that allows the screw to enter at the correct angle and depth without protruding through the other side of the board.
Learn more about how pocket holes work with our comprehensive guide.
![]()
How deep should a pocket hole be?
The depth of a pocket hole depends on the thickness of the material, but typically the hole should be deep enough to accommodate a screw that will reach into the adjoining piece without breaking through.
Most pocket hole jigs come with depth collars or stops that you can adjust based on your board thickness. As a general guideline:
– For 1/2″ material, set the depth to about 1/2″
– For 3/4″ material, set the depth to about 5/8″
– For 1-1/2″ material, set the depth to about 7/8″
Always refer to your specific pocket hole system’s instructions for the most accurate depth settings.
Learn more: how material thickness matters when creating pocket holes.
![]()
Do I need to use pocket hole screws in pocket holes?
It’s best to use pocket-hole screws, as they are specifically designed with a flat washer head and self-tapping threads to work optimally with pocket holes, ensuring a tight, secure joint.
Using the correct pocket-hole screws ensures stronger joints and better overall results.
![]()
How do you prevent over-drilling and over-driving pocket holes?
Over-drilling or over-driving pocket holes can be annoying and lead to reworking parts of your project. Fortunately preventing both is pretty easy with a few simple adjustments.
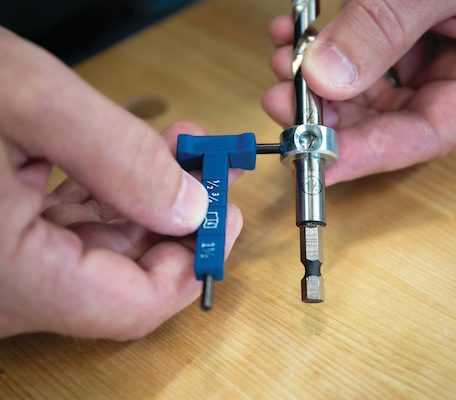
Preventing Over-Drilling
To prevent over-drilling pocket holes, start by adjusting the drill bit stop collar to the etched marking that matches your workpiece thickness.
If you are still over-drilling, loosen and slightly shift the stop collar closer to the cutting end of the drill bit. Tighten the stop collar back down and test the new setup on a piece of scrap wood. Repeat this process until you get the desired result.
Preventing Over-Driving
Over-driving a pocket-hole screw typically happens when using an impact driver or a drill with the clutch set too high to drive screws.
We recommend using a standard drill with the clutch set to a low setting. This ensures that the drill will stop driving the screw when it gets snug in the joint.
If you find that your screw isn’t going deep enough, adjust the clutch on your drill to a slightly higher setting until you get a strong, snug joint.
Learn more: How To Use A Drill Clutch
![]()
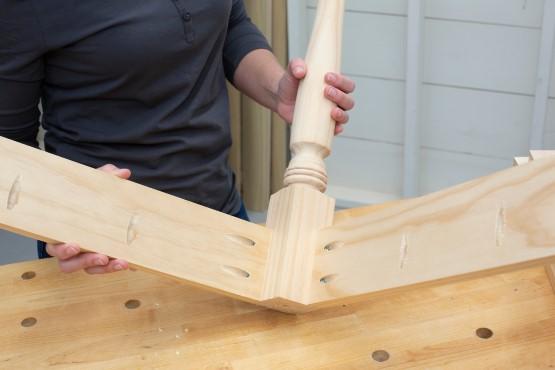
How do you keep pocket-hole joints flush?
Pocket-hole joints may occasionally shift slightly out of place during assembly as the screw enters the mating piece. This is caused by the screw tip working its way between grain fibers in the mating piece. Kreg screws feature a self-tapping tip to minimize this as much as possible, but it can still happen sometimes, particularly if your two boards are not clamped together.

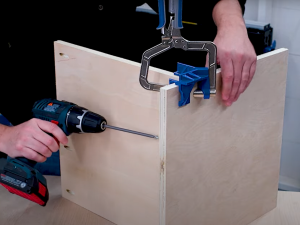
Make Assembly Easier With Clamps
Using clamps to hold your two boards in place while you drive in your pocket-hole screws will prevent the joint from shifting in most cases. We offer a variety of clamps to assist with assembling pocket-hole joints.
Our Right Angle Clamp and 90° Corner Clamp are perfect for getting rock-solid 90° joints such as box joints or T-joints.
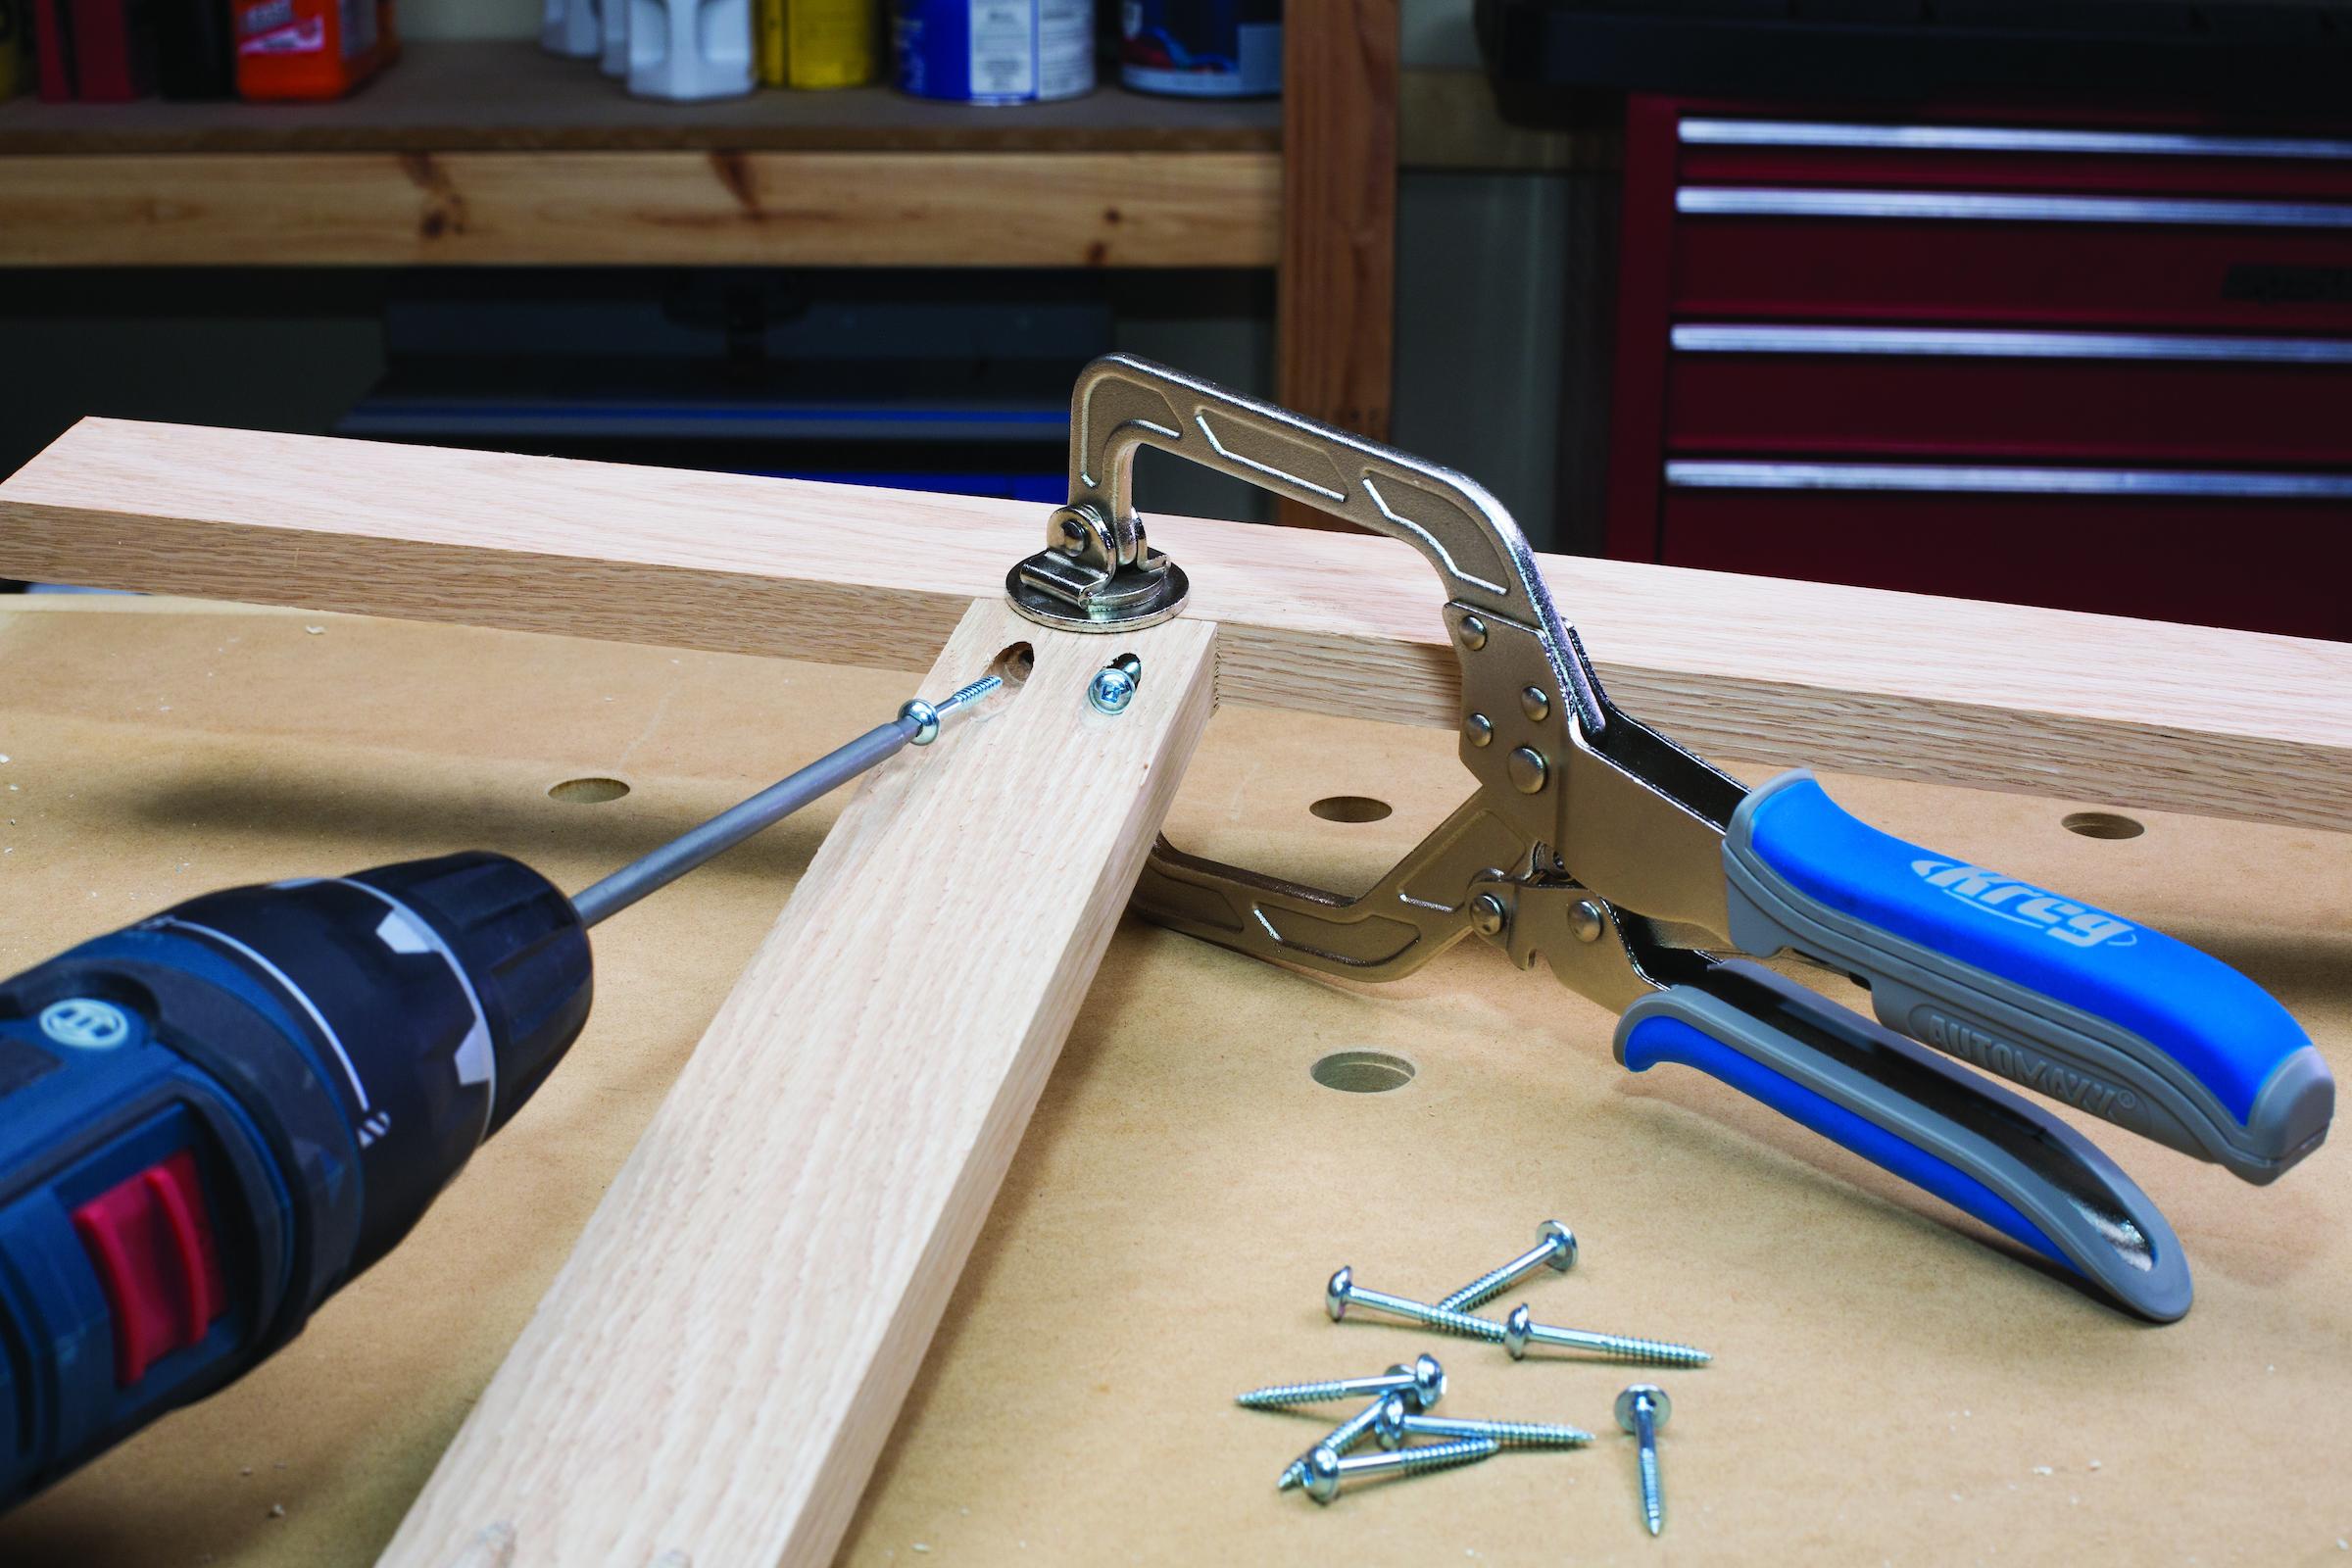
Face clamps handle applications like building face frames or mitered picture frames. These clamps feature a large, flat clamp face to ensure the joint is clamped down securely and pressure is evenly spread across the joint. The large clamp face also helps prevent marring or damage to your workpiece.
The best part about using pocket-hole joinery is that once the screws are in place, the clamps can be removed right away even if you’re waiting for glue to dry.
Learn more about using clamps with pocket-hole joinery: Make Project Assembly Easier With Clamps
![]()
How do you select the correct screw size?
Choosing the best pocket-hole screw for your project is determined by three things:
- Will your project live indoors or outdoors?
- How thick is the wood you’re using?
- What kind of wood are you using?
Check out our article all about pocket-hole screws to learn the ins and outs of screw selection. We’ll break it all down for you so you’ll know exactly how to select the right pocket-hole screw for any project.
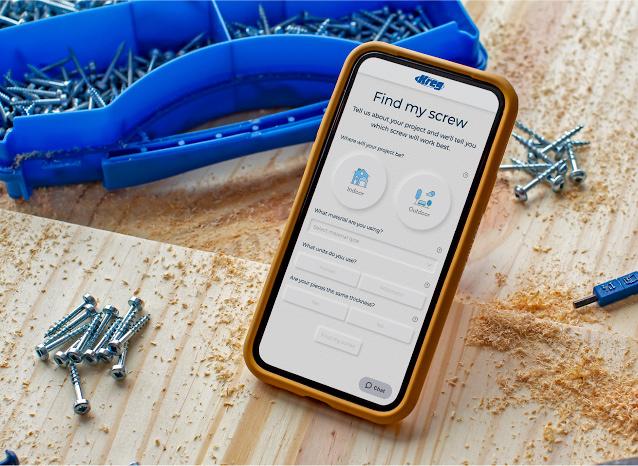
Bookmark Our Online Screw Selector
If you’re looking for a fast and simple way to find out which screws to use, try our free online Screw Selector tool. Simply plug in a few details about your project and we’ll recommend the best screw for your project. Bookmark it for a shortcut to selecting screws for every project!
Watch The Video Series On Instagram
![]()
Can you use pocket holes with 1/2″ plywood?
Yes, you can use pocket holes with 1/2″ plywood, but you need to use shorter screws, ¾” or 1″, to avoid breaking through the surface.
When working with thinner materials like 1/2″ plywood:
1. Use a pocket hole jig designed for thin materials or adjust your standard jig accordingly.
2. Use for shorter screws (3/4″ or 1″) to prevent breakthrough.
3. Be careful not to over-tighten the screws to avoid splitting or damaging the plywood.
![]()
Can you use pocket holes in 2×4?
Yes, pocket holes work well in 2×4 lumber, and you should use 2 1/2-inch screws for a strong, secure connection between thicker boards.
When using pocket holes in 2x4s:
1. Set your pocket hole jig for 1-1/2″ thick material.
2. Use 2 1/2″ pocket hole screws for maximum holding power.
3. Consider using coarse-thread screws, as 2x4s are typically softwood.
The Kreg Pocket-Hole Jig XL extra-large jig makes it easy to build using 2×4 or 4×4 boards.
![]()
Can you use pocket holes on MDF?
Yes, pocket holes can be used on MDF, but extra care is needed because MDF is prone to splitting; using fine-thread screws and gluing the joint is recommended for added strength.
Some additional considerations:
1. Use coarse-thread screws designed for sheet goods.
2. Pre-drill the screw holes to reduce the risk of splitting.
3. Be cautious not to over-tighten the screws, as this can cause the MDF to bulge or break.
4. Consider using wood glue in addition to pocket hole screws for added strength.
![]()
Why are pocket holes so strong?
Pocket holes are strong because the screws are driven at an angle, creating a mechanical connection that pulls the two pieces of wood tightly together, and the flat head of the screw helps distribute pressure across a larger surface area.
Angled entry
The screw enters the joining piece at an angle, creating a mechanical hold similar to a dowel or biscuit joint.
Large screw size
Pocket hole screws are typically larger and longer than standard wood screws, providing more holding power.
Clamping force
As the screw is driven, it pulls the two pieces tightly together, creating a solid, gap-free joint.
Increased surface area
The angled pocket provides more surface area for the screw to grip, enhancing the joint’s strength.
Hopefully, the answers to these questions will help you be successful as you build projects with your Pocket-Hole Jig. You can find more answers to common questions in the frequently asked questions section of our website.
You may also enjoy learning the basics of pocket-hole joinery in this video: 10 Helpful Pocket-Hole Joinery FAQs For Beginners
Related Video
Associated Products


Kreg® Pocket-Hole Jig 320

Kreg® Pocket-Hole Jig 520PRO