People ask us all the time if Kreg pocket-hole joints can be used to assemble miter joints. The short answer is absolutely. It’s an easy process, just like all pocket-hole joints, with just a few things you need to keep in mind.
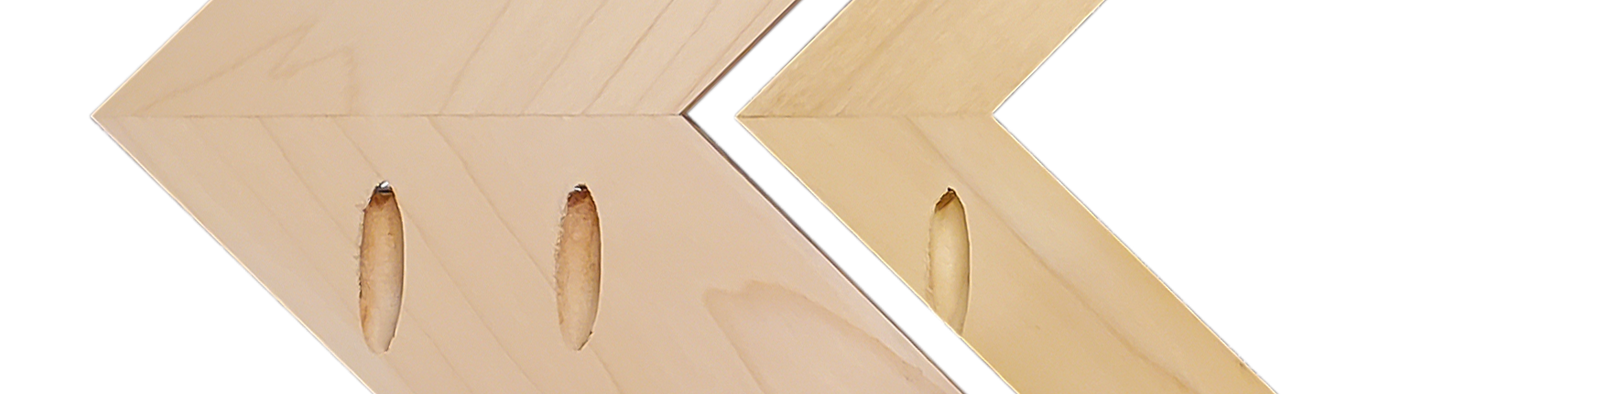
An inside look at a mitered joint
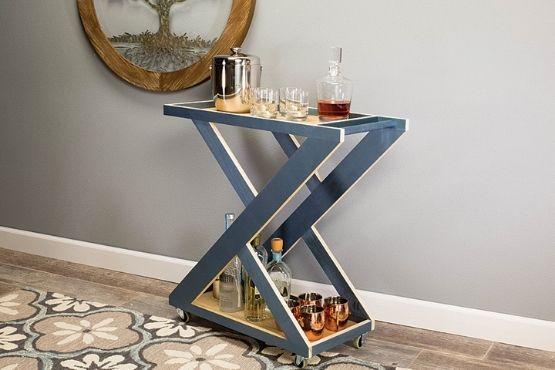
Most of us know that a miter joint brings two pieces together at an angle. Most often, the ends of both pieces are cut at the same angle. And in majority of the cases, that angle is 45°, so that when the two pieces meet they form a 90° corner that hides the end of both pieces.

When it comes to joinery, though, a miter joint isn’t a lot different than any other joint where you’re joining the end of one piece to another. You still drill the pocket-holes so they’re perpendicular to the end of the piece, so that the screws can drive into the mating piece, as shown.
Board width makes a difference
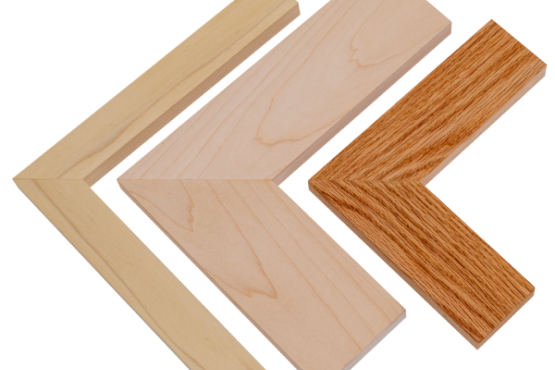
What makes a miter joint a bit different is that the pocket hole will be angled across the workpiece. So, you’ll need to look at how wide your piece is to ensure that there’s room for the pocket holes. The easiest way to understand this is to look at how the pocket holes fit into a few common board widths.
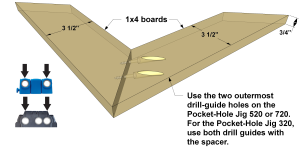
Boards like this 1×4 are wide enough to have space for a couple pocket holes. Your Kreg Pocket-Hole Jig makes placement of those holes easy. You can just use the preset spacing options that are built into the jig.
If you’re using a Pocket-Hole Jig 320, keep the spacer installed between the drill guides, and then drill a hole using each guide. If you have a Pocket-Hole Jig 520PRO2, a Pocket-Hole Jig 720, or a Pocket-Hole Jig 720PRO (or one of our older K3, K4, or K5 jigs), they have three holes in the drill guide. Use the two outermost holes.
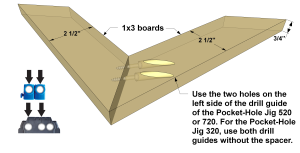
Boards like this 1×3 still offer enough width for a couple pocket holes, but you’ll want less space between the holes. If you’re using a Pocket-Hole Jig 320, remove the spacer between the drill guides, connect the guides side by side, and then drill a hole using each guide. If you have a 520PRO, a 720, or a 720PRO, use the two holes at the left.

In a narrow board, like a 1×2, you’ll have room for one pocket hole. As you can see, there’s plenty of space for the pocket hole and the pocket-hole screw to produce a strong joint. The shallow end of the pocket hole will overlap one edge of the board, so you’ll want to make sure that you can hide that edge. If you can’t, you can fill the hole with a pocket-hole plug, and then sand it flush.
With any of these combinations, you’ll create a strong, tight pocket-hole miter joint. For the smoothest, flattest joint, secure the pieces with a Kreg clamp while you drive the screws.
To glue or not to glue
Pocket-hole screws create joints that are incredibly strong, which is why we say that glue isn’t needed. That’s true. But there are some joints that can benefit from adding glue. Miters are one of those cases.
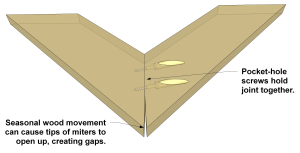
Wood expands and contracts seasonally as it absorbs and sheds moisture from the air. That can cause the outside tips of a miter joint to open up and create a gap. The pocket-hole joint will still be strong, but the joint may not look great. Adding wood glue will help seal up the wood fibers to limit moisture change, and it will hold he fibers together to keep the joint as seamless as it is strong.
Associated Products

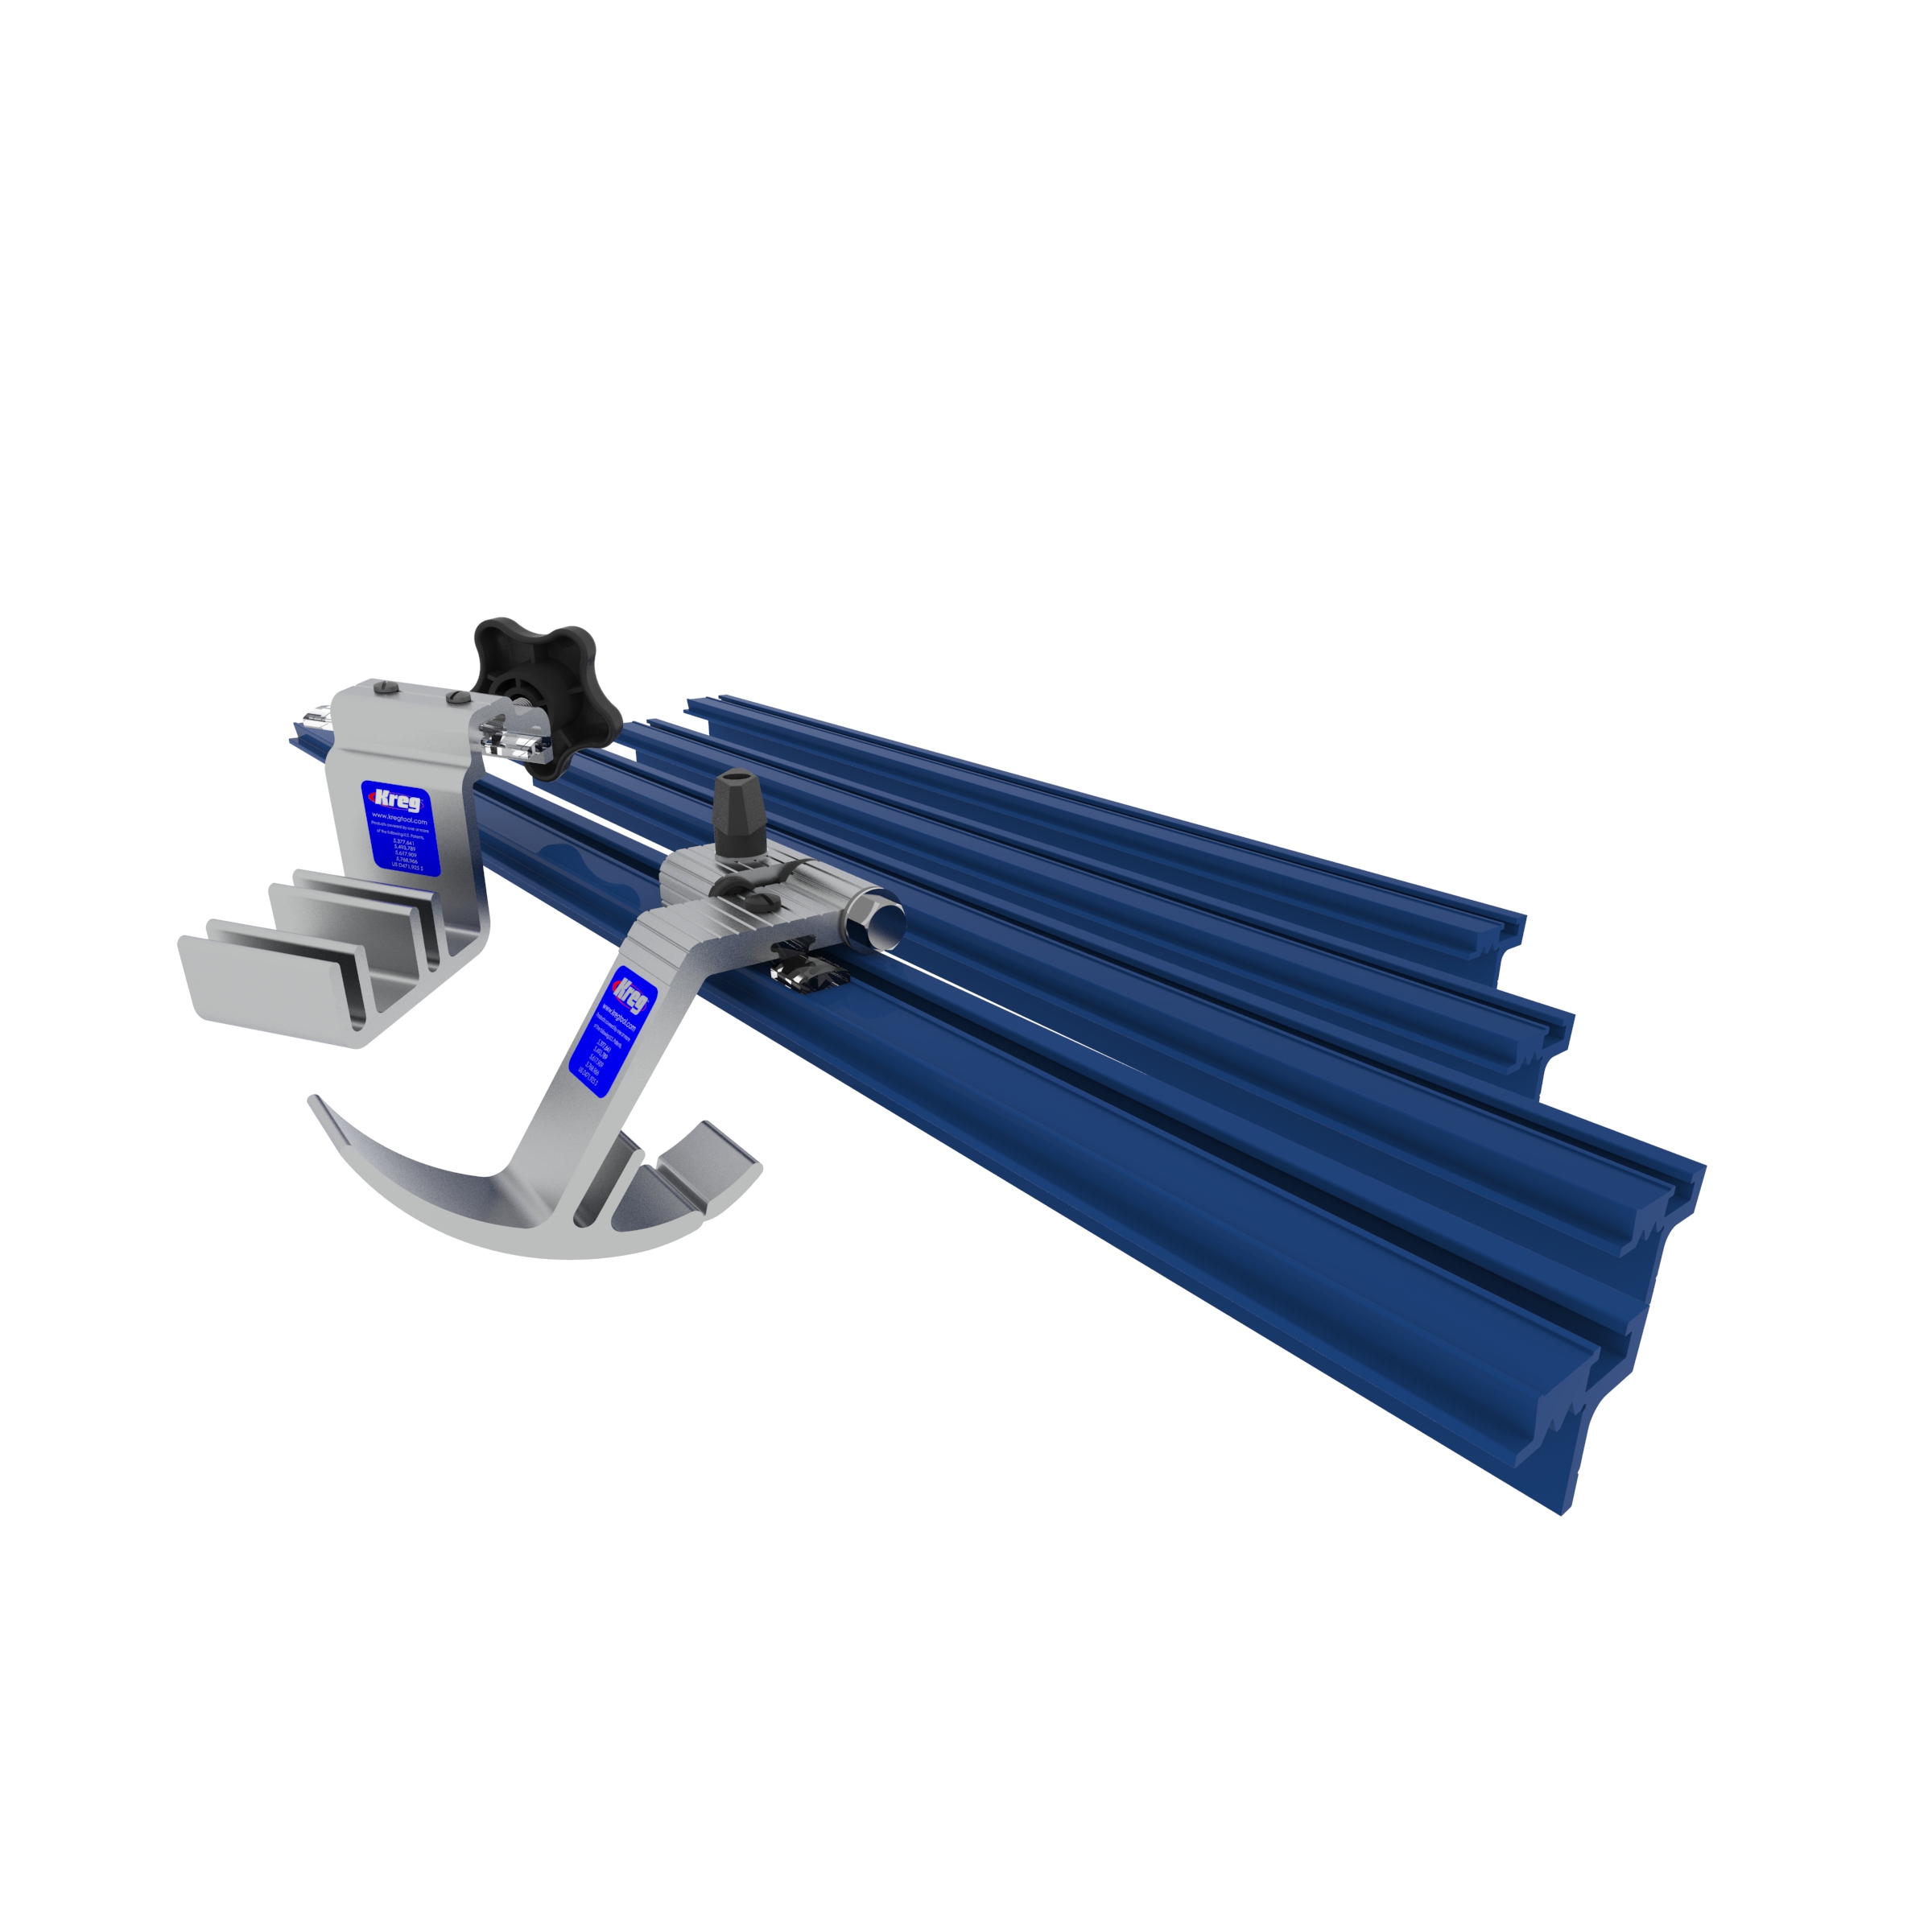
Kreg® Pocket-Hole Jig 520PRO


Portable Crosscut

Crosscut Station