When you’re building projects with mitered joints, accurate cuts are important. Without them, you’ll end up with assemblies that don’t fit together right or that have visible gaps in the joints. That’s especially true if you don’t have a miter saw, and you have to make your miter cuts using a circular saw. It’s challenging to align the blade with your mark, to hold the saw steady as you start the cut, and to keep the saw moving perfectly straight along a marked line.
You can make it easier to cut miters accurately, though, with a saw guide. We’ll show you a couple. Plus, we’ll show you how to easily check to make sure 45° miters are accurate.
What is a miter?
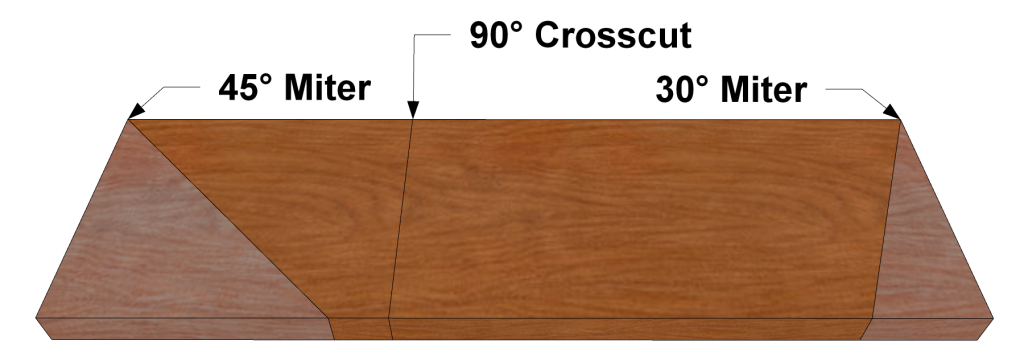
Before we look at how to cut a miter, let’s cover what a miter is. Simply put, a miter is a cut across a workpiece at an angle other than 90° to the edge. A mitered joint connects one piece to another piece at an angle.
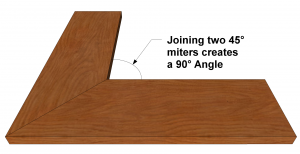
Though a miter cut can be at any other angle other than 90°, the most common miter angle is 45°. Put two 45° miters together, and you’ll get a 90° corner, like on the corner of a picture frame. We’ll concentrate on those 45° miters here.
Tip 1. Use a portable saw guide
When you cut miters with a circular saw, the three biggest challenges are: aligning the saw blade with your cut line, holding the saw steady as you start, and keeping the saw moving straight. Many people cut using a tool called a speed square, which is a compact square used in framing and roofing.
While a speed square helps guide your saw straight, that only solves one of the three challenges. That’s why we developed the Portable Crosscut. It solves all three challenges, and it does more.
 Cutline Indicators can be adjusted to match any circular saw. The indicators are spring loaded, so they align the Portable Crosscut correctly every time, and then retract out of the way.
Aligning your cut:
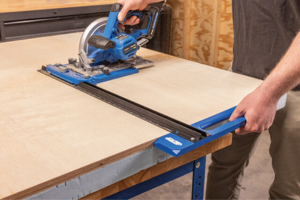
The Portable Crosscut is equipped with two cutline indicators—one on the 90° side and one on the 45° side. The indicators are adjustable so, when you get your Portable Crosscut, you set the indicators to show exactly where your saw’s blade will cut. The spring-loaded indicators retract, so that they’re out of the way as you cut.
After a simple one-time setup, the cutline indicator will always show where you should place the tool to guide your cut. Simply push the indicator outward and align the end of the indicator with your cutline. Then hold the Portable Crosscut against the edge of the board. Take your thumb off the indicator button, and a spring retracts it out of the way.
That’s all it takes to align the Portable Crosscut. You know it will be positioned correctly every time–without you having to measure for the blade offset.
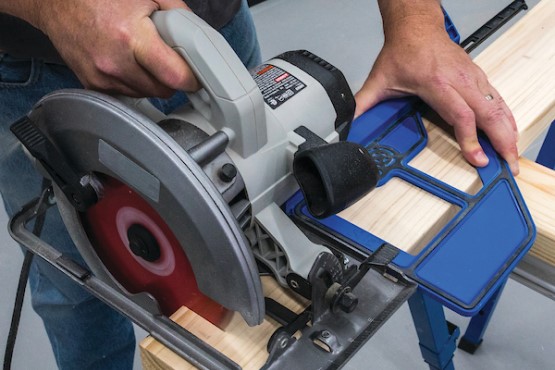
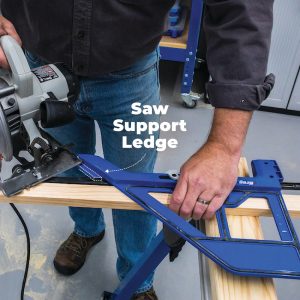 The Saw Support Ledge provides a stable place to rest your saw as you start the cut, which ensures that the blade will beheld perpendicular to the face of the wood.
Holding the saw steady:
Next, while you hold the Portable Crosscut in place with one hand, place your saw so the edge of the baseplate is aligned with the Portable Crosscut’s 45° saw edge guide. A saw support ledge supports the part of the saw baseplate that’s not on the wood, so you don’t have to worry about holding the saw steady and level as you start the cut. The ledge keeps the saw from tipping, which ensures that the edge of your miter will be straight and flat from the beginning of the cut to the end.
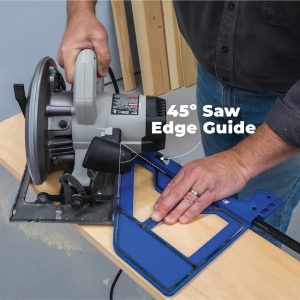 By simply holding the base of the saw against the Saw Edge Guide, you can be confident that your cut will be straight, and at the 45° angle that you want.
Keeping the saw straight:
With the saw in position, cutting an accurate 45° miter is as simple as pushing the saw forward while keeping the saw’s baseplate against the saw edge guide. You’ll get a straight and accurate cut, and you’ll end up with a great miter cut.
The Portable Crosscut makes the process even easier by staying solidly in place on your board. The design allows you to hold the Portable Crosscut in place and hold the wood. Plus, our GripMaxx™ surface grabs onto the wood to prevent slipping.
Tip 2. Find success with a cutting station
If you make a lot of miter cuts with your circular saw, you may want to step up to a more sophisticated setup to guide your saw. That’s where a tool like the Crosscut Station can be handy.
The Crosscut Station makes your circular saw operate a lot more like a miter saw in a few ways. First, the Crosscut Station holds your work in place against a fence. Second, the Crosscut Station also sets your cutting angle for you. Finally, this handy cutting station guides your saw blade precisely along a single line, so you’ll know exactly where your saw will cut every time.
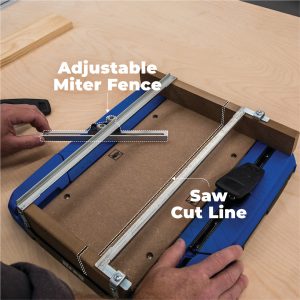 The fence can be positioned at any angle to the saw’s cut line. Molded-in lines every 5° make alignment easy. You can slide the fence closer to the cut line for maximum support near the blade.
Holding your workpiece and setting the angle:
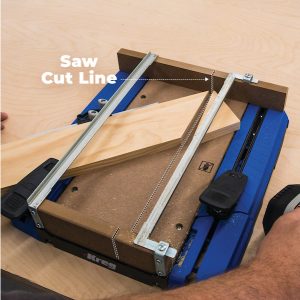
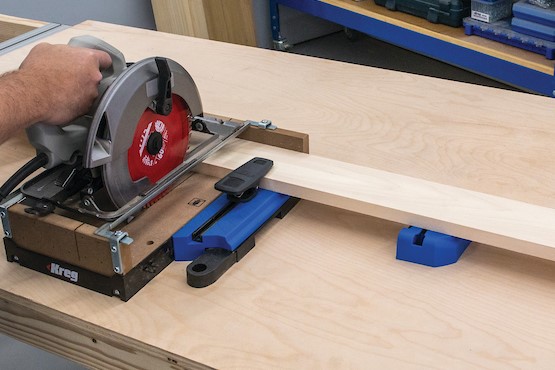
With the Crosscut Station, you don’t hold the cutting guide on your workpiece. Instead, you place your workpiece in the guide. You can cut at 90° or set the adjustable fence at any miter angle, including 45°, by using the lines molded into the station’s base. Then you can hold the piece in place using the built-in clamps or by hand. That ensure your workpiece will stay put at 45° for accurate miters.
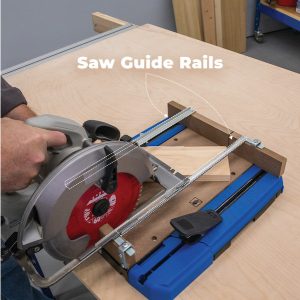 Guide Rails adjust to fit your saw’s base exactly so that it travels smoothly and precisely along the same cutting path every time.
Guiding your saw blade:
To ensure that your saw moves precisely as you cut, the Crosscut Station uses a pair of rails to guide your saw. After a one-time setup to fit the rails to your saw’s base, all you have to do is push the saw forward. The rails guide it straight, so you don’t have to worry about the saw wandering off your intended cutline. Your saw—and your saw blade—move on exactly the same line every time.
 The design of the Crosscut Station makes clean, accurate miter cuts easy, because the saw blade cuts predictably. That makes your circular saw perform like a miter saw.
Because the saw moves on the same line every time, the Crosscut Station also makes it easy to cut to the exact length you want. Just align the cut mark on your workpiece with the kerf in the station’s base. You’ll end up with a piece that’s cut at the exact length and angle you need.
Tip 3. Three easy ways to check miter accuracy
When you’re putting mitered joints together, accuracy is important to ensure the correct angle. With 45° miters, there are a few easy ways to check that the angle you’ve cut is correct.
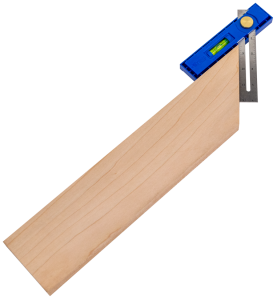
Use a combination square
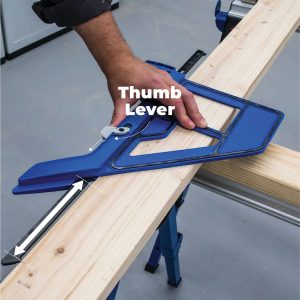
You can check the cut angle using a combination square or the Kreg Multi-Mark™. Just set the square to 45°, and then hold it against the cut. You’ll get the most accurate result if you capture the workpiece in the square, as shown. If the square fits tight to the mitered end and the edge of the workpiece, you know the angle is correct.
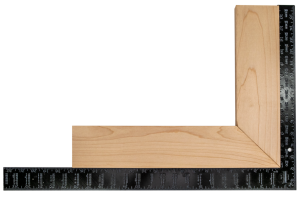
Use a framing square
If you’re assembling two mitered pieces to create a 90° joint, you can check the of the 45° miters using a framing square. Just place the pieces against the legs of the square, and then check for gaps.
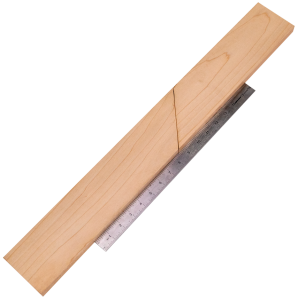
Use a straightedge
If you don’t have a square handy, you can check the accuracy of mitered joints using a straight edge. Just flip one of the two pieces and line them up straight. If your miters are accurate, the angles will cancel each other out, and both pieces will lay flat against a straightedge with no gaps.


Associated Products

Portable Crosscut

Crosscut Station

Straight Edge Guide

Accu-Cut™

Multi-Mark™