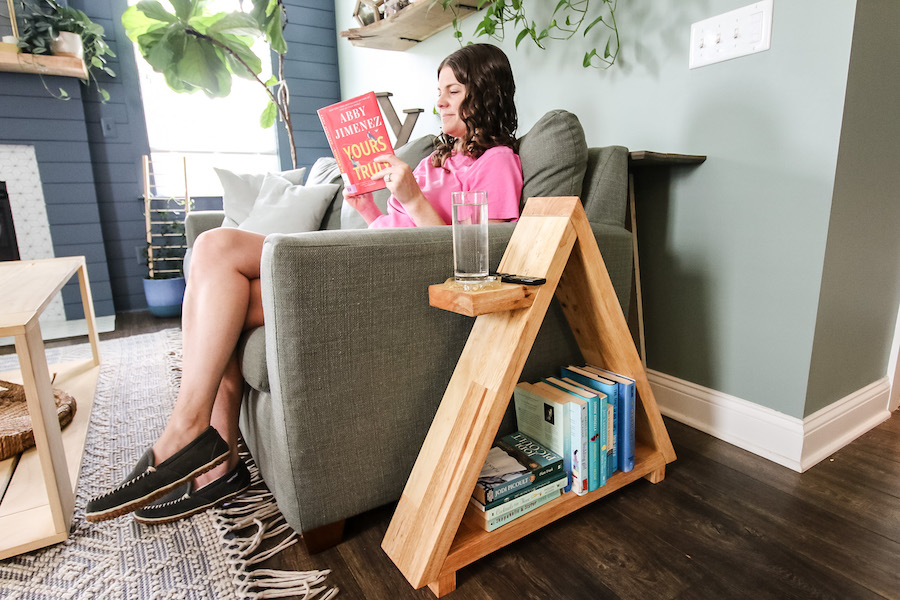
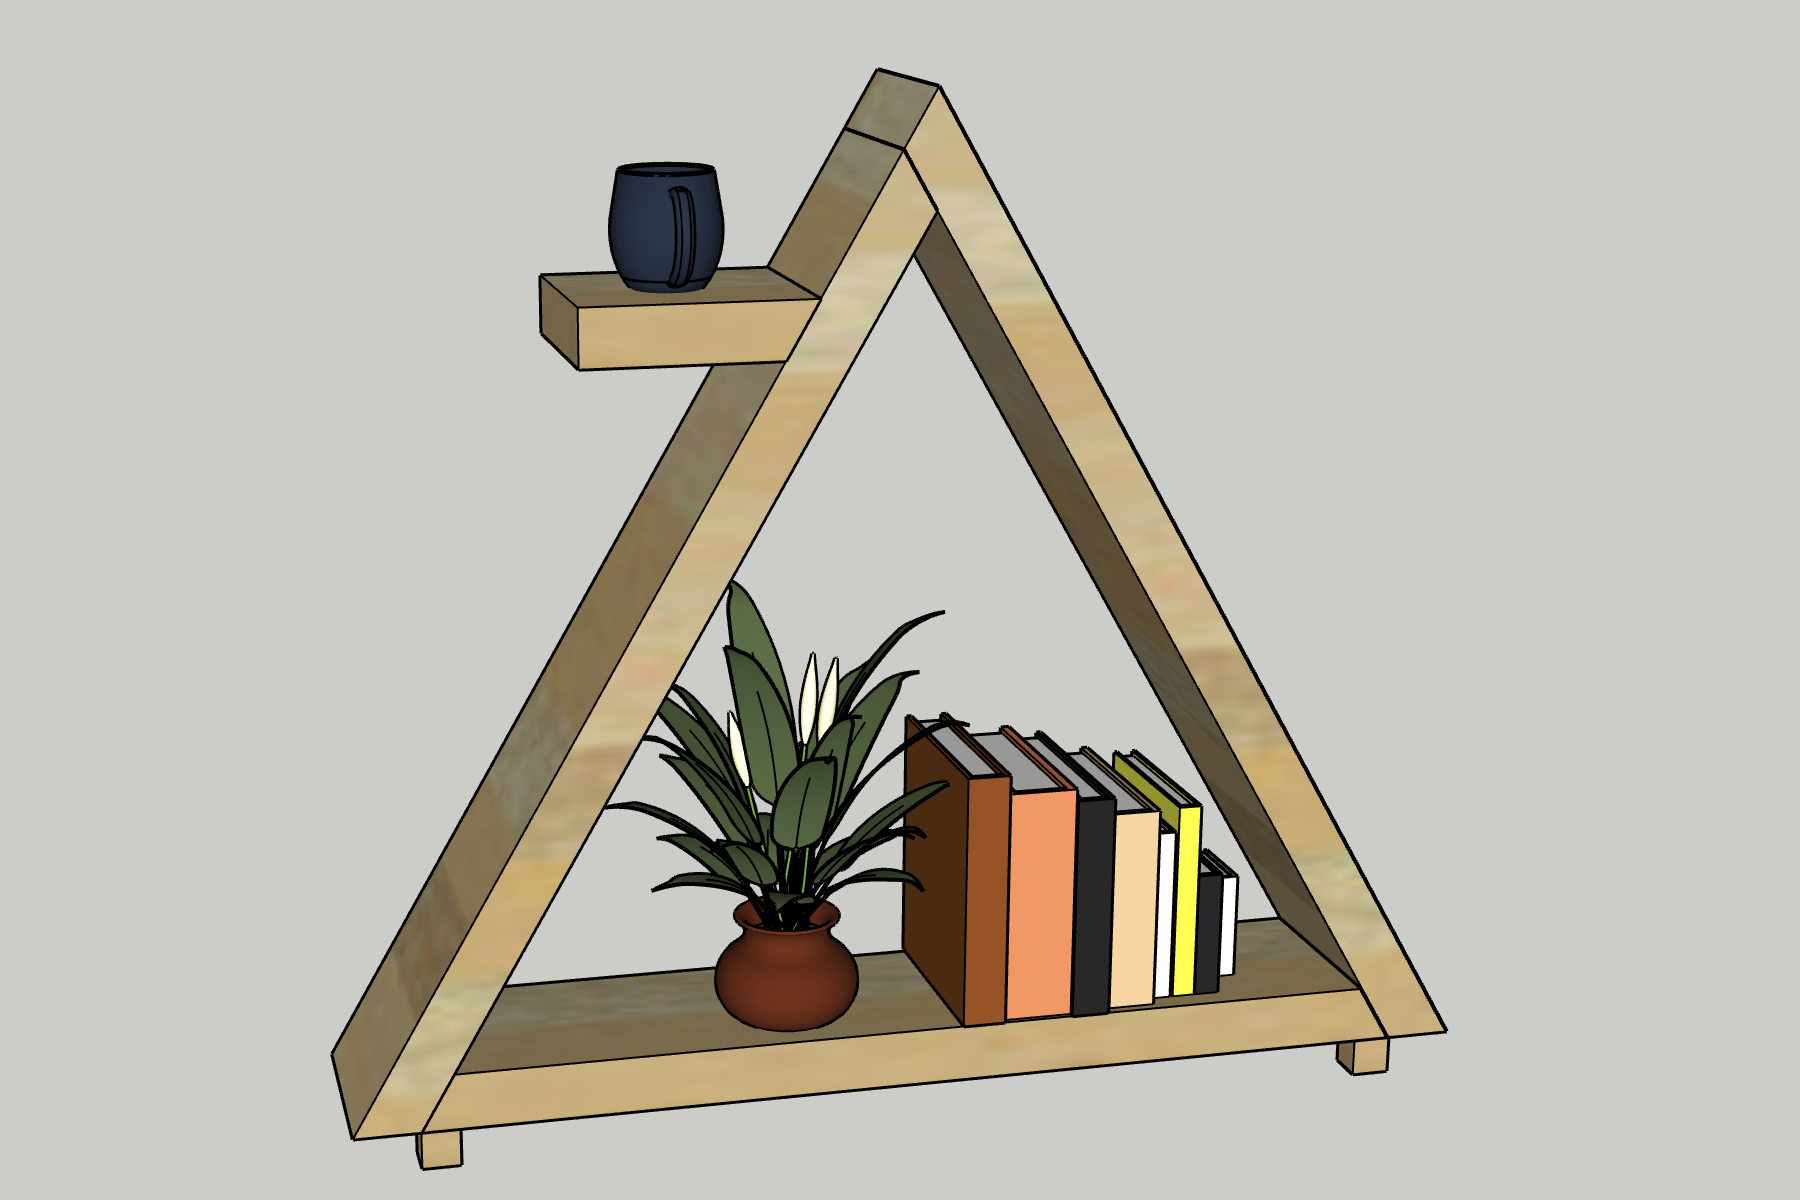
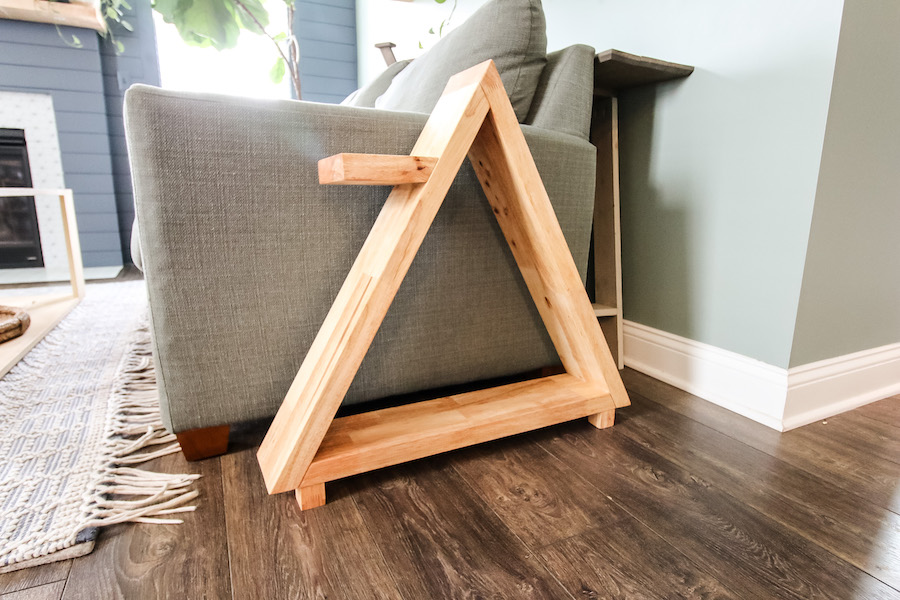
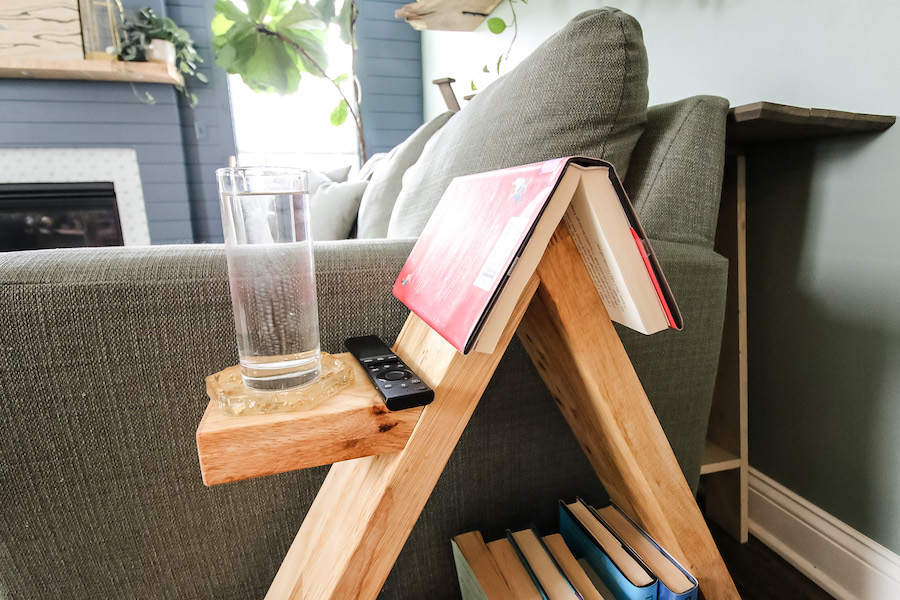


Check out this simple DIY modern triangular side table with a place to display your books and set your drink. It's a great rustic modern look you'll love! This is an easy project to make that makes a big impact. Plus, it can be a great scrap wood project after you have trimmed some other wood!
Tools
Kreg Tools


Other Tools
-
Miter Saw

-
Table Saw
Materials
Wood Products
- 1 Butcher block , 1 1/2" x 5 1/2" x 8'
Hardware & Supplies
- 6 2 1/2" Kreg pocket screws
- 4 1 1/2" Kreg pocket screws
- 1 Wood glue
- 1 Oil or stain
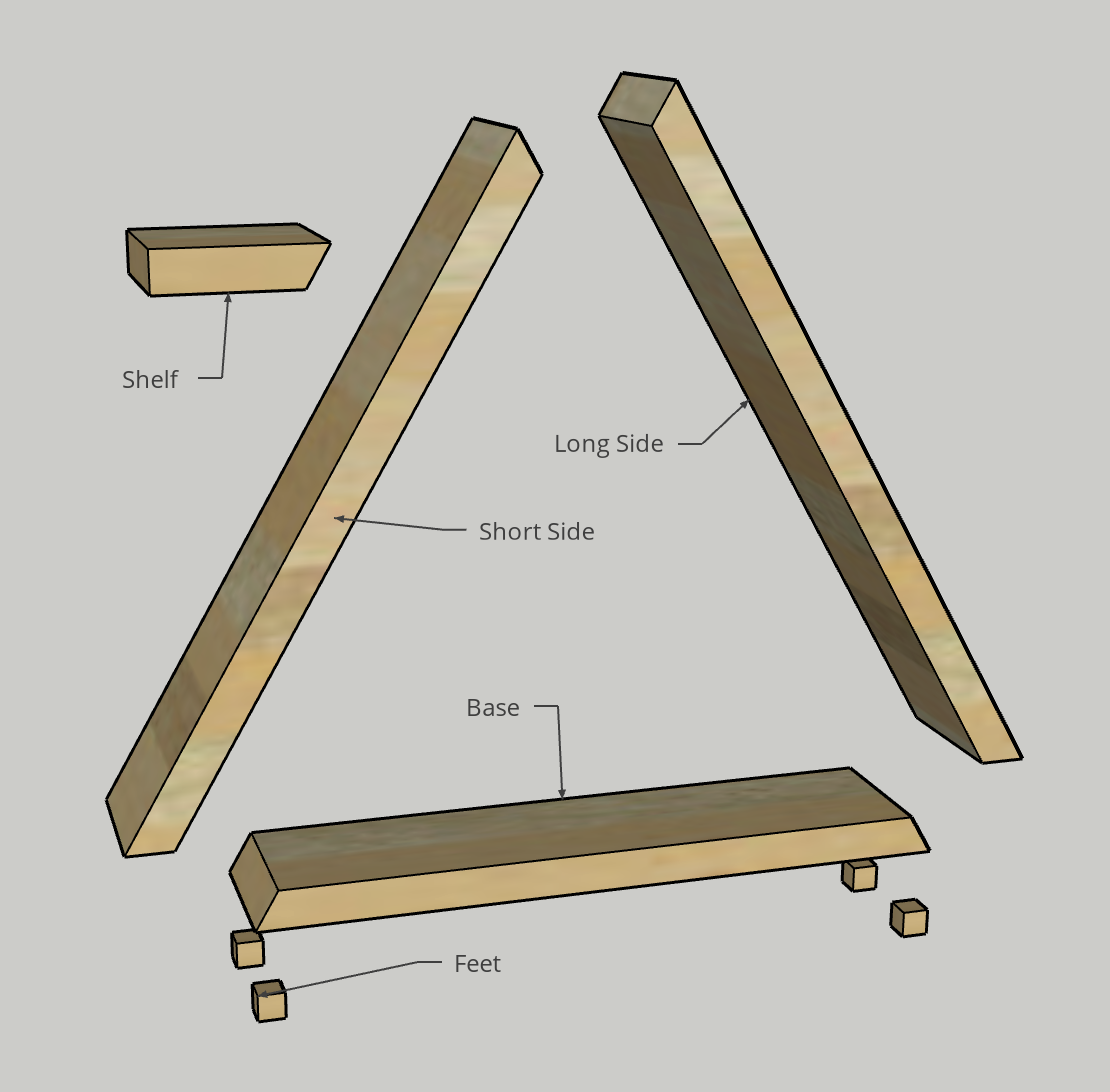
Cut List & Parts
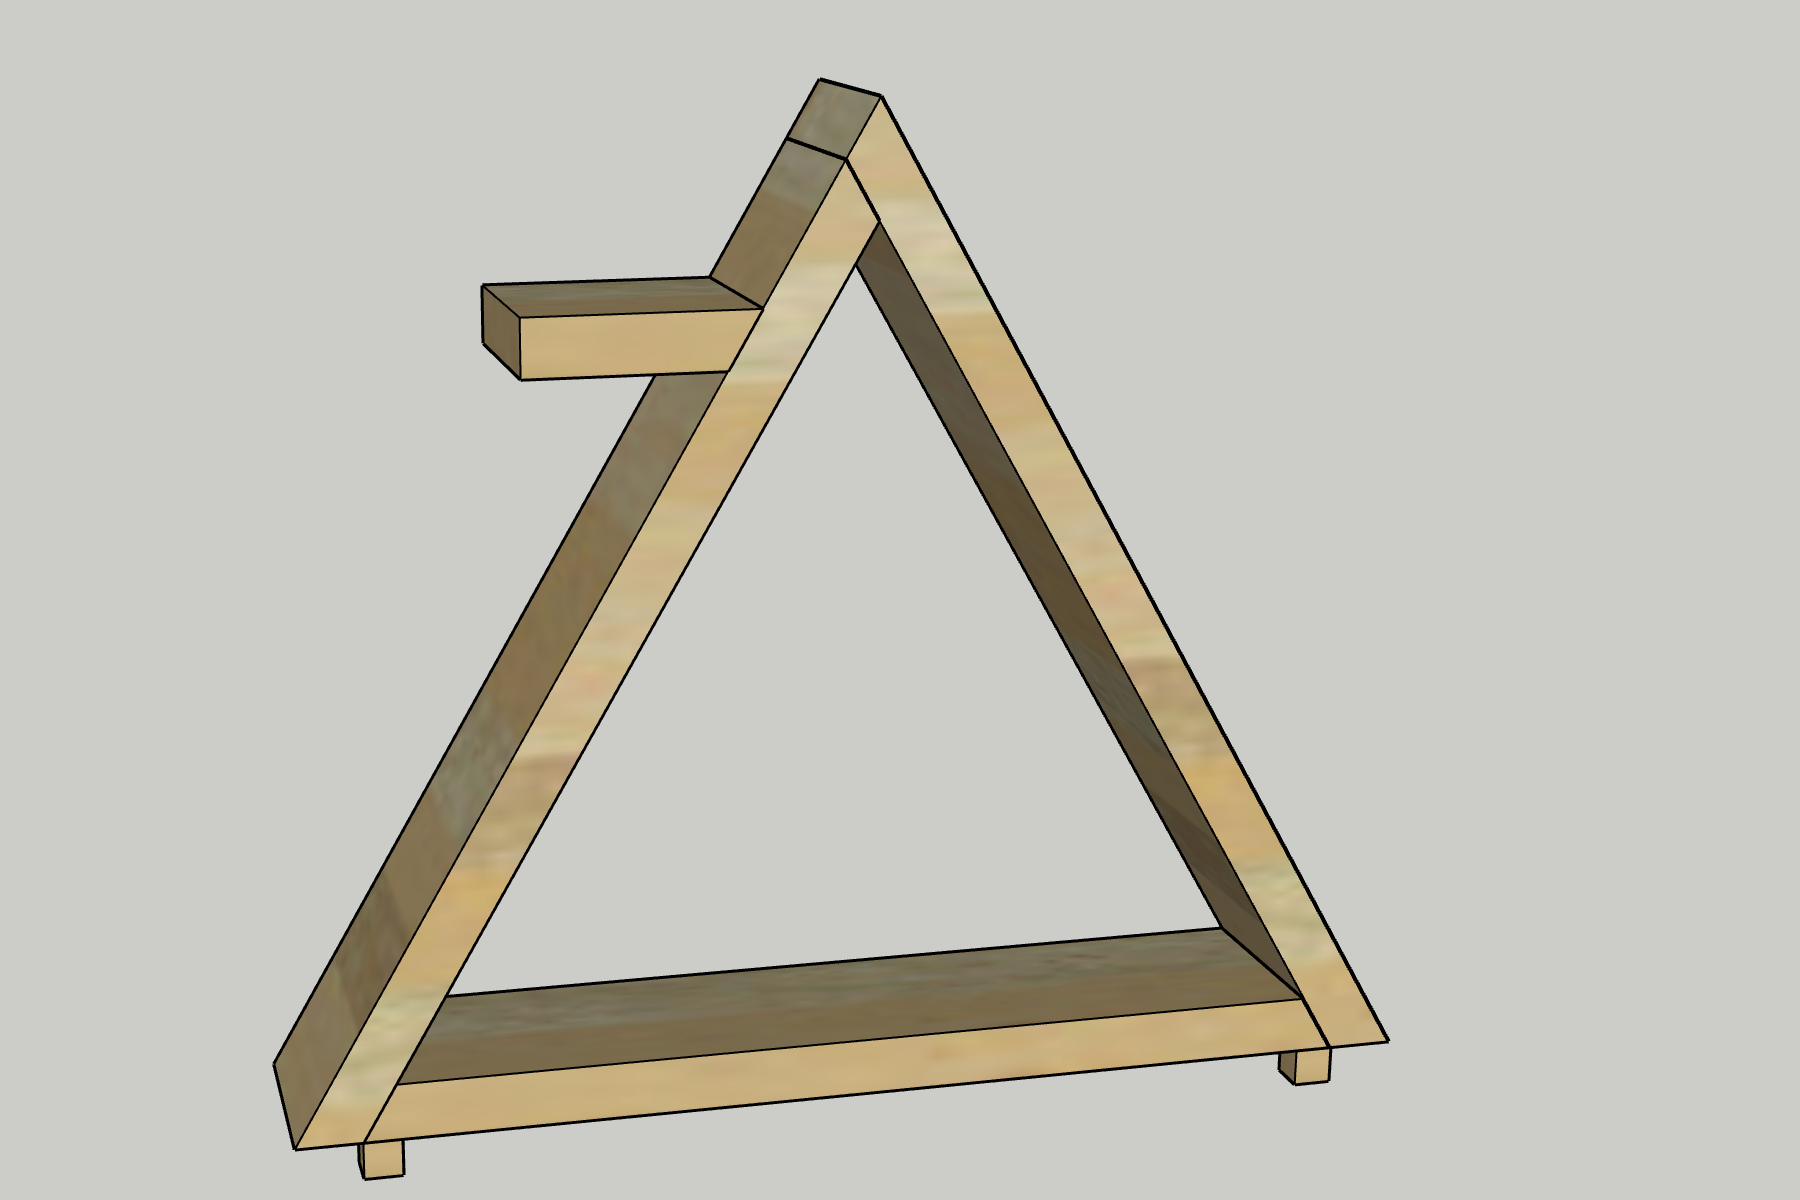
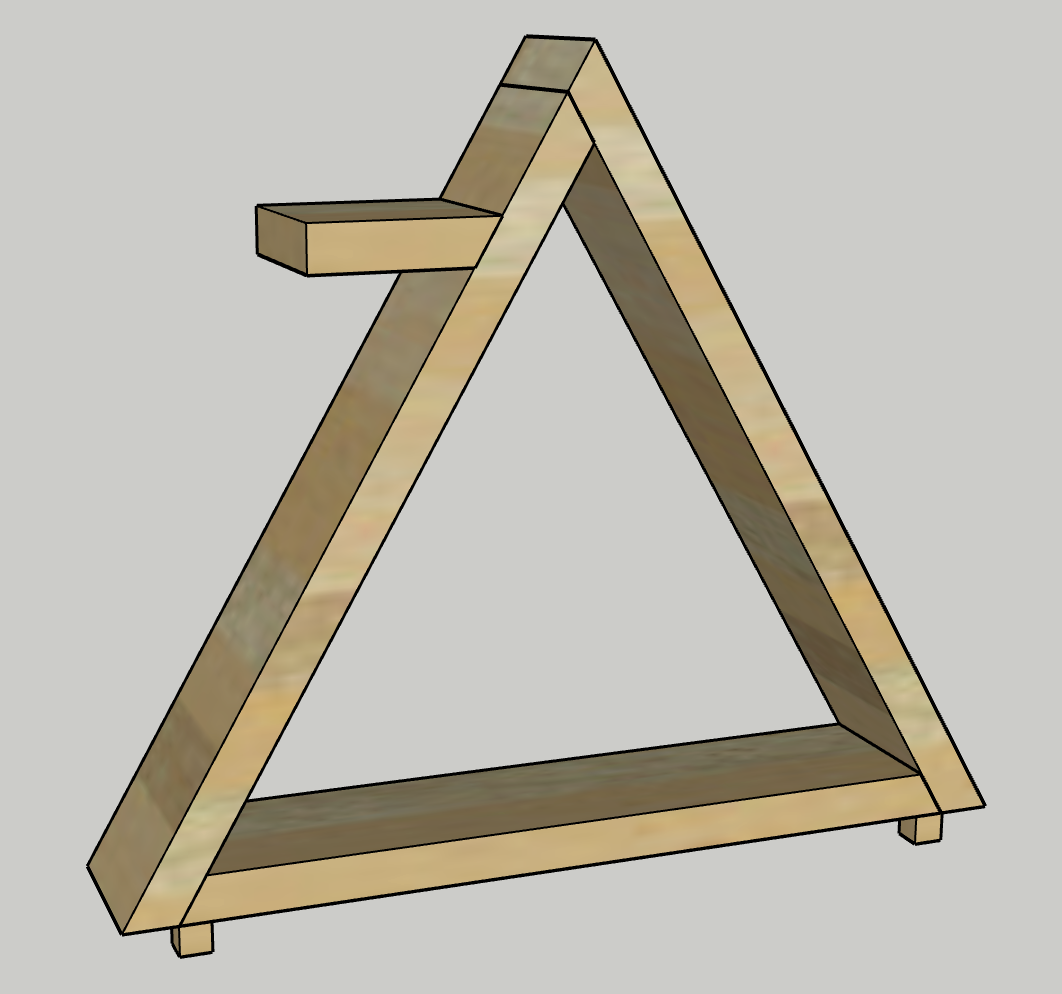
- 1 Base , 26 1/2" x 3 1/2" x 1 1/2"
- 1 Short Side , 28 1/4" x 3 1/2" x 1 1/2"
- 1 Long Side , 30" x 3 1/2" x 1 1/2"
- 1 Shelf , 6" x 3 1/2" x 1 1/2"
- 4 Feet , 1" x 1" x 1"
- 1 *Note , Cut 30 degree opposing bevels on each end of the Base, Short Side and Long Side, with the length of the long edge equal to the length shown in the cut list. Additionally, do a 30 degree bevel on one end of the Shelf with the long side being 6".
Directions
-
Drill pocket holes
- Start by drilling all your pocket holes using your favorite Kreg pocket hole jig. For this project, the sturdy base of the 720 might be the best bet, but you can use whatever jig you have.
- Drill two pocket holes on each end of the long side of the Base.
- Drill two pocket holes on one end of the short side of the Short Side.
- Drill two pocket holes on the short side on the angled end of the Shelf.
- Additionally, drill a pilot hole and counter sink hole through each of the Feet.
-
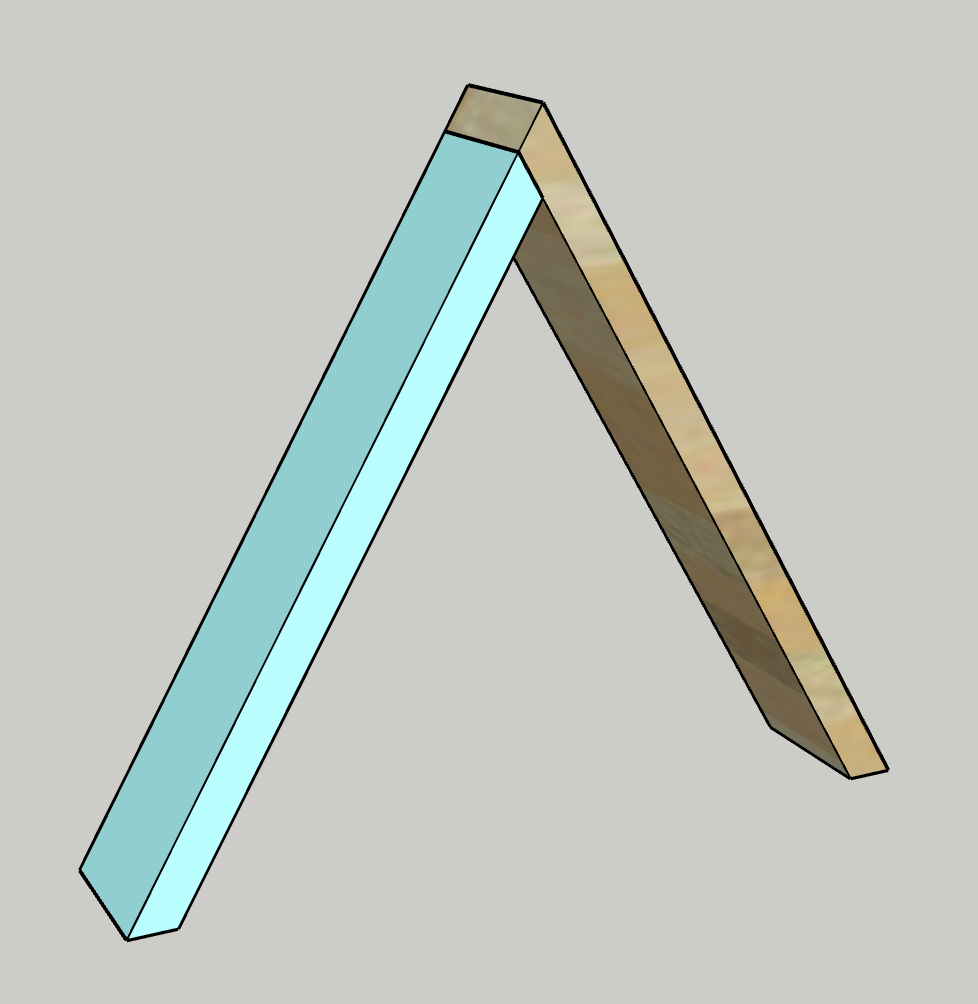
Connect sides
Using wood glue and pocket hole screws, attach the end of the Short Side with pocket holes to the end of the Long Side so that their angles align.
-
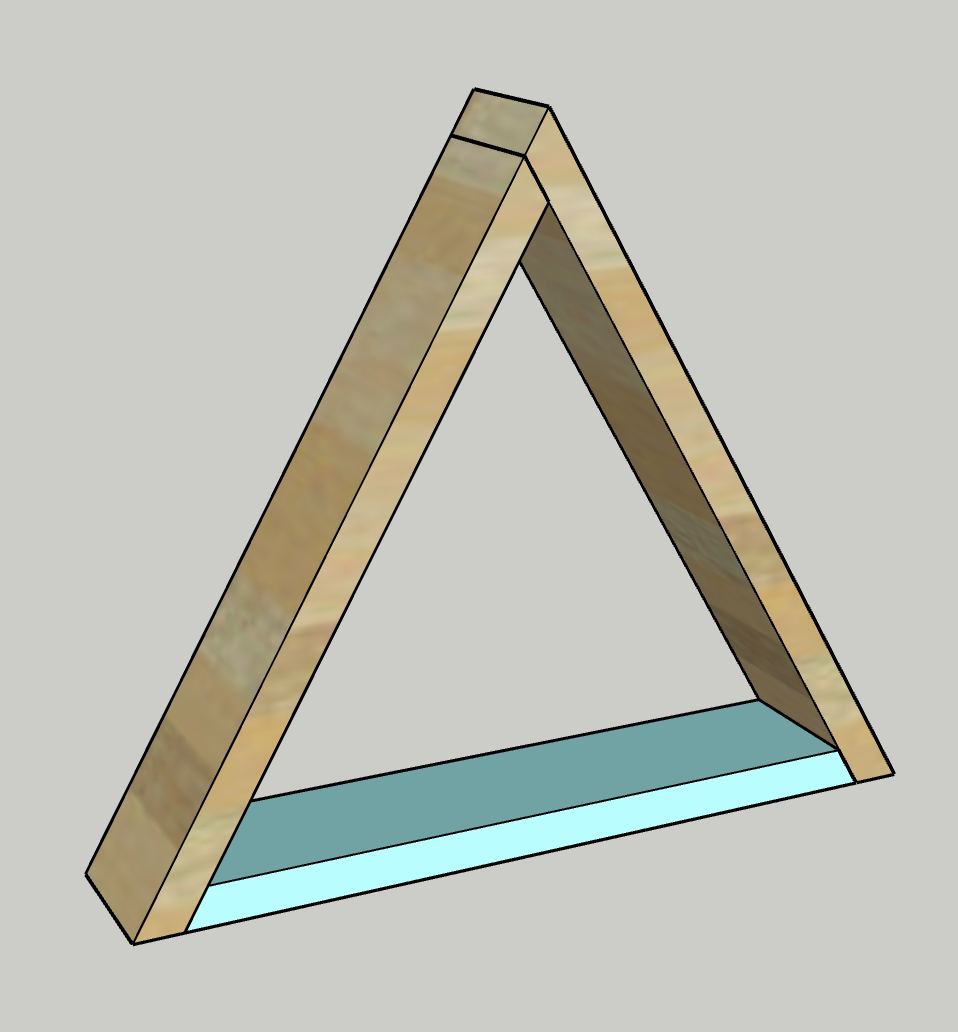
Attach base to sides
Using wood glue and pocket hole screws, attach the Base to the two sides so that it aligns flush at the bottom.
-
Attach shelf
- Using wood glue and pocket hole screws, attach the Shelf to the Short Side at a height that is appropriate for the chair you plan on having it next to.
- We put ours about 6" down from the peak of the triangle.
-
Attach feet
- Using wood glue and 1 1/2" pocket hole screws, attach the four Feet to the Base at its corners.
- Drill the screws through the pilot holes you drilled in step one and countersink the screw heads.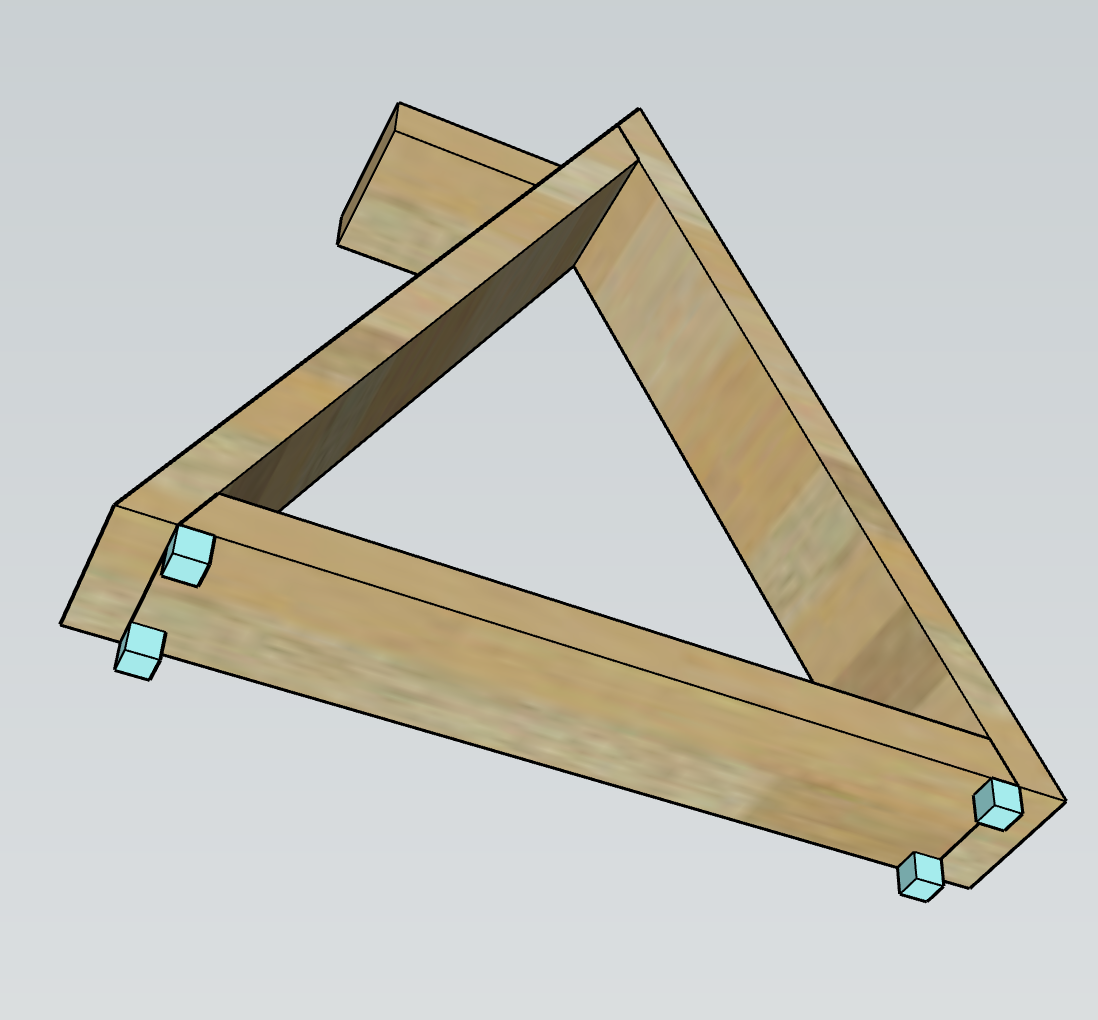
-
Apply oil or stain
If you want to oil or stain, do that here!
-
Add books and decor
- Align your favorite books or decor on the Base and set your coffee down on the shelf while you read your favorite book!
- Need to stand up? Simply set your open book on the peak of the triangle!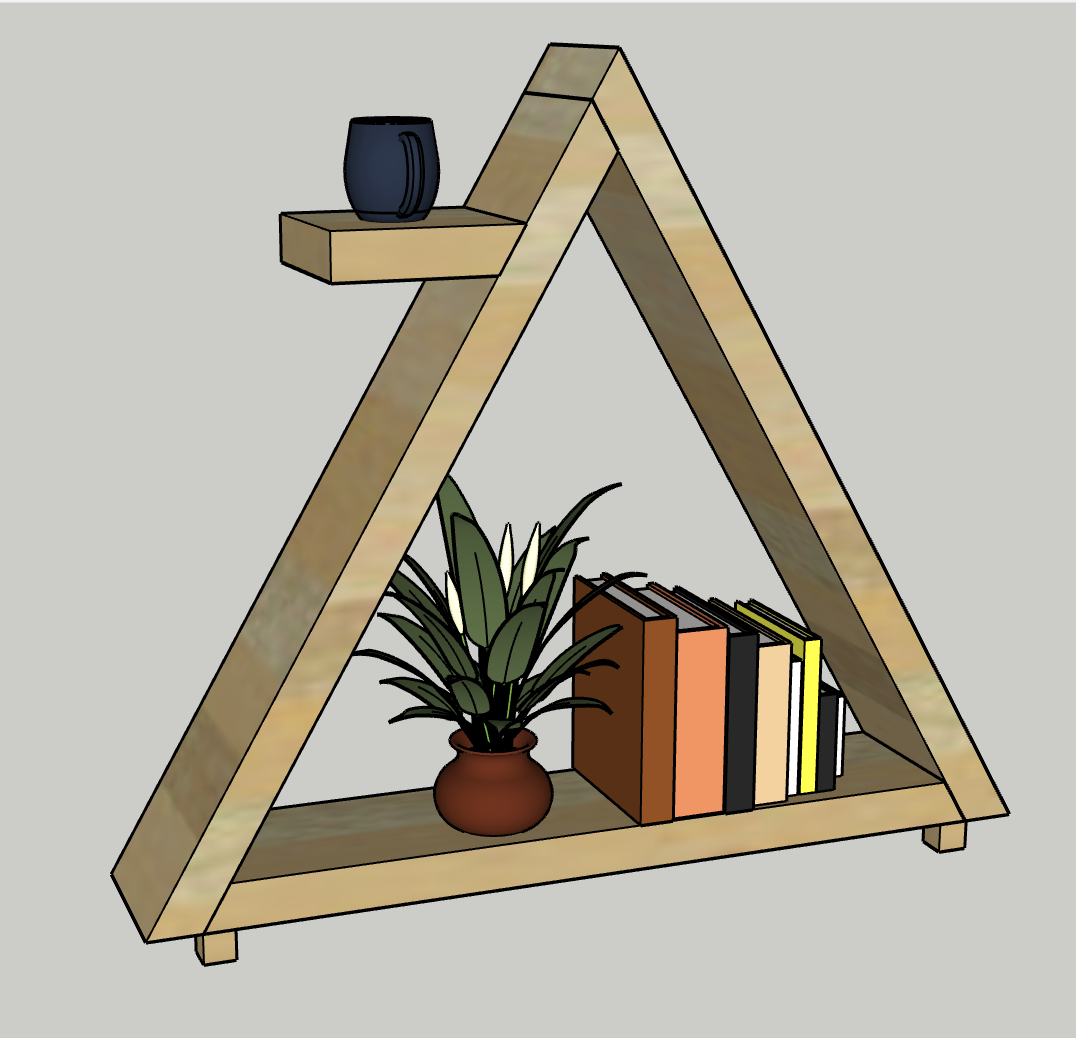
-
Enjoy
Enjoy your handiwork and tag @CharlestonCrafted on Instagram with a picture!