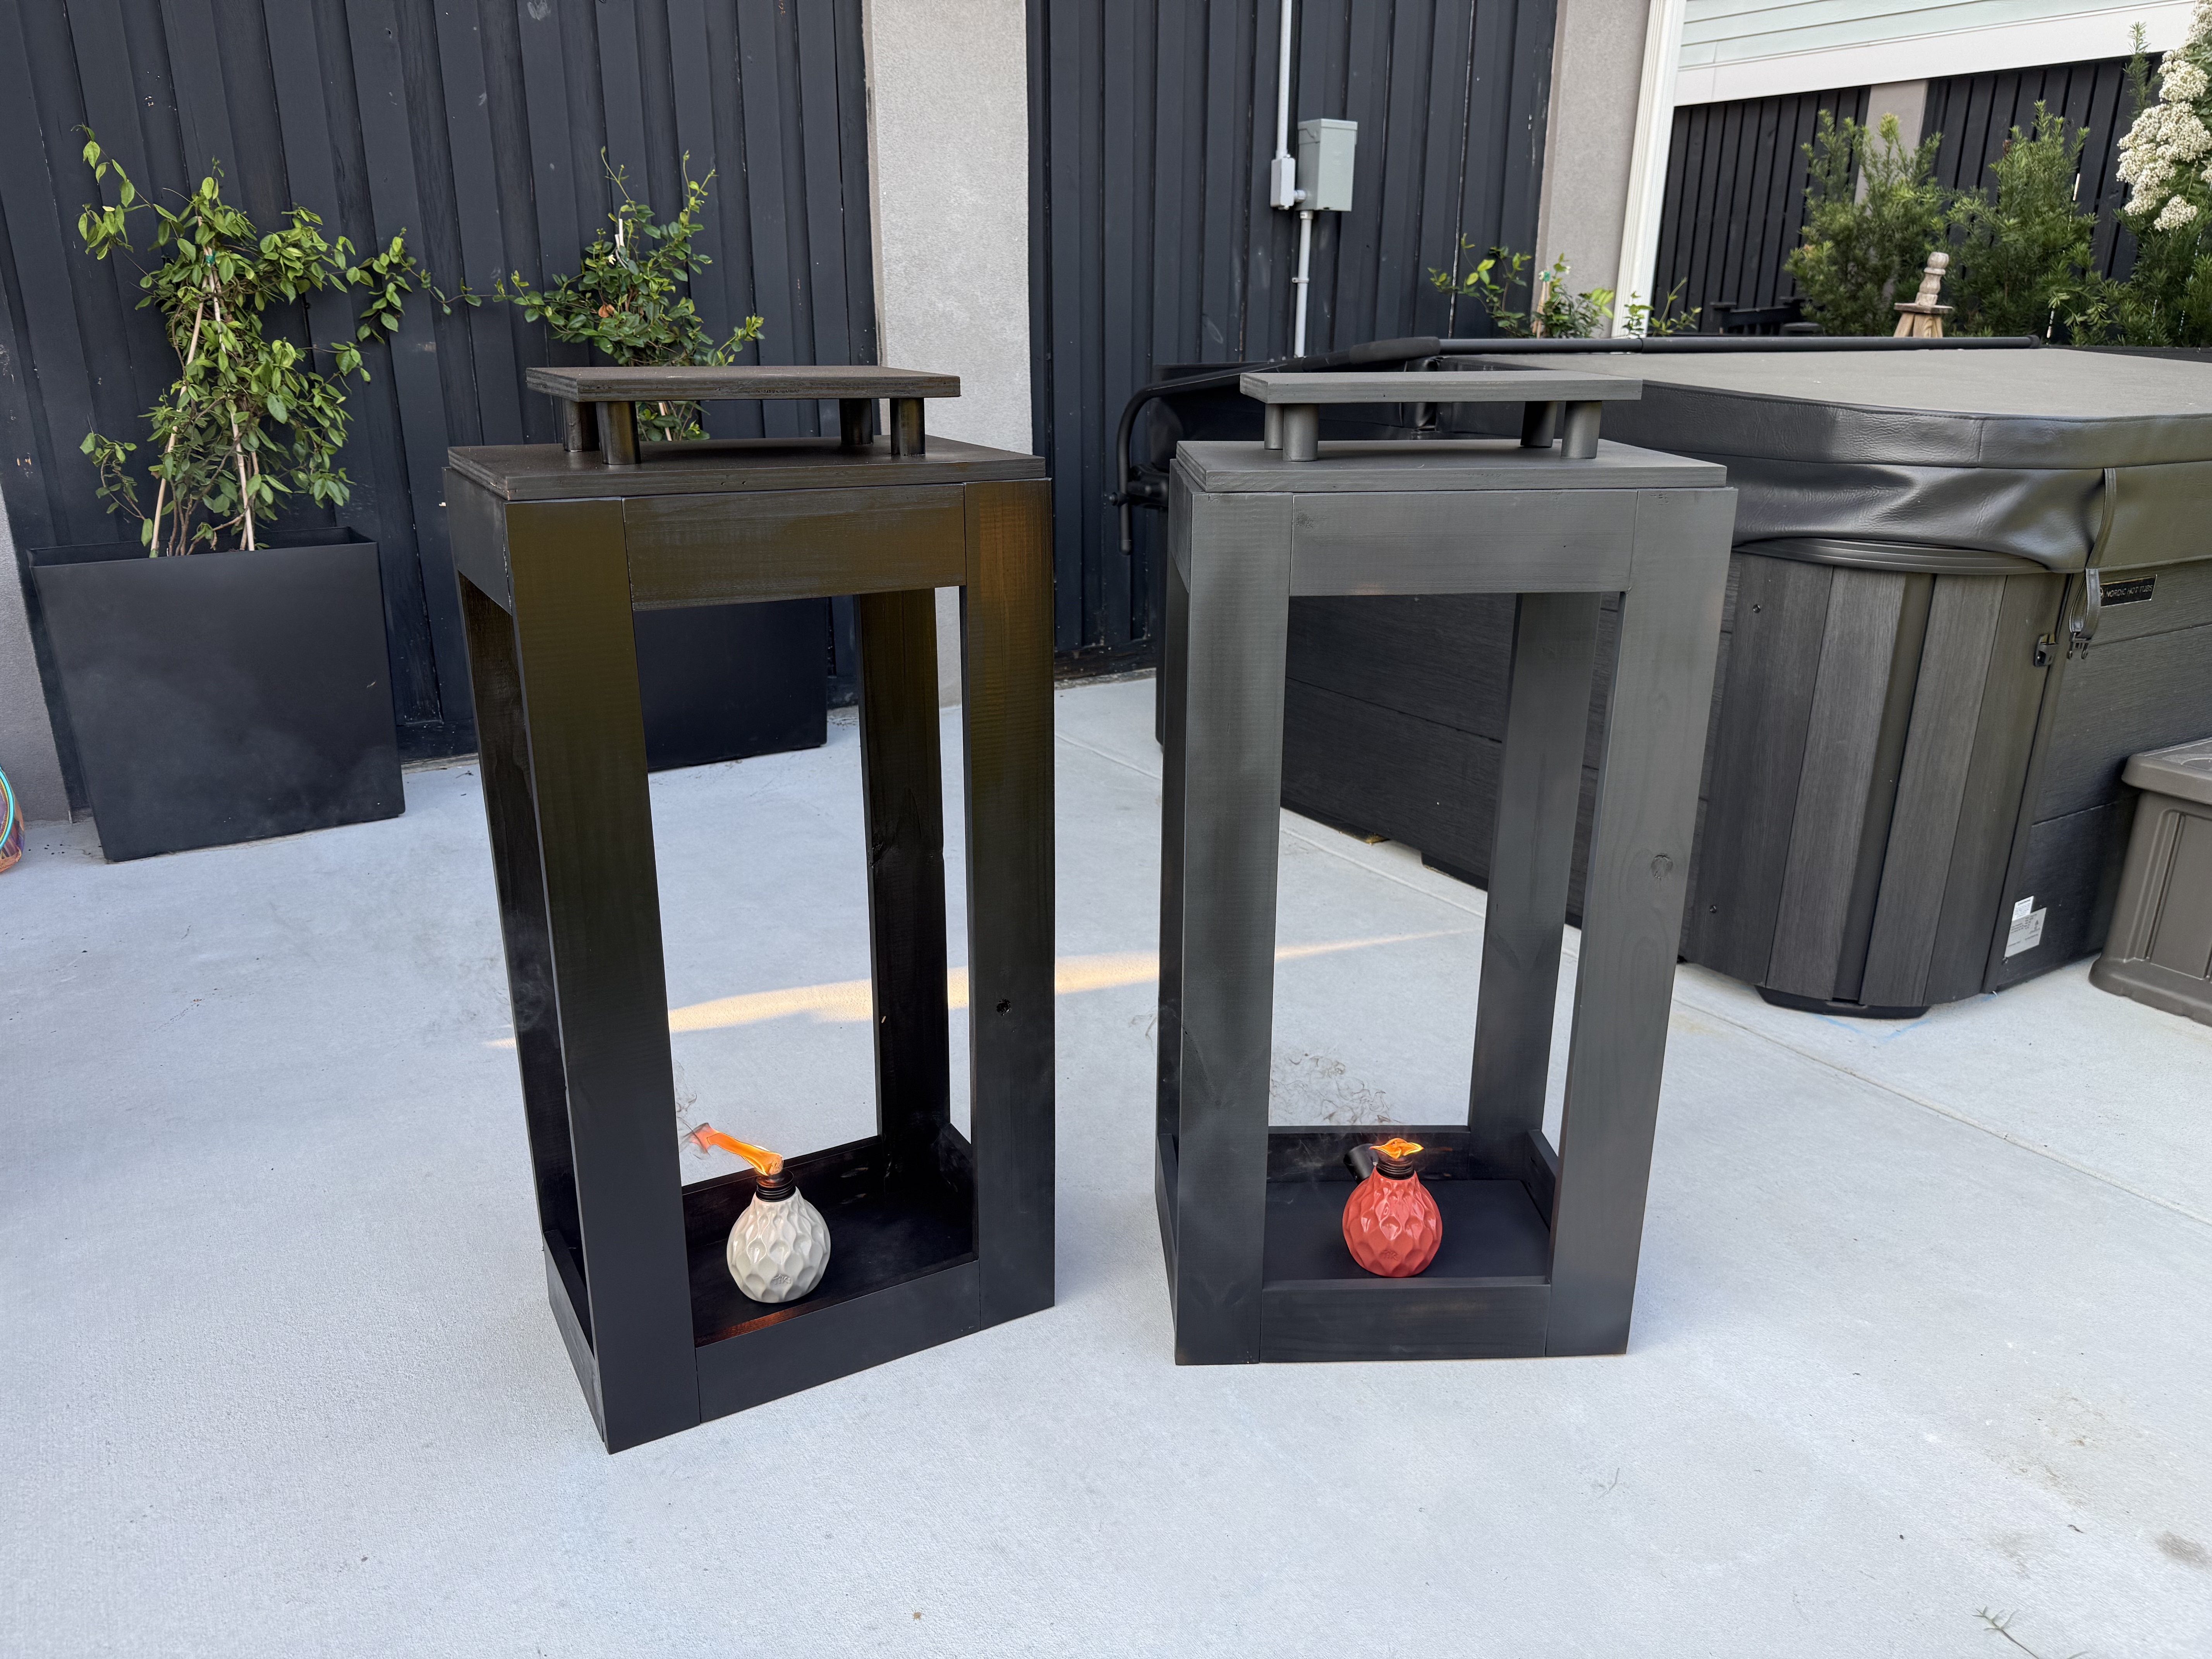
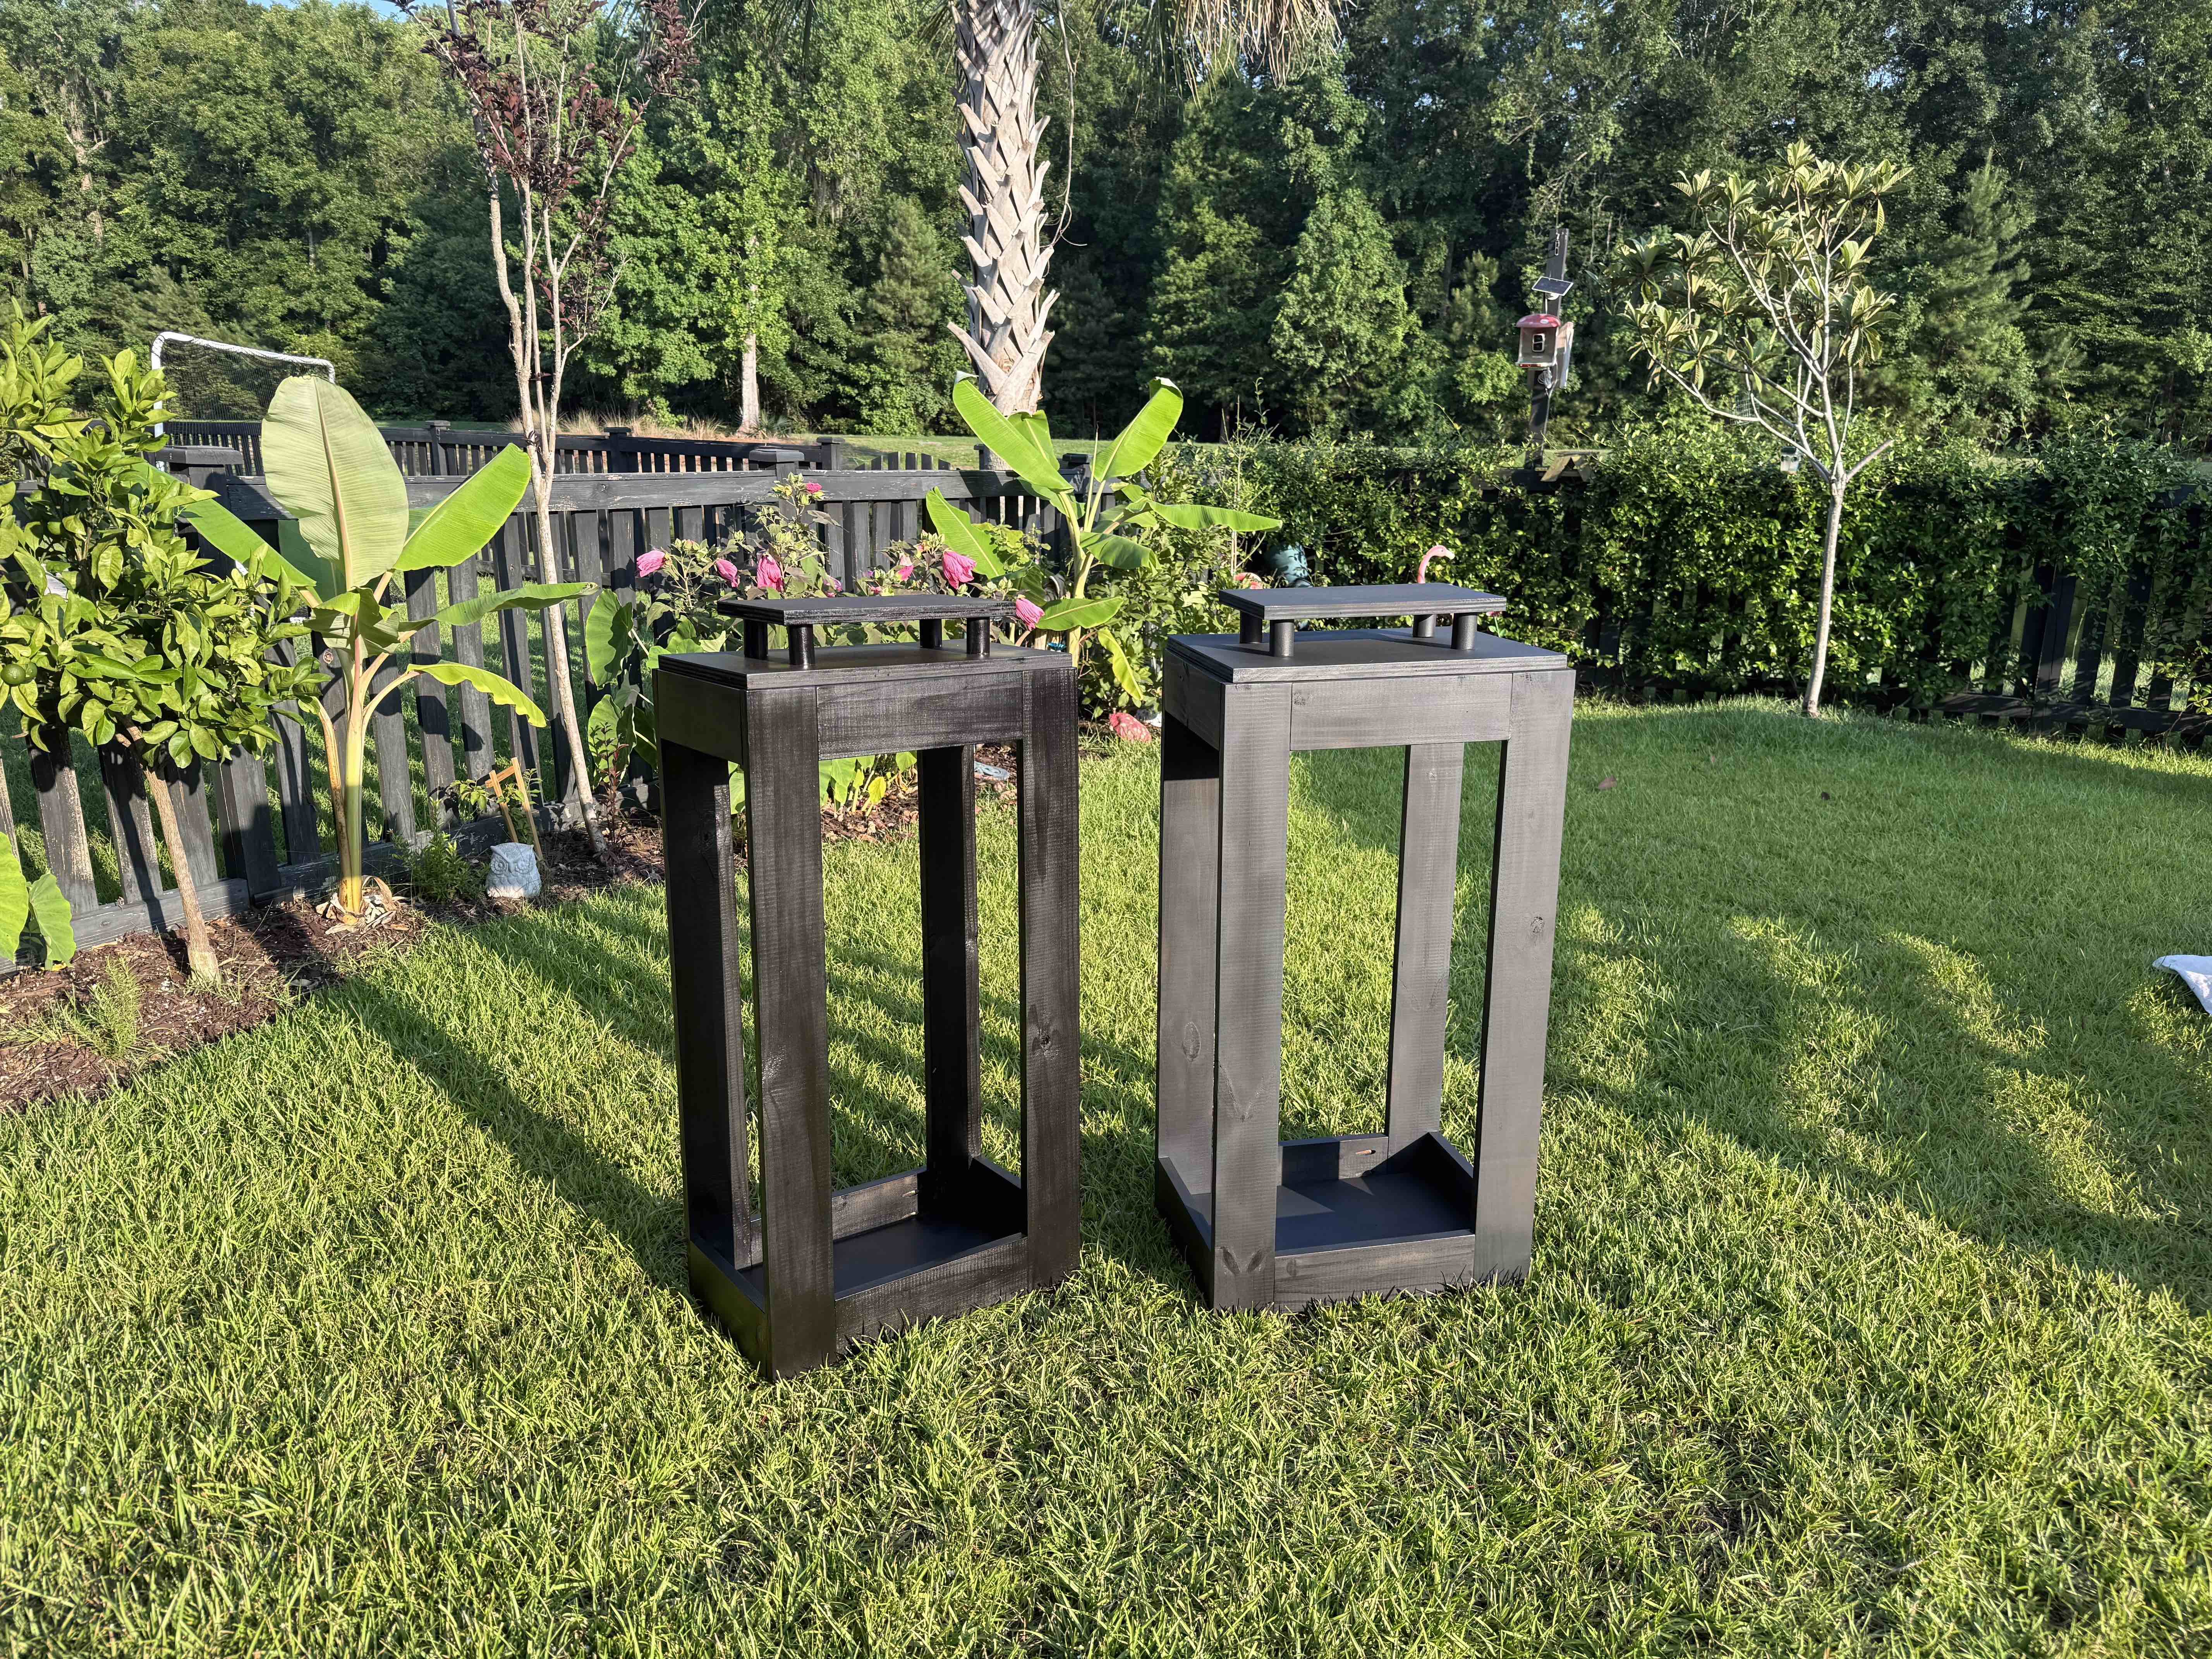
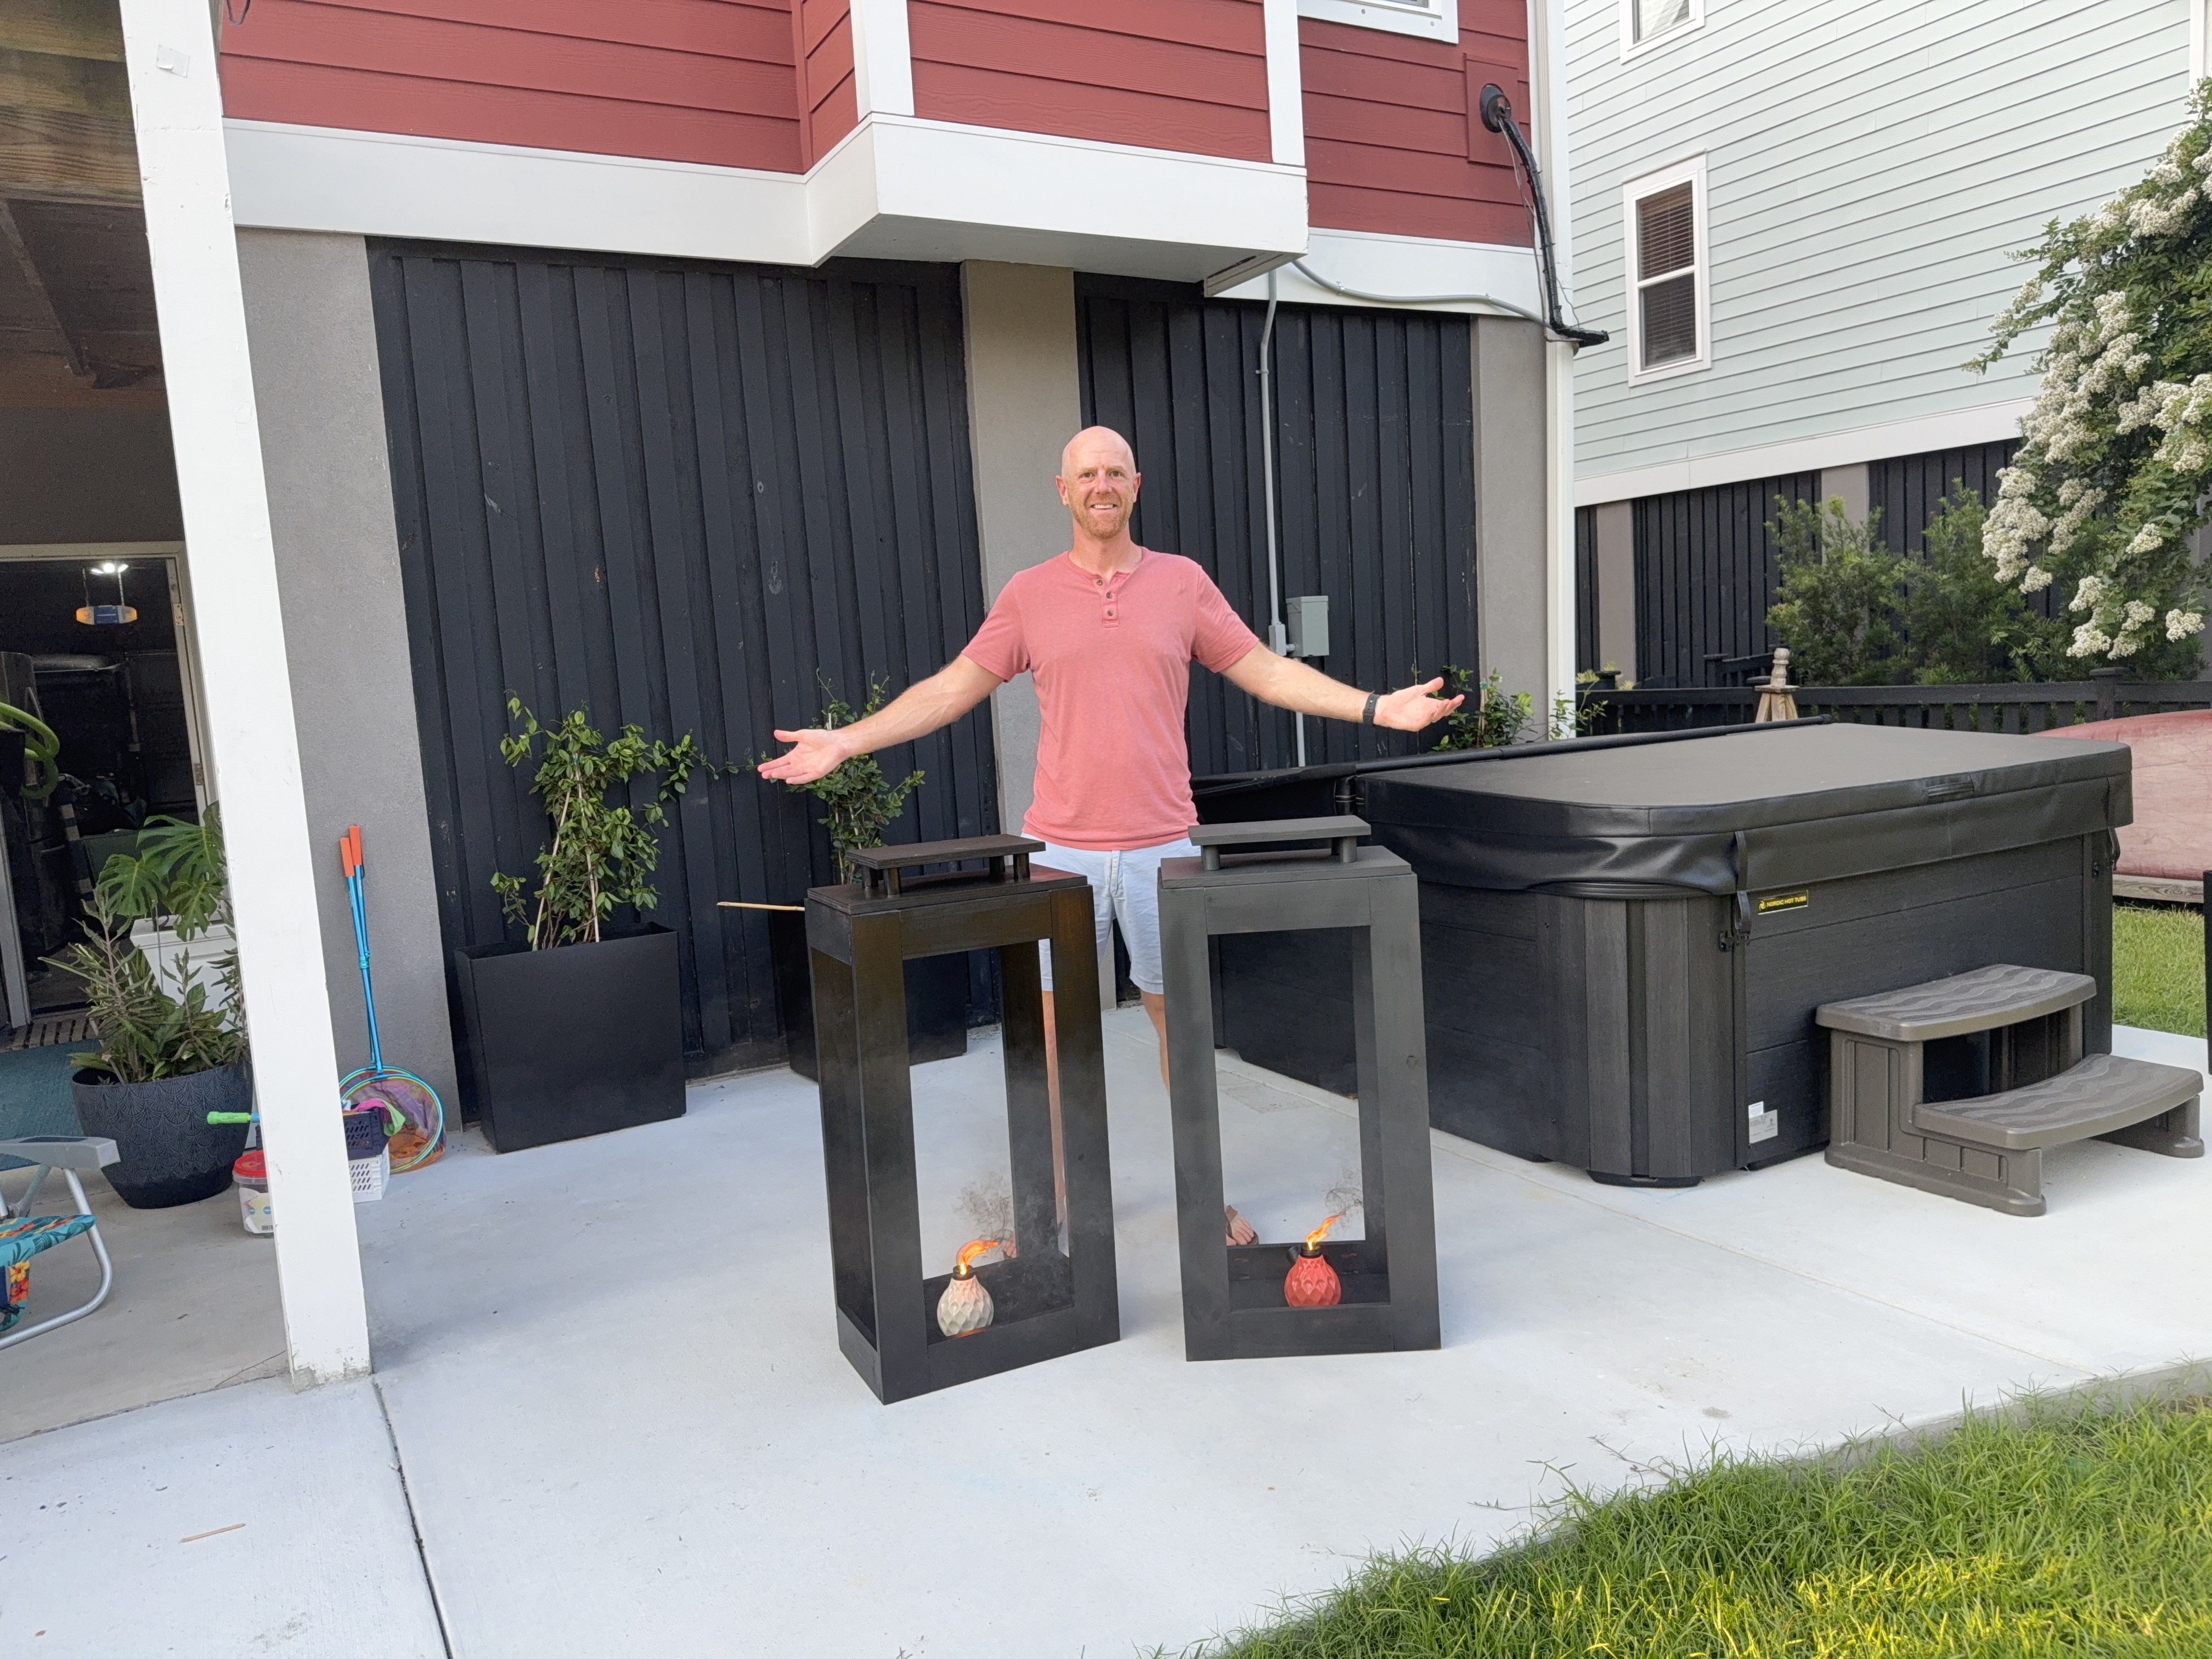
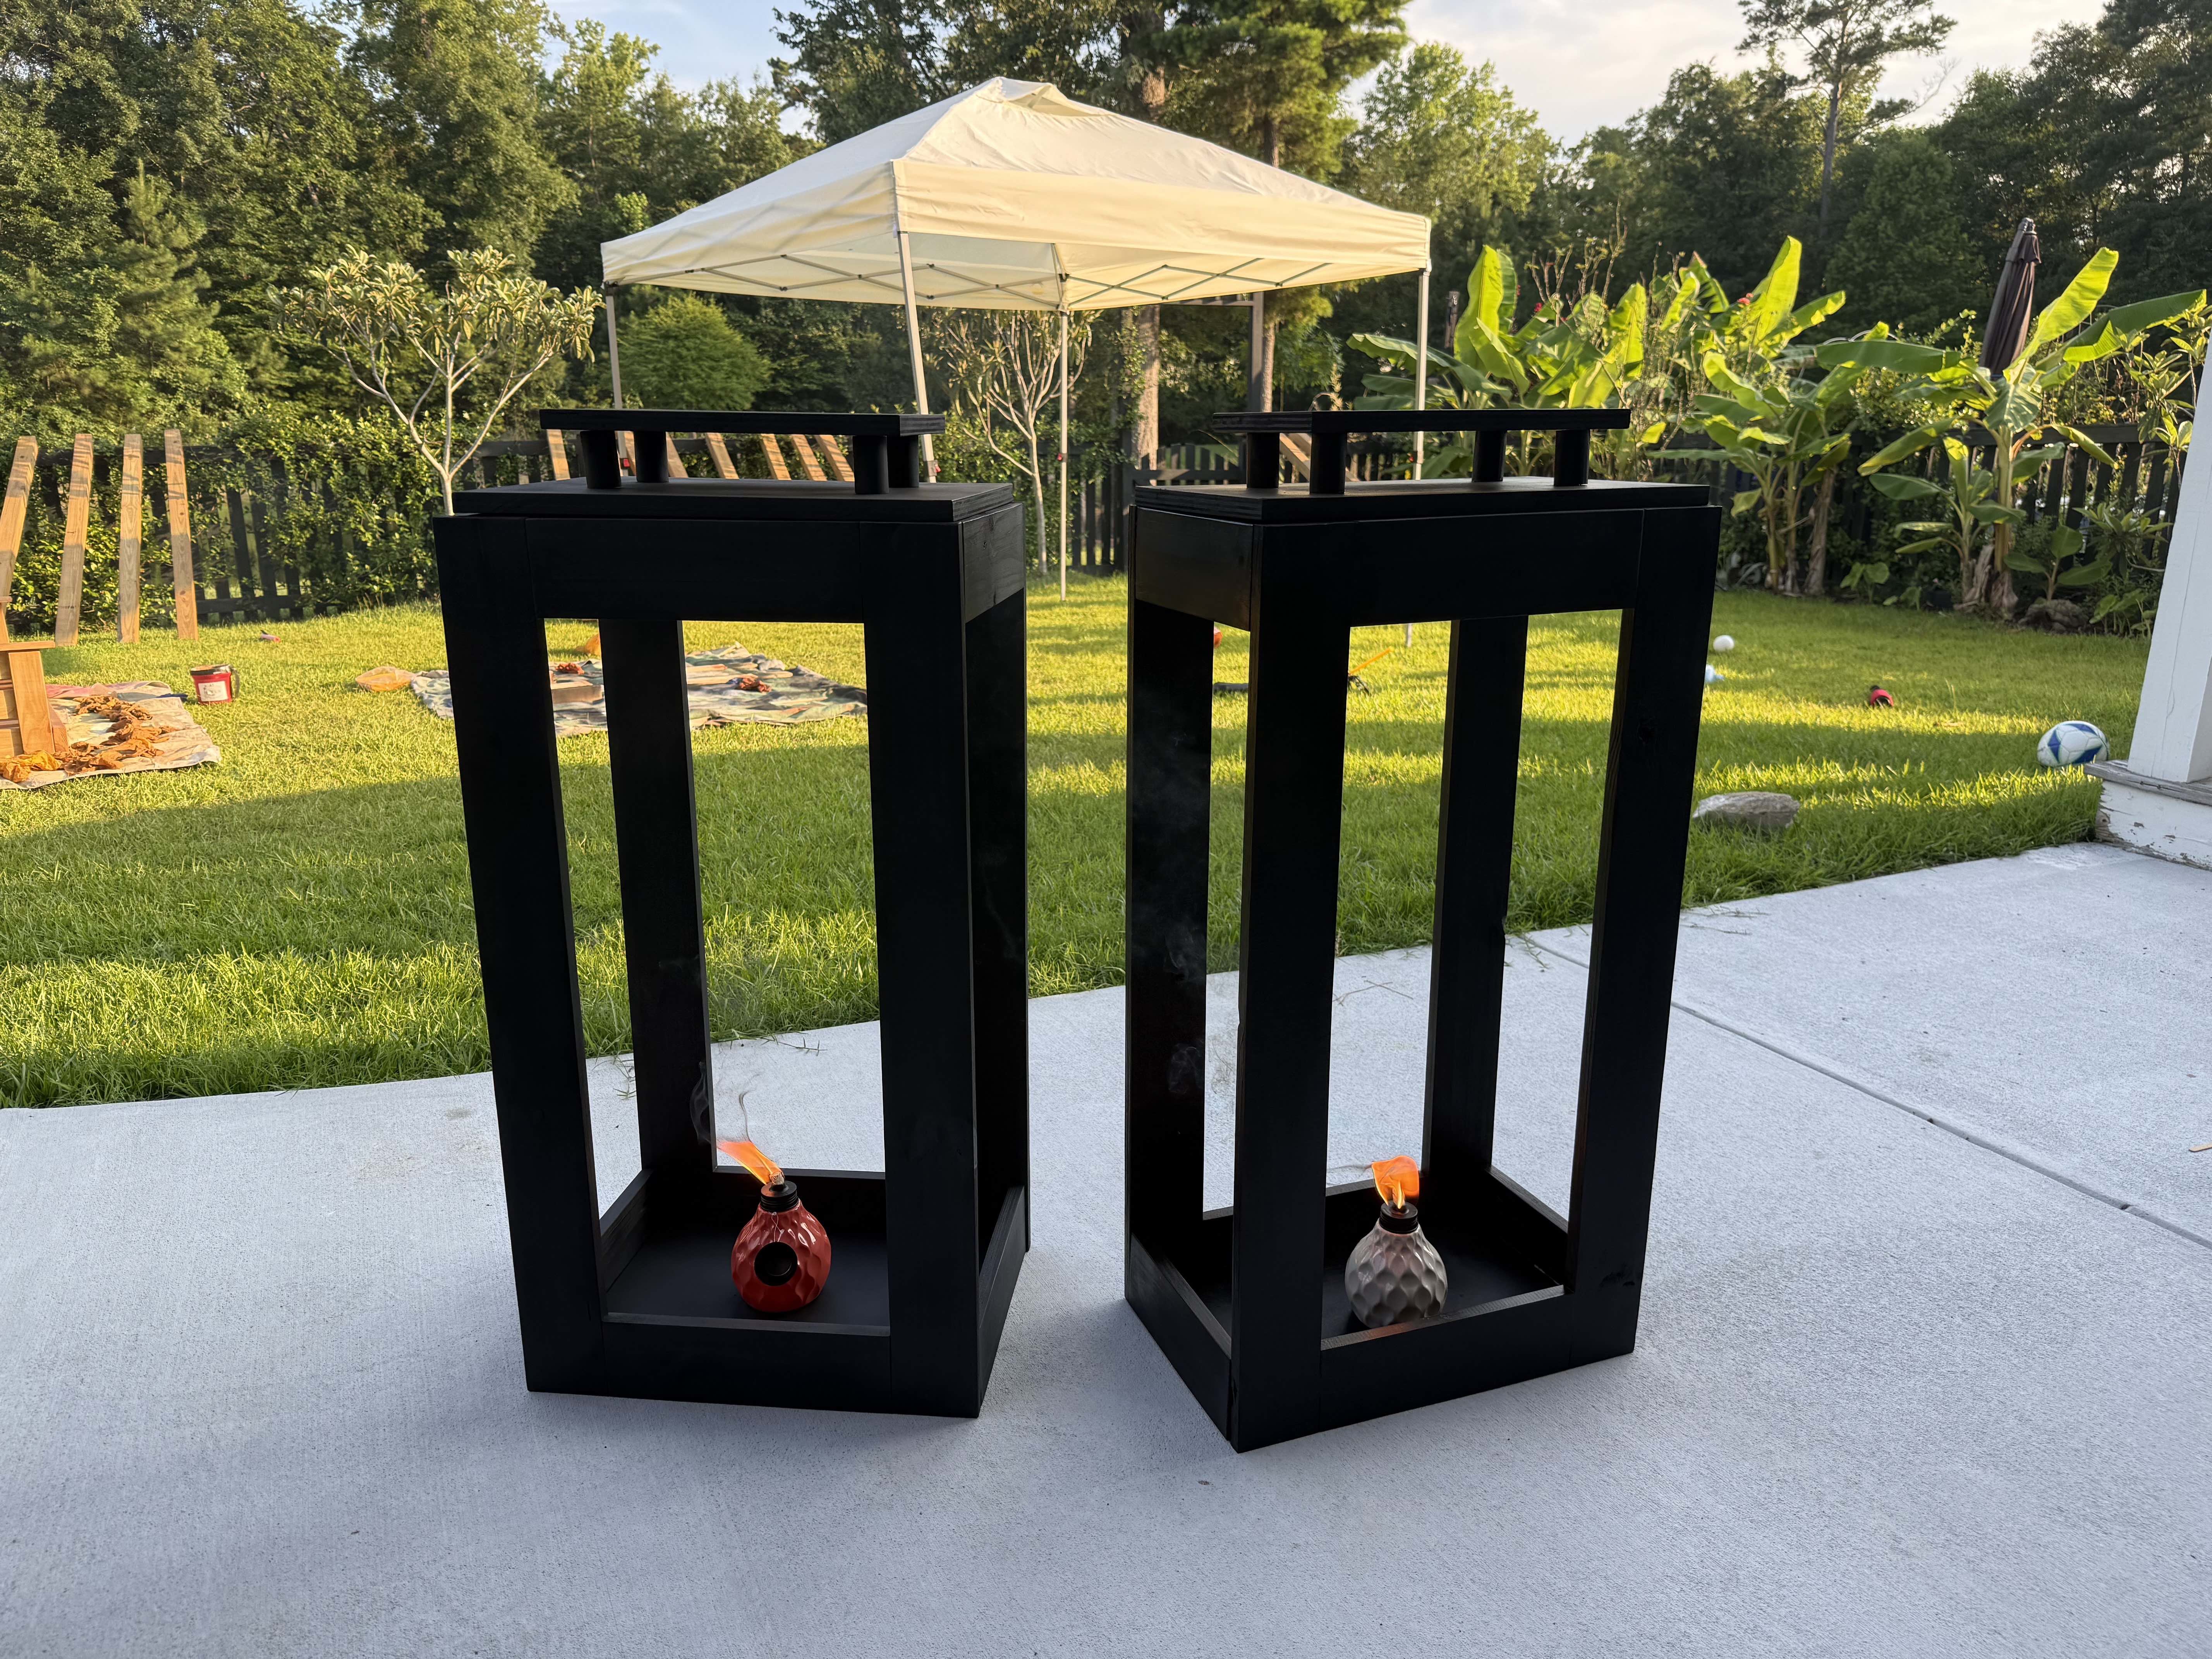


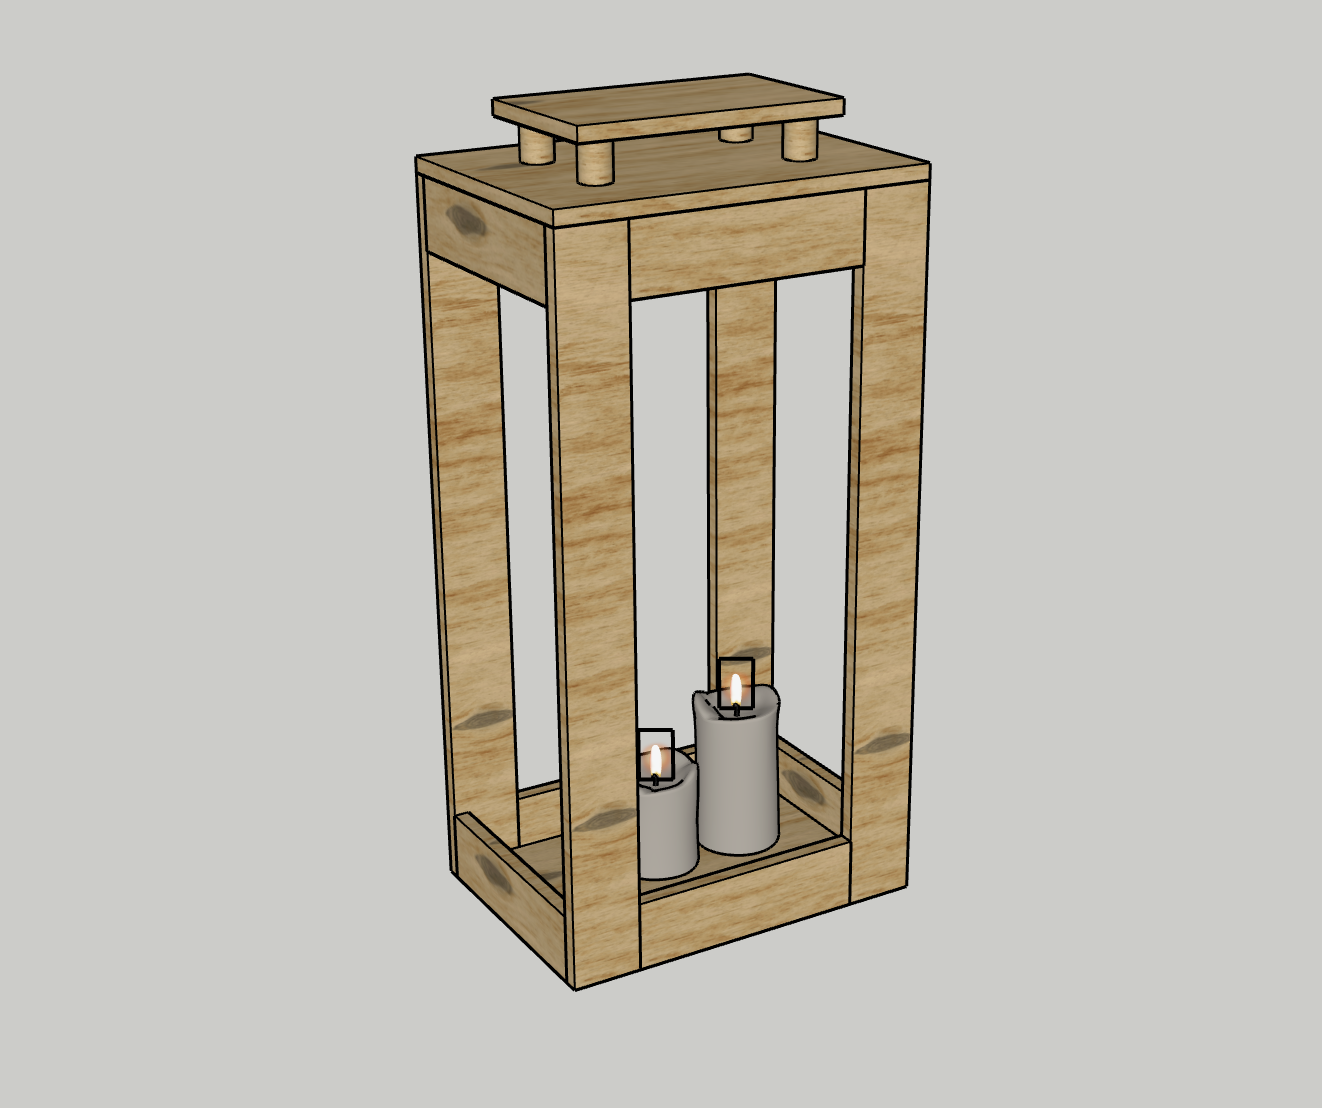
Want to light up the night in your backyard entertaining space? These oversized outdoor lanterns are a great way to add ambience to your evenings outside.
Tools
Kreg Tools


Materials
Wood Products
- 3 3/4" x 3 1/2" x 8' boards
- 1 3/4" plywood board
- 1 1" thick dowel , 10" long
Hardware & Supplies
- 32 1 1/4" Kreg pocket hole screws
- 1 Wood Glue
- 8 1/4" Kreg dowels
- 1 Paint or stain
- 2 Battery powered light sources
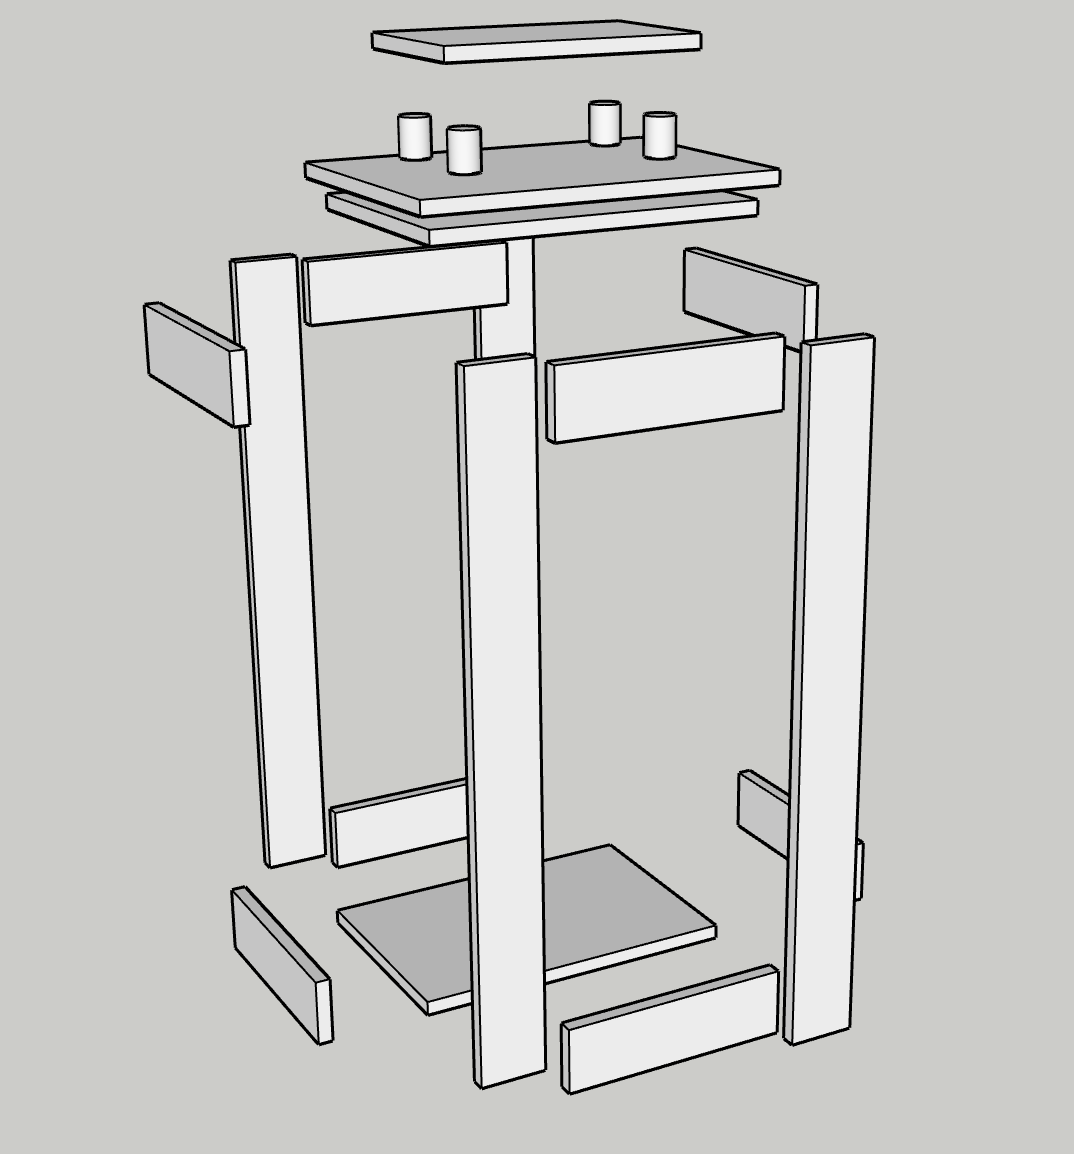
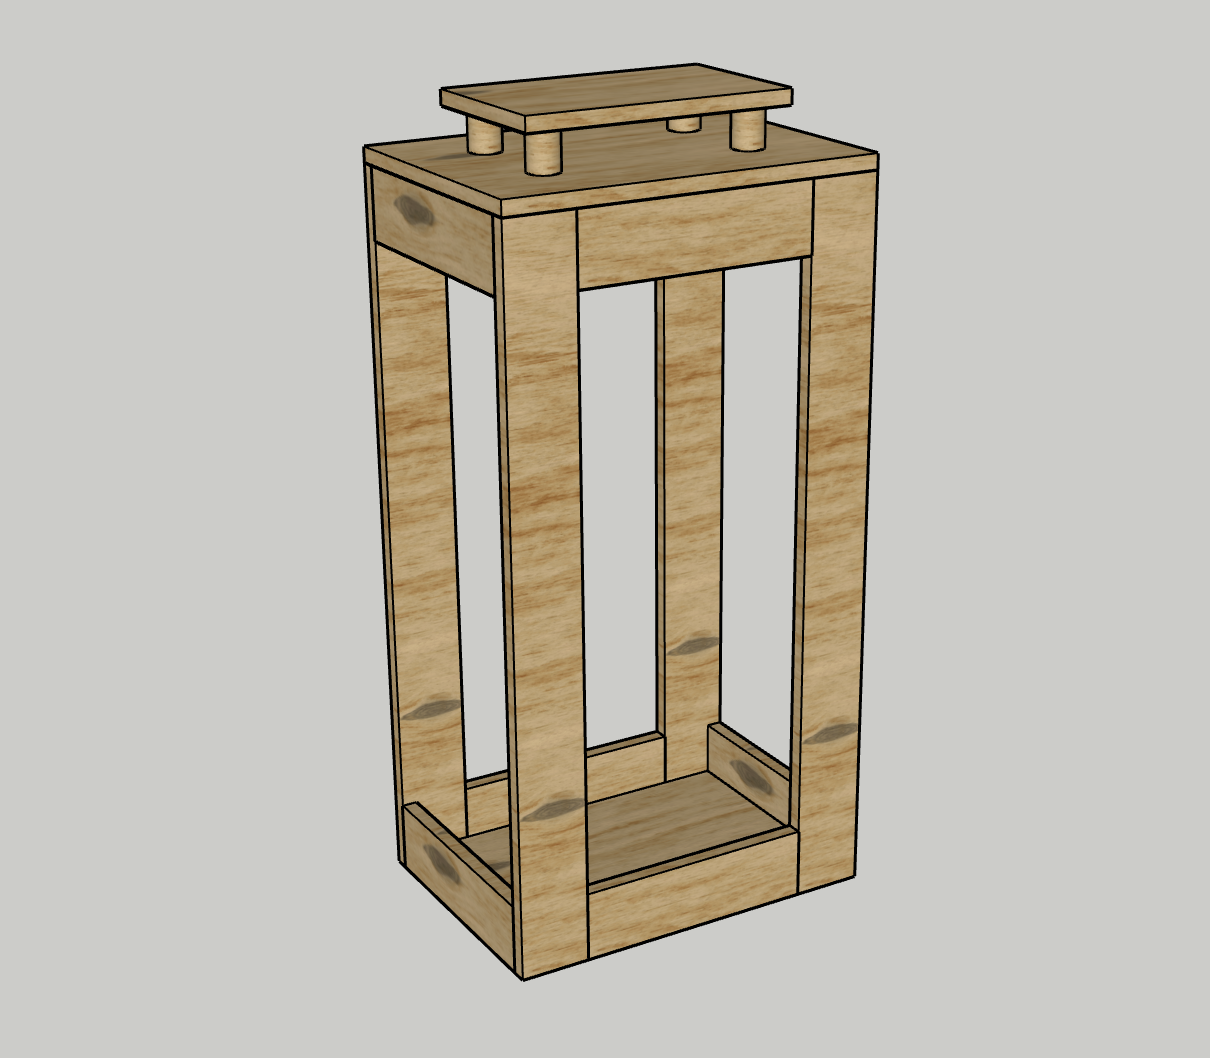
Cut List & Parts
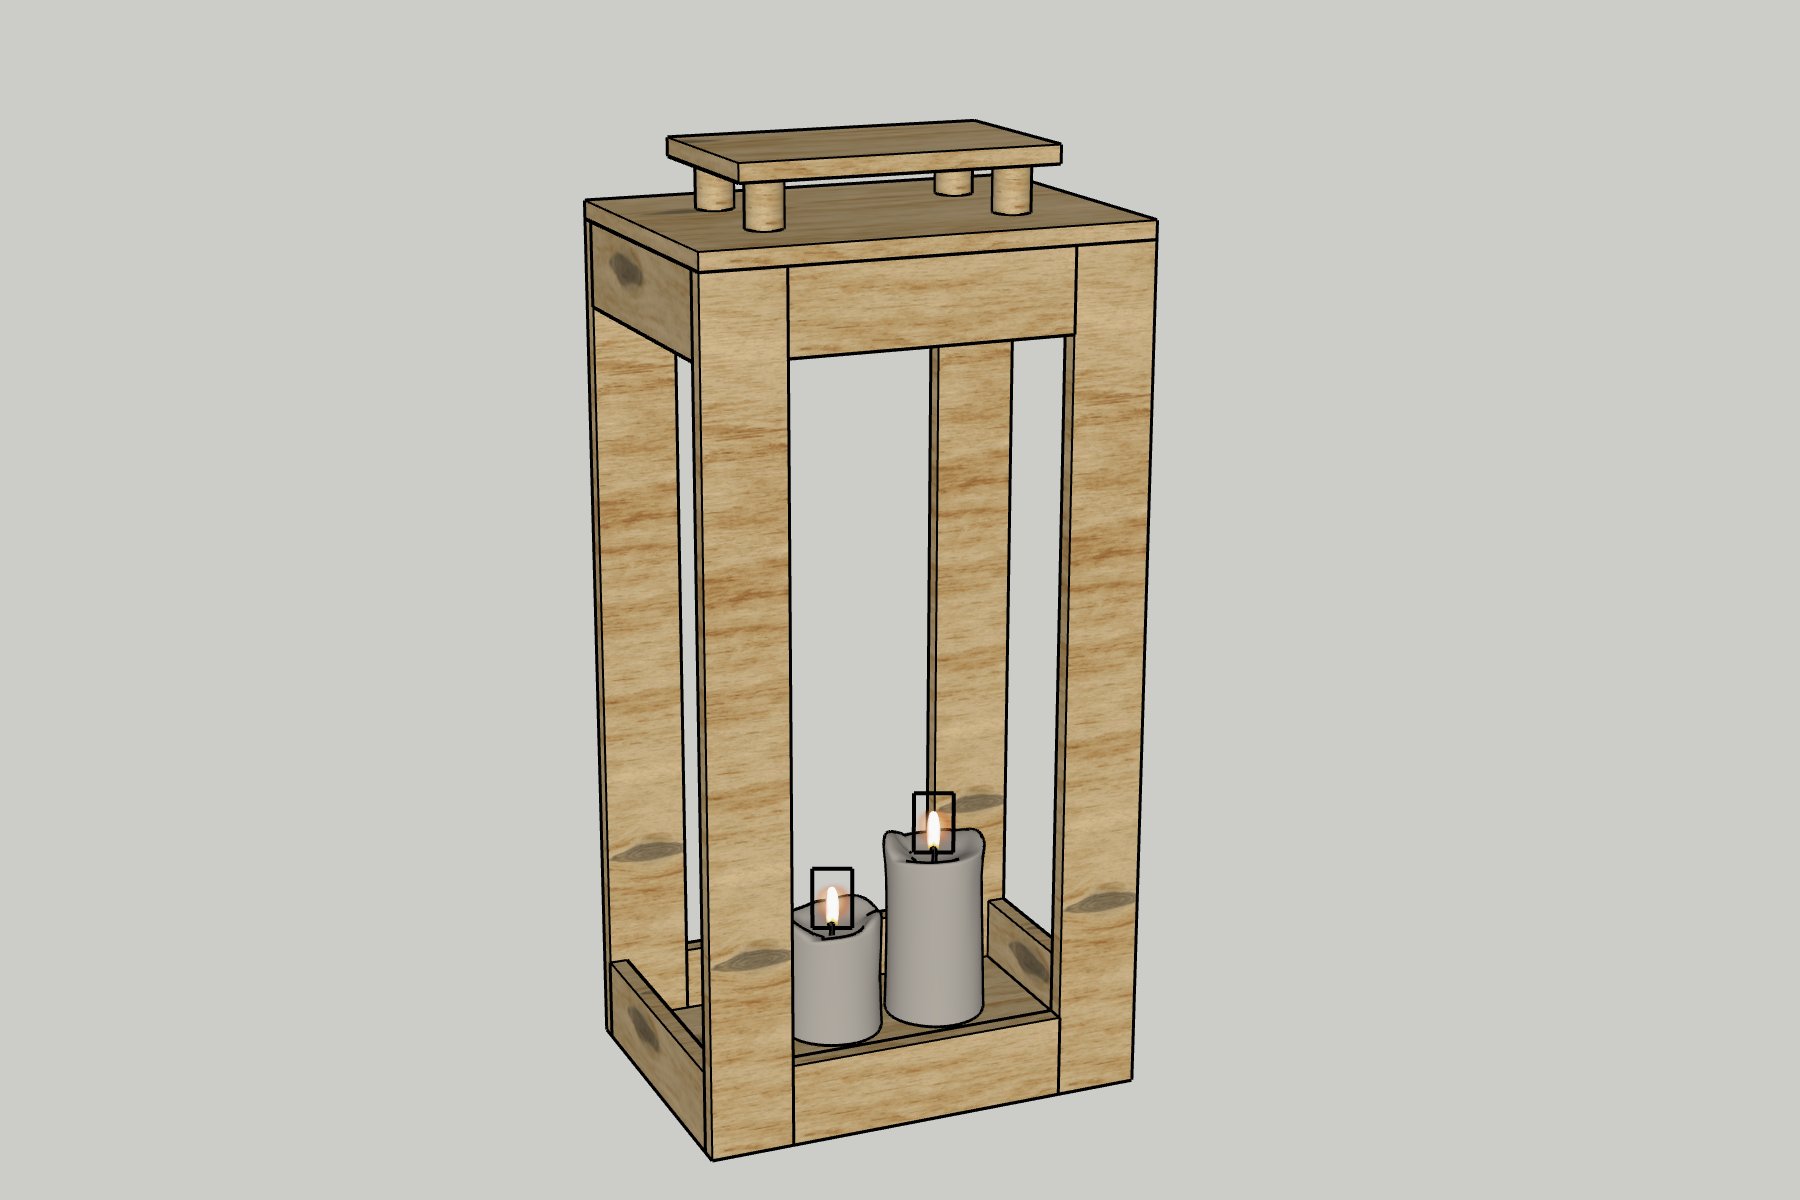
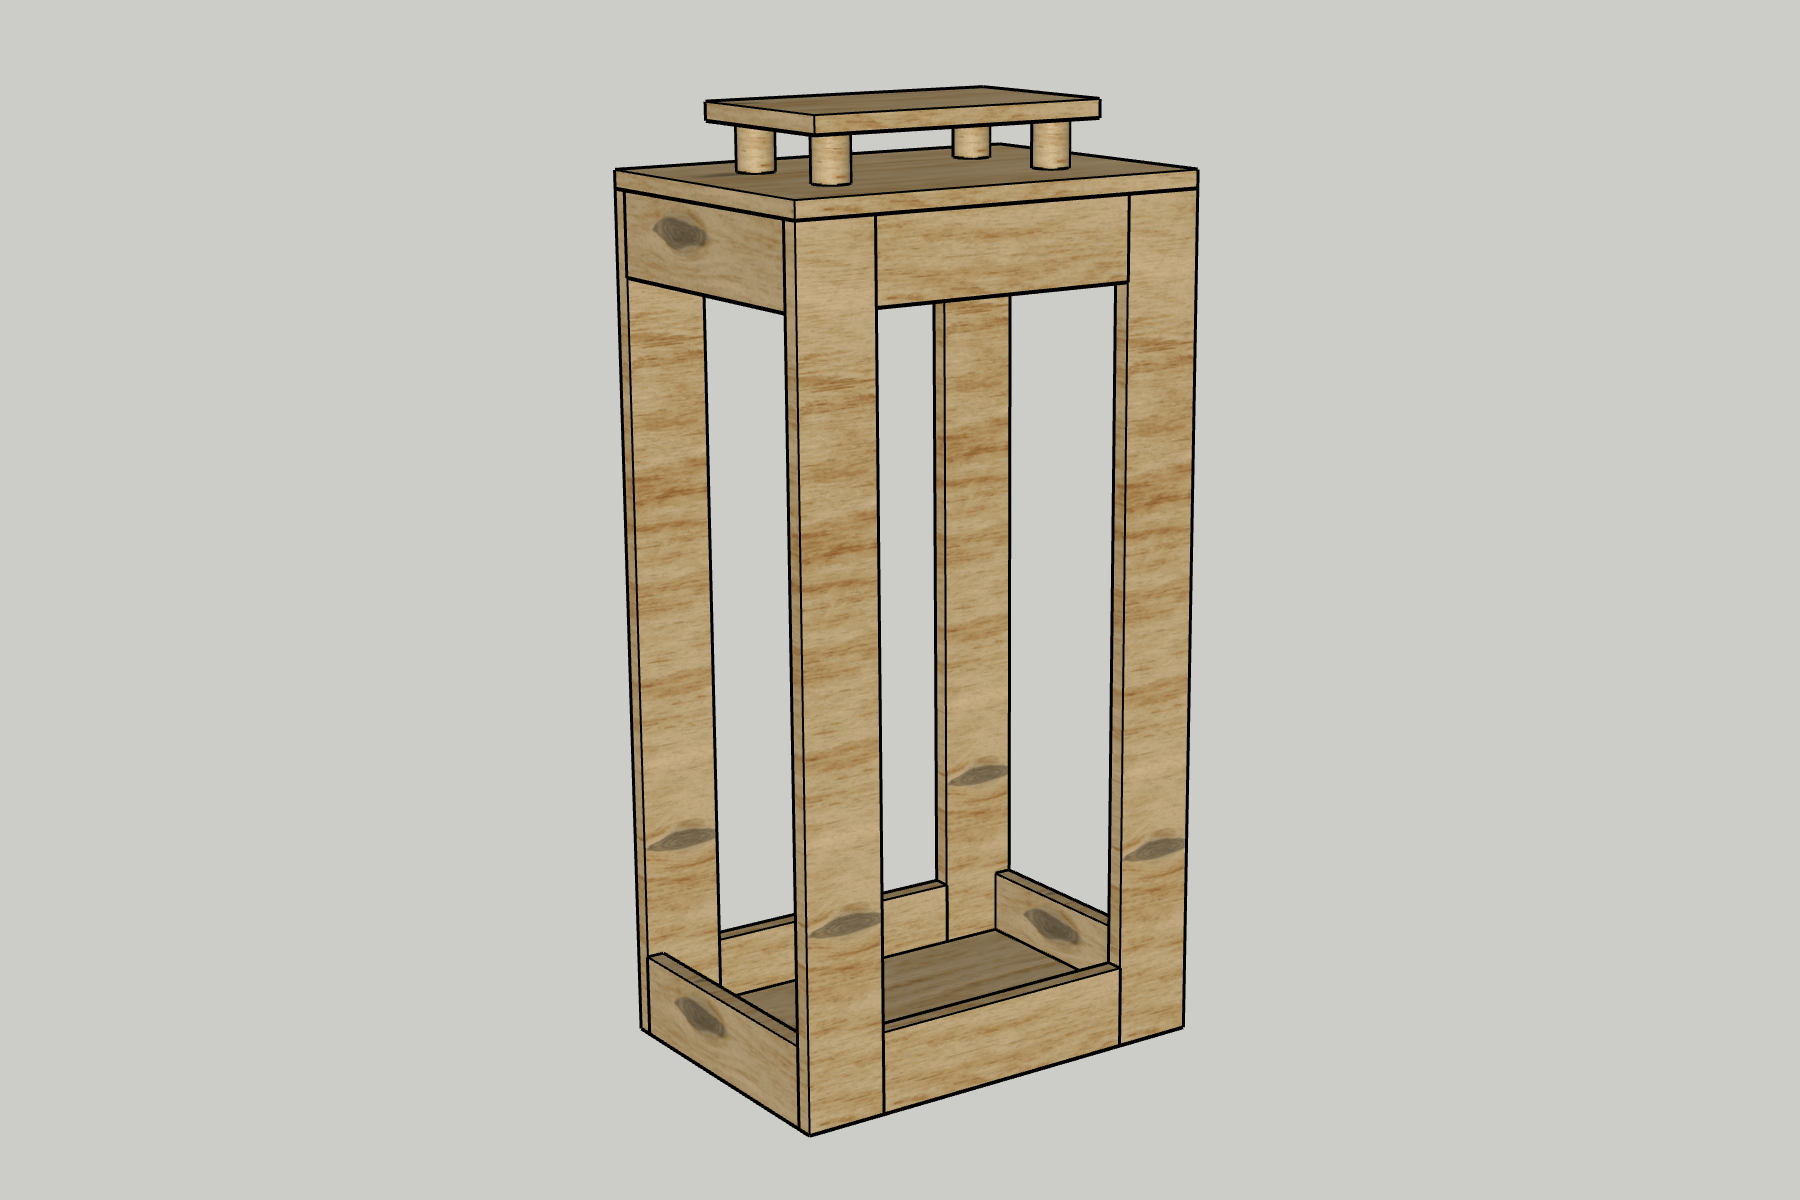
- 4 Posts , 3/4" x 3 1/2" x 36"
- 4 Top/Bottom , 3/4" x 3 1/2" x 12"
- 4 Sides , 3/4" x 3 1/2" x 12"
- 1 Bottom , 3/4" x 17 1/2" x 12"
- 1 Lid , 3/4" x 19" x 13 1/2"
- 1 Lid Support , 3/4" x 16 1/2" x 11"
- 1 Top , 3/4" x 13 1/2" x 8"
- 4 Dowels , 1" x 2"
Directions
-
Build Face Frames
- Drill two pocket holes in each end of the Top/Bottom pieces.
- Using wood glue and pocket hole screws, attach one Top/Bottom Piece between two Posts at the top and one at the bottom.
- Repeat to create a second frame.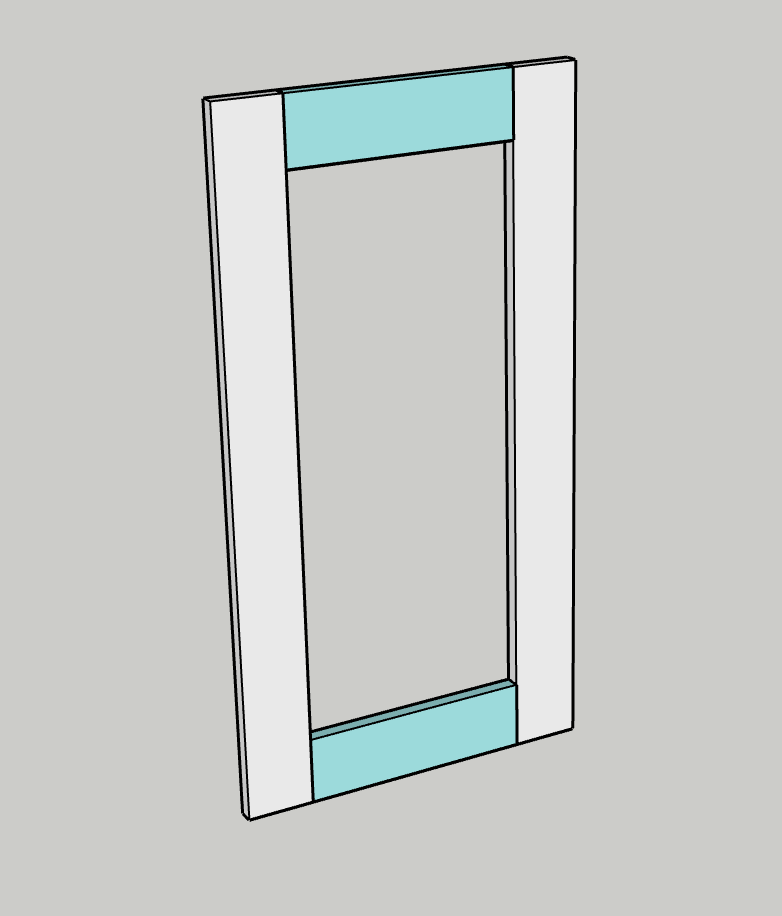
-
Attach Sides
- Drill two pocket holes in each end of the Side pieces.
- Flip one face frame on its front.
- Using wood glue and pocket hole screws, attach one Side piece to the four corners of each of the frame with the pocket holes all facing inward.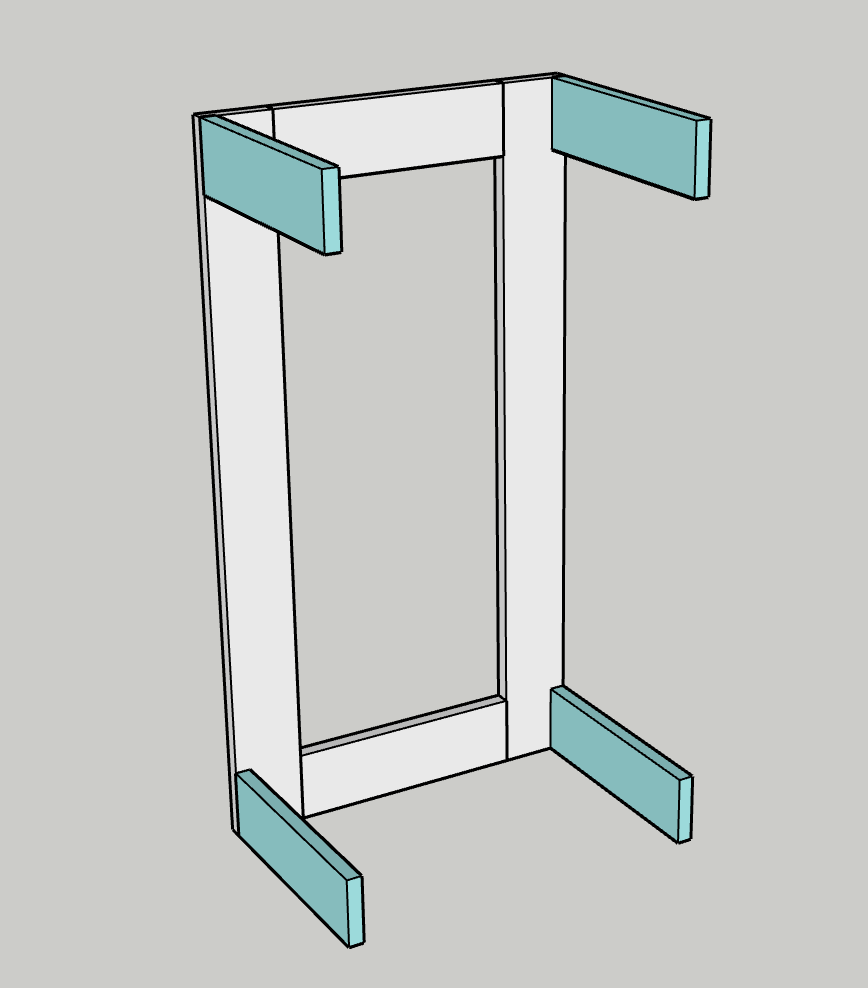
-
Attach Bottom
- Drill two pocket holes on each side of the Bottom, evenly spaced on the edges.
- Using wood glue and pocket hole screws, attach the Bottom between the two Sides and the Top/Bottom along the bottom edge of the frame.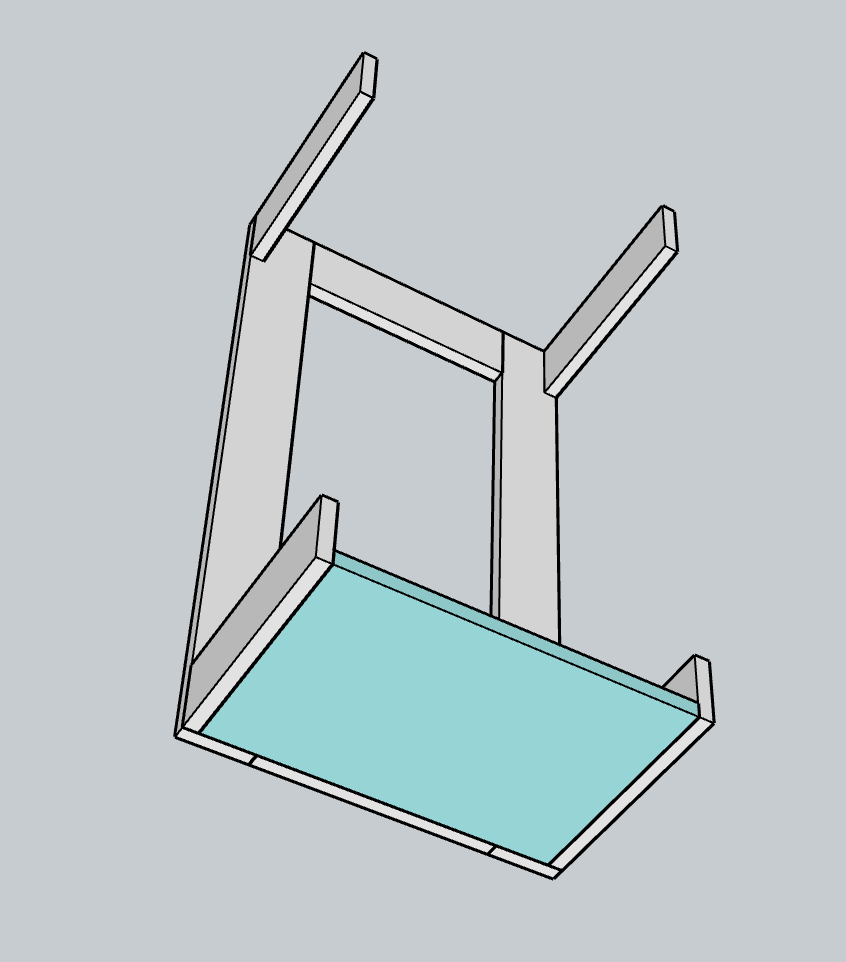
-
Attach Second Face
- Flip the second face frame over onto its front.
- Apply wood glue to the exposed ends of the Sides and edge of the Bottom and then flip it over onto the other face frame.
- Use pocket hole screws to attach the body together.
-
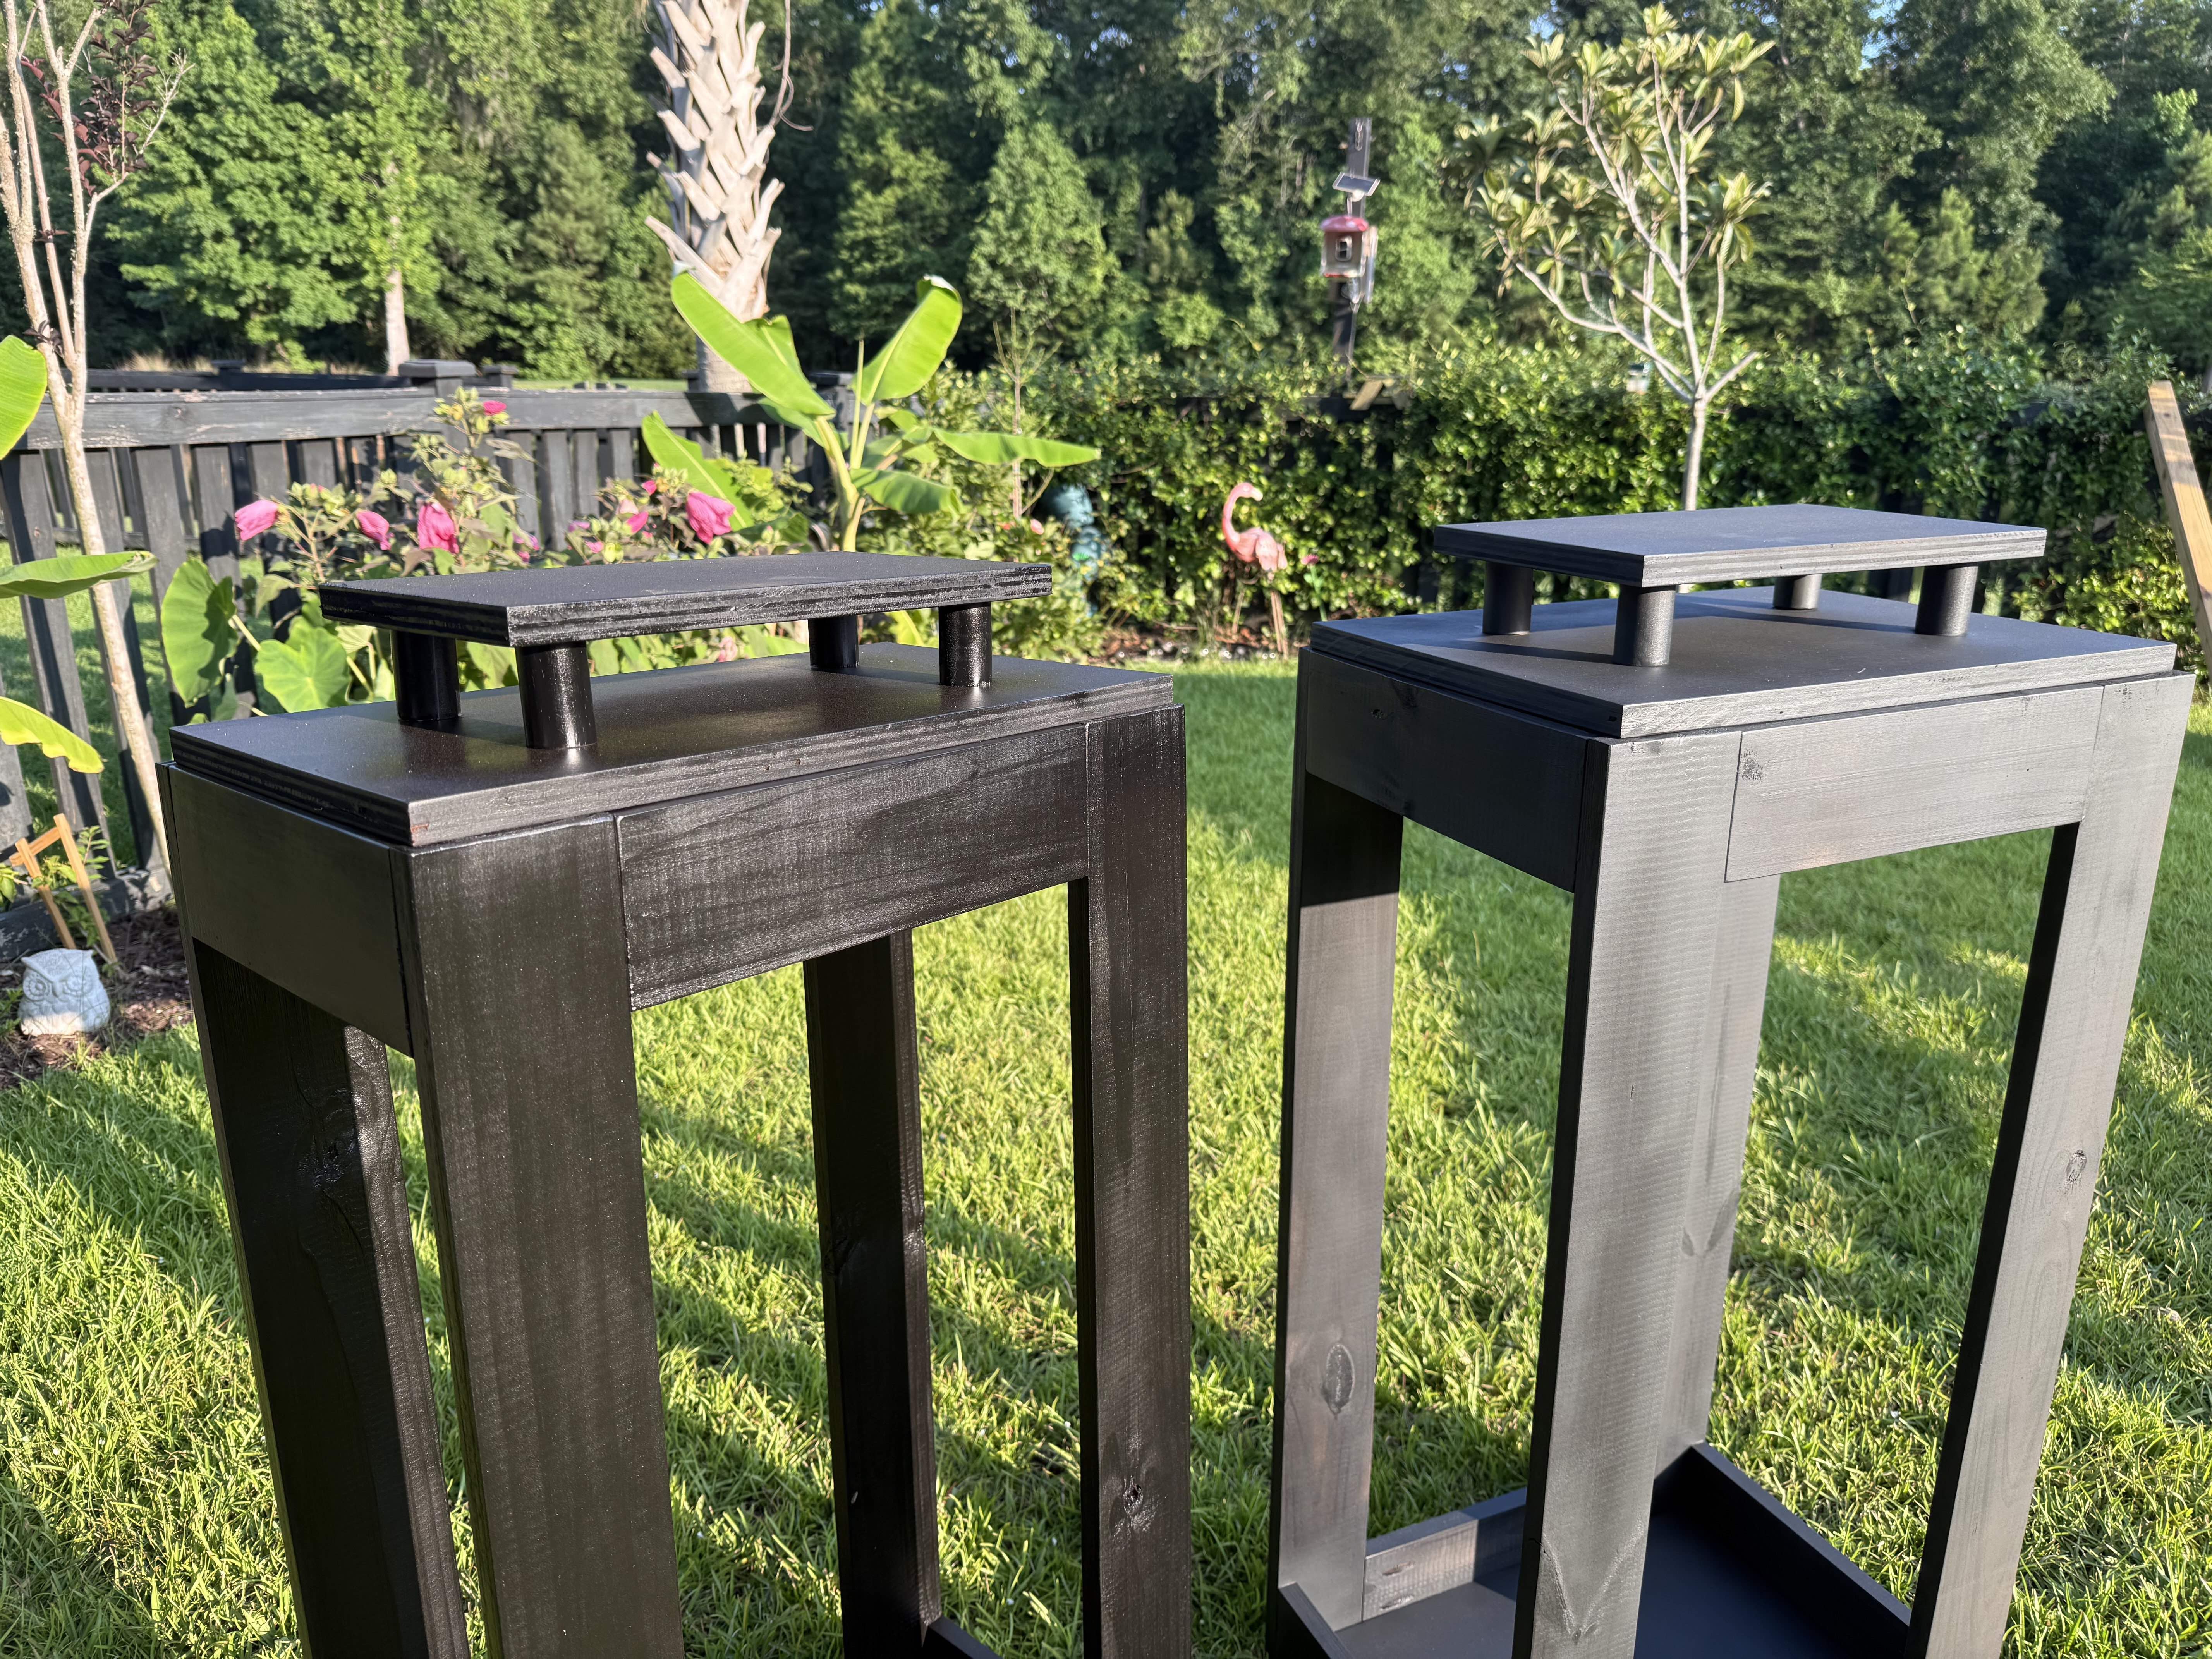
Start Lid
- Using wood glue and a couple of nails (or not if you just want to clamp), attach the Lid Support to the underside of the Lid.
- It should be about 1 1/4" from each edge of the Lid.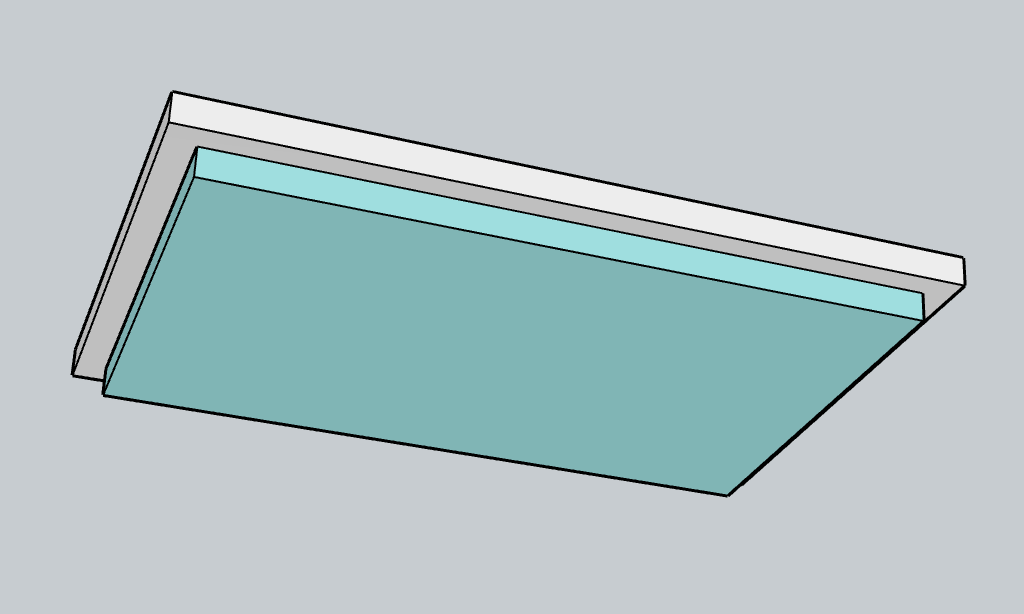
-
Attach Dowels to Top
- Using wood glue and 1/4" dowels (nails), attach the Dowels to one side of the Top.
-- Drill a 1/4" hole on each end of the Dowels, then insert a 1/4" dowel inside the hole.
-- Drill a corresponding hole on the Top 1 1/2" x 1 1/2" from each corner.
-- Insert the dowels.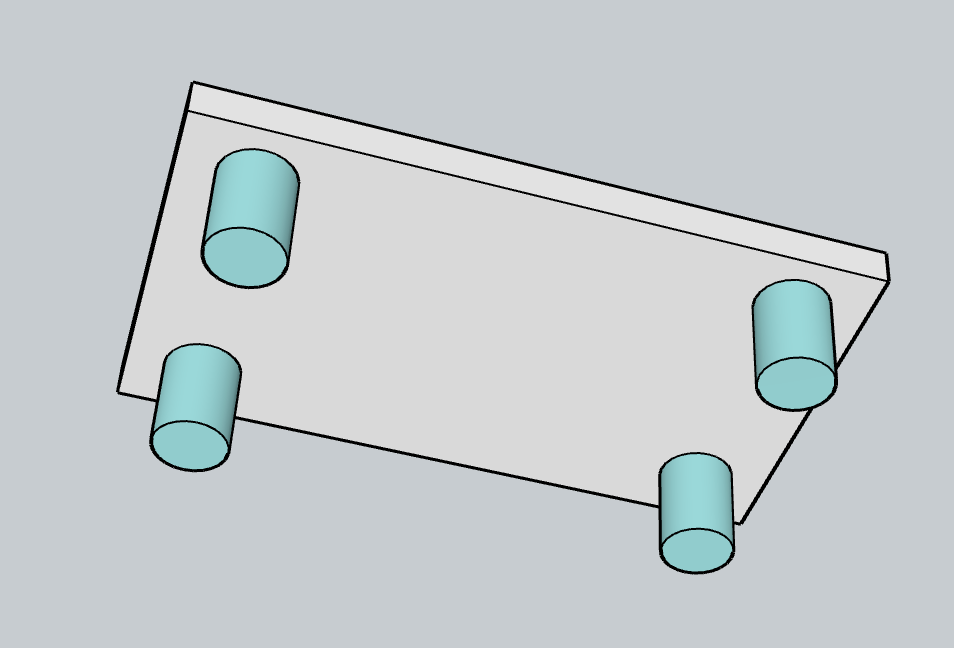
-
Finish Top
- Insert 1/4" dowels into the Dowel pieces and line up on top of the Lid. They should be about 3 1/4" from each side, but if yours are slightly off, just make sure they are centered and mark the dowels.
- Drill 1/4" holes in the marked spots and fill with wood glue.
- Insert the 1/4" dowels attached to the Dowels into the holes in the Lid.
-
Stain/Paint/Seal
Stain, paint or seal your lanterns with an outdoor product to keep it in good shape and to adjust the color to what you like.
-
Add Light
Use a battery powered light source or carefully controlled small flame to illuminate the lantern and enjoy the evening.
-
Enjoy!
Enjoy your handiwork and tag @CharlestonCraftedBuilds on Instagram with a picture!