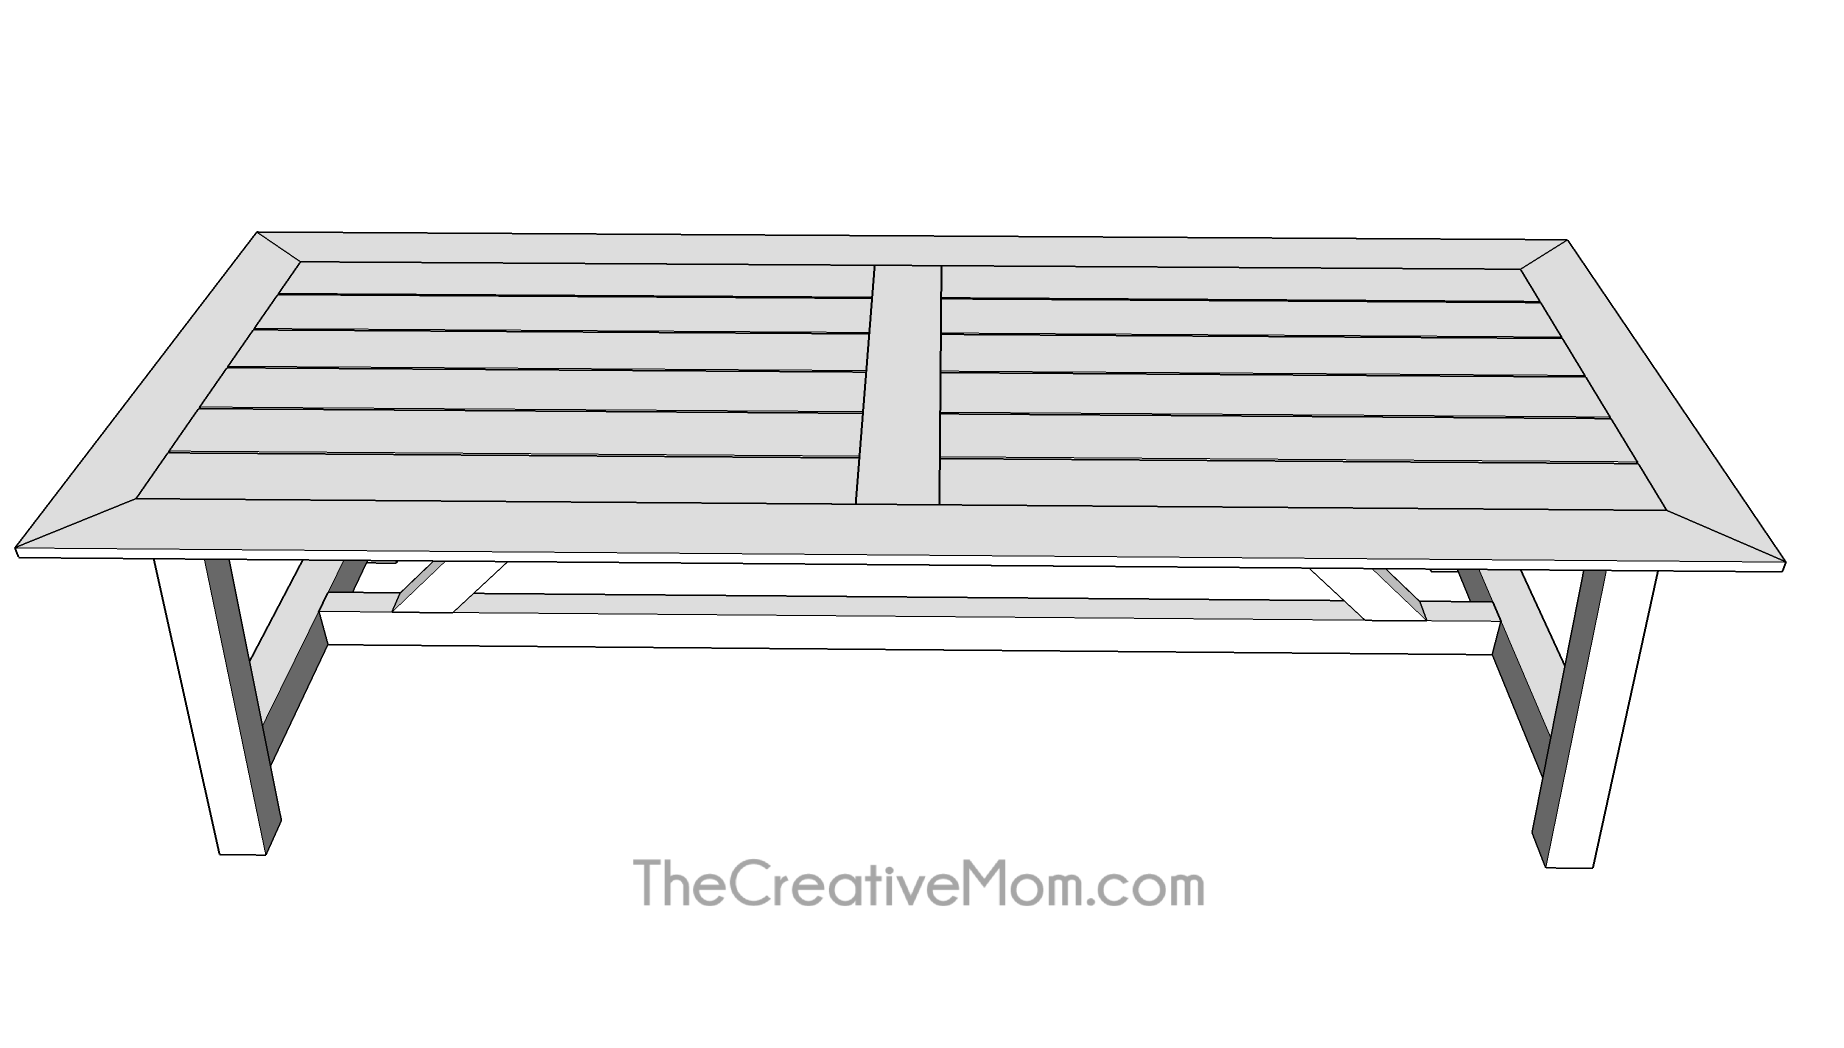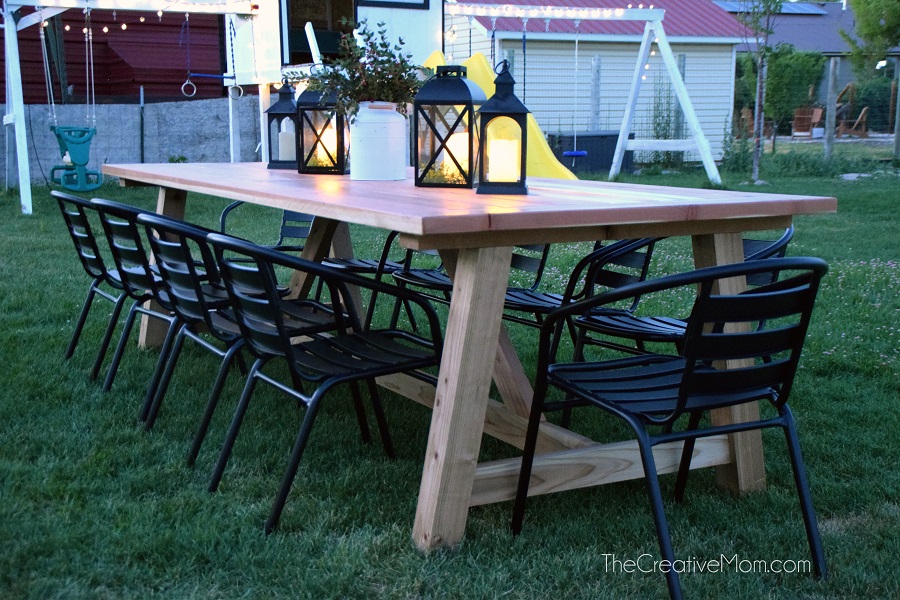
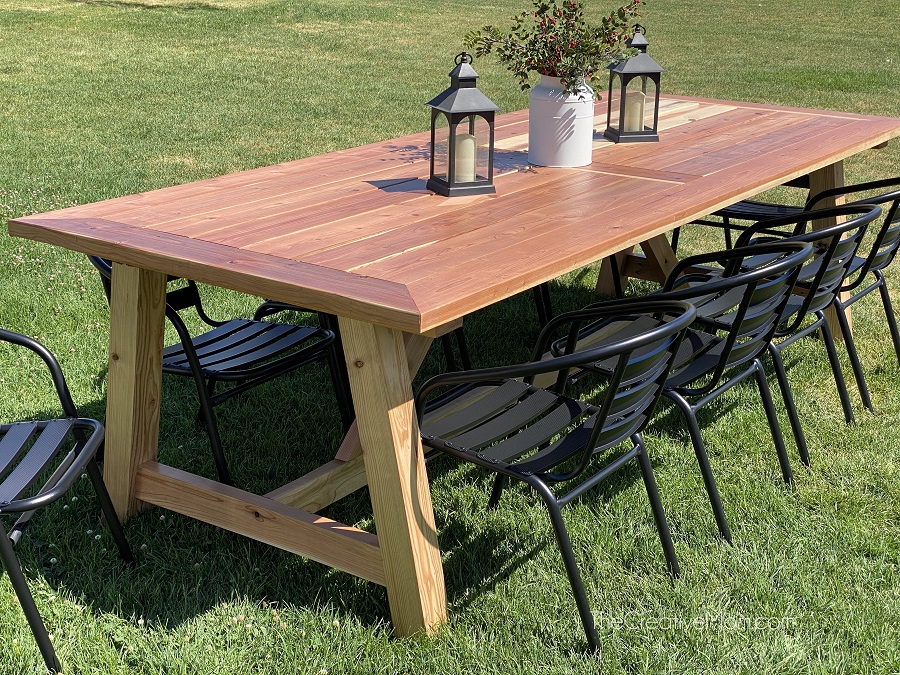
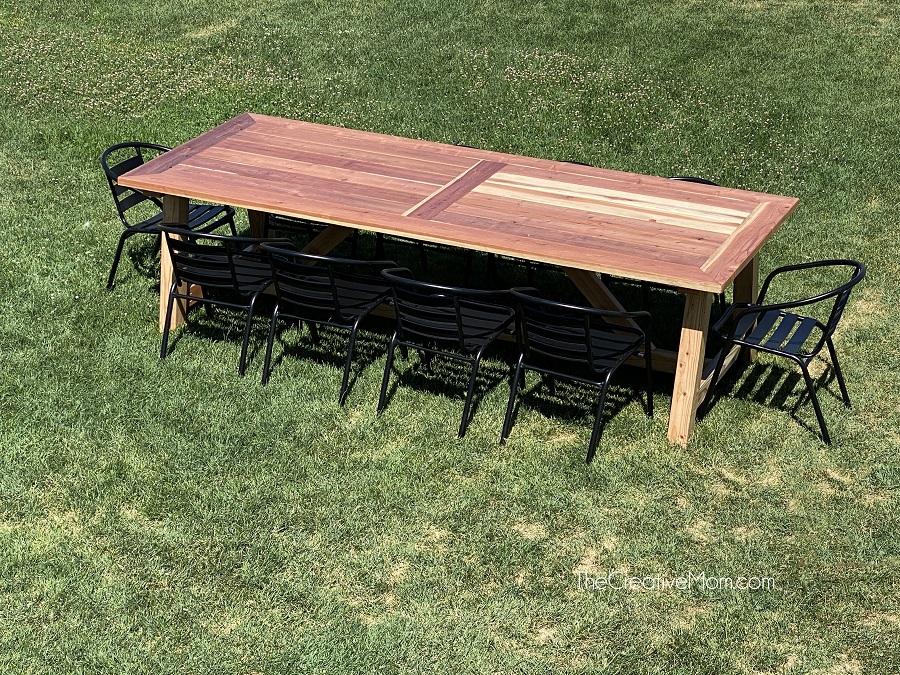
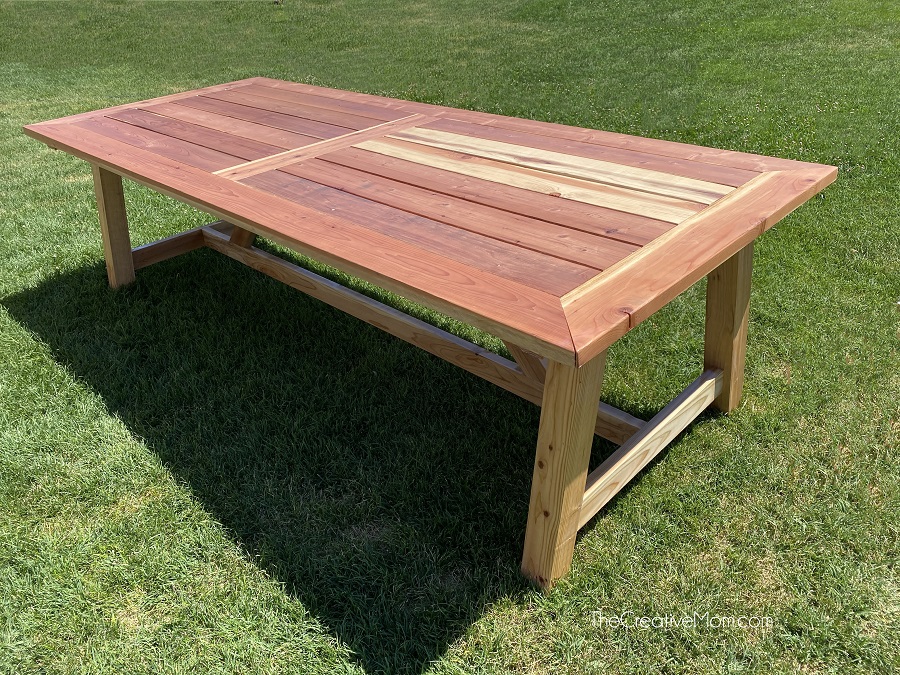
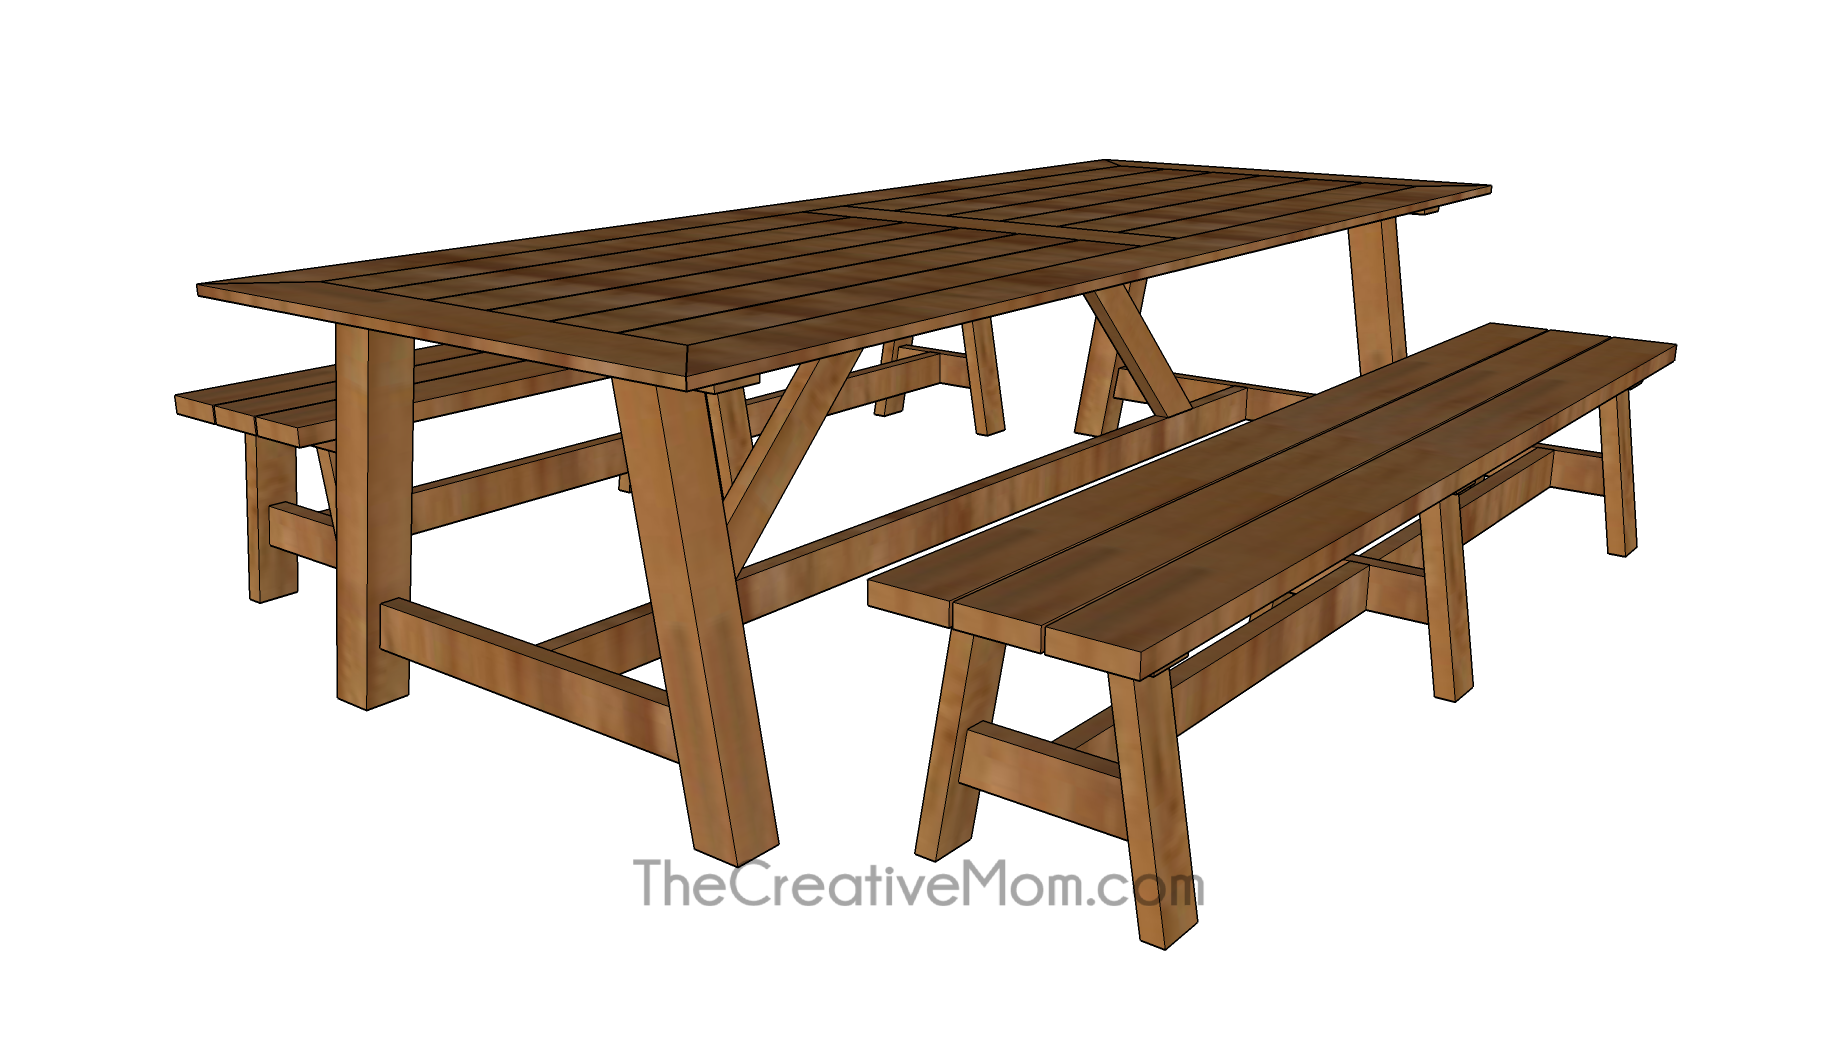
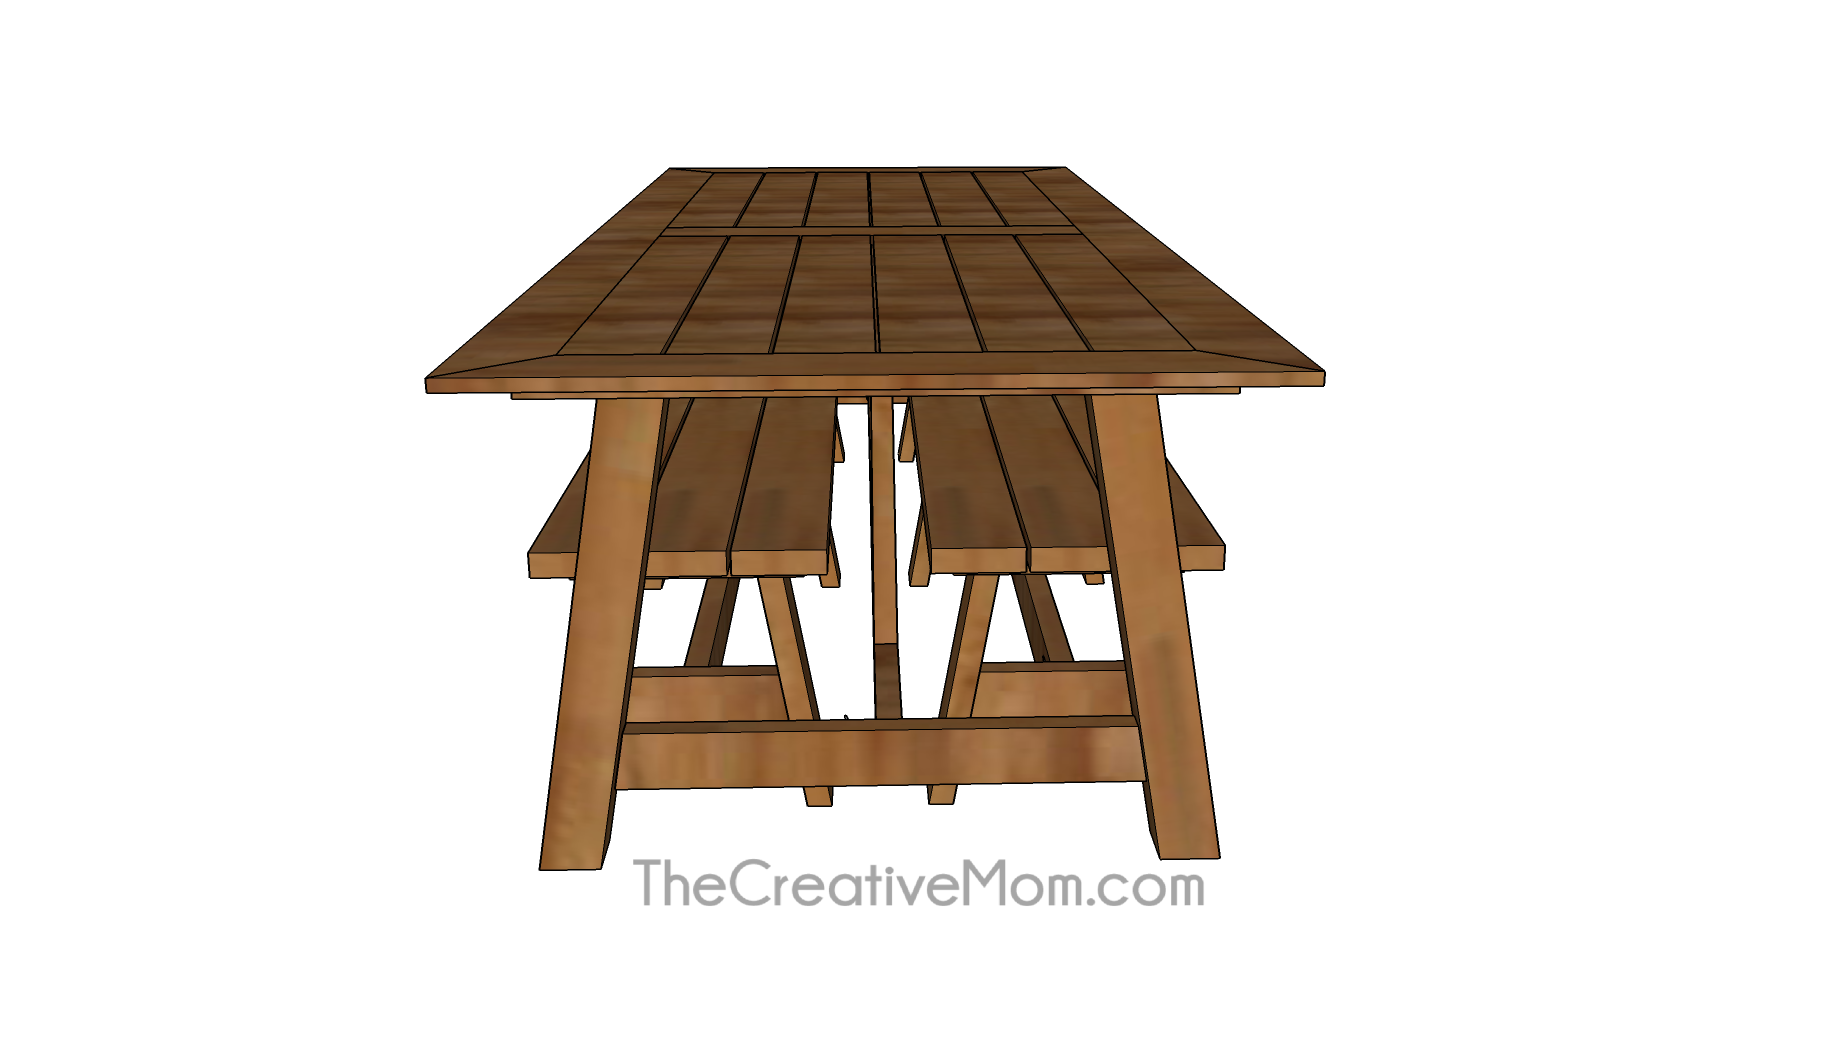
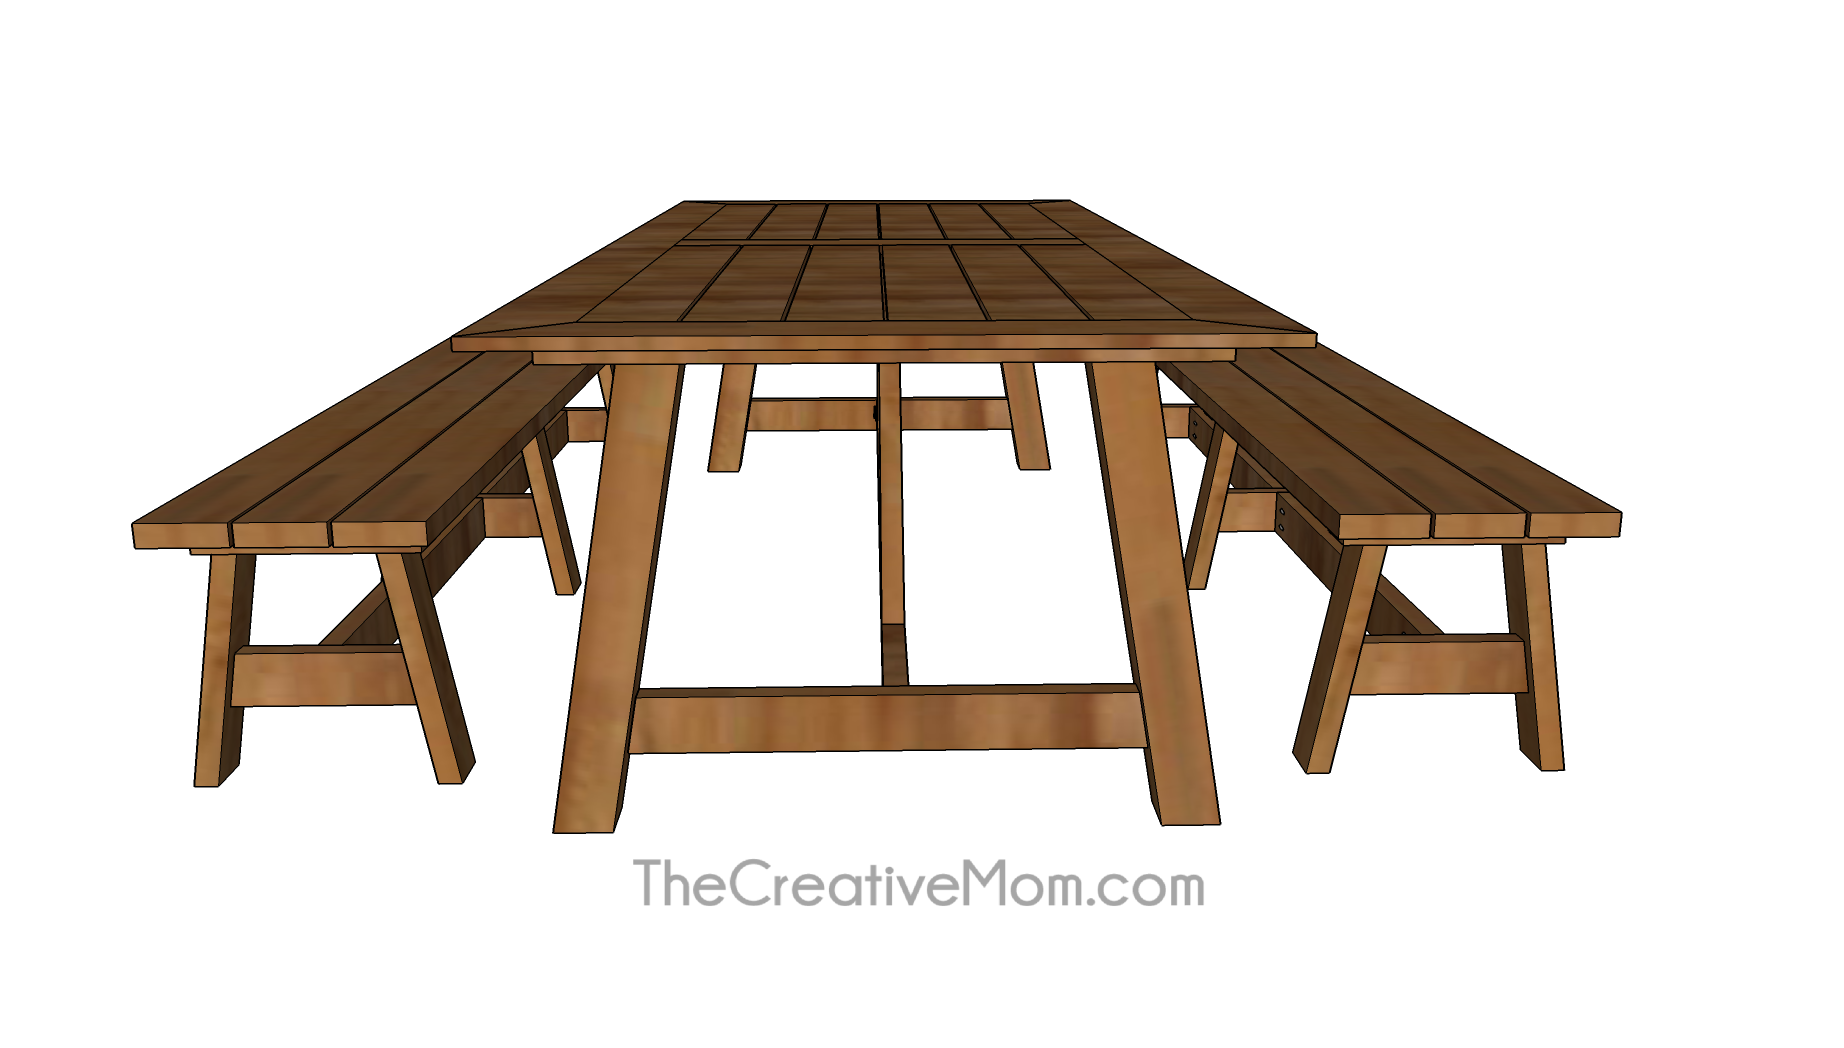
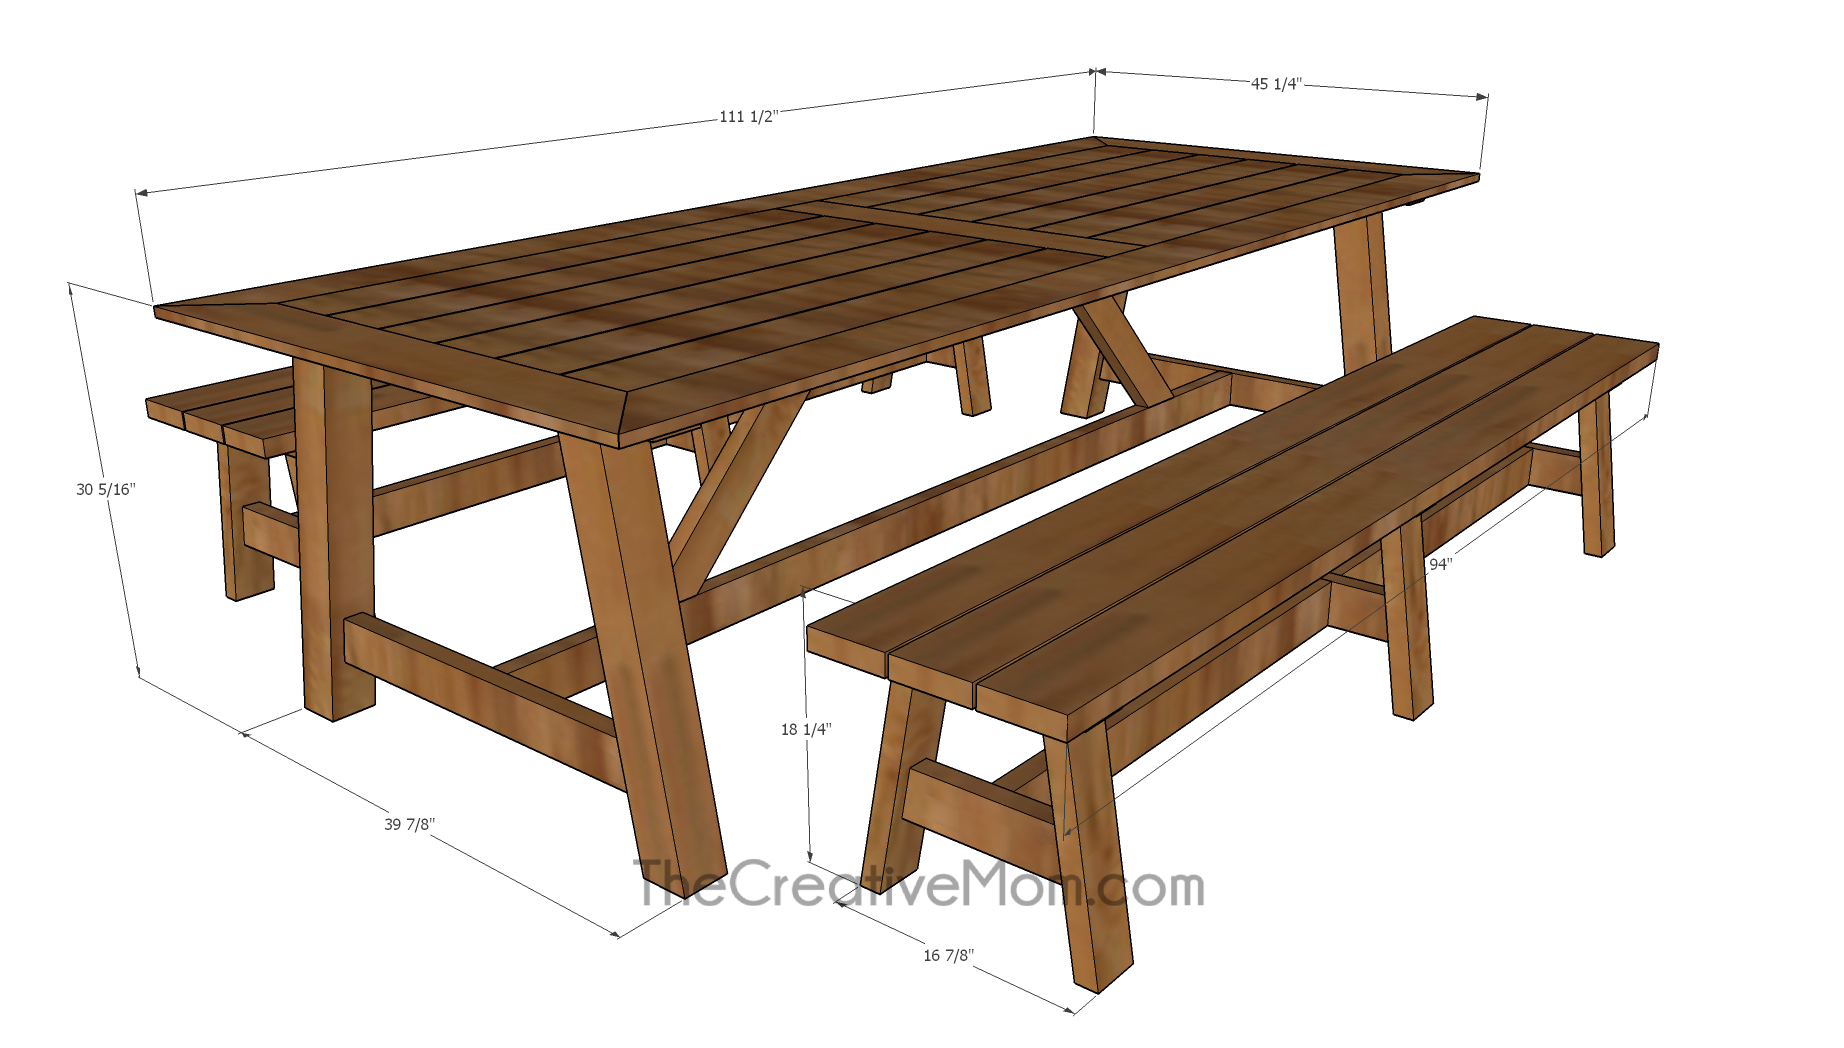


This farmhouse style outdoor table and bench are big! At 9 1/2 feet, you can fit about 8-10 people around this table, and it is STURDY! This is a table that is built to withstand the elements, and last for years to come. The build is pretty straight forward, using basic tools like a miter saw and Kreg pocket hole jig. Bonus bench plans are below in the extras tab!
Tools
Kreg Tools


Other Tools
-
Miter Saw

Materials
Wood Products
- 2 Boards , 2"x6" , 120"
- 8 Boards , 2"x6" , 96"
- 5 Boards , 2"x4" , 96"
- 2 Boards , 4"x4" , 96"
Hardware & Supplies
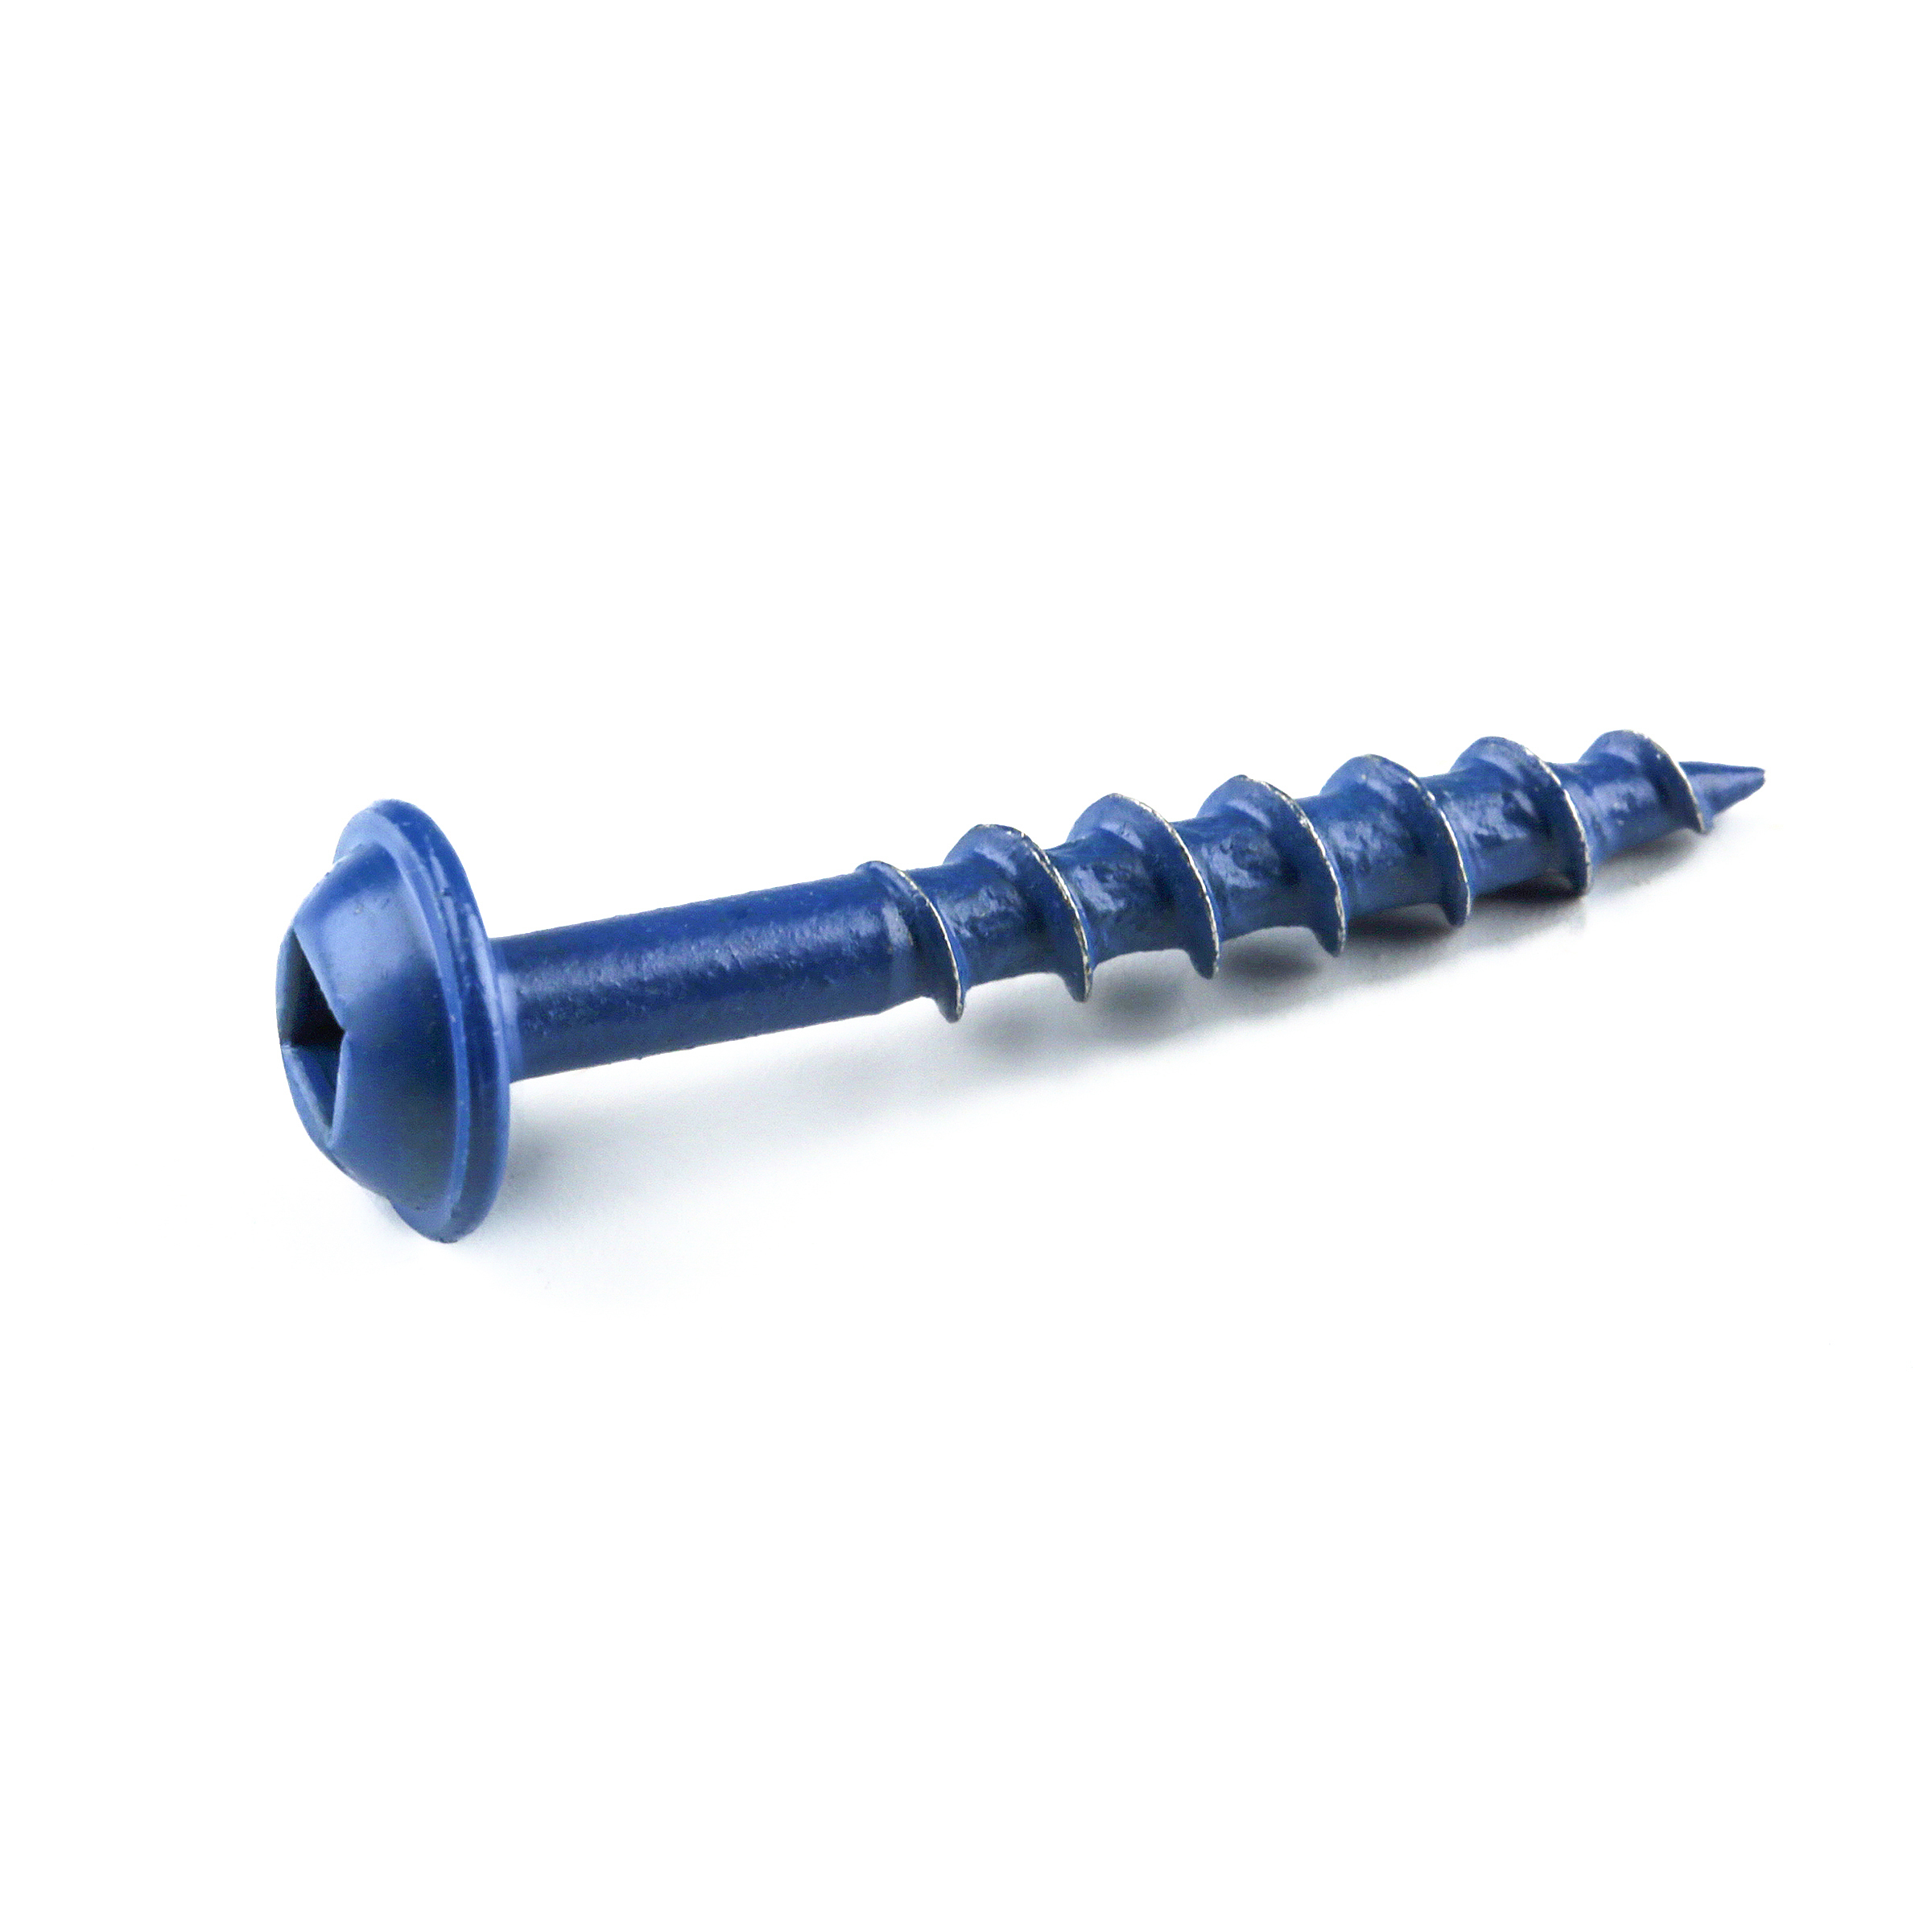
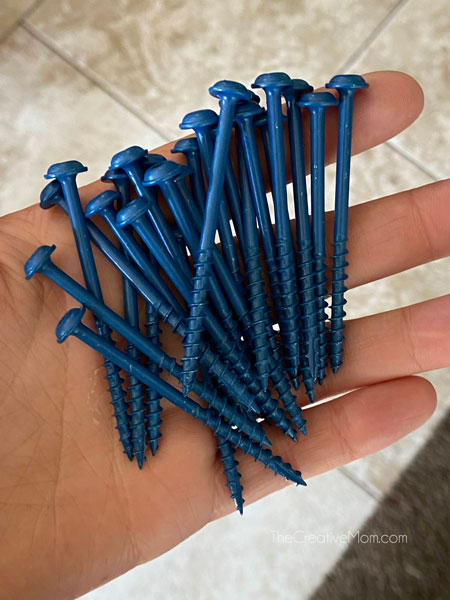
- 60 2 ½” outdoor pocket hole screws
- 20 2 ½” outdoor wood screws
- 1 Wood Glue
- 1 Sandpaper, stain or paint, outdoor polyurethane
- 1 Eye & Ear protection and other safety gear
- 1 Measuring tape
Directions
-
Choose your lumber
Choose your lumber. Some lumber is better outdoors than other lumber. Redwood and Cedar are more weather resistant than most other species of lumber. If the table will be outdoors, I suggest using Redwood boards. You will also want to make sure you are using hardware that is meant to withstand outdoor conditions. I recommend using Kreg Blue Kote screws.
-
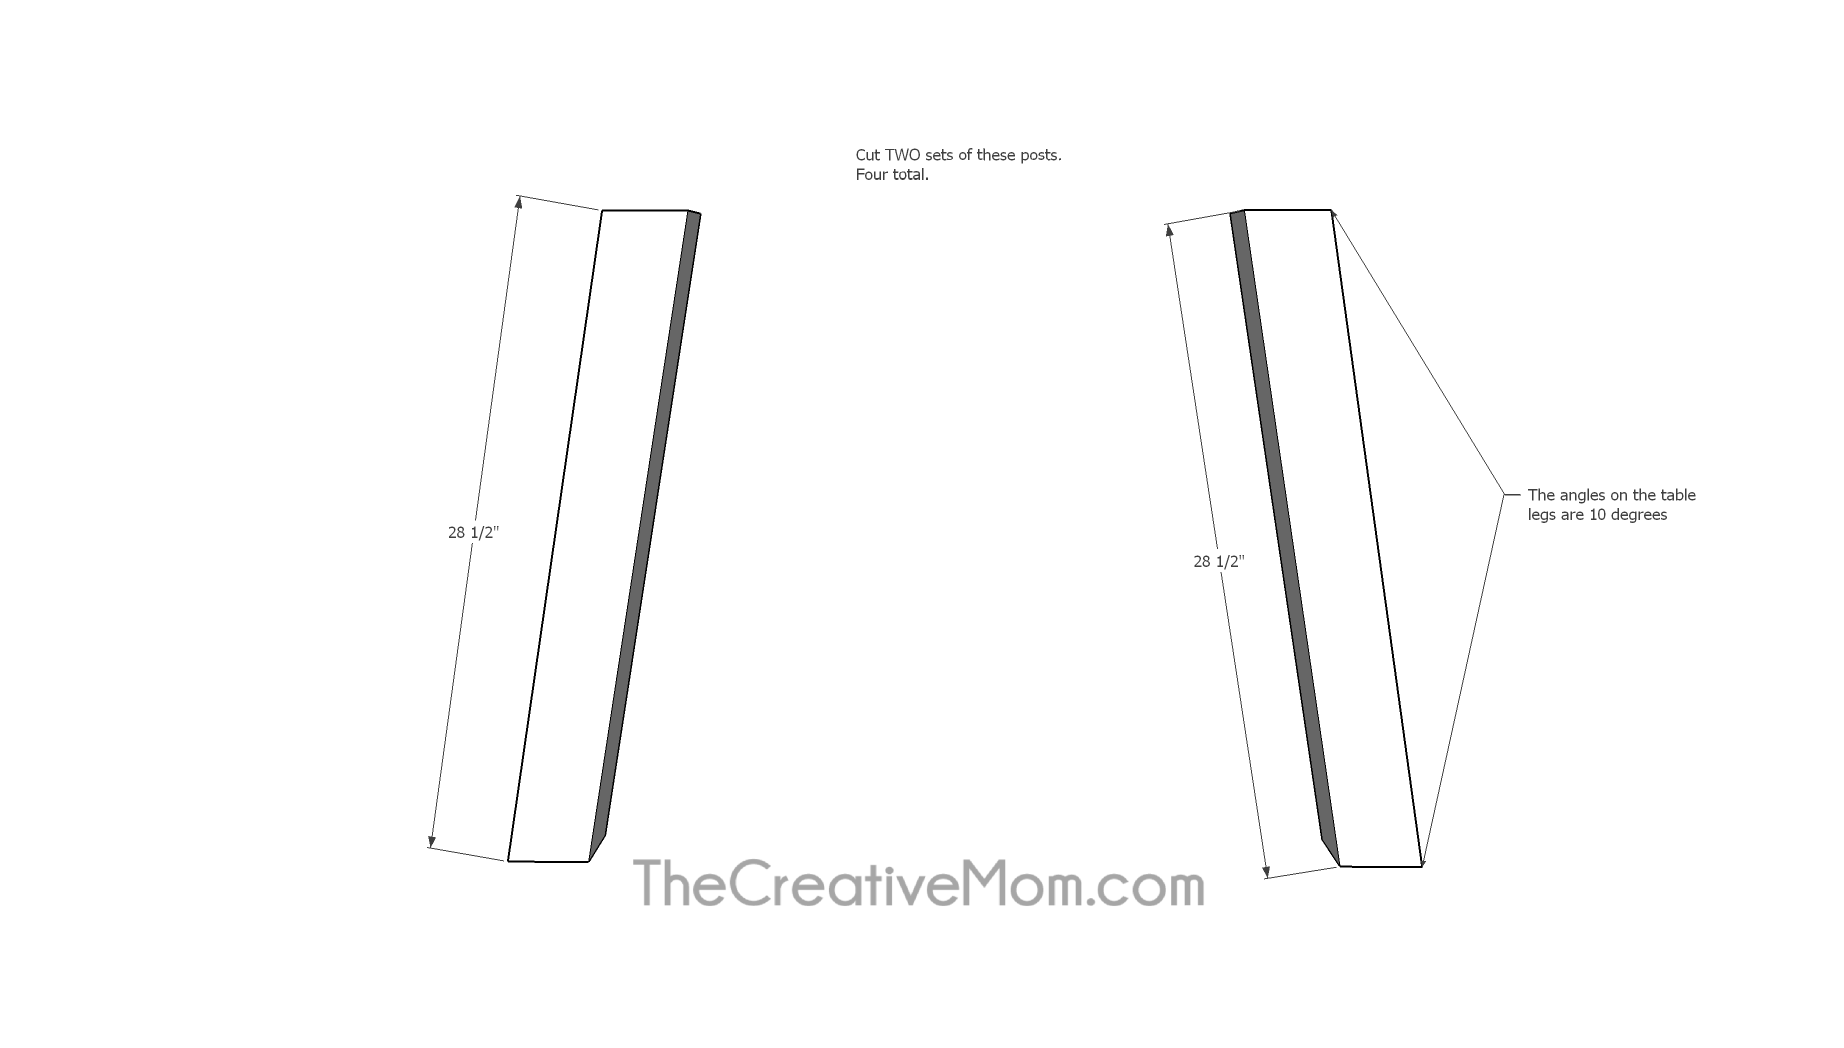
Cut legs
Cut four 4x4 posts for the table legs. The legs will be 28 ½”, mitered at a 10 degree angle on both ends.
-
Create both leg assemblies
You will be making TWO leg assemblies for the table, so make sure you double this step.
For each leg, cut one 39” 2x4.
For each leg, cut one 31” 2x4, mitered at 10 degrees on both sides. (Measurement is taken on the long side. See plans). Drill pocket holes in both ends of the 31” board.
Using wood glue and 2 ½” outdoor pocket hole screws, attach the 31” board to the 4x4 legs. This board will be 5 inches from the bottoms of the legs.
Using wood glue and 2 ½” outdoor wood screws, attach the 39” 2x4 on the top of the 4x4 legs, leaving a 4 ½” overhang on each side.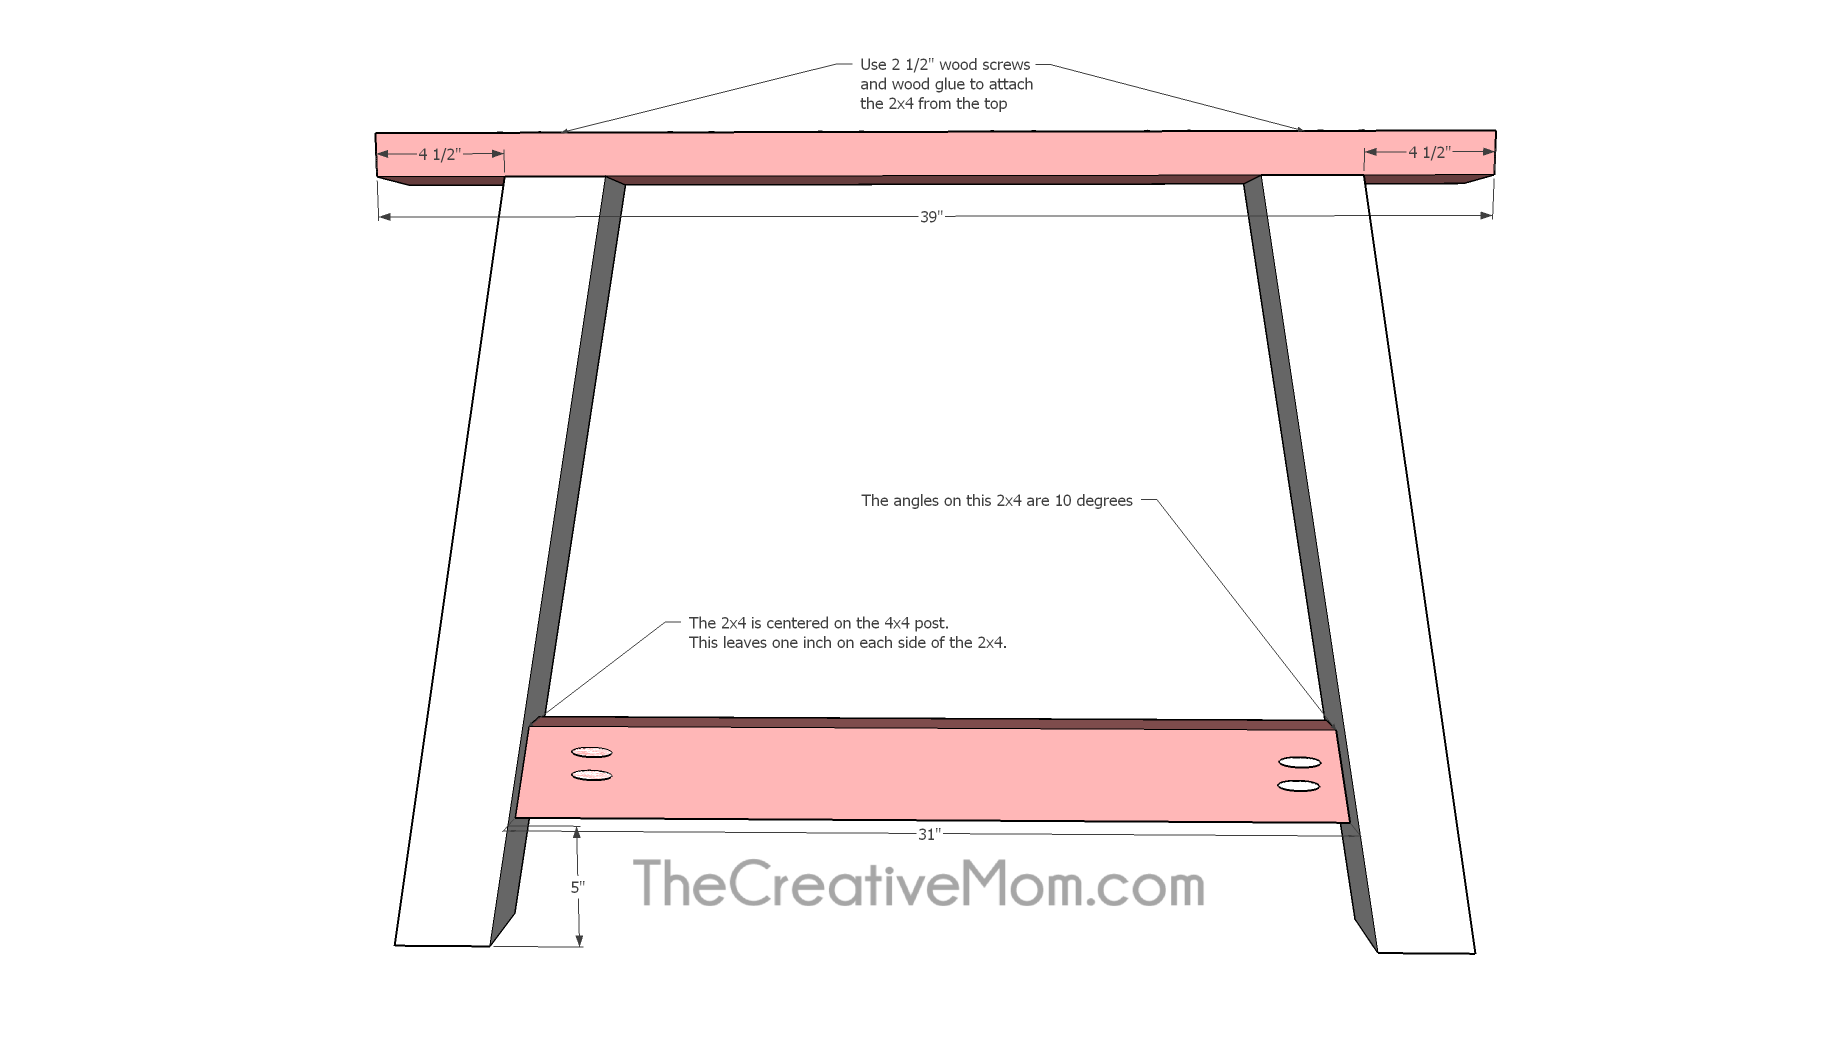
-
Cut stretchers
Cut a 94” 2x4. Drill pocket holes in each end.
Cut a 96” 2x4. Drill pocket holes in each end.
Using wood glue and 2 ½” outdoor pocket hole screws, attach the 96” bottom stretcher board to the center of the 31” mitered leg support we just attached..
Using wood glue and 2 ½” outdoor pocket hole screws, attach the 94” top stretcher board to the center of the top leg support 2x4. The pocket holes will be on the underside of the board.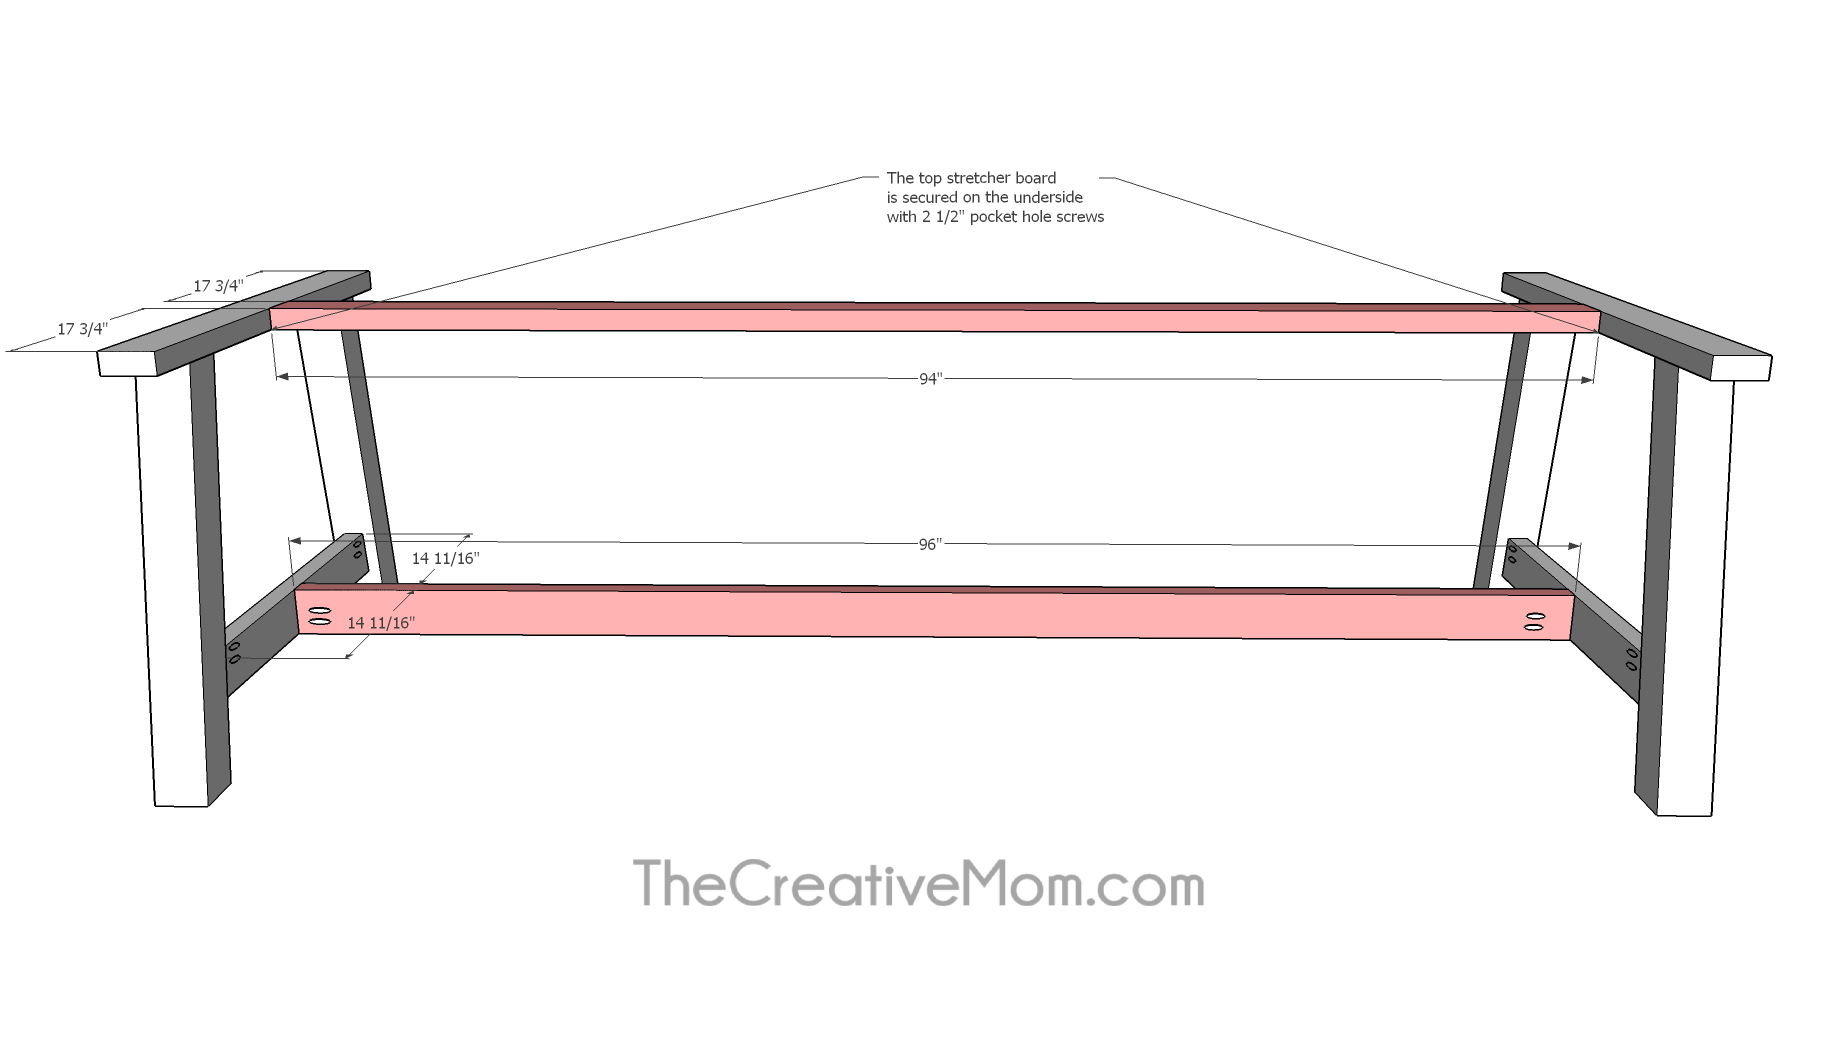
-
Add supports
Cut two 28 ¼” 2x4’s, mitered at 45 degrees on both sides. Drill pocket holes in each end of both boards.
Using wood glue and 2 ½” outdoor pocket hole screws, attach the angled boards between the long 2x4’s we just attached.
The diagonal supports will be 12” from each edge of the bottom 2x4.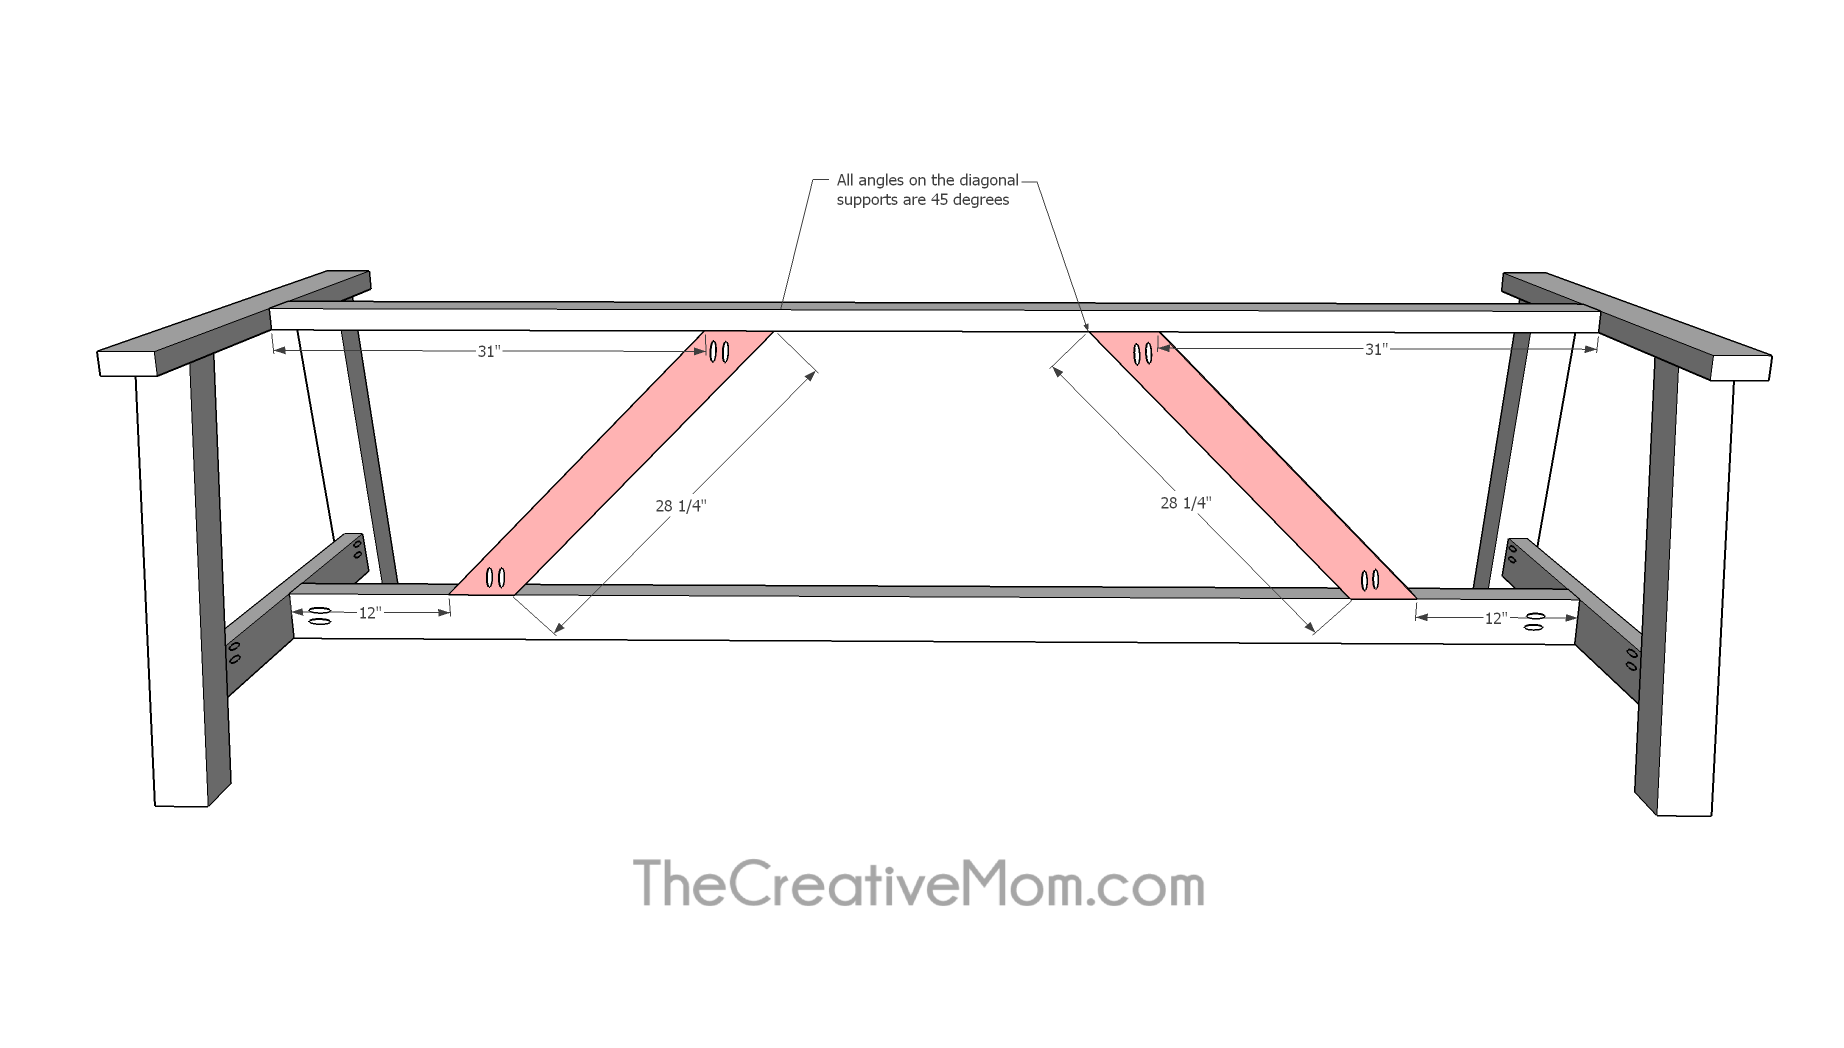
-
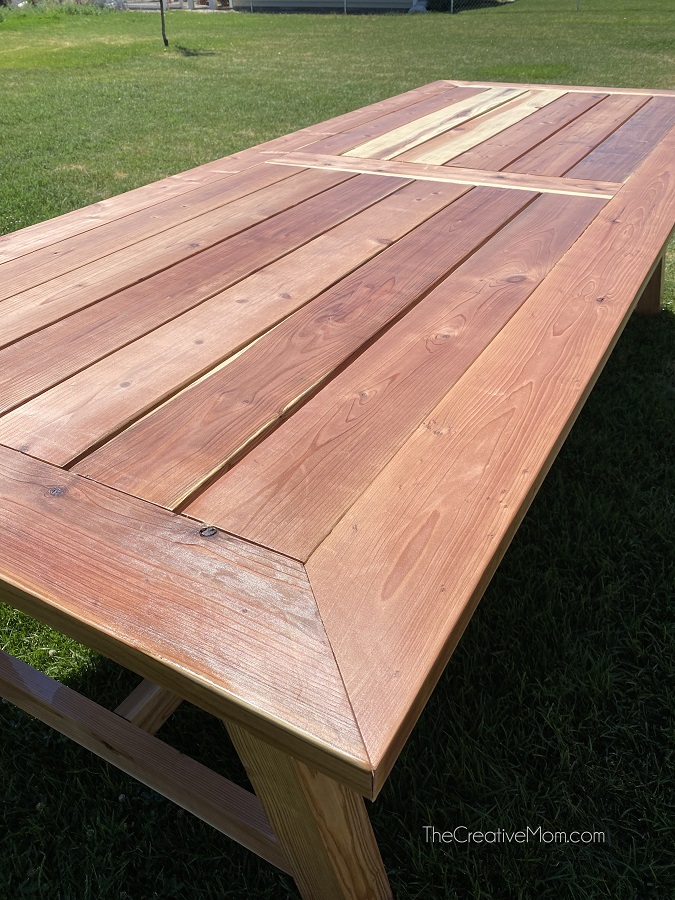
Build table top
Our table base is built, so now we will begin building the table top.
Cut twelve 47 ½” 2x6’s. Drill pocket holes in each end.
Cut one 34 ½” 2x6.
Using wood glue and 2 ½” outdoor pocket hole screws, attach the 47 ½” planks to both sides of the 34 ½” board.
Start on each side, and work your way inward, leaving ¼” gaps between the boards for drainage.(hint: use carpenter’s pencils for your spaces between boards. They are exactly ¼” thick.)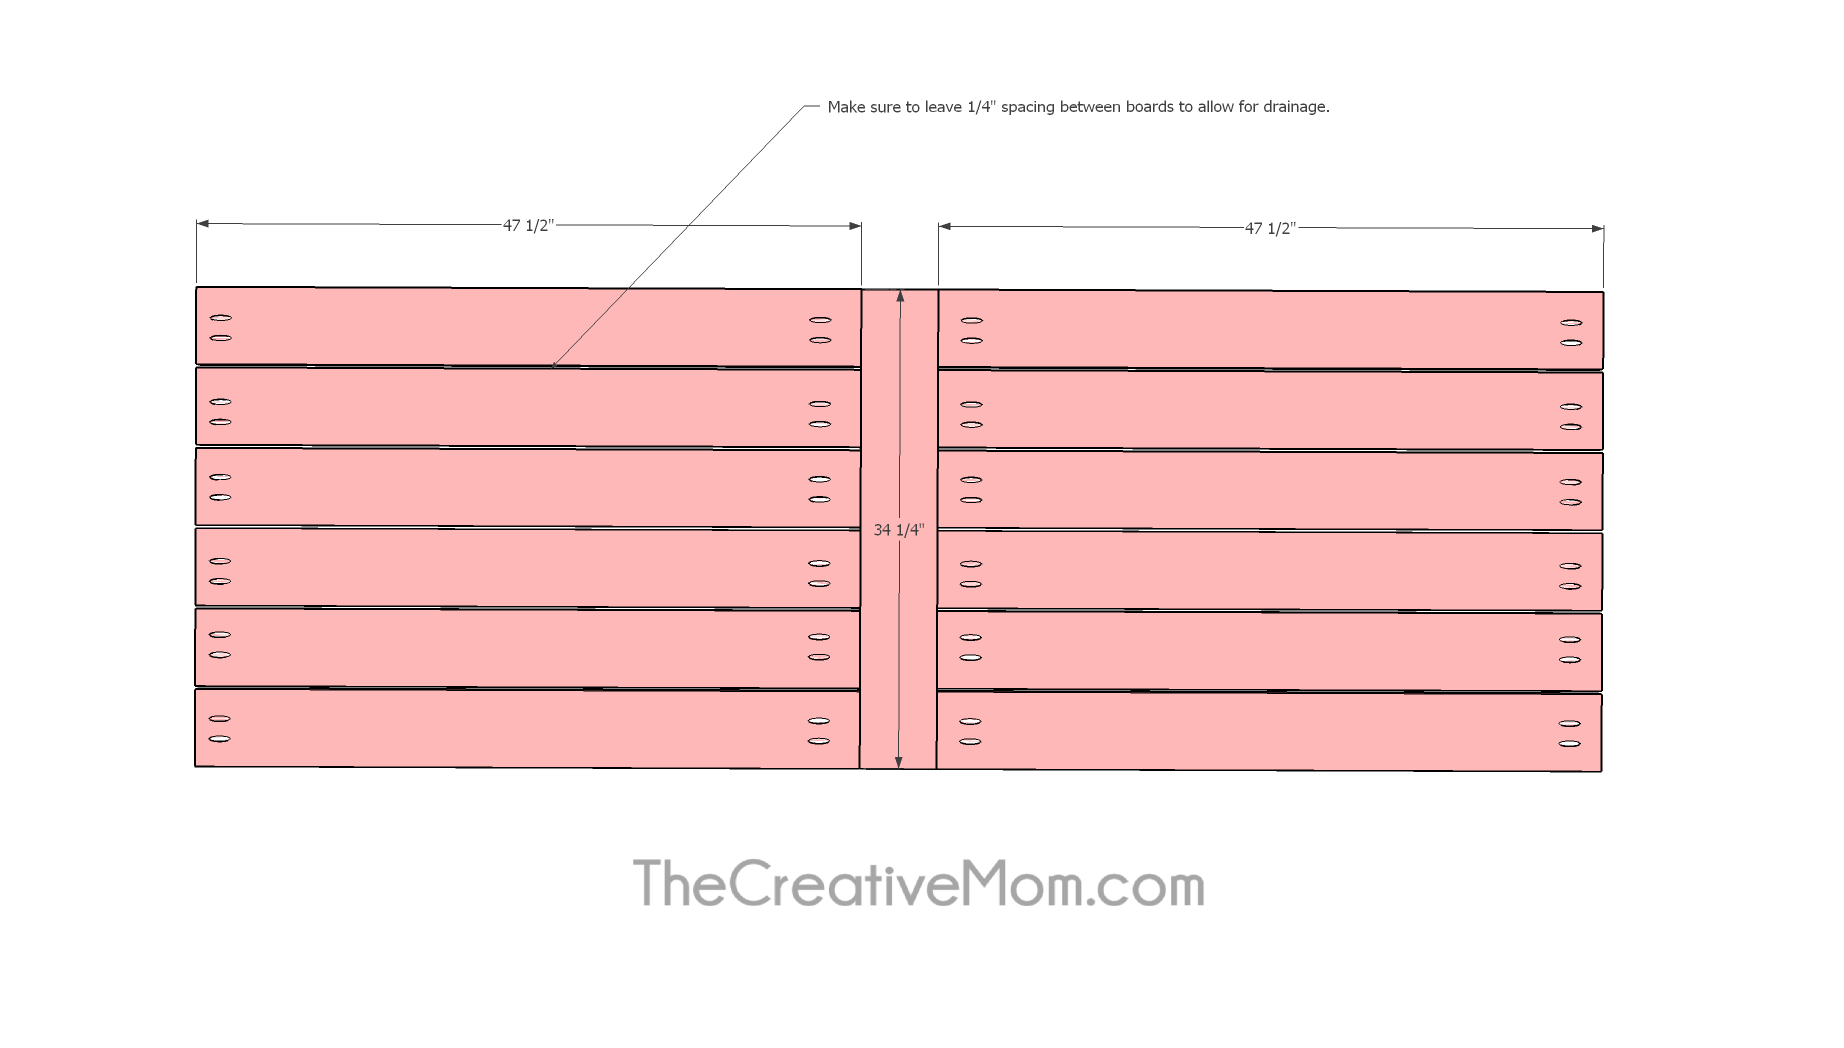
-
Create table top frame
Cut two 111 ½” 2x6’s. Both ends of each board will be mitered at 45 degrees. Drill pocket holes along one side of each board.
Cut two 45 ¼” 2x6’s. Both ends of each board will be mitered at 45 degrees. Drill pocket holes in both ends of each board.
Using wood glue and 2 ½” outdoor pocket hole screws, attach these boards to create a frame around the table top planks.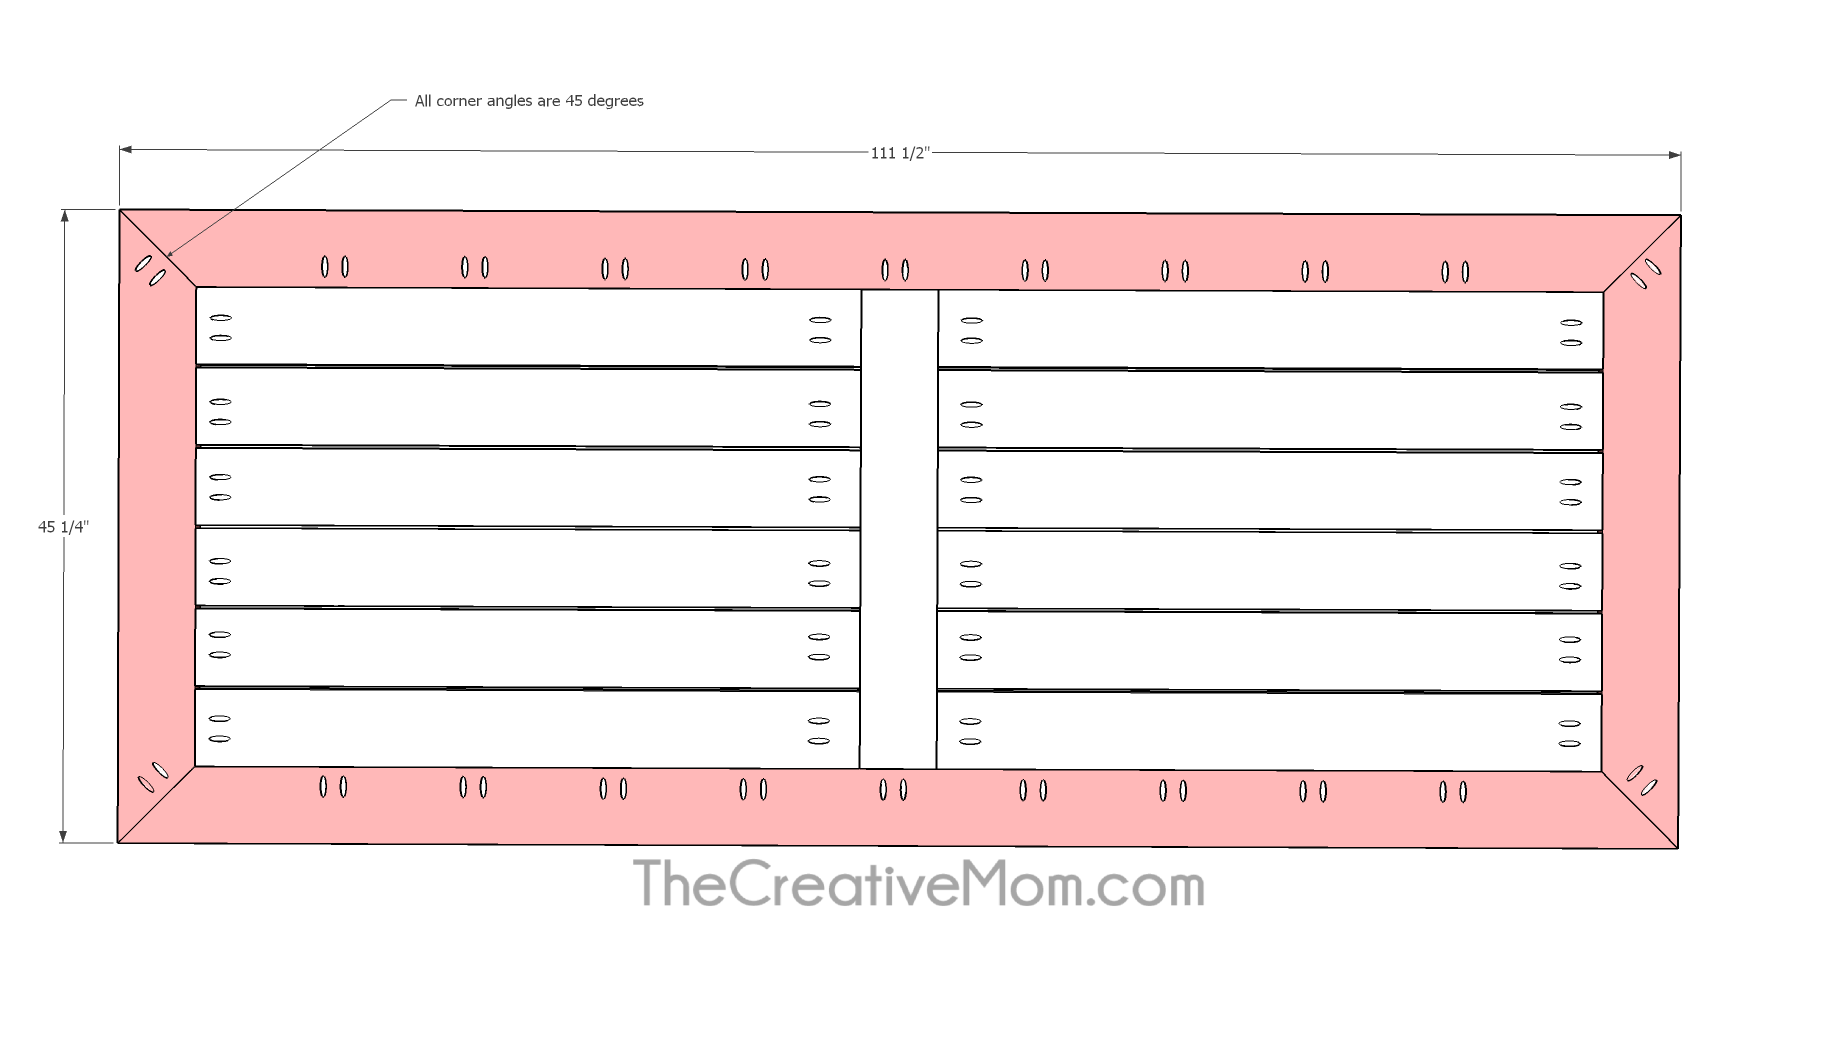
-
Attach table top to base
Place the table top on the base. Make sure you are centered and square.
Using wood glue and 2 ½” outdoor wood screws, attach the table top to the table base from the underside.
Predrill to avoid splitting, and screw through the 2x4’s into the table top.
Make sure to check the length of your screws so your screws don’t go all the way through your table top and poke out the top.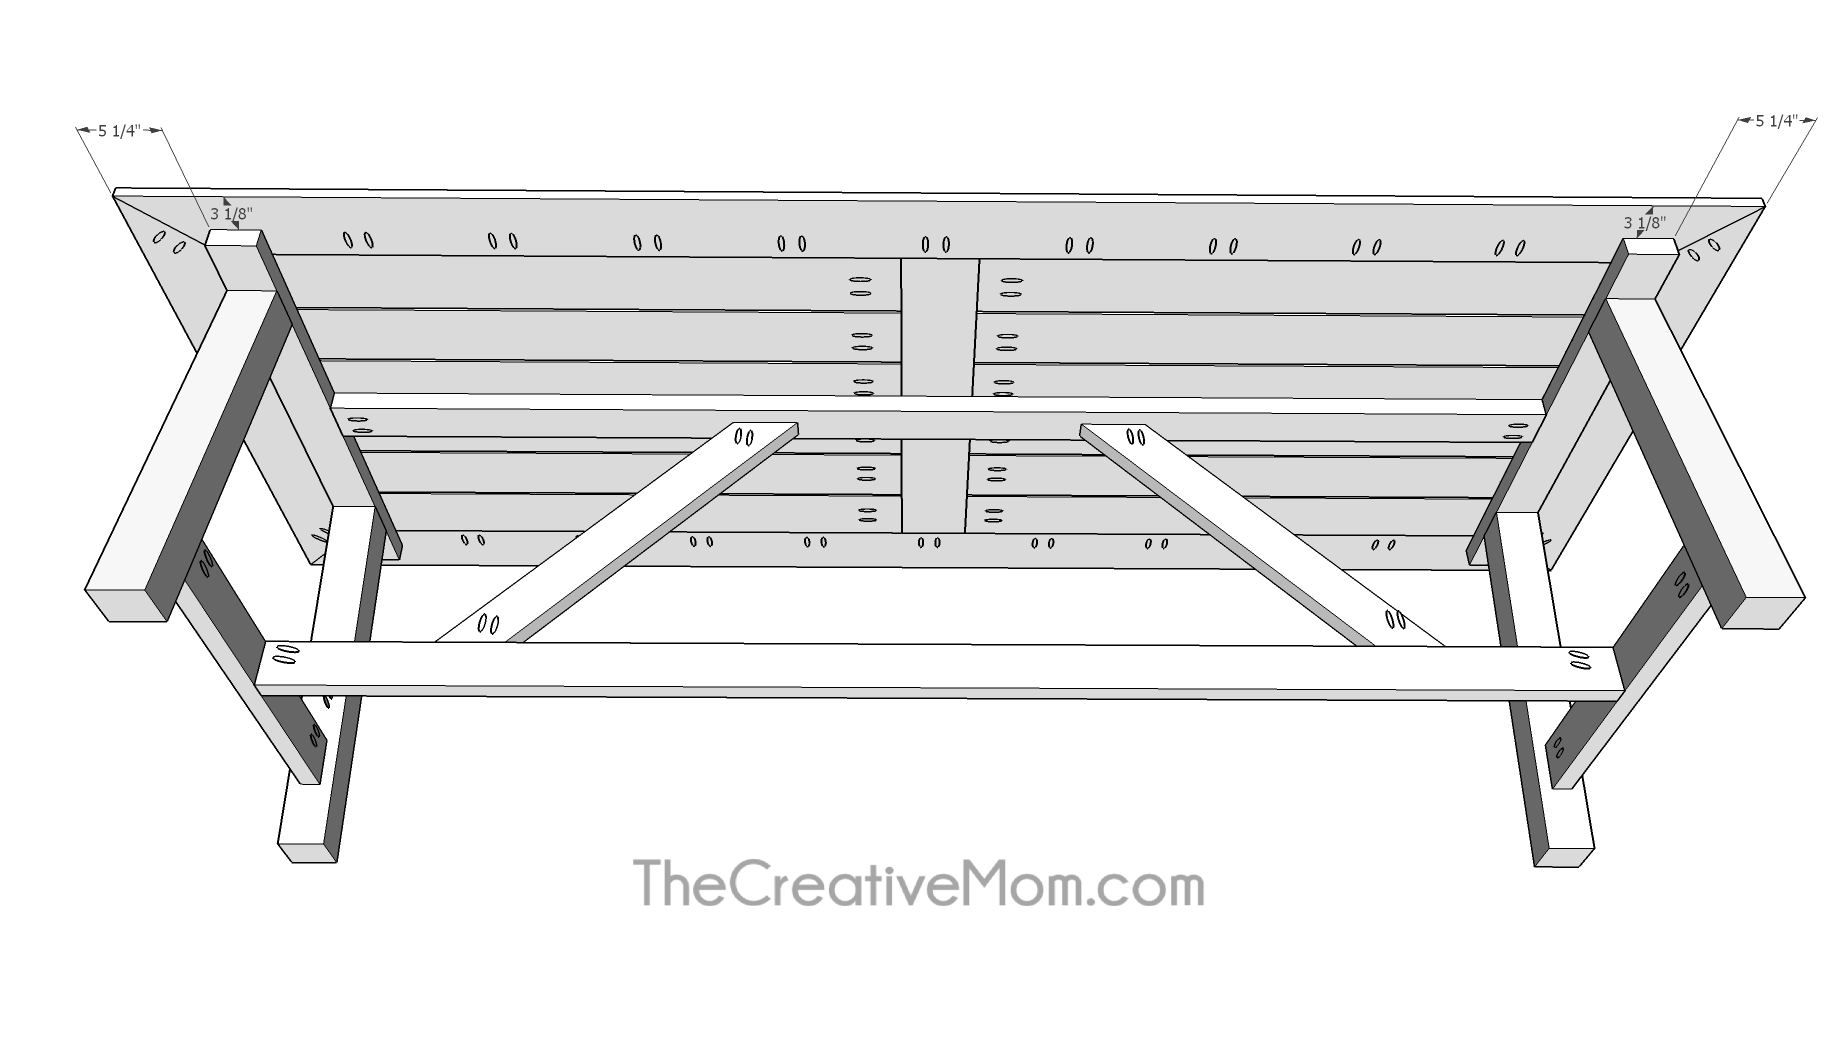
-
Plug pocket holes, sand and finish table
Plug your pocket holes. Sand your table and finish with paint or stain and polyurethane. If your table will be outdoors, make sure you use outdoor finishing products. You can see which products I used on my website, www.TheCreativeMom.com/build-outdoor-dining-table and see video of the entire build on my instagram page www.Instagram.com/thecreativemom