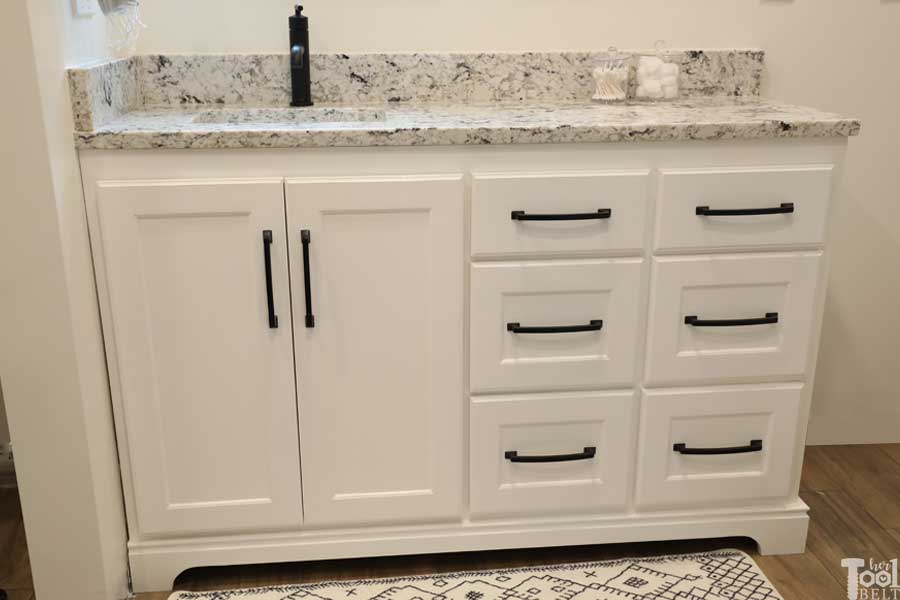
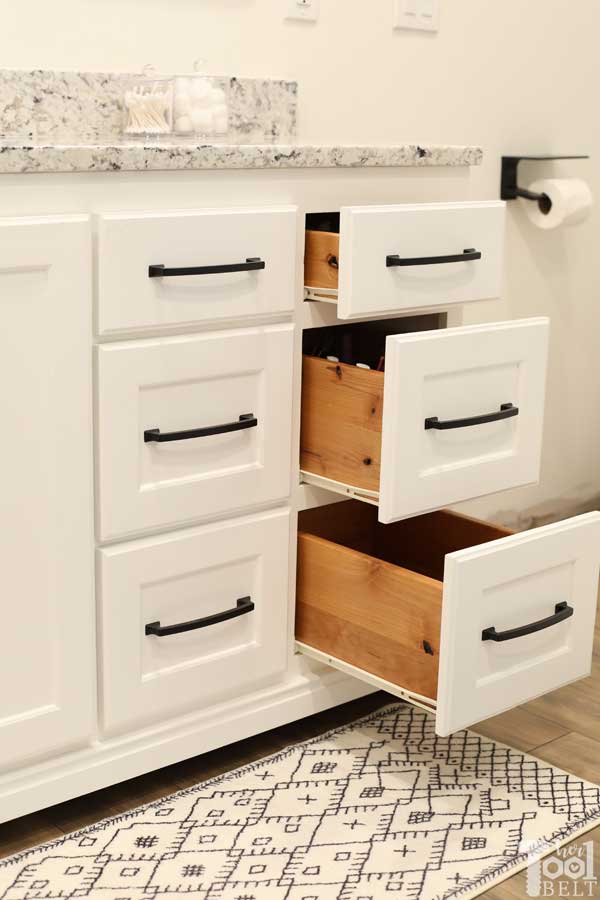
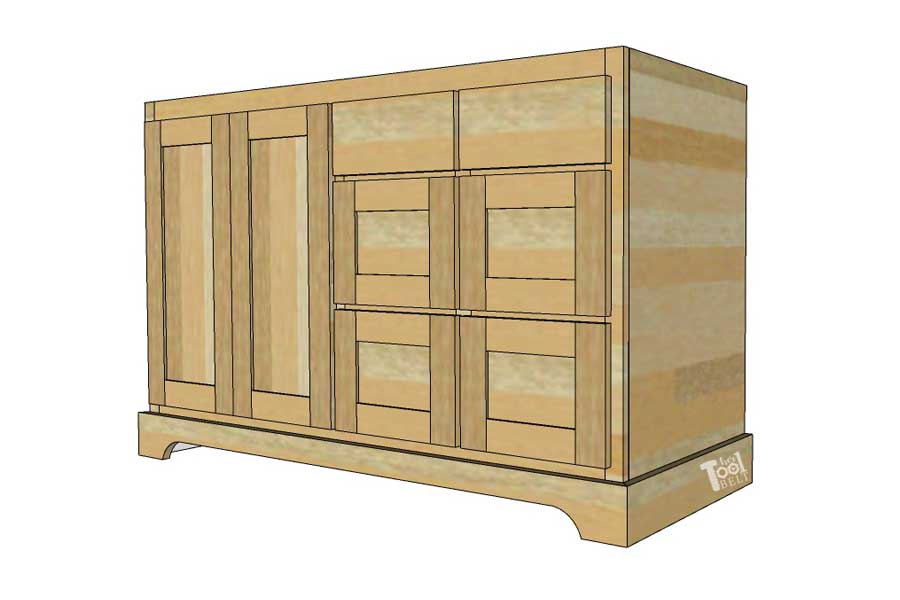
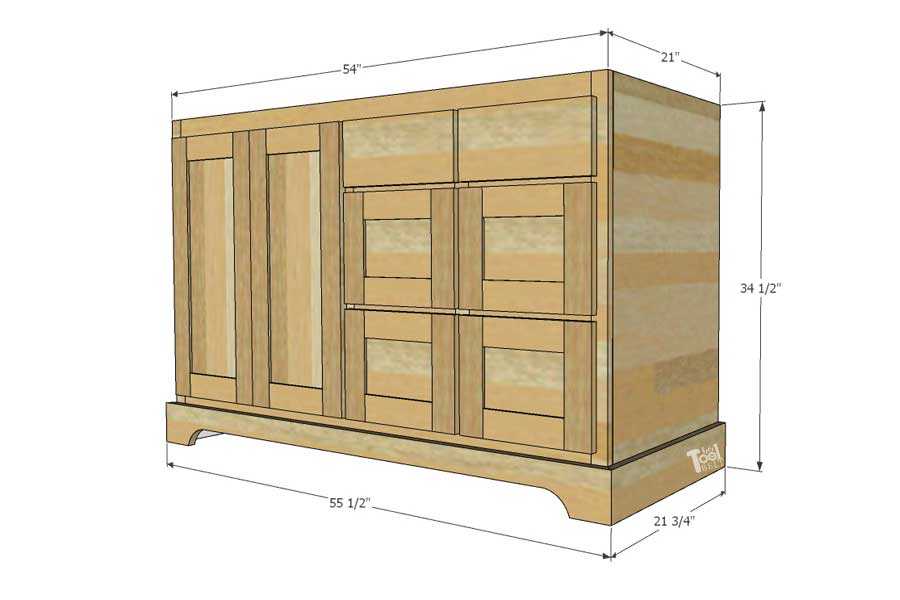


Traditional style 54” bathroom vanity with a left offset sink. The cabinet has a large cabinet space under the sink and 6 large and spacious drawers to the right.
Tools
Kreg Tools


Other Tools
-
Miter Saw

-
Bandsaw
-
Measuring Tape
-
Brad Nailer
Materials
Wood Products
- 1 Board , 1” x 8” x 8’
- 1 Board , 1” x 6” x 8’
- 4 Boards , 1” x 3” x 8’
- 3 Boards , 1” x 2” x 8’
- 2 Sheets of ¾” plywood
- 1 Sheet of ¼” plywood
Hardware & Supplies
- 1 1 ¼” pocket hole screws (see tool list)
- 1 1 ¼” brad nails
- 1 ¾” brad nails
- 6 20” drawer slides
- 2 Sets ½” overlay concealed hinges
- 8 Drawer pulls
- 1 Wood glue
- 1 Wood filler
- 1 Sandpaper
- 1 Paint/primer or stain/top coat
Cut List & Parts
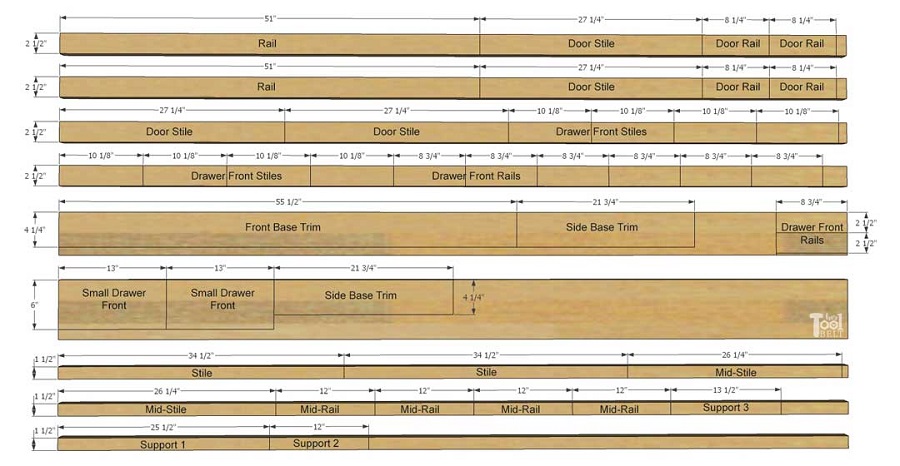
- 2 Stile - board , ¾” x 1 ½” x 34 ½”
- 2 Rail - board , ¾” x 2 ½” x 51”
- 2 Mid-stile - board , ¾” x 1 ½” x 26 ¼”
- 4 Mid-rail - board , ¾” x 1 ½” x 12”
- 1 Support 1 - board , ¾” x 1 ½” x 25 ½”
- 1 Support 2 - board , ¾” x 1 ½” x 12”
- 1 Support 3 - board , ¾” x 1 ½” x 13 ½”
- 4 Door rail - board , ¾” x 2 ½” x 8 ¼”
- 4 Door stile - board , ¾” x 2 ½” x 27 ¼”
- 8 Drawer front rail - board , ¾” x 2 ½” x 8 ¾”
- 8 Drawer front stile - board , ¾” x 2 ½” x 10 1/8”
- 2 Small drawer front - board , ¾” x 6” x 13”
- 1 Front base trim - board , ¾” x 4 ¼” x 54 ¾” or 55 ½”
- 1 Side base trim - board , ¾” x 4 ¼” x 21 ¾”
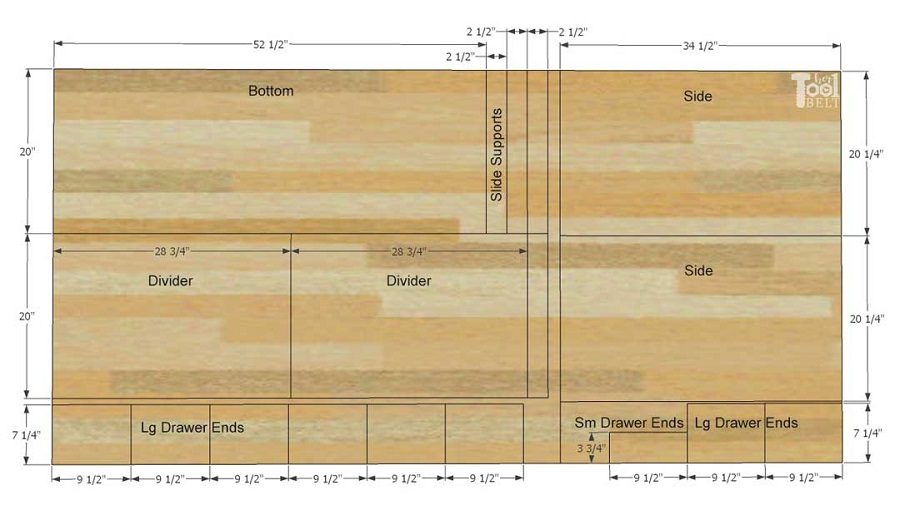
- 1 Bottom - ¾” plywood , ¾” x 20” x 52 ½”
- 2 Side - ¾” plywood , ¾” x 20 ¼” x 34 ½”
- 2 Divider - ¾” plywood , ¾” x 20” x 28 ¾”
- 6 Drawer bottom - ¾” plywood , ¾” x 9 ½” x 18 ½
- 8 Large drawer end - ¾” plywood , ¾” x 7 ¼” x 9 ½”
- 8 Large drawer side - ¾” plywood , ¾” x 7 ¼” x 20”
- 4 Small drawer end - ¾” plywood , ¾” x 3 ¾” x 9 ½”
- 4 Small drawer side - ¾” plywood , ¾” x 3 ¾” x 20”
- 6 Slide support - ¾” plywood , ¾”x 2 ½” x 20”
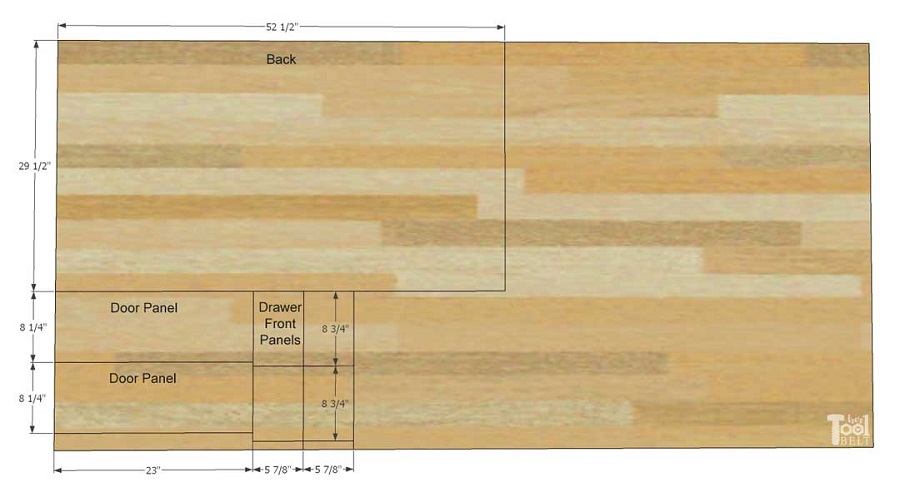
- 1 Back - ¼” plywood , ¼” x 29 ½” x 52 ½”
- 4 Drawer front panel - ¼” plywood , ¼” x 5 7/8” x 8 ¾”
- 2 Door panel - ¼” plywood , ¼” x 8 ¼” x 23
Directions
-
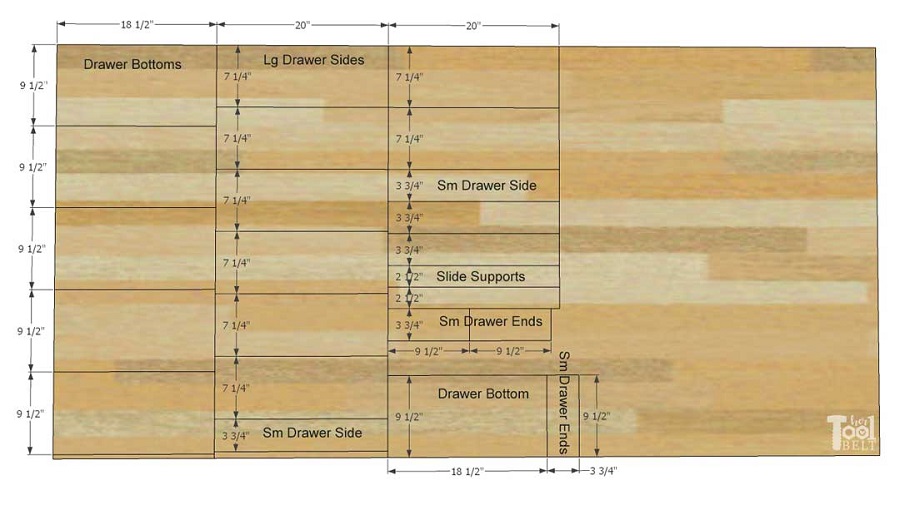
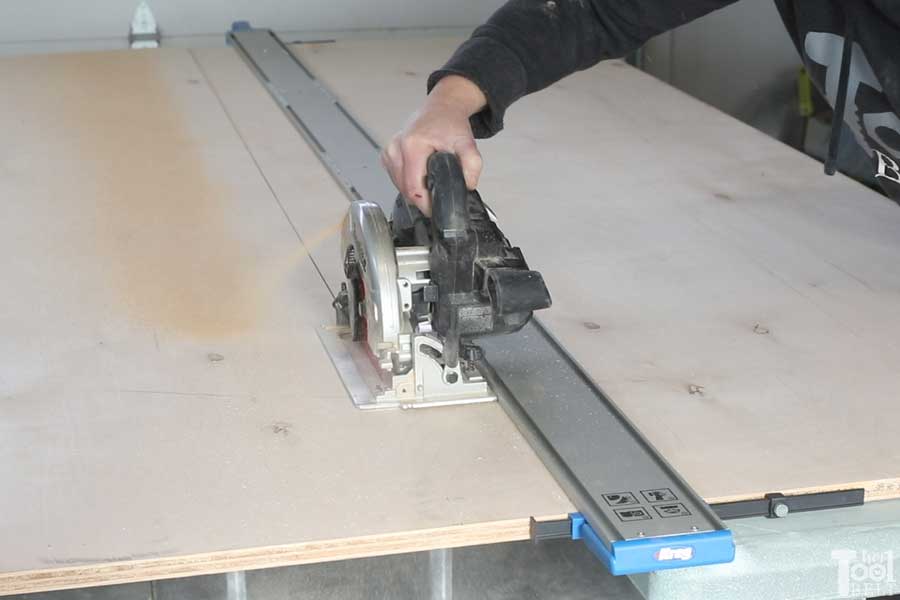
Cut plywood
Using a Kreg Straight Edge Guide XL and circular saw, cut the plywood sheets down to the sizes in the cut list and cut diagram.
-
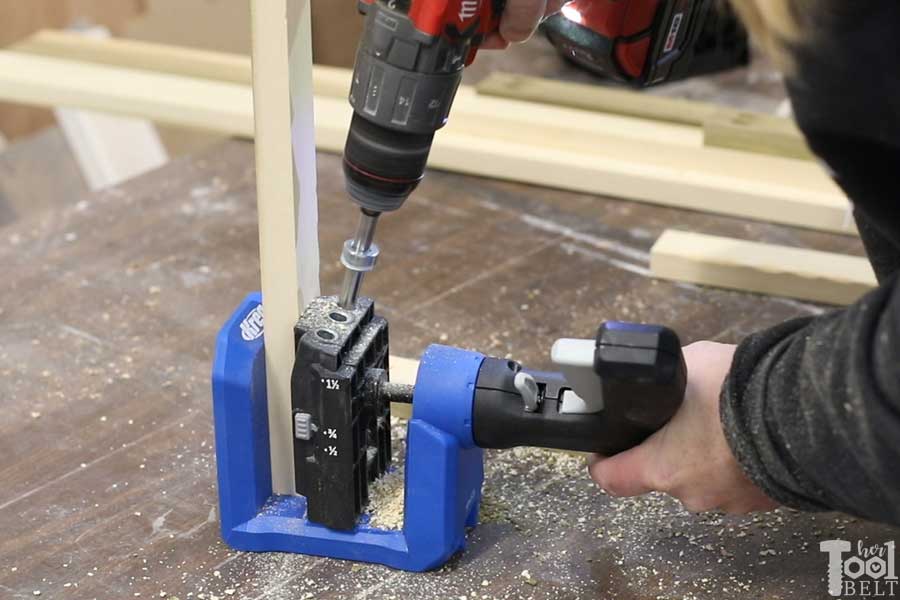
Drill pocket holes in boards
Using a Kreg pocket hole jig, drill pocket holes for ¾” material in both ends of the following boards: Rails, Mid-Stiles, Mid-Rails, Supports 1, 2 and 3.
-
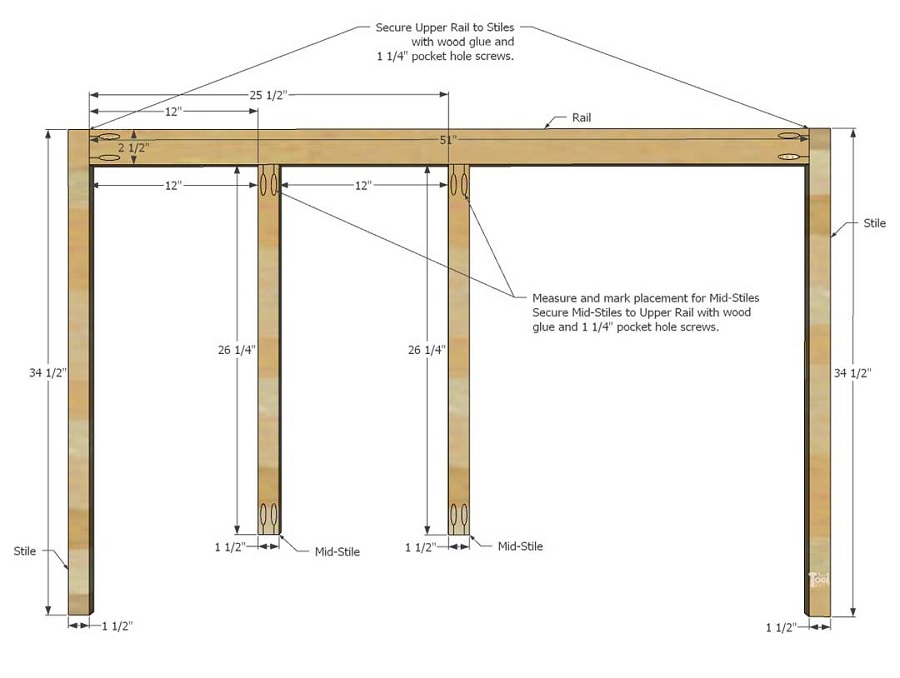
Outer face frame assembly
On the Rail pieces, measure and mark 12” and 25 ½” from the left side (pocket holes up). Secure the upper Rail to the Stiles on each end with wood glue and 1 ¼” pocket hole screws, make sure the tops are flush. At the 12 and 25 ½” marks, secure Mid-Stile pieces to the upper Rail with wood glue and 1 ¼” pocket hole screws.
-
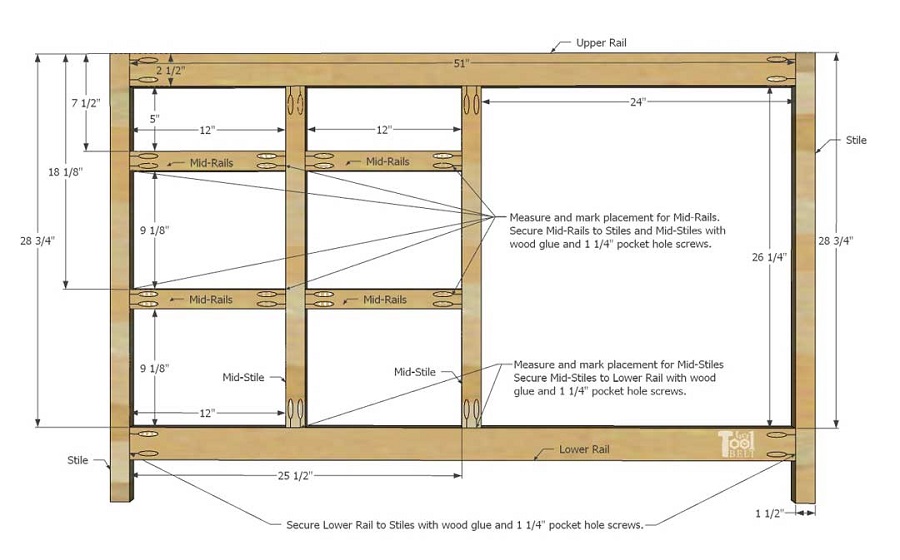
Inner face frame assembly
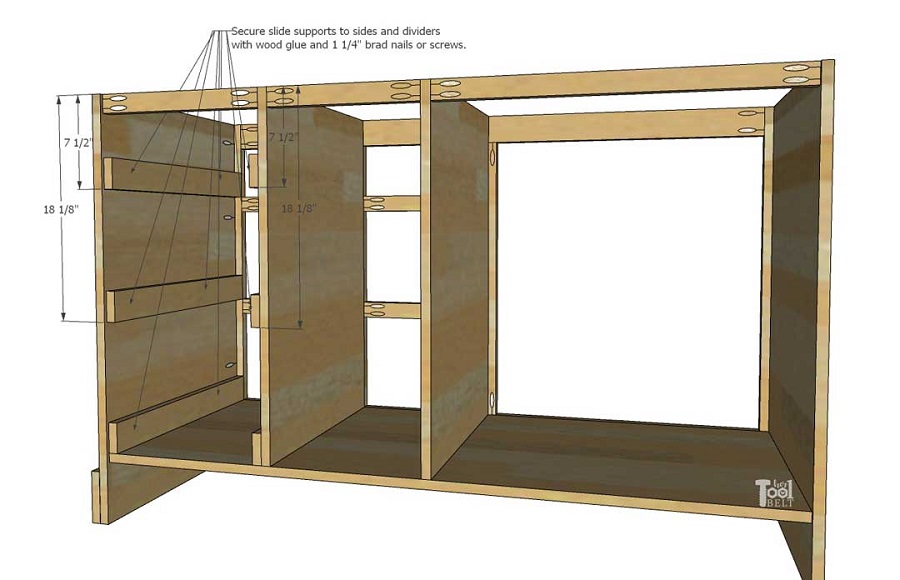
Measure and mark down from the top: 7 ½”, 18 1/8” and 28 ¾” on the Stiles and Mid-stiles. Use wood glue and 1 ¼” pocket hole screws to attach the Mid-Rails to the left stile and mid-stiles at the 7 ½” and 18 1/8” marks. This should leave the upper drawer space 5” and 9 1/8” for the lower drawers.
Secure the lower Rail to the stiles and mid-stiles with wood glue and 1 ¼” pocket hole screws. The rail should be about 28 ¾” down from the top.
At this point, make sure the face frame is drying square. Use clamps as necessary to pull the face frame square while the glue is drying.
-
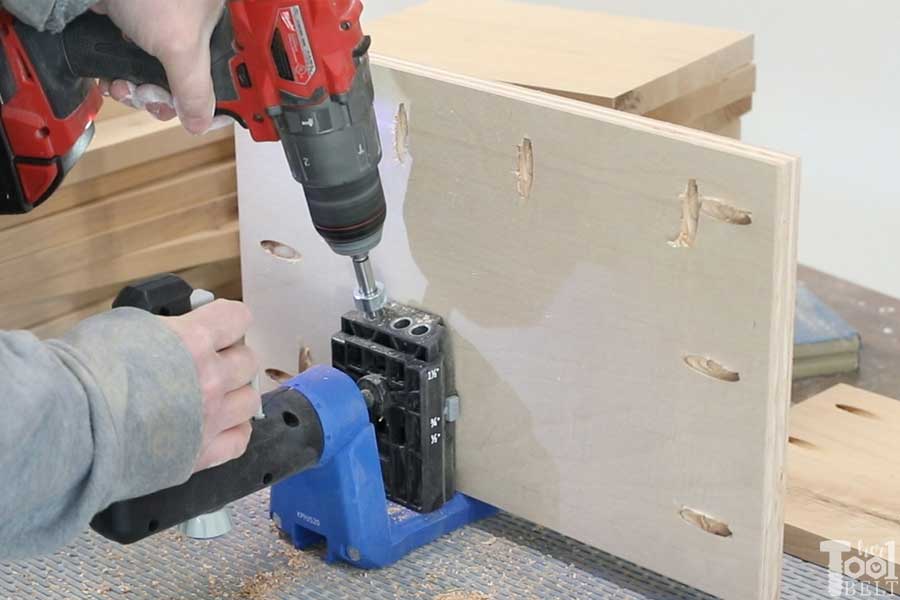
Drill pocket holes in plywood pieces
Using a Kreg pocket hole jig, drill pocket holes for ¾” material spaced about every 4”-6” in the following plywood pieces: Bottom (one 51” side and both 20” sides), Sides (one 34 ½” side), Dividers (one 28 ¾” and one 20” side), Drawer Bottom (all sides), Lg drawer ends (both 7 ¼” sides), Sm drawer ends (both 3 ¾” sides).
See the following steps for pocket hole placement diagrams.
-
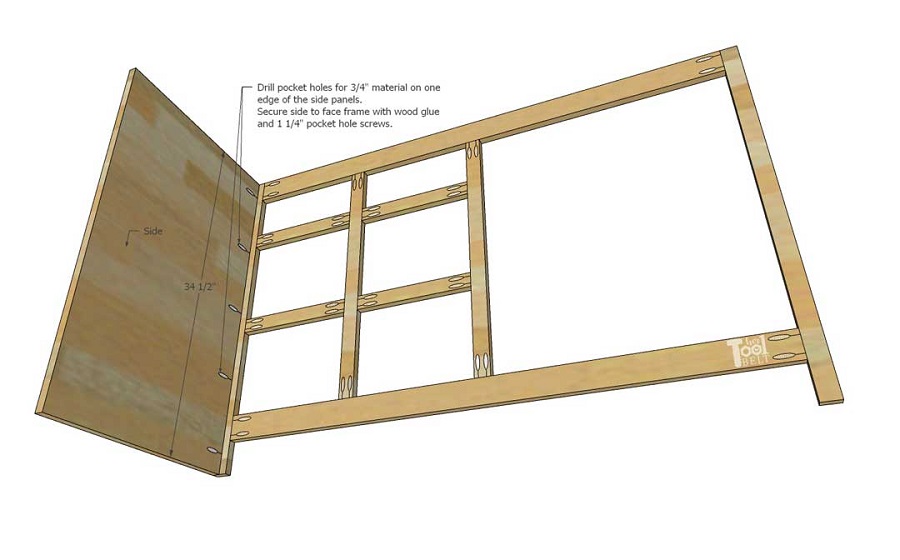
Attach side panel
If not already done, drill pocket holes for ¾” material on one 34 ½” edge. Secure the side panel to the face frame stile with wood glue and 1 ¼” pocket hole screws. The outside face of the side should be flush with the outside corner of the face frame.
-
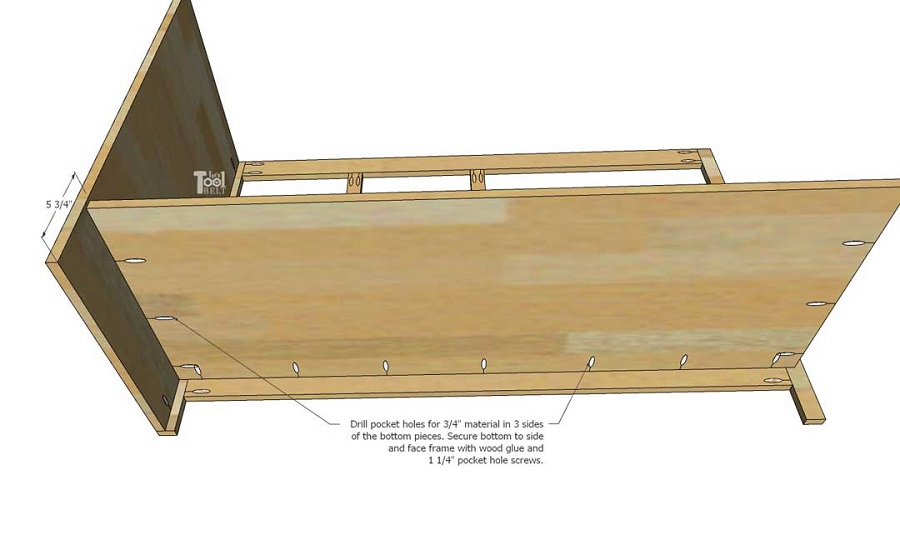
Attach bottom
Measure and mark 5 ¾” up from the bottom on the side panel. If not already done, drill pocket holes for ¾” material on one 52 ½” and both 20” edges of the bottom. Secure the bottom to the face frame and side panel with wood glue and 1 ¼” pocket hole screws. The bottom should be 5 ¾” up from the bottom and the top of the bottom piece should be flush with the top of the lower rail.
-
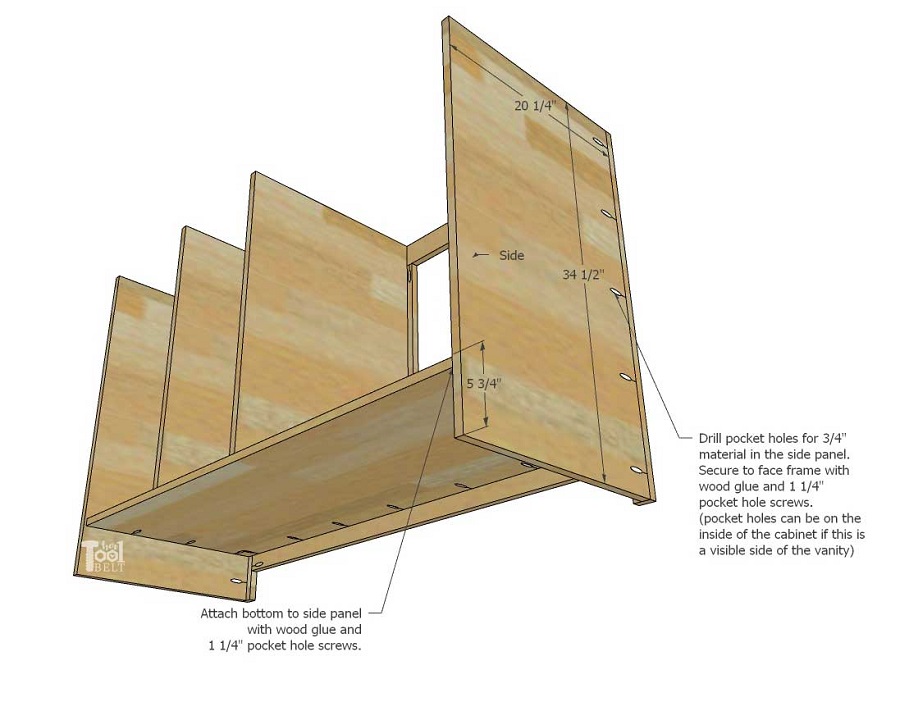
Install the Dividers
The dividers will be flush with the center section Mid-Stiles, this will make drawer slide installation easier. Mark over from the side 13 1/2” and 26 ¼” on the bottom piece. If not already done, drill pocket holes for ¾” material on one 28 ¾” and one 20” edge of the dividers .Secure the dividers to the face frame and bottom with wood glue and 1 ¼” pocket hole screws.

-
Install last side panel
Mark up 5 ¾” from the bottom on the inside face of the side panel. Also, the pocket hole screws can face inside or outside. This vanity was installed by a wall on the left, so the pocket holes faced outwards.
If not already done, drill pocket holes for ¾” material on one 34 ½” edge of the side panel. Secure the side to the face frame with wood glue and 1 ¼” pocket hole screws. Secure the bottom to the side panel with wood glue and 1 ¼” pocket hole screws.
-
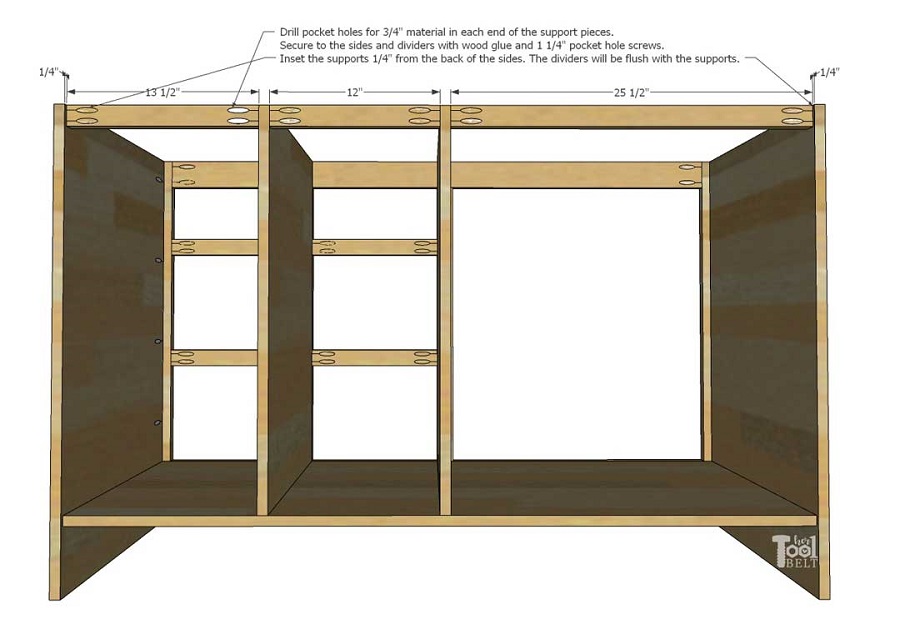
Install support boards
At the top back corner of the side panels mark in ¼”. The supports will be attached ¼” inset on the side panels and flush with the top, the supports at the dividers will be flush with the back corner. Secure the support pieces in place with wood glue and 1 ¼” pocket hole screws.
At this point, make sure everything is drying square. Use clamps as necessary to pull the cabinet square while the glue is drying.
-
Attach slide supports
In the far drawer section (13 ½” wide), measure and mark down 7 ½” and 18 1/8” from the top. Attach slide supports with wood glue and 1 ¼” brad nails at 7 ½”, 18 1/8” and the bottom.
-
Build drawers
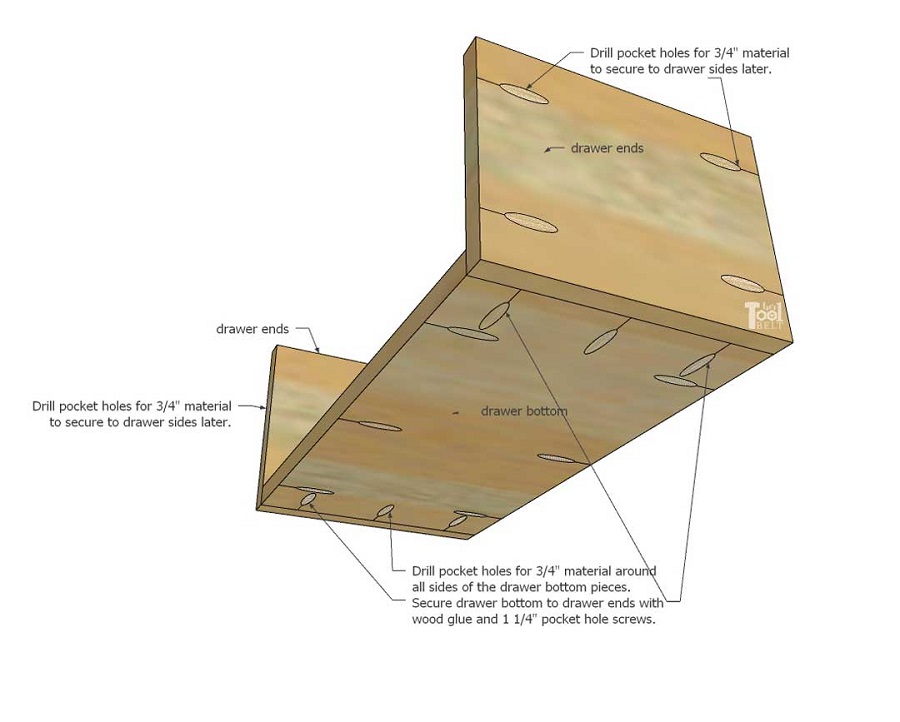
If not already done, drill pocket holes for ¾” material around all edges in the drawer bottoms and both short edges on the drawer ends. Secure the drawer bottoms to drawer ends with wood glue and 1 ¼” pocket hole screws. Repeat for each drawer.
-
Assemble drawers
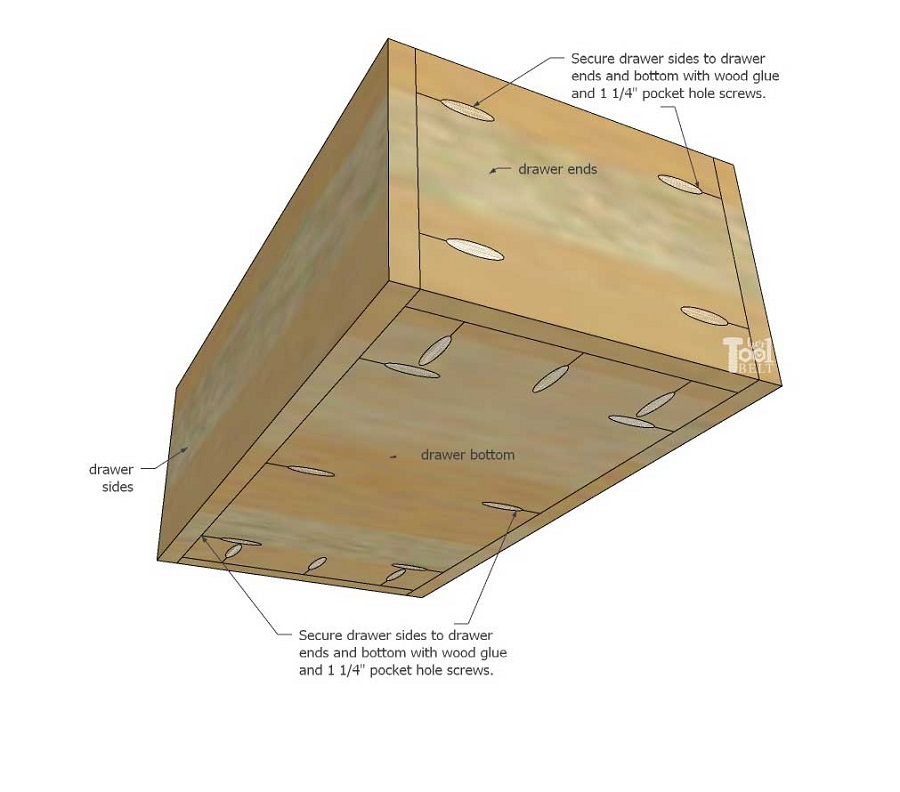
Attach drawer sides to the drawer bottom and ends with wood glue and 1 ¼” pocket hole screws.
Install drawer slides to drawers and slide supports or dividers in cabinet.
-
Door and drawer front pieces
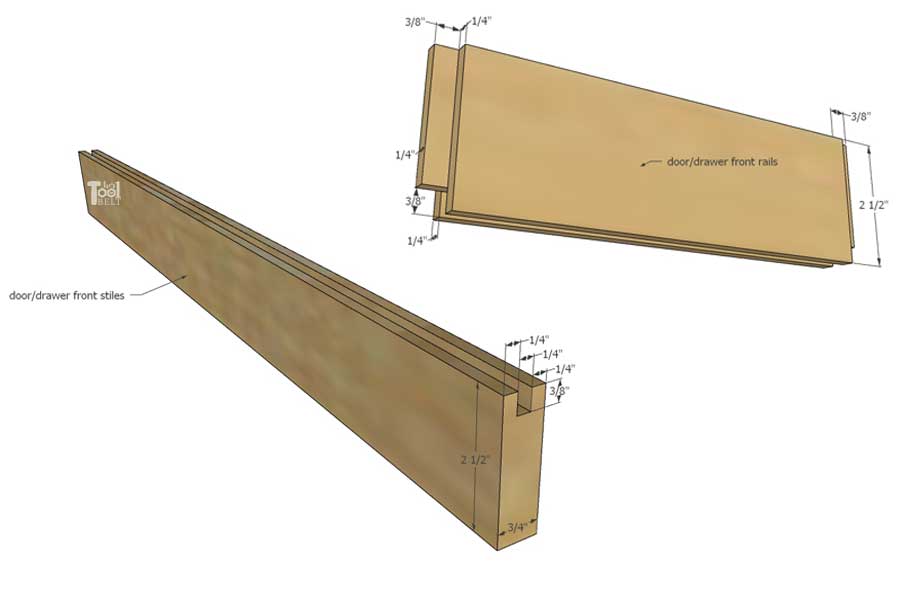
Create a tongue and groove system to assembly the doors and drawer fronts.
In each door or drawer front stile and rail pieces, cut or route a ¼” wide x 3/8” deep groove in the center of the board (about ¼” from each edge.)
In each door or drawer rail, cut or route a 1/4” wide x 3/8” deep groove on each end on the front and back face. This will result in a ¼” wide x 3/8” tongue on each end of the rails. The rail should slide snuggly into the stile groove. Also, the ¼” panel should slide into the groove. Trim to fit as needed.
-
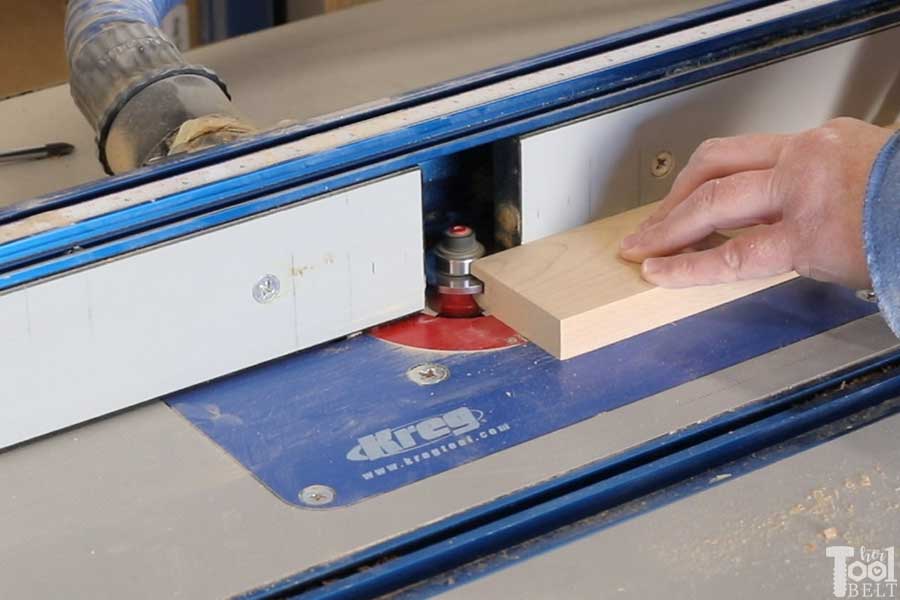
Routing the rails and stiles
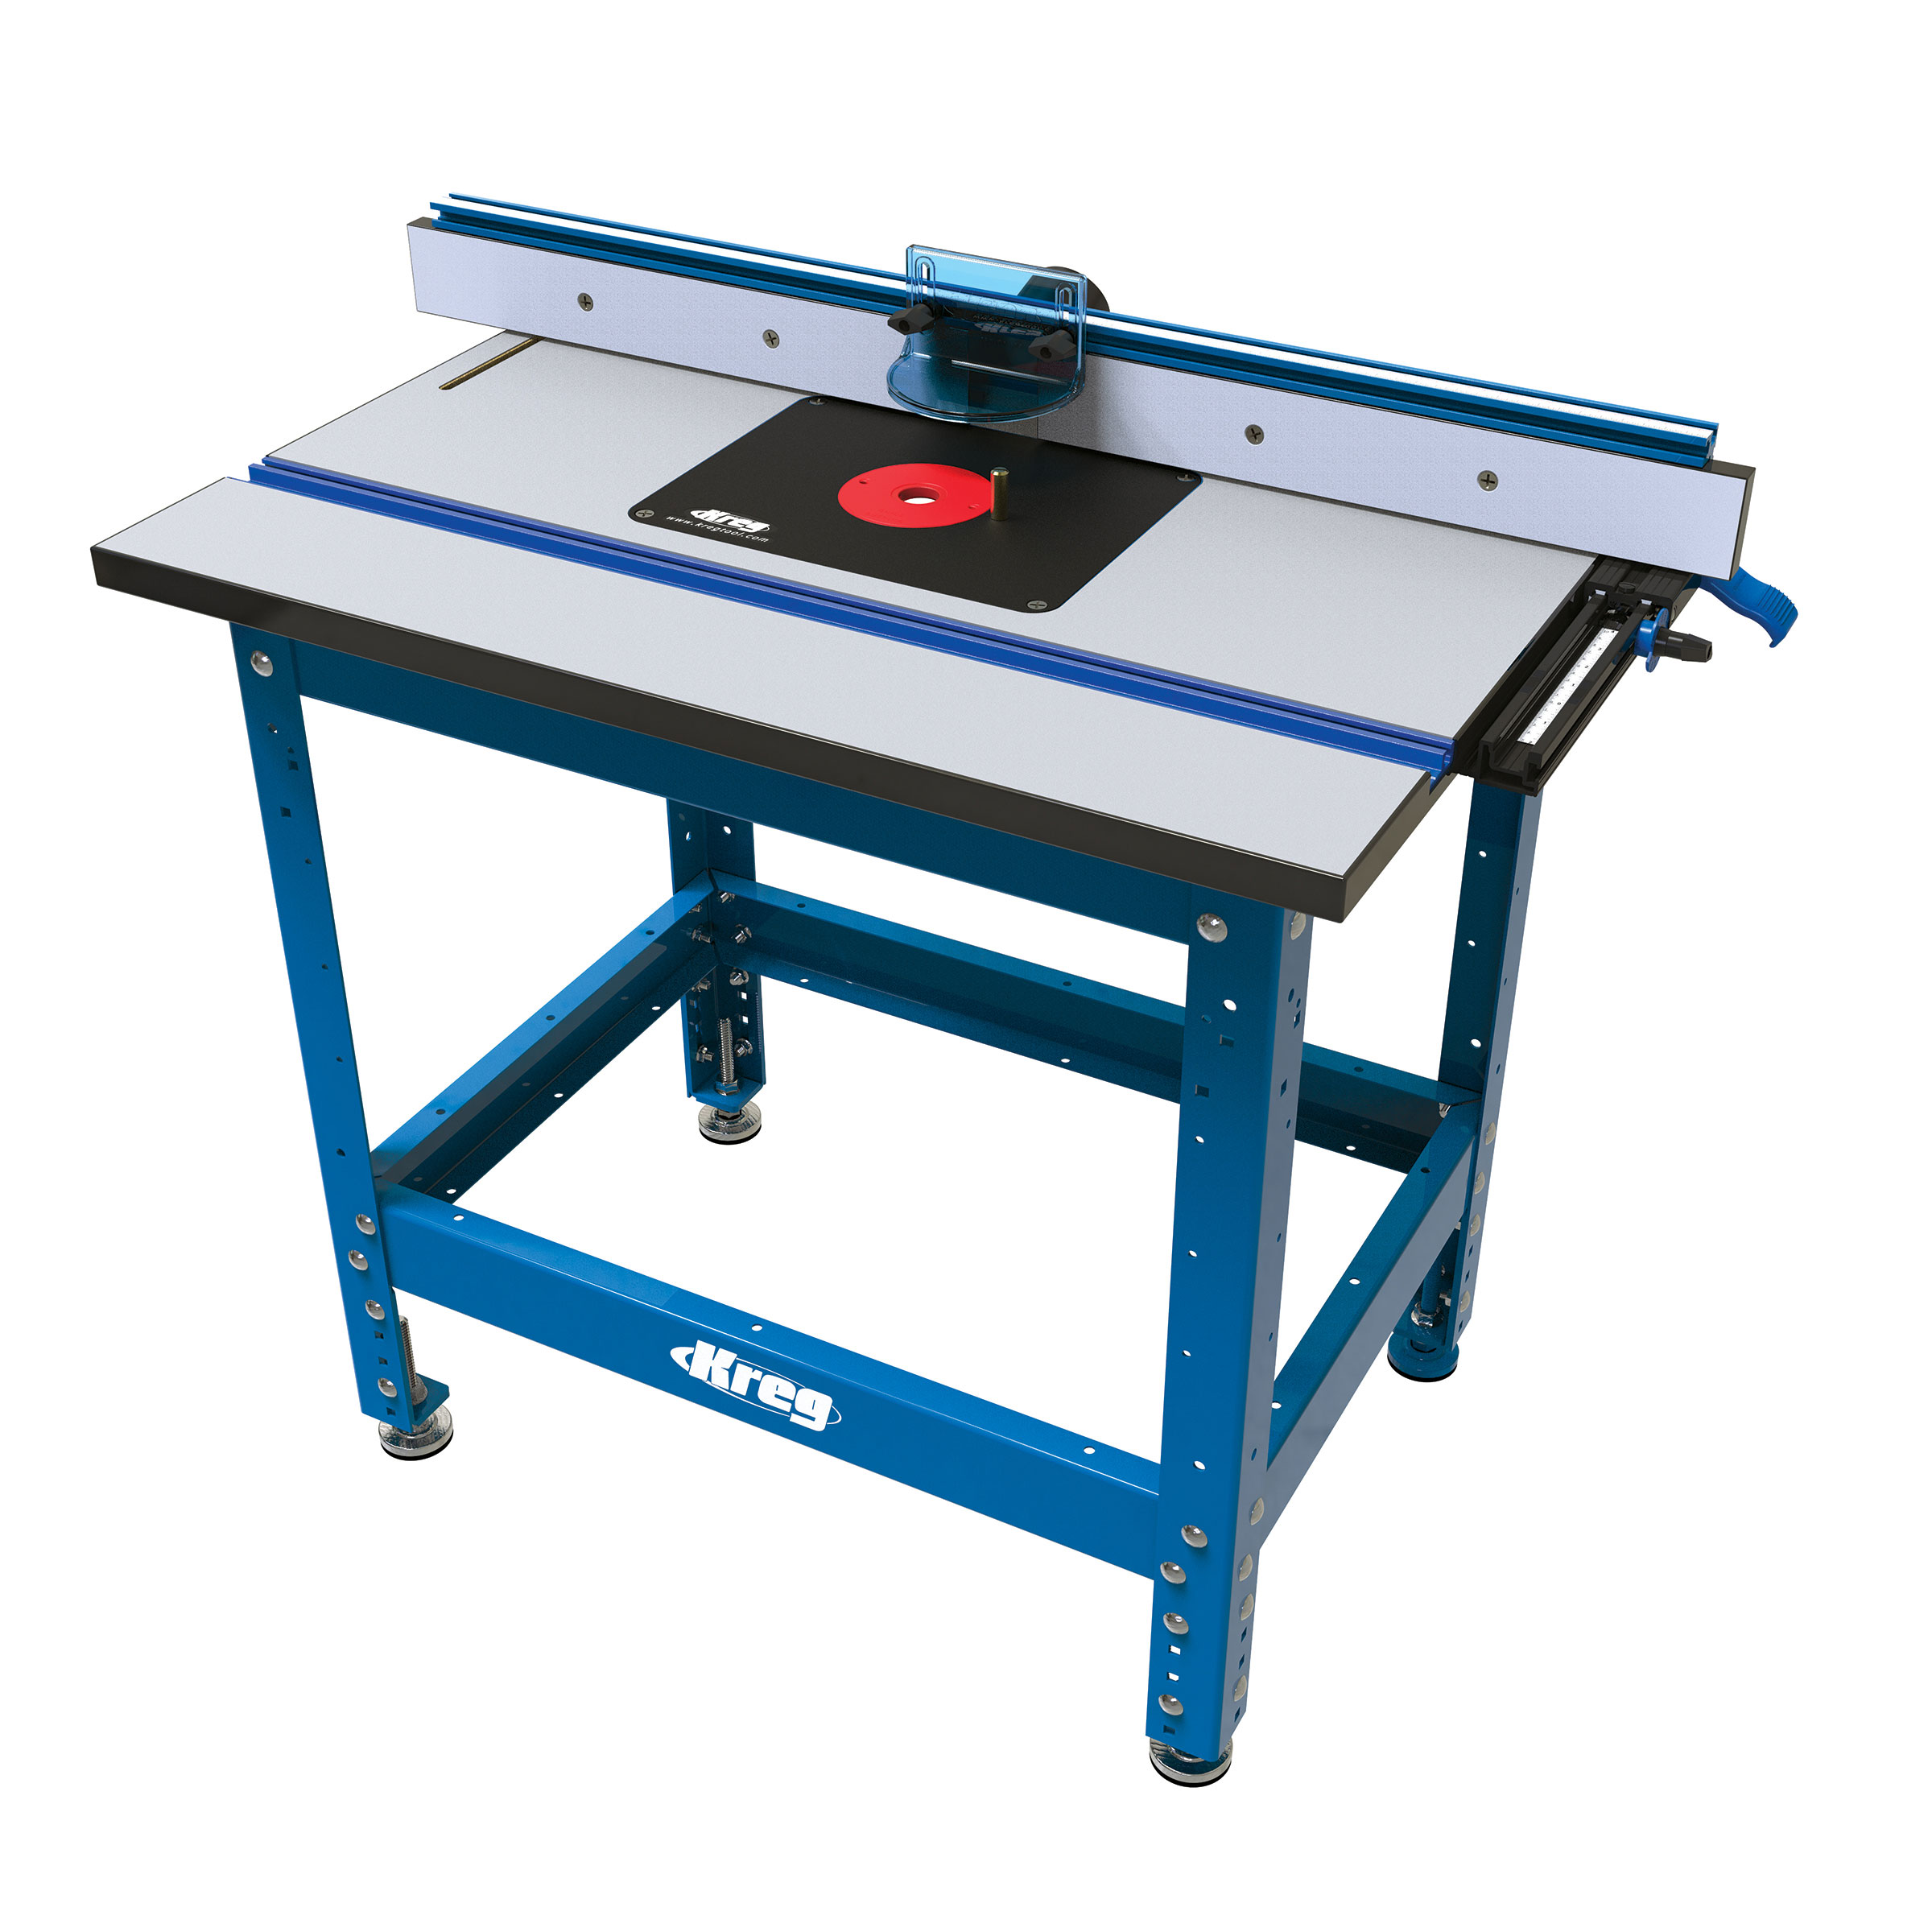
The door and drawer front rails and stiles can be routed using rail & stile bits or a ¼” straight bit (for shaker style). I used a rail & stile bit set with the Kreg Precision Router Table to create the tongue and groove system.
I profile can be routed on the small drawer fronts as desired.
-
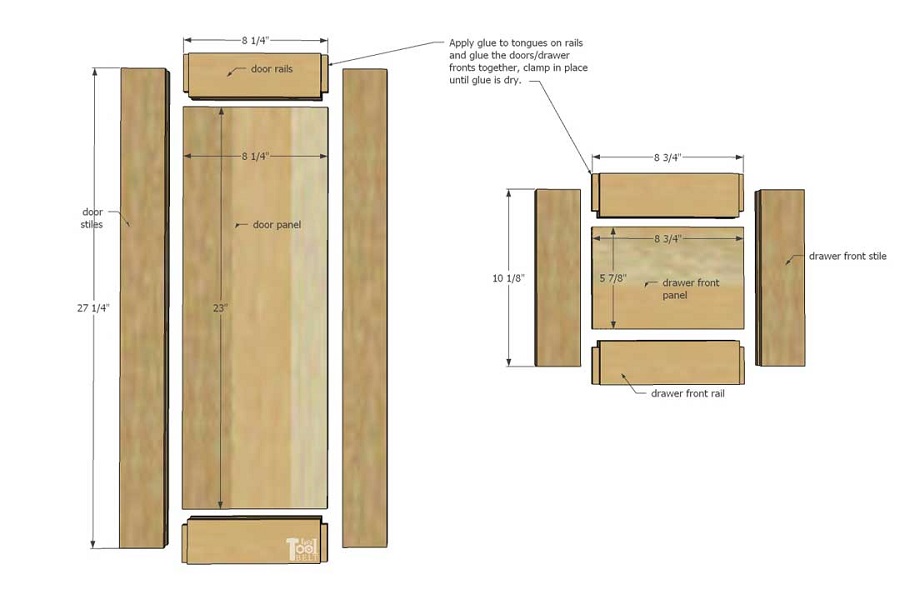
Assemble doors and drawer fronts
The door panel and drawer front panels should slide smoothly into the stile and rail grooves, they should be slightly undersized to not ‘push’ out on the door stiles. Trim panels as necessary.
Glue the doors and drawer fronts together by applying wood glue to the tongue & groove surface where the rails mate to the stiles. The drawer panels are not glued into the groove, they float. Clamp the doors and drawer fronts together until the glue dries. Make sure the doors and drawer fronts are square.
-
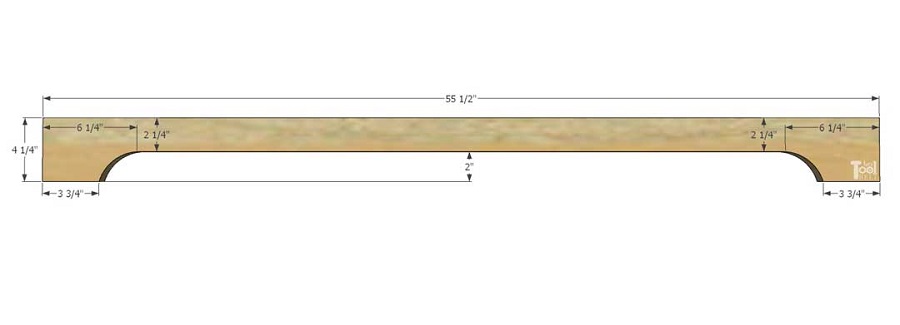
Base trim style
The Base trim is optional and can be added depending on your bathroom configuration. This vanity only used base trim on the right side. Cut the base trim pieces 4 ¼” wide and as long as needed for your situation. For one side base trim the front base trim will be ¾”shorter (54 ¾”). I routed a small profile at the top of the base trim boards. On the front base trim board, I cut out a simple profile. I measured 2” up from the bottom, 3 ¾” from the ends (3” if no side trim is used) and 6 ¼” from the ends (5 ½” if no side trim is used). I used a quart paint can, to trace the round section. Then used a bandsaw (or scroll saw or jig saw) to cut out the profile.
-
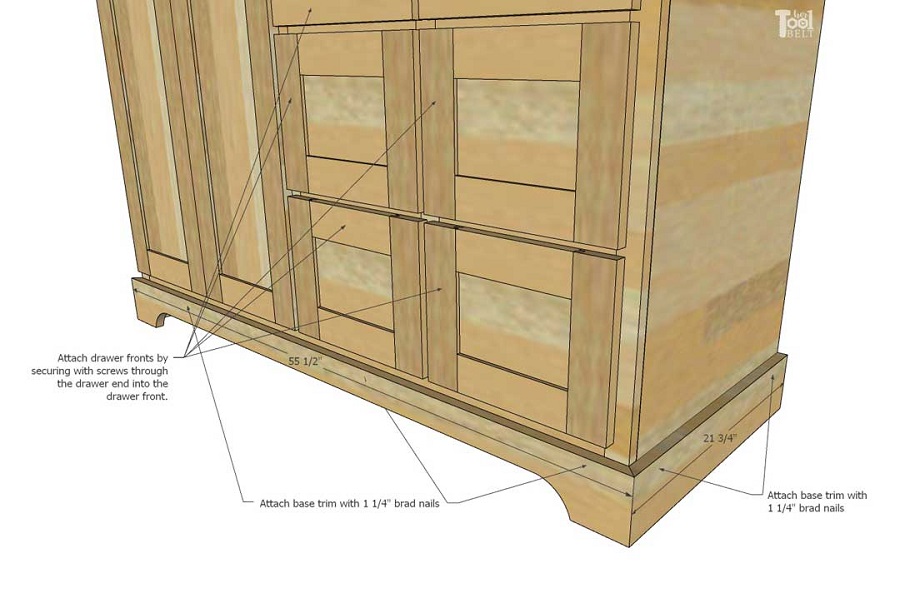
Install trim, drawer fronts and doors
Cut a 45 deg miter on the mating ends of the base trim and attach the base trim to the front of the vanity with 1 ¼” brad nails.
Center and attach the drawer fronts to the drawers. Secure the drawer fronts with screws through the drawer ends into the drawer fronts.
Attach the doors to the face frame with hinges. If using concealed hinges, the concealed hinge jig is very helpful for hinge installation.
-
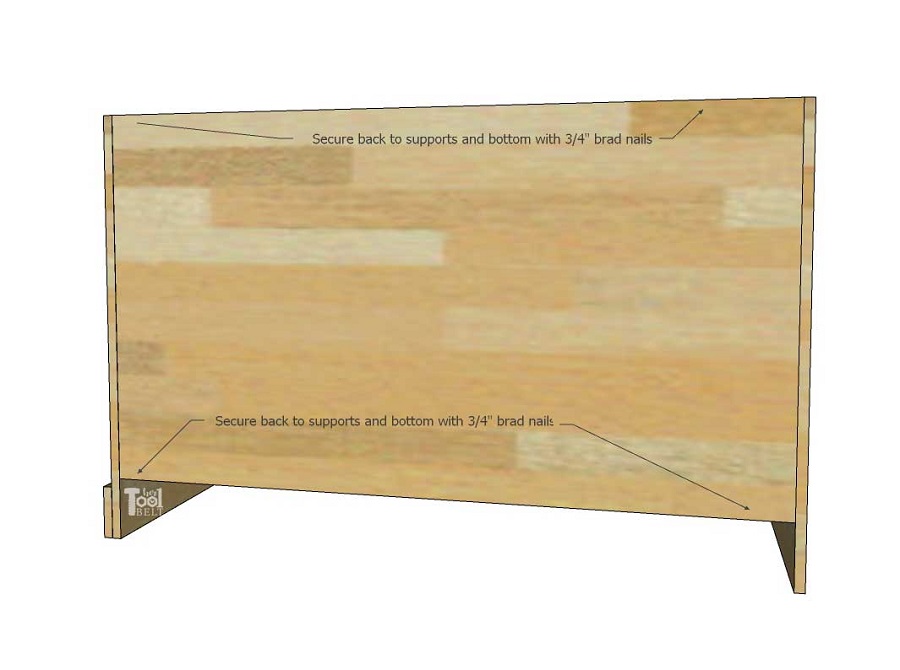
Attach back
Attach back panel to the supports, dividers and bottom plywood pieces with ¾” brad nails.
-
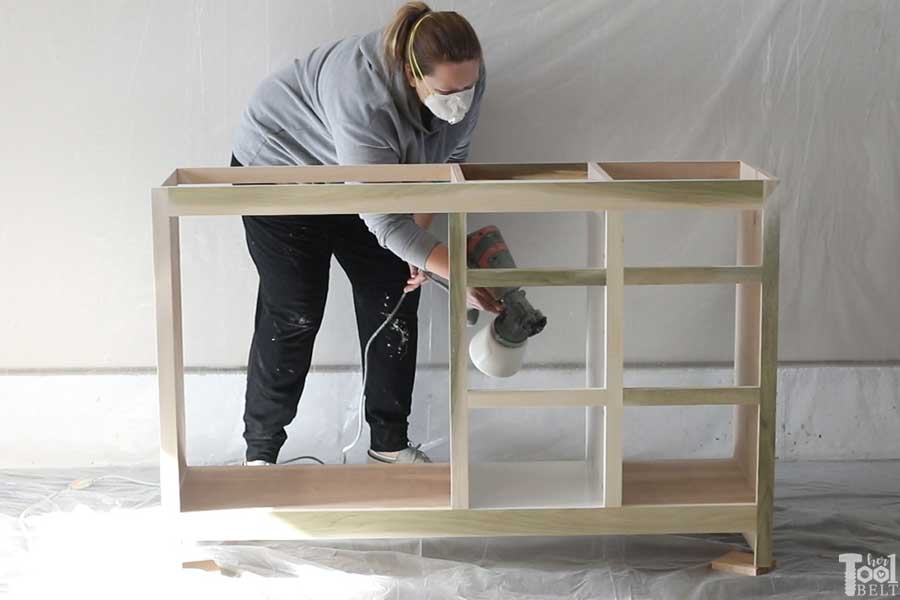
Sand and Finish
Fill any blemishes, nail holes or cracks with wood filler and let dry. Sand vanity with sandpaper starting at 80 grit paper and working up to about 220 grit paper. Finish as desired. I primed the vanity with paint primer, then applied 2 coats of white cabinet and trim paint, making sure to lightly sand in between each coat.