

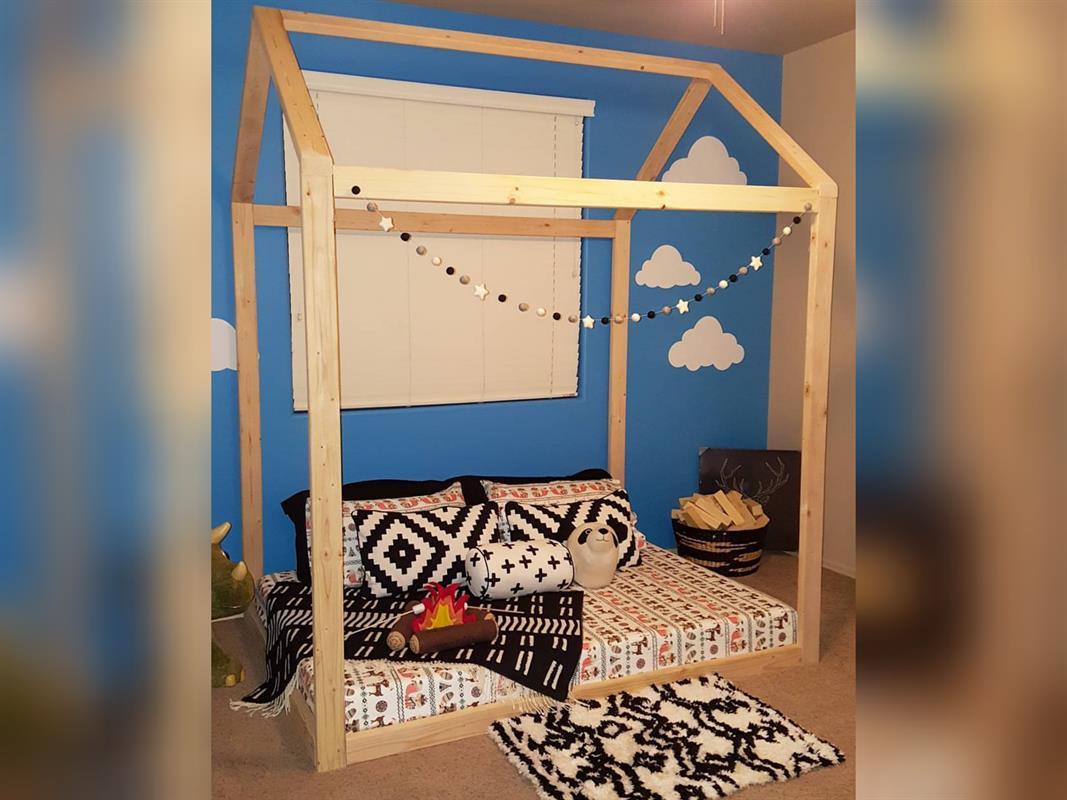


Make your very own house bed for your kids’ room. Fully customizable to fit the décor you are looking for. This build is made from 2″ x 4″ dimensional lumber available at any home improvement store.
Tools
Kreg Tools


Other Tools
-
Miter Saw

-
Square
Materials
Wood Products
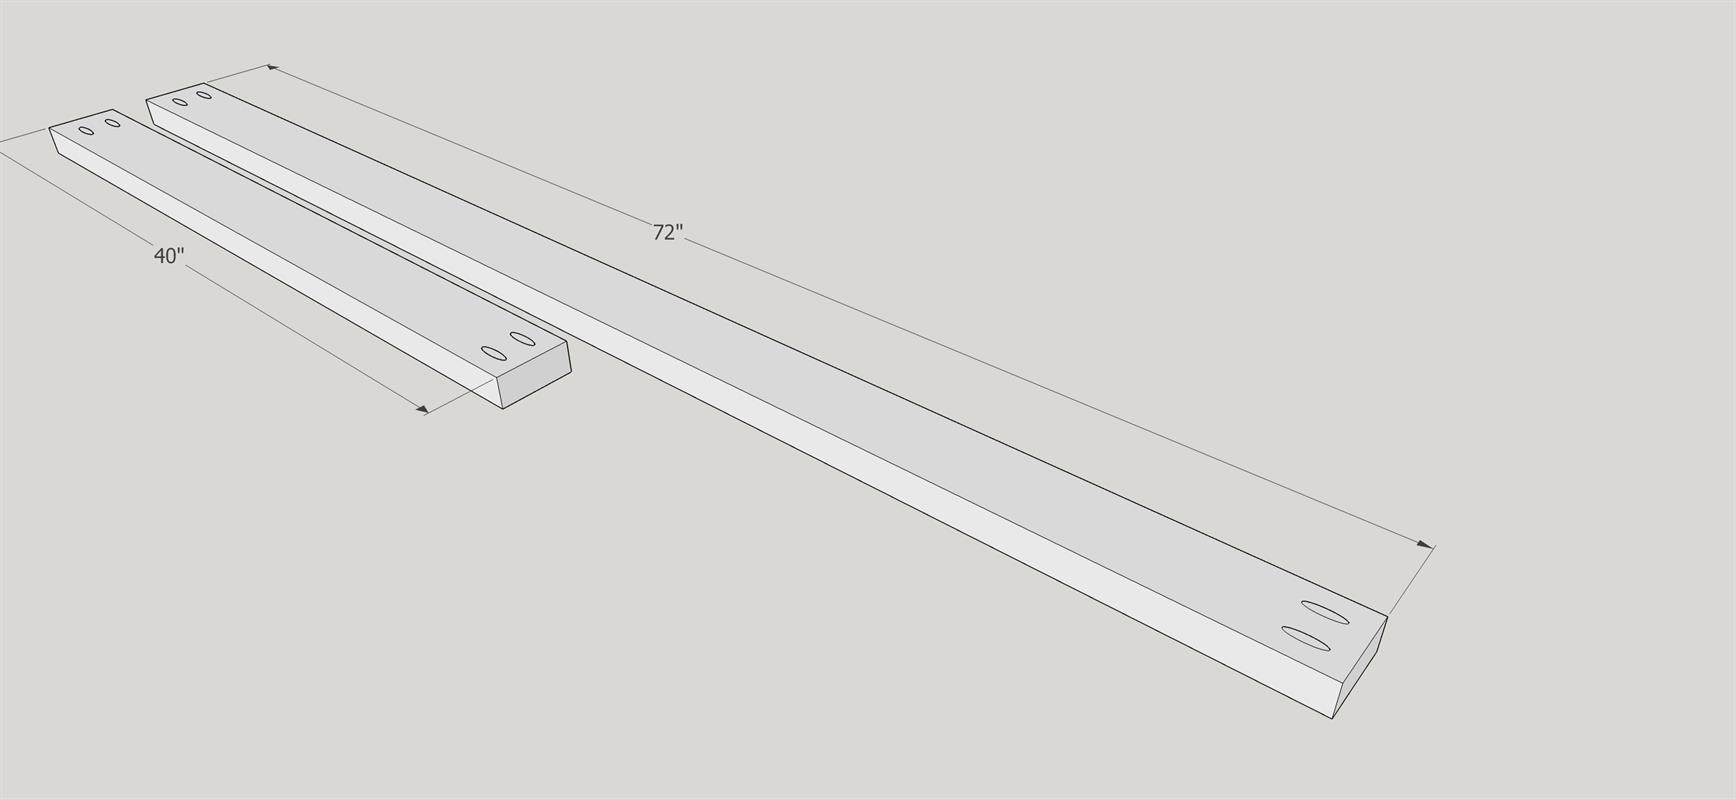
- 4 Board , 2x4 , 96"
- 7 Board , 2x4 , 72"
Hardware & Supplies
- 26 1-1/2" Kreg Screws
- 26 Solid-Wood Pocket-Hole Plugs
- 1 Wood Glue
Directions
-
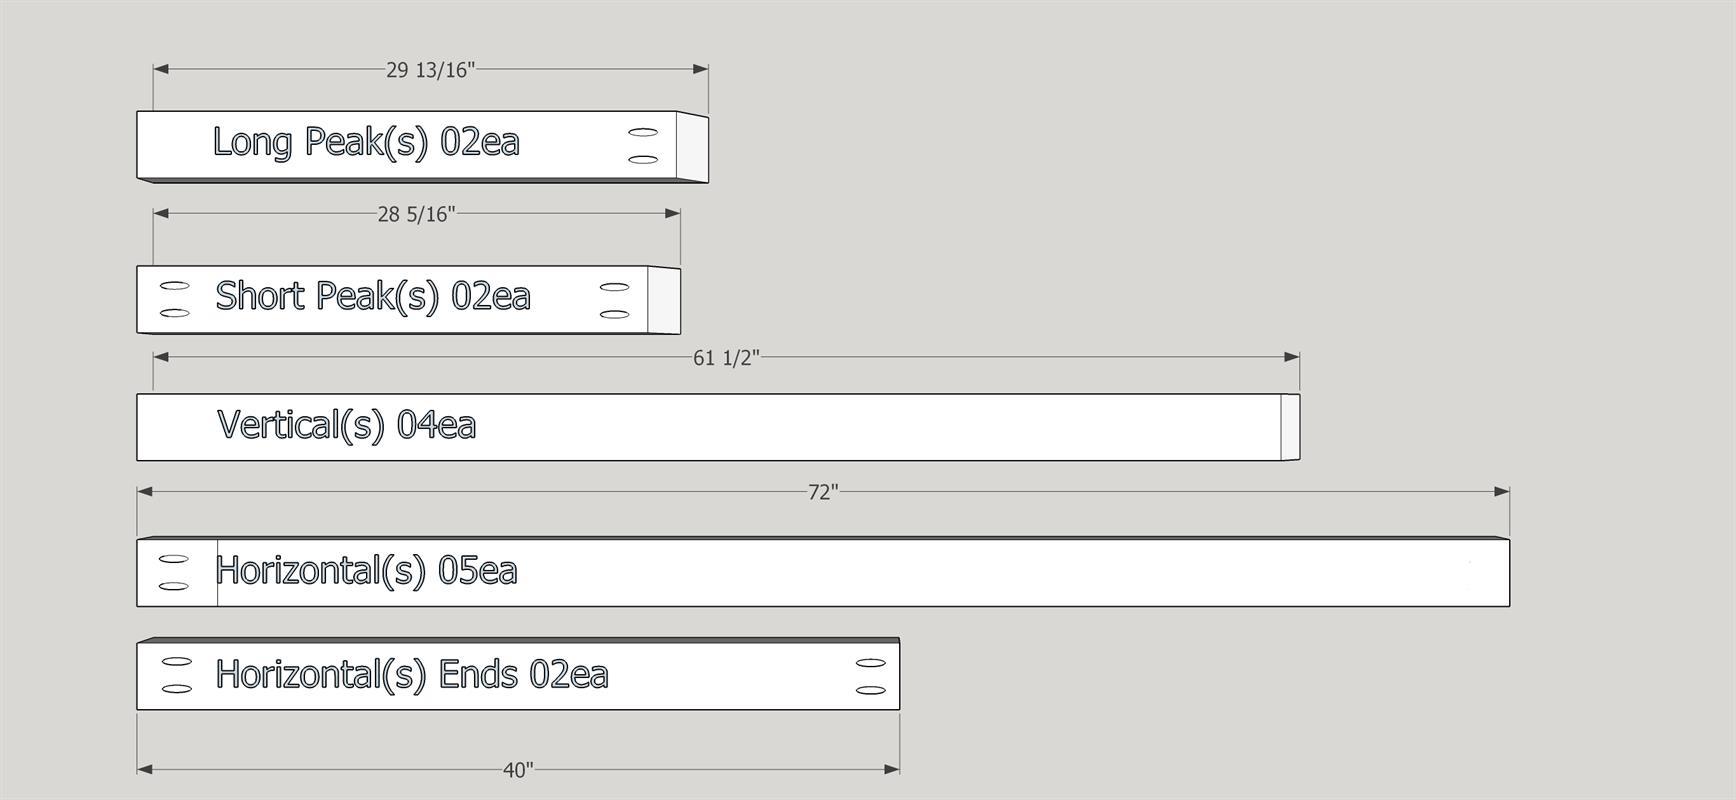
Cut Parts
Using the cutlist provided, cut all the parts necessary for this build.
Reference material list as needed.
-
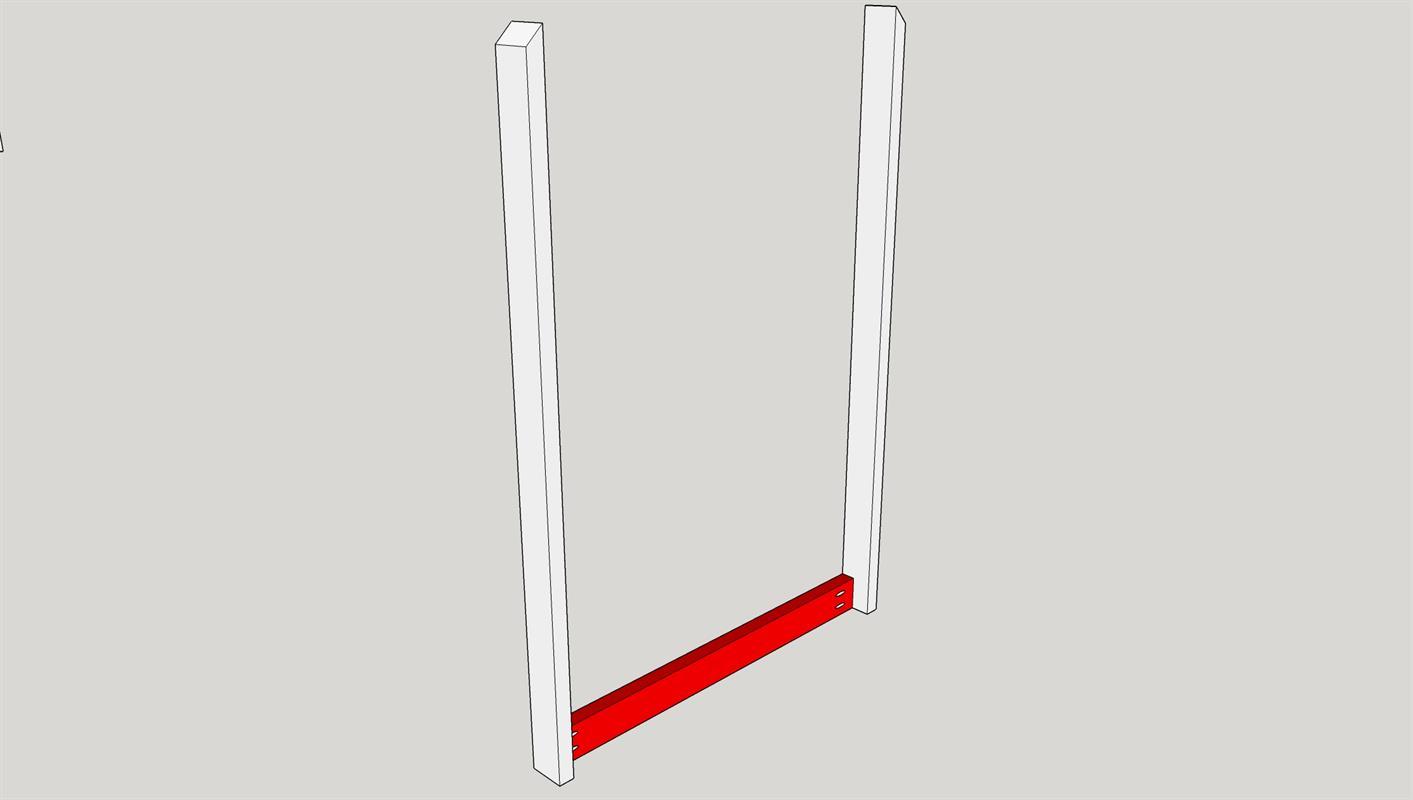
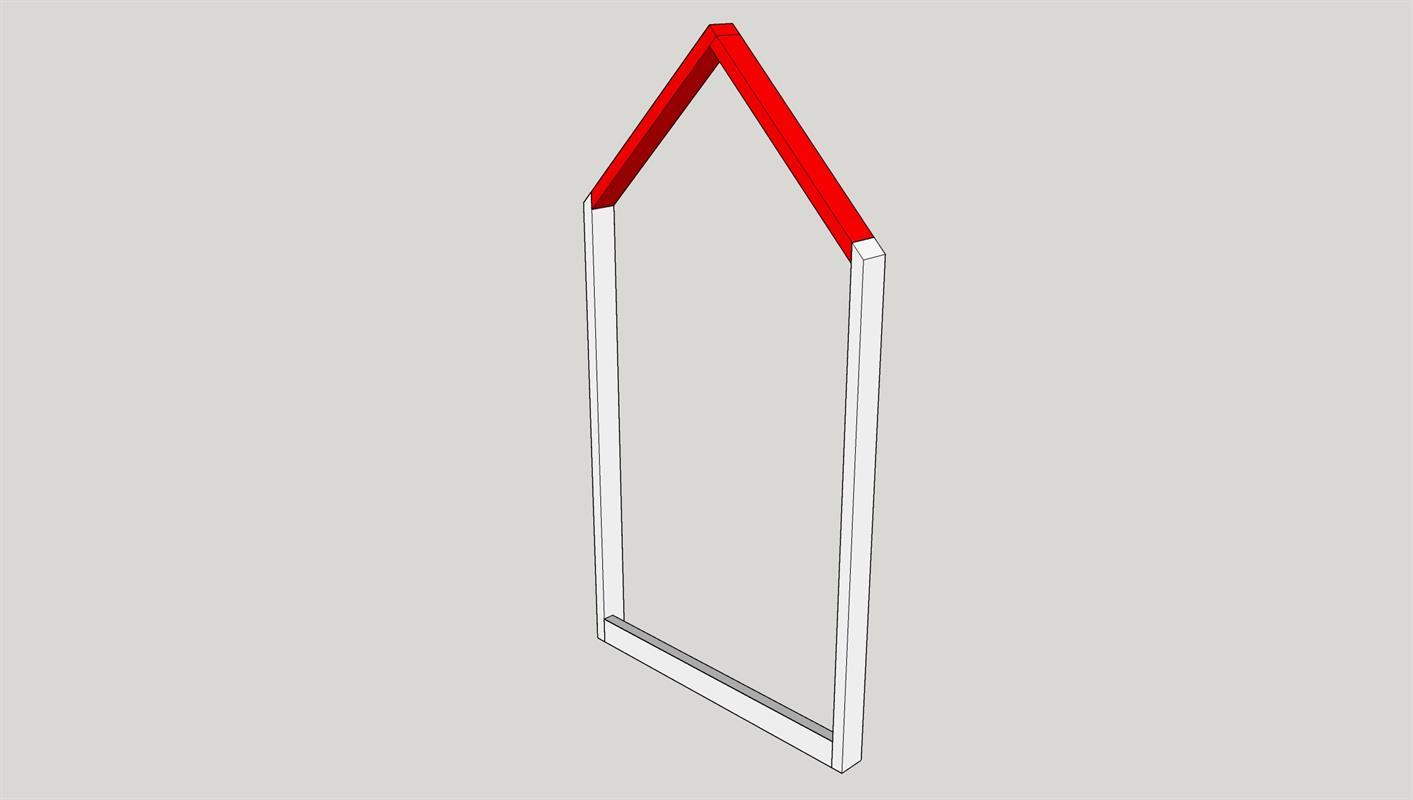
Assmeble Ends
Assemble the ends of the house bed per attached image. Glue is recommended on both pieces prior to attachment.
repeat this for the other end too.
Once screws are in, fill holes with wood plugs made by kreg - sand flush as needed.
-
Connect the two ends
Now that you have both "house ends" built, connect them with with your horizontals*
*You'll want to do this step in the bedroom otherwise you'll build the ship outside the bottle.
I'd recommend having all your pocket holes face away from the front of the bed or the door. Even though we are filling them, we can keep the attachments "hidden" so to speak.
Once screws are in, fill holes with wood plugs made by kreg - sand flush as needed.
-
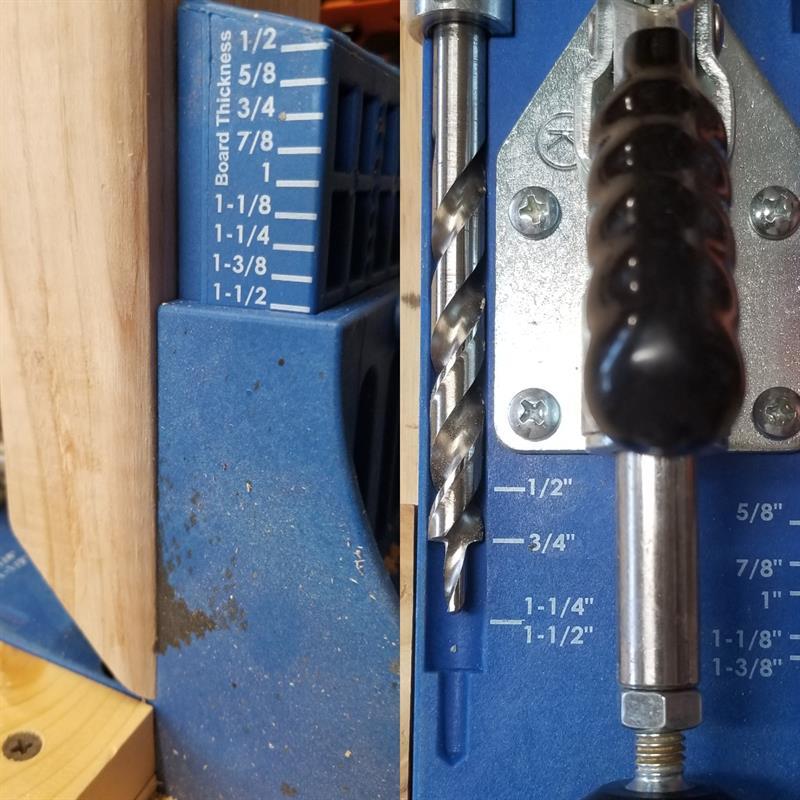
Drill Pocket Holes in Horizontals
Drill pocket holes on both ends of all the horizonatal pieces.
Double check your settings on both your pocket hole jig and the collar on your drill bit for 1 1/2" setting.
-
Drill Pocket Holes in Peak Parts
Pull the parts labeled "peak" and drill the pocket holes.
Please note on the ends with the miters, you will drill on the long side. Set your jig to 1-1/2" but set your drill bit collar to 3/4" ***
See attached image. ***This is only for the mitered end - the "peak short" will get pocket holes on the square end - use your typical settings on your jig and drill bit for 1 1/2"
-
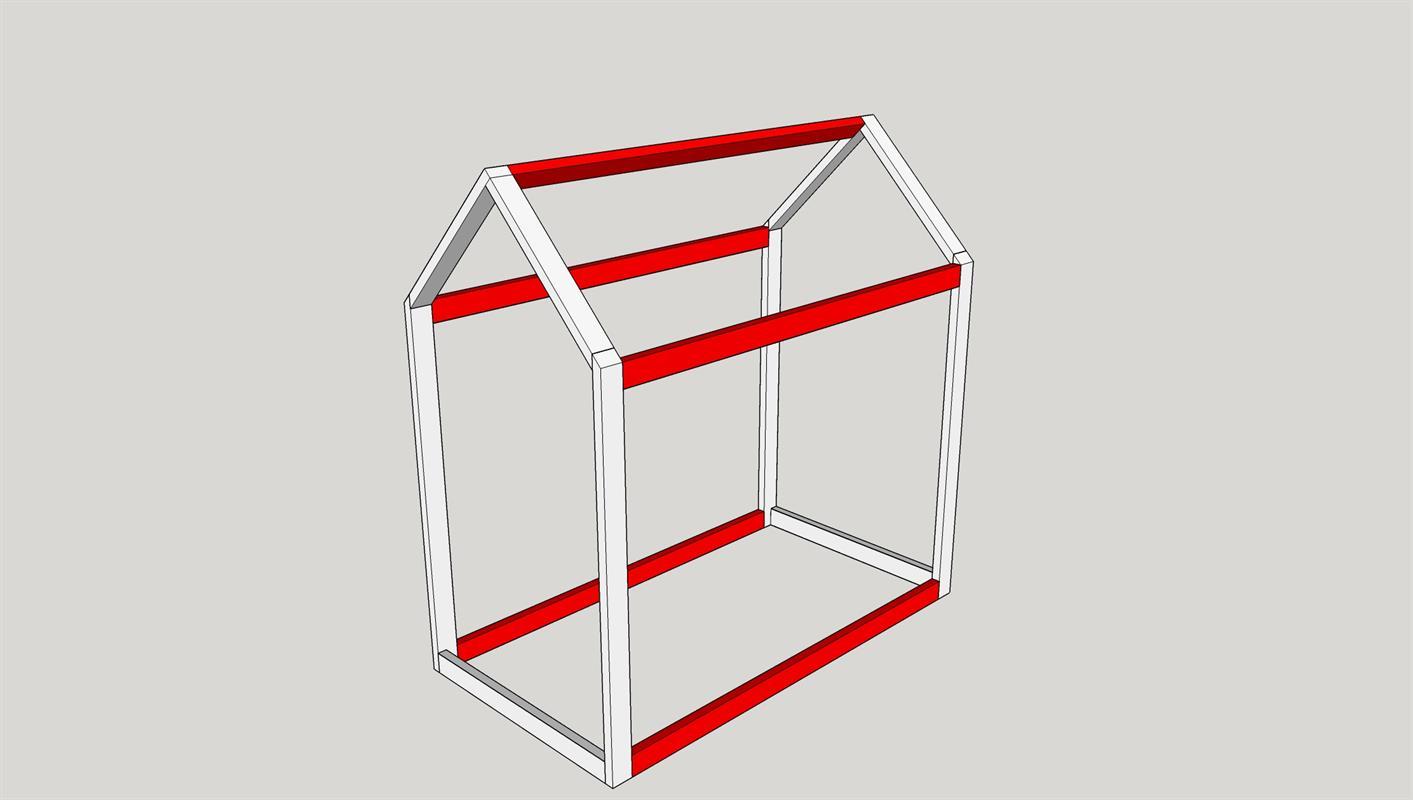
Assemble Peaks
Using the same 1 1/2" pocket hole screws, attach the peaks to each other per the attached image. Glue is recommended on all the pieces that will be screwed together.
Repeat the above step for the other peaks for the opposite end.
Once screws are in, fill holes with wood plugs made by kreg - sand flush as needed.
-
Finish and decorate
This build can be stained, painted or left raw. Depending on the direction you take, you may want to finish the parts before you assemble them.
.
You'll definately want to sand and finsh the (2) ends and connecting horizontals before final assembly in the bedroom.