

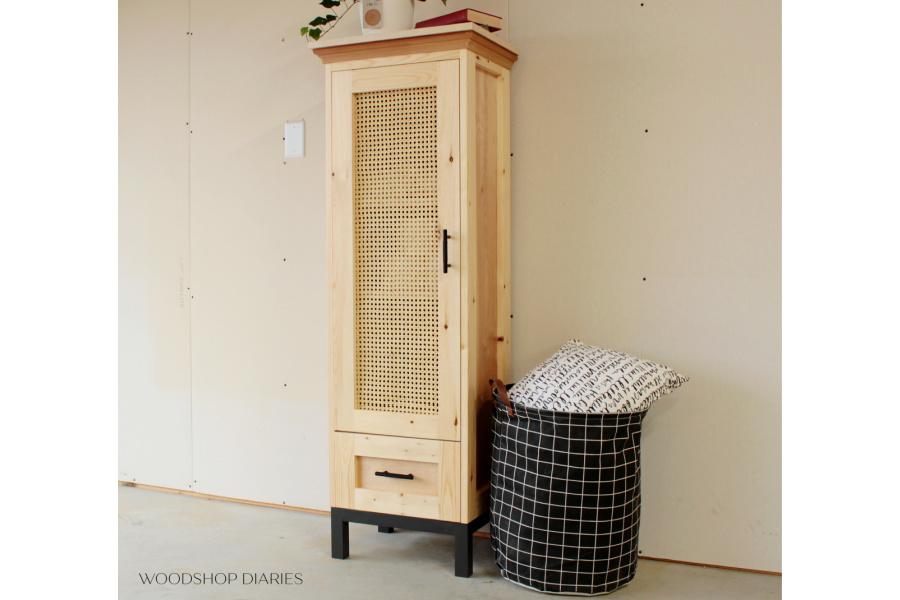


This easy to build DIY linen cabinet features a storage drawer, adjustable shelves, and a decorative cane panel door to give it a fun, modern vibe. It would work perfect in a small bathroom for extra towel storage or in a small entryway to tuck away leashes, gloves, hats, etc.
Tools
Kreg Tools


Other Tools
-
Miter Saw

-
Staple Gun
-
Nail Gun
Materials
Wood Products
- 1 Board , 2x2x8
- 1 Full Sheet Plywood , 3/4"
- 1 Full Sheet Plywood , 1/4"
- 5 Boards , 1x3x8
- 1 Small Crown Molding , 4'
- 1 Lattice Trim
Hardware & Supplies
- 1 13" x 36" piece cane webbing
- 1 1/8” x ¾” x 8’ lattice trim (optional)
- 2 Full overlay concealed hinges for frameless cabinet
- 1 Box 1 ¼” pocket hole screws
- 1 Box 2” wood screws
- 1 Box 9/16" staples
- 1 Box brad nails
- 2 Set of Shelf Pins
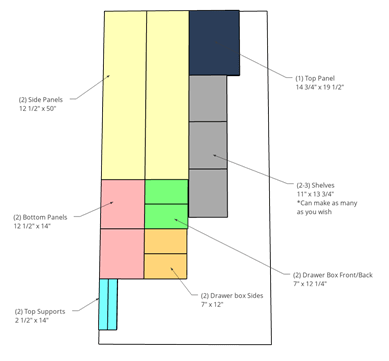
Cut List & Parts
- 2 Side Panels , ¾” x 12 ½” x 50”
- 2 Bottom Panels , ¾” x 12 ½” x 14”
- 2 Top Supports , ¾” x 2 ½” x 14”
- 1 Back Panel , ¼” x 15 ½” x 50”
- 1 Top Panel , ¾” x 14 ¾” x 19 ½”
- 4 1x3s for side panel trim , ¾” x 2 ½” x 50”
- 4 1x3s for side panel trim , ¾” x 2 ½” x 8 ½”
- 1 1x3 for front trim , ¾” x 2 ½” x 15 ½”
- 2 1x3s for door frame sides , ¾” x 2 ½” x 38 ¾”
- 2 1x3s for door frame top/bottom , ¾” x 2 ½” x 10 ¼”
- 2 Drawer box sides , ¾” x 7” x 12”
- 2 Drawer box front/back , ¾” x 7” x 12 ¼”
- 1 Drawer box bottom , ¼” x 12” x 13 ¾”
- 2 1x3s for drawer front frame sides , ¾” x 2 ½” x 8 3/8”
- 2 1x3s for drawer front top/bottom , ¾” x 2 ½” x 10 ¼”
- 4 2x2s for base frame legs , 1 ½” x 1 ½” x 6”
- 2 2x2s for base frame sides , 1 ½” x 1 ½” x 10 ½”
- 2 2x2s for base frame front/back , 1 ½” x 1 ½” x 14”
- 2 Shelves , ¾” x 11” x 13 ¾”
- 3 Crown molding , Cut to fit
Directions
-
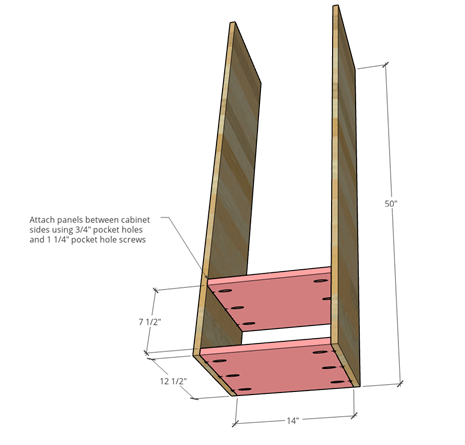
Assemble Cabinet Carcass
Cut two side panels, two bottom panels, and two plywood strips (OR use 1x3s) to assemble the cabinet carcass like shown. Drill ¾” pocket holes into the ends of the plywood strips and along the edges of the bottom panels.
Before assembling, apply iron on edge banding to the front edges of each piece if desired.
-
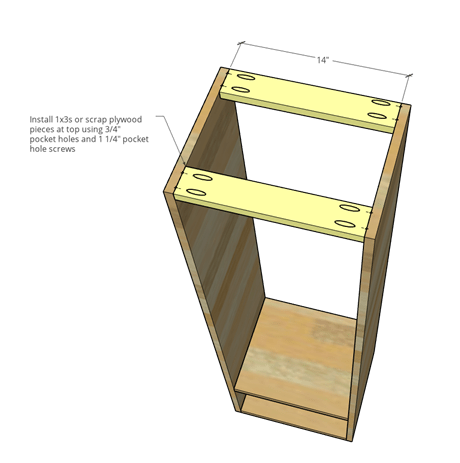
Add Top Supports
Then, assemble using 1 ¼” pocket holes.
NOTE: You can use a solid panel for the top instead of strips—I was just trying to save on lumber.
-
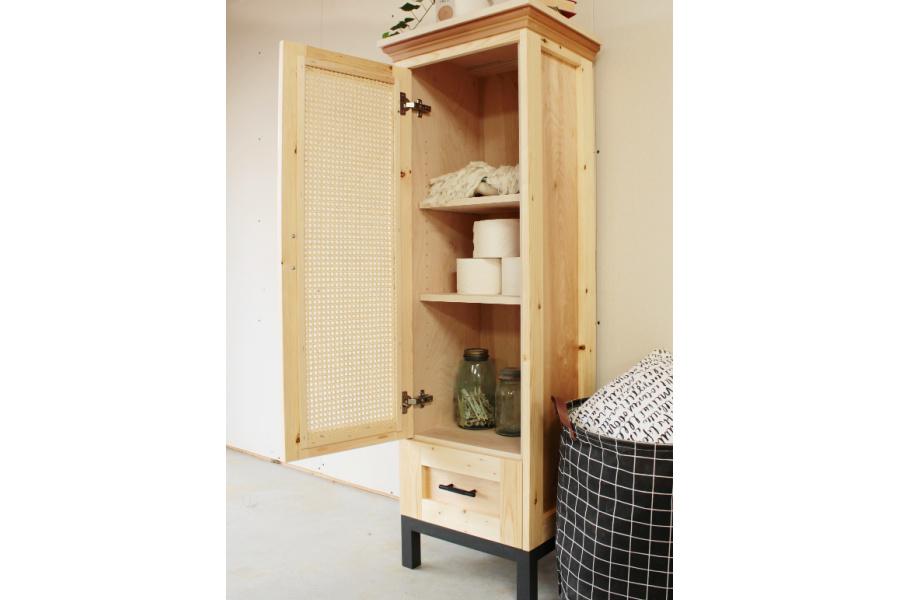
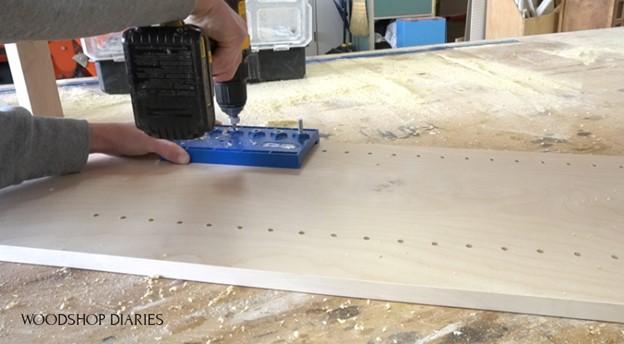
Drill Shelf Pin Holes
Drill shelf pin holes along both sides of the cabinet to install adjustable shelves later.
-
Attach Back Panel
Cut ¼” plywood panel to fit over the back side and staple (or screw with 1 ¼” screws) onto the back.

-
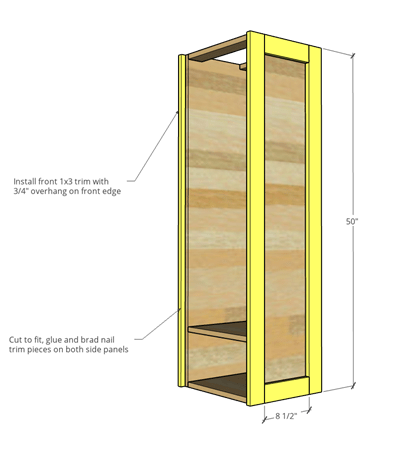
Trim Out Side Panels
Glue and brad nail 1x3s on both side panels like shown. Note that the 1x3 at the front should overhang the front edge by ¾”. These measurements are a good guideline, but with trim pieces, it’s best to double check your sizing and cut to fit for tighter joints.
-
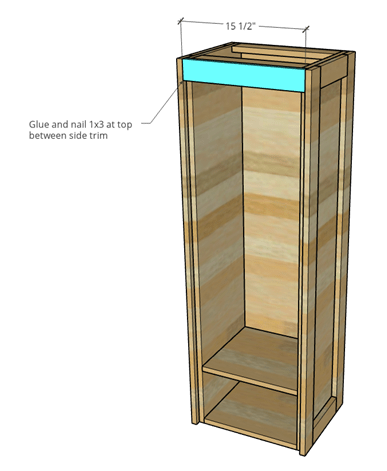
Attach Front Trim
Cut one more 1x3 piece to fit along the top edge like shown. Glue and nail in place.
-
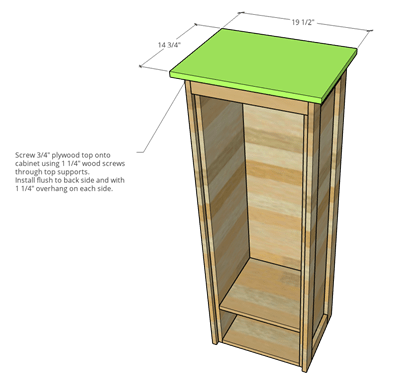
Attach Top
Cut ¾” plywood piece for the top and apply edge banding on front and sides if desired. Place it on the top of the cabinet leaving 1 ¼” overhang on both sides and so that it’s flush on the back side. Use 1 ¼” wood screws through the top supports to attach.
-
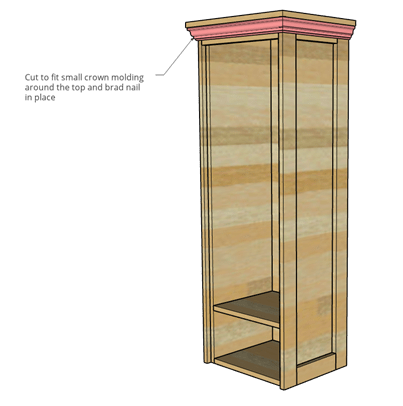
Add Crown Molding
Cut to fit small crown molding (I used 1 ¾” crown) around the top and brad nail in place.
-
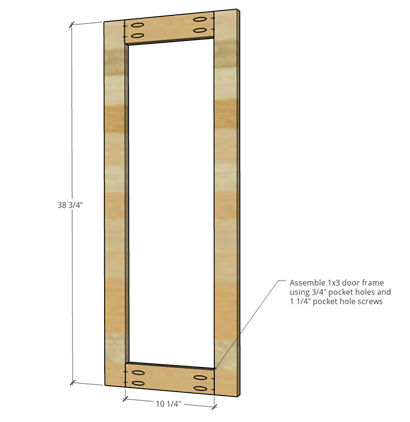
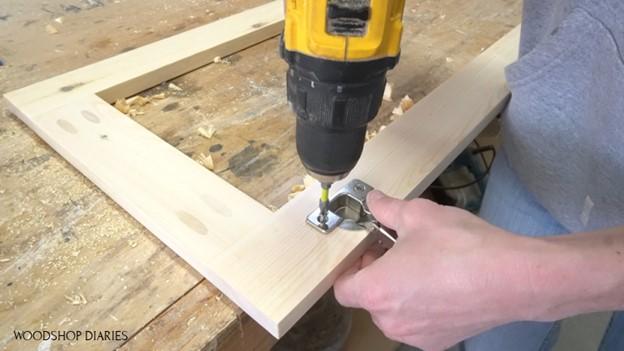
Assemble Door Frame
Cut 1x3s for door frame and assemble using ¾” pocket holes and 1 ¼” pocket hole screws (use glue as well, if you’d like) like shown. Once assembled, you can plug pocket holes if desired or leave as is. I plugged mine for a cleaner look.
-
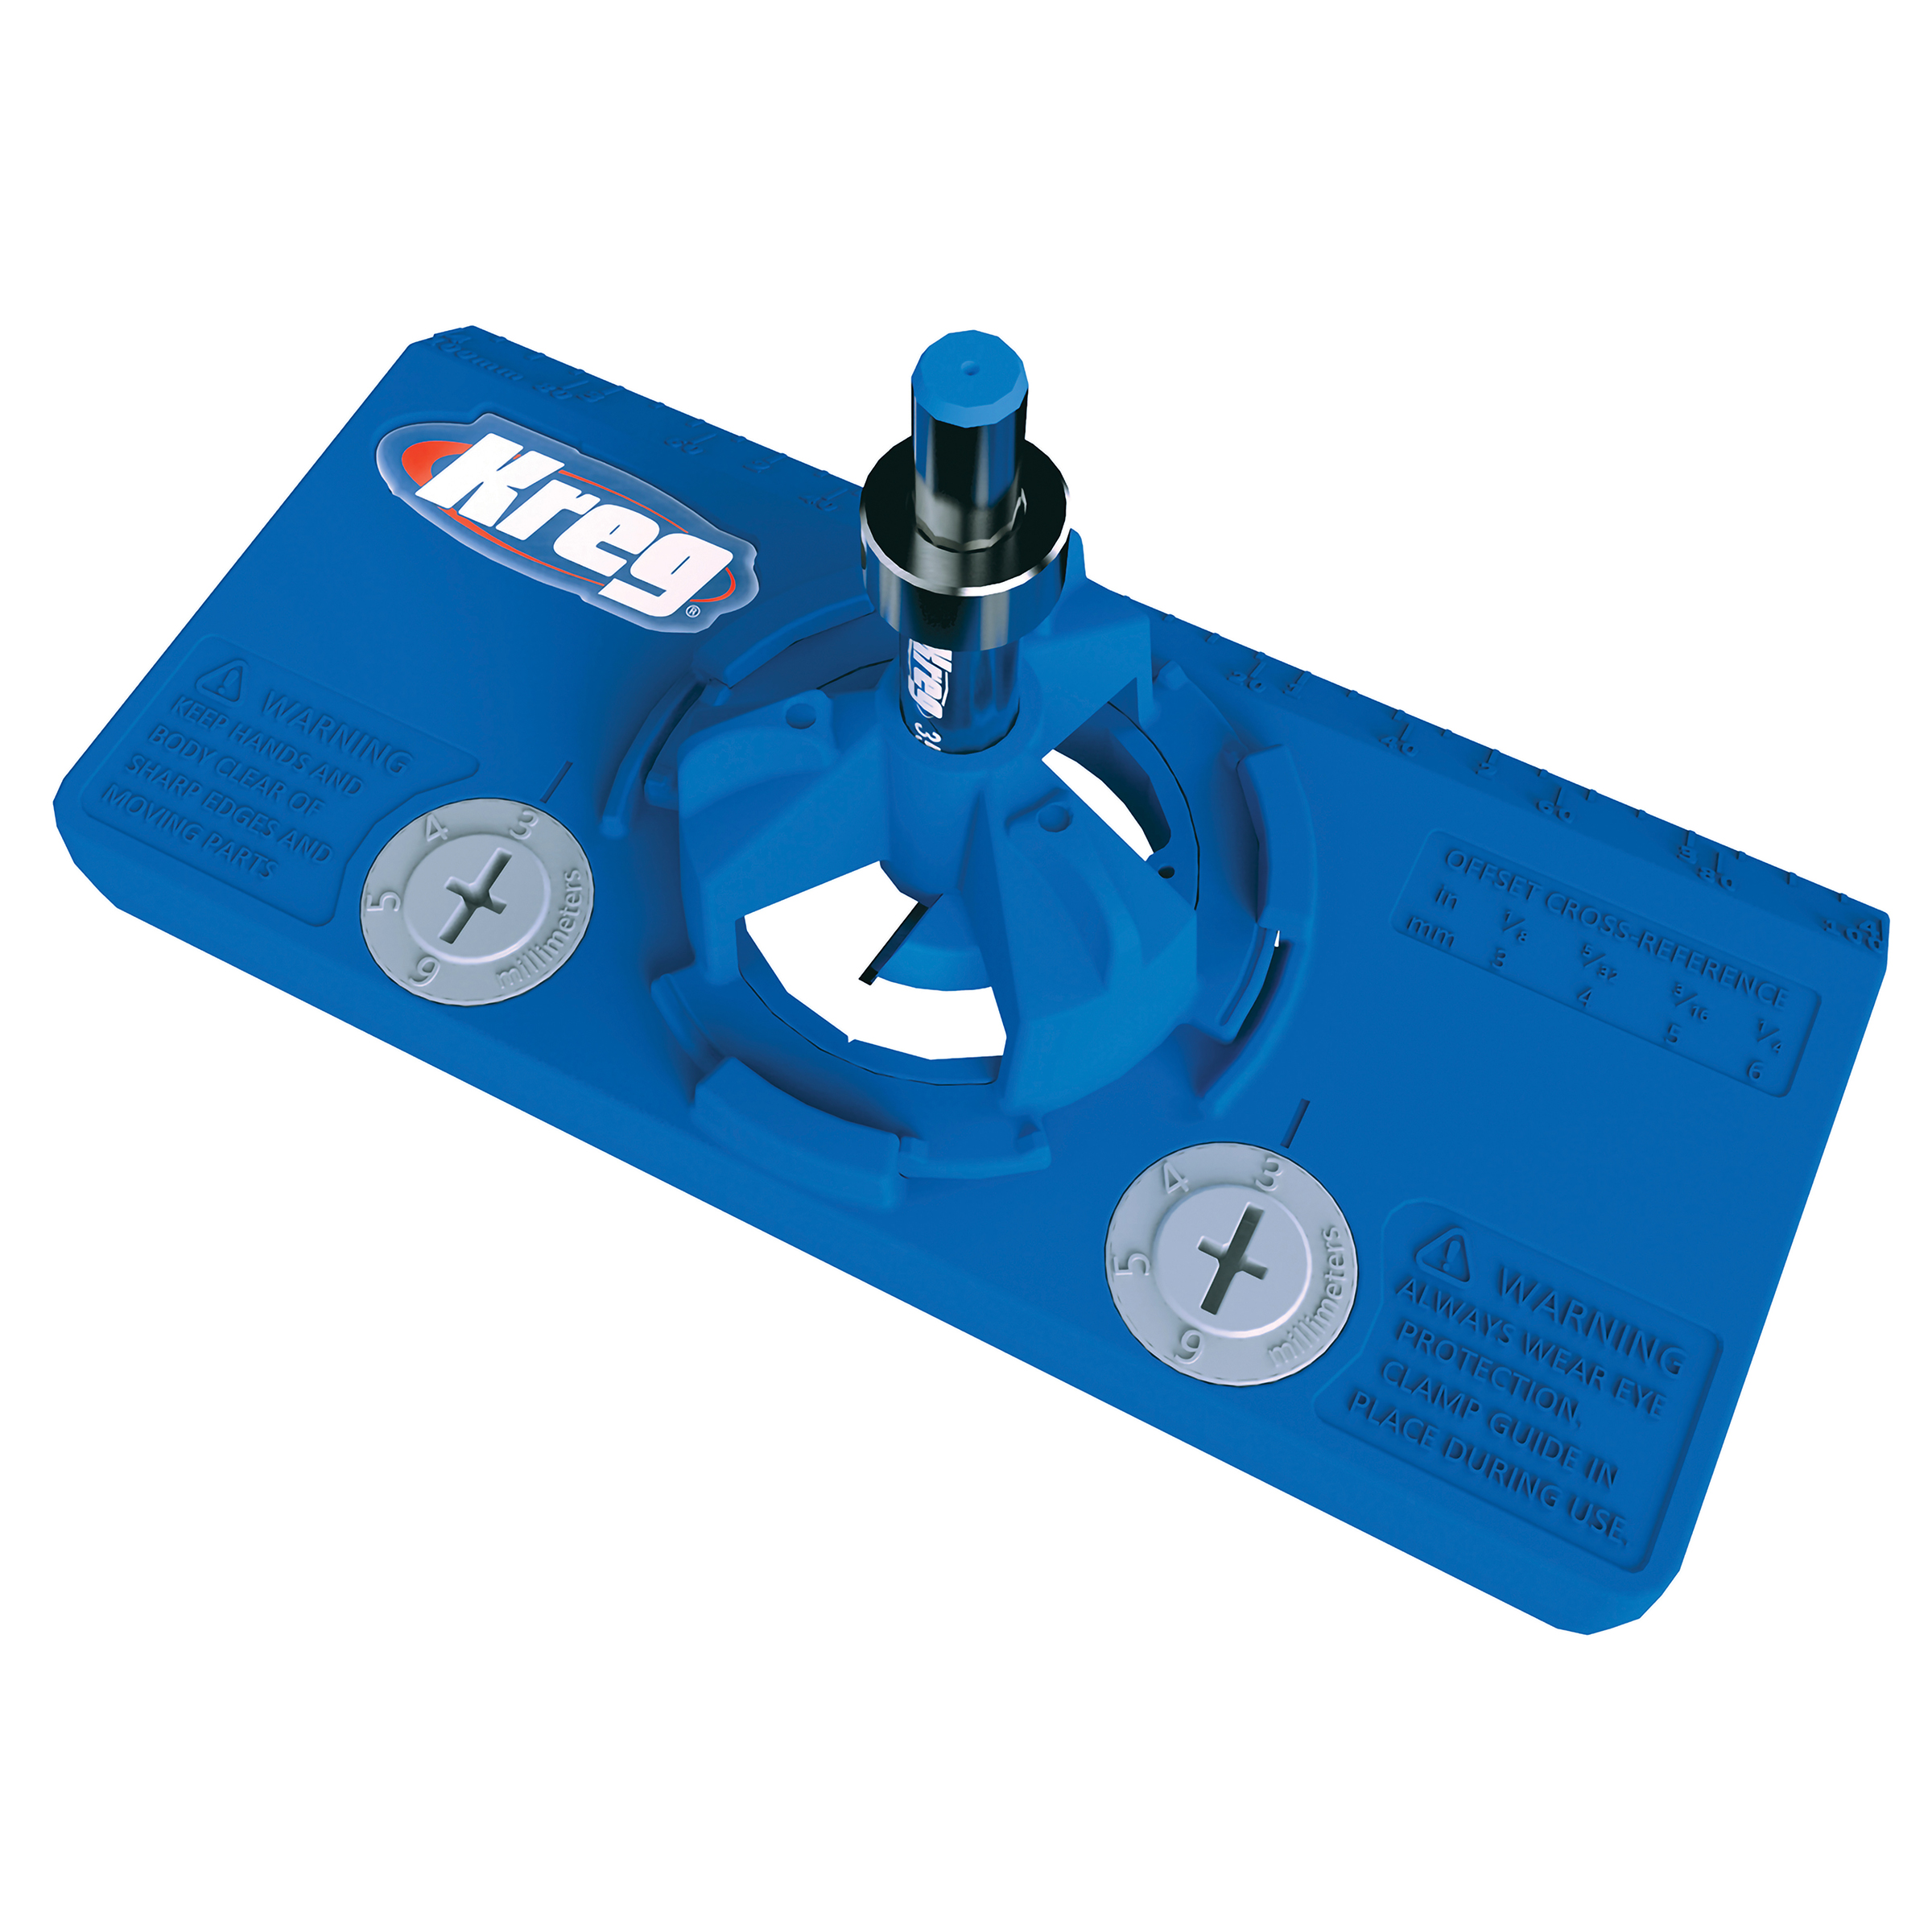
Install Door Hinges
Use a Kreg Concealed Hinge Jig to drill cup holes to install full overlay cabinet hinges for frameless cabinets.
-
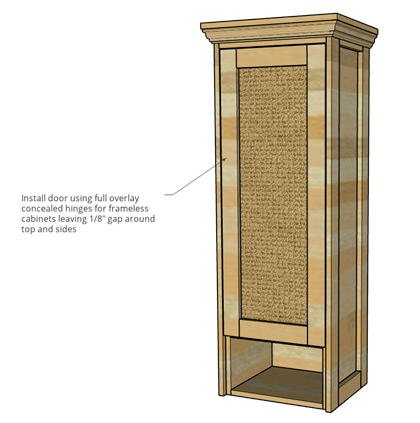
Attach Cabinet Door
Screw the hinges into the door and install door into cabinet.
-
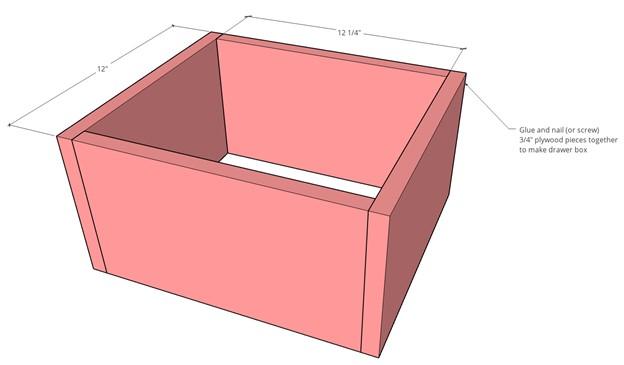
Assemble Drawer Box
Cut ¾” plywood pieces to assemble drawer box like shown. Glue and brad nail (or use 1 ¼” wood screws) to assemble box.
-
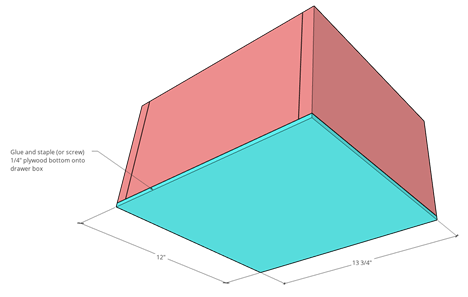
Attach Drawer Bottom
Then, cut ¼” plywood panel to staple (or screw) onto the bottom.
-
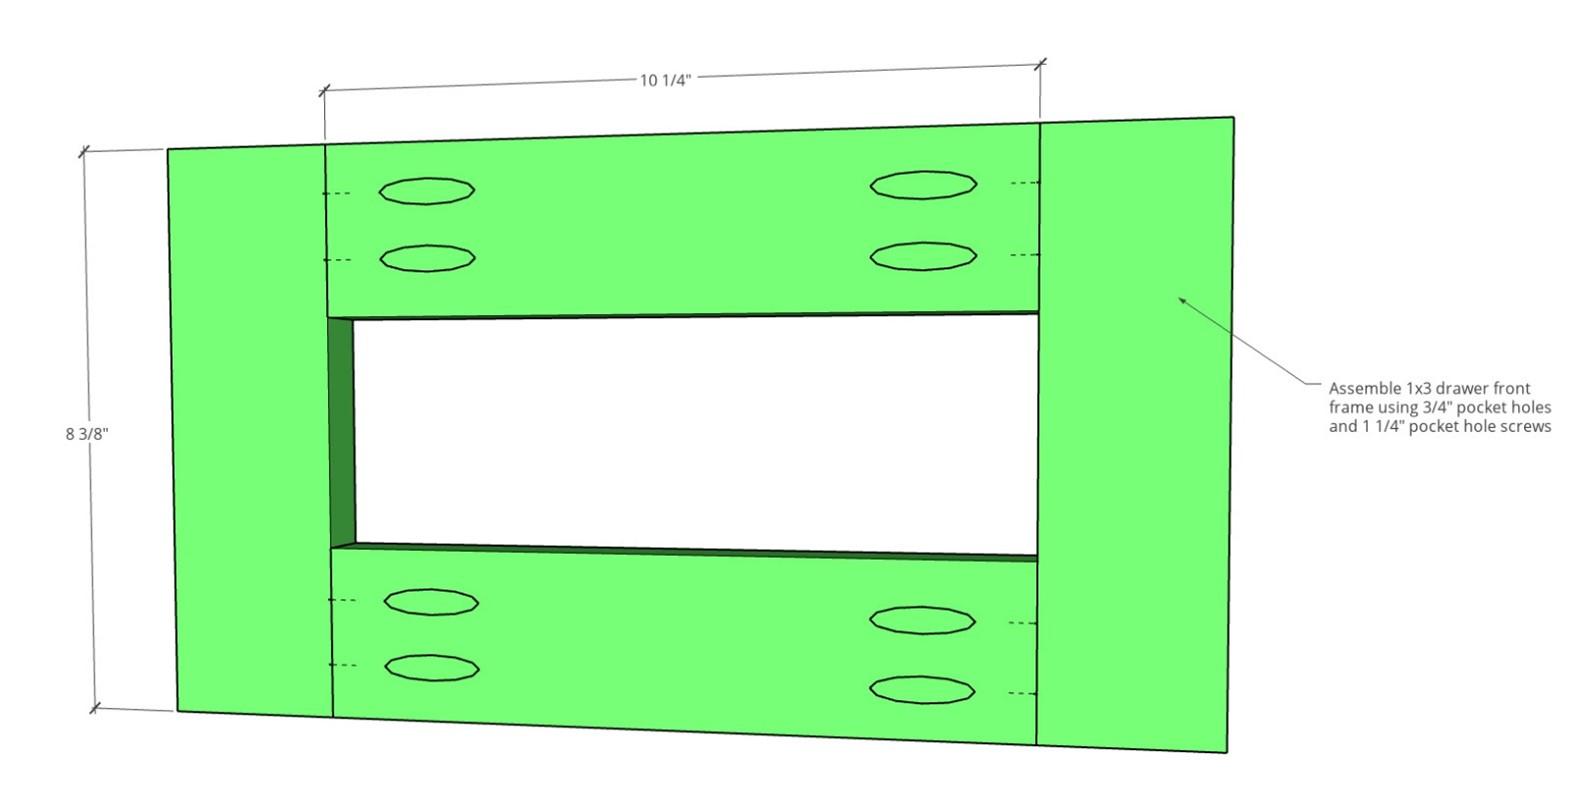
Build Drawer Front
Cut 1x3 drawer front pieces like shown and assemble just like the door frame using ¾” pocket holes and 1 ¼” pocket hole screws.
-
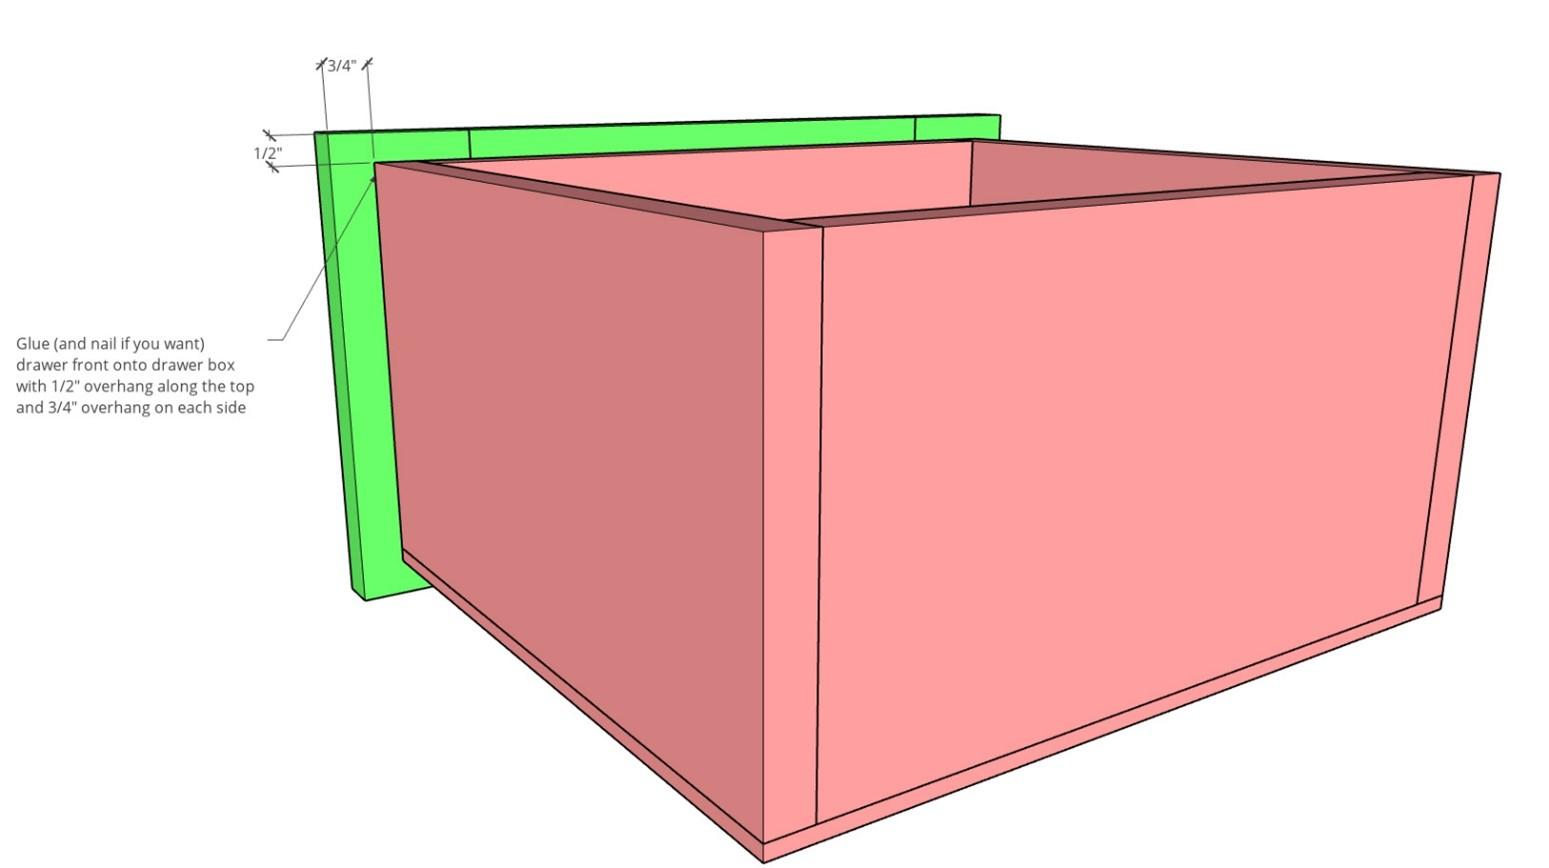
Attach Drawer Front
Glue/brad nail this frame onto the drawer so that when installed into the cabinet, it leaves 1/8” gap around all sides.
-
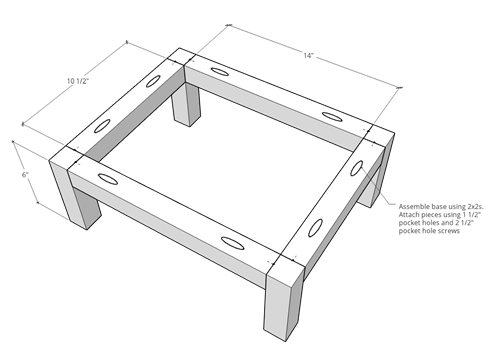
Build Cabinet Base
Assemble a 2x2 frame for the cabinet base using 1 ½” pocket holes and 2 ½” pocket hole screws with wood glue like shown.
-
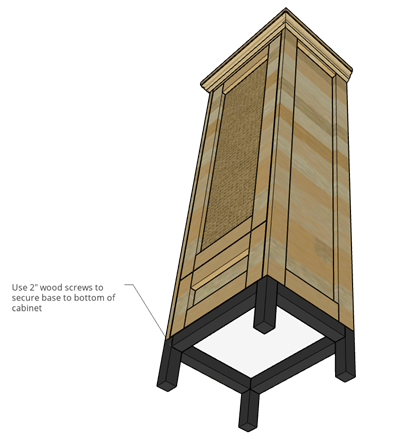
Install Cabinet Base
Using 2” wood screws through the bottom, install this base onto the bottom of the cabinet.
-
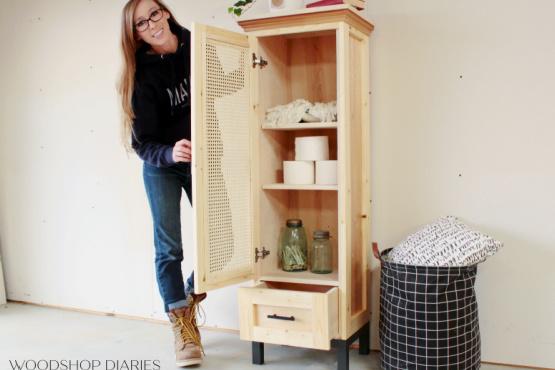
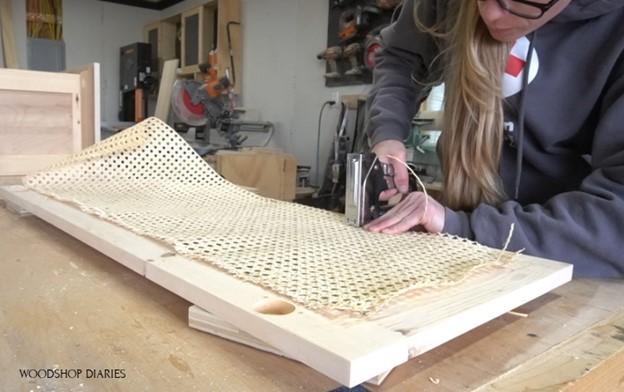
Finish and Install Cane Panel
Finish the cabinet as desired—I painted my base SW Iron Ore and gave the top a couple coats of clear poly. You can attach the can panel before or after finish, but I’d recommend doing it after.
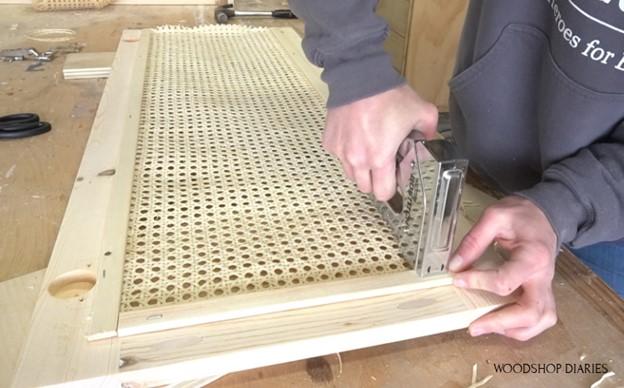
To install the cane, remove the door from the hinges and lay it face down. Trim the cane to fit over the opening with about 1” overhang on all sides (approx. 12 ½” x 35 ¾”). Regular, general purpose scissors work fine for this. Staple the cane into the door frame pulling as tight as you can and keeping it straight.
-
Add Trim to Back of Door
Then, cut to fit thin scrap strips or some lattice trim and staple over the edges. Make sure not to staple any trim where it will interfere with the hinges.
-
Add Shelves
Cut ¾” plywood to 11” x 13 ¾” to use as the shelves. Use shelf pins in the holes drilled in step three to install as many shelves as you wish.
Check out more from Woodshop Diaries here:
WoodshopDiaries.com
Instagram
Facebook
YouTube
TikTok