

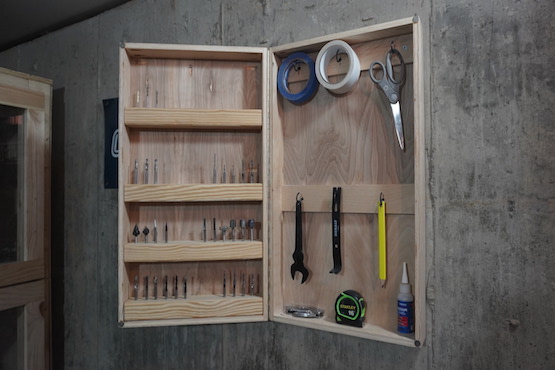


I use this router storage bit cabinet to help organize all my CNC tools and supplies but this could easily be used near a router table as well. It holds a total of 52 router bits and is fully customizable. I built it in a way where it can be changed to better fit my needs as they change in the future.
Tools
Kreg Tools


Other Tools
-
Table Saw

-
Miter Saw (Optional)
-
Band Saw (Optional)
-
Corner Clamp (Optional)
Materials
Wood Products
- 1 Half sheet of Plywood , 1/2" x 4 x 8
- 1 Walnut , 2” x 2” x 24”
- 1 Pine , 2” x 4” x 8”
Hardware & Supplies
- 1 Box of Pocket Hole Screws (See tools list)
- 1 Piano hinge
- 1 Box of hooks
- 4 Small magnets
Directions
-
Watch The Build Video
If you want to build this, I highly recommend watching the video. There are many nuanced techniques and "order of operation" approaches that are much easier to explain and understand by watching the video.
-
Prepare Material
Cut ½” plywood to the specifications in cut list
Cut walnut edge banding to specifications in cut list
Cut pine to specifications in cut list
-
Drill Pocket Holes
I set up my Kreg 520 Pro pocket hole jig for slightly less than a half inch. This is to take into account that half inch plywood is actually just under a half of an inch. I added 2 pocket holes to the ends of the top and bottom pieces.
-
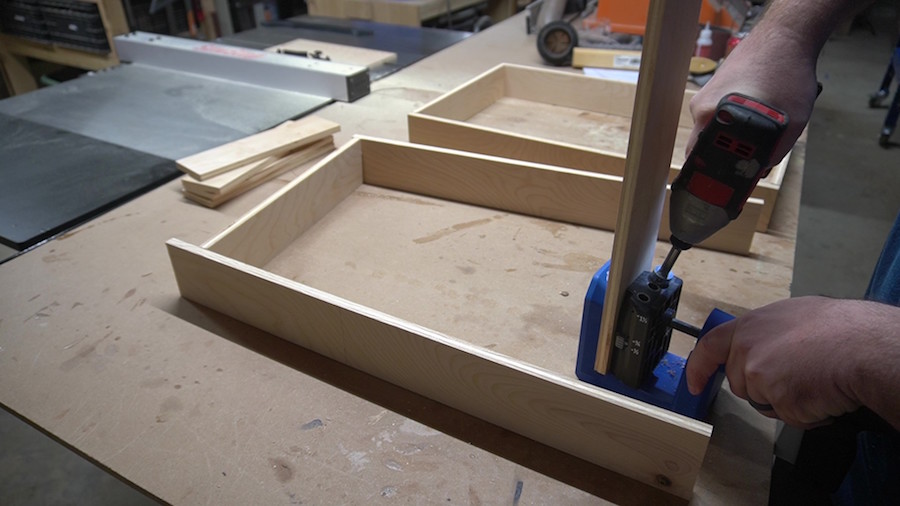
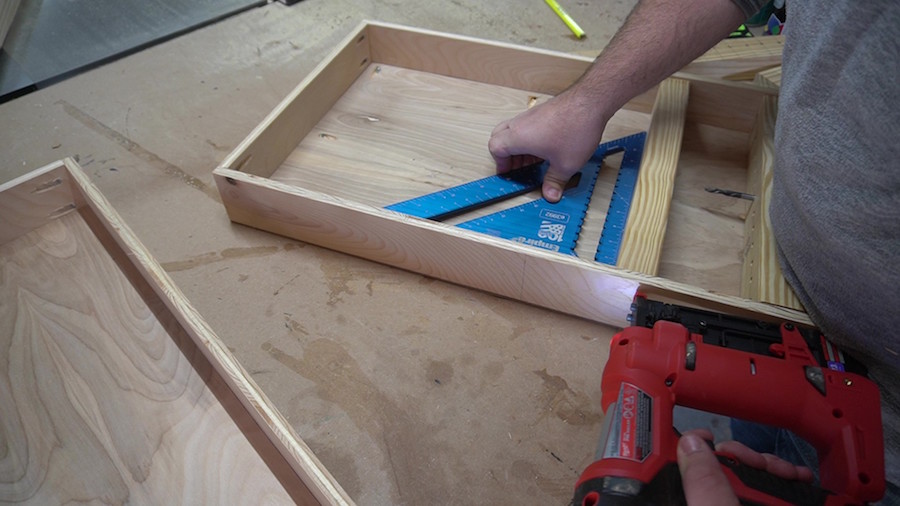
Assemble Frames
I used 1 inch pocket hole screws and wood glue to join everything together. I used a corner clamp to help hold everything square while fastening everything together, a square and a quick clamp would work here too. Just make sure to use something to hold your work pieces in place while screwing them together because it's common for them to want to move.
-
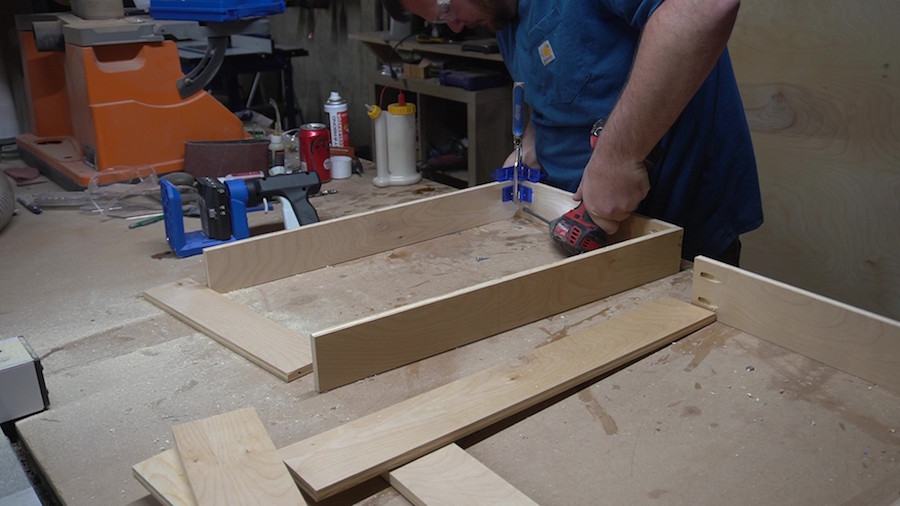
Assemble Edge Banding
I cut strips a quarter inch thick using my band saw. A cool trick to get the exact size you need is to use a cutoff of the plywood and adjust the fence to it. This gives you the exact width you need. This makes up for the quarter inch I left off the front panel walls to make the front and back the same depth. I attached the edge banding using wood glue and blue tape as a clamp to hold it in place until the wood glue dried.
-
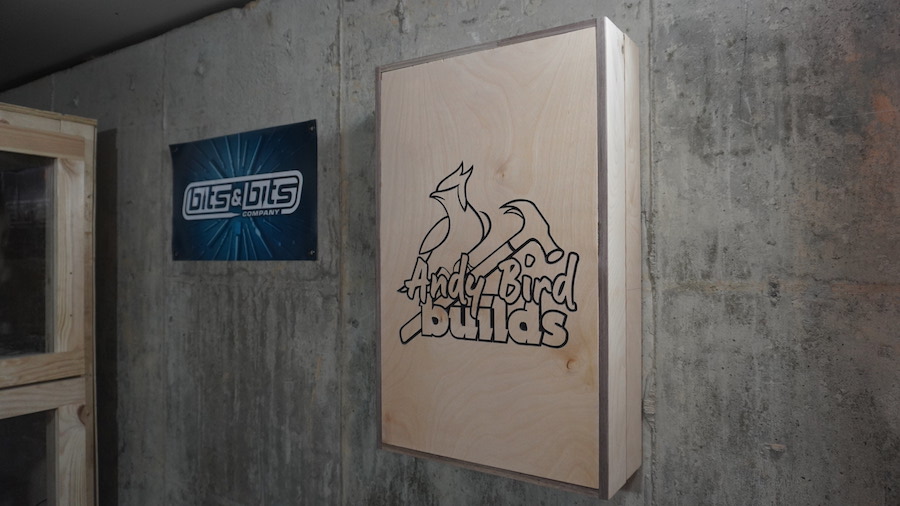
(Optional) CNC Logo On Front Panel
See images
-
Assemble Panels to Frames
Next, I assembled the front and back panels to the sides using more pocket holes, screws and wood glue.
-
Install Piano Hinge
Then using a piano hinge I assembled the front and back together.
-
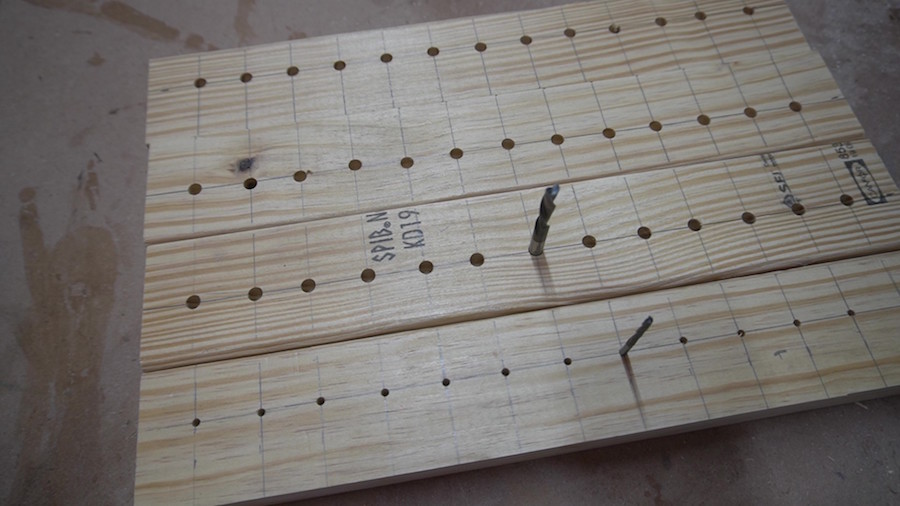
Layout Holes On Pine Blocks
I used 1” spacing on center
-
Drill Holes On Pine Blocks
I used my drill press to drill all the holes. I set a stop depth of 1 inch so that all the holes would be the same depth. But if you don’t have a drill press you could use a power drill and mark your depth on the drill bit using blue tape.
-
Install Pine Router Blocks
I used a pin nailer through the sides but you could use wood glue and clamps or screws through the sides
-
Install Hook Supports and Hooks
I added these two extra pieces of plywood to support the screw in hooks
-
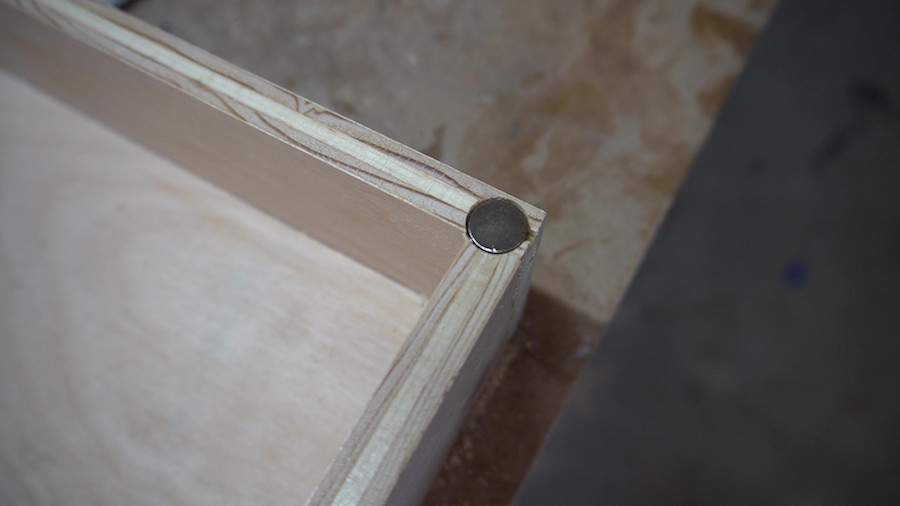
Install Corner Magnets
I drilled a hole equal to the height and width of my magnets in all four corners. I used a little super glue to hold them in place.
-
Final Sanding
One final sanding with 120 grit to finish the project