

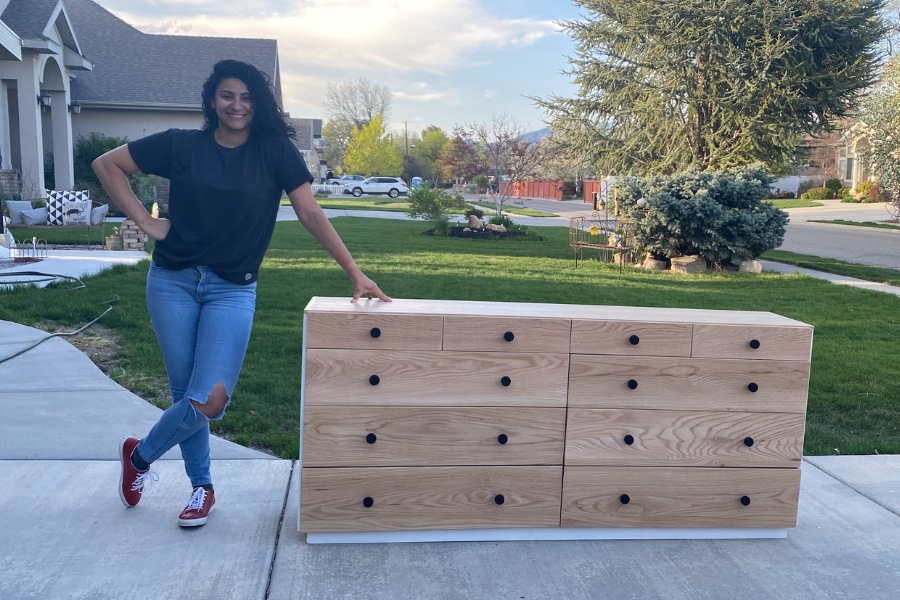


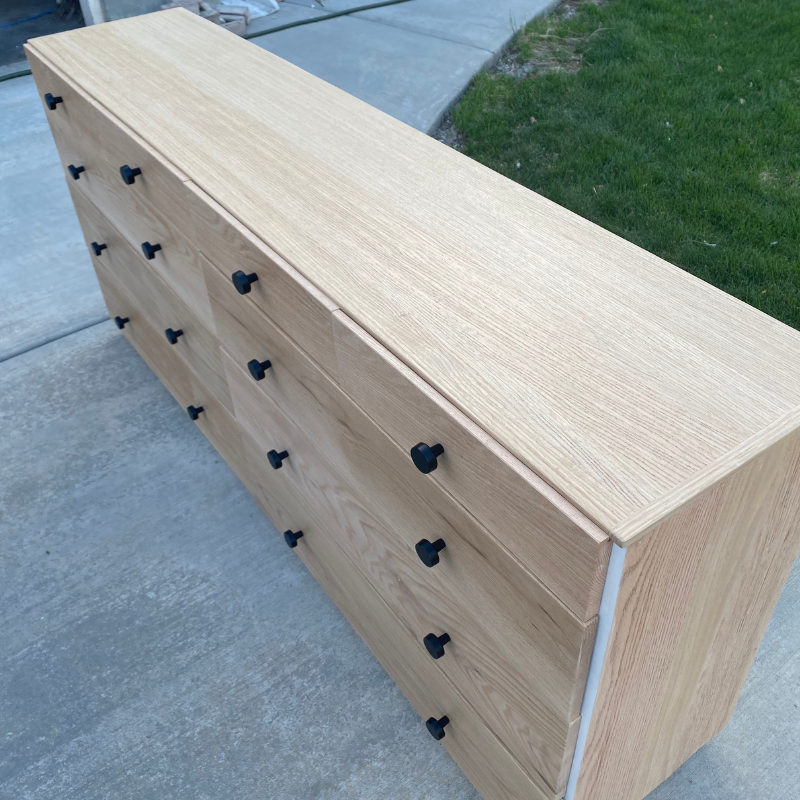
Looking for more storage? This modern dresser is perfect for you. With 10 drawers, storage won't be an issue.
Tools
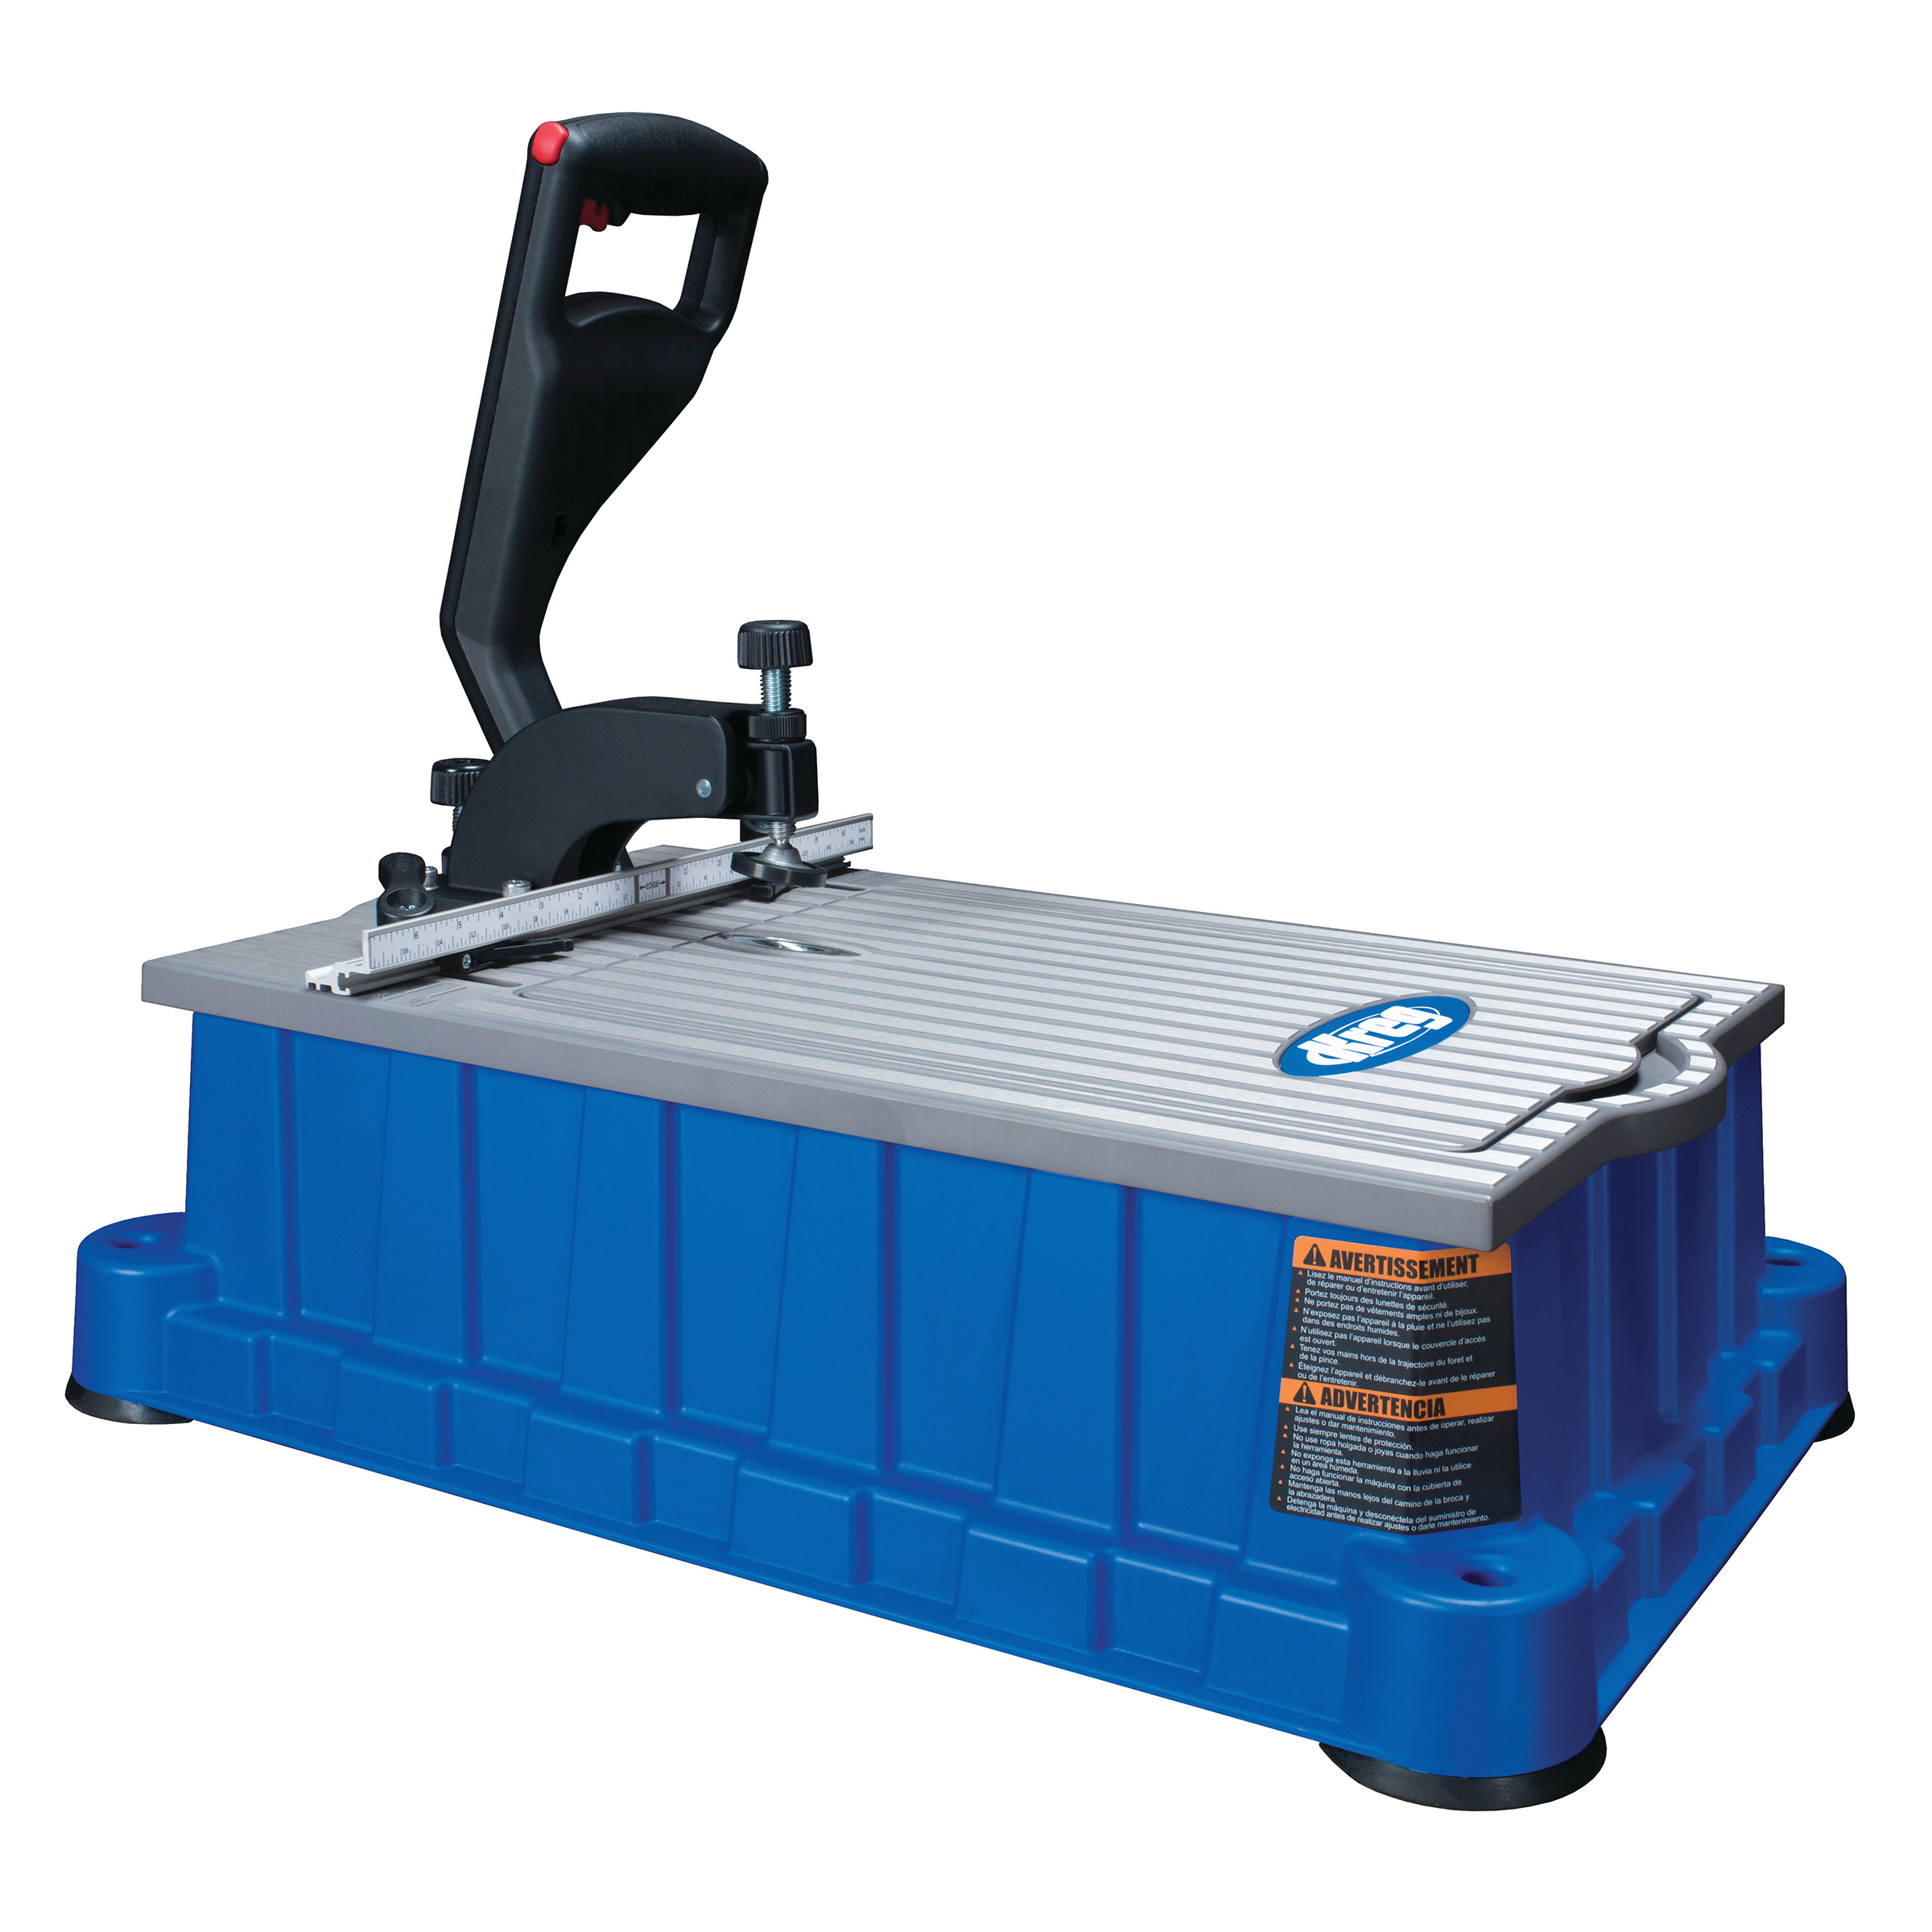
Kreg Tools

Other Tools
-
Table Saw

-
Track Saw
-
Miter Saw
-
Brad Nailer
-
Measuring Tools
Materials
Wood Products
- 2 Red oak plywood , 96" x 48" , 3/4
- 2 Plywood (any specie) , 96" x 48" , 1/4
- 1 Plywood (any specie) , 96" x 48" , 1/2
- 2 Red Oak , 75" x 6" , 3/4
- 6 Red Oak , 3' x 6" , 1/4
- 3 Red Oak , 72" x 10" , 3/4
Hardware & Supplies
- 10 Full Extension Drawer Slides
- 16 (Optional) Knobs
- -- 3/4 in Pocket Holes screws
- -- Glue
- -- Brad Nails
- -- (Optional) Polyurethane
- -- (Optional) White paint
Directions
-
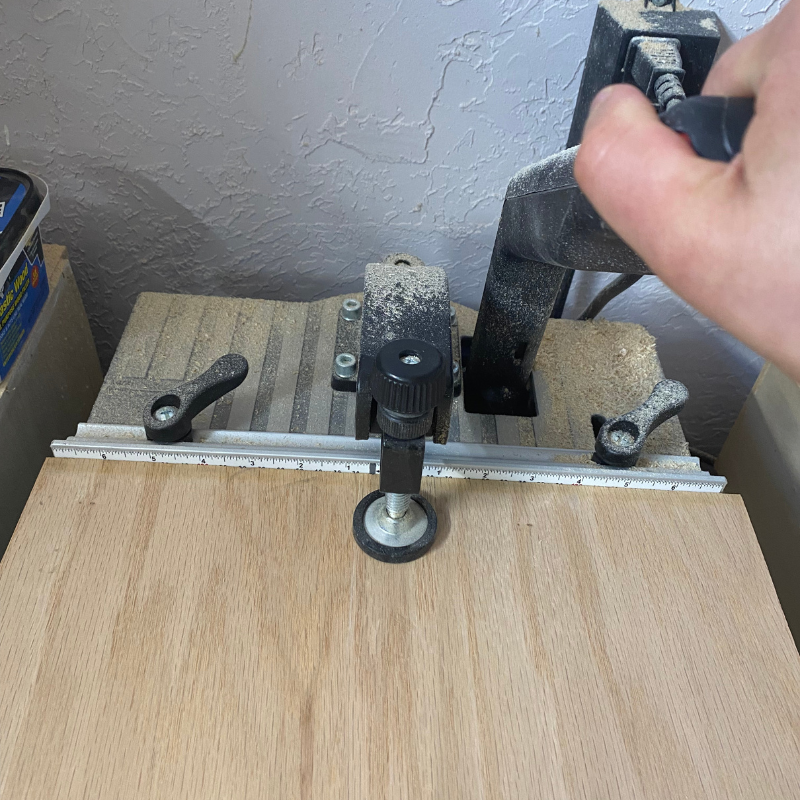
Adding the Pocket Holes
After you do all the cuts provided in the cut list, you can use your Kreg Jig of choice and make the pocket holes, I added 3 pockets holes in each piece.
-
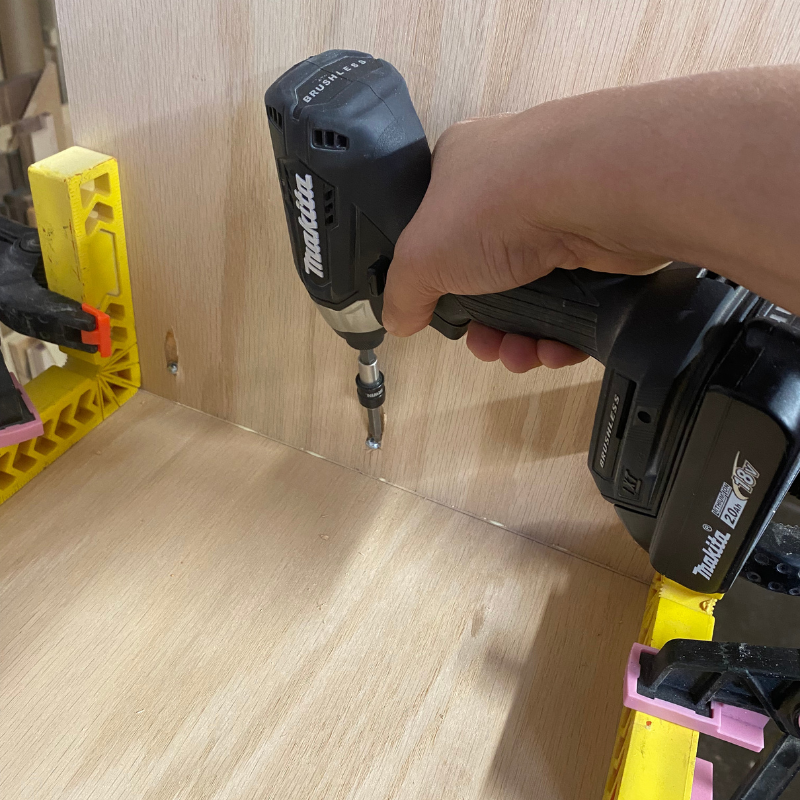
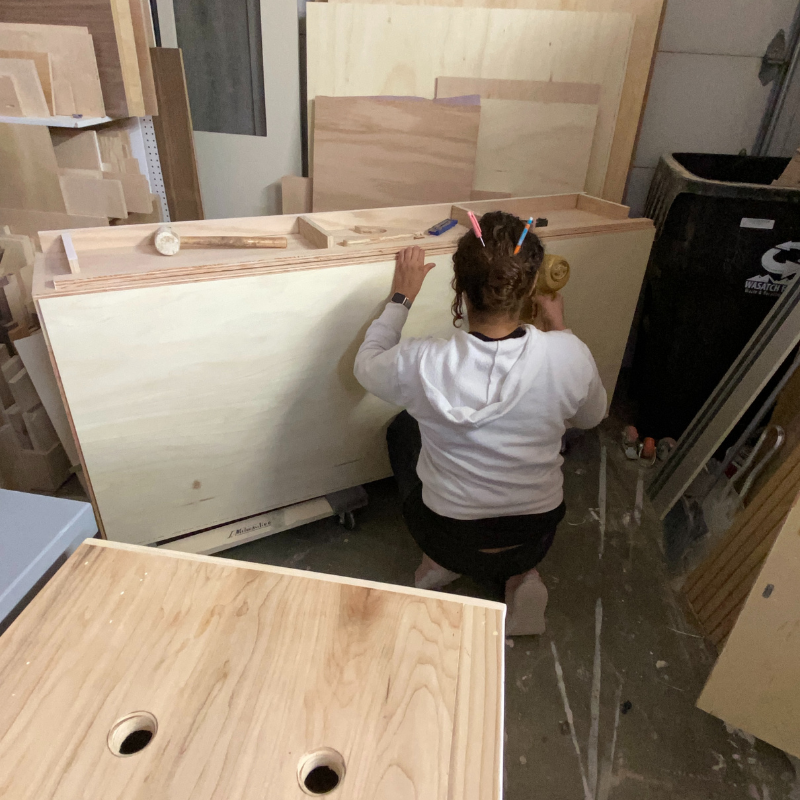
Assemble
To assemble I used clamps to keep in place and straight while I was adding the screws. I use glue and 3/4 in-pocket screws to assemble the entire piece.
-
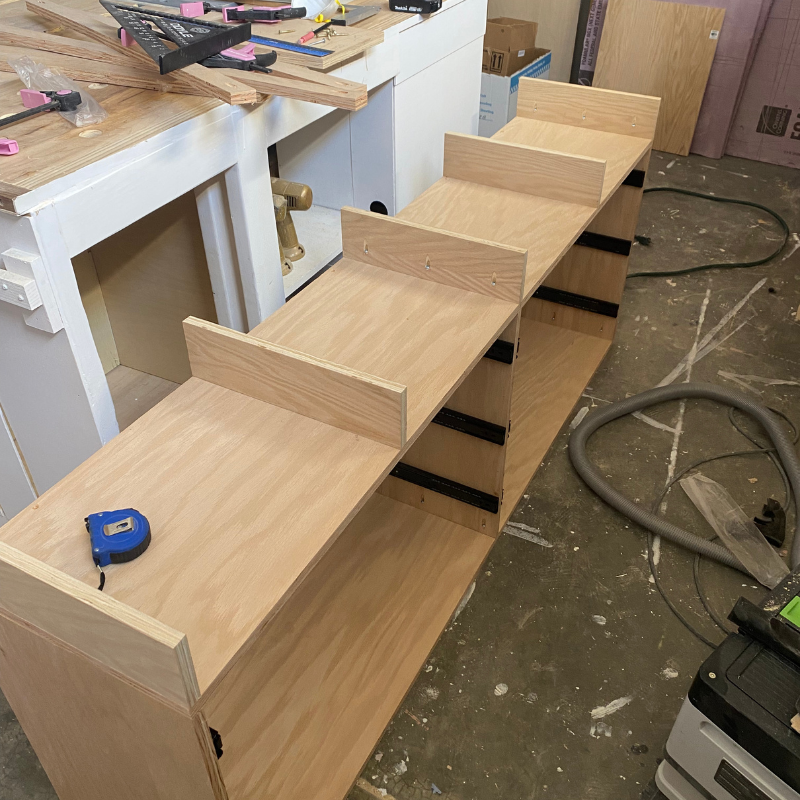
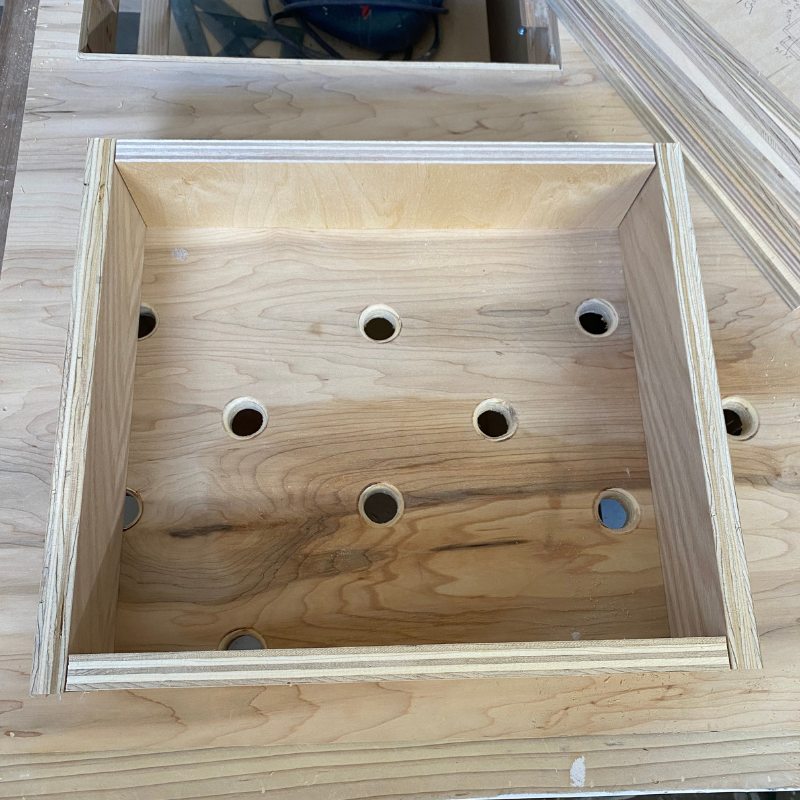
Attach the smaller dividers
For the dividers, I screw 3 like the one below. 2 on each end and 1 in the middle. Plus I also add in between each side to build the smaller drawers.
-
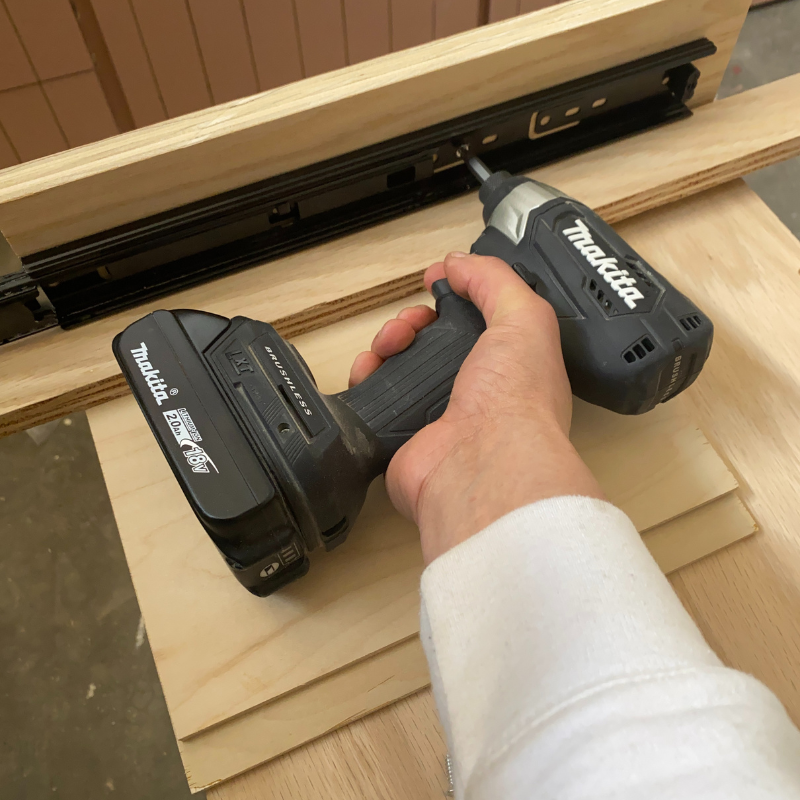
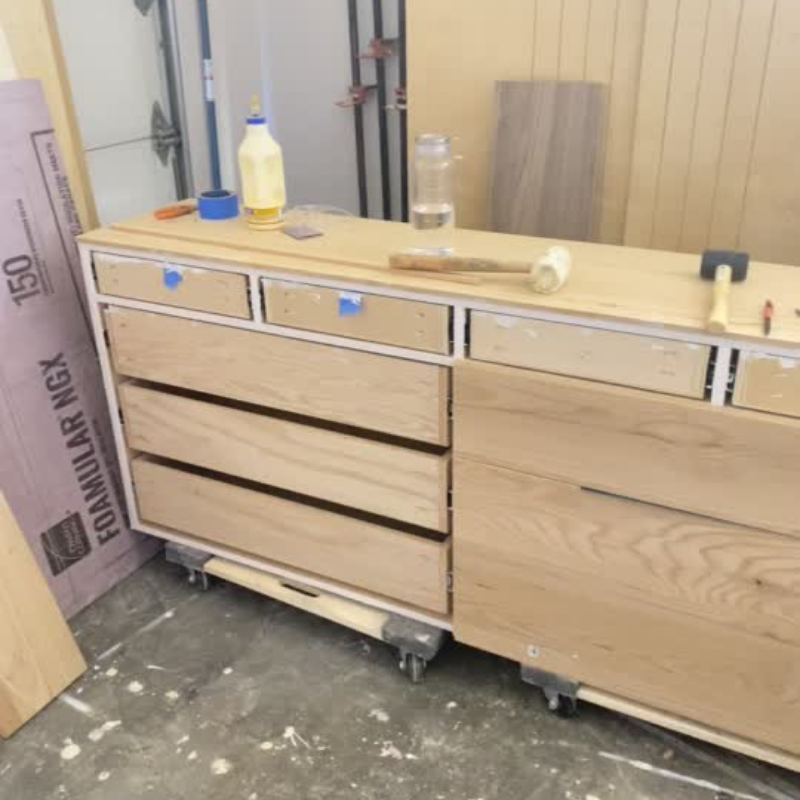
Install the sliders
For the drawer slides, I use spacers to help me attach everything in the middle and I use the screws that came with it.
-
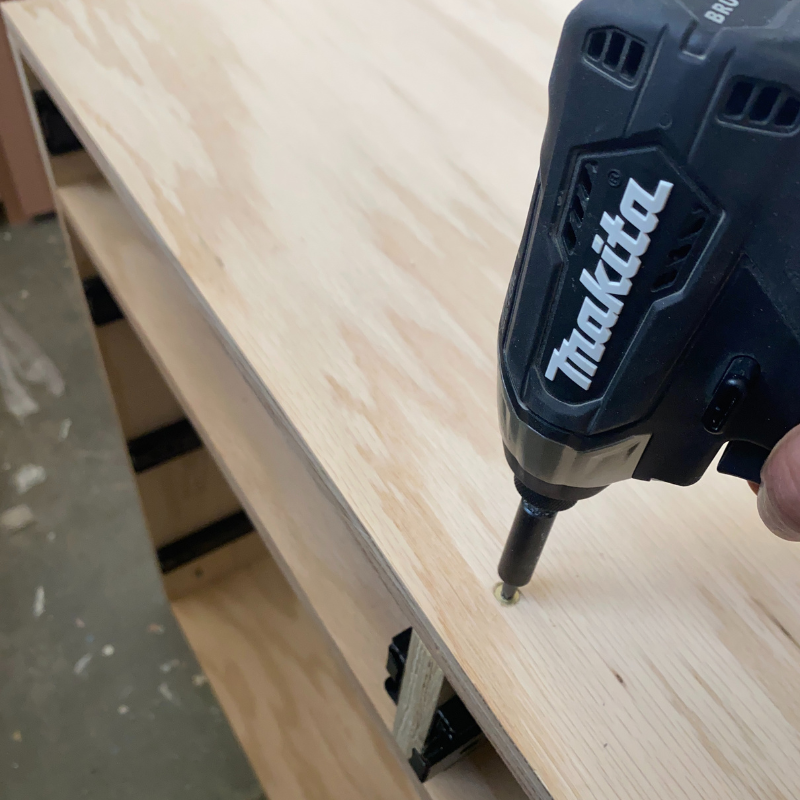
Add the top/backer
I screwed the top after attaching the drawers slides because I knew would be hard to do this before. I use 3/4 in screws and countersink so the screw would not be visible. To keep the budget down and still have a thick top. I glue the 3/4 in solid red oak on top of the plywood top and on the sides, I glue the 1/4 in to look solid.
-
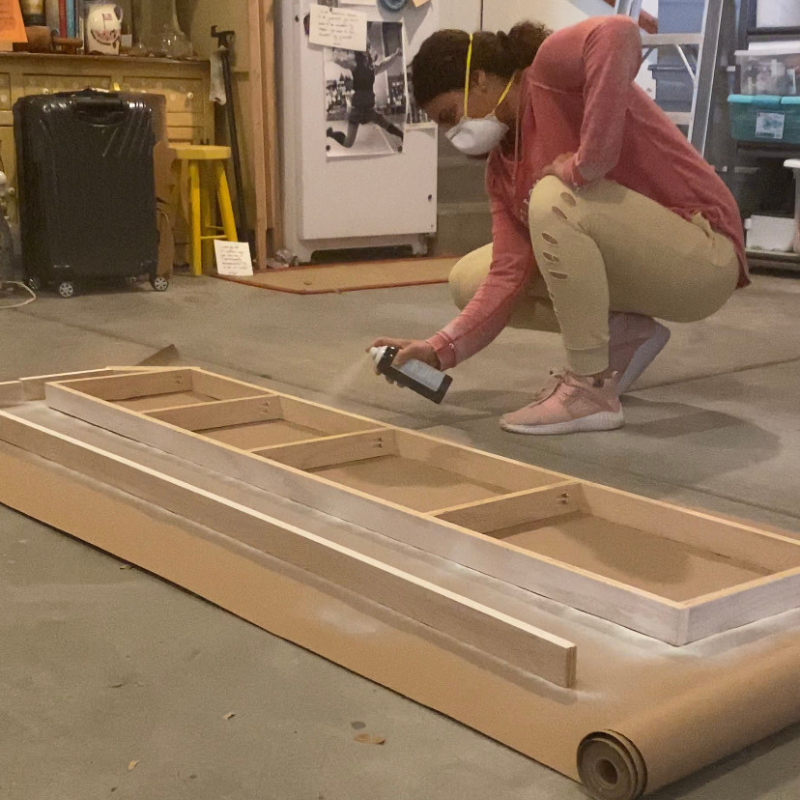
Base
For the base I used pocket holes to assemble and I decided to paint in white to give some cool variation to the wood.
-
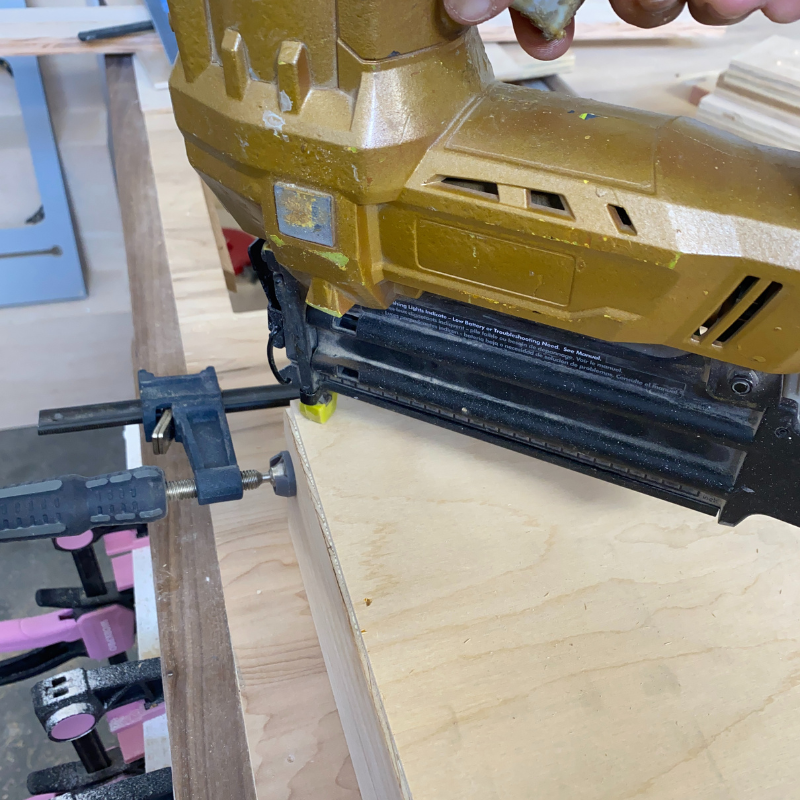
Install the back
To attach the back I use brad nails, I didn't glue them because If I need to replace later I can.
-
Build the drawer boxes
The drawer boxes - I add the pocket holes in the front and back of the drawers to be invisible and I use 3/4 in pocket screws and glue.
-
Drawers backer
I use 1/4 in backer for the drawers and I use only glue and brad nails for that and it's pretty strong.
-
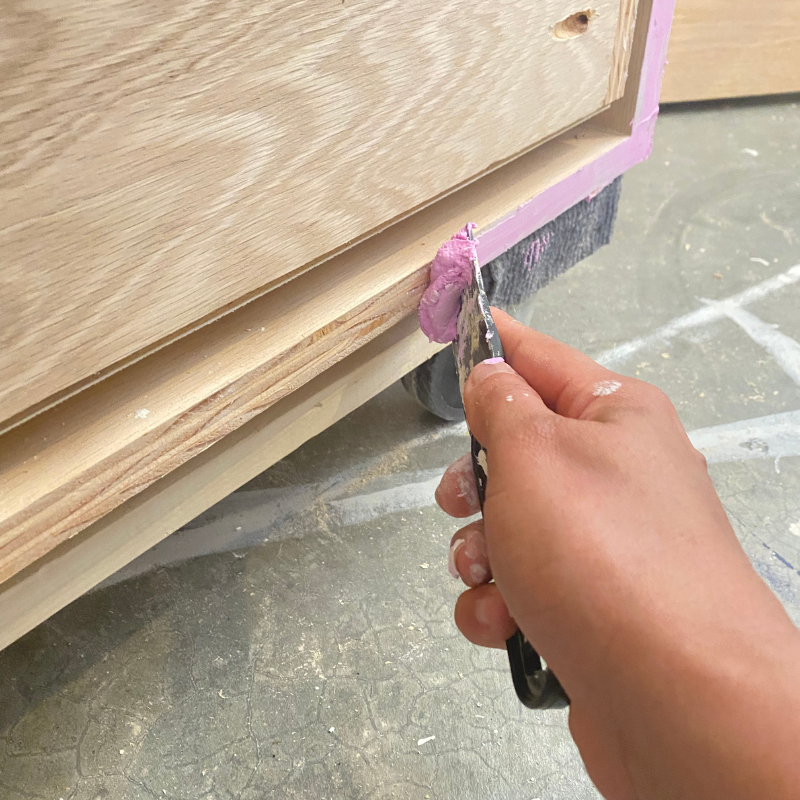
Plywood edges
Instead of adding edge banding on the edges of the plywood, I decided to paint white because I wanted to make a reveal on each side of the drawers. So, I added wood filler, and primer and give 2 coats of white paint.
-
Drawer fronts
I dried fit all the drawer fronts before installation to see how I would like best. then, I sand the entire piece to 220 and applied 2 coats of polyurethane. Added the knobs and it's done!
-
The results
This is the result, I loved how turned out and if you want to understand a little bit more about the steps and how I came up with this design, you can watch my full video.
Watch the full video: https://youtu.be/yOWrihGihh8