Farmhouse Storage Bed
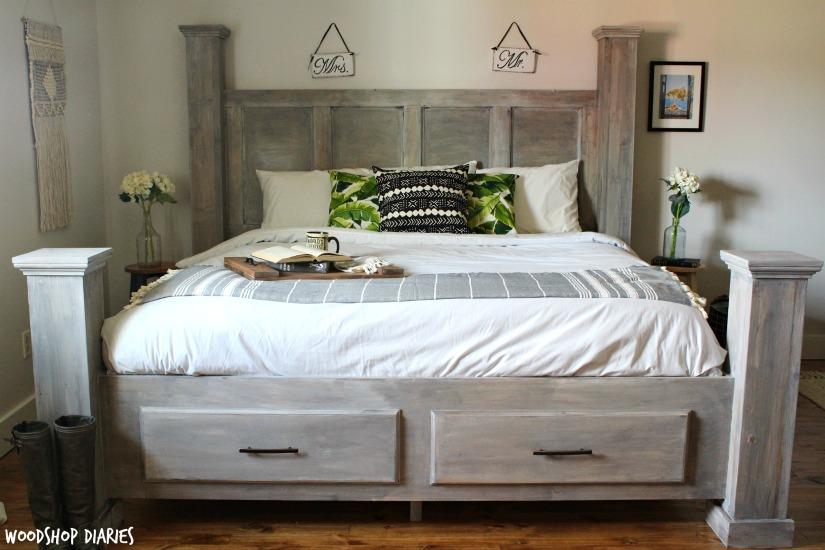
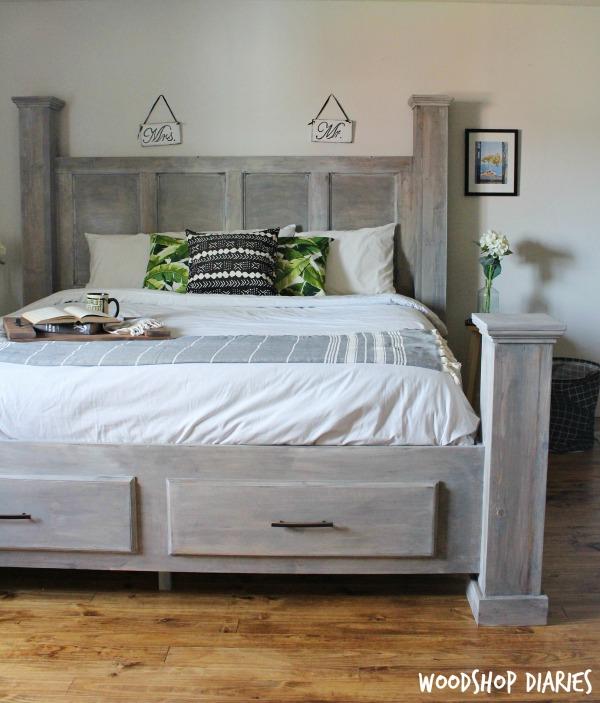
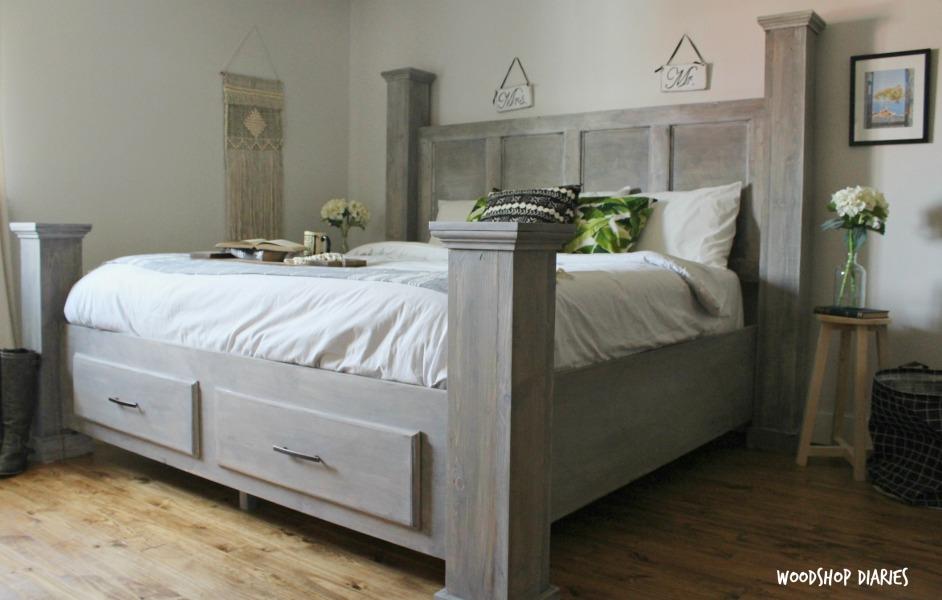
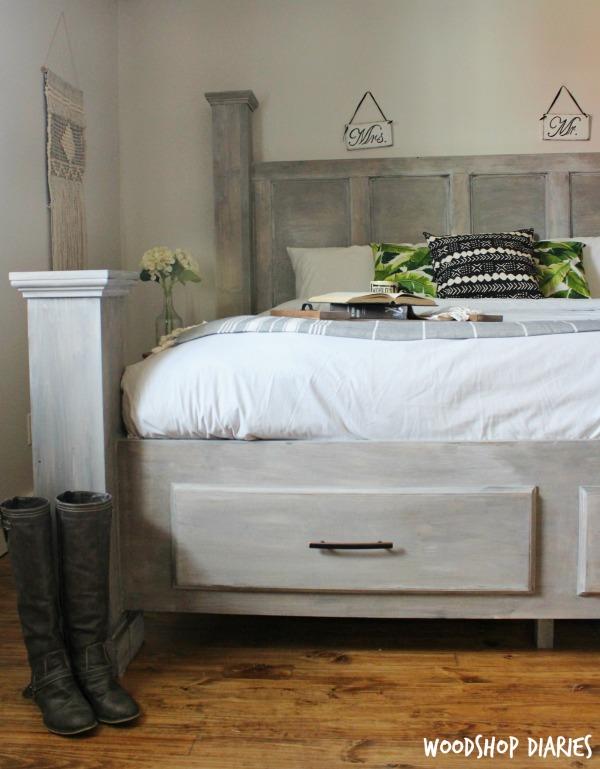
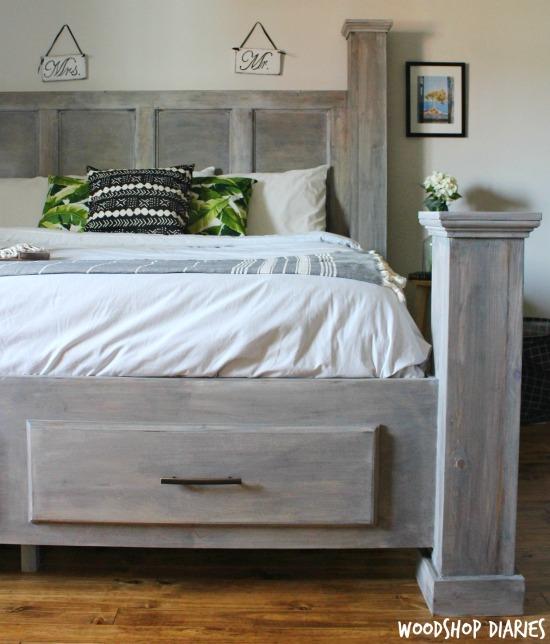
By Woodshop DiariesThis gorgeous King bed not only boasts big style with large posts, paneled headboard, and tall rails, but it also boasts big storage with two large drawers built into the footboard. Since it’s built in four pieces, you could build just the headboard, skip the drawers, and/or modify the size easily.
Directions
-
Cut Boards for Bed Posts
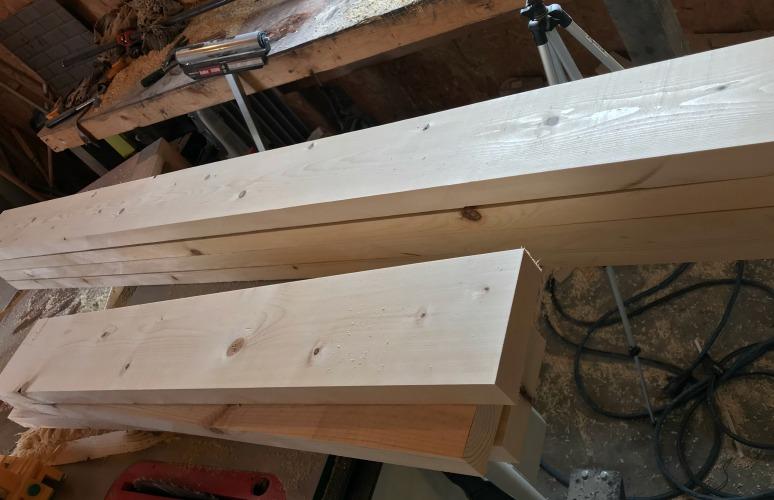
First, from each of your 2x6x10 boards, cut one piece 72” and one piece 36” long. You should have 8 of each length. These will become the bed posts. The result will come out cleaner if you use a table saw to square off the edges of these boards, but it’s not required.
-
Build "Half Posts"
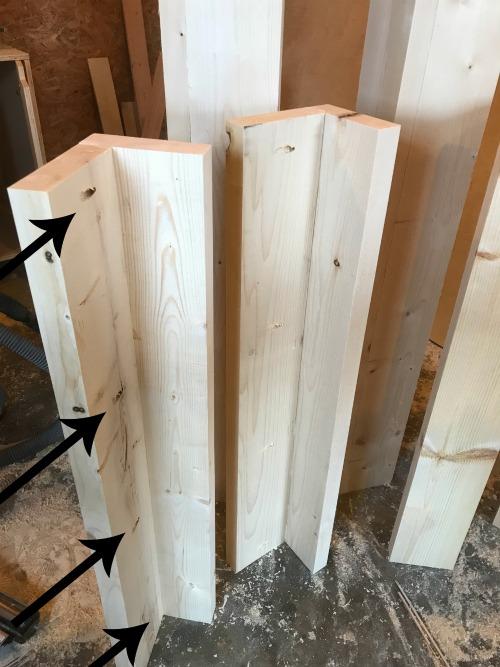
Drill 1 ½” pocket holes along the long edge of four of the short and four of the long boards. I drilled 4 evenly spaced holes in the short ones and about 7 evenly spaced holes in the long ones. Then, glue and screw the boards with the pocket holes into the boards without pocket holes using 2 ½” pocket hole screws so that you get 8 “half posts” like shown here.
-
Assemble the Whole Post
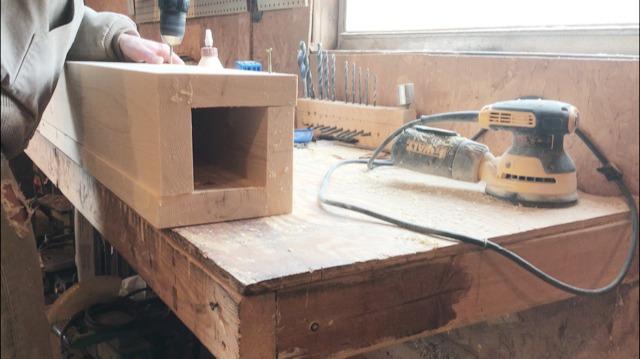
Now, using glue and 2 ½” wood screws, screw two half posts together to make a whole post like shown. You will end up with two tall hollow posts and two short hollow posts. You can see more details in the video tutorial in the extras tab of this plan.
-
Attach Bed Post Tops
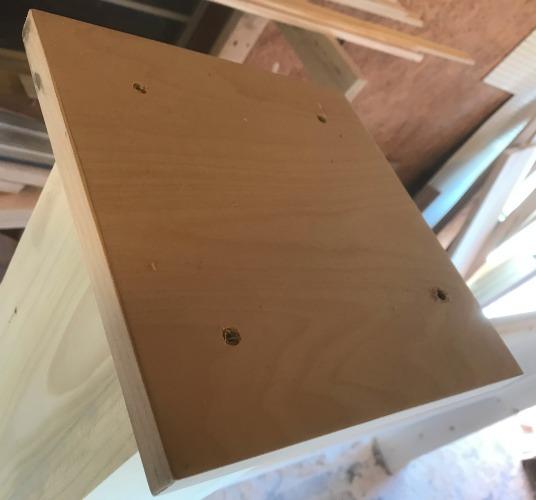
Cut 4 pieces of ¾” plywood about 9 ¼” square and apply edge banding for a clean, finished look. Then using 1 ¼” wood screws, center each of these pieces on each of the posts (both the short and long ones) and screw in place.
-
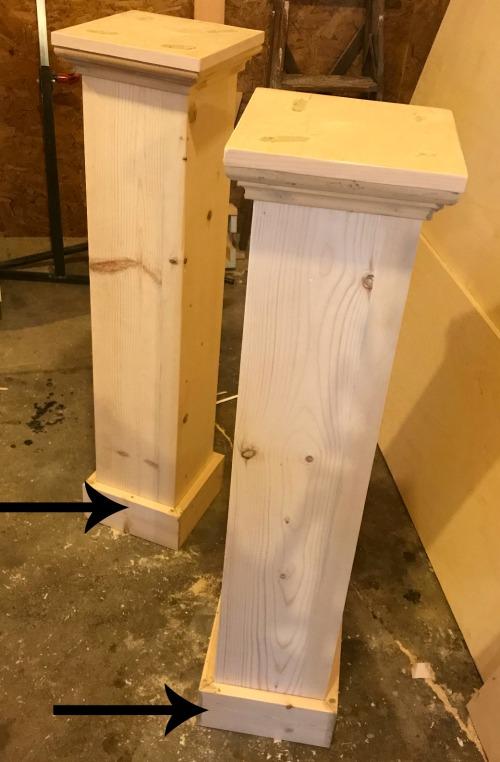
Add Trim to Bed Posts
This step is optional, but really adds to the character of the build. Cut to fit small crown molding (2”) around the top of the bed posts and brad nail in place. Also, cut to fit pieces of 1x4 with mitered corners around the bottom of each posts as a baseboard.
-
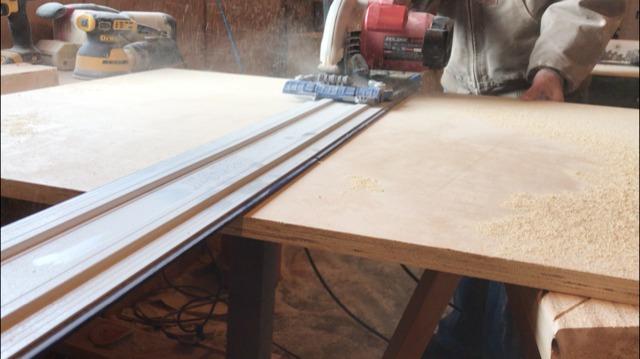
Cut Headboard Panel
Cut a piece of ¾” plywood according to the cut list for the headboard. The Kreg Rip Cut and the Kreg AccuCut are super helpful for this and will save a ton of time throughout this project. Note: This is for a King Size bed. If you wanted to make this bed a different size, adjust the width of this headboard panel at this step.
-
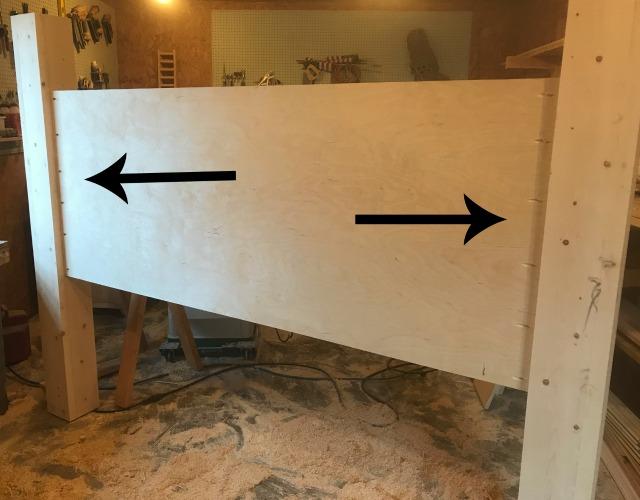
Attach Headboard Panel Between Post
Drill ¾” pocket holes into the ends of the headboard panel and attach between the two tall posts using 1 ¼” pocket hole screws like shown. You can adjust this as desired, but I attached so that the top of the panel was 12” down from the top of the post and was 1 ½” from the back of the posts. It also doesn’t matter here which direction (front or back) the pocket holes are facing. NOTE: I added the trim from the steps above after this so you wont see it in the picture.
-
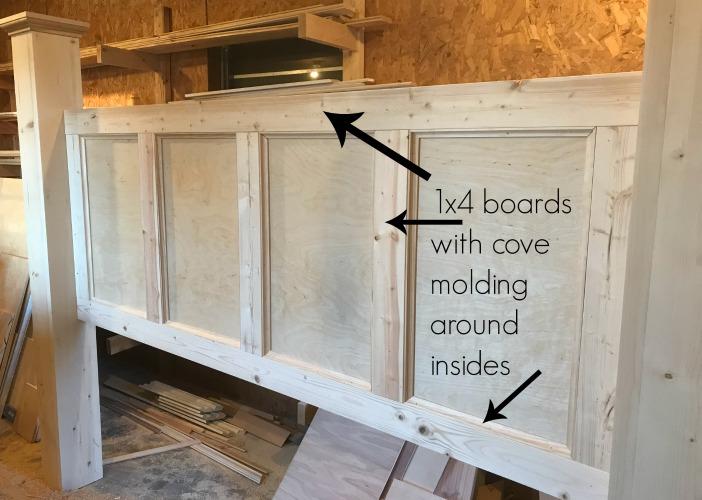
Add Trim Detail to Headboard Panel
Cut to fit 1x4 boards to create a frame around the headboard panel. You can also add some “dividers” throughout the middle to create several smaller frames for more detail. These headboard trim cut lengths are listed in the cut list section, but it’s best to cut to fit here. Glue and brad nail these boards in place and cut to fit cove molding for a little added detail around each section of the headboard.
-
Prepare Footboard for Assembly
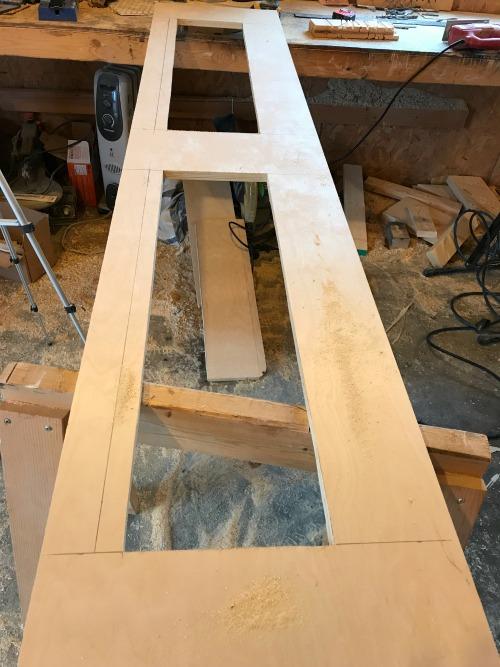
Cut a piece of ¾” plywood 16” wide and 79” long. Then mark out where the drawers will go. I marked in from each end 6”, then marked out a 6” space in the middle between the drawers. Then, I marked 3” from the bottom and 5” down from the top. Use a speed square to help you get all these lines straight and square, then drill a hole inside the boxes for the drawers and use a jig saw to cut them out. Drill ¾” pocket holes into the ends of the footboard. Also, for a cleaner look, apply edge banding to the top of the footboard to cover the plywood edges.
-
Attach Footboard Between Bed Posts
Using glue and 1 ¼” pocket hole screws, attach the footboard between the short bed posts like shown. Attach so that the bottom of the footboard is 5 ½” from the bottom of the posts and about 1 1/2" from the front side of the posts.
-
Add Footboard Supports
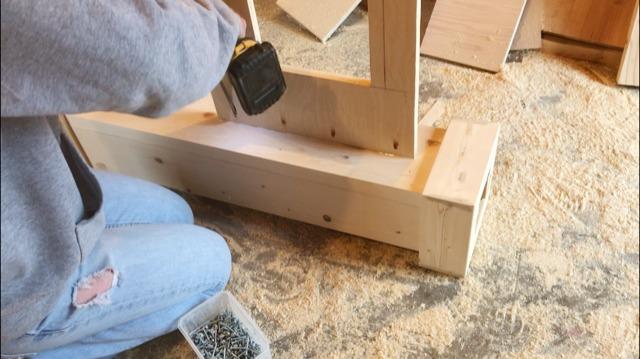
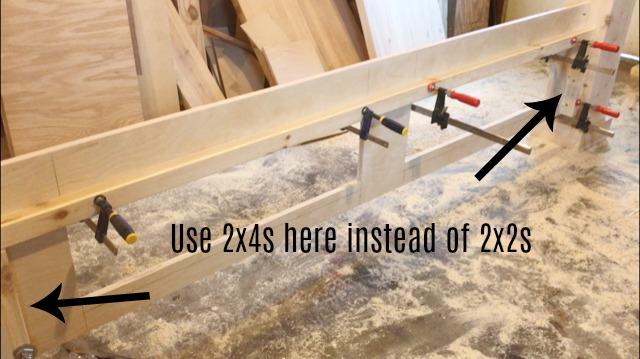
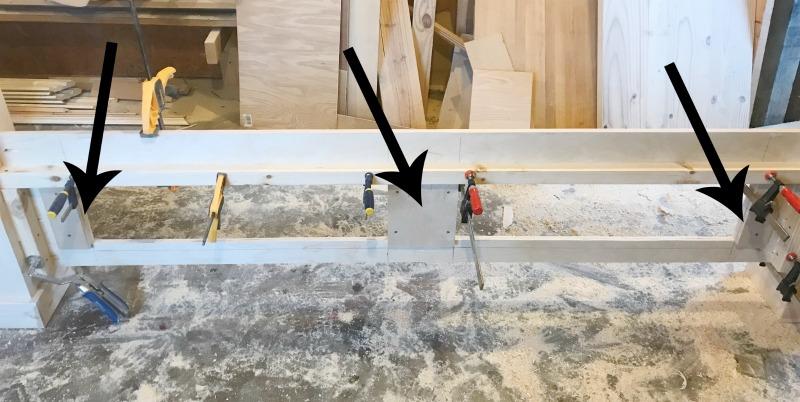
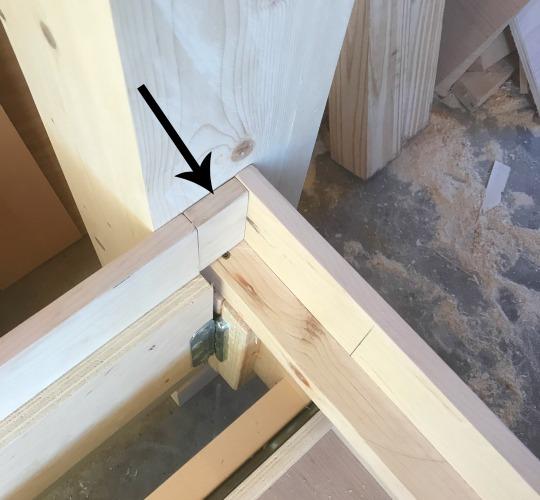
Here is where I messed up. I used 2x2 blocks for my corner pieces. I should have used 2x4 blocks. I had to add another 2x2 block later to fix this. So, don’t do what I did. Cut two 2x4 pieces to 11” and drill 1 ½” pocket holes into the edge of one long side. Glue and screw this piece into the bed post on the inside corner where the footboard meets the post. Make sure it’s even with the bottom of the footboard. Then, attach that same piece to the footboard with 2” wood screws. This corner block will help hold the footboard in place, but will also act as a support for the bed sides later. Then, add a piece of 79” long 2x2 along the top of these boards. Glue and screw into the footboard and into the 2x4 supports you just added. See video for details. This 2x2 should run along the top of the drawer openings.
-
Add Drawer Box Blocks
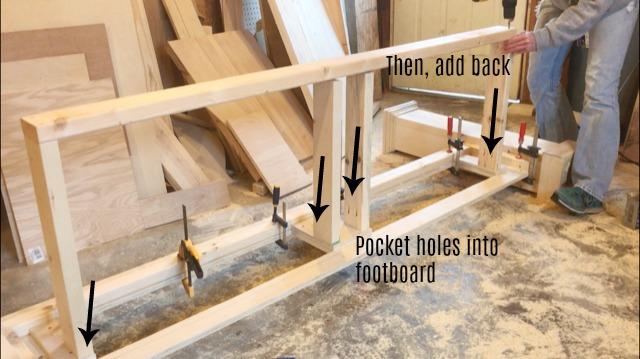
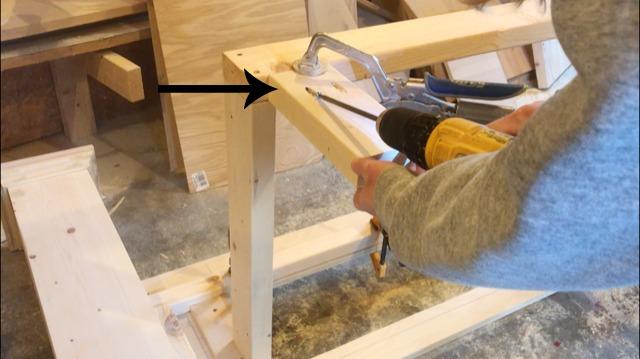
If you’ve worked with pocket holes much, you probably know that to screw a 2x board into a ¾” board, you can’t use 1 ½” pocket holes and 2 ½” pocket hole screws or your screw will pop out the end. I wanted to use 2x4s for my drawer box supports, but the footboard is only ¾” thick. So, to fix this, I screwed some scrap plywood into the footboard like shown. Simply cut some scraps so that they won’t cover any of the drawer hole and screw into the space between the drawer openings, and on each of the other sides using 1 ¼” wood screws.
-
Attach Drawer Box Supports
Cut four 2x4 pieces to 22” long and drill 1 ½” pocket holes into one each of each board. Attach like shown on each side of each drawer using 2 ½” pocket hole screws. (This is why you needed the plywood in step 12.) Make sure you attach so that the bottom of the 2x4s are even with the bottom of the drawer opening—so 3” from the bottom of the footboard. Then, using 2 ½” wood screws, attach another 2x4 piece cut to 70” long to the back of these pieces like shown. Make sure the boards are square before attaching the back piece.
-
Add Drawer Box Support Legs
Cut two 2x4 pieces 8 ½” long and drill 2 ½” pocket hole screws into one end of each. Attach like shown to the bottom of the drawer box from step 13 using 2 ½” pocket hole screws. Now the footboard should stand up on its own and be ready for drawers.
-
Add Drawers to Footboard
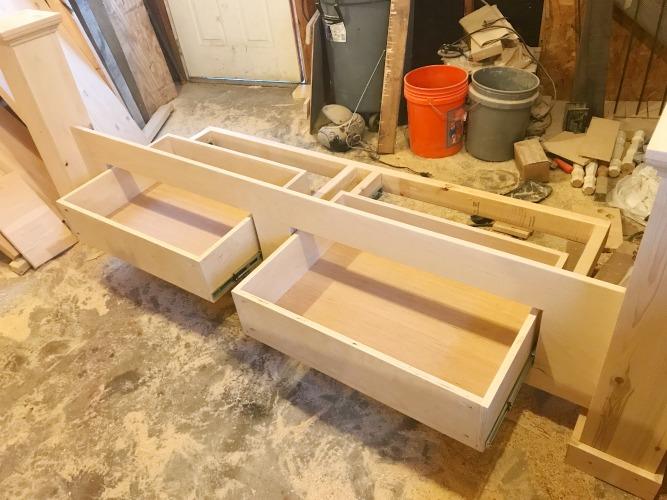
Attach 22” ball bearing drawer slides to the four drawer box supports from step 13. Cut drawer pieces according to the cut list. Drill ¾” pocket holes into the ends of the 28” long pieces. Cut dados in drawer pieces to slide in the drawer bottoms if desired. Assemble the drawers using 1 ¼” pocket hole screws. Add ¼” plywood bottom (with either dados or by stapling onto the underside of the drawer box. Then, attach the drawers to the slides like shown.
-
Add Drawer Front
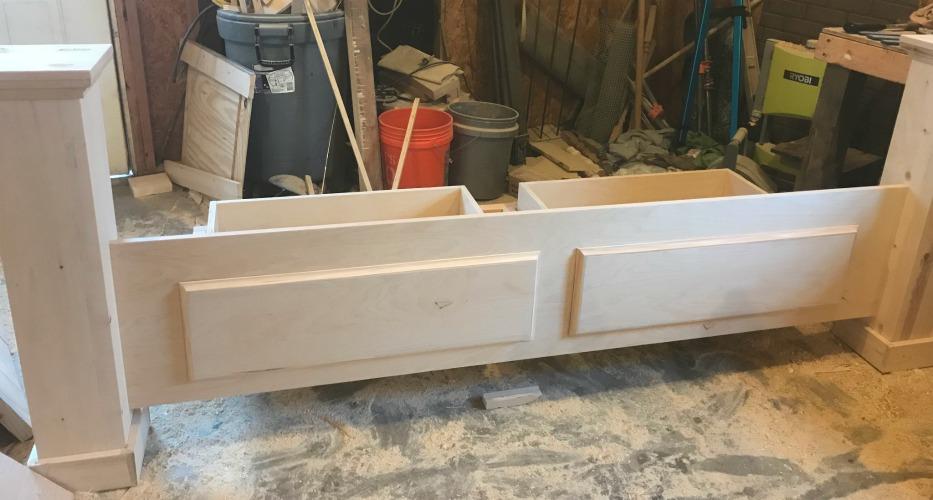
Cut drawer fronts according to the cut list. For some added detail, I edged my plywood drawer front with some cove molding. You could also use plain edge banding or another type of molding. Brad nail these drawer fronts in place (making sure they are square to the footboard and not crooked), then use 1 ¼” wood screws to secure them from the inside of the drawer. Now, the footboard is finished until the end of the project, so you can move it out of the way for now.
-
Cut Bed Sides
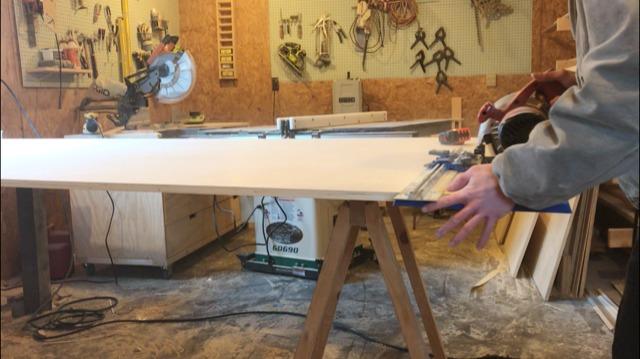
Using a Kreg AccuCut, cut a whole sheet of plywood down to 80” long. Then, using a Kreg Rip Cut, rip two pieces 16” wide and two pieces 8” wide. Each bed side will use one 16” piece and one 8”piece.
-
Assemble Bed Sides
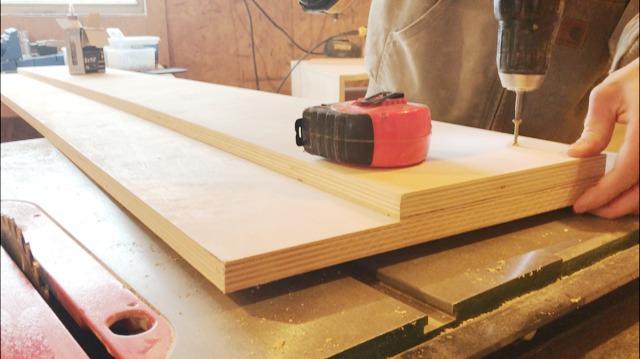
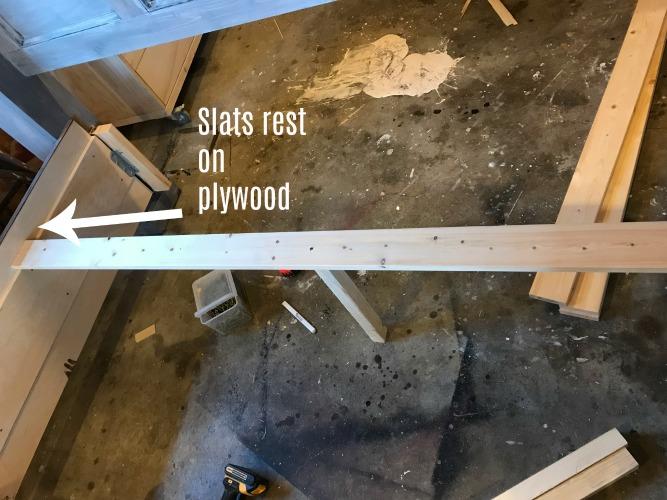
For a cleaner look, apply edge banding to the top of both 16” wide pieces. Then, make a mark 3 ½” down from the top of the 16” pieces. Apply wood glue to one side of the 8” piece and place it on the 16” piece lining the top with the marks you made. Screw in place using several 1 ¼” wood screws down the board. Gluing and screwing the plywood together makes a much sturdier bed side, but the shorter piece is also where the slats will rest later.
-
Add Bracket Supports to Headboard
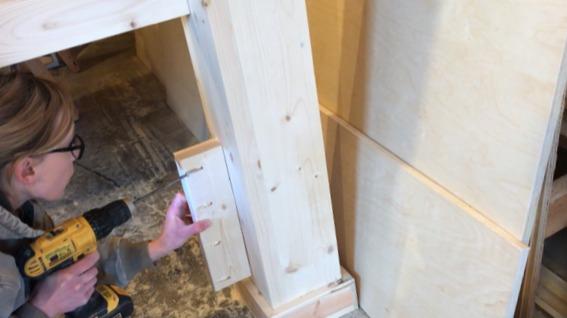
Cut two 2x4s about 12” long and drill 1 ½” pocket holes along one long side of each piece. Glue and screw these into the headboard post like shown. Make sure it’s lined up (front to back) with the headboard and the bottom is about 5 ½” from the bottom of the post. This will be where you attach your brackets to hold the bed together. Instead of using this method, you could also cut a piece of 2x6 or wider board to attach between the two headboard posts using pocket holes and screws.
-
Add Brackets and Test Fit
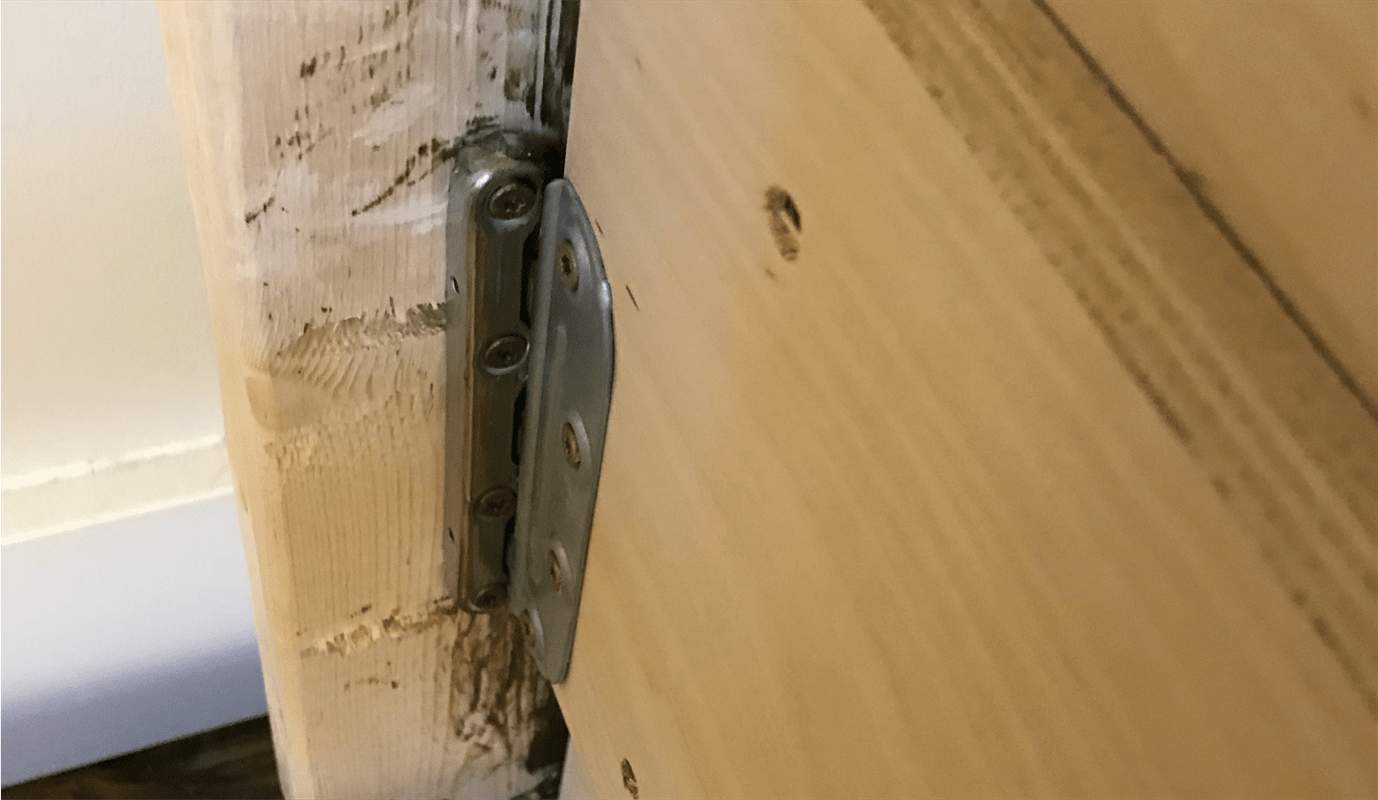
These bed rail brackets are made for applications like this where you want to assemble a bed quickly and easily and also be able to take it apart in order to move it later. Screw the pieces with the slots into the supports from step 19 on the headboard and into the corner supports on the footboard making sure to leave at least 1 ½” between the bracket and the posts. Then, screw the part of the brackets with the “teeth” to the bedsides so that they fit together like shown. Keep in mind, these should be attached the same distance from the top and bottom so that the bed sides line up with the footboard and are level from the footboard to the headboard. Assemble the bed to make sure everything fits as it should.
-
Add Spacer Block to Footboard
Here’s another place I messed up. Once I assembled the bed, I realized there was a gap between the footboard and the bed sides at the top. Structurally, this made no difference, but visually, it looked a little off. So I cut a small piece of plywood to fit in these spots on each side and just glued them in place. To avoid this, you could also cut your bed sides longer and notch out the bottom, but I think this method is much easier and once it’s finished, it won’t be noticeable. You can see more details of this in the blog post link in the extras tab.
-
Assmble and Install Bed Slats
Take a deep breath, this is a long build, but we are almost done! Cut your bed slat parts according to the cut list above. Glue and screw (using a 2 ½” wood screw) one leg into the center of each slat. Once the bed is finished and assembled, these slats should be evenly placed across the bed, and resting on the bed sides. They should also be screwed into place (into the plywood supports on the bed sides) using 1 ¼” wood screws.
-
Finish
Putty all nail and screw holes and give the bed a good sanding. Take apart and finish as desired. Then, assemble in its final location and screw bed slats in place. You can see this done in the video link in the extras tab of this plan. Add a mattress, blankets, pillows, and you deserve to take a nap after such a long build! ;) Be sure to check out the video tutorial and also details on the hardware used on this build in the blog post in the extras tab.
-
NOTE
NOTE: I know not everyone has a queen size bed. To make this fit a queen, just adjust the width of the head and footboard to 63”, then adjust the drawer widths accordingly. Also, you could skip the drawers and make this build simpler OR even just build the headboard to go with a simple metal bed frame. Since this was made in pieces, you can pick and choose which parts to use and not use. Now get out there and build something :)


