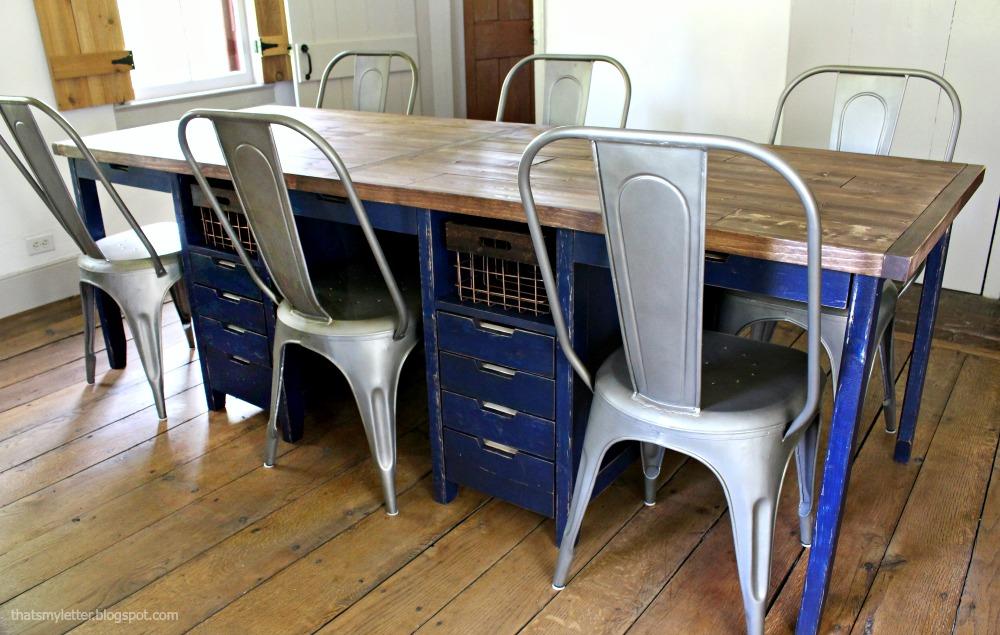
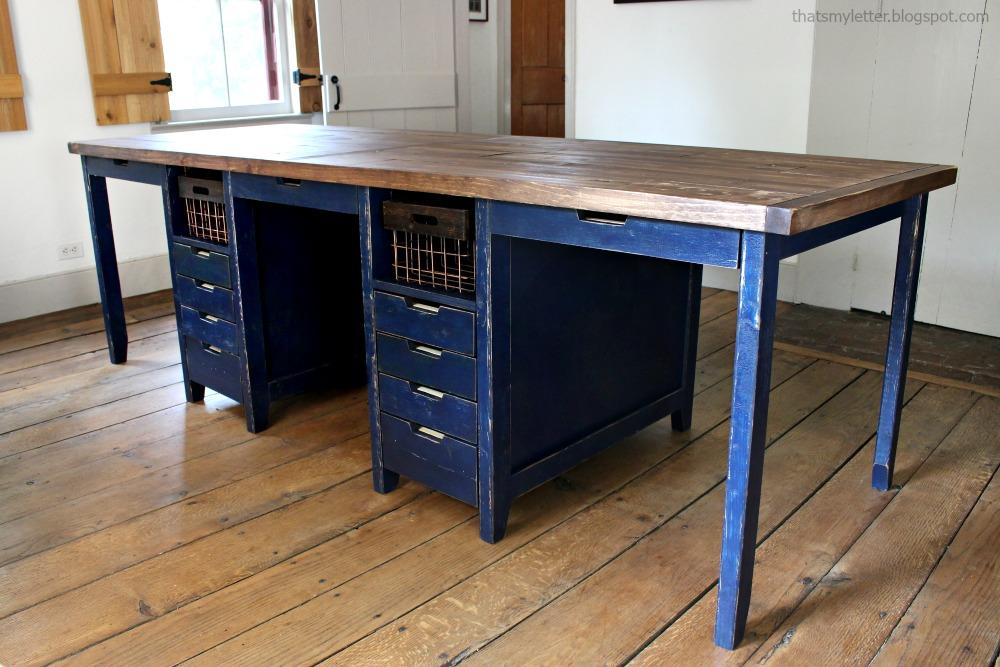
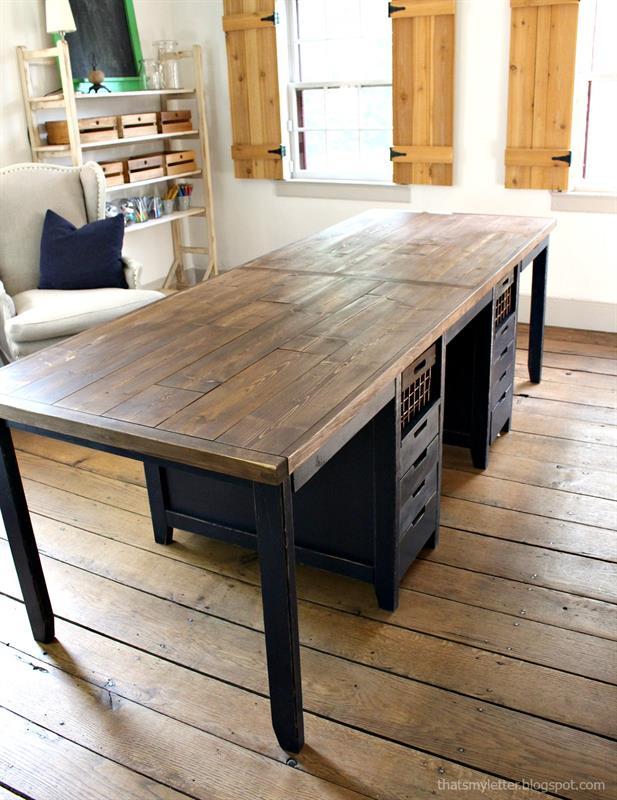
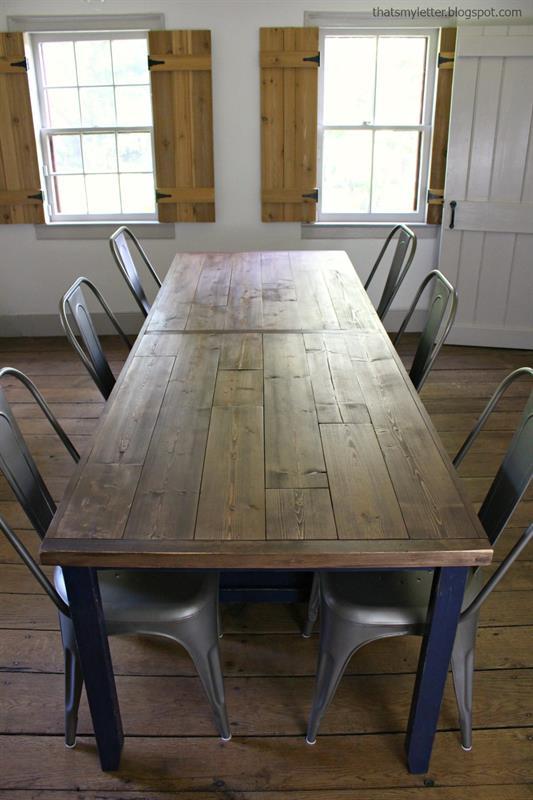
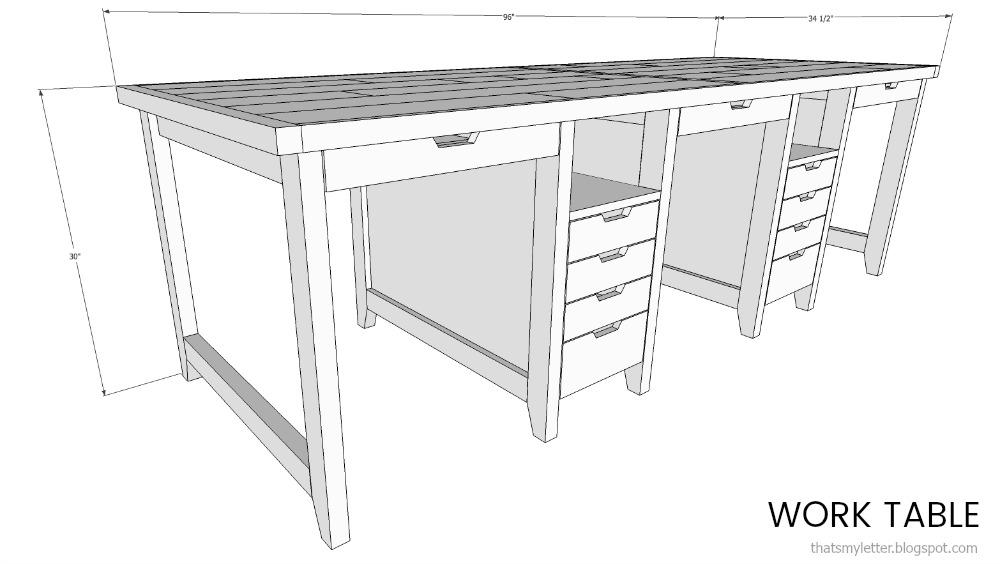
work table with storage
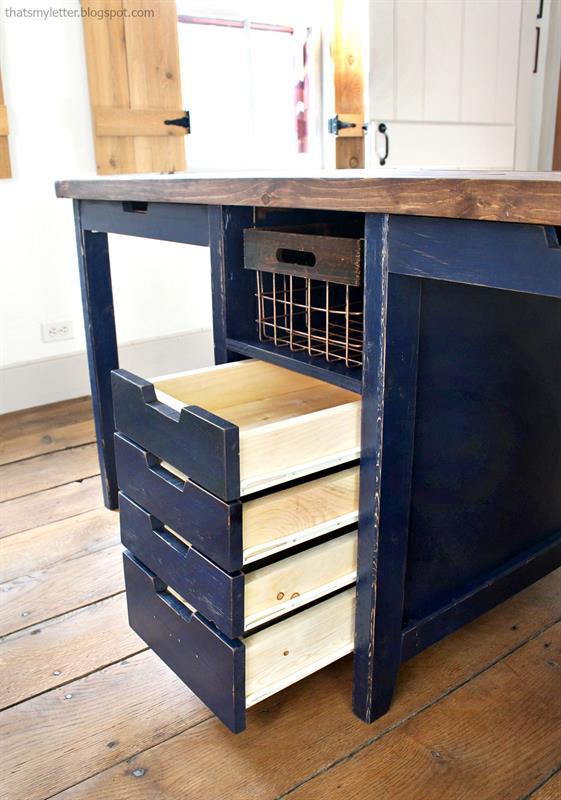
By Jaime CostiglioLooking for a multipurpose work table that also doubles as extra dining space during family gatherings? Or a great homeschool work surface with dedicated storage. Or a craft table? With 22 drawers and 4 open shelves there’s plenty of storage space and bonus hidden power in the top surface.
Directions
-
Overall Dimensions
96"l x 34 1/2"w x 30"h
-
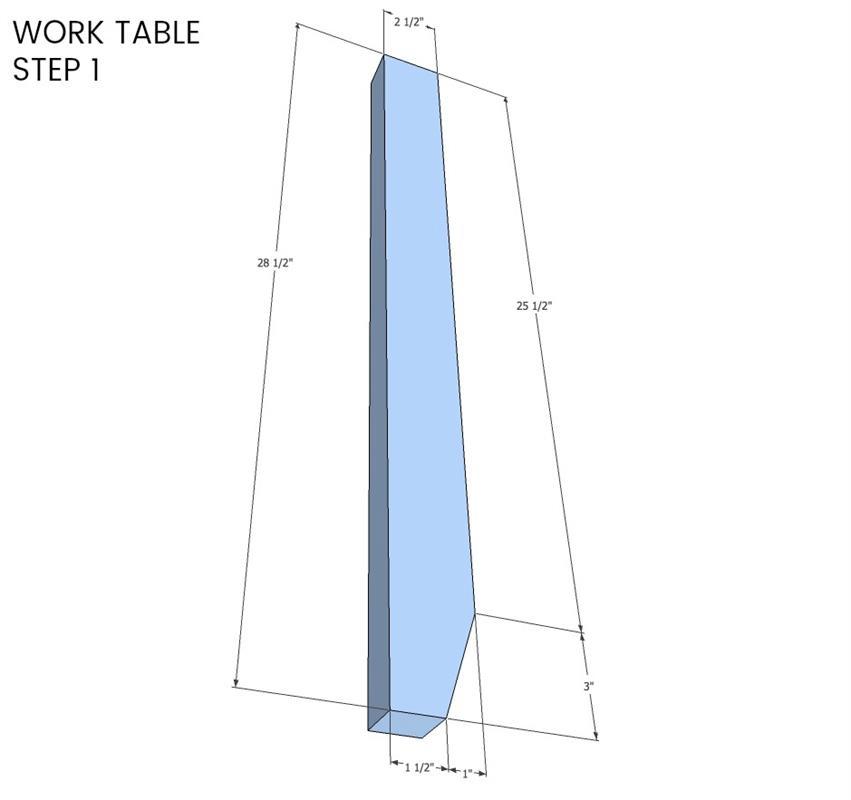
Step 1
Step 1: Cut 12 legs and taper the interior bottom corner.
-
Step 2
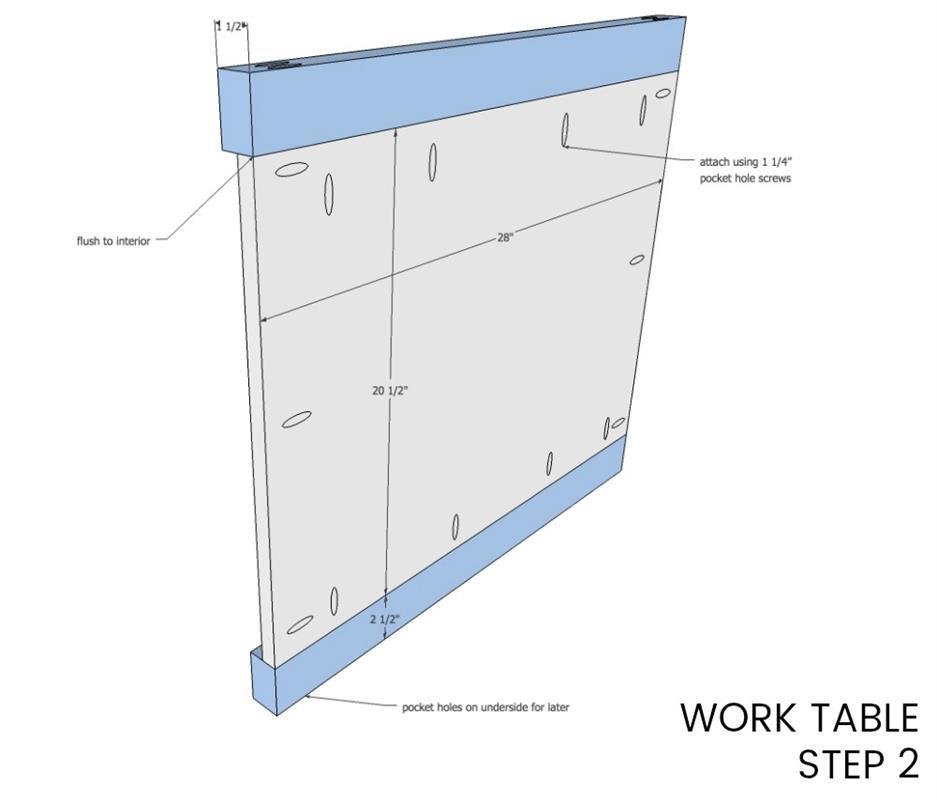
Step 2: Make the tower side panels. Attach top and bottom 2x3 to plywood panel using wood glue and 1 ¼” pocket hole screws. Be sure to pre drill pocket holes into the 2x3 for later attaching to legs. Keep plywood panel flush to interior of 2x3 boards.
Make 4.
-
Step 3
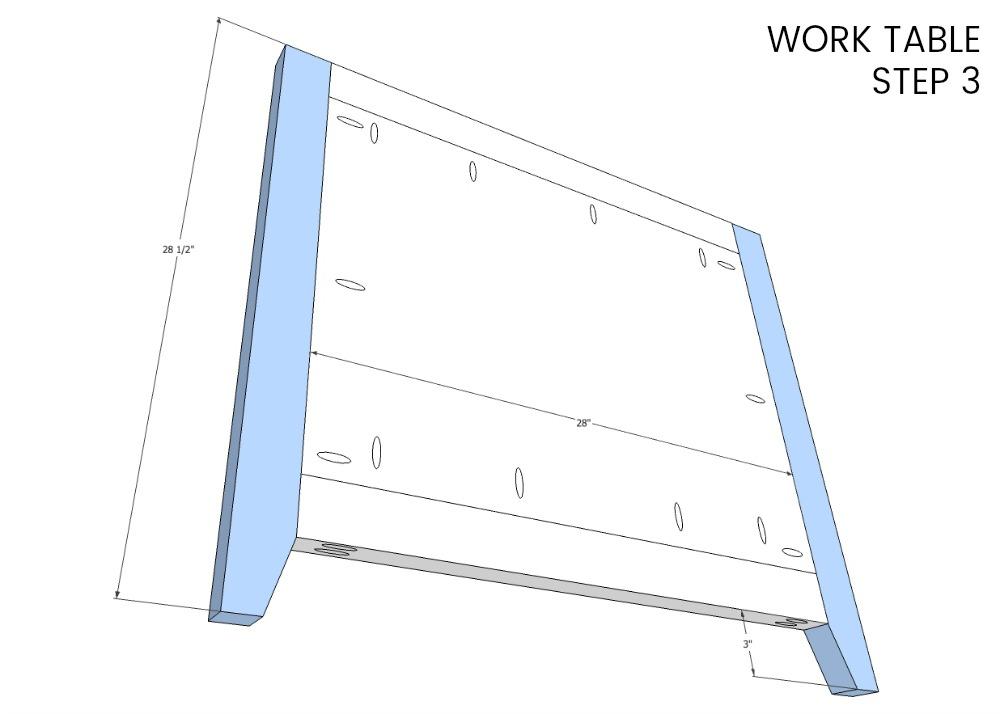
Step 3: Attach legs to side panels using wood glue and 2” pocket hole screws. Keep leg flush to interior of plywood panel.
-
Step 4
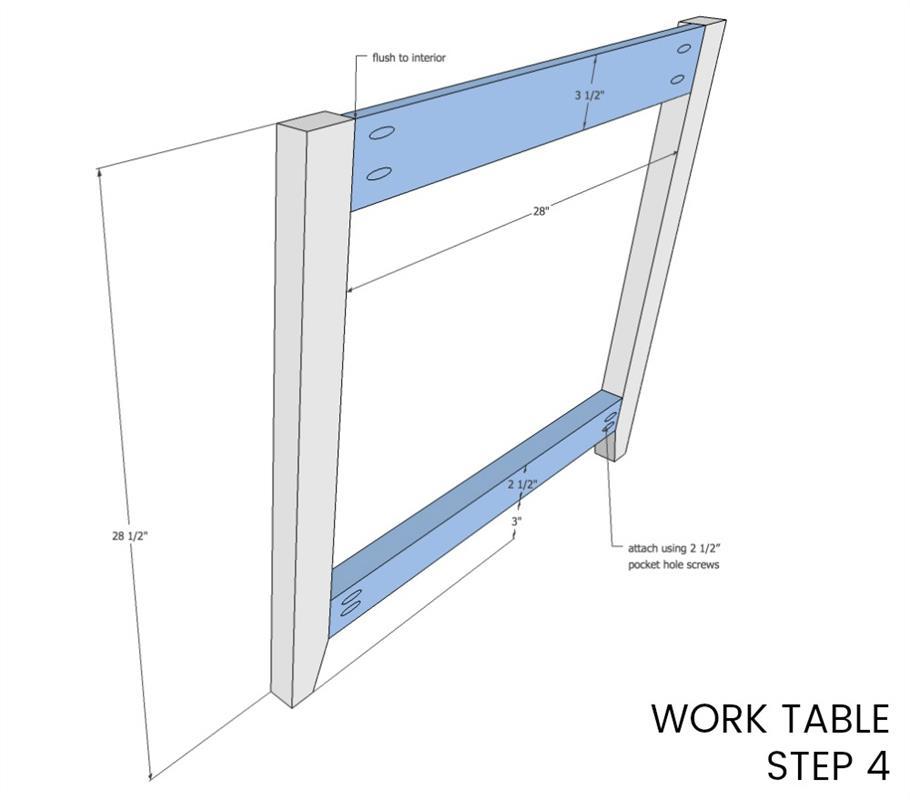
Step 4: Make end leg pieces. Attach 1x4 apron and 2x3 cross support to legs using wood glue and 2 ½” pocket hole screws.
Make 2.
-
Step 5
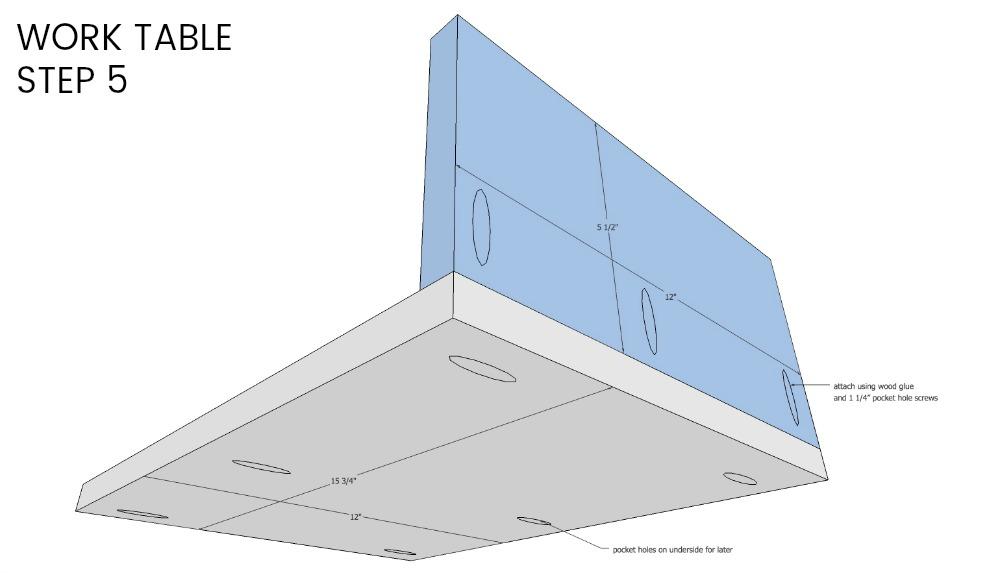
Step 5: Prepare tower shelf by attaching 1x5 back piece to plywood shelf using wood glue and 1 ¼’ pocket hole screws.
Make 4.
-
Step 6
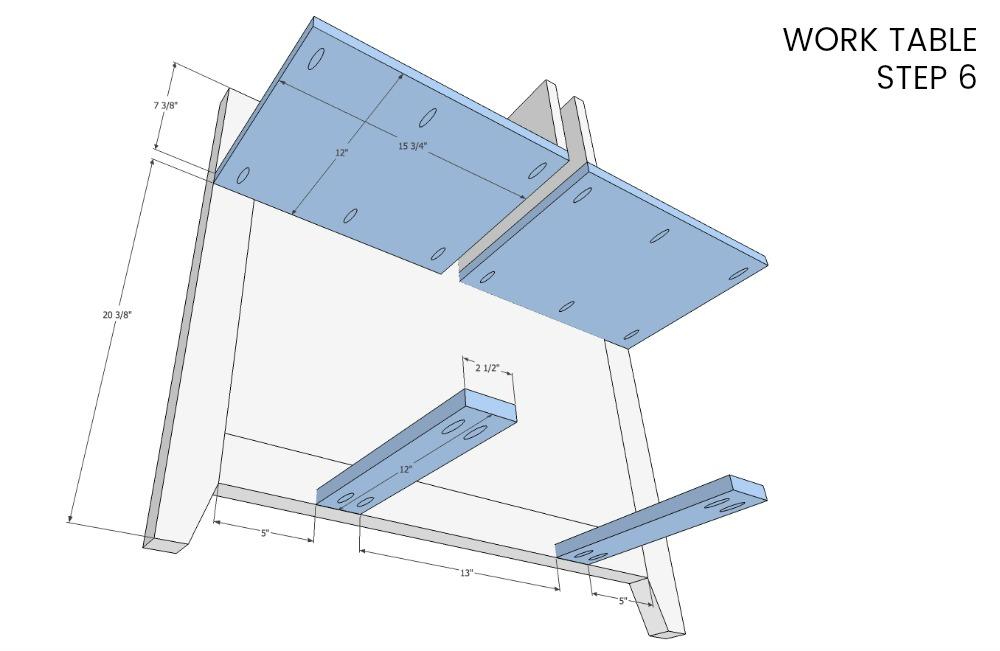
Step 6: Attach shelf portion to one side using wood glue and 1 ¼” pocket hole screws. Also attach bottom tower supports.
Make 2.
-
Step 7
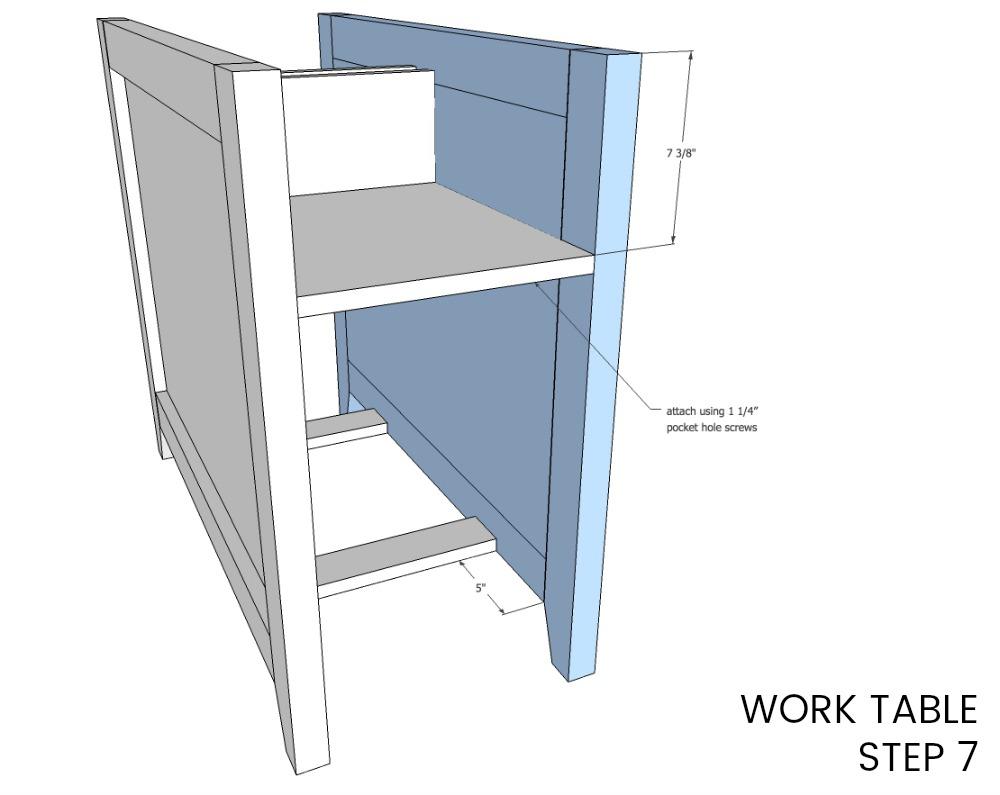
Step 7: Attach other side panel.
-
Step 8
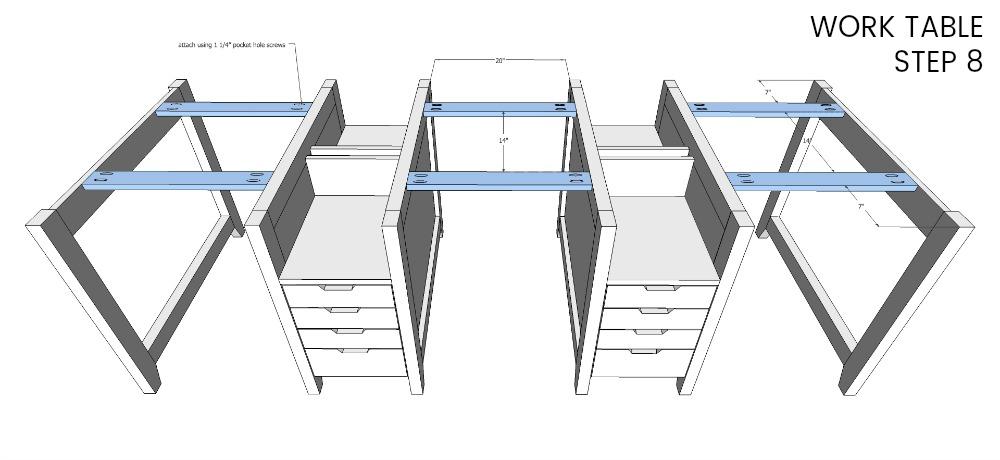
Step 8: Position towers (without drawers) and end leg units and attach top supports using 1 ¼” pocket hole screws.
-
Drawers A Step 1
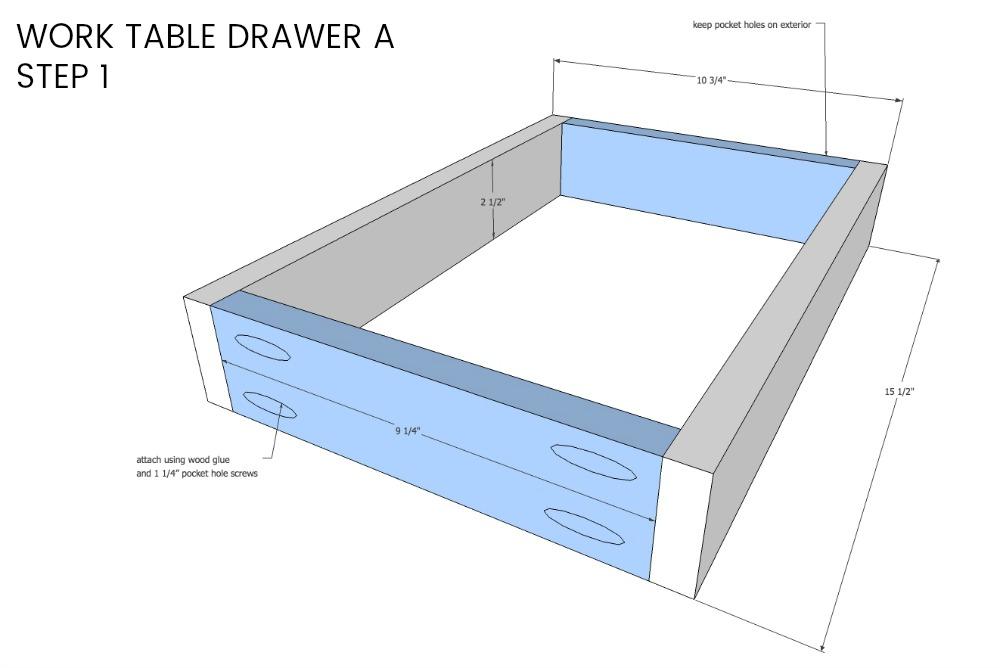
Step 1: Make the drawer box using wood glue and 1 ¼” pocket hole screws. Keep the pocket holes on the exterior.
Make 12.
-
Drawers A Step 2
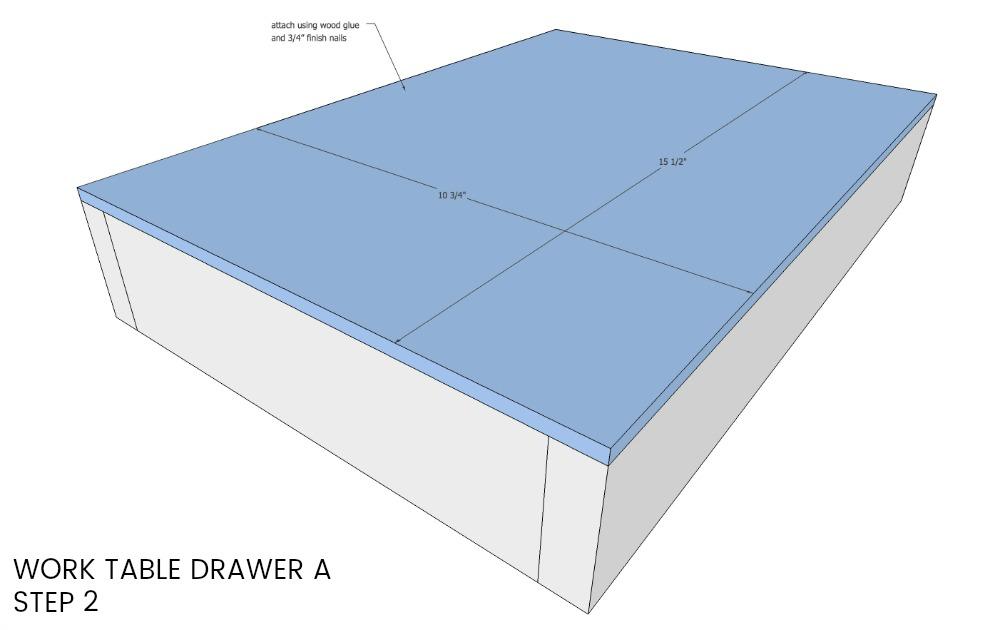
Step 2: Attach the drawer base to the box using wood glue and ¾” finish nails.
-
Drawers A Step 3
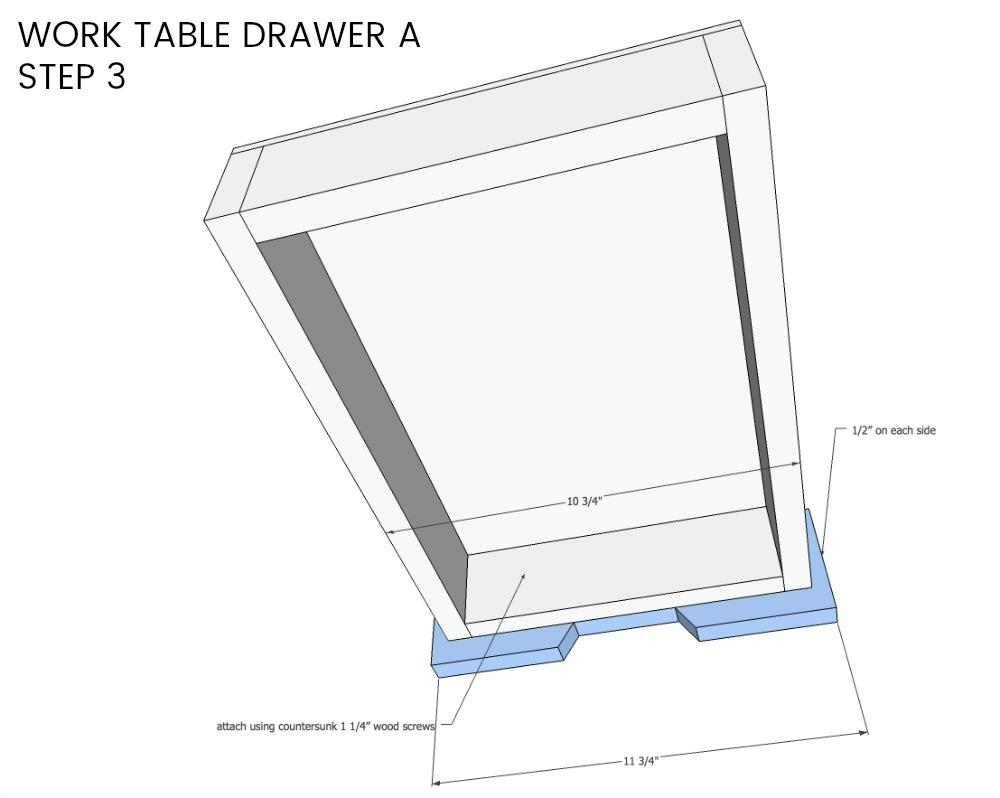
Step 3: Attach the drawer front to the box using wood glue and 1 ¼” countersink screws. Install drawer glides and fit into base.
-
Drawers B Step 1
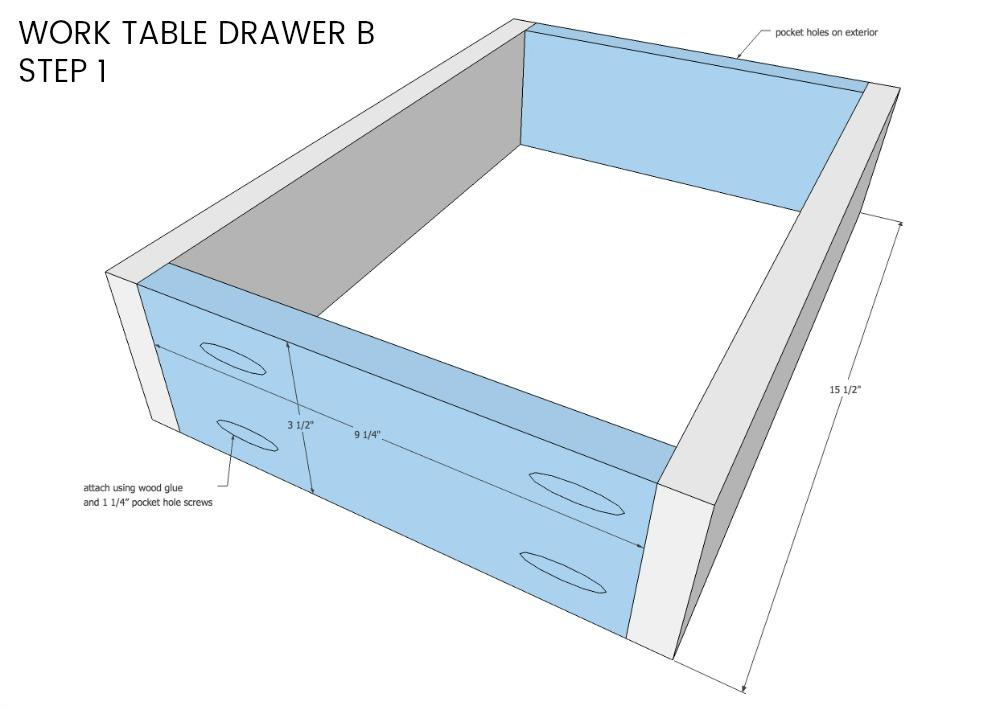
Step 1: Make the drawer box using wood glue and 1 ¼” pocket hole screws. Keep the pocket holes on the exterior.
Make 4.
-
Drawers B Step 2
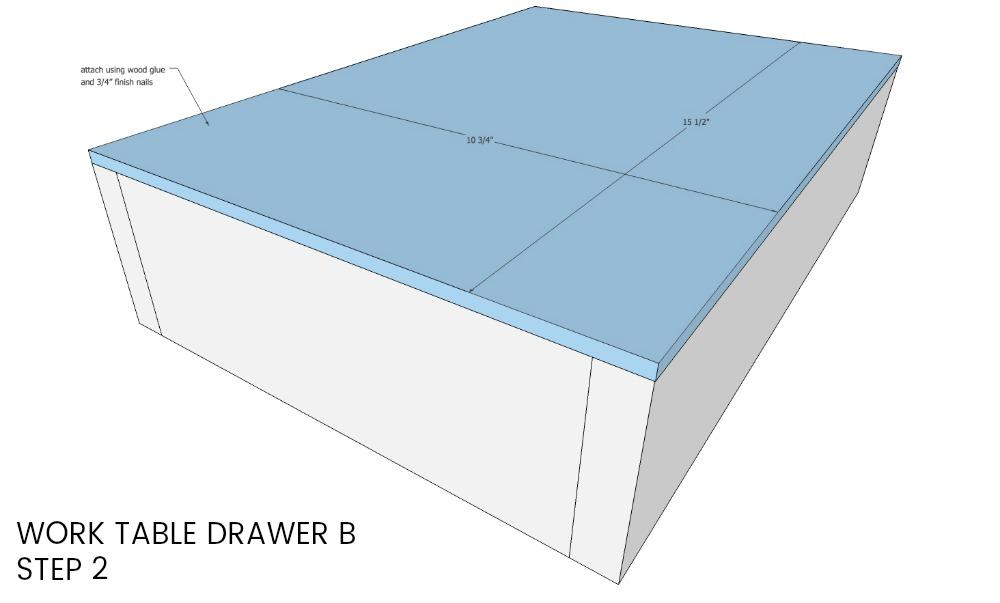
Step 2: Attach the drawer base to the box using wood glue and ¾” finish nails.
-
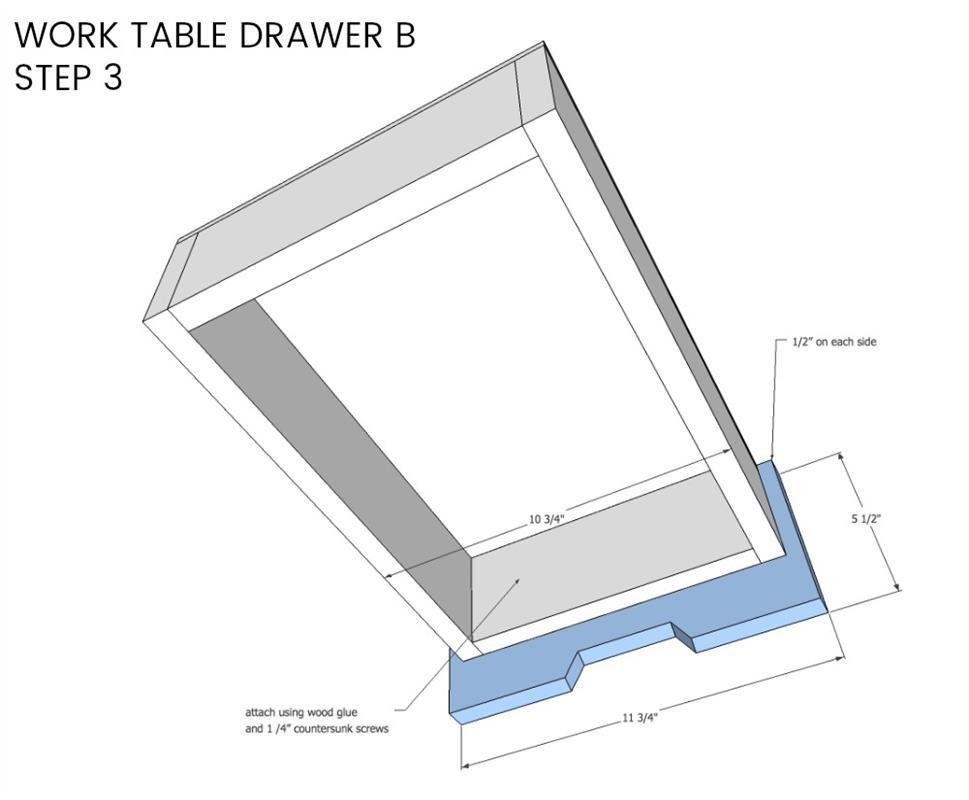
Drawers B Step 3
Step 3: Attach the drawer front* to the box using wood glue and 1 ¼” countersink screws.
* Attach the drawer front after installing drawer glides and placing box into tower.
-
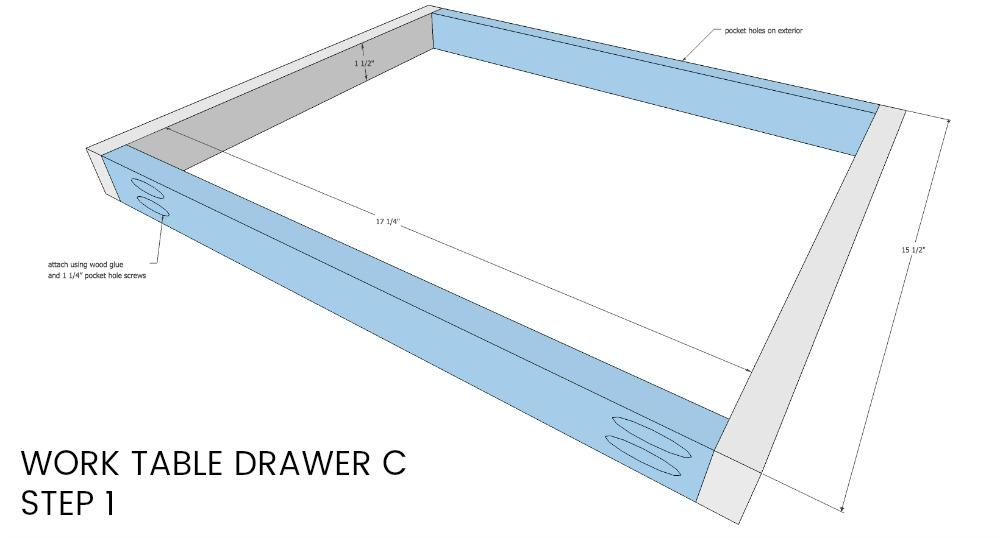
Drawers C Step 1
Step 1: Make the drawer box using wood glue and 1 ¼” pocket hole screws. Keep the pocket holes on the exterior.
Make 6.
-
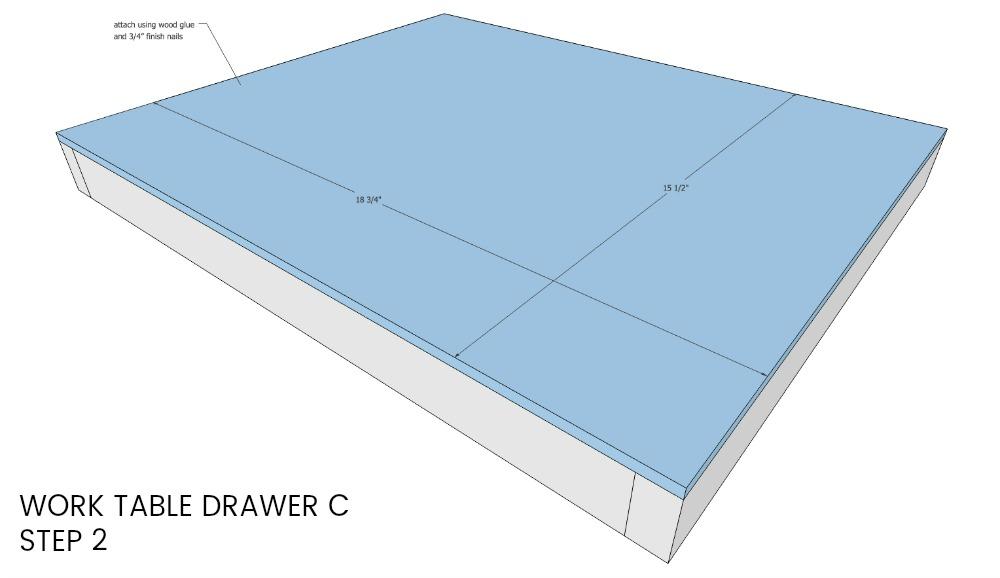
Drawers C Step 2
Step 2: Attach the drawer base to the box using wood glue and ¾” finish nails.
-
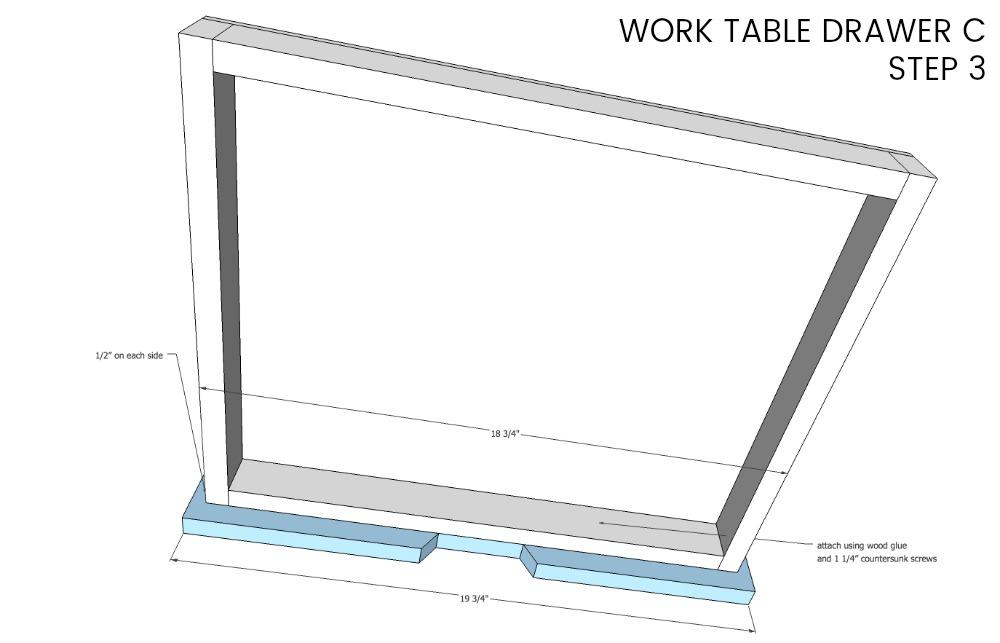
Drawers C Step 3
Step 3: Attach the drawer front to the box using wood glue and 1 ¼” countersink screws. Install drawer glides and fit into base.
-
Top Step 1
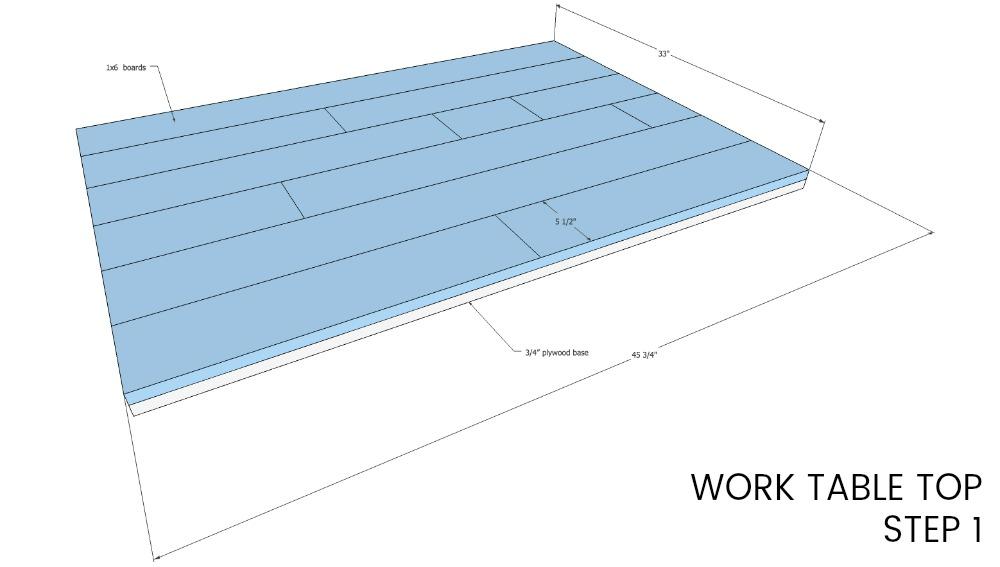
Step 1: Measure 1x6 width x 6 to determine width of plywood underlayer. Use one full piece at 45 ¾” long or multiple shorter pieces to create a staggered look. Make 2.
-
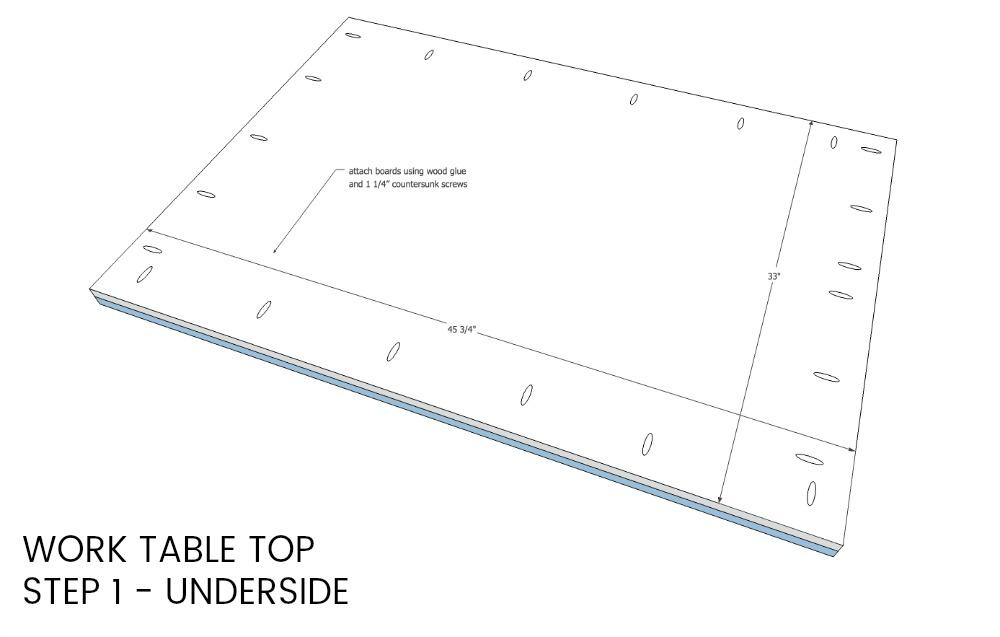
Top Step 1 Underside
Underside view
-
Top Step 2
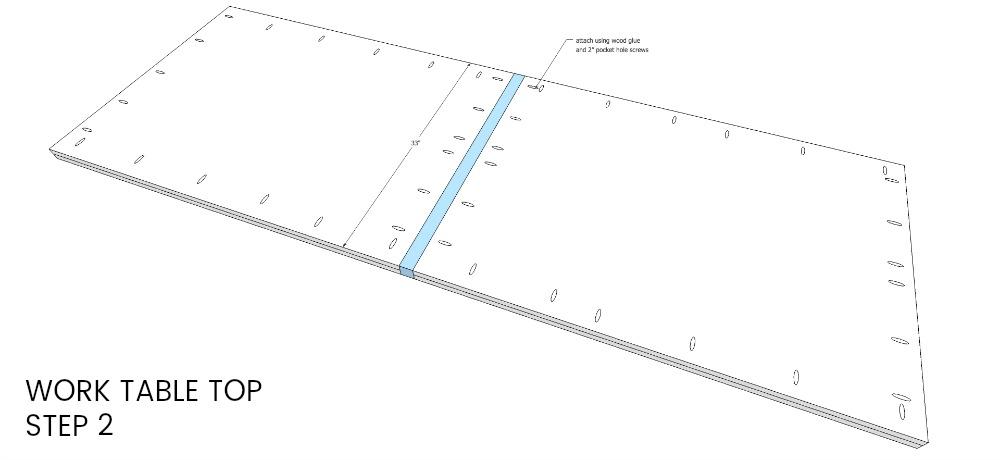
Step 2: Attach center divider using wood glue and 2” pocket hole screws.
-
Top Step 3
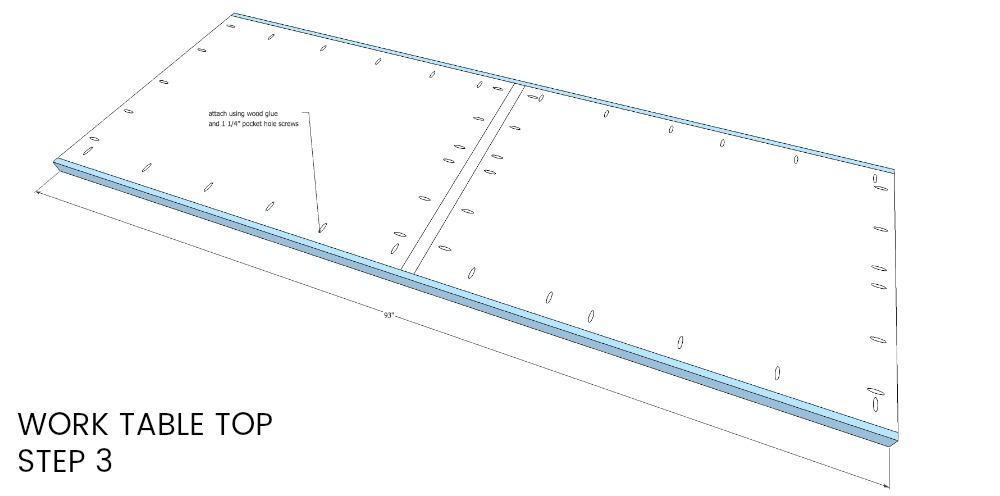
Step 3: Attach side pieces using 1 ¼” pocket hole screws.
-
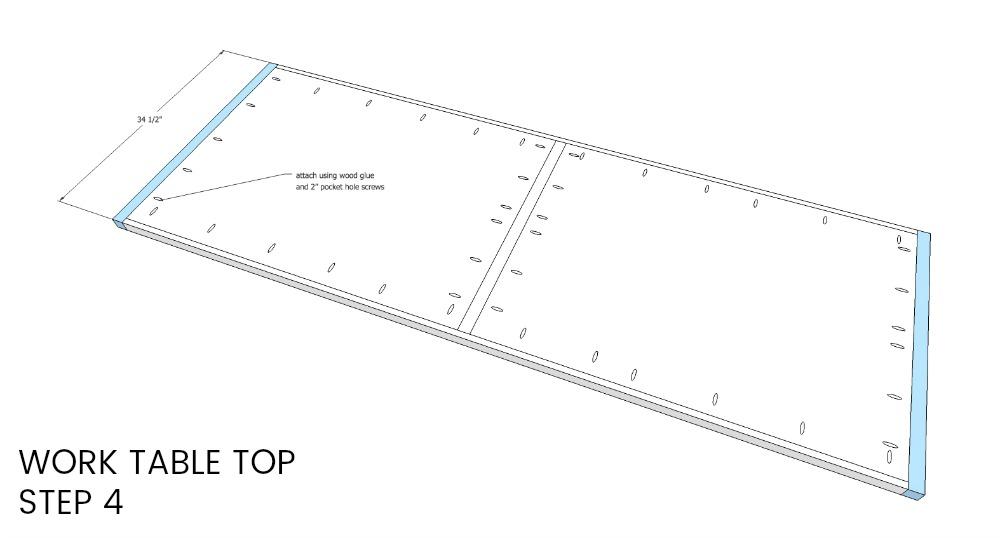
Top Step 4
Step 4: Attach ends to top using 2” pocket hole screws.
Center table top onto base and attach using corner braces or steel angles.


