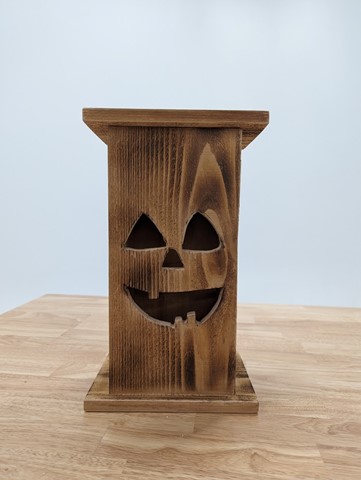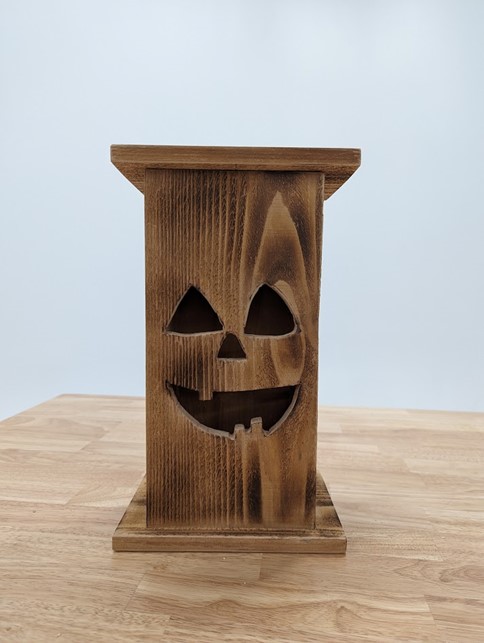
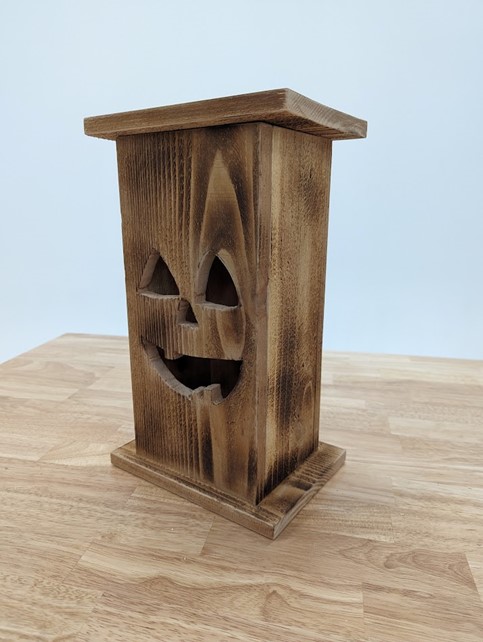


Turn your Halloween decor up a notch with this DIY Jack-O-Lantern project! This creative endeavor allows you to craft a unique and spooky wooden Jack-O-Lantern box using a few essential tools and materials. Whether you're an experienced woodworker or a beginner looking for a fun holiday-themed project, this plan has you covered.
Tools
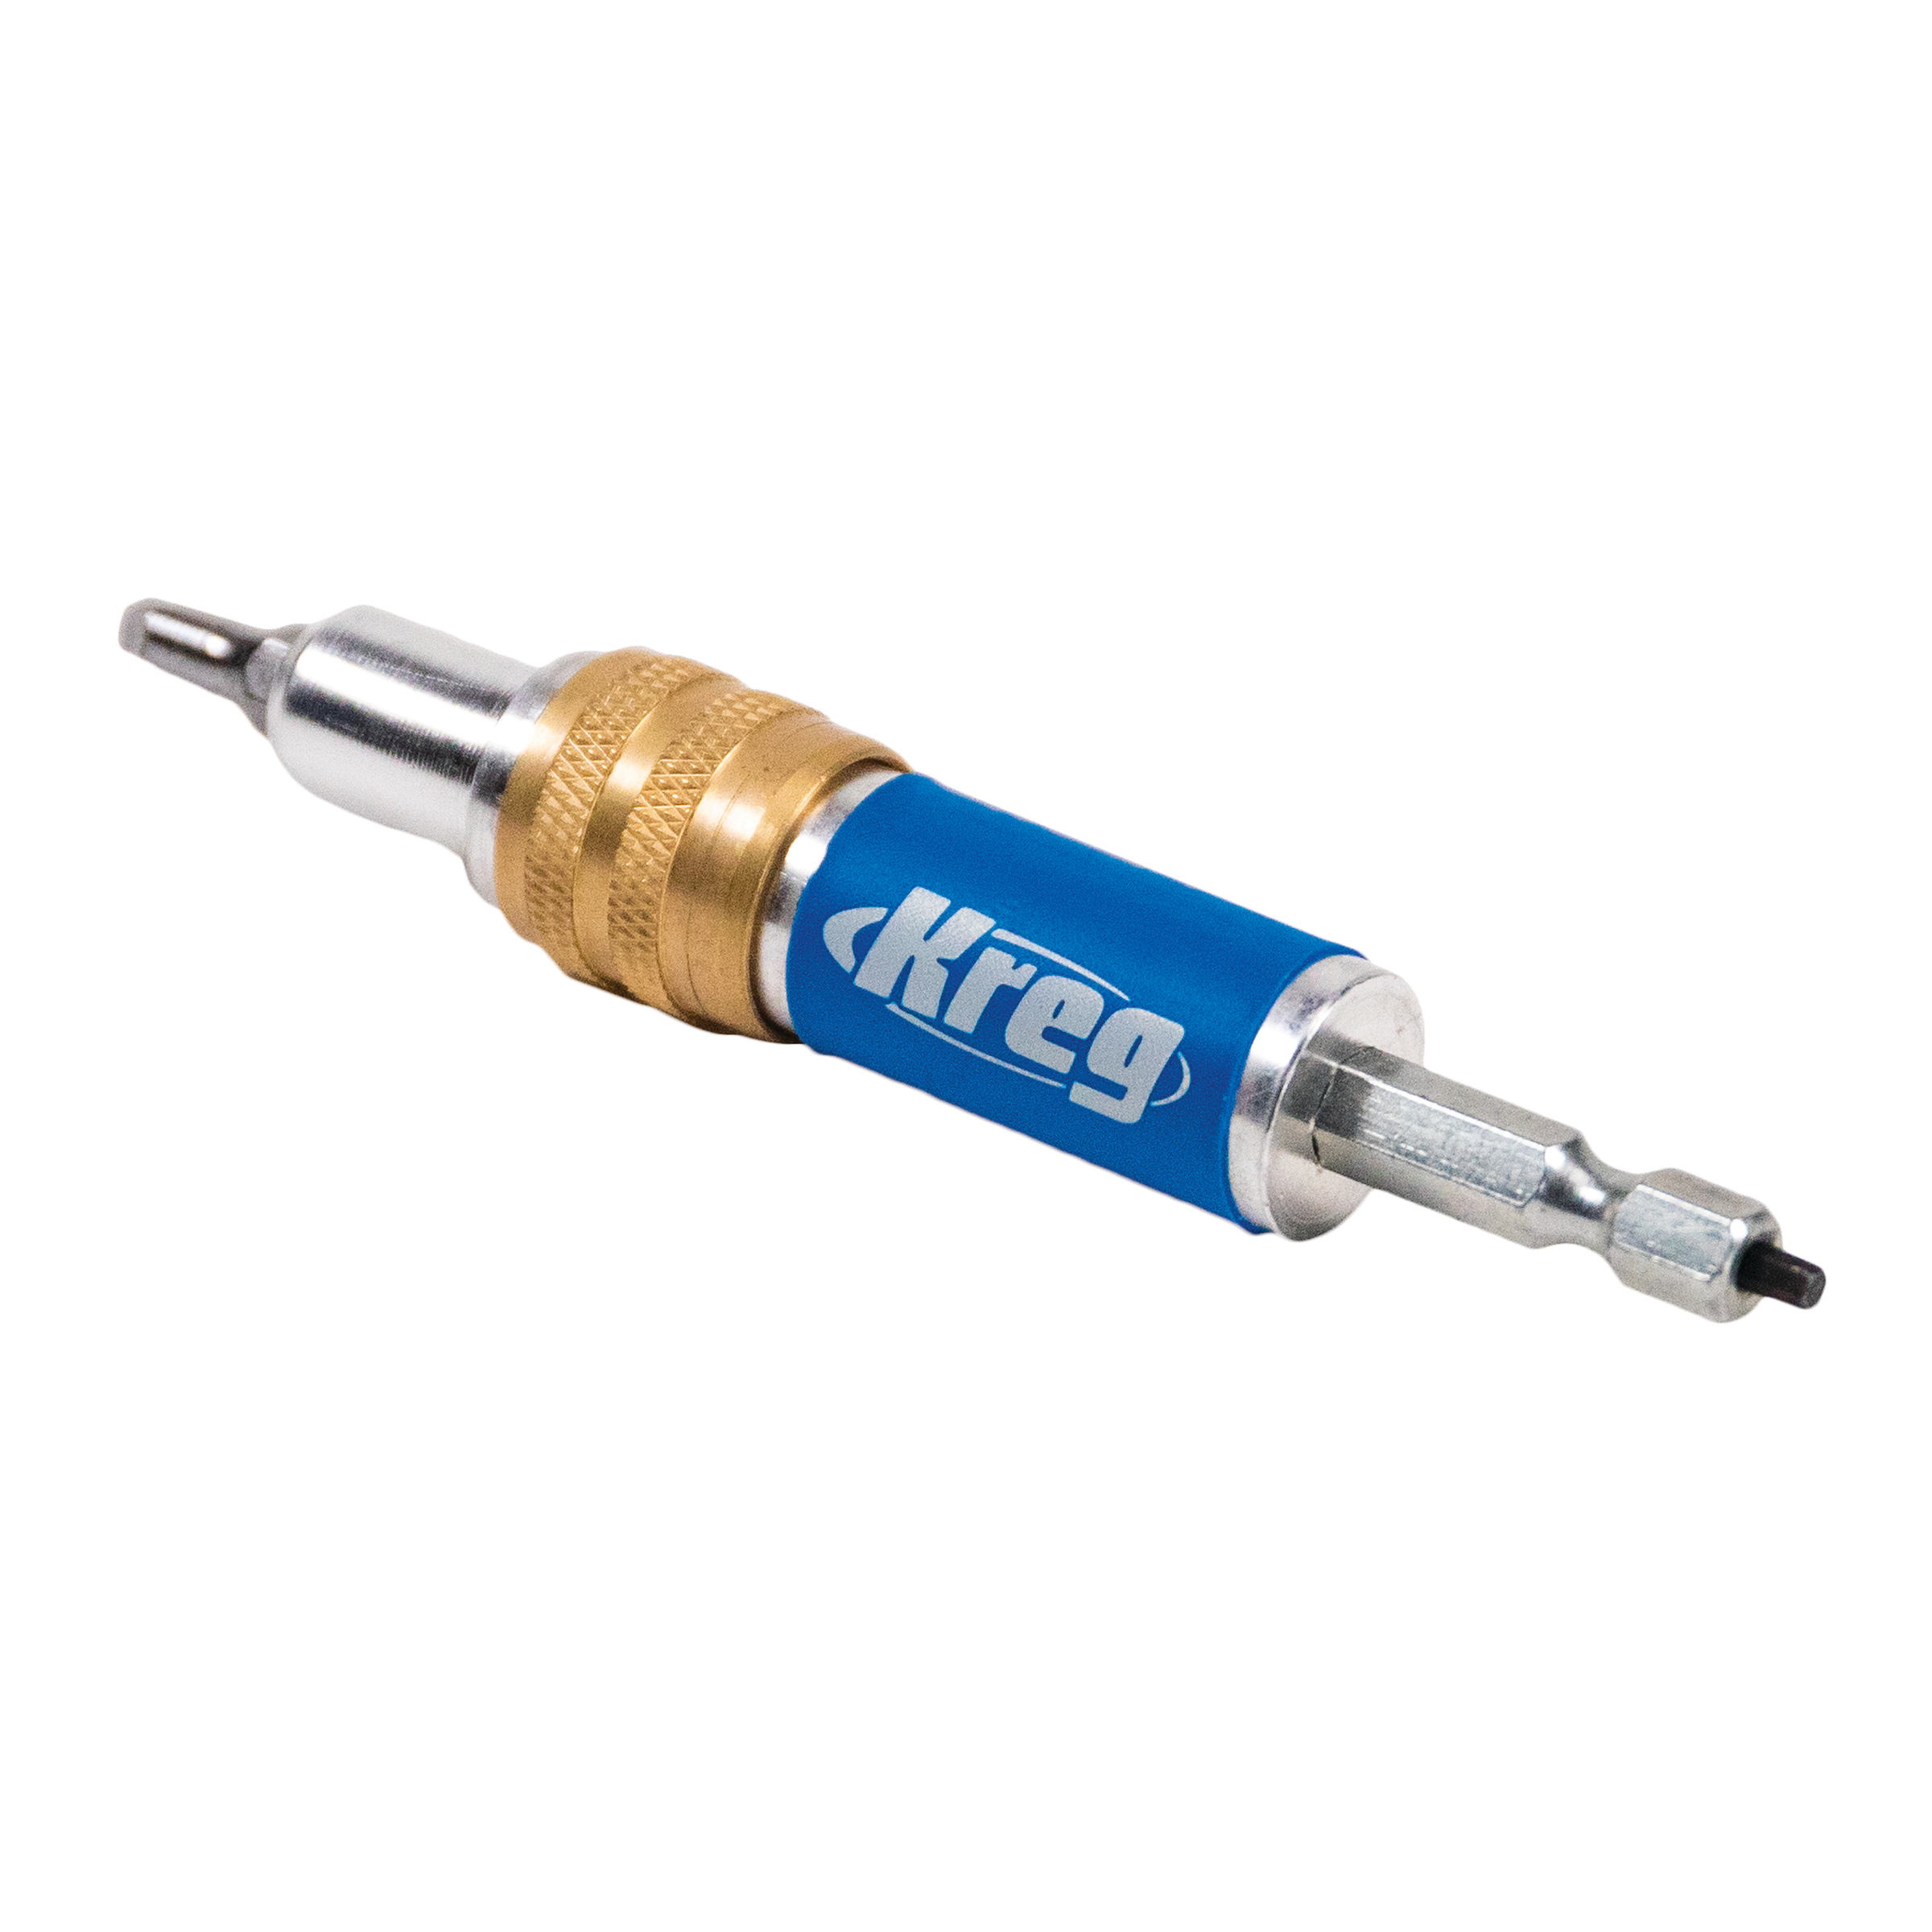
Kreg Tools


Other Tools
-
Propane Torch

-
Tape Measure
-
Pencil
Materials
Wood Products
- 1 Cedar board (can also use 1x6) , 1"x8"x4'
- 1 Cedar board , 1"x6"x4'
Hardware & Supplies
- 20 Kreg Pocket Hole Screws (1 ¼”) (see tools list)
- -- Sandpaper
- -- Stain or Outdoor Finish (optional)
Directions
-
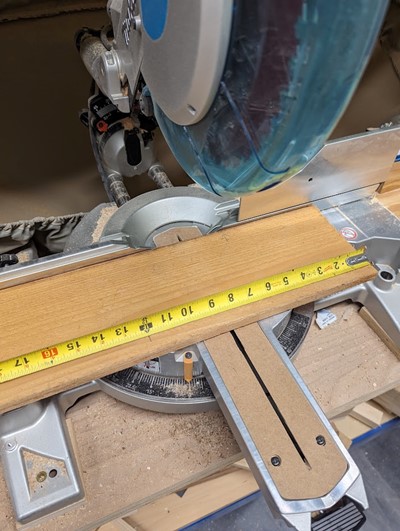
Cut front and back pieces
Cut your Front and Back pieces from your wider board at 12” long, or a separate desired height.
-
Cut sides
Cut your two Sides from your narrower board, also at 12” long or the same length as above.
-
Measure widths of sides
Stack your two Sides on your Front board and measure the width from the inside of your two Sides to the edge of your Front board. Or optionally use the formula: Bottom length = Front width – (Side thickness x 2).
-
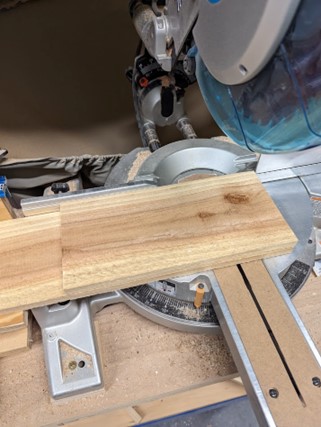
Cut bottom and top cap plug
Cut your Bottom and Top Cap Plug from your narrower board at the length determined above. Using a 1x8 (that is actually ¾“ x 7 ¼“), this measurement would be 5 ¾“.
-
Cut base and top cap
Cut your Base and Top Cap, from your wider board, at somewhere between 1 and 2” longer than the width of your wider board. We chose 1.5” below.
-
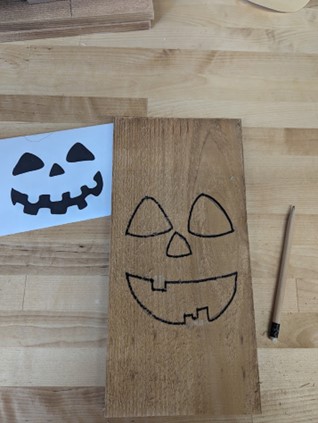
Draw jack-o-lantern face
Draw or trace onto the Front board your desired Jack-O-Lantern face or Halloween artwork. I recommend using pencil, although I used a black sharpie below so it would show better on camera.
-
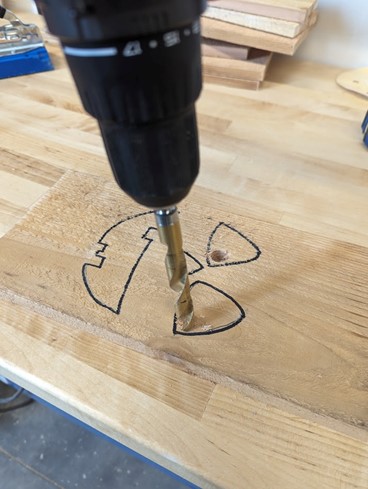
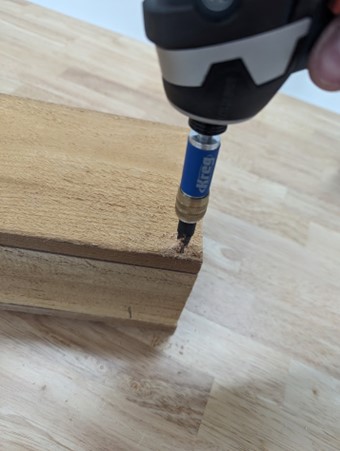
Drill holes for jig saw
Use a drill bit to drill holes at the corners of each place on your face that needs to be cut out. Use a bit large enough to accommodate your jigsaw blade (I used ½” drill bit).
-
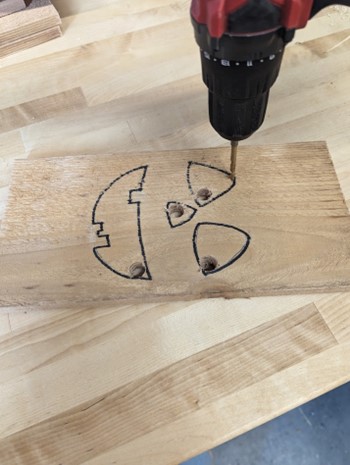
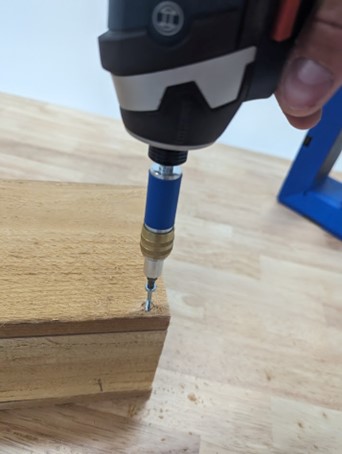
Use a smaller bit for corners
Optionally, to make using your jigsaw easier, use a smaller drill bit to drill holes in each inside corner of Jack-O-Lantern face. We used a 1/8” drill bit.
-
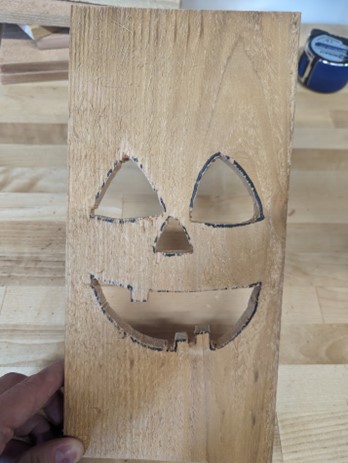
Cut out face
Use your jigsaw to cut out all your Jack-O-Lantern holes, starting with your jigsaw blade in the ½” holes.
-
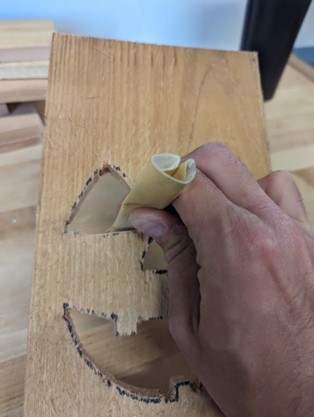
Sand edges of jack-o-lantern's face
Once complete, fold a piece of sandpaper and smooth out your cuts and soften the edges.
-
Drill pocket-holes
Setup your preferred Kreg Pocket Hole Jig to the correct settings and drill the below pocket holes:
a. Two on one inside edge of each Side, being careful to place somewhere where they will not interfere with your Jack-O-Lantern face.
b. One pocket hole on three outside edges of bottom piece.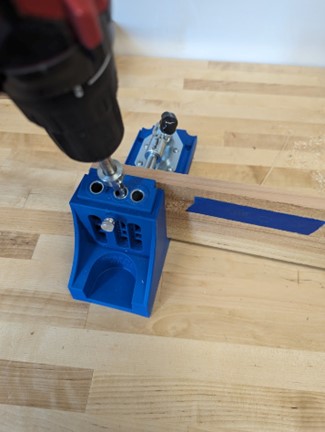
-
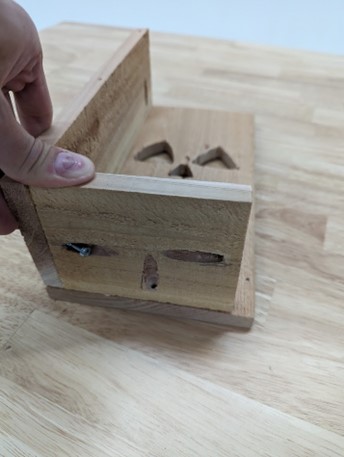
Attach side and front
Attach one Side to the Front board (with Jack-O-Lantern face), using two pocket hole screws, with pocket holes facing inwards.

-
Attach bottom
Attach the Bottom with pocket holes facing outwards. Start with attaching the Bottom to the Side from above, then attach to the Bottom to the Face. This will help ensure the box is square.
-
Attach other side
Attach the other Side to the Front board, using two pocket hole screws, with pocket holes facing inwards.
-
Attach bottom to second side
Attach the Bottom to the Side from above using last remaining pocket hole.
-
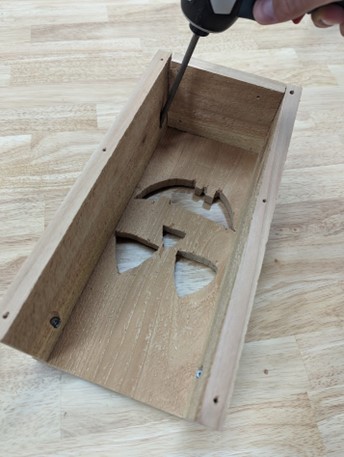
Dry fit top cap
Place the Top Cap Plug in the opening above, check that it fits loosely. If not, cut, sand, or file to get desired fit.

-
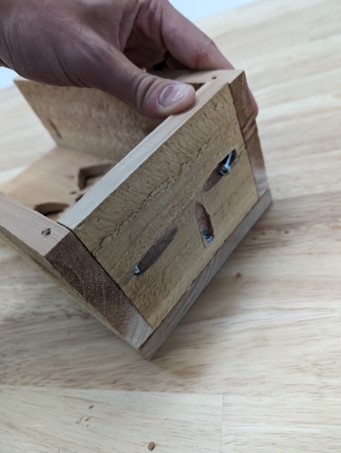
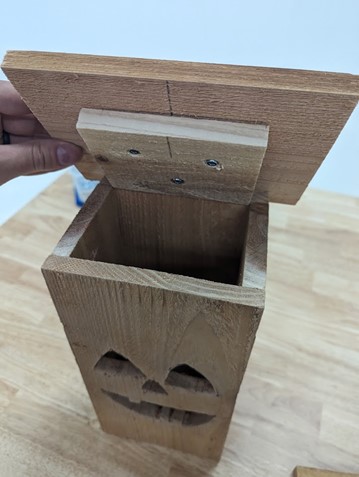
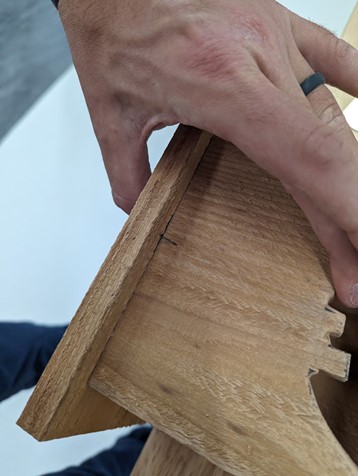
Drill pilot holes
Place Back piece on top of assembled box, line up all edges, and drill 6 counter-sunk, pilot holes using your Kreg Quick-Flip bit, or a separate 1/8“ drill bit and square driver.
-
Secure the back
Using Kreg pocket hole screws, flip your Kreg Quick Flip bit to the square drive and secure the Back to the rest of the project. Drilling traditional, perpendicular screw holes here will allow you to more easily remove in the future if you need larger access to the box.
-
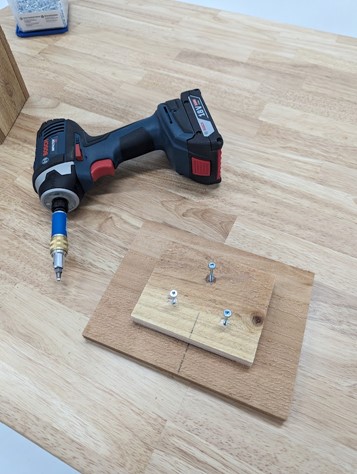
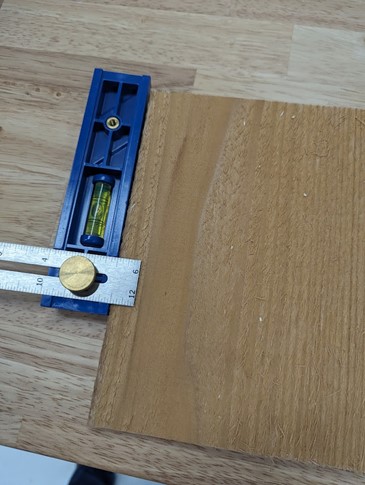
Mark center for top cap
Find and mark center on your Top Cap and Top Cap Plug. Measure desired offset on Top Cap and draw a parallel line. We used the Kreg Multi-Mark tool and chose a one-inch offset.

-
Attach top cap and top cap plug
Lineup Top Cap and Top Cap Plug, drill countersunk pilot holes, and attach with screws.
-
Dry fit top
Test fit assembled Top Cap and cut, sand, or file plug to get desired fit, as needed.
-
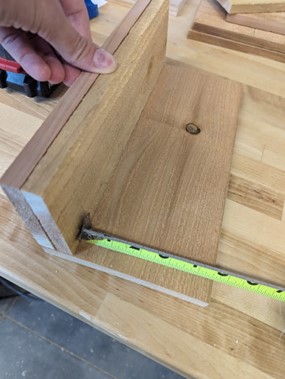
Measure offset for top cap
With Top Cap fitted snugly on the Jack-O-Lantern box, use a tape measure or Kreg Multi-Mark tool to measure the offset of Top Cap.
-
Transfer offset to base
Transfer above offset to the Base, then find and mark center on Base and Jack-O-Lantern face.
-
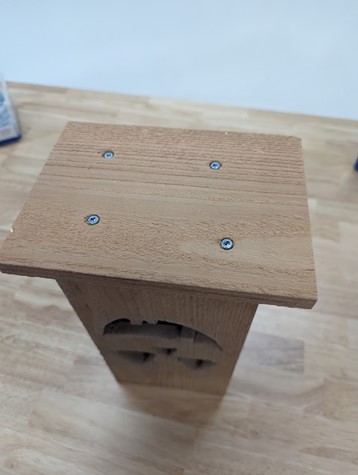
Secure base
Line up marks above, flip project, drill countersunk pocket holes, and secure using screws.
-
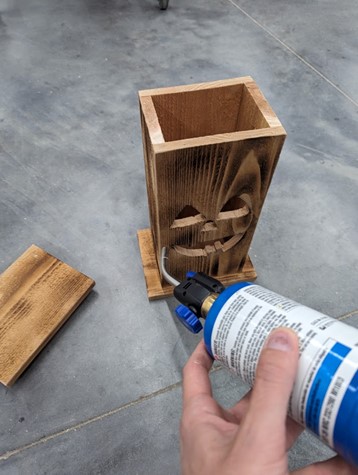
Finish the jack-o-lantern
Apply a stain, outdoor finish, or burn the wood with propane torch (as below) to give the project a spooky, finished look.
-
Enjoy!
Re-add the Top Cap and enjoy!