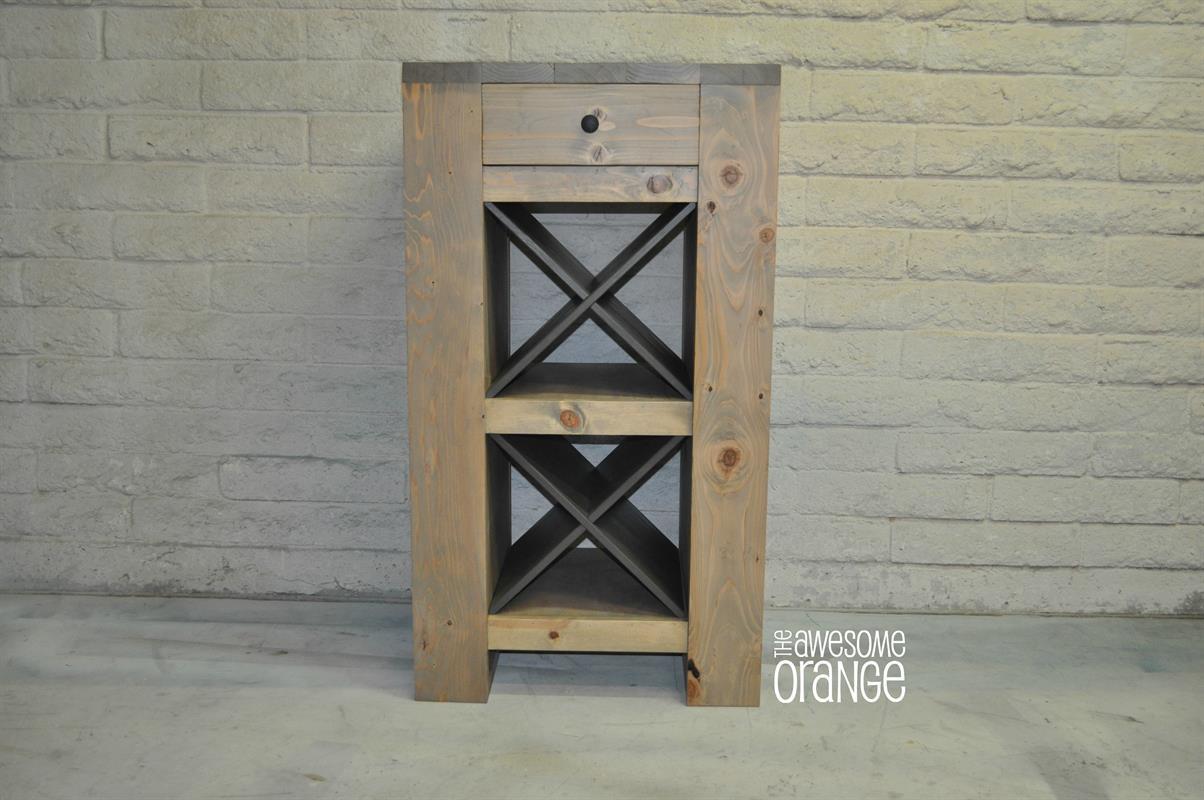
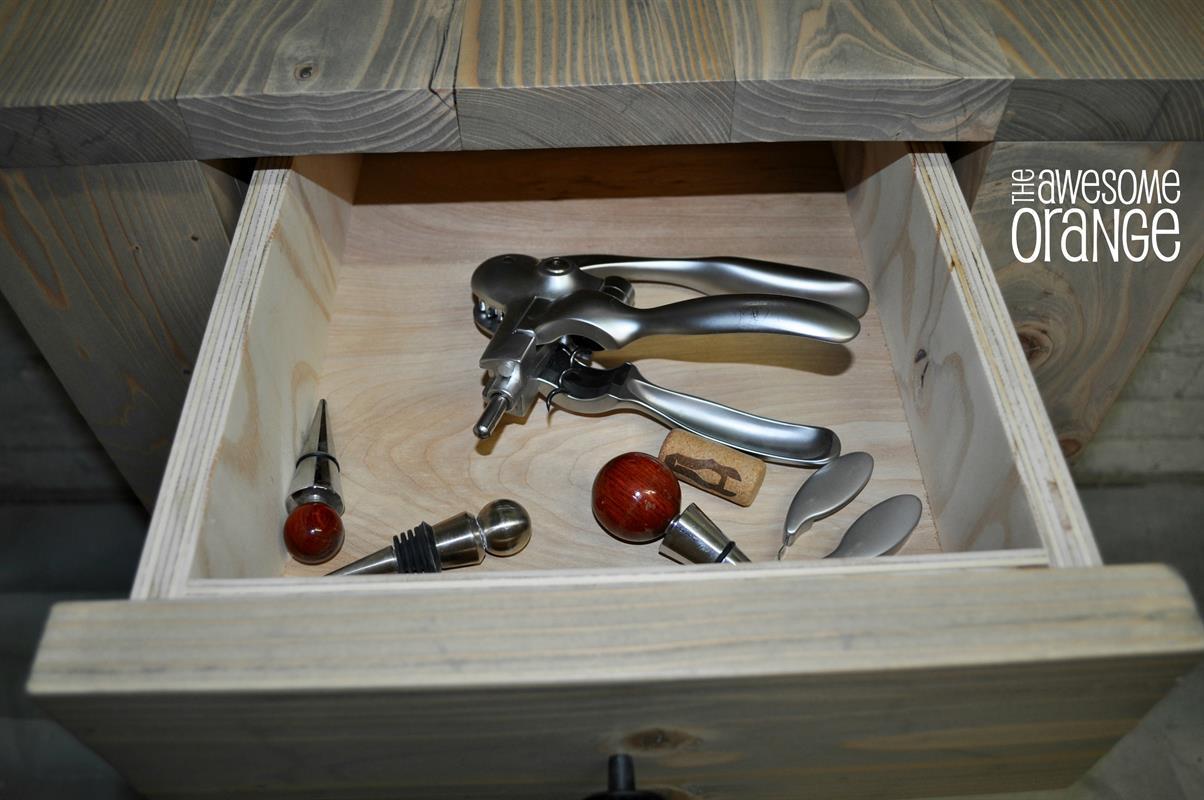
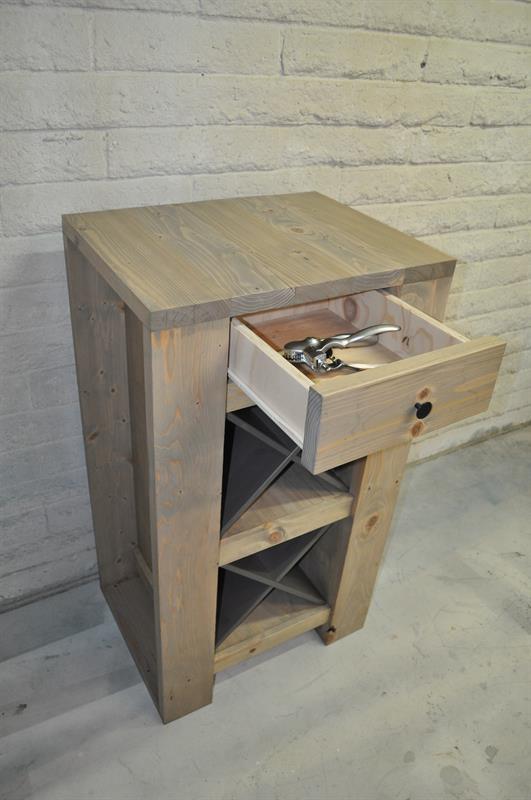
After a long day it is nice to have a special place that houses all your wine essentials and have a drink…. or two! The Wild Wine Bar can house all your adult libations, glasses, accessories and be an inviting spot to belly up to. Dimensions: 42″ H x 23.5″ W x 18″ D
Tools
Kreg Tools


Other Tools
-
Jointer

-
Miter Saw
-
Square
-
Table Saw
-
Tape Measure
-
Thickness Planer
-
Clamps
-
Air Compressor
-
Shop Vacuum
Materials
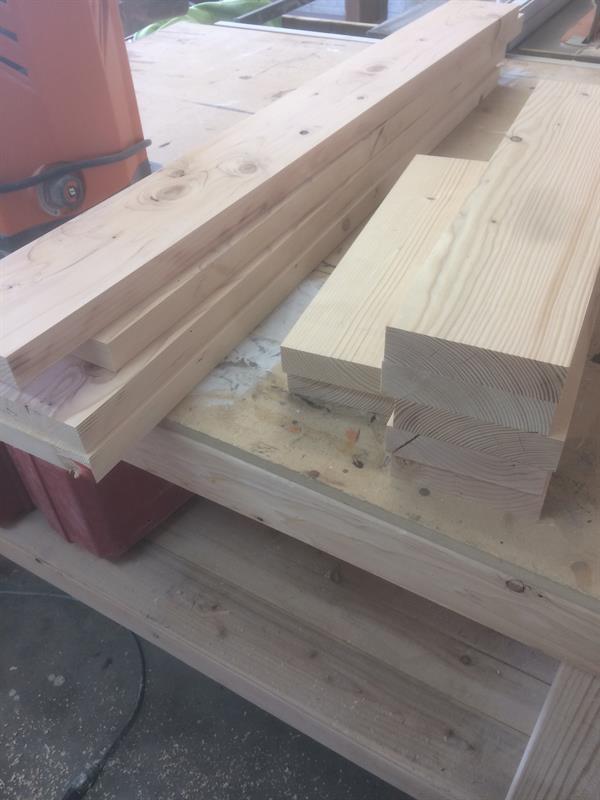
Wood Products
- 4 Board , 2x6 , 96"
- 1 Board , 1x4 , 96"
- 1 Plywood , 3/4" Thick , Full Sheet
- 1 Plywood , 1/4" Thick , Quarter Sheet
Hardware & Supplies
- 24 2" Coarse Kreg Screws
- 34 1 1/4" Coarse Kreg Screws
- 1 220 Grit Sanding Block
- 1 120 Grit Sanding Pad
- 1 60 Grit Sanding Pad
- 1 Knob Pull n Choice of Finish
- 1 14" Side Mount Drawer Slides
- 1 Wood Glue
- 2 IKEA Nornas Wine Racks - (OPTIONAL)
Directions
-
Mill Wood
Mill all 2x materials to 1.25" Thick x 5" Wide. Milling = face joint, edge joint, thickness plane, rip to width. If you don't have the tools for this step adjust the dimensions as necessary. *Tip - Sand pieces before assembly (60 grit then 120 grit). Much easier to get in all the corners and then only need to touch up sand before finish!
-
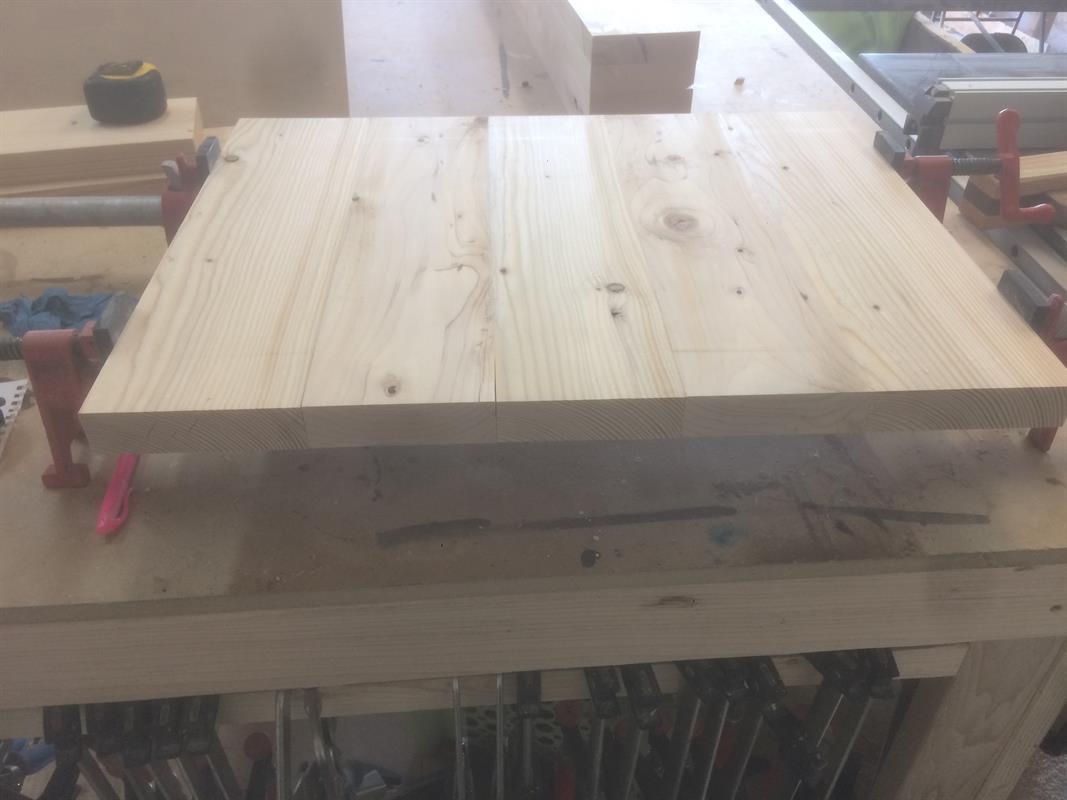
Glue Up Top
Glue top pieces together (5" - 4.5" - 4.5" - 4.5" - 5") and clamp overnight. If you don't have clamps you can also pocket hole the top and secure with glue and 2" pocket holes screws.
-
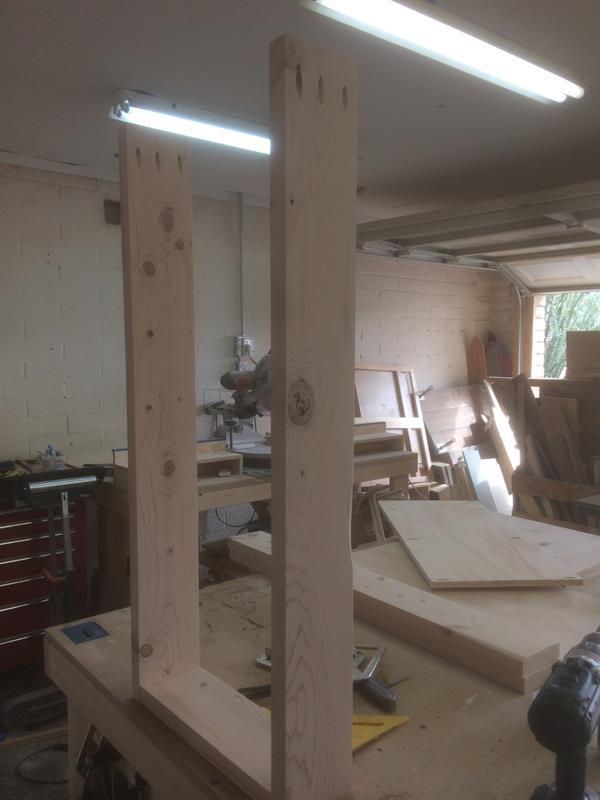
Assemble Legs
Drill pocket holes for 1.25" material (adjust if necessary to your thickness) and use 2" Kreg pocket hole screws. For the leg uprights you will only need to drill on the top of the leg that will eventually attach to the top. For the stretcher between the legs you need pocket holes on both ends. Be sure that the pocket holes are faceing down once assembled. *Tip - make sure PH's on leg uprights are installed facing the back so you don't see looking at the piece from the front.
-
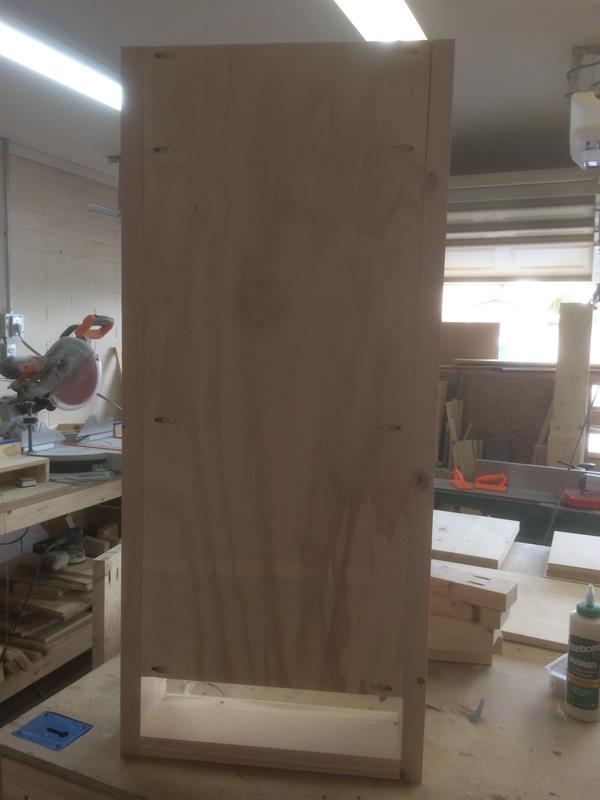
Attach Side Panels
Using pocket holes attach side panels flush to the inside edge of legs. *Tip - I placed my pocket holes where the shelves were going to intersect, so when you add the shelves it will hide the pocket holes.
-
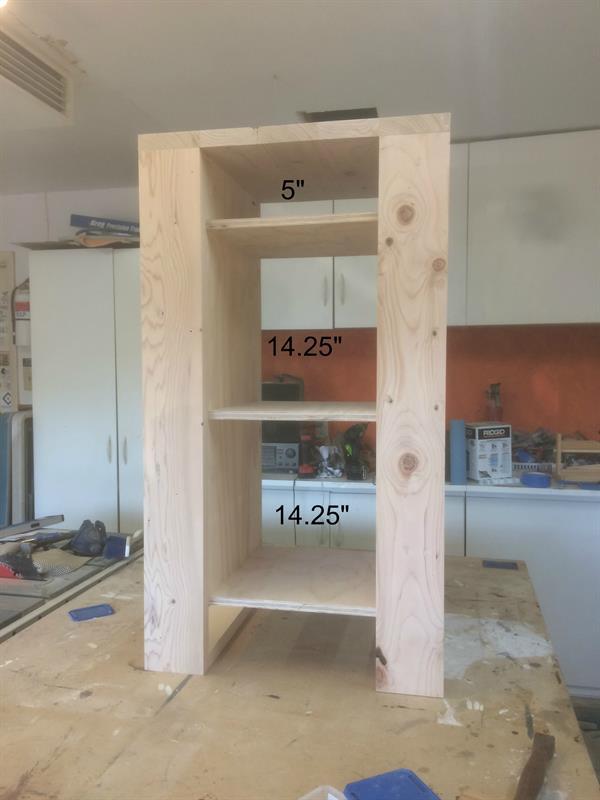
Attach Shelves
Attach shelves using pocket holes and 1 1/4" pocket hole screws. First shelf is 5" down from bottom of top. 2nd is 14.25 from bottom of 1st shelf. 3rd shelf is 14.25" down from bottom of 2nd shelf. These distances can be adjusted to fit what you are storing.
-
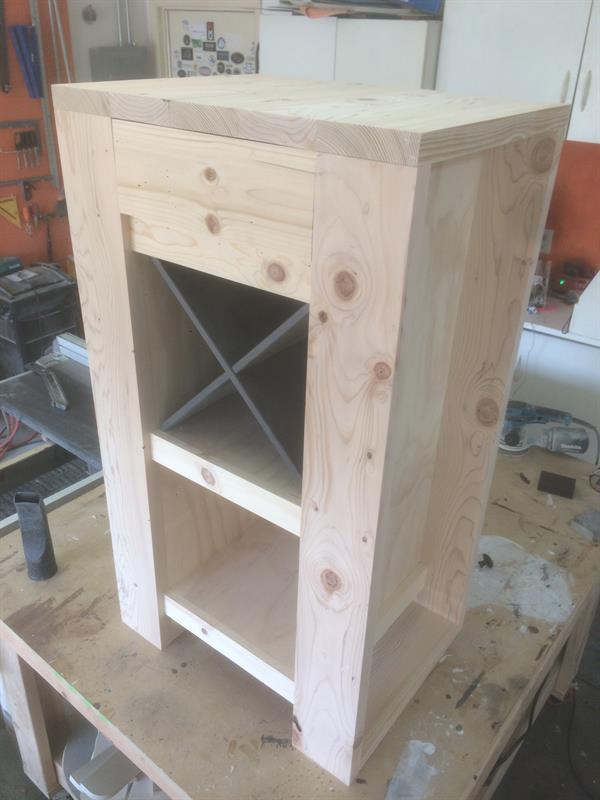
Add Trim
I made my trim 2 1/4" W to cover the wine X's. You can make adjust your width to fit your storage needs. I attached the trim using wood glue and 18 ga 1 1/4" brad nails. You can see in the pic that I not only added the trim to the front shelf edges, but also carried it across to the sides on the bottom to give it a more finished look. The sides have about 4" of space. I think it would be AWESOME to customize the side with pipe to hold a towel or wine glass shelves. The possibilities are endless!
-
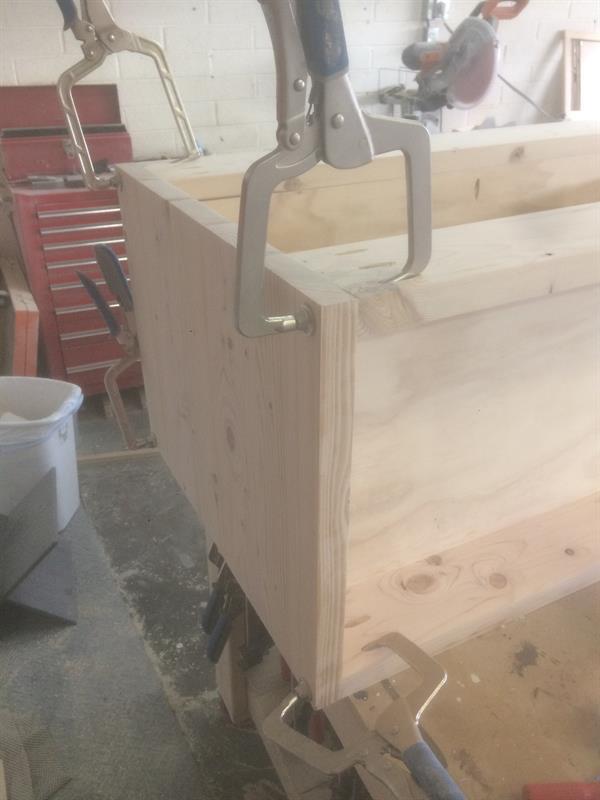
Attach Top
Place top on legs and secure using some right angle clamps then attach using 2" pocket hole screws.
-
Install Slides & Assemble Drawer
The slides take up 1/2" on each side of opening, so the overall width of your box will be 1" smaller than the opening or 12.5". Install slides set back to where the plywood sides start or 1.25". This will give room for the drawer front to sit flush with the top. Once slides are in cut bottom of box (1/4" plywood) and attach slides. Test if it slides good. If bottom slides good build box to those measurements. If not, adjust as necessary. *Tip - ensuring that your box/frame is square is key with drawers sliding smooth!
-
Install Drawer Front
Drawer front will need to be trimmed approximately 1/16" - 1/8" to ensure drawer opens properly. Once you have it to correct size I lined it up with the drawer box and the opening and marked where is needed to be and then drilled in two screws from inside of the drawer box to the drawer front to attach.
-
Finish & Add Hardware
Touch up sand, then stain in your choice of color, add a protective finish, and add then hardware and X's! You did it! You built yourself an Wild Wine Bar! You deserve a drink! Visit my blog for a full description of the products, finishes, and hardware used on this build (direct link can be found in the "Extras" tab)!