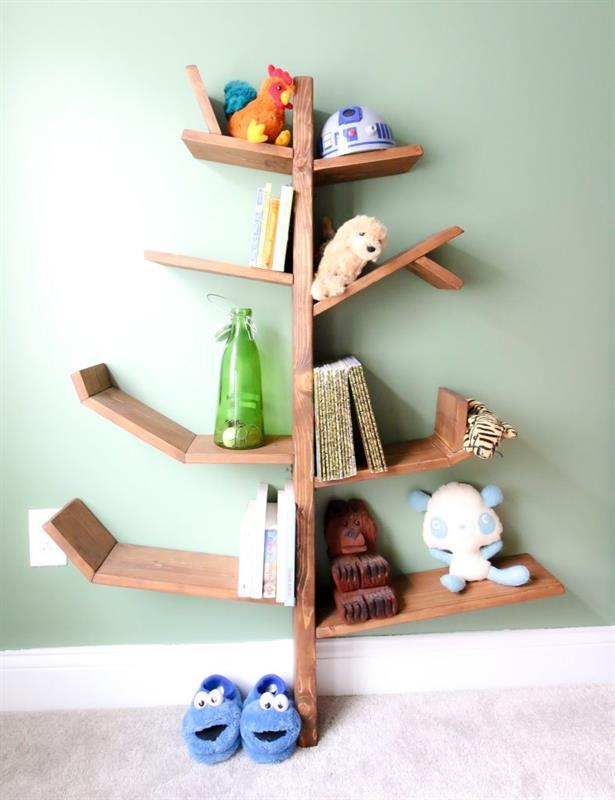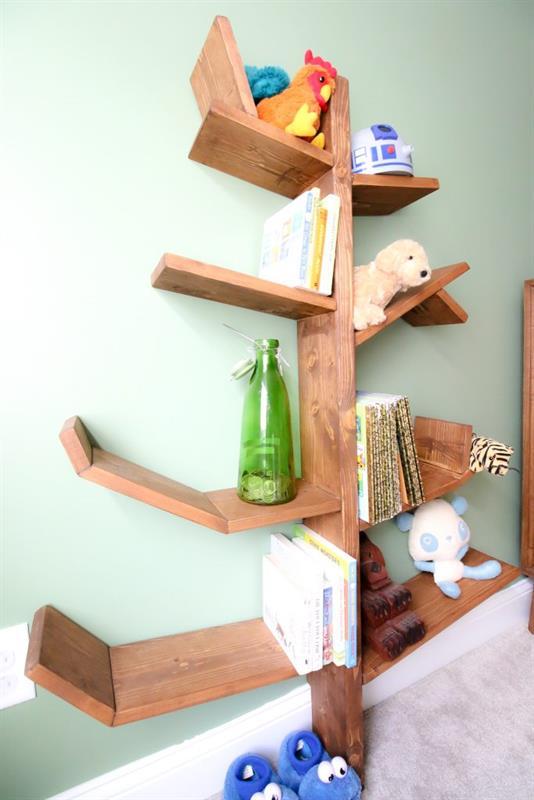


If you want to add a bookshelf shaped like a tree to your home, here is how to build it! We are giving our son a jungle themed bedroom makeover and decided to build him this DIY tree style bookshelf and toy shelf!
Tools
Kreg Tools


Other Tools
-
Miter Saw

Materials
Wood Products
- 1 Board , 2x6 , 72"
- 2 Board , 1x6 , 96"
Hardware & Supplies
- 50 1 1/4" Kreg pocket screws
- 4 Corner braces
- 1 Wood glue
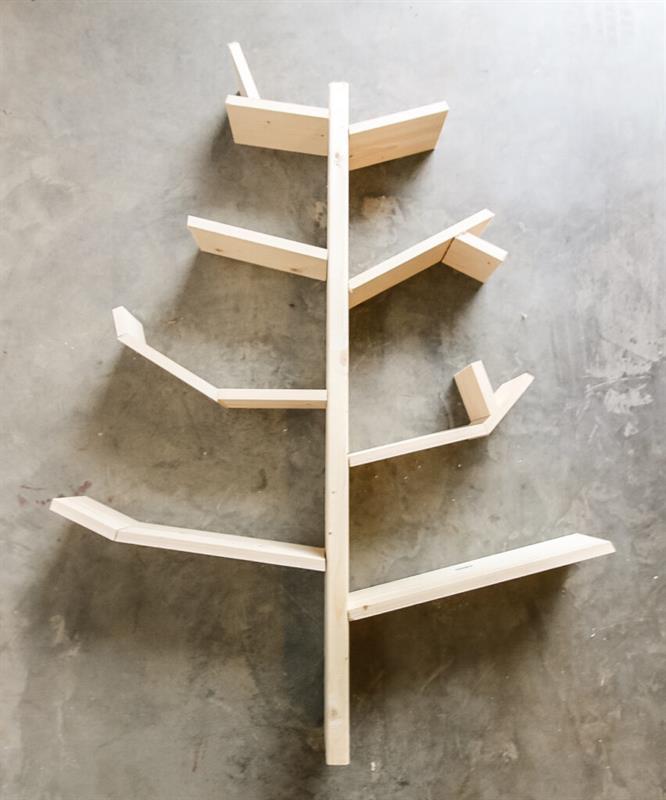
Cut List & Parts
- 1 Trunk , 1.5"x5.5"x50
- 15 Branches , Cuts in steps
Directions
-
Branch 1
Cut out gap for your wall's base moulding at the bottom of the Trunk.
Cut Branch One to 20" with a 10 degree bevel on one end.
Drill 3/4" pocket holes in that end.
Attach to the trunk 9" from the base using pocket screws and wood glue.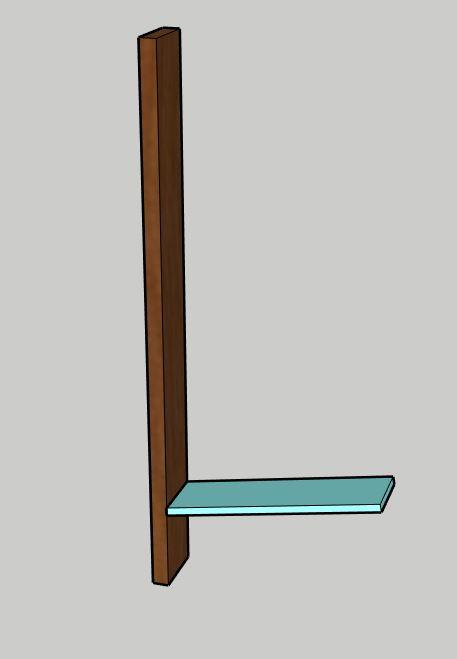
-
Branch 2
Cut Branch 2.1 to 15" with a 10 degree bevel on both ends.
Cut Branch 2.2 to 5" with a 30 degree bevel on one end.
Drill 3/4" pocket holes in one end of 2.1 and in the beveled end of 2.2.
Attach the angled end of 2.2 to the end of 2.1.
Attach 2.1 to the trunk 11" from the base using pocket screws and wood glue.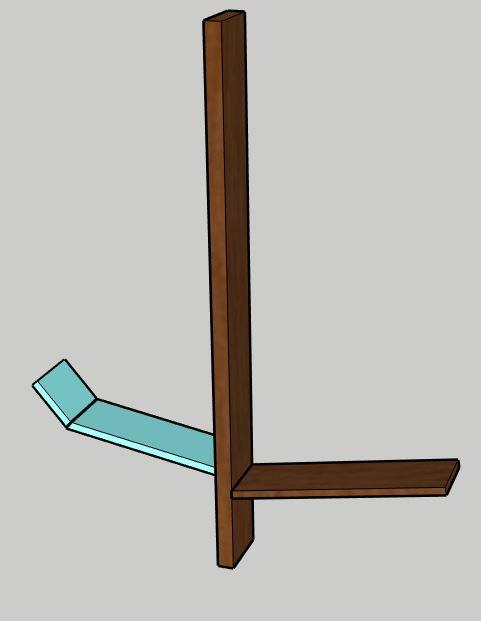
-
Branch 3
Cut Branch 3.1 to 10" with a 10 degree bevel on both ends.
Cut Branch 3.2 to 5" with a 10 degree bevel on one end.
Cut Branch 3.3 to 4" with a 30 degree bevel on one end.
Drill 3/4" pocket holes in one end of 3.1 and the angled ends of 3.2 and 3.3.
Attach 3.2 to 3.1 and the ends, then attach 3.3 to the middle of 3.2.
Attach to the trunk 20" from the base using pocket screws and wood glue.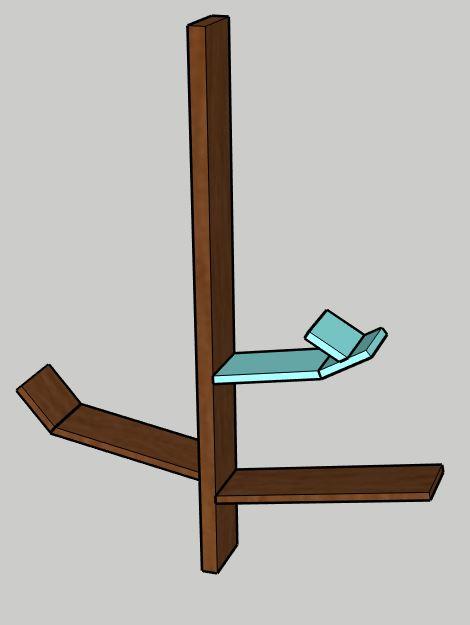
-
Branch 4
Cut Branch 4.1 to 8" with no bevel on either end.
Cut Branch 4.2 to 9" with a 30 degree bevel on both ends.
Cut Branch 4.3 to 2" with no bevel on either end.
Drill 3/4" pocket holes in one end of 4.1 and the angled ends of 4.2.
Attach 4.2 to 4.1, then attach 4.3 to the end of 4.2.
Attach to the trunk 22" from the base using pocket screws and wood glue.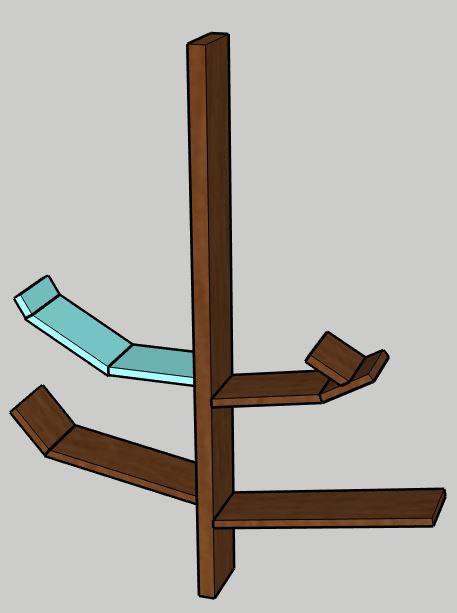
-
Branch 5
Cut Branch 5.1 to 12" with a 30 degree bevel on one end.
Cut Branch 5.2 to 4" with a 30 degree bevel on one end.
Drill 3/4" pocket holes in the angled end of 5.1 and 5.2.
Attach 5.2 to the underside of 5.1 9" up.
Attach to the trunk 33" from the base using pocket screws and wood glue.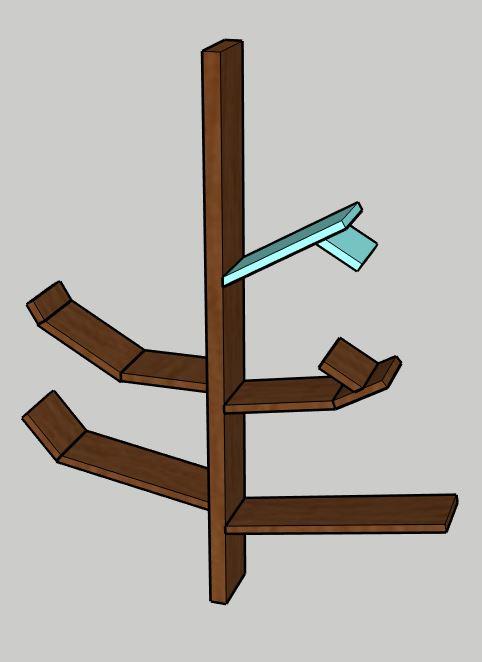
-
Branch 6
Cut Branch 6 to 11" with a 10 degree bevel on one end.
Drill 3/4" pocket holes in that end.
Attach to the trunk 35" from the base using pocket screws and wood glue.
-
Branch 7
Cut Branch 7 to 8" with a 10 degree bevel on one end.
Drill 3/4" pocket holes in that end.
Attach to the trunk 43" from the base using pocket screws and wood glue.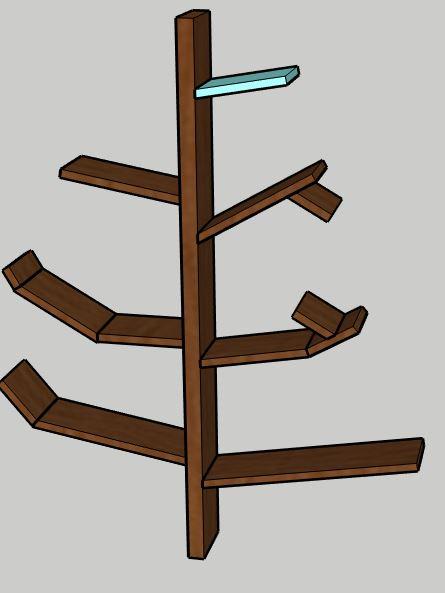
-
Branch 8
Cut Branch 8.1 to 8" with a 10 degree bevel on one end.
Cut Branch 8.2 to 5" with a 30 degree bevel on one end.
Drill 3/4" pocket holes in both angled ends.
Attach 8.2 to 8.1 2" from the end on top.
Attach to the trunk 45" from the base using pocket screws and wood glue.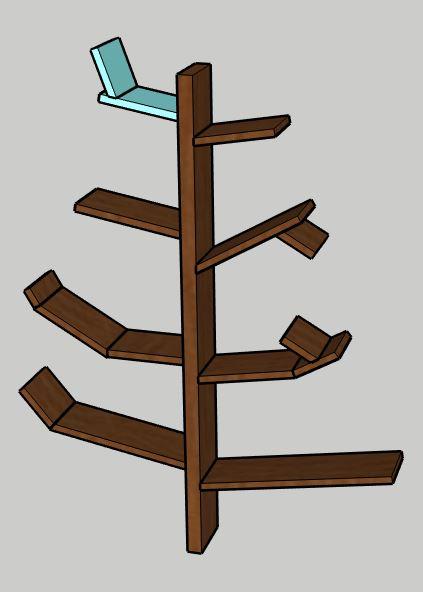
-
Stain and hang
Stain or paint to your liking.
Attach to the wall using corner braces near the top and bottom on the trunk.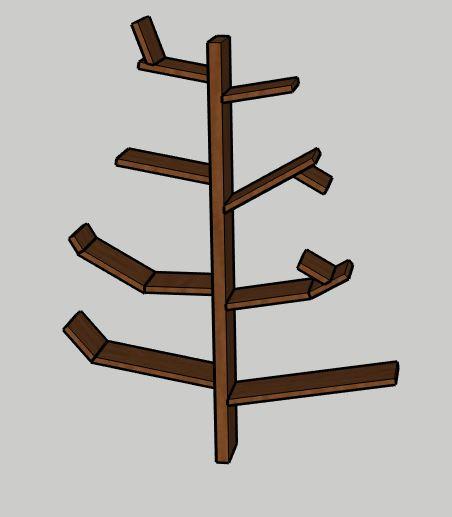
-
Enjoy!
Enjoy your handiwork and tag @CharlestonCrafted on Instagram with a picture!