

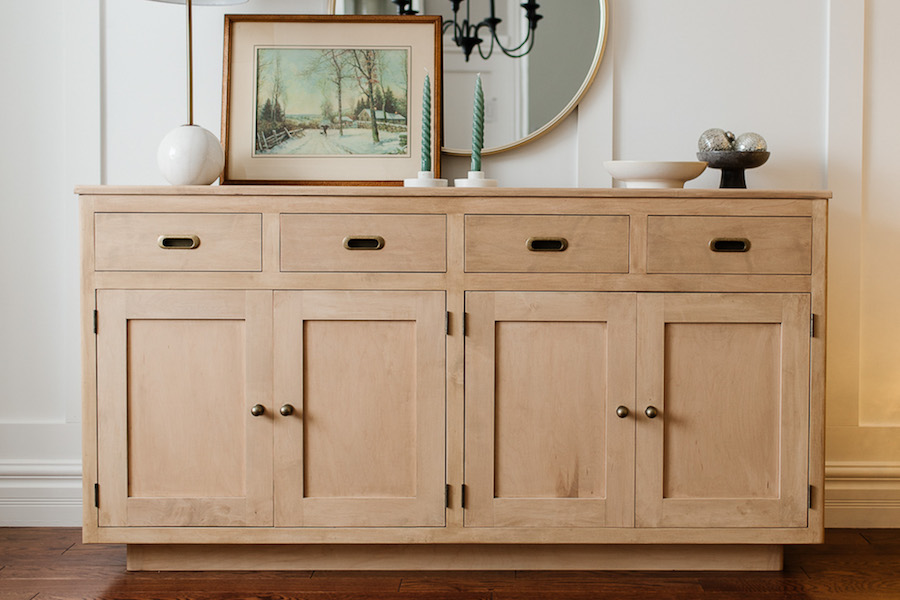
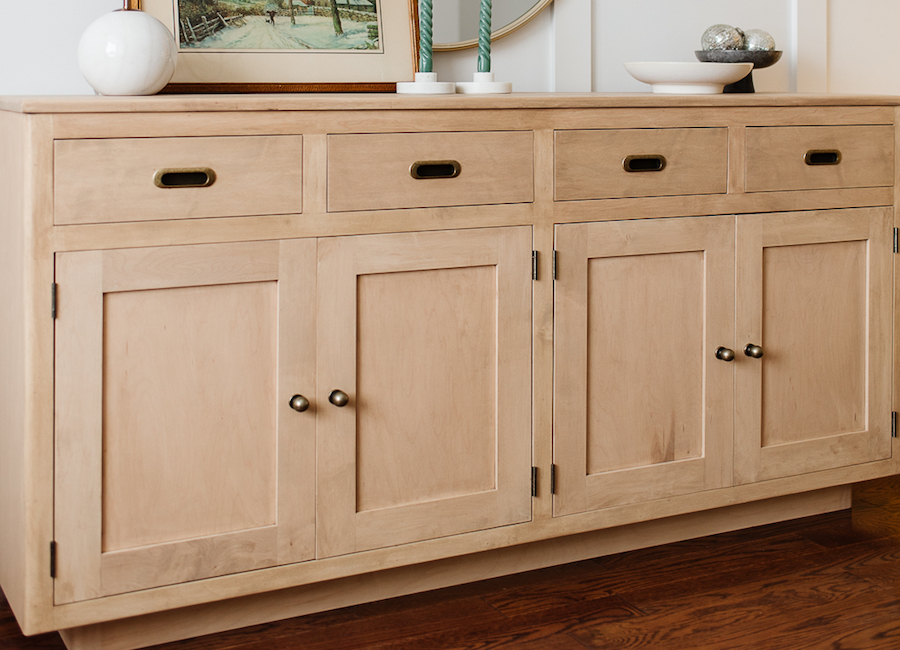
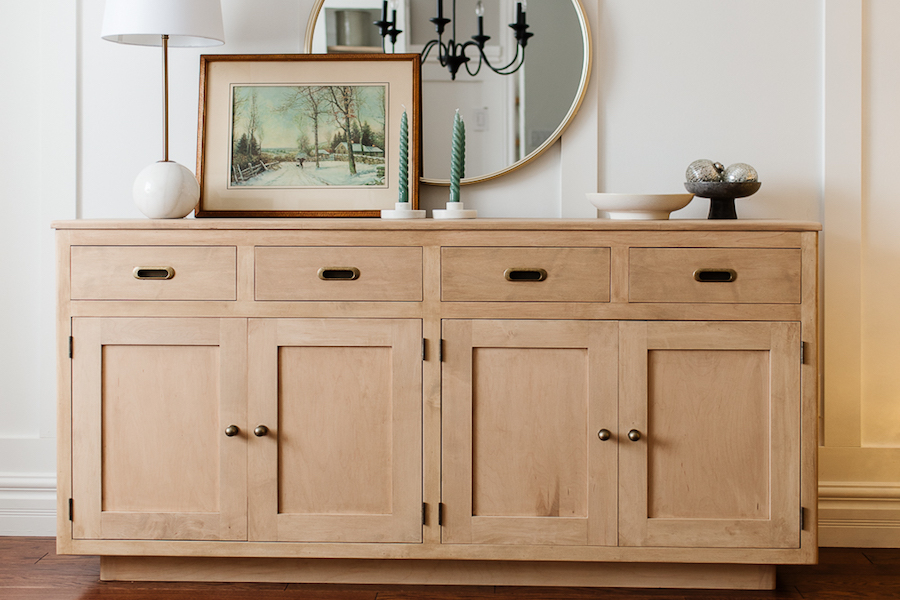
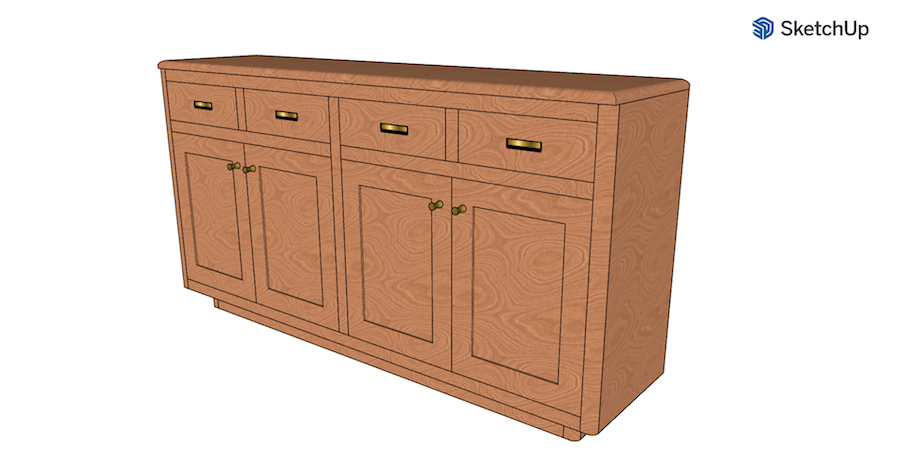


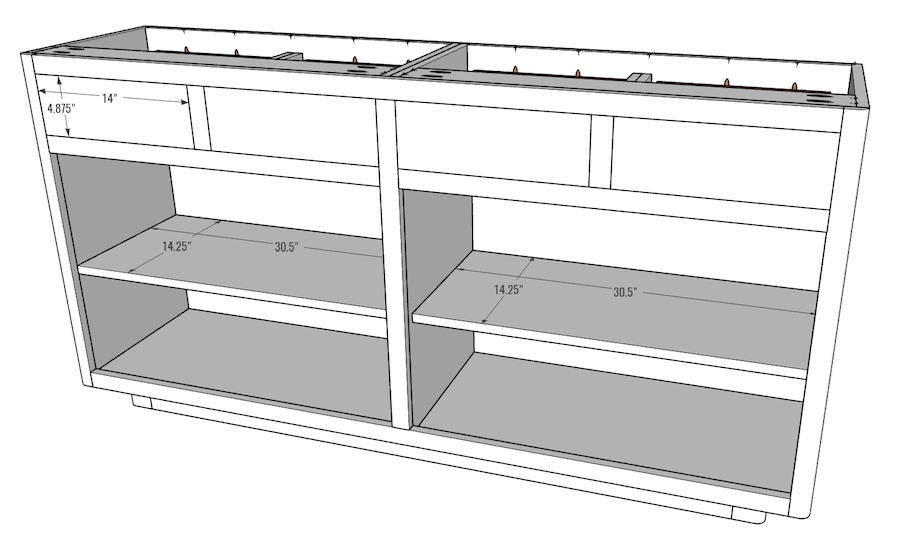
This sideboard design marries traditional and contemporary styles to create a timeless design that suits any space. With plenty of storage in four drawers and two large cabinet, it can house all of your dining-related items like glassware, cutlery, fine china, candles, napkins, and tablecloths. Overall size is 64” x 16” x 33-3/4”.
Tools
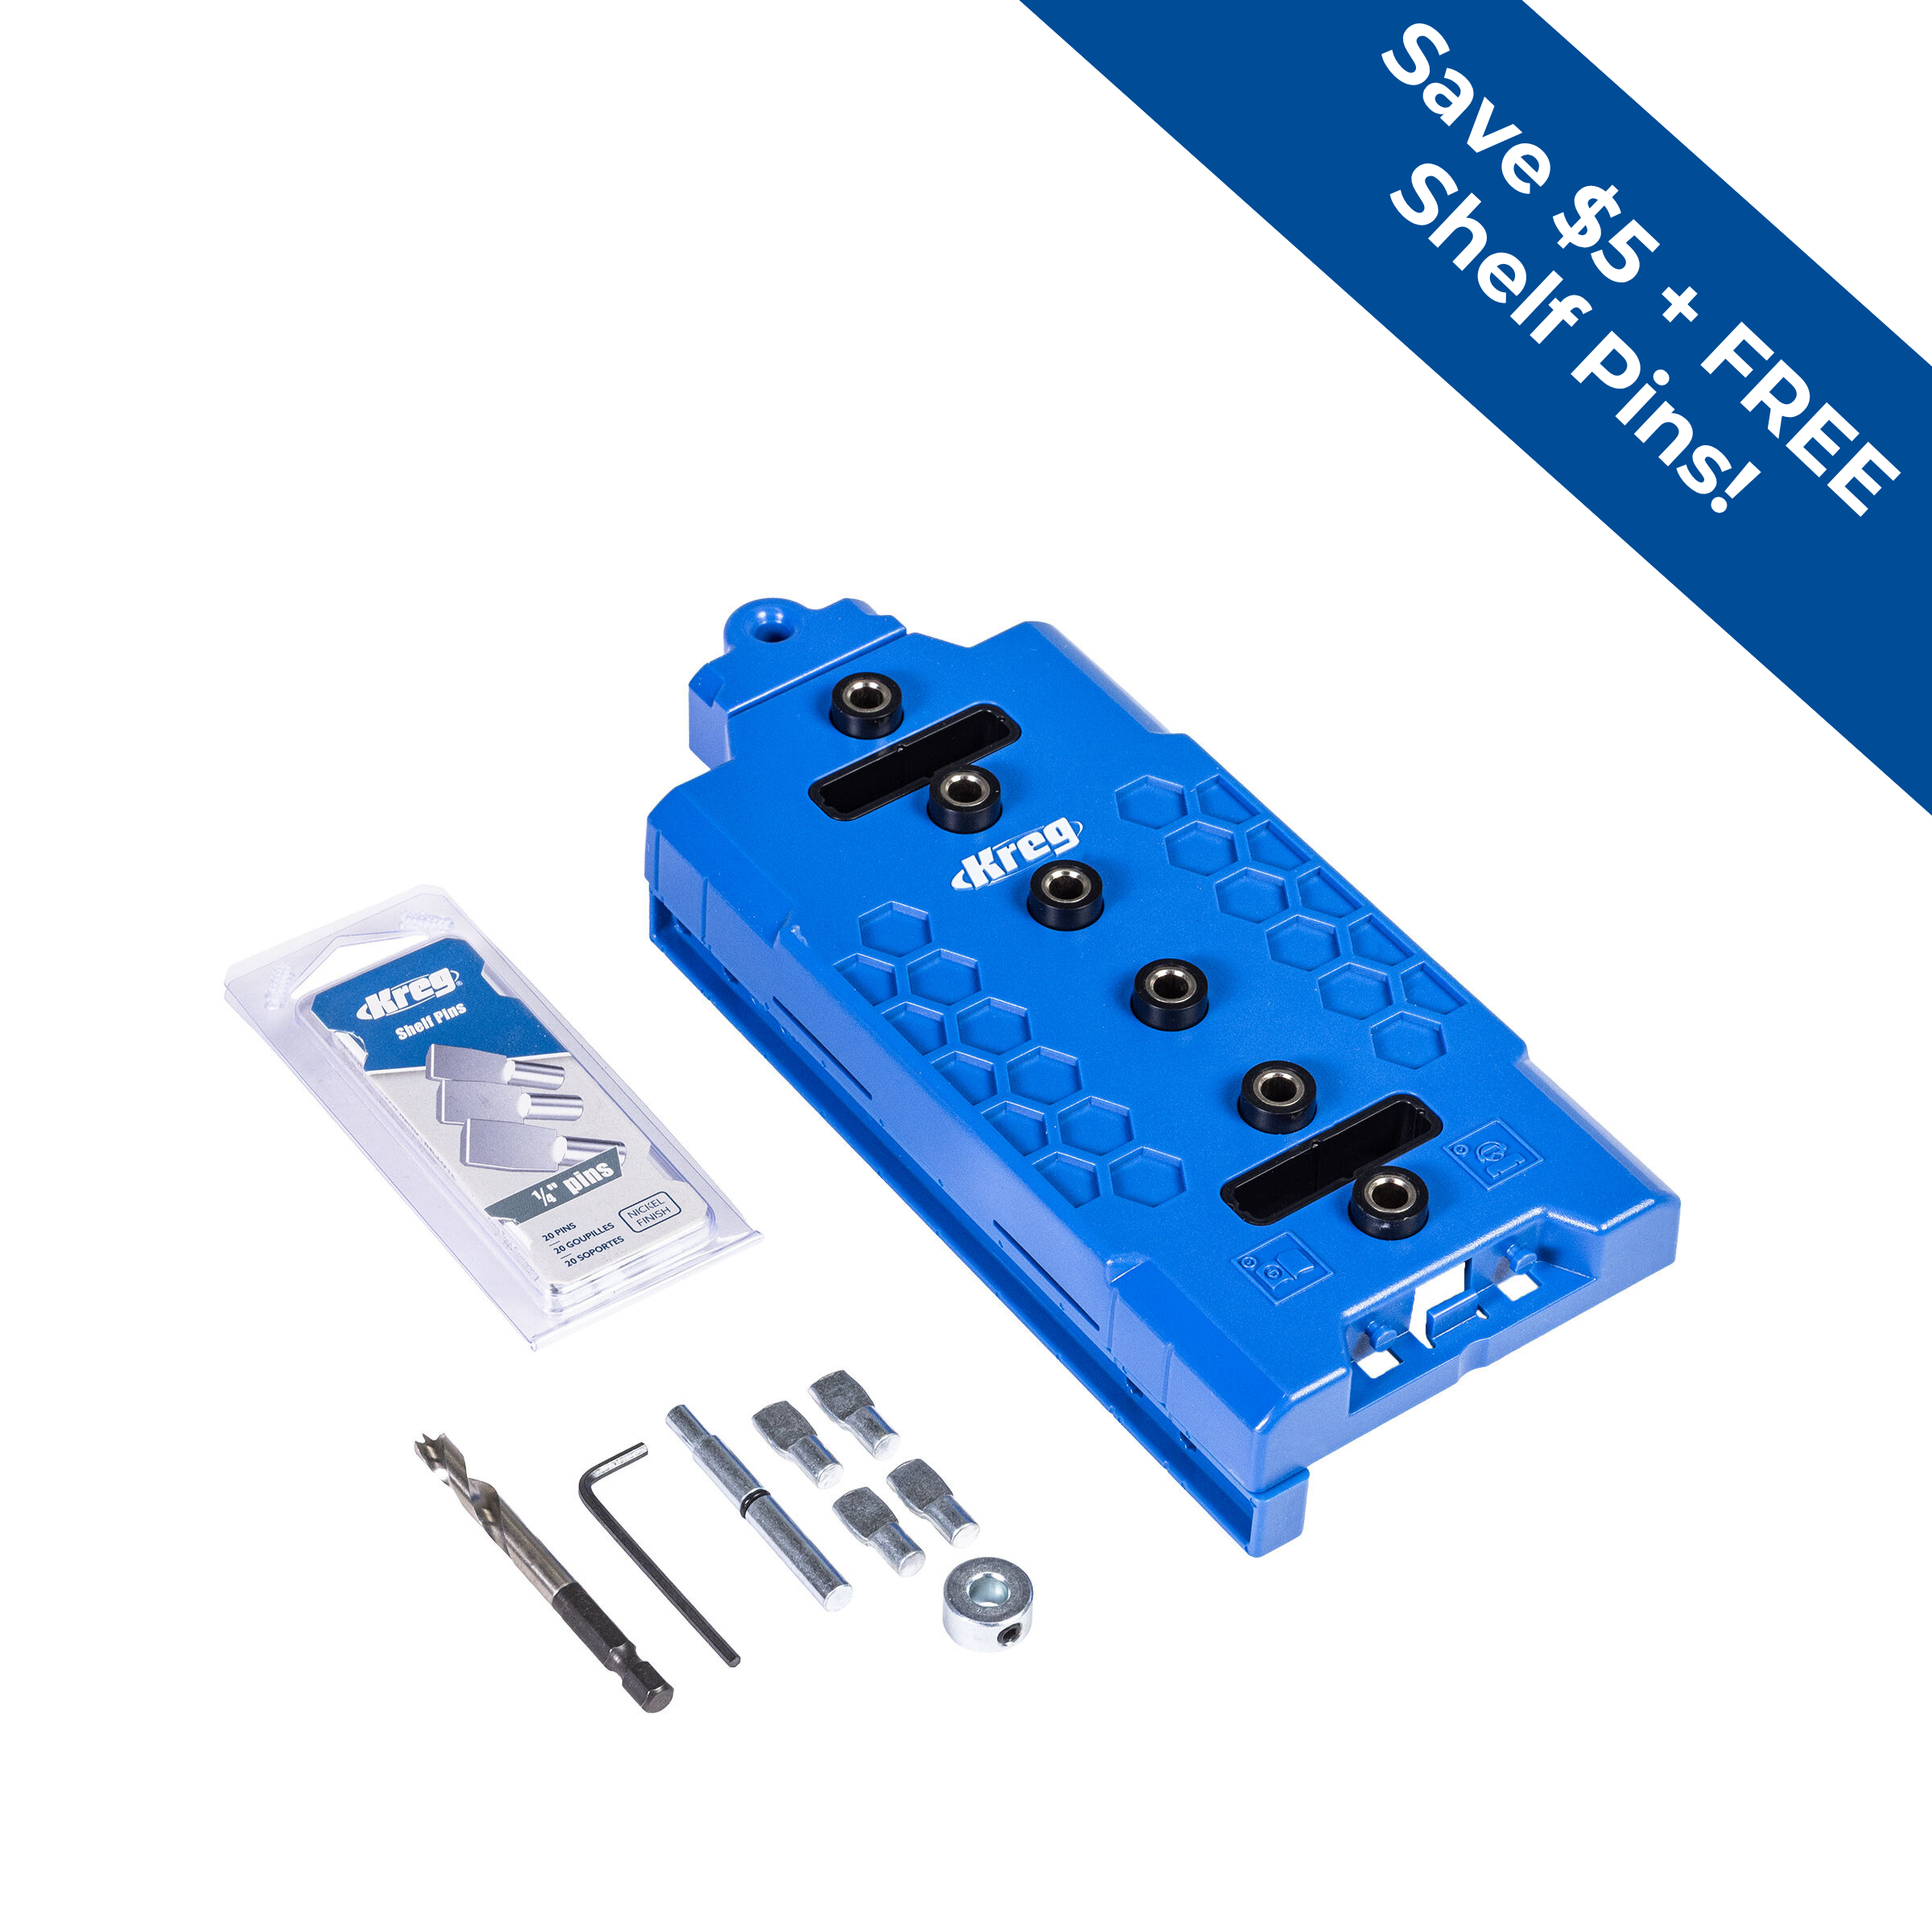
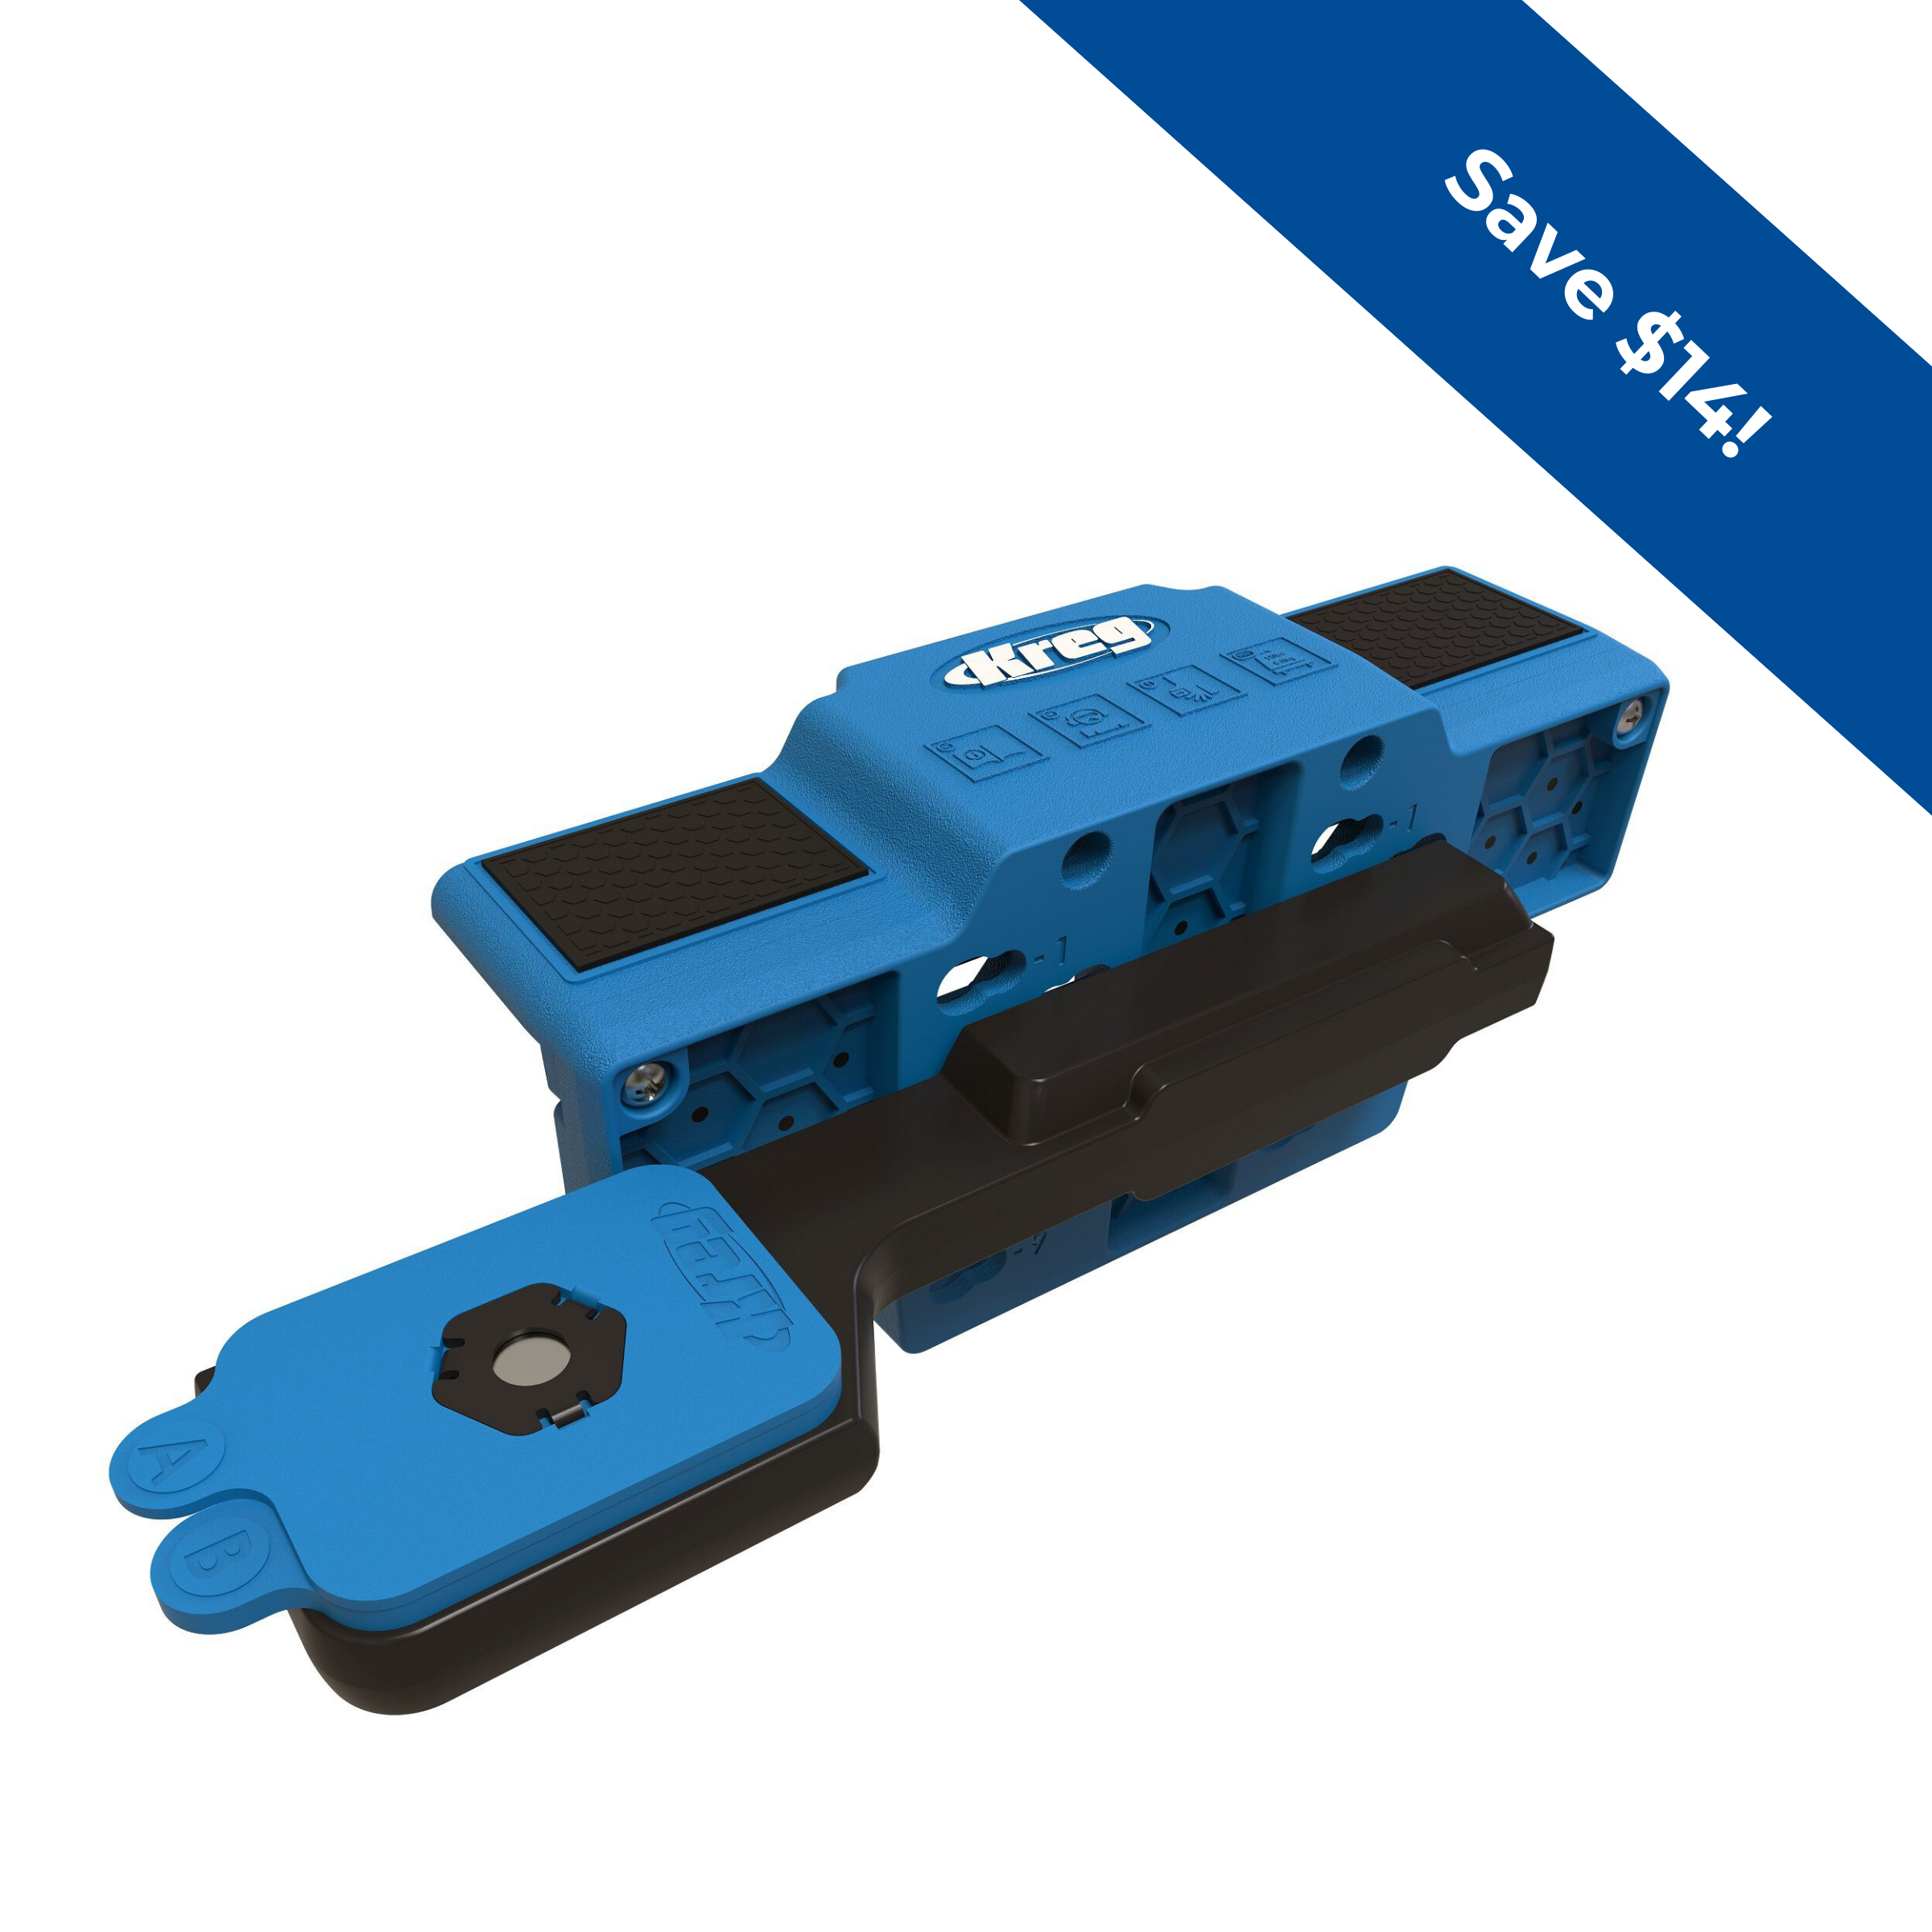
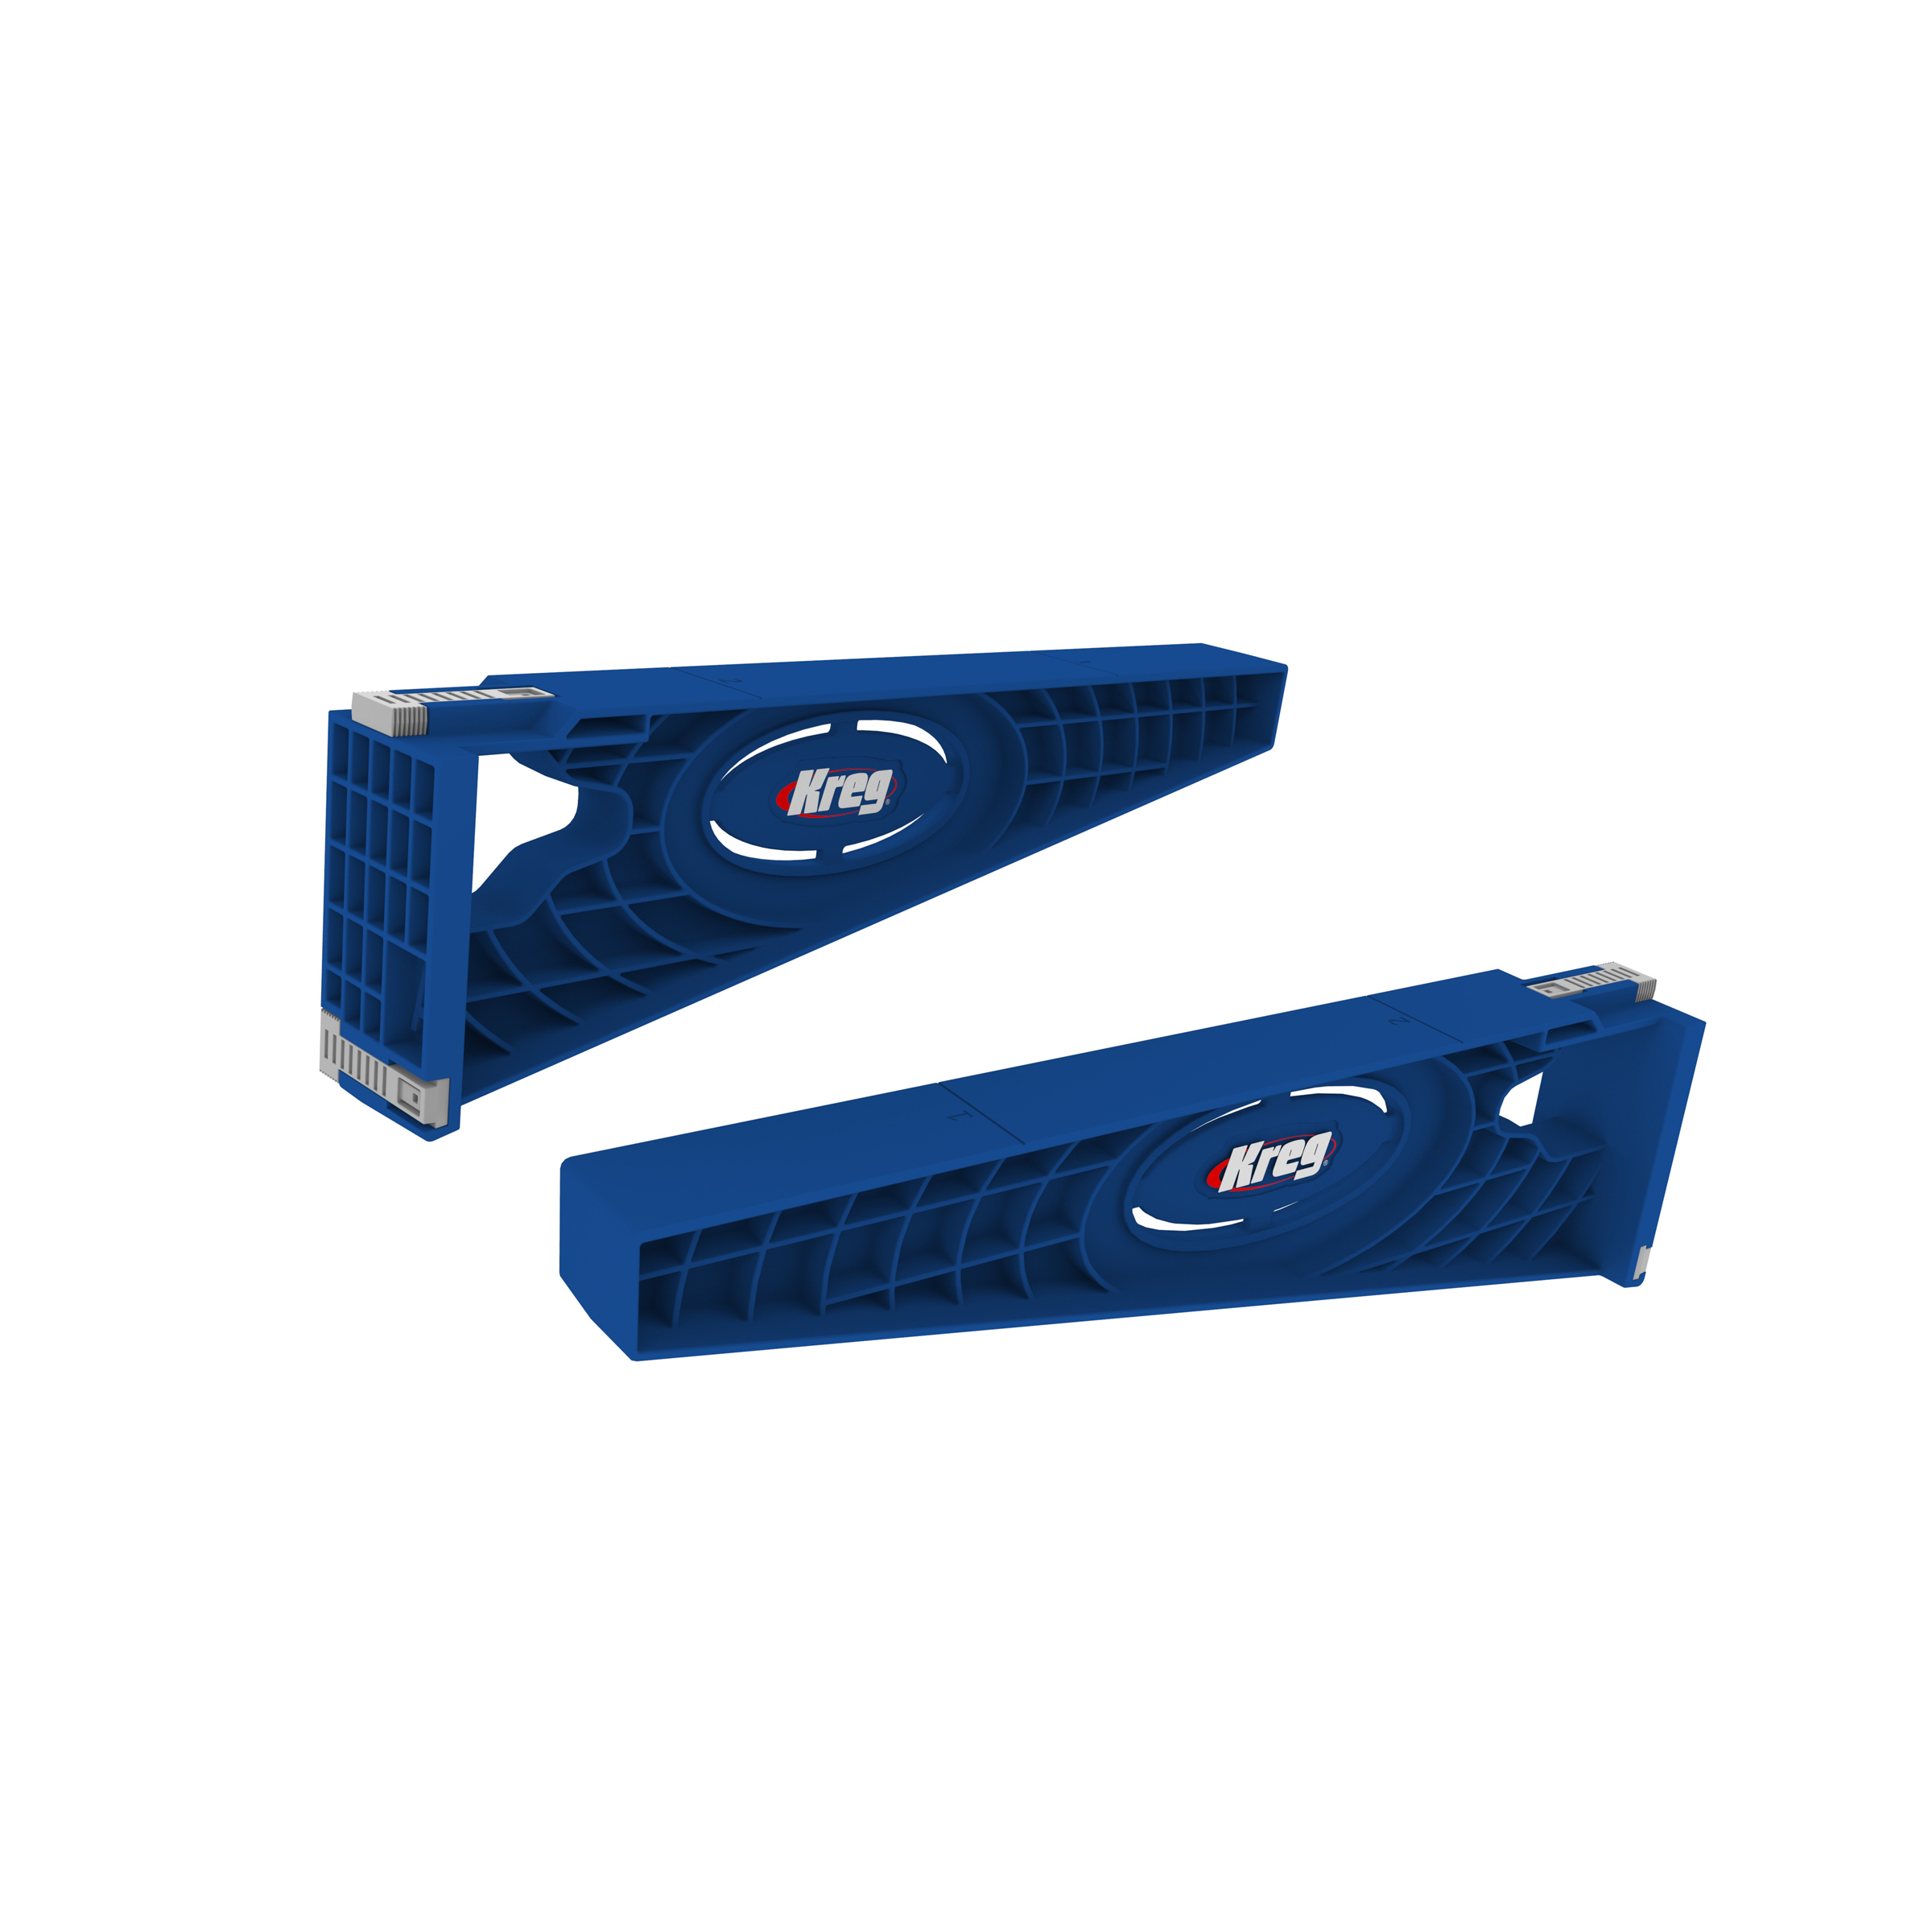
Kreg Tools


Materials
Wood Products
- 2 Plywood , 3/4” x 4’ x 8’
- 1 Plywood , 1/4" x 4’ x 8’
- 3 Boards , 1 x 3” x 8’
- 3 Boards , 1 x 2” x 8’
- 1 Board , 1 x 6” x 6’
Hardware & Supplies
- 1 Box of 1 ¼" Kreg Pocket Hole Screws- for softwood (see tools list)
- 1 Box of 1 ¼" Kreg Pocket Hole Screws- for hardwood (see tools list)
- 1 Box of 1 ¼" brad nails
- 1 Roll edge banding
- 4 Sets of 2" non-mortise cabinet hinges
- 4 Sets of 14” Ball Bearing Drawer Slides
- 4 Knobs
- 4 Pulls
- 2 Double Magnetic Catches
- 1 Pencil
- -- Wood glue
- 1 Sandpaper (various grits)
Cut List & Parts
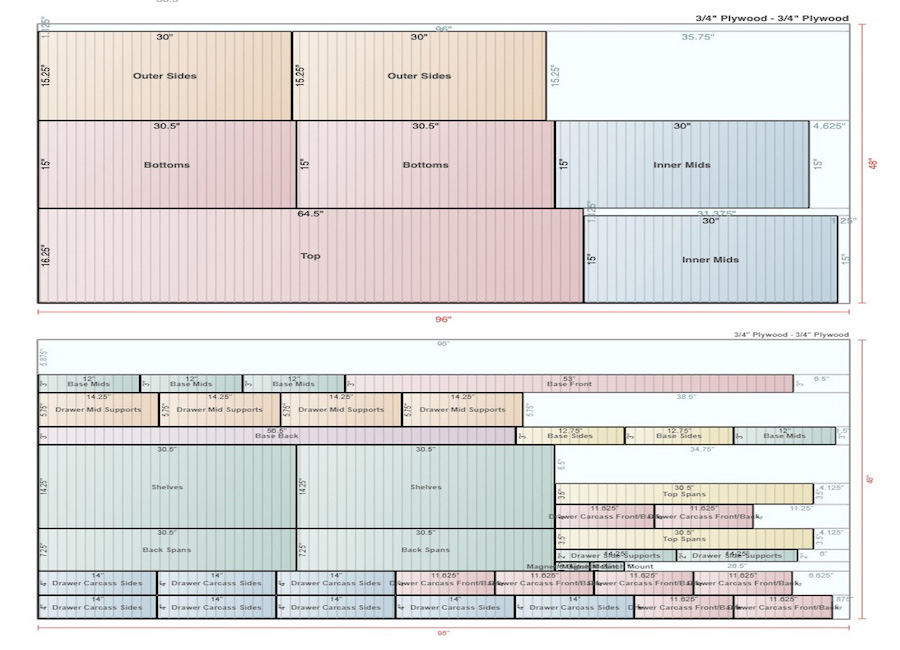
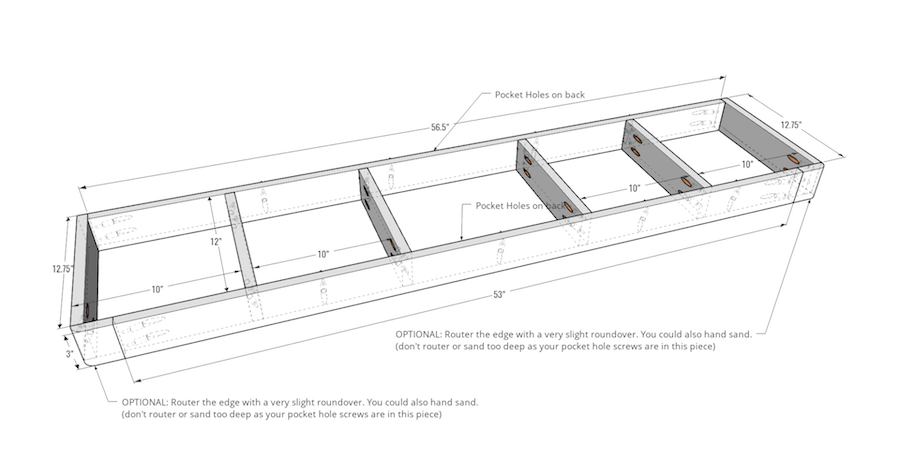
- 1 Base Back , 56-1/2 x 3 x 3/4”
- 1 Base Front , 53 x 3 x 3/4"
- 2 Base Sides , 12-3/4 x 3 x 3/4"
- 4 Base Mids , 12 x 3 x 3/4"
- 2 Base Corners , 3 x 2-1/2 x 3/4"
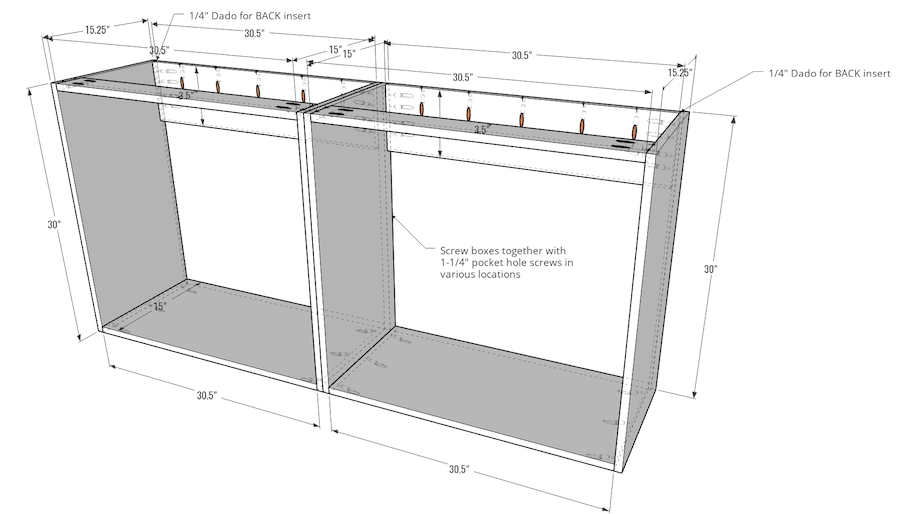
- 2 Outer Sides , 30 x 15-1/4 x 3/4"
- 2 Inner Mids , 30 x 15 x 3/4"
- 2 Bottoms , 30-1/2 x15 x 3/4"
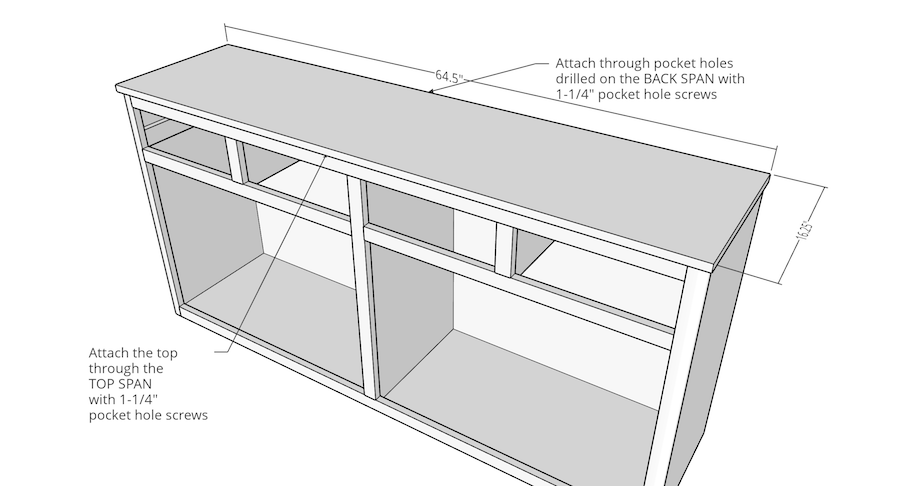
- 2 Top Spans , 30-1/2 x 3-1/2 x 3/4"
- 2 Back Spans , 30-1/2 x 7-1/4 x 3/4"
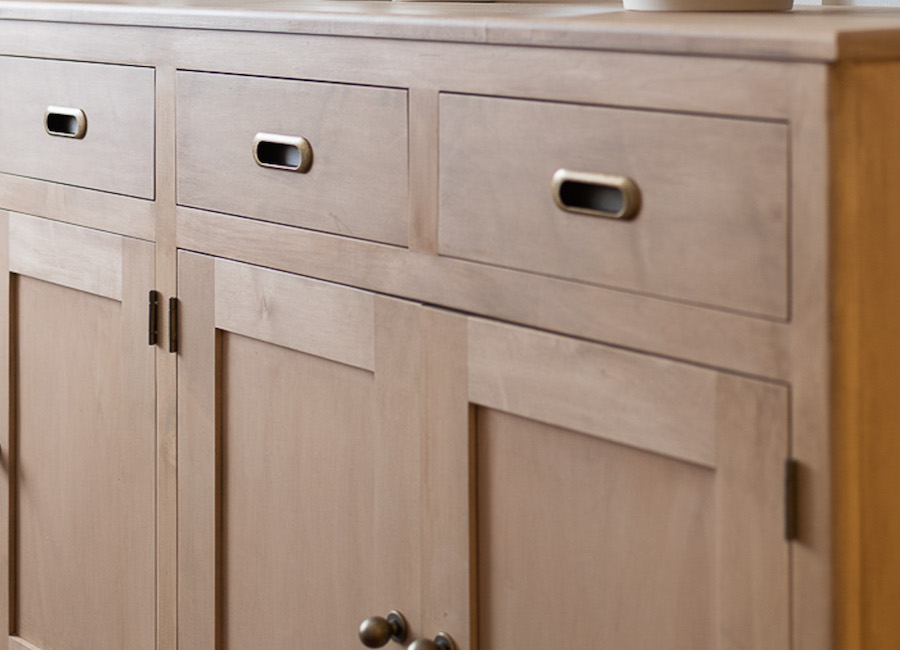
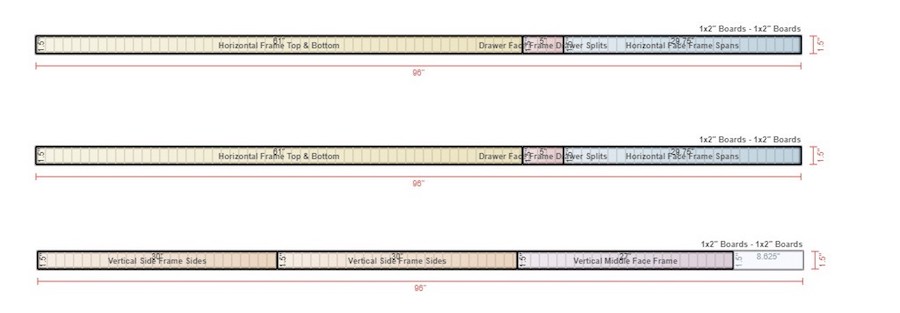
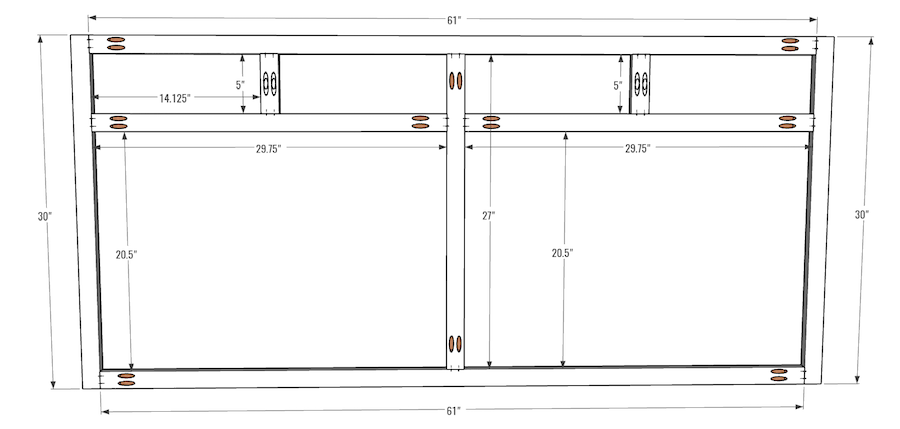
- 2 Horizontal Top/Bottom Face Frame , 61 x 1-1/2 x 3/4"
- 2 Vertical Side Face Frame , 30 x 1-1/2 x 3/4"
- 1 Vertical Middle Face Frame , 27 x 1-1/2 x 3/4"
- 2 Horizontal Face Frame Spans , 29-3/4 x 1-1/2 x 3/4"
- 2 Drawer Face Frame Splits , 5 x 1-1/2 x 3/4"
- 2 Drawer Side Supports , 14-1/4 x 2 x 3/4"
- 4 Drawer Mid Supports , 14-1/4 x 5-3/4 x 3/4"
- 1 Back , 63 x 30 x 1/4"
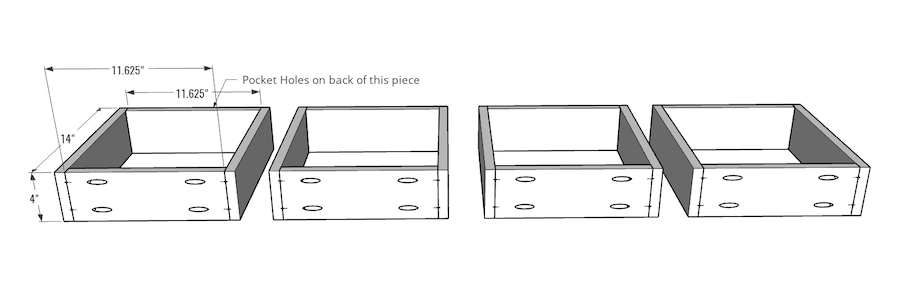
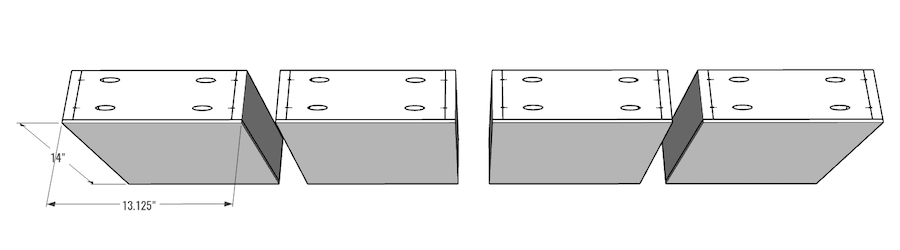
- 8 Drawer Carcass Sides , 14 x 4 x 3/4"
- 8 Drawer Carcass Front/Back , 11-5/8 x 4 x 3/4"
- 4 Drawer Carcass Bottoms , 14 x 13-1/8 x 1/4"
- 2 Shelves , 30-1/2 x 14-1/4 x 3/4"
- 2 Magnetic Catch Mounts , 4 x 1-1/2 x ¾”
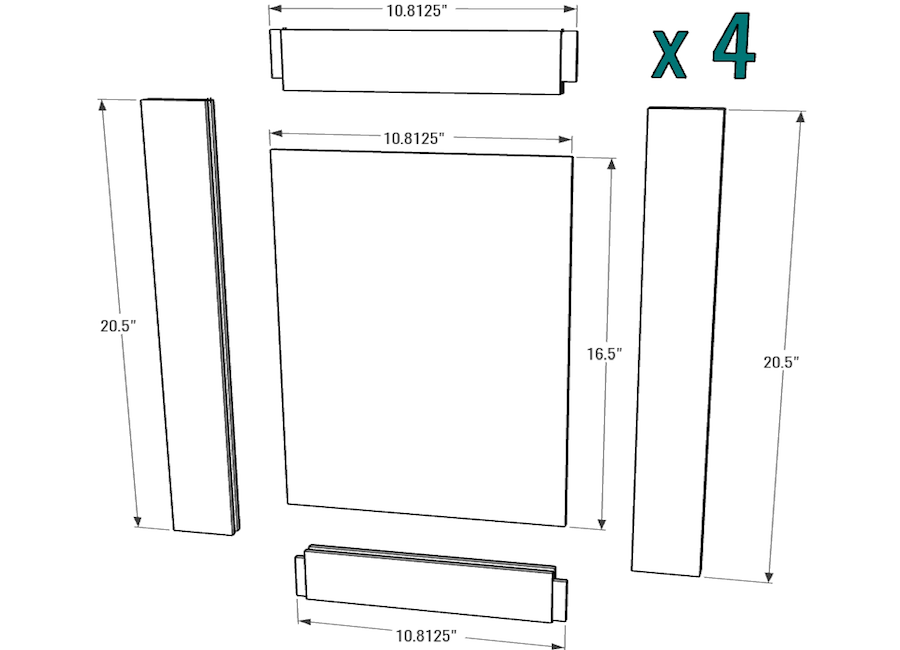
- 8 Door Rails , 10-13/16 x 2-1/2 x 3/4"
- 8 Door Stiles , 20-1/2 x 2-1/2 x 3/4"
- 4 Door Panel Inserts , 16-1/2 x 10-13/16 x 1/4"
- 4 Drawer Fronts , 14-1/8 x 4-7/8 x 3/4"
- 1 Top , 64-1/2 x 16-1/4 x 3/4"

Directions
-
Step one
Cut all parts to size as per the CUT LIST/DIAGRAM.. To ensure you keep the correct orientations, mark each piece with name and dimensions on each side and edge. Drill pocket holes on the boards included on this diagram in the locations shown on the ¾” setting on your drill bit collar. Your Kreg 720PRO will automatically adjust for the thickness of the wood.
-
Step two
Create a 1/4" dado (groove) on one side of the OUTER SIDE pieces on the 30” length. This is where the back panel will eventually be inserted and attached.
-
Step three
Take note of the orientation of all pocket holes on the diagram. Lay the pieces out as shown before attaching anything. Attach BASE CORNERS to the ends of the BASE FRONT piece using 1-1/4" Pocket Hole Screws (Note: The grain direction will not match between the two pieces - this is intentional). Attach BASE SIDES to BASE CORNER pieces as shown using 1-1/4" Pocket Hole Screws. Attach BASE BACK to the BASE SIDES using 1-1/4" Pocket Hole Screws. Insert and attach the BASE MIDS as shown to finish the base component.
Tip:
OPTIONAL: Round the edges of the BASE CORNERS by lightly sanding or routing.
-
Step four
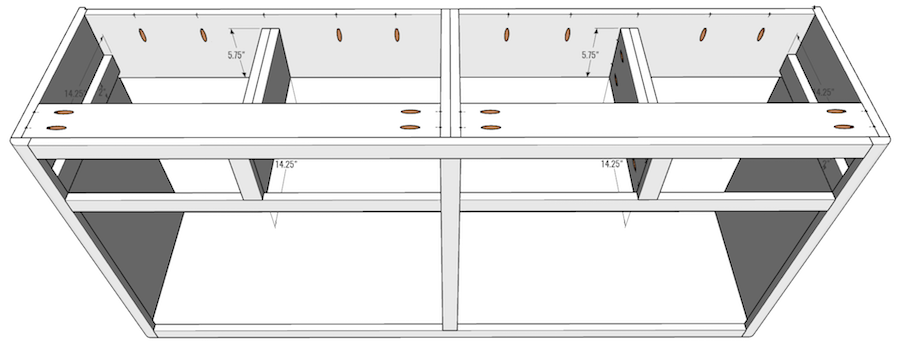
Create the cabinet boxes by attaching the BOTTOMS, TOP SPANS and BACK SPANS to the OUTER SIDES ensuring the dado is at the back and facing the inside of the cabinet. The TOP SPANS and BOTTOMS should be flush with the face of the OUTER SIDES. Then attach the INNER MIDS to complete the two individual boxes, ensuring they are flush with the front side of the cabinet. Use 1-1/4" pocket hole screws for all connections. Attach the boxes together using 4 pocket hole screws on each side of the INNER MIDS (not in actual pocket holes and can be in any location except where you expect to install your drawer slides).
-
Step five
Attach the assembled bottom to the two boxes as shown.

-
Step six
On a flat surface, lay out the pieces for the face frame as shown in the diagram. Attach using wood glue and 1-1/4" pocket hole screws.
-
Step seven
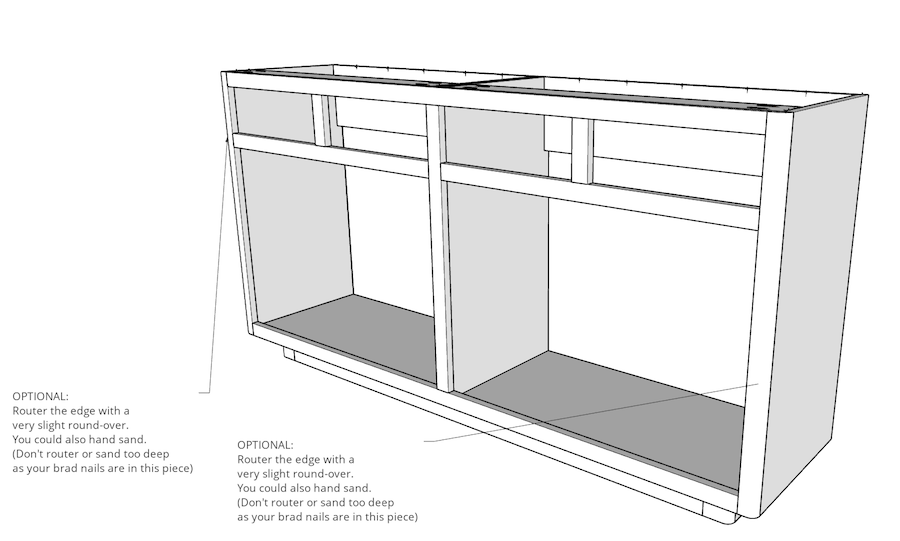
Attach the face frame with glue and 1-1/4" brad nails. OPTIONAL: Round the edges of the sides by lightly sanding or routing.
-
Step eight
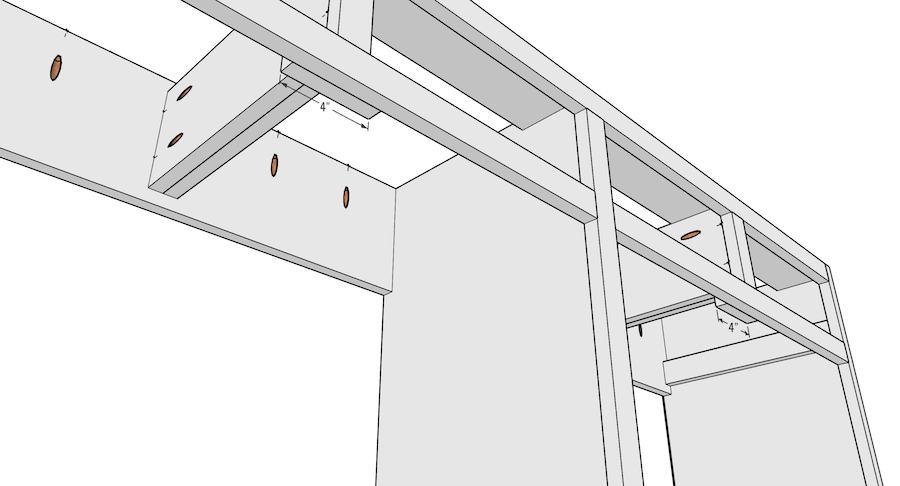
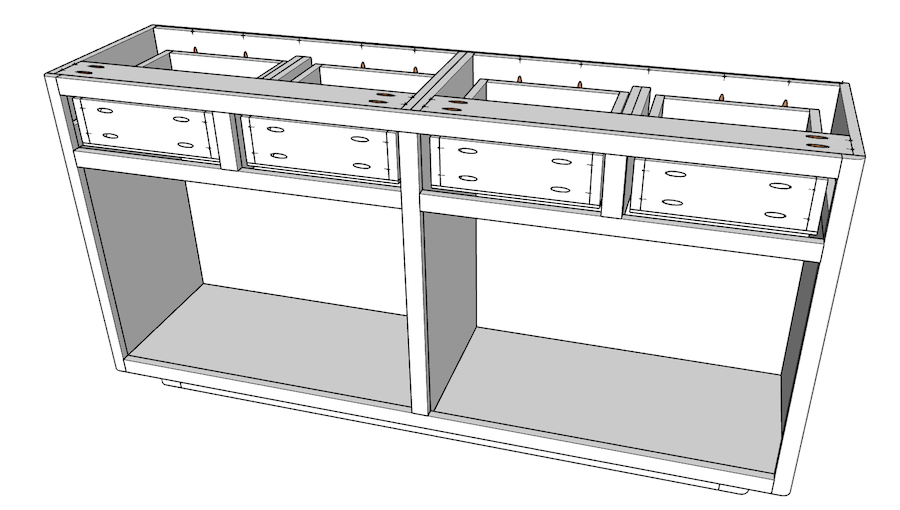
Attach DRAWER MID SUPPORTS flush with the buttom of the TOP SPAN and matched with the DRAWER FACE FRAME SPLITS using 1-1/4" pocket hole screws. Attach DRAWER SIDE SUPPORTS on the left and right side to match up with the bottom of the drawer opening using wood glue and 1-1/4" brad nails. This is where you will attach your drawer slides to the OUTER SIDES in Step 14.
-
Step nine
Glue and brad nail the MAGNETIC CATCH MOUNTS as shown on the diagram. This is where you’ll affix the magnetic catch.
-
Step ten
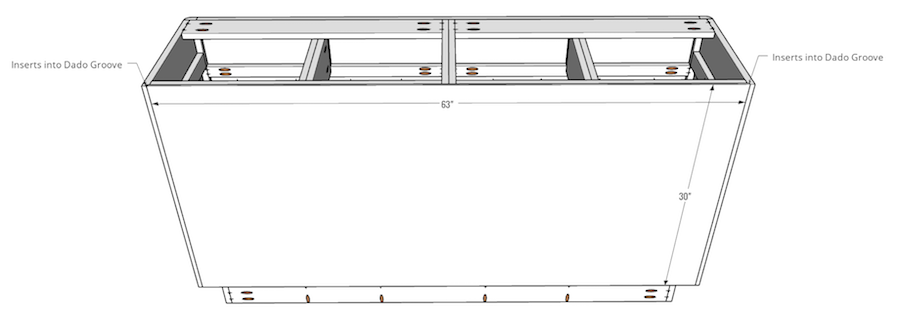
Attach BACK to the cabinets, inserting into the grooves on each side and carefully attaching with 1-1/4" brad nails.
-
Step eleven
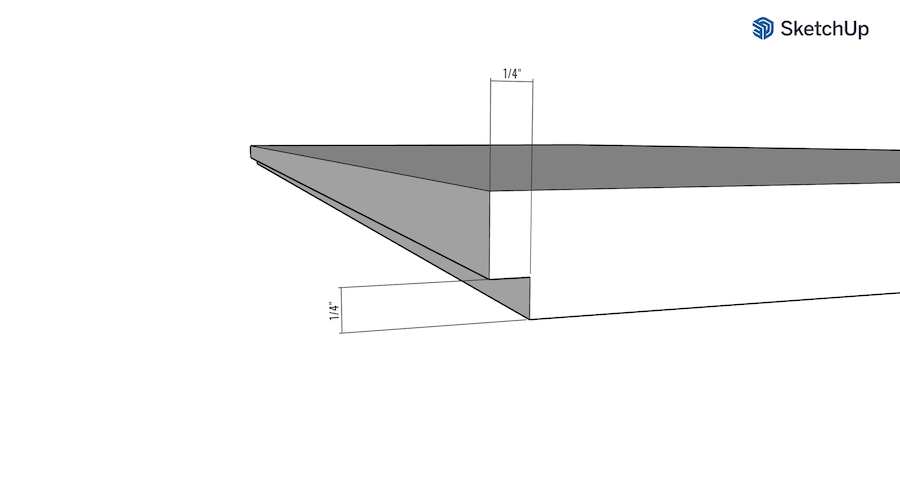
Before attaching the top, iron on edge banding and trim accordingly to all four sides. Attach top to the cabinet base leaving 1/4" overhang on the front and sides and flush on the back. Use 1-1/4" pocket hole screws through the TOP SPAN and into the top, and using the pocket holes drilled in the BACK SPAN into the the top.
-
Step twelve
Build four drawer boxes as shown. The pocket holes on the DRAWER CARCASS FRONT/BACKS should face outwards. Use wood glue and 1-1/4" pocket hole screws.
-
Step thirteen
Attach 1/4" drawer bottoms with wood glue and 1-1/4" brad nails.
-
Step fourteen
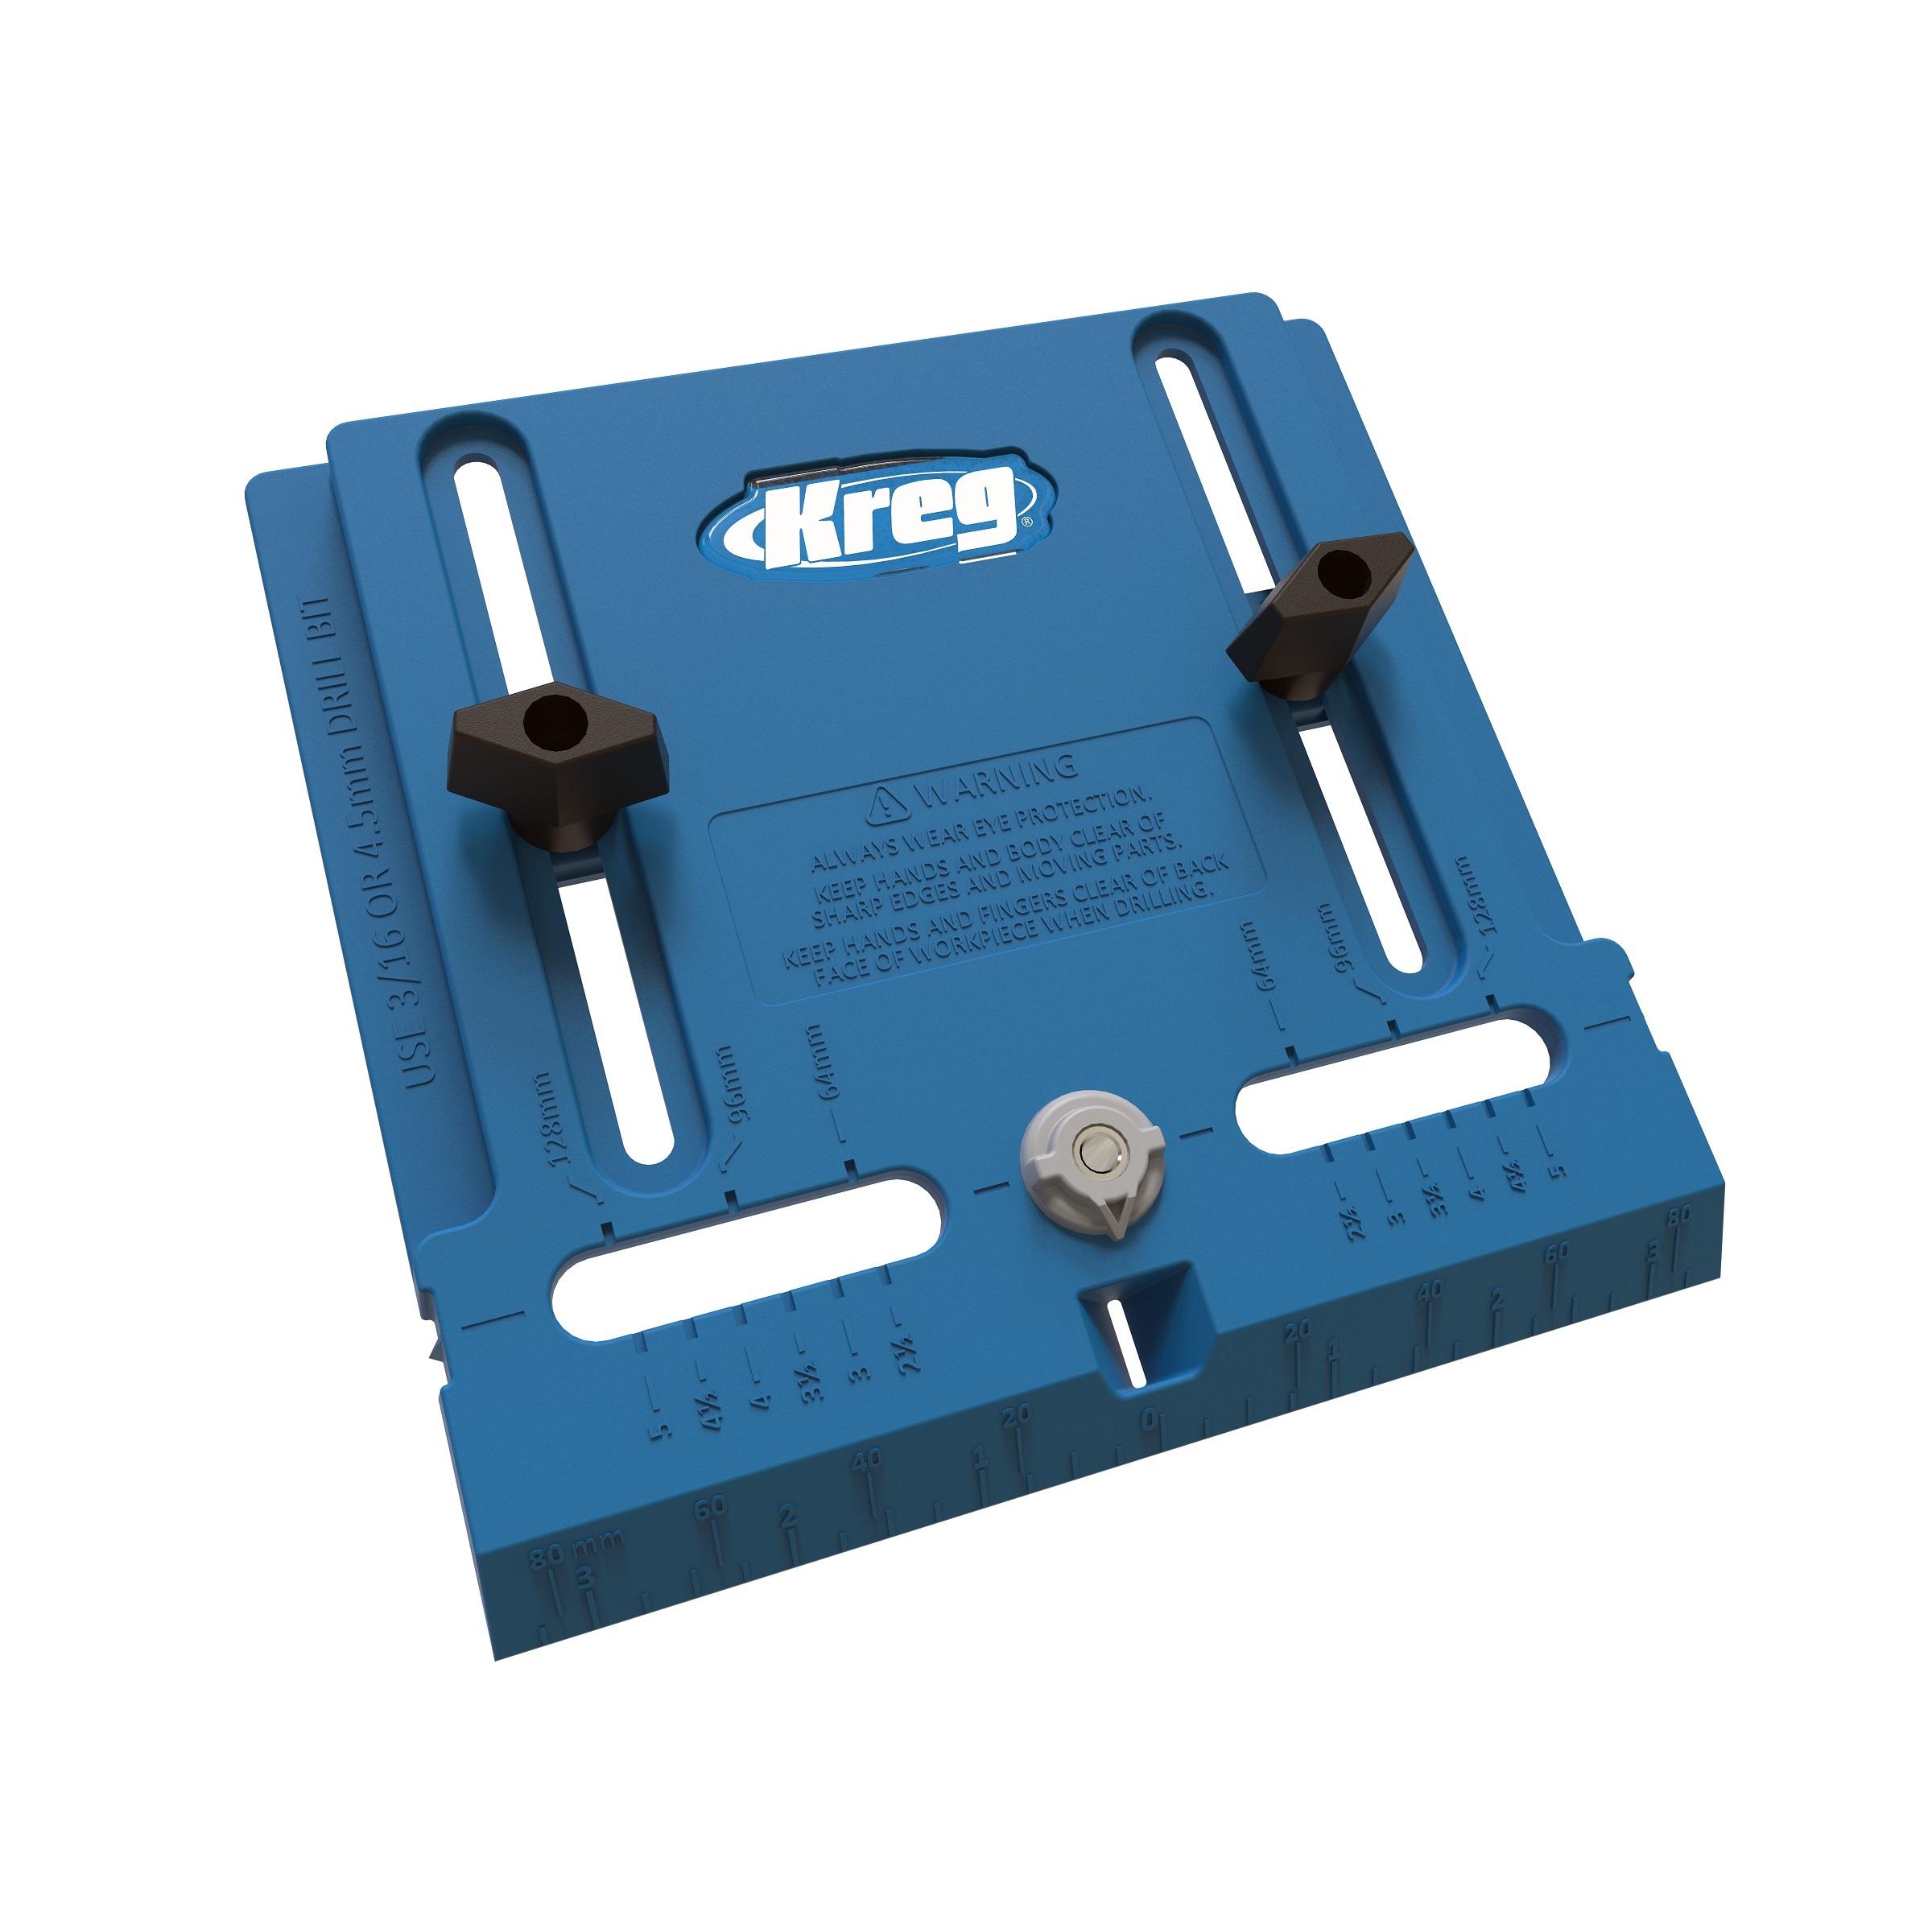
Install the 14” drawer slides using the Kreg Drawer Slide Jig, and attach the drawer boxes.
-
Step fifteen
Attach drawer faces using double sided tape to temporarily secure into place (centered in the opening), then open the door by reaching inside the cabinet to the back and pull the drawer box forward. Screw two 1-1/4" pocket hole screws through the inside of the drawer box into the drawer front. Be careful to avoid the place you are going to put your knob/pull. Also, drill holes using the Kreg Shelf Pin Jig for the shelves. You can drill for one shelf location, or multiple if you plan on adjusting the shelves to different levels.
-
Step sixteen
Build four doors as shown on the diagram. First, both the DOOR RAILS and DOOR STILES will need a 1/4" wide x 1/2" groove down the center of one side of the board. This can be accomplished on a router table with the appropriate bit, or on a table saw. Second create a 1/4" wide 1/2" tongue on each end of the DOOR RAILS. This can also be accomplished on a router table with the appropriate bit, or on a table saw. There are tutorials and videos online for each method. Add glue in each groove and assemble any three sides of the frame together, slide in the center panel, and attach the fourth side of the frame. Clamp and check for square and let glue dry.
-
Step seventeen
Install doors using non-mortise hinges. If the doors are too snug, you can simply take a little off of the edges (very little at a time on your table saw), until you have the perfect fit. Add the hardware of your choice.
-
Step eighteen
Finish by sanding, staining and sealing, or painting.