Traditional Toolbox – Metric
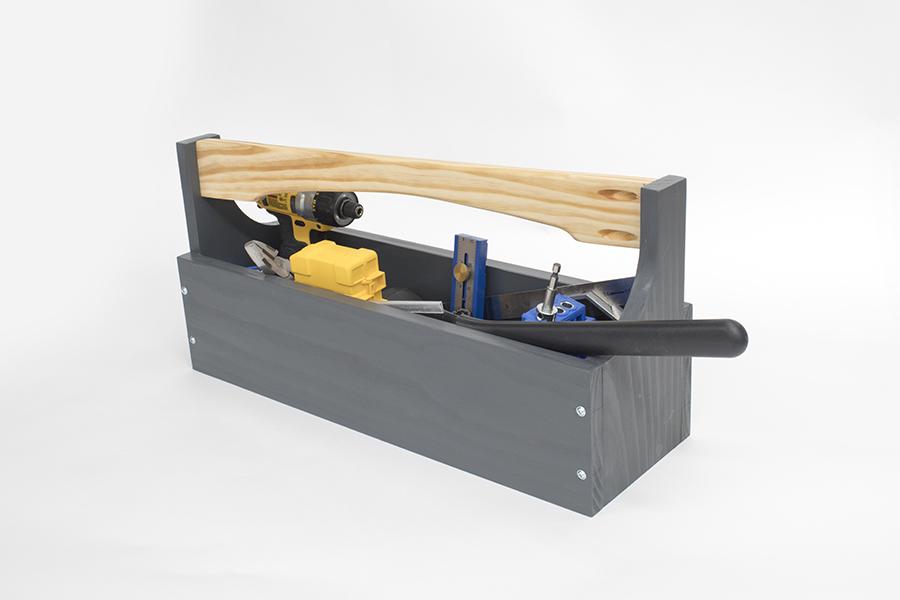
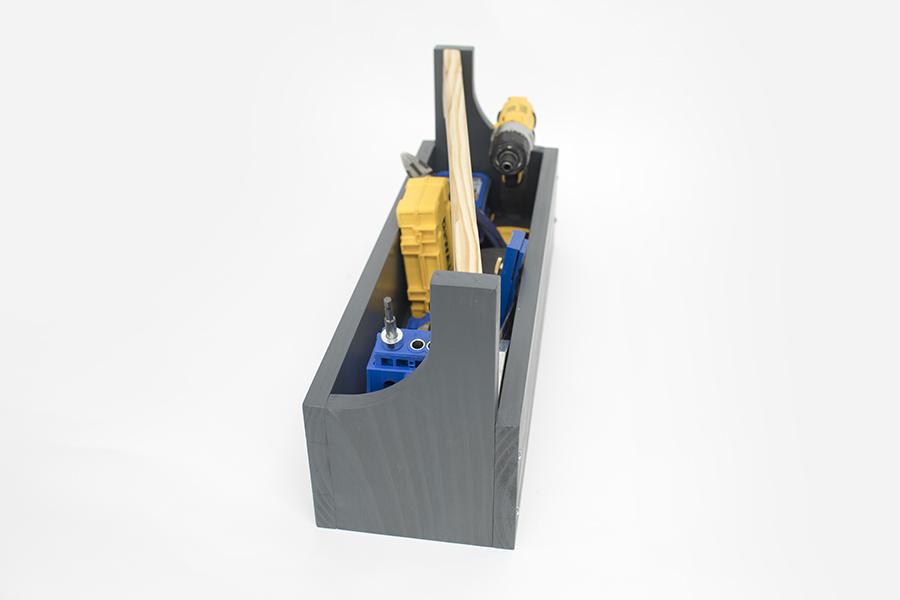
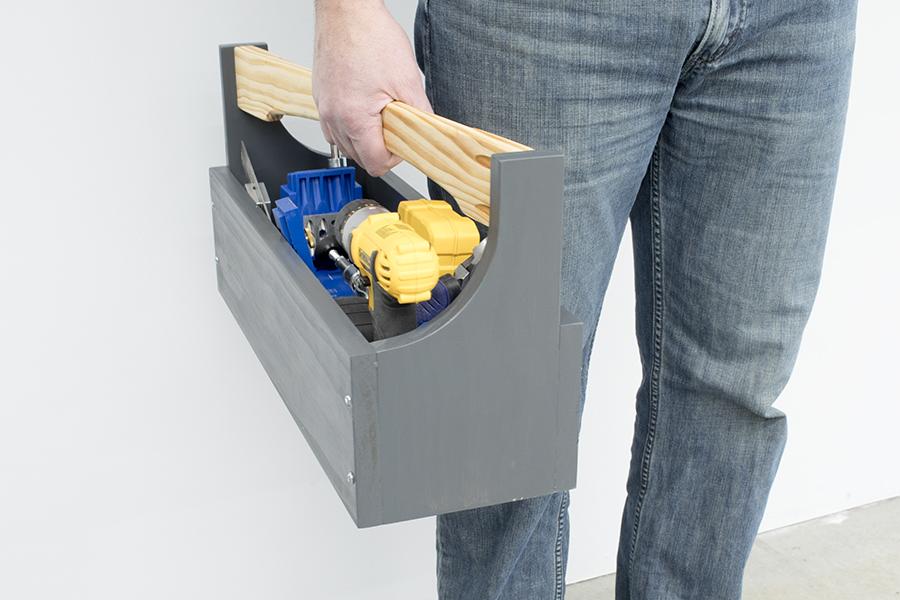
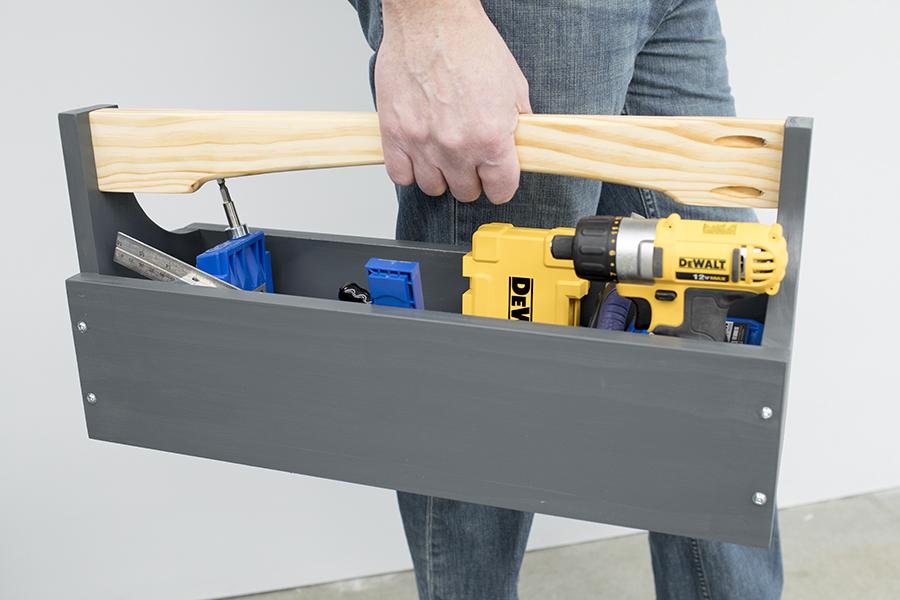
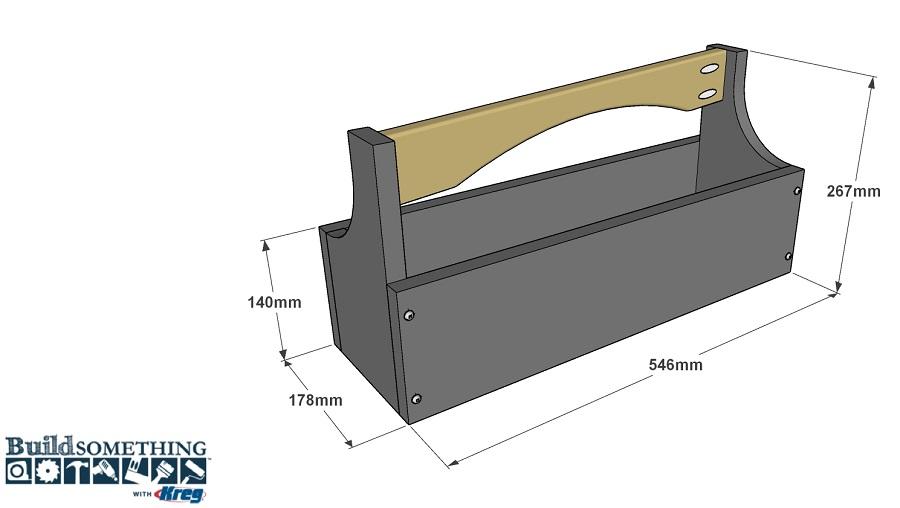
By Kreg ToolThere still may be no better way to tote small tools than with a traditional toolbox. This one offers a unique design twist, with a handle that’s set at an angle. It’s a simple idea, but you’ll be surprised how it simplifies getting things in and out, and how much more comfortable it is to carry.
Directions
-
Make the Bottom
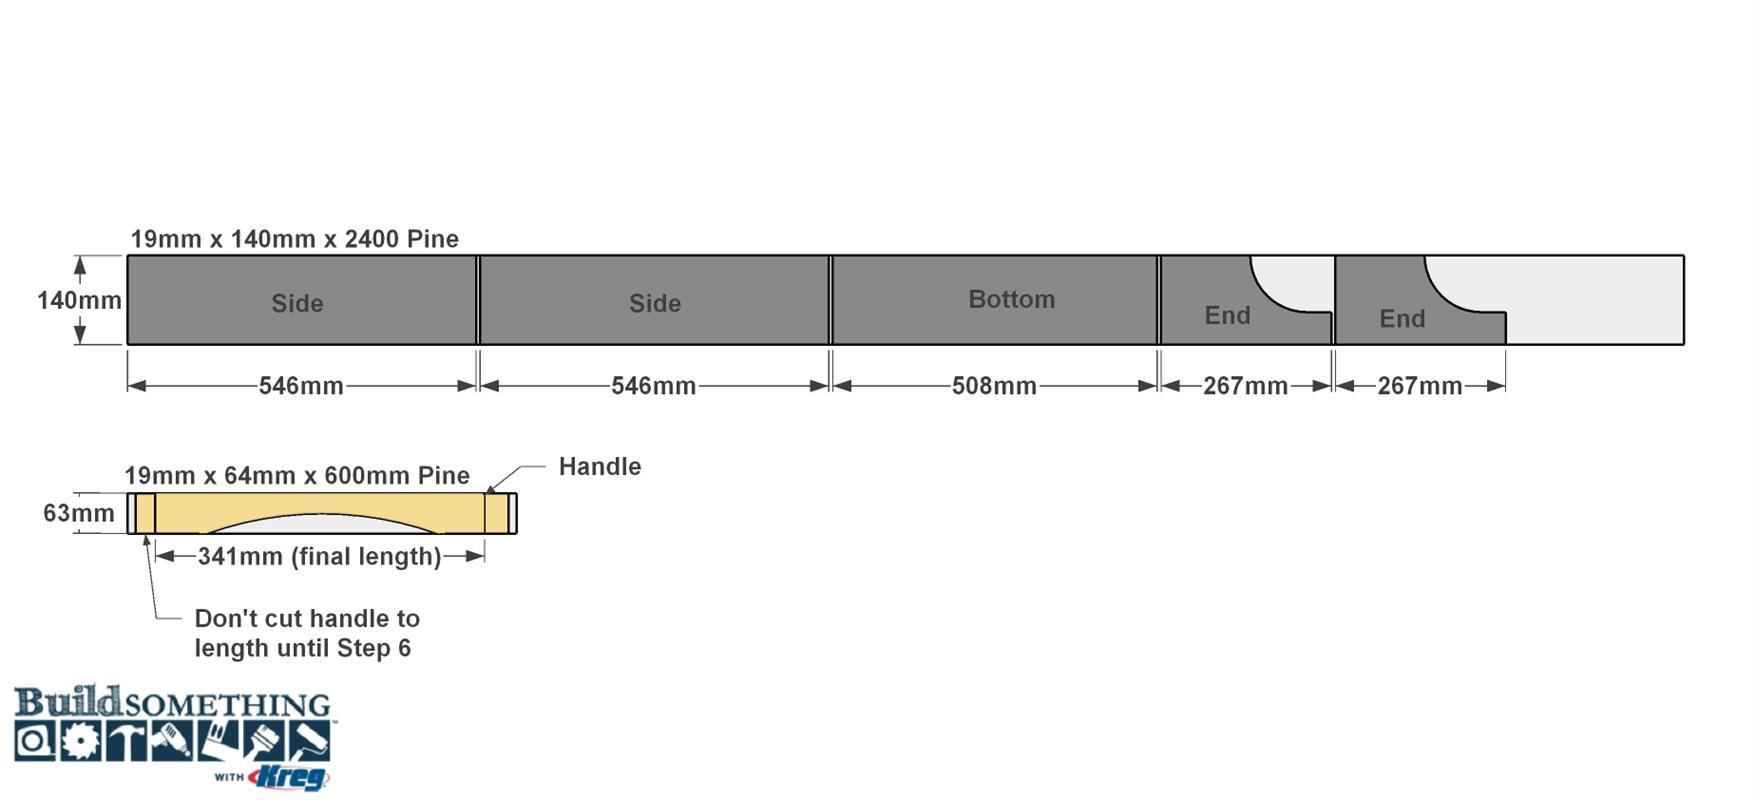
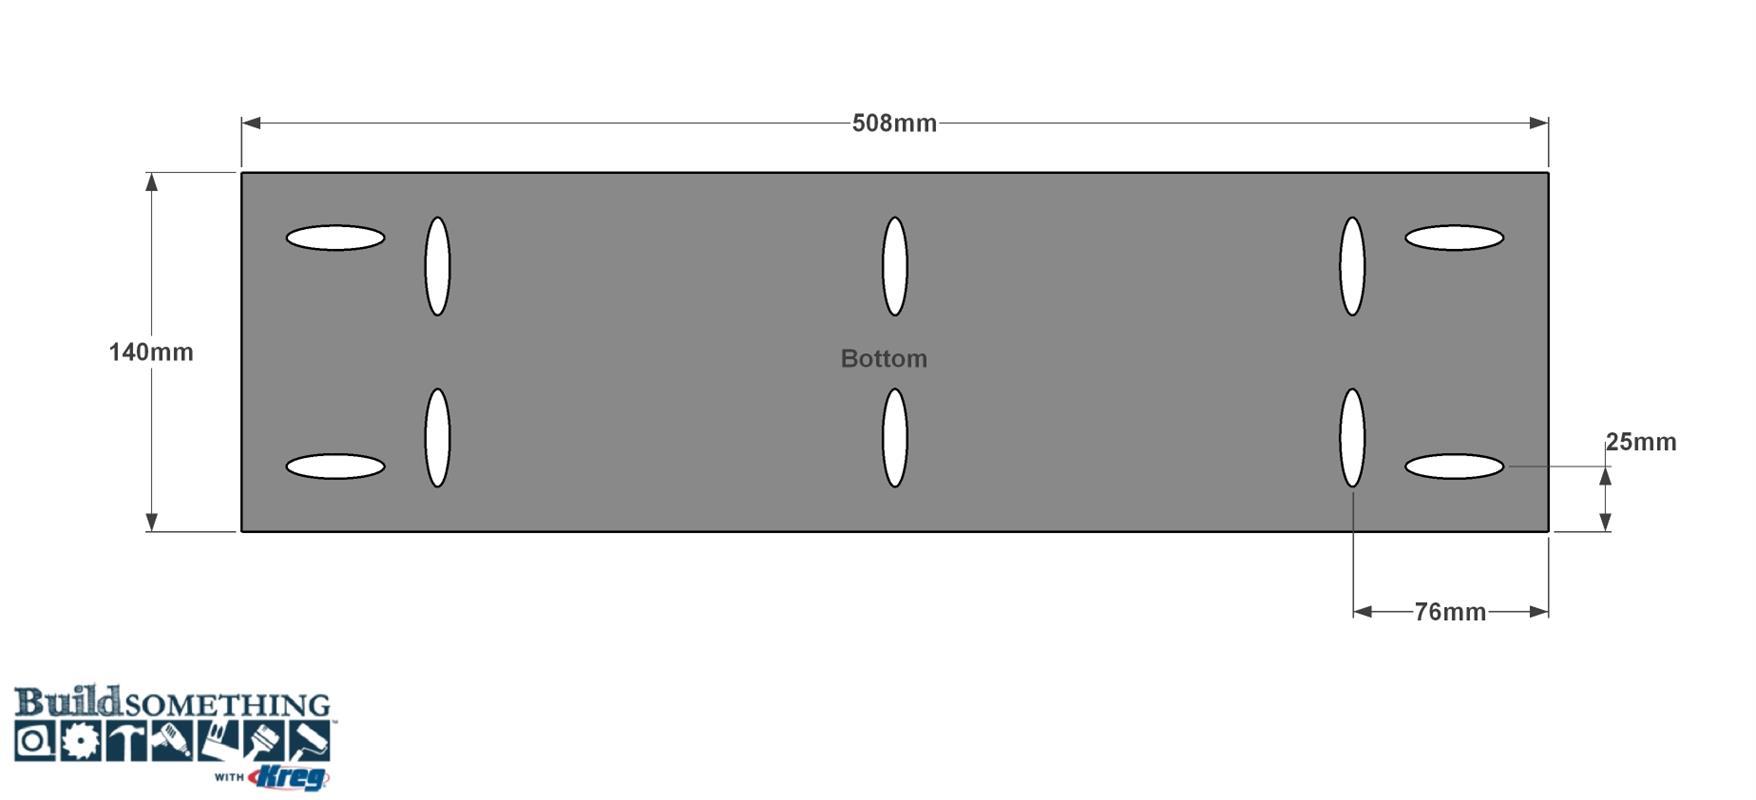
Start by cutting the Bottom to size from a 19mmx x 140mm board, as shown in the cutting diagram. Set your Kreg Jig® for 19mm-thick material, and then drill pocket holes at the locations shown. Sand the faces smooth—but don’t worry about sanding the edges or ends.
-
Make the Ends
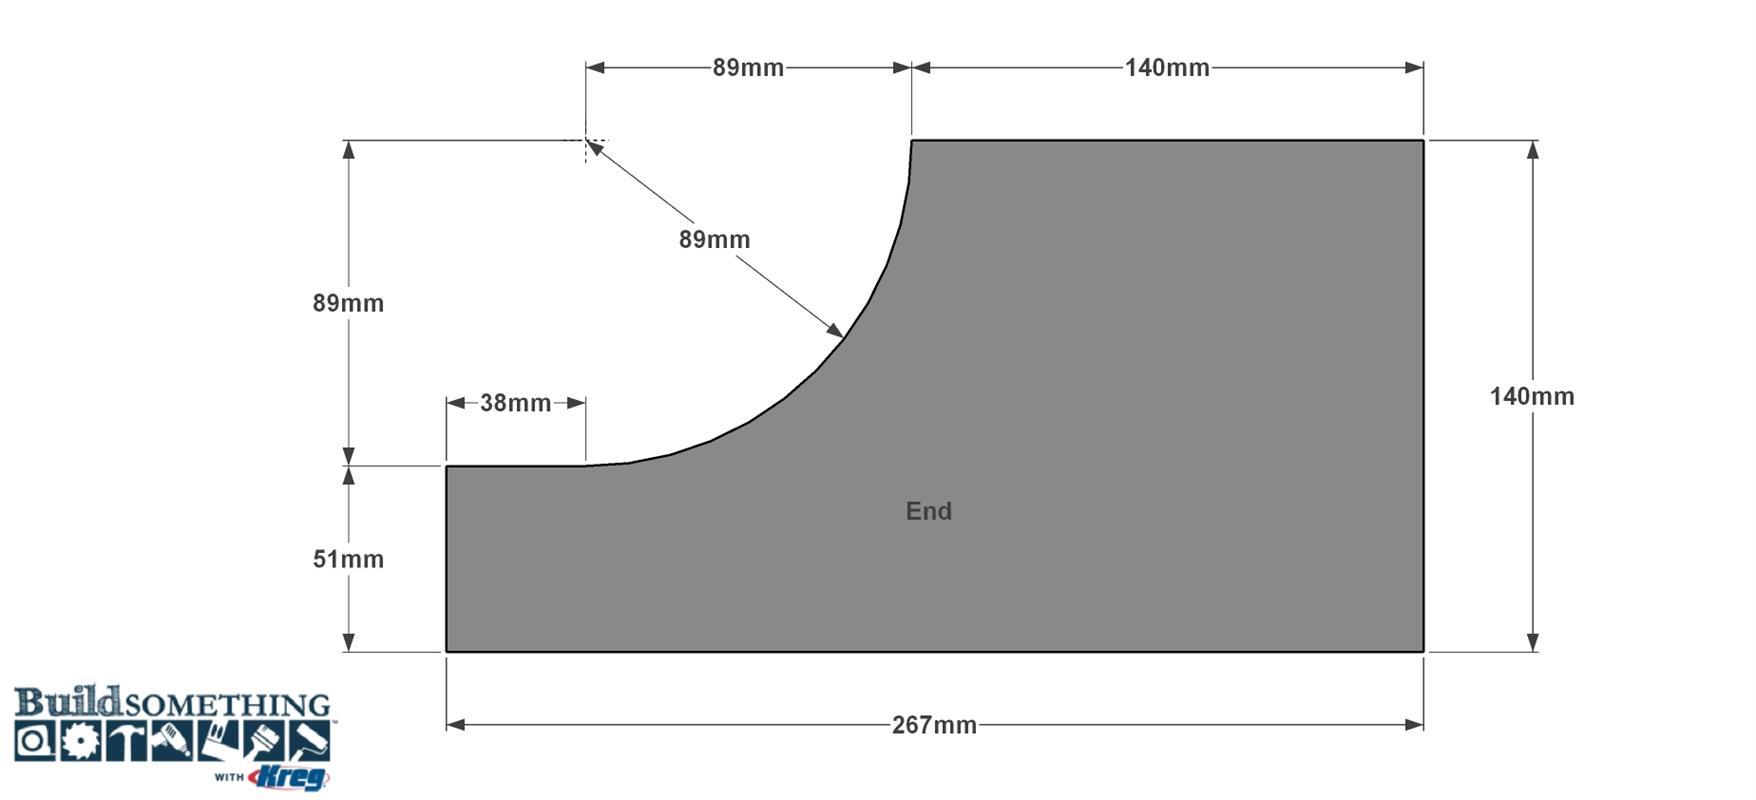
Cut two Ends to length, as shown in the cutting diagram. Now you can lay out the curve on each one. You can use a compass, or you can mark out the straight line from the top edge, and then set an ordinary quart can in place and trace around it. Once you have the shape laid out in each End, cut the curve in each using a jigsaw. Cut just outside the line on the “waste” side, and then sand up to the line to create a consistent, smooth shape. Sand the faces smooth and other edges smooth, as well.
-
Cut the Sides
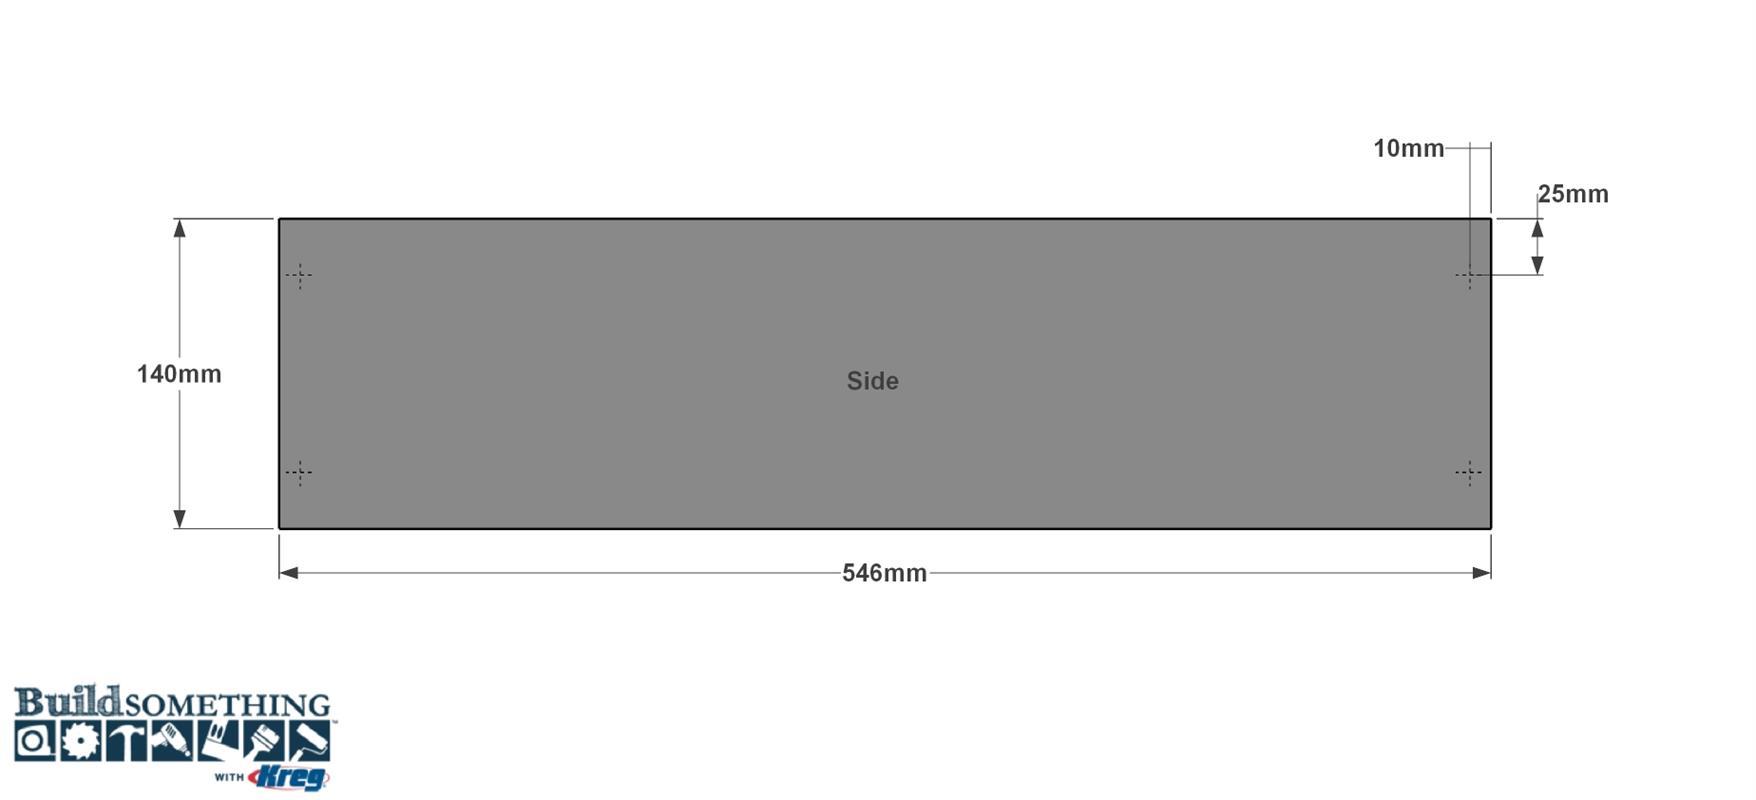
Cut two Sides to length, as shown in the cutting diagram. Sand the faces, edges, and ends smooth. If you plan to paint the toolbox, as we did, consider painting the Bottom, Ends, and Sides now. This may be easier than painting after the toolbox is assembled. It also allows you to apply the paint using a foam roller, as shown in the how-to video below, to create a smooth paint finish. Once the paint is dry, or before you move on if you’re not applying paint, mark the locations of four pilot holes in each Side, as shown. Don’t drill holes yet, though. You’ll do that as part of Step 5.
-
Attach the Ends
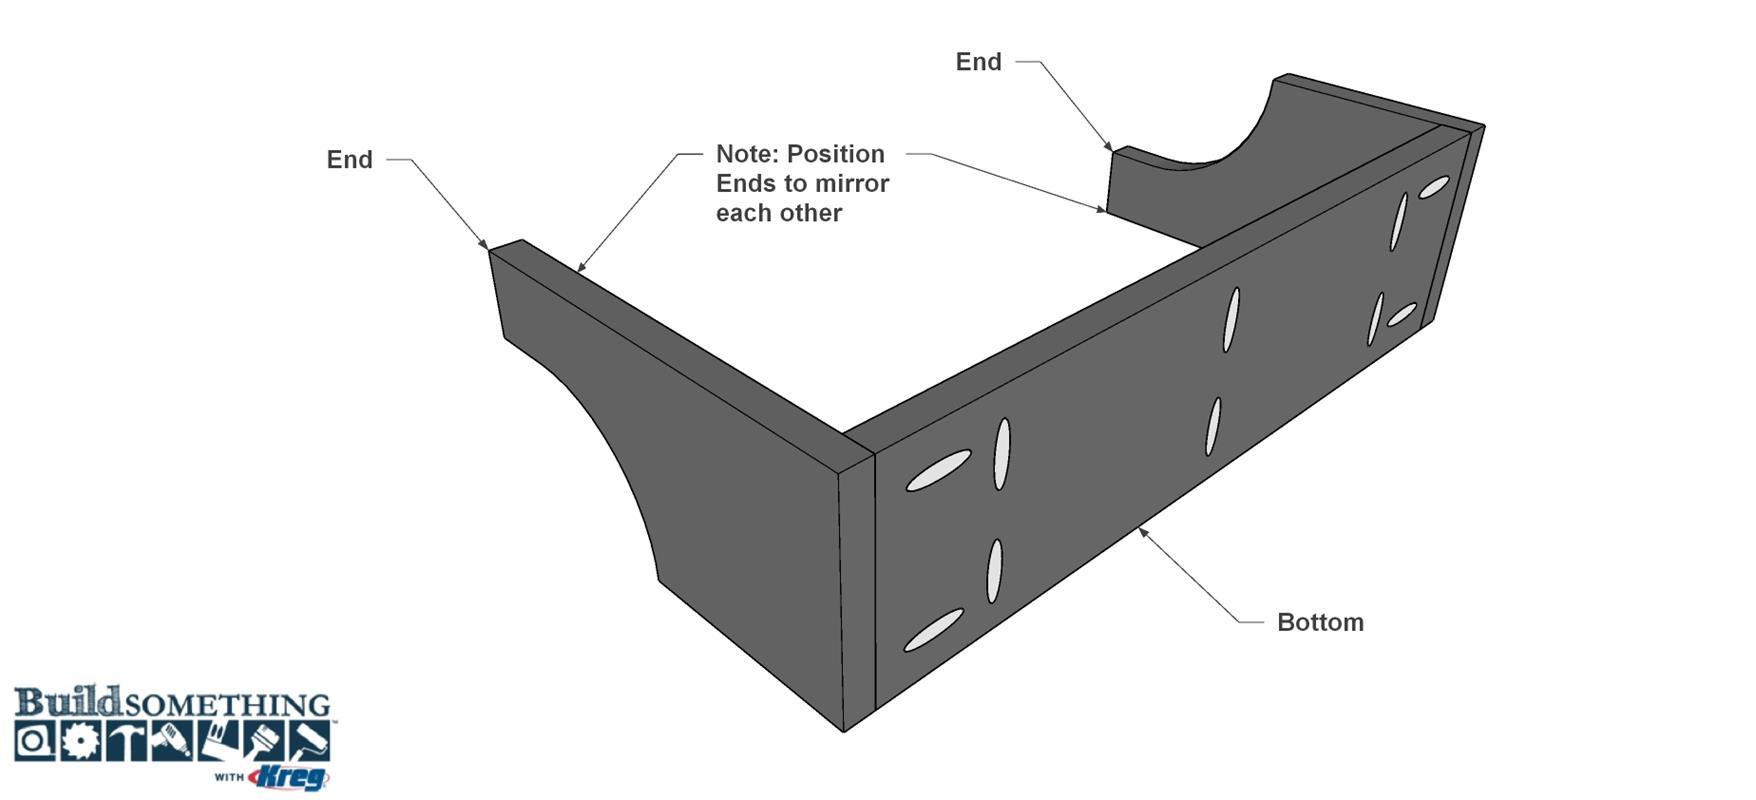
Lay the Bottom and the Ends on edge on a flat work surface so they’re oriented as shown—with the tall portions of the ends offset. Clamp these pieces together, and then attach the Bottom to the Ends using 32mm coarse-thread Kreg Screws.
-
Attach the Sides
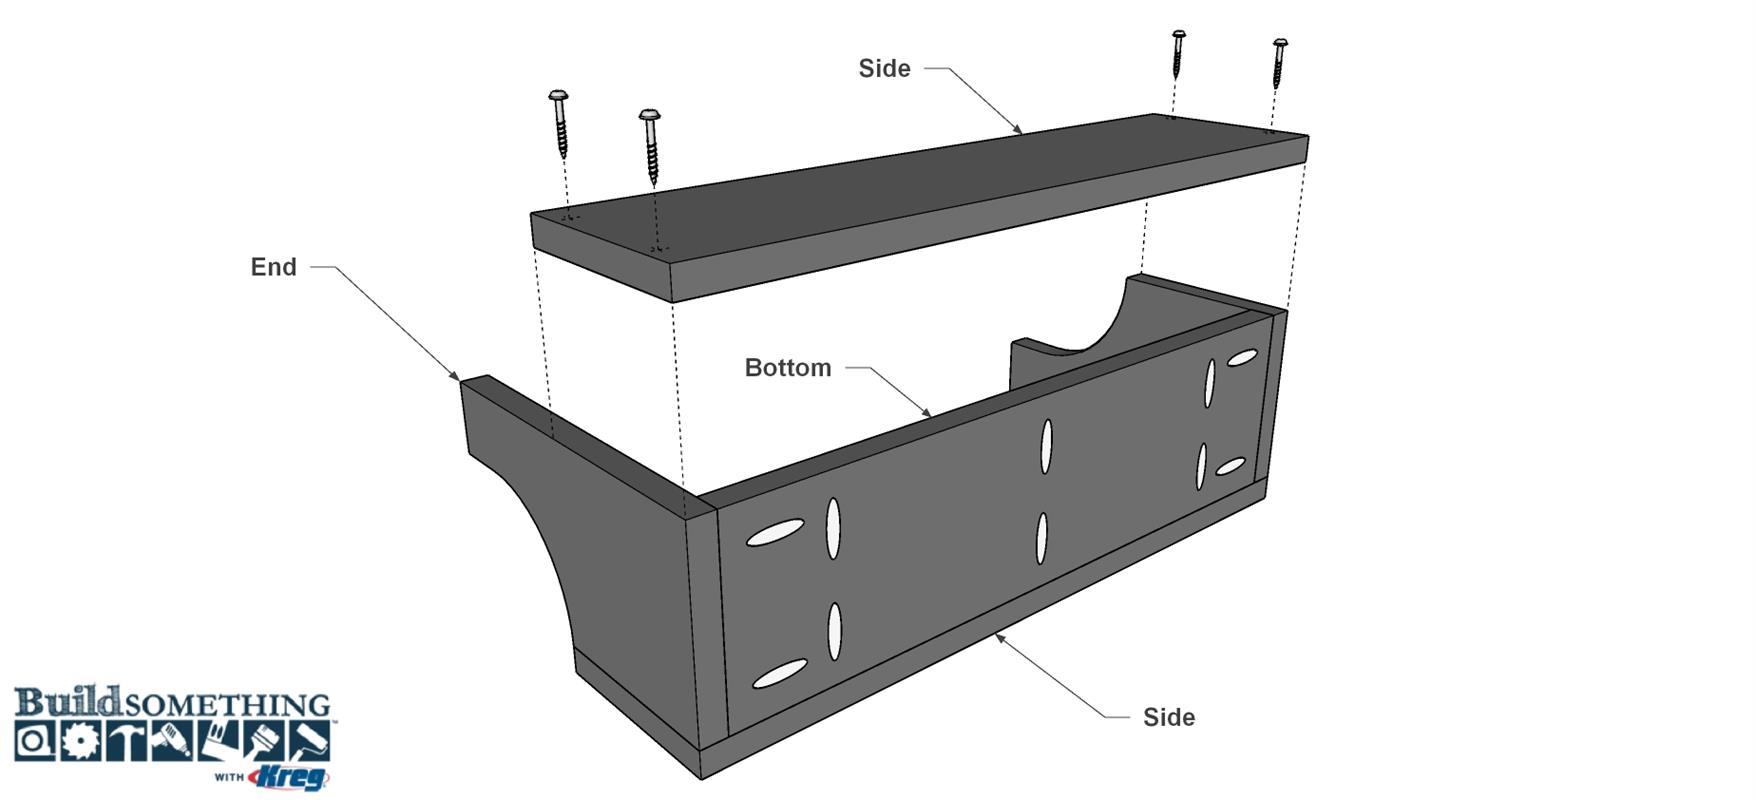
Now you can attach the Sides to the Bottom/Ends assembly. Make sure the Sides are aligned properly with the Ends and then clamp them in place. Next, connect the Bottom to the Sides using 32mm coarse-thread Kreg Screws. Now drill 1.5mm pilot holes about 25mm deep at each marked location in the Sides. Drive 32mm coarse-thread Kreg Screws into these holes. Use a low clutch setting to prevent over-driving the screws.
-
Find the Handle Length and Angle
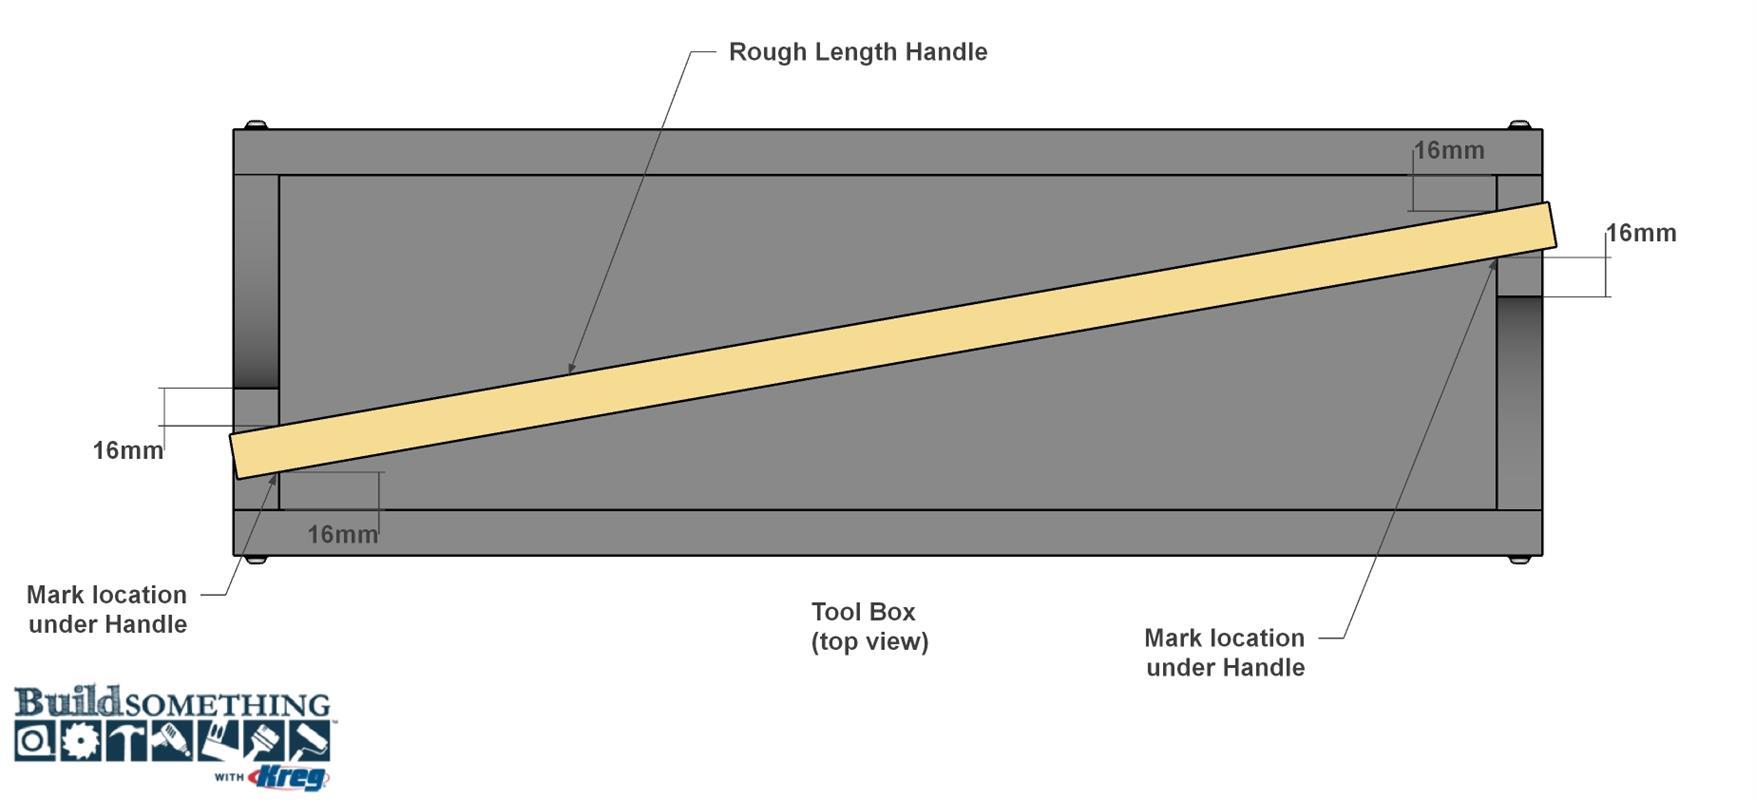
Cut a Handle to rough length from a 19mm x 64mm board, as shown in the cutting diagram. To get the proper angle and length, position the Handle on top of the Ends as shown. With a pencil, mark the length and angle onto the bottom of the Handle where it meets the top of each End. Cut the final length and angle on the miter saw. In our case, the angle was approximately 10°.
-
Shape the Handle
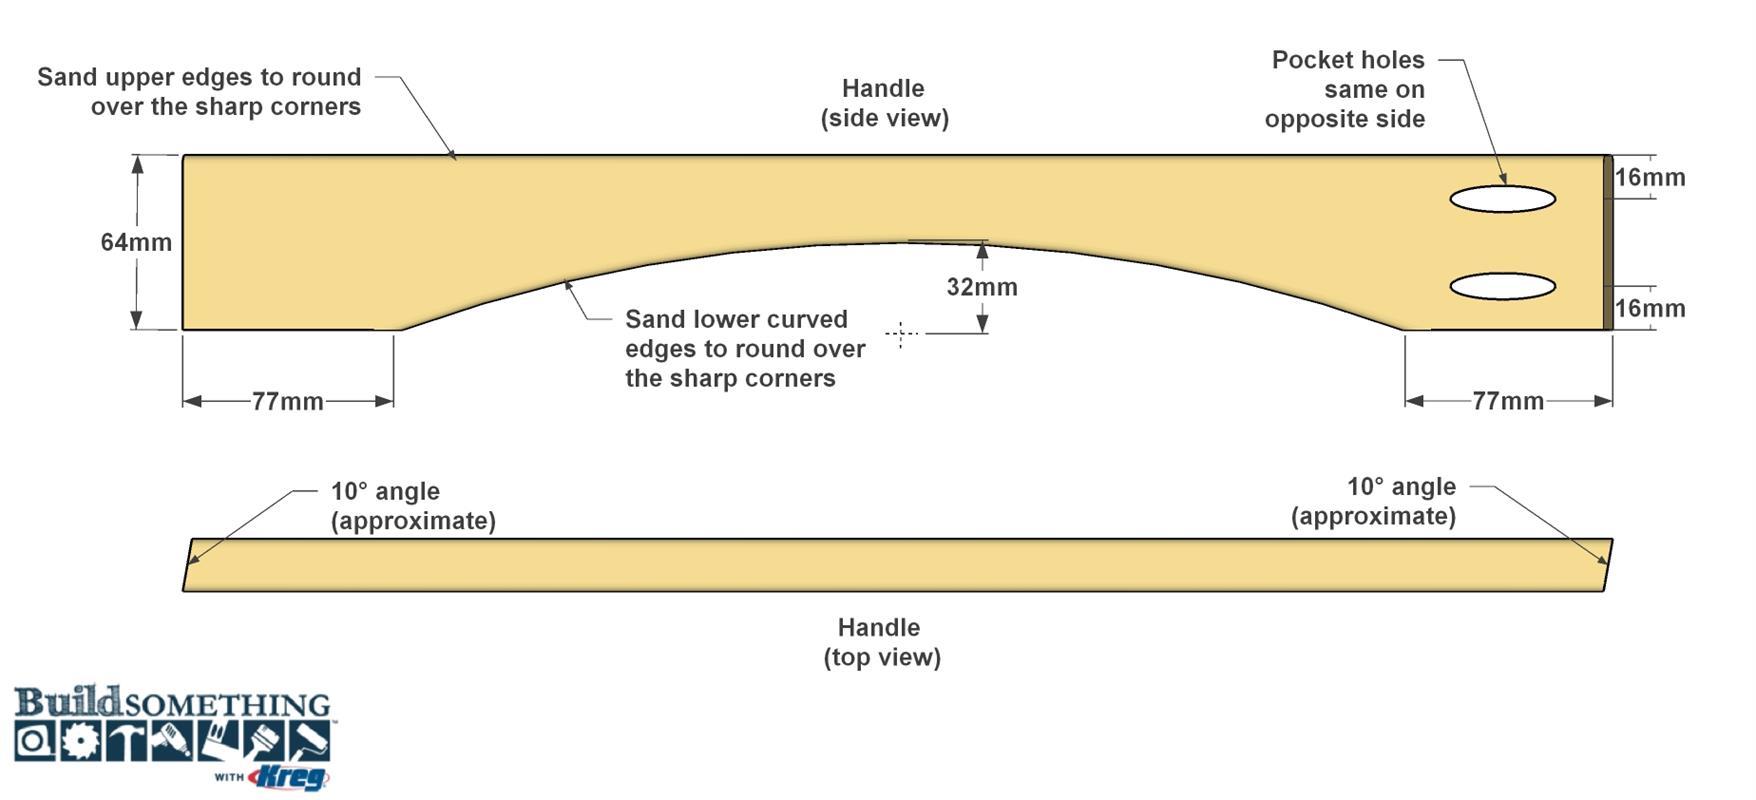
First, drill pocket holes in the Handle. There are two in each face—on the “shorter” side of the beveled end. Next, lay out the curve of the handle, cut it out with a jigsaw, and then sand the curve smooth. Finally, ease the sharp edges of the handle by sanding a slight roundover along the top edges and the edges of the curved area, as shown. After that, you can either paint the handle, or apply a couple of coats of clear finish, like we did.
-
Attach the Handle
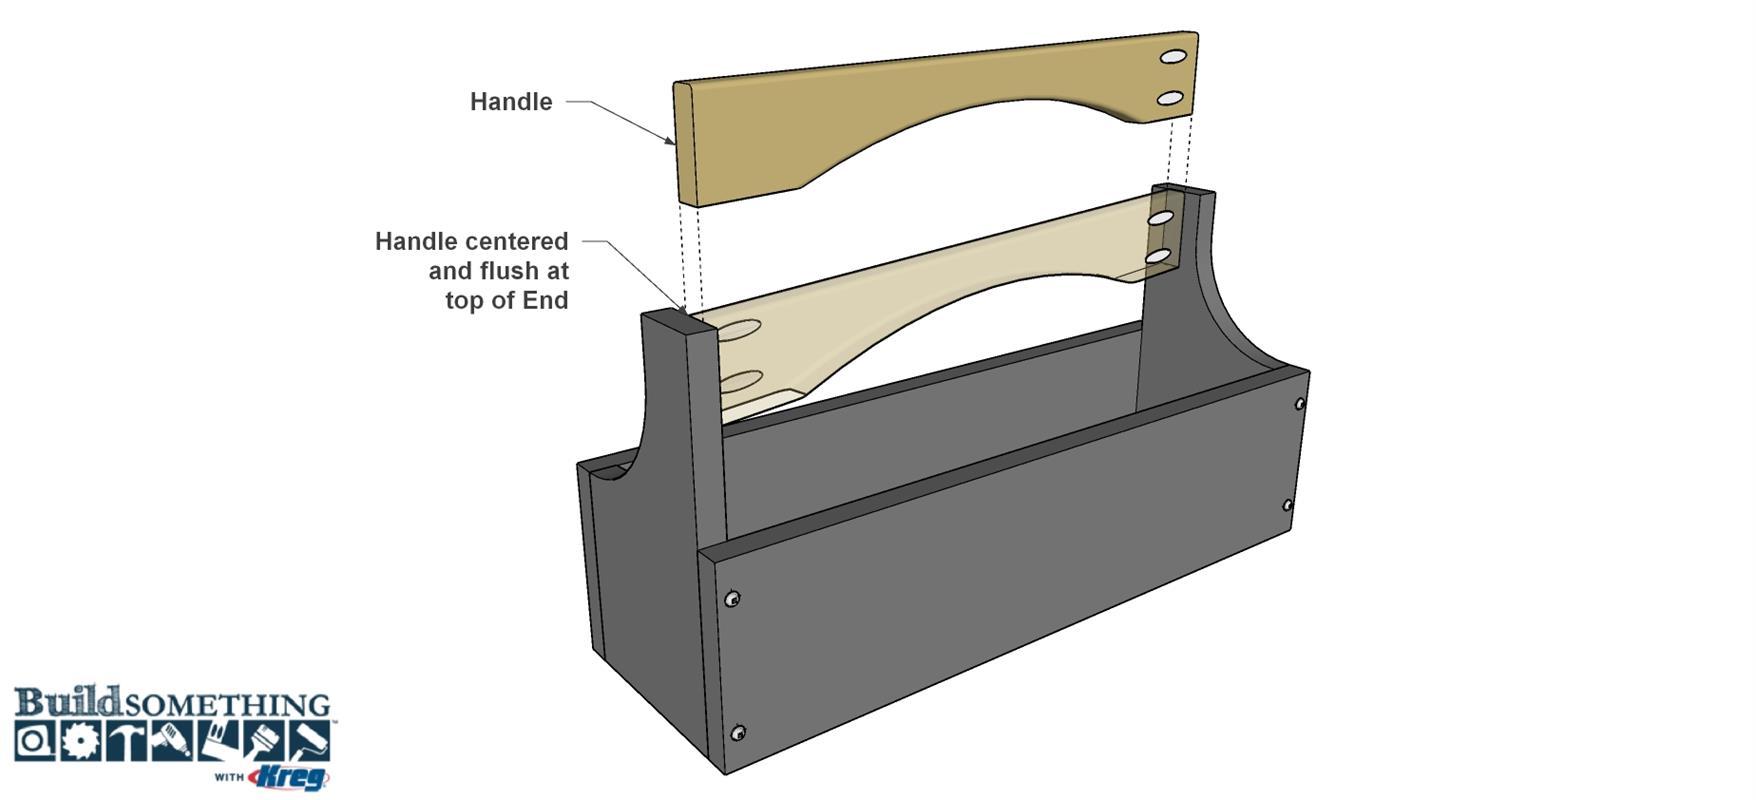
To attach the Handle, first position it so it sits centered and flush at the top of each End. You may need to clamp the Handle in place while you secure it using 32mm coarse-thread Kreg Screws.


