Tool Storage Shelves
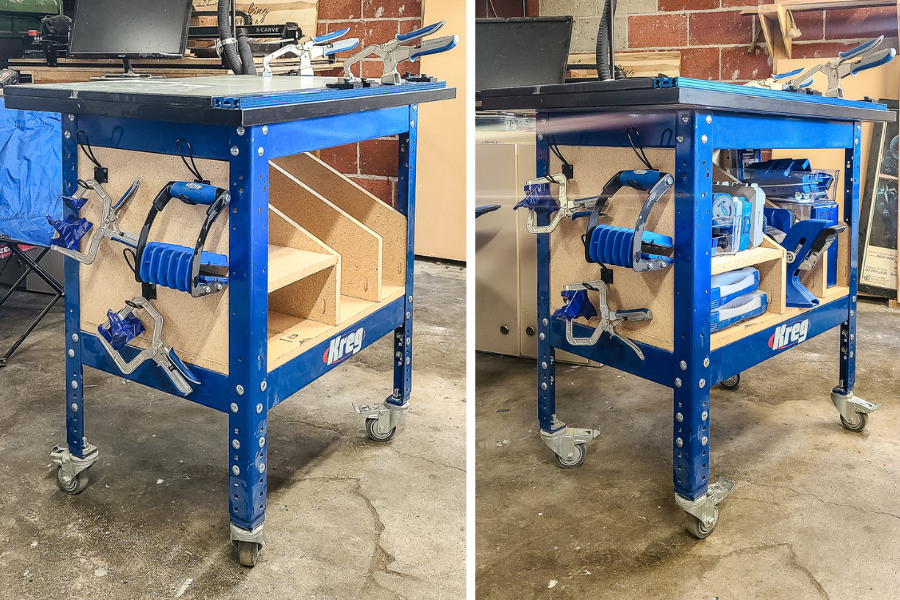
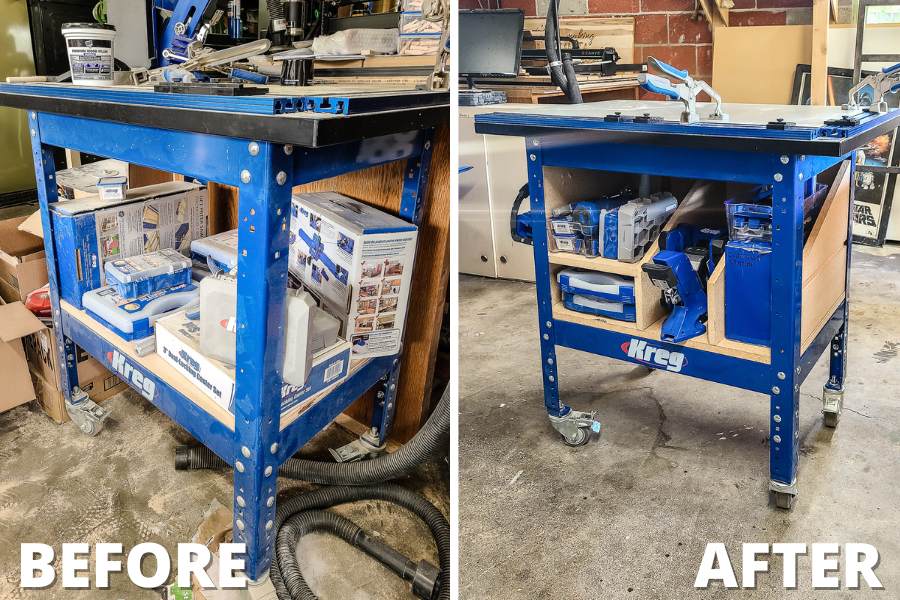
By Making ManzanitaNeed a good place to keep all of your awesome Kreg tools? Build these tool storage shelves, out of inexpensive particle board. The shelves are designed to fit perfectly in the bottom of the Kreg clamp table base and easily store several Kreg jigs and accessories.
Directions
-
Cut wood
Cut wood according to the visual cut list in the woodworking plans with a table saw and circular saw and a fine tooth trim blade. Using a trim blade helps prevent chipping on the particle board. However, if you don’t have a trim blade, you can make the cuts using clamps, a level/straight edge, a circular saw, scrap pieces of particle board, and painter’s tape. To do this, you’ll need to use painter's tape and a scrap board. Apply 2 layers of painter's tape where you’ll be cutting after you line up the cut on your table saw or circular saw (using clamps and a straight edge.) Next place a scrap board over the top of the painter’s tape. The scrap board will take all the chips and rips leaving the board underneath intact.
-
Cut dado
With the panels cut, it is time to put in the dado cuts for the shelf. Take the one side panel and one middle panel that will connect to the shelf and make the dado cuts with a table saw and a dado blade (which is wider than a normal table saw blade) using the measurements in the woodworking plans. If you do not have a dado blade, you’ll have to use a regular table saw blade and run it through multiple times. Make a pass on the line and then move the blade a saw blade width at a time until you finish the dado cut. Make sure the shelf is tight by checking a scrap piece of particle board. Be sure not to make the dado cut larger than ¾” or else the shelf will be loose.
-
Dry fit and adjust pieces
These measurements are extremely tight for the storage rack to maximize space under the Kreg clamp table. Start by dry fitting to ensure your pieces are going to fit in your Kreg cart. Make any adjustments with the table saw or circular saw before assembling.
-
Drill pocket holes
Drill pocket holes as shown in the woodworking plans. We used the Kreg 720 Pro. Particle board is extremely easy to drill into, but try to keep an even pace to avoid tearing particle board, which will happen if you drill too fast.
-
Assemble on the cart
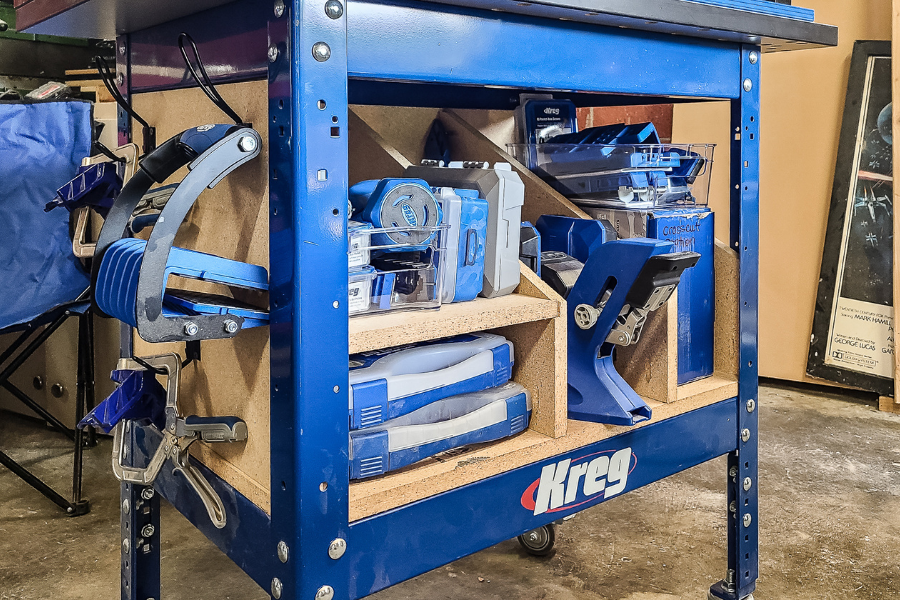
Start by putting the bottom panel inside the Kreg table stand sitting on the blue ledge. The next piece to go in is the back panel that you’ll attach other dividers to. Put the back panel piece in and attach it to the bottom panel with the pre-drilled pocket holes. Next, put on the two side panels using the pre-drilled pocket holes and then the two middle divider panels. Lastly, detach the leg of the cart that is blocking the shelf using a crescent wrench. You can remove some and loosen other bolts if needed to make enough room to slide in the shelf where to dado cut is. Once everything is assembled, reattach the leg on the table stand to lock in the shelf.
-
Stock the storage rack with tools
Depending on the tools you want to store, you can stock a hefty of tools amount here. Our storage rack fits our Kreg 720 Pro on the right and has plenty of room for screws, plugs, and other Kreg jigs on the shelves to the left. We added a few hooks on one of the edges to hang clamps and used some clear bins to round up some smaller tools and pieces on the shelves. The tools rack successfully houses: Kreg 720 Pro, Crosscut Cutting Station, Portable Crosscut, 320 Jig, 3 large boxes of pocket hole screws, 1 small box of screws, 4 boxes of plugs, 2 90-degree corner clamps, the panel carrier, XL pocket hole jig, cabinet door mounting jig, 4 project blocks and has room to spare.
Tool Storage Shelves Woodworking Plans – Making Manzanita
See more on their website: https://www.makingmanzanita.com/diy-tool-organizer/


