

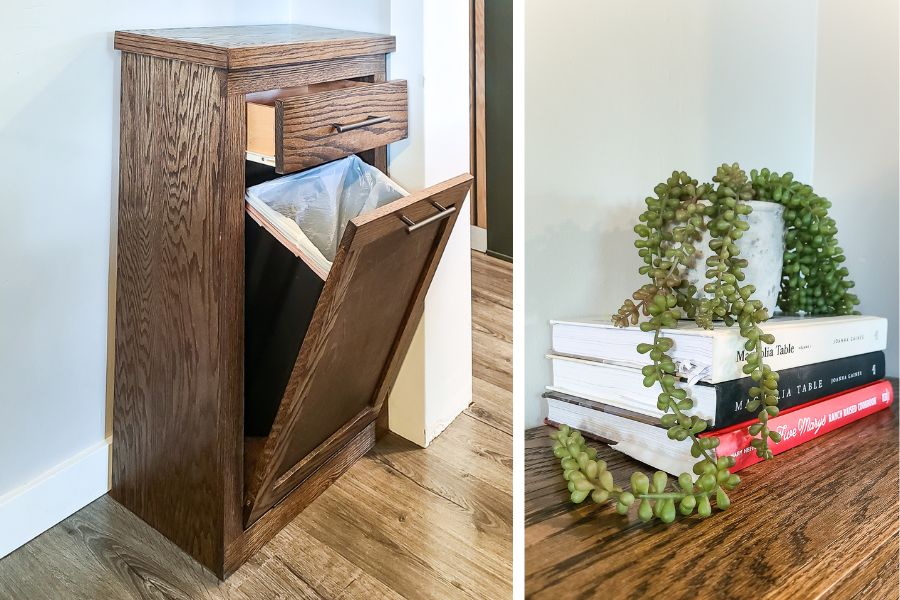
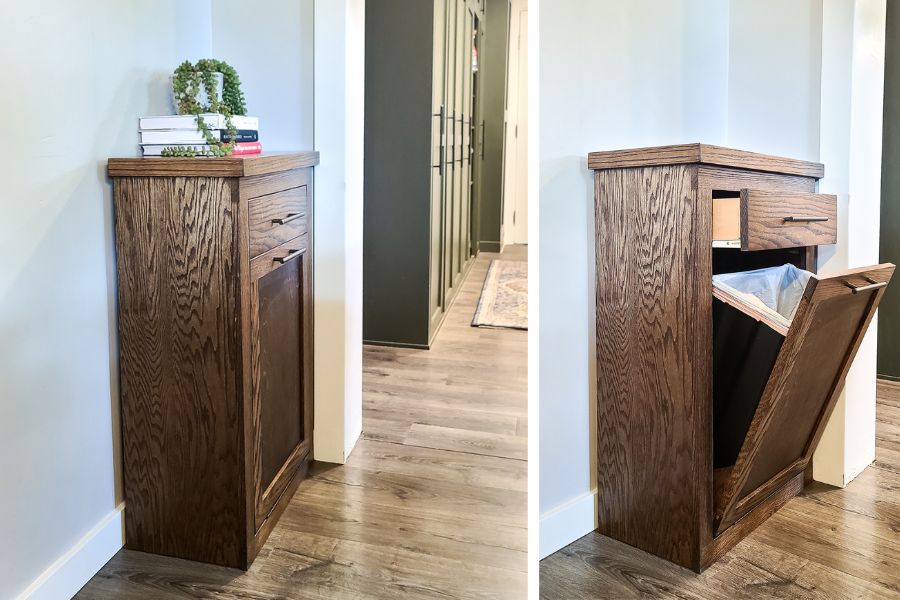
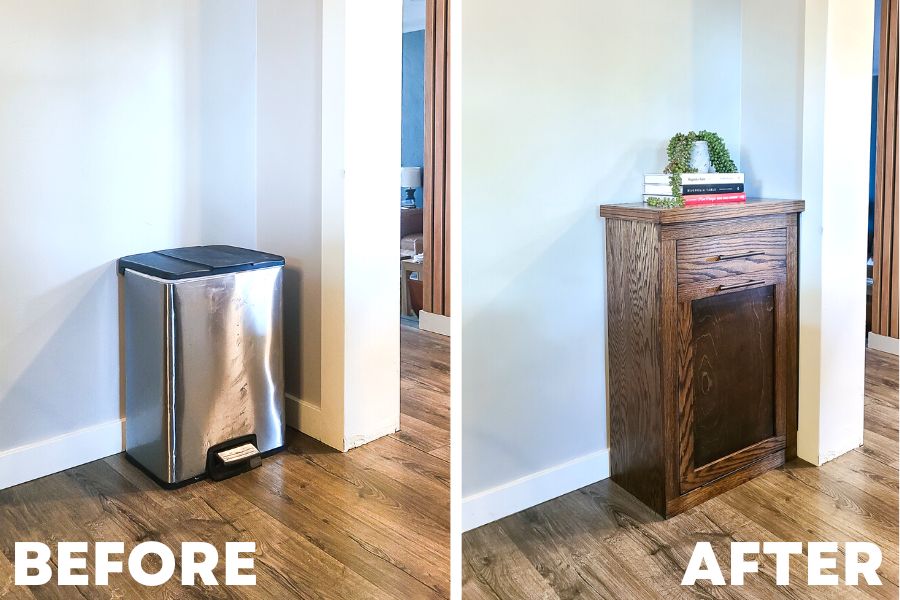


The perfect DIY project to hide that trash bin in your kitchen!
Tools
Kreg Tools


Other Tools
-
Table saw

-
Miter saw
-
Tape measure
-
Clamps
-
Dado blade
-
Trim blade for table saw
-
Finish nailer
-
Brad nailer
-
4' level or straight edge
Materials
Wood Products
- 1 Oak Plywood , ¾” x 4’ x 8’
- 1 Oak Board , ¾” x 2” x 5’
- 1 Oak Board , ¾” x 3” x 18’
- 1 Oak Board , ¾” x 6” x 2’
- 1 Oak Plywood , 1/4" x 4' x 4'
Hardware & Supplies
- 1 Box of 1 ¼” Kreg Pocket Hole Hardwood Screws (see tools list)
- 1 Box of 1 ¼” Kreg Pocket Hole Softwood Screws (see tools list)
- 1 Pencil
- 1 Wood glue
- 1 80 and 150 grit sandpaper
- 3 Spray Lacquer
- 1 0000 Wire wool
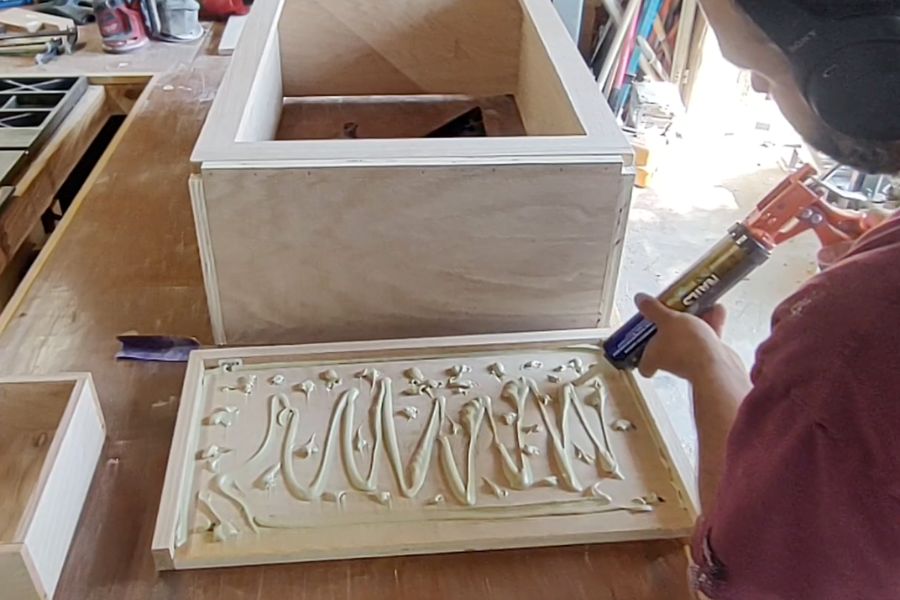
- 1 Construction adhesive
- 1 Painters tape
- 1 Pack of drawer slides
- 1 Box of 1 ¼” Finish nails
- 1 Box of 1 ¾” Finish nails
- 1 Box of 1 ½” Brad nails
- 1 Drawer Slide inserts for Face Frame Cabinets
- 1 Caulking Gun
- 1 Wood stain of choice
- 1 Staining rag
- 1 Black piano hinge 2” x 12”
- 1 10” Euro Drawer slides
- 2 Rear drawer track back plates
- 2 Drawer pulls
Directions
-
Cut wood
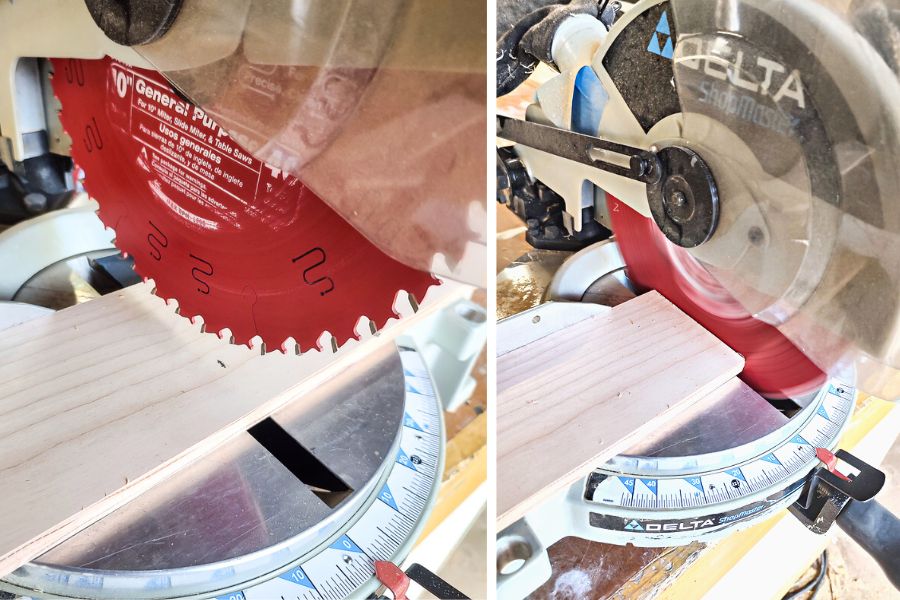
Cut plywood according to the visual cut list in the woodworking plans with a table saw and fine tooth trim blade. Also use the table saw to cut the widths of the oak boards according to the woodworking plans. Cut the lengths of the oak boards with a miter saw. Using a trim blade on the table saw helps prevent chipping the oak veneer of the plywood. However, if you don’t have a trim blade for your table saw, you can make the cuts using clamps, a level/straight edge, a circular saw, scrap pieces of wood, and painter’s tape. To do this, you’ll need to use painter's tape and a scrap board. Apply two layers of painter's tape where you’ll be cutting after you line up the cut on your table saw or circular saw (using clamps and a straight edge.) Next place a scrap board over the top of the painter’s tape. The scrap board will take all the chips and rips leaving the board underneath intact.
-
Cut dado for the drawer
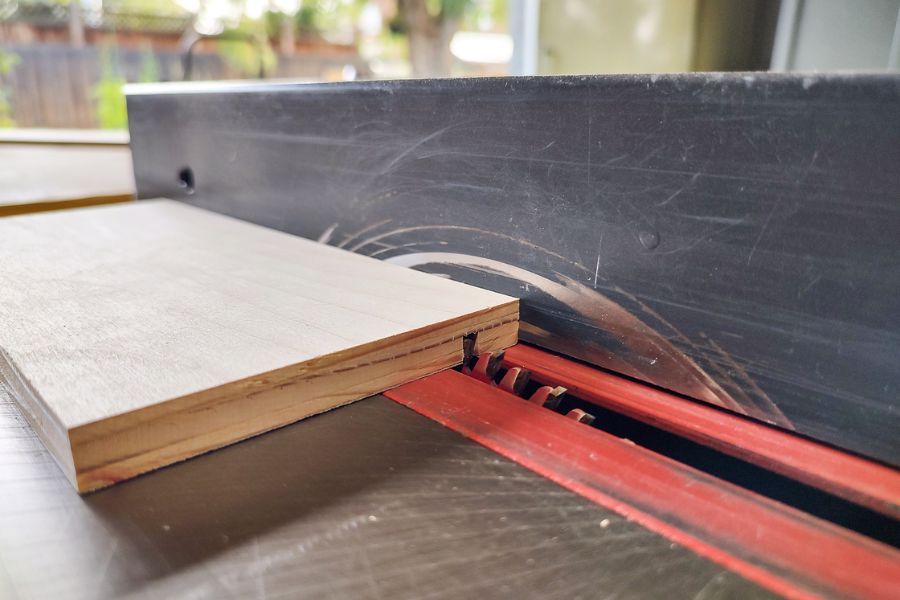
With the wood pieces cut, it is time to put in the ¼” dado cuts for the bottom of the drawer. Take the one drawer side and one drawer front or back piece and make the dado cuts with a table saw and a dado blade (which is wider than a normal table saw blade) using the measurements in the woodworking plans. If you do not have a dado blade, you’ll have to use a regular table saw blade and run it through multiple times. To do this, you will mark a line using a pencil then make a pass through on the line on the table saw. Next, move the blade a saw blade width at a time until you finish the dado cut at it is ¼” wide. Make sure the drawer bottom is tight by checking a scrap piece of ¼” oak plywood. Be sure not to make the dado cut larger than 1/4”.
-
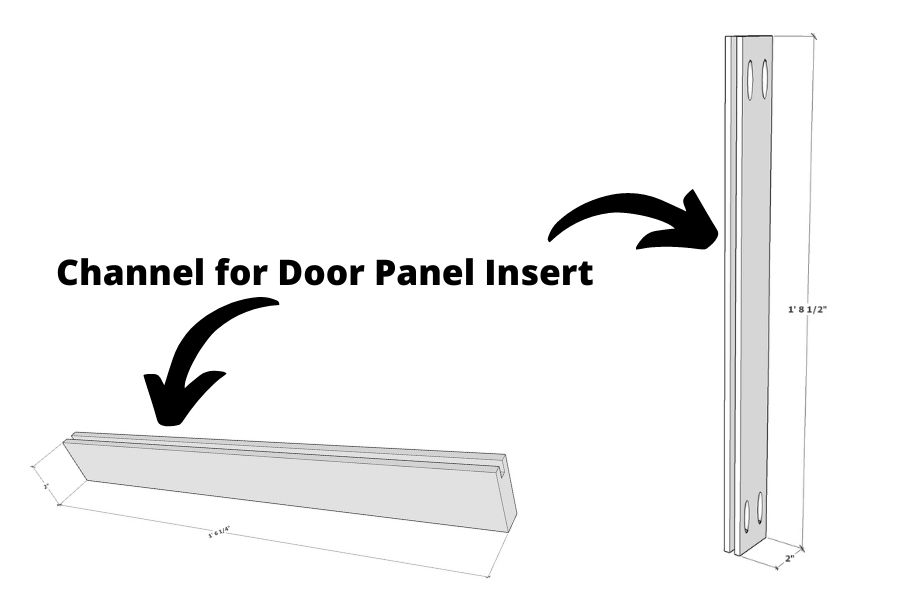
Cut groove for door panel insert
Much like the dado for the bottom of the drawer, cut a groove into the sides of your door rails and stiles for the panel to slide into. Using the table saw just make a couple of passes ⅜” deep into your door rails and stiles until your groove is ¼” wide for your door panel insert.
-
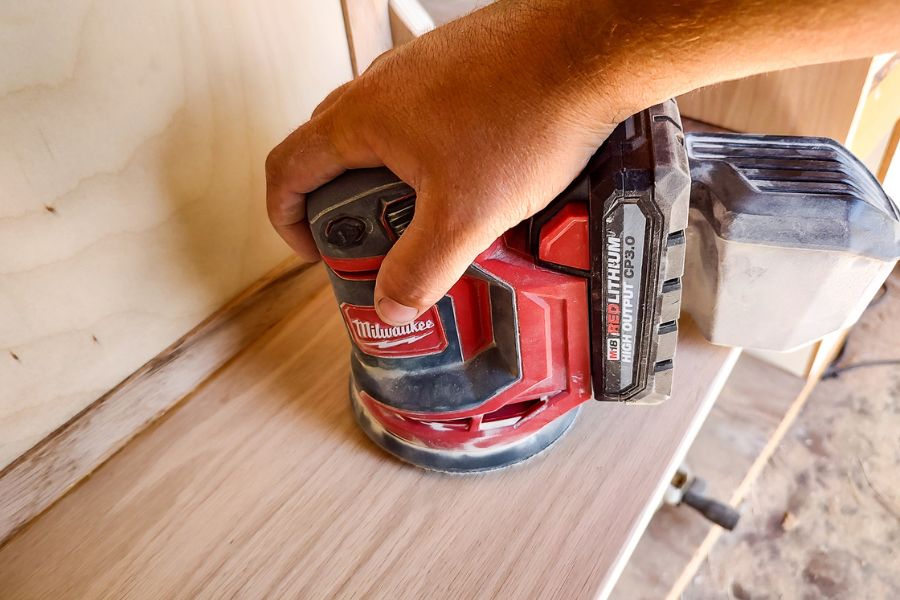
Sand
Light sand all cut wood pieces with 80 grit sandpaper and an orbital sander.
-
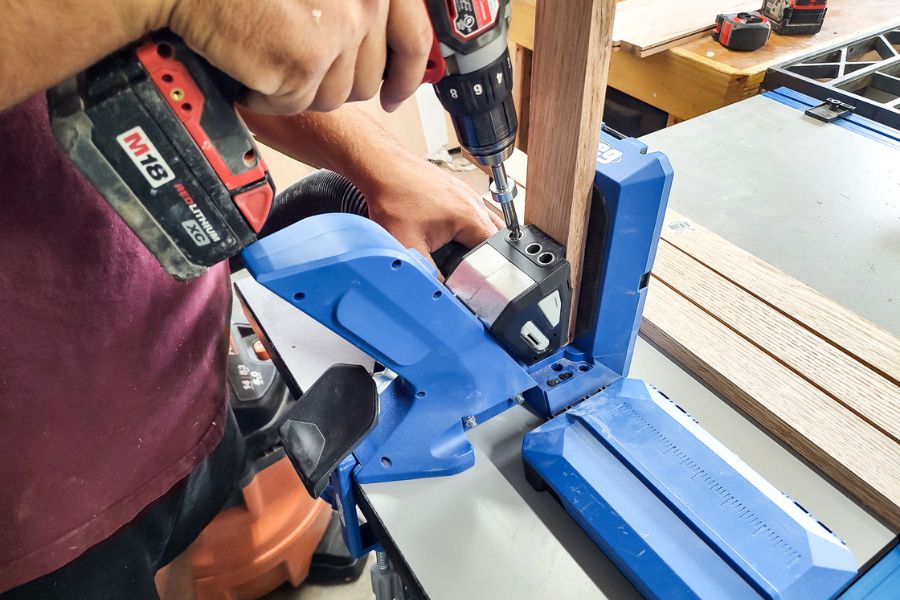
Drill pocket holes
Drill pocket holes as shown in the woodworking plans. We used the Kreg 720 Pro. The hardwood veneer on plywood is very thin so drill slowly to avoid damaging the veneer.
-
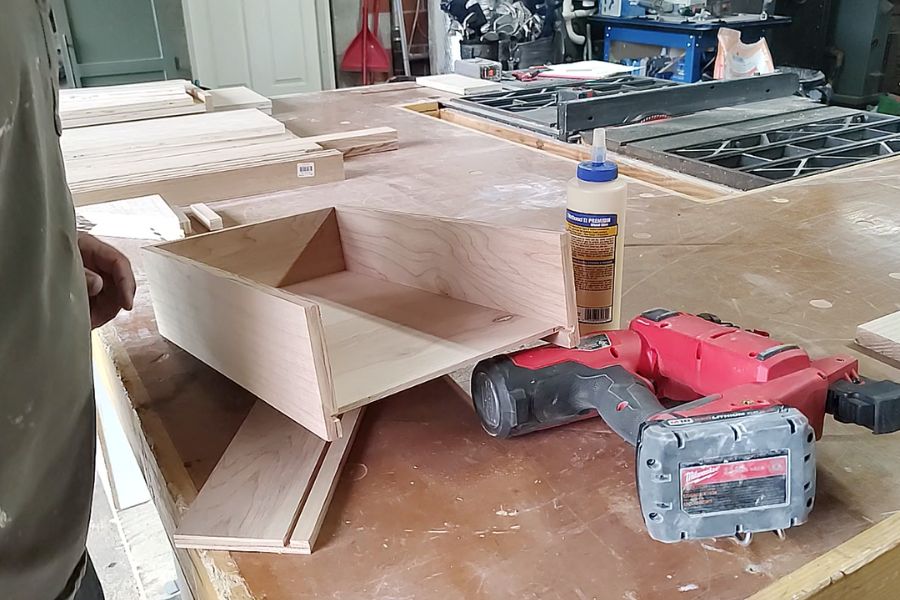
Assemble the drawer.
Start by putting together the drawer. Take the back and two sides of the drawer and glue and nail them together with the brad nailer and 1 ¼” brad nails. Slide in the drawer bottom into the dado channel and add the front drawer piece. Nail together, clamp, and wipe any excess glue with a slightly damp shop rag. Set the drawer aside to dry.
-
Assemble the face frame
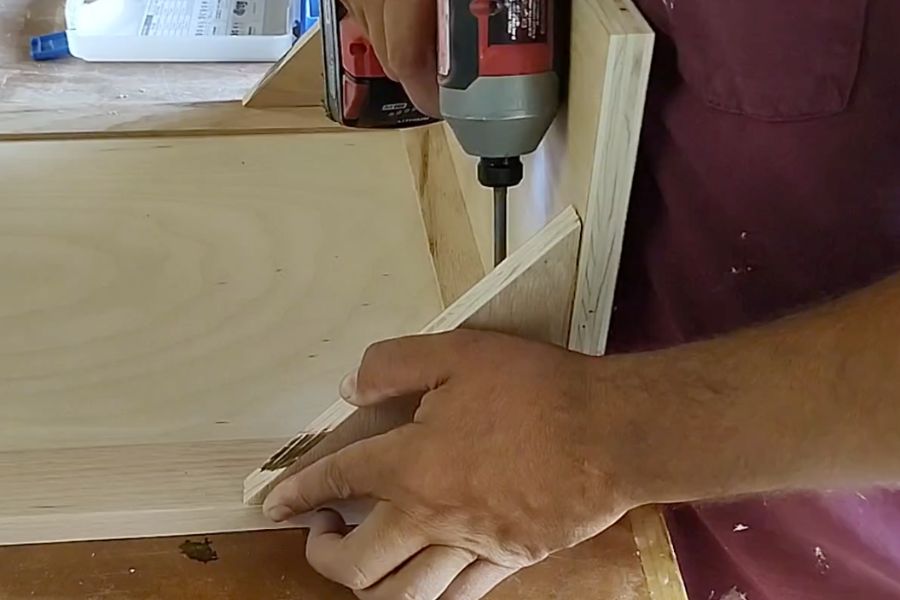
Start by taking one face frame side piece and one face frame top/bottom piece and clamp them together. We love using our Kreg clamp table for this part. Screw in your 1 ¼” hardwood Kreg screws enough to make a mark on the piece of wood but don’t screw them in tight. When working with Oak it has a tendency to split because it is such a hardwood. To prevent this, we usually predrill some pilot holes for our pocket hole screws. Take a drill and drill bit and predrill a hole at the angle the screw will go into the wood. Be careful not to go all the way through your frame. This will ensure any splits don’t happen as you are making more room for the screw so only the threads on the screw are grabbing the wood. Continue assembling the face frame until all four pieces are attached with pocket hole screws.

-
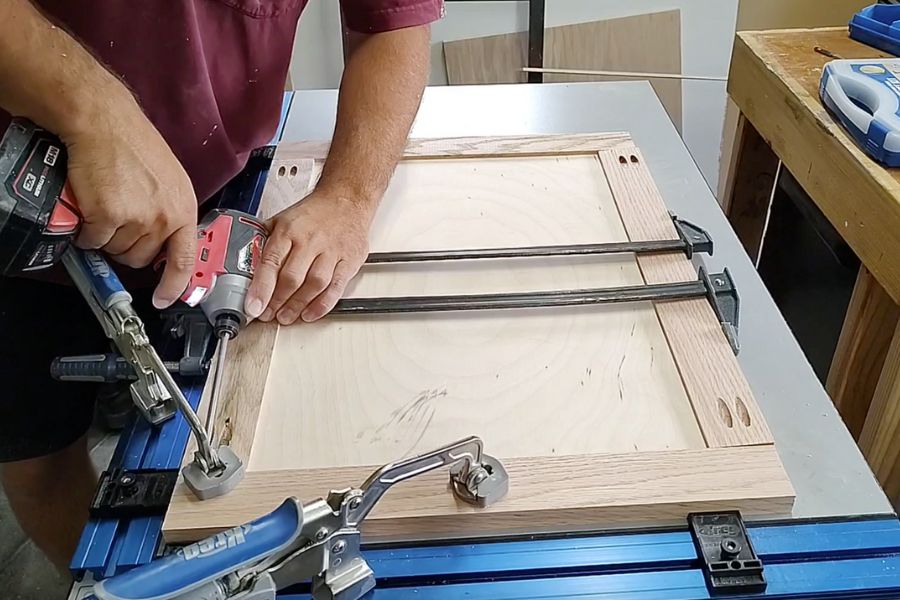
Assemble the door
Take the door pieces and dry fit the parts together. Next, clamp the pieces together and make marks, and pre-drill just like the face frame. Once pre-drilled, add a little bit of wood glue into the groove and start assembling the door. Put all pieces of the door together and clamp together and clamp down to Kreg clamp table to make sure it is flat and square. Then screw in pocket hole screws to attach. Wipe any excess glue with a slightly damp shop rag. Allow the door to dry.
-
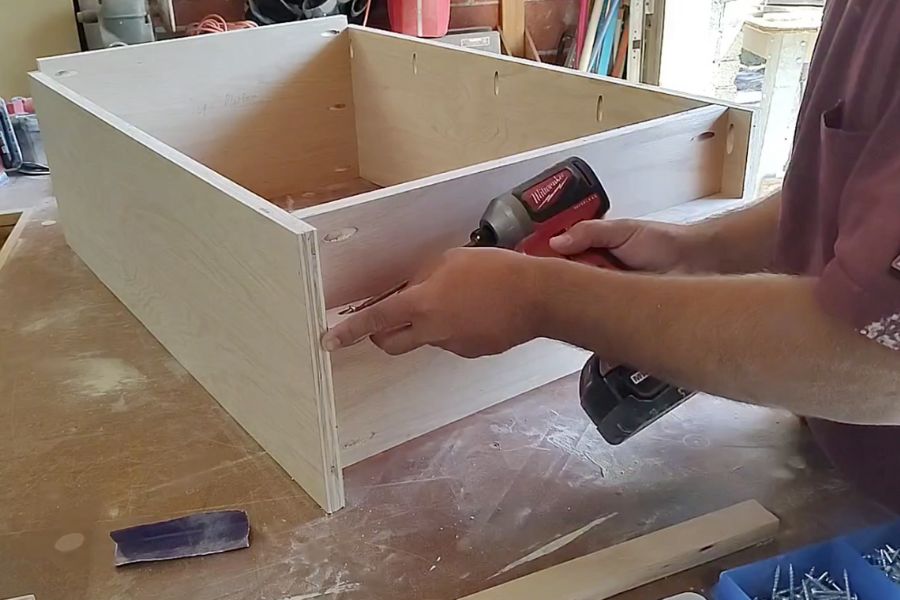
Build the cabinet
Take your cabinet side panels, cabinet bottom panel, cabinet top panel, and cabinet bottom supports. Assemble them all together with the pre-drilled pocket holes. Use what clamps you can to get the cabinet assembled. Be sure to add the two bottom supports underneath the cabinet bottom. Use the 1 ¼” Softwood/plywood Kreg screws here.
-
Build the top
Dry fit the top front and side trim pieces to the top panel and clamp and make marks through the pocket holes (which should be pre-drilled into the bottom of the top panel) to create pilot holes. Once the trim pieces are all pre-drilled, use the 1 ¼” Kreg hardwood screws to assemble this entire top together.

-
Attach the face frame and top to the cabinet
Start by attaching the assembled face frame with 1 ¼” Kreg hardwood screws through pre-drilled pocket holes on the cabinet side panels. Again use the marking and pre-drill method to ensure no splits happen in the face frame. Once your face frame is attached to the cabinet, you can attach the top to the cabinet. Put some construction adhesive on the bottom side of the top and place the top onto the cabinet. Press firmly all over the top to get a good bond with your construction adhesive. Next, take your finish nailer and 1 ¼” finish nails and nail them up into your top from inside of the box. Do this at a slight angle so none of the finish nails go through your top.
-
Assemble the trash bin tilt platform
Attach the tilt support triangles to the trash bin tilt platform base using wood glue and 1 ¾” finish nails. Then attach the bin tilt platform to the assembled door using the pre-drilled pocket holes. Be sure to use the same marking and pre-drilling method as before to prevent splitting. Also, we recommend adding high-quality wood glue here to make this connection extra strong as it will be the reason your trash can stops at a tilt. Wipe away any excess wood glue with a slightly damp shop rag and allow that all to dry before moving on.
-
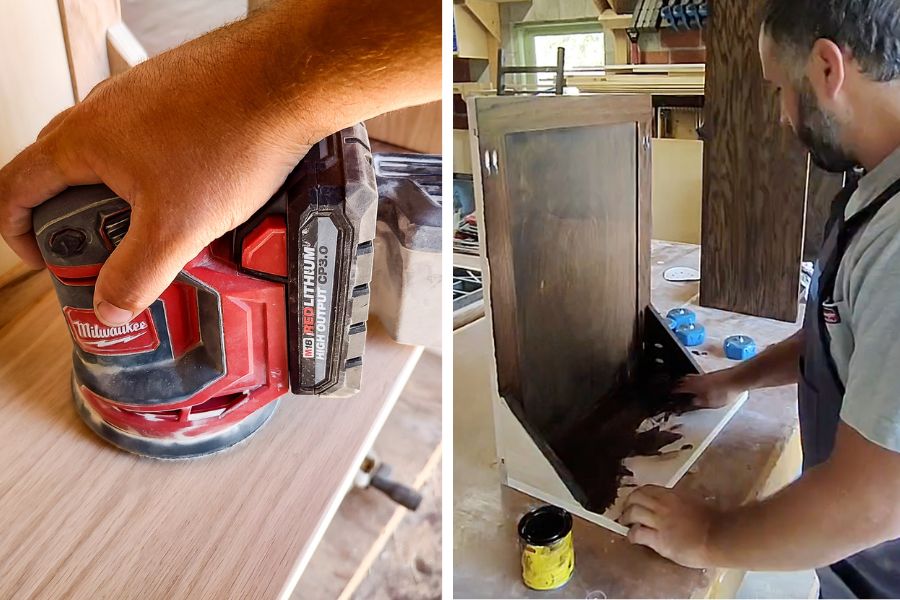
Sand and stain
Using the 80 grit on your random orbital sander start sanding and shaping all of your parts. Be sure to let the sander do the work and don’t press too hard to avoid scratches on the wood. Once shaped, follow up with 150 grit for a smoother and more even stain. Wipe away all sanding dust and apply the wood stain of your choice. We used Minwax Dark Walnut stain. Wait at least 8 hours before applying a finish.
-
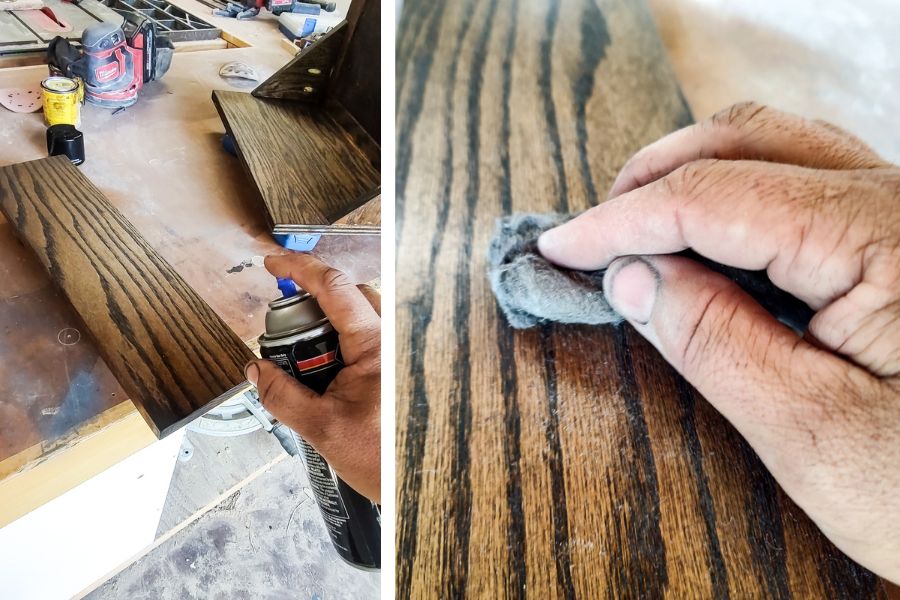
Apply your finish
Spray the first coat of lacquer onto your parts. Then follow up at least 3 times to ensure a good layer of protection that also helps with cleaning the piece later. After an hour and is dry to the touch, lightly rub #0000 wire wool (steel wool) over everything moving in the same direction as the wood grain. This will get rid of any imperfections and give a glass smooth finish without removing those layers of finish.
-
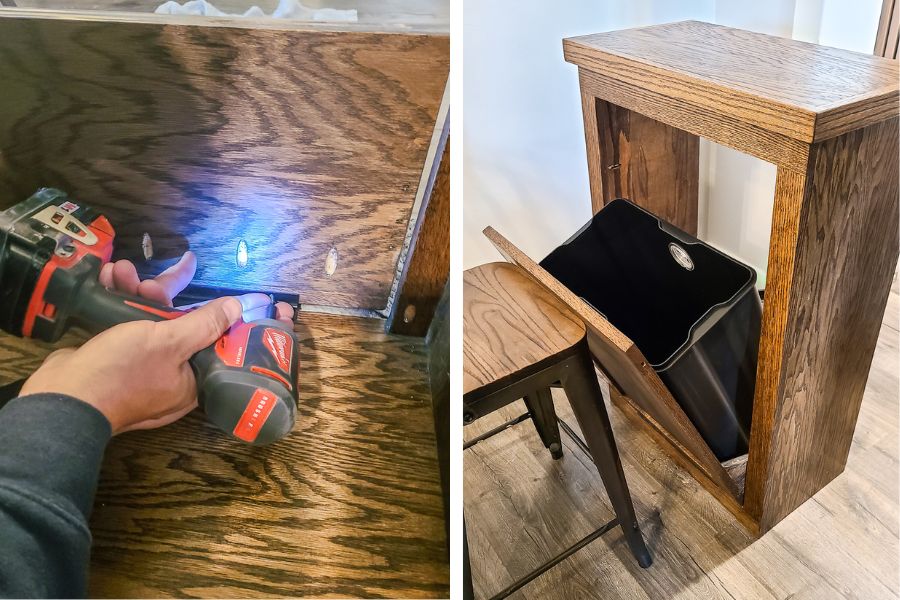
Add hinges and tilt stops
Get your door & tilt platform and put it into place inside the cabinet. Next, attach the piano hinge to the bottom edge of the cabinet and door. Also, grab the trash can that you will be using and put it into place. Tilt open the door to your desired angle to make sure you have plenty of room to remove the trash can liners once full. The was roughly 30 degrees for us, which is shown in the measurements in the woodworking plans included. Put something in front of the door to rest it on at the right angle, we used a barstool. Once at the proper angle, attach the tilt stops to the tilt support triangles as shown using your finish nailer, wood glue, and 1 ¾” finish nails. Make sure everything works as desired.
-
Add the back panel
Now that everything works properly you can now add the back panel to the cabinet with 1 ¼” softwood/ plywood Kreg screws.

-
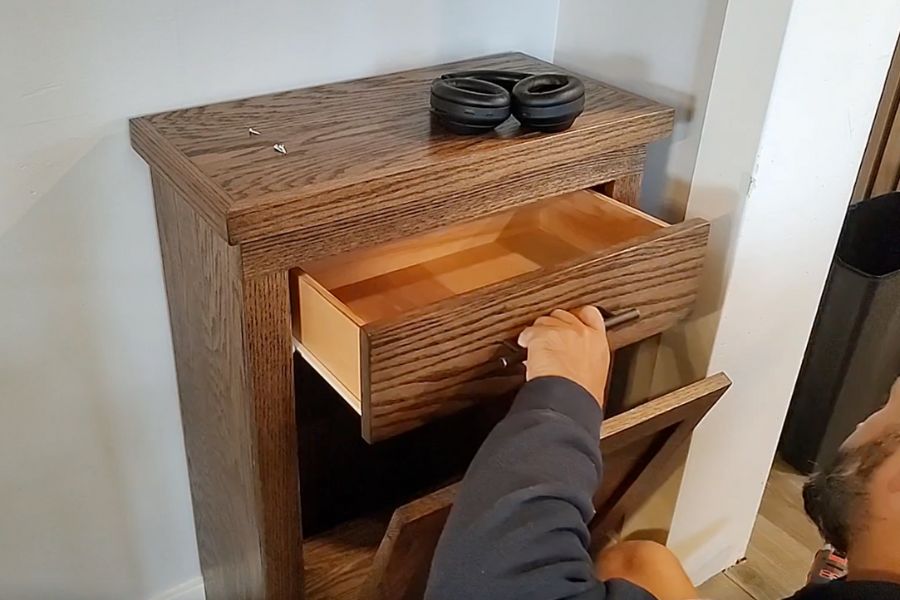
Add drawer slides, drawer face & hardware
Clamp together the drawer and the drawer face and add the drawer handle to attach the drawer face to the drawer. Using a hardware template or jig for this can be helpful. Next, follow the instructions for the drawer slides that you chose. Depending on what you are able to find, you may need to cut the drawer slides down to get them to fit inside the cabinet. We did this with a Dremel. Then, simply slide the drawer into place. Lastly, attach a matching handle to the top of the door to tilt the trash bin out.
See more on their website – https://www.makingmanzanita.com/diy-trash-can/