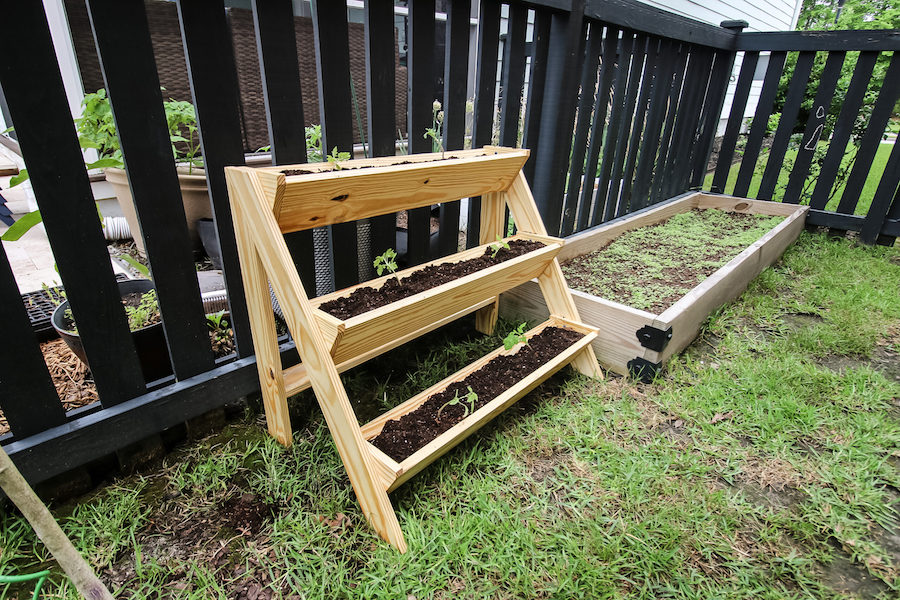

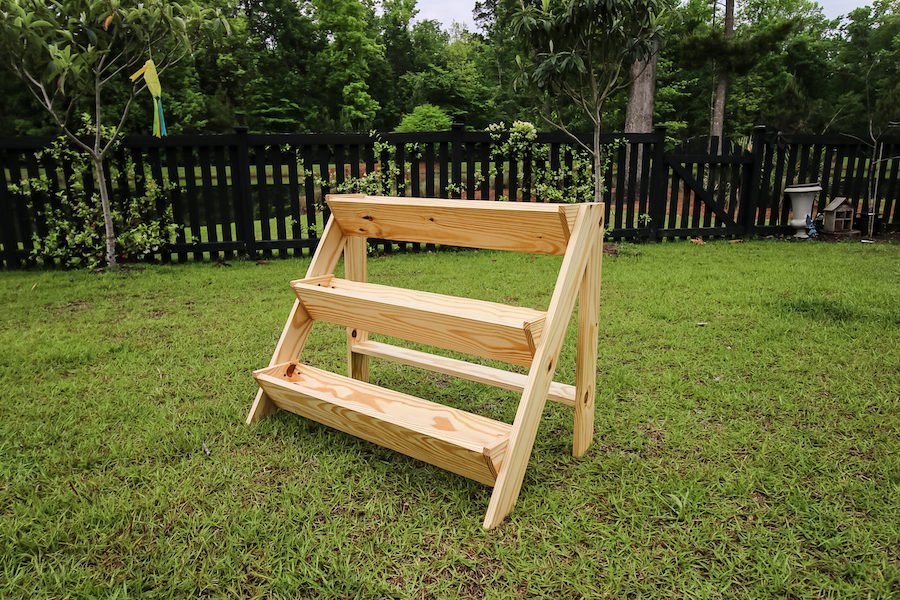
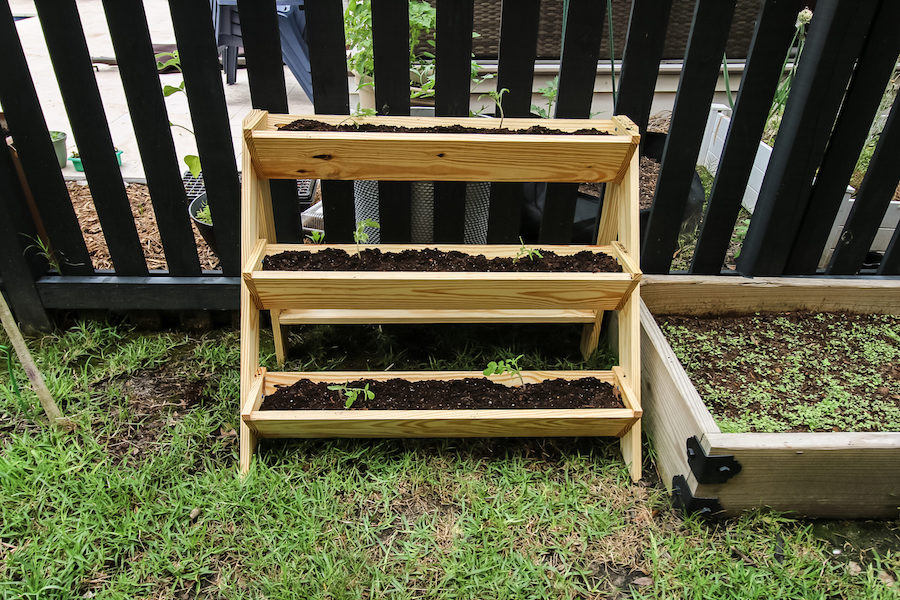


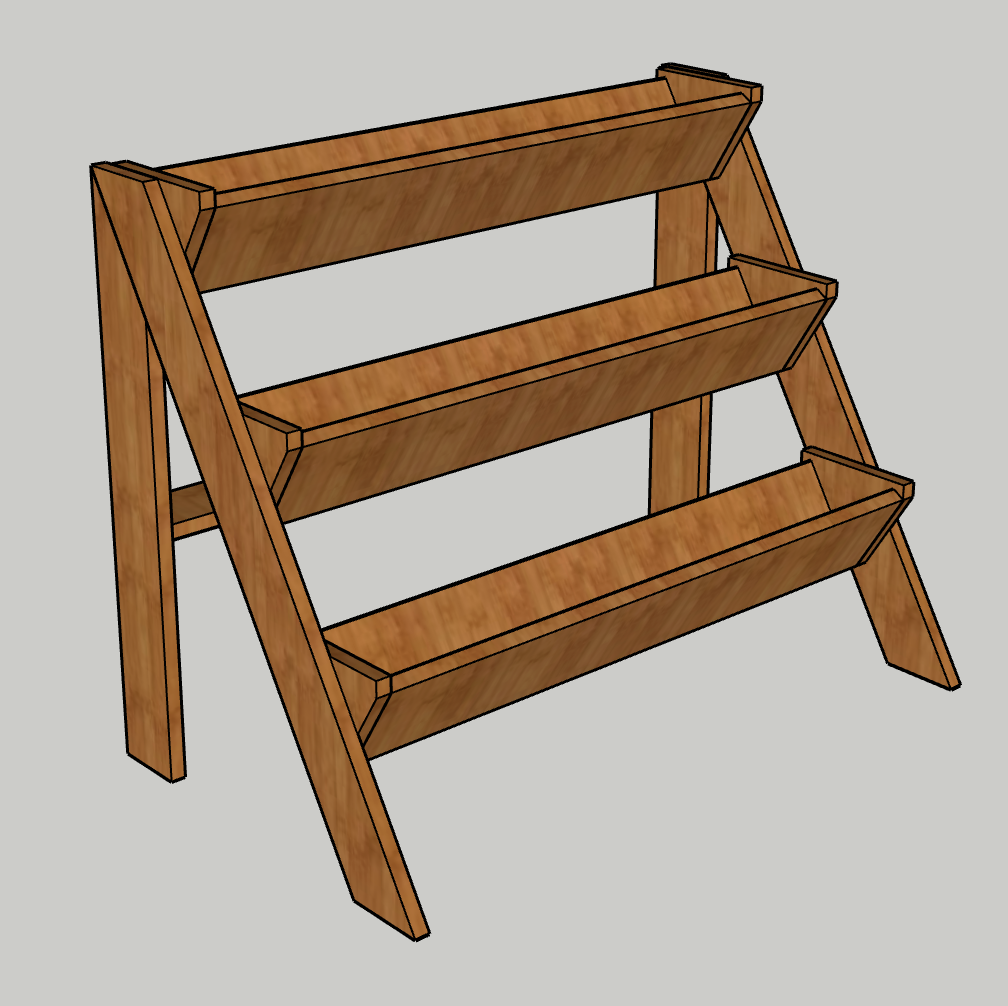
This tiered planter is perfect for growing herbs or veggies! It has a good amount of growing space and is vertical, so it’s a great option for tight spaces! Check out how we built this simple and beautiful three tiered planter and make one for yourself!
Tools
Kreg Tools


Other Tools
-
Miter Saw

Materials
Wood Products
- 3 Boards , 1x6x8
- 2 Boards , 1x4x8
Hardware & Supplies
- 40 1 1/4" Kreg outdoor screws
- 1 Wood glue
- 1 Outdoor sealant
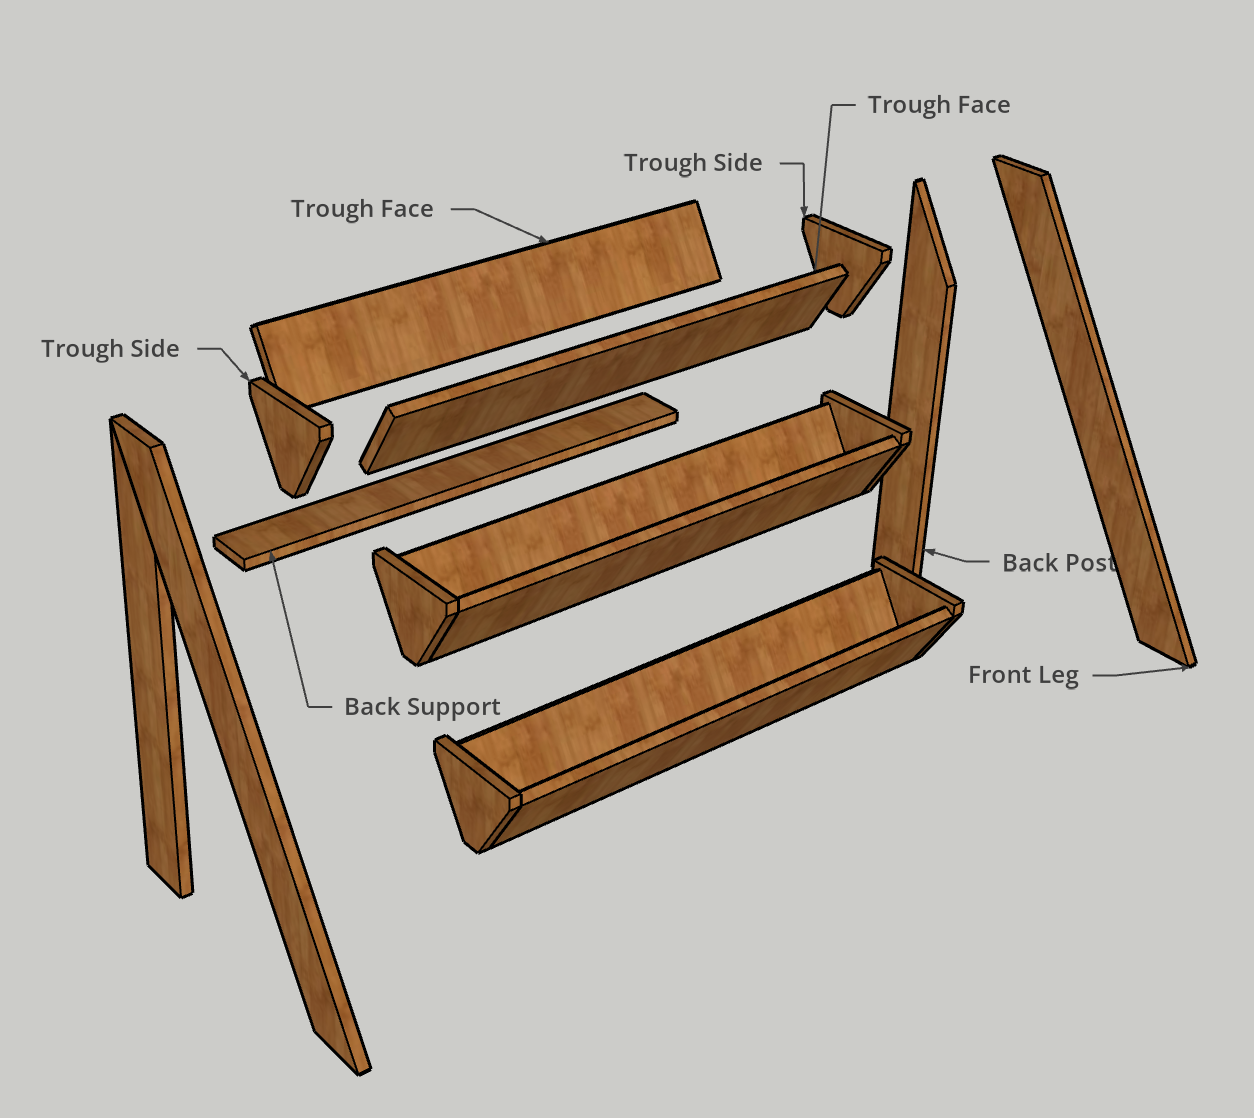
Cut List & Parts
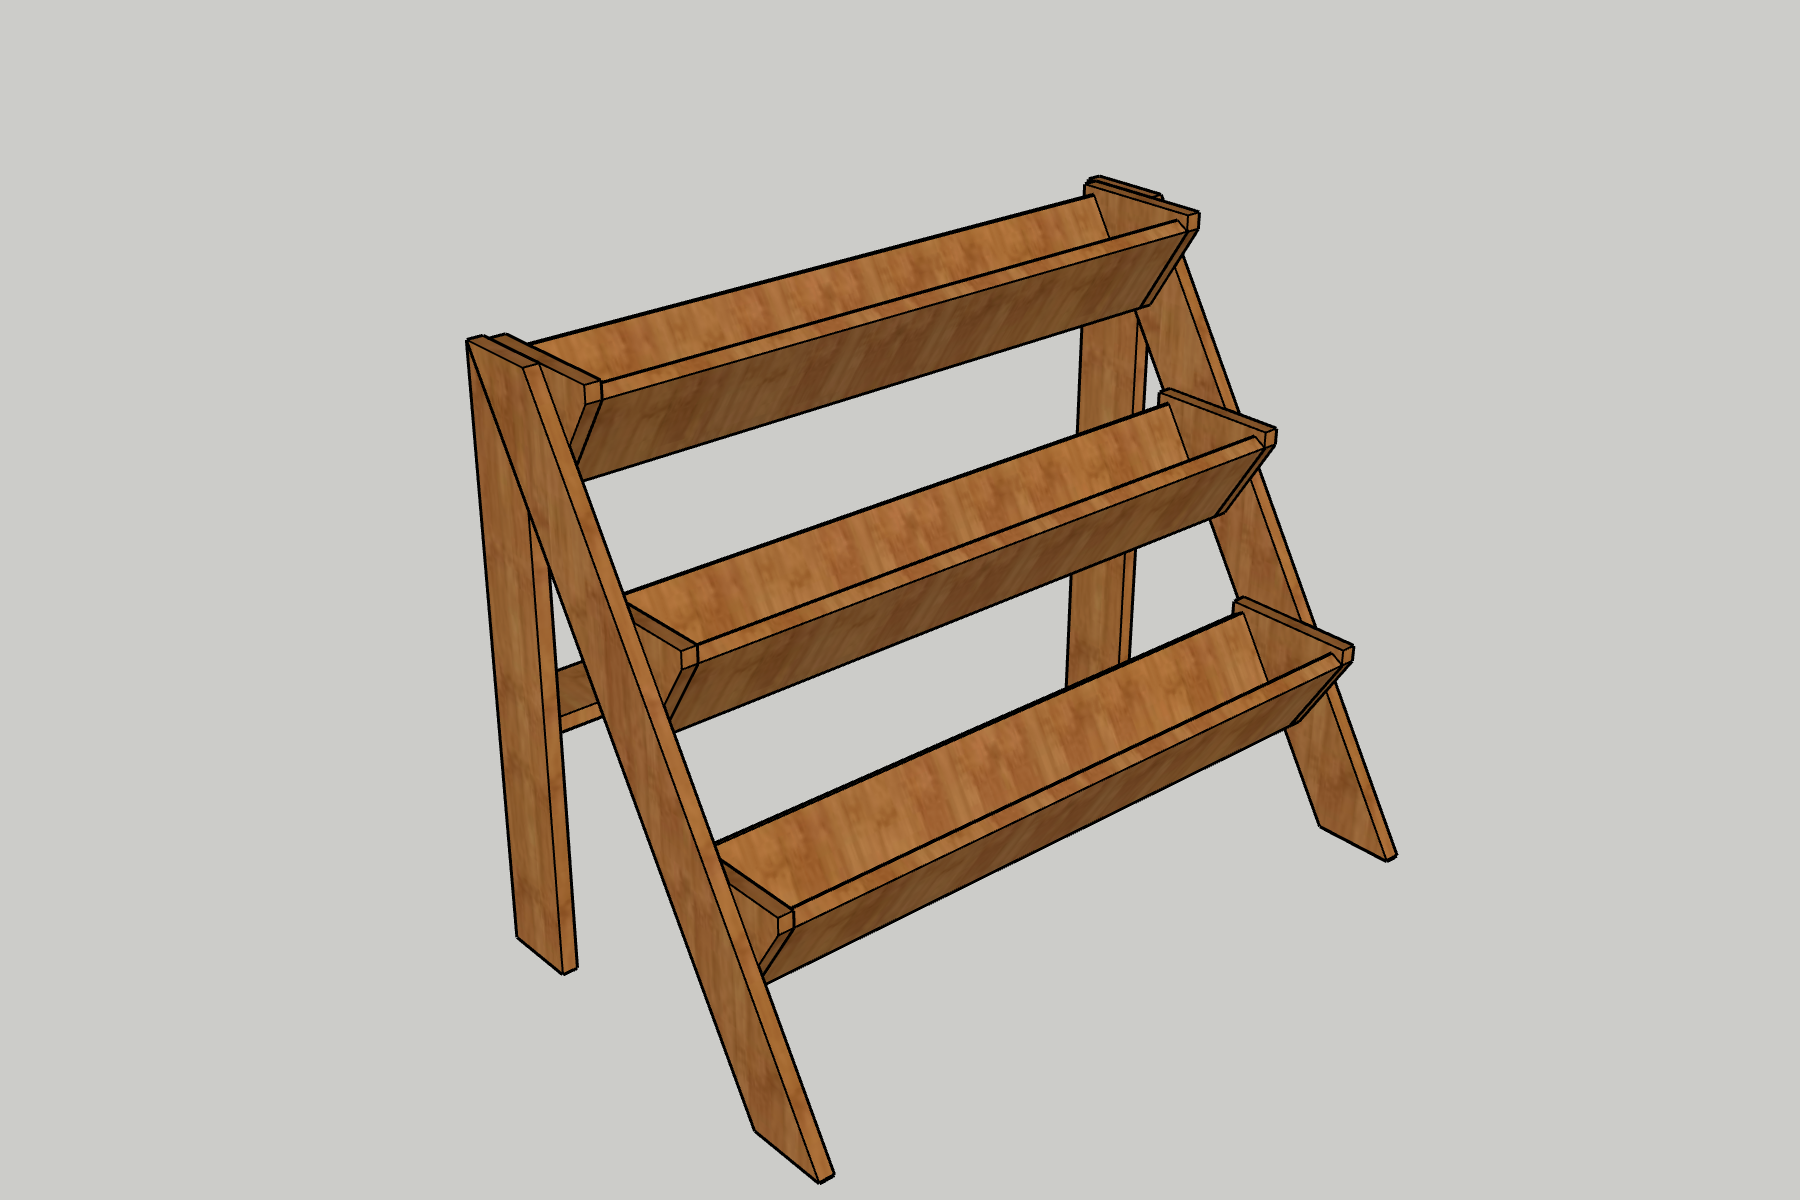
- 2 Back Posts , 28 7/8" x 3 1/2" with 58.6 degree miter on one end
- 2 Front Legs , 34" x 3 1/2" with 31.6 degree parallel miter on each end
- 1 Back Support , 34 1/2" x 3 1/2"
- 6 Trough Faces , 33" x 5 1/2"
- 6 Trough Sides , 6 3/4" x 5 1/2"
Directions
-
Build Sides
- Drill two pocket holes on the angled edge of each of the Back Posts.
- Make sure you drill the holes on one side of one Back Post and the opposite side of the other so the holes face in on both.
- Using wood glue and pocket hole screws, attach the Back Posts to the angled Front Legs so that their angles align at the top to form a 90 degree angle.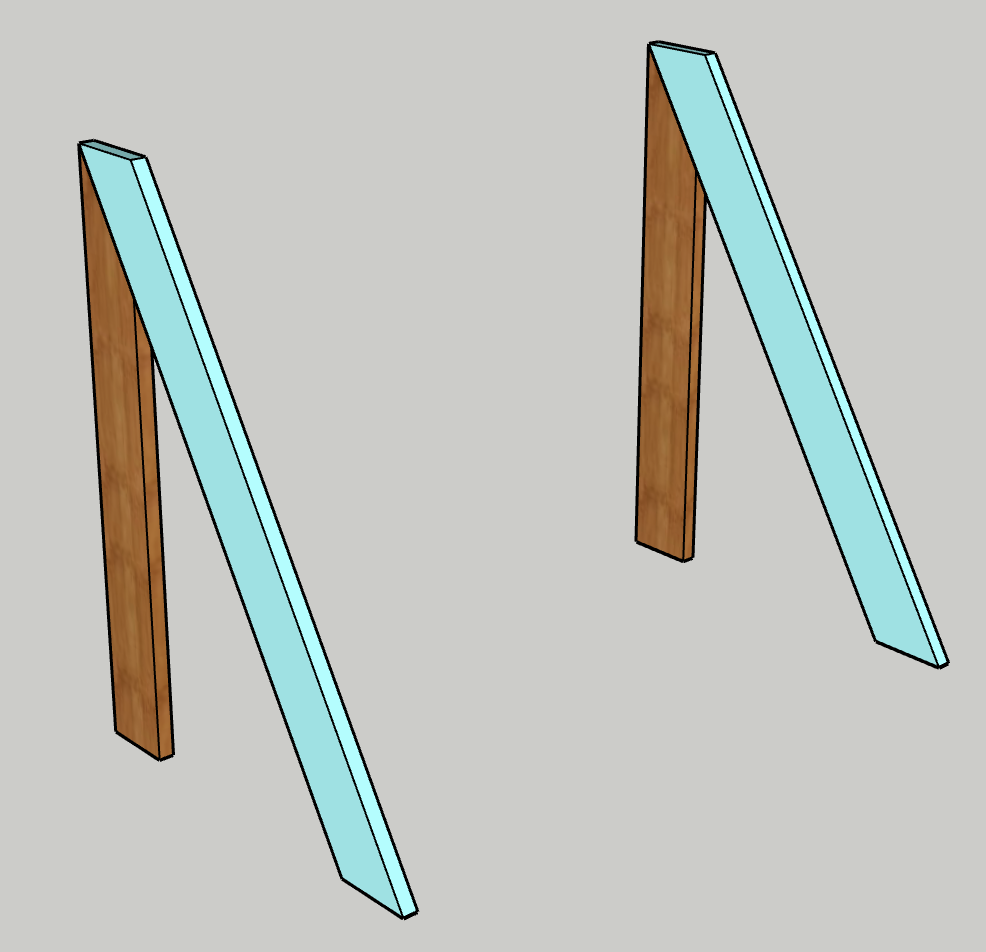
-
Cut Trough Sides
- Next, take the Trough Side pieces and cut a 31.6 degree angle on each side.
- Measure a mark 13/16" down from both ends of one of the 6 3/4" long sides.
- Make two opposing 31.6 degree cuts inward from those points.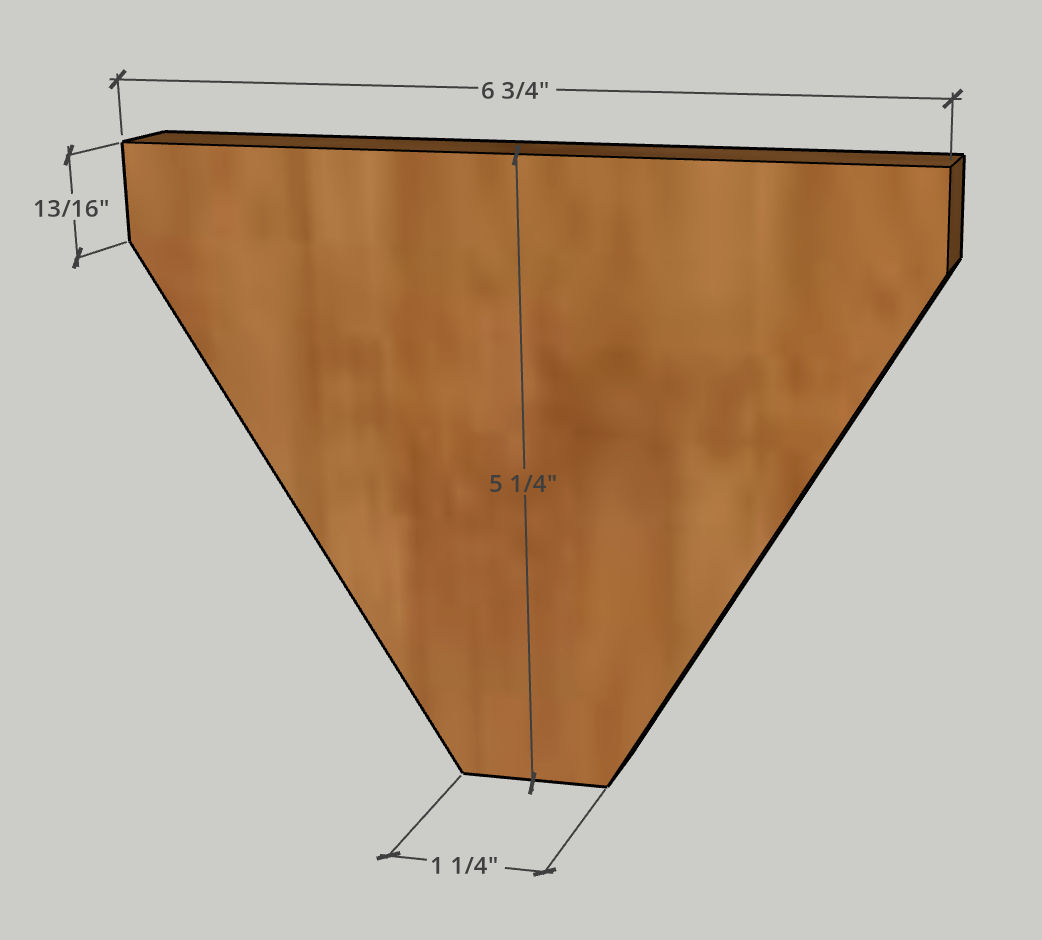
-
Build Troughs
- Drill two pocket holes in each end of each of the Trough Faces.
- Using wood glue and pocket hole screws, attach two of the Trough Faces into a Trough Side, keeping in line with their angled sides.
- Repeat on the other end.
- Note- it’s ok that the two Trough Faces don’t connect in the middle. That leaves spacing for drainage.
- Repeat to build two more troughs.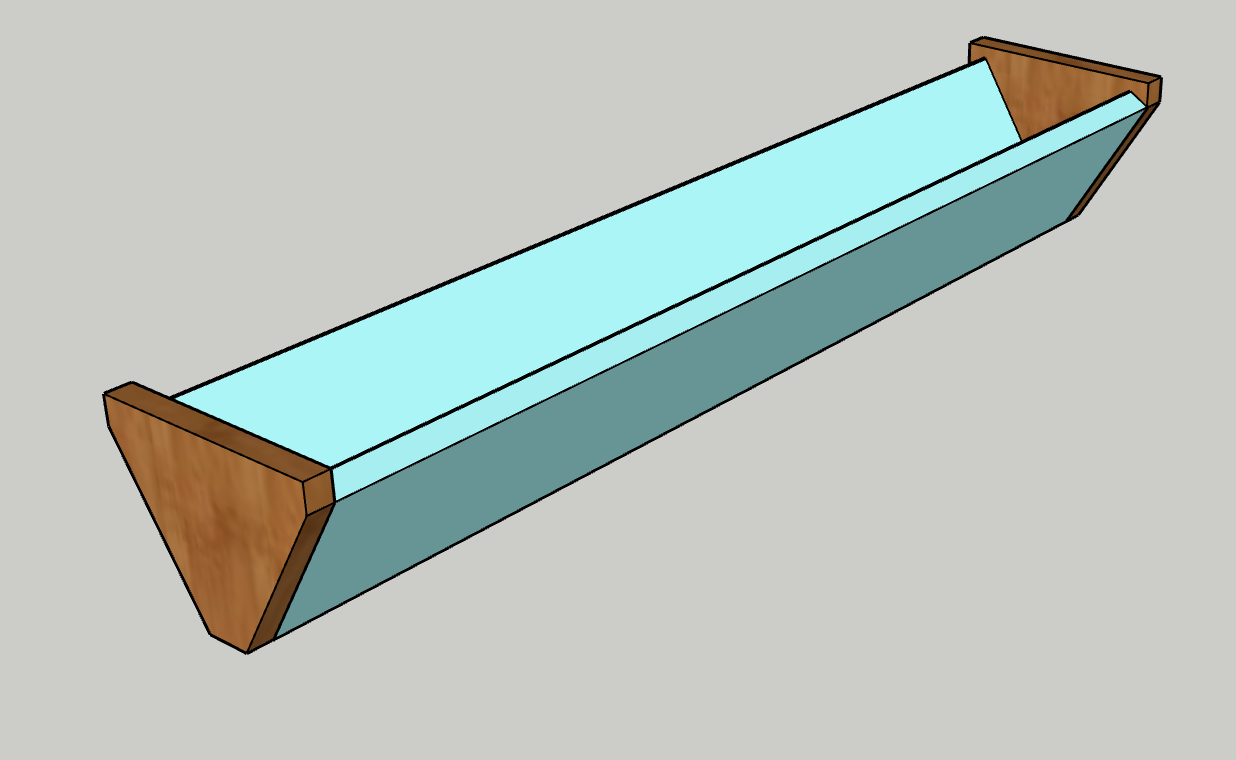
-
Attach First Trough
- Align your first trough at the top of one of the side pieces made in Step One. Align the angle and top of the Trough Side with the angled Front Leg.
- Use wood glue and pocket hole screws drilled straight through the inside of the Trough Side into the Front Leg.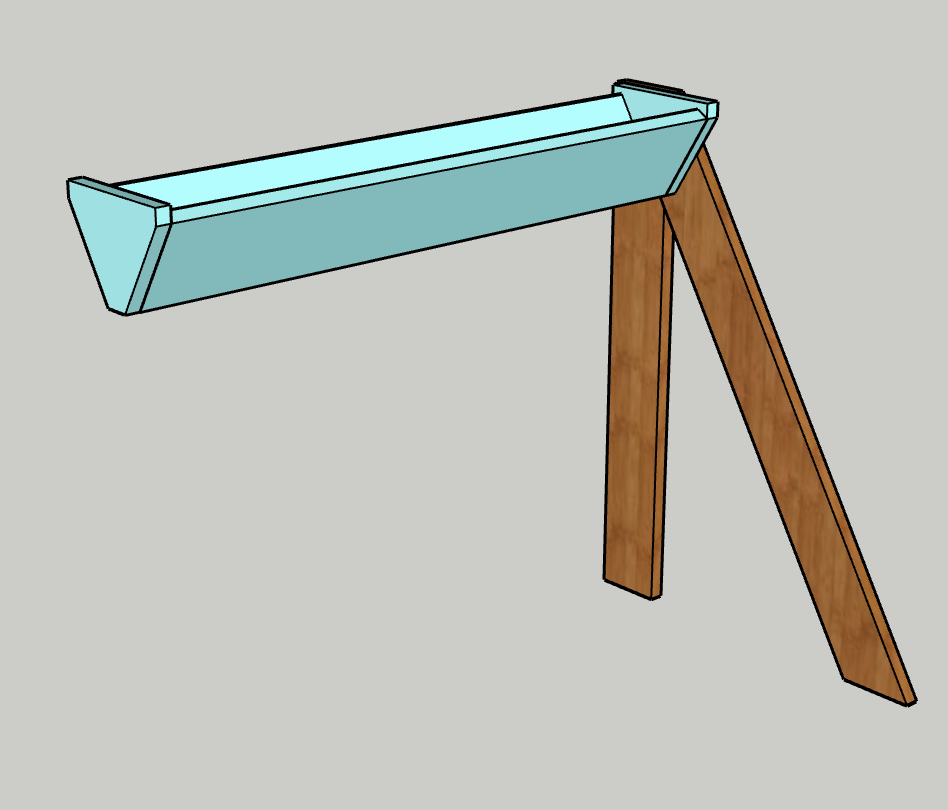
-
Attach Other Troughs
- Align the second trough the same way and about 6" down from the first one and attach with wood glue and screws.
- Repeat for the third trough.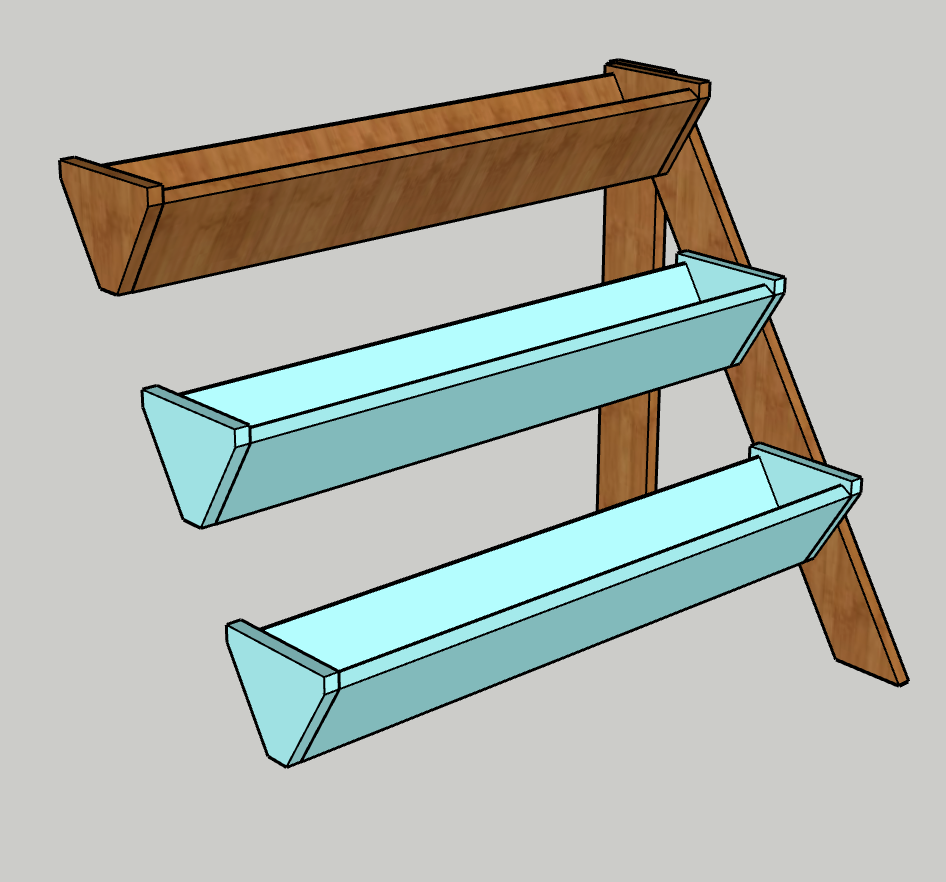
-
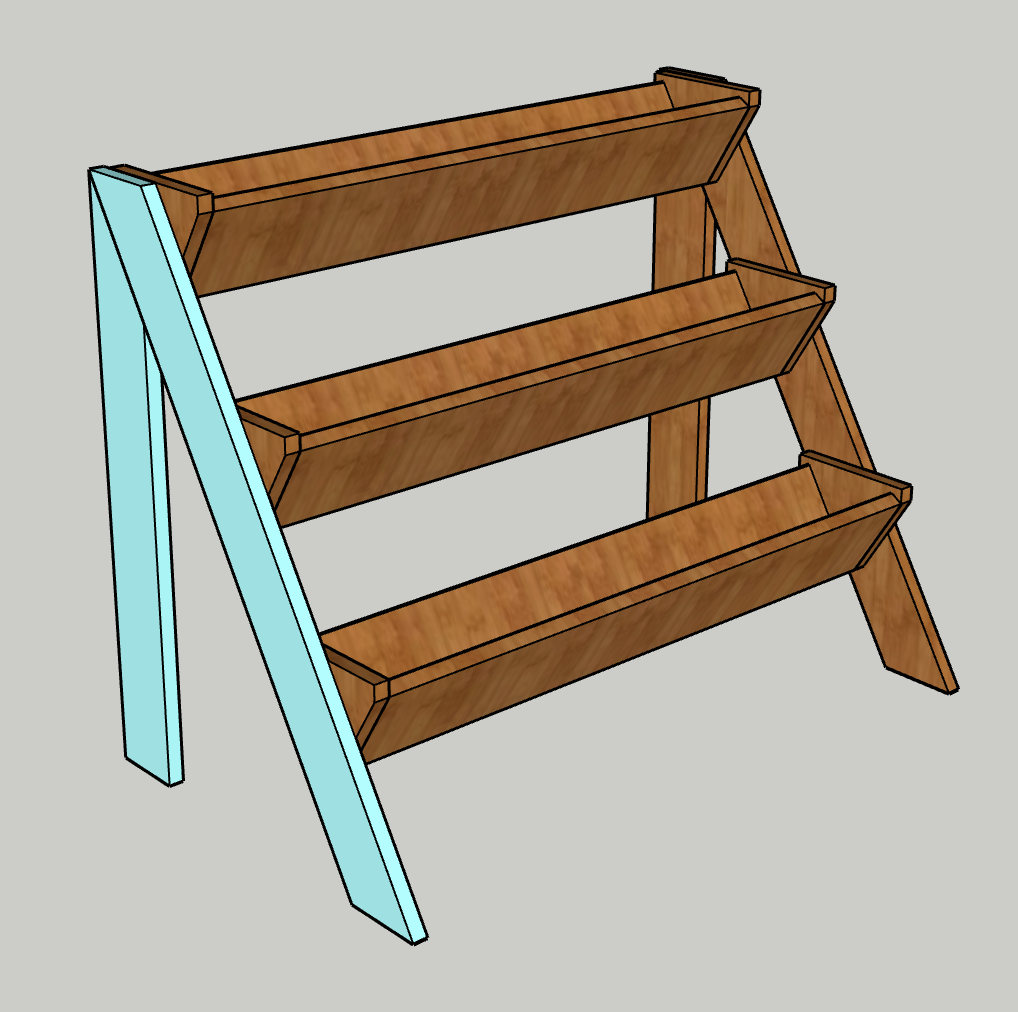
Add Second Side
- Flip over the unit you just assembled onto the second side and secure it to the second side in the same manner with the same spacing.
-
Attach Back Support
- Drill two pocket holes in each end of the Back Support.
- Using wood glue and pocket hole screws, attach the Back Support between the two Back Posts 6" up from the bottom.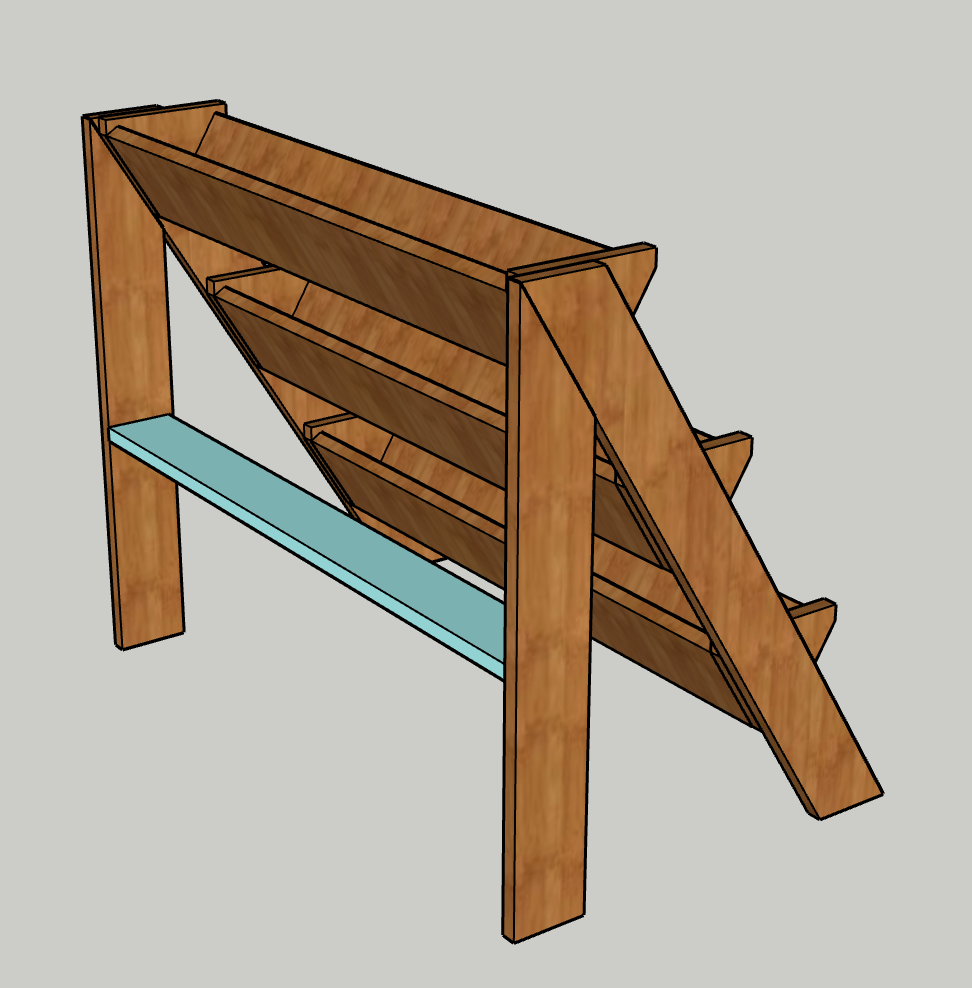
-
Stain or Seal
- Add a coat of stain or outdoor sealant to your planter to give it the color you want and help protect it from the outdoors.
-
Fill
- Optional- Add a strip of weed barrier liner inside each trough to keep the dirt from making direct contact with the wood.
- Fill the troughs with soil.
- Add herbs or veggie plants as desired!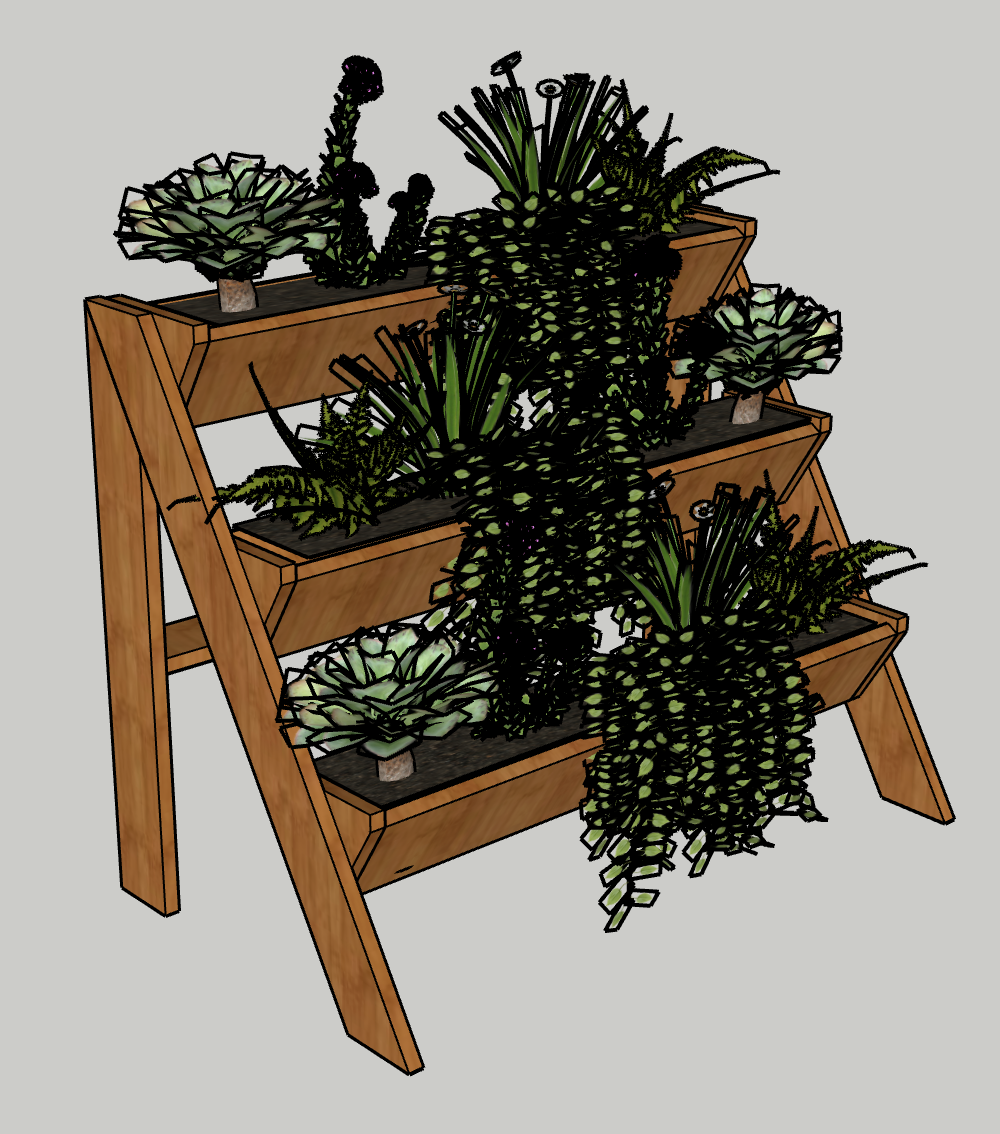
-
Enjoy!
- Enjoy your handiwork and tag @CharlestonCrafted on Instagram with a picture!