

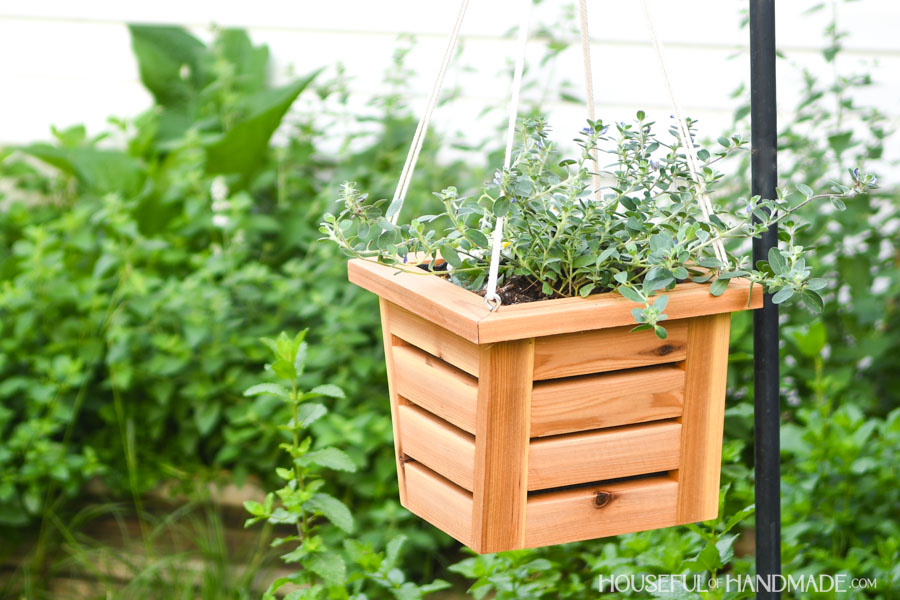


Upgrade your hanging planters with beautiful wooden planters. These tapered bottom planters look stunning and are made from just two 1x2 boards!
Tools
Kreg Tools


Other Tools
-
Miter saw

-
Stapler
Materials
Wood Products
- 2 Board , 1x2 (3/4" x 1 1/2") , 8' long
Hardware & Supplies
- 50 1 1/4" Blue-kote pocket hole screws
- 1 Outdoor wood glue
- 4 1 1/2" screw eyes
- 1 Landscaping fabric (~15" x 20")
- 1 16' long cord
- 1 S-hook
- 1 Super glue
Directions
-
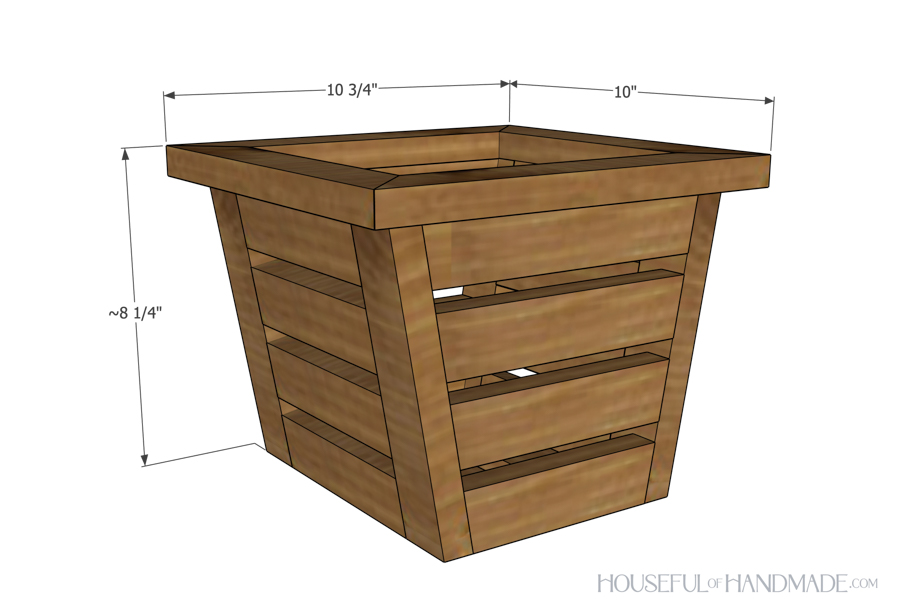
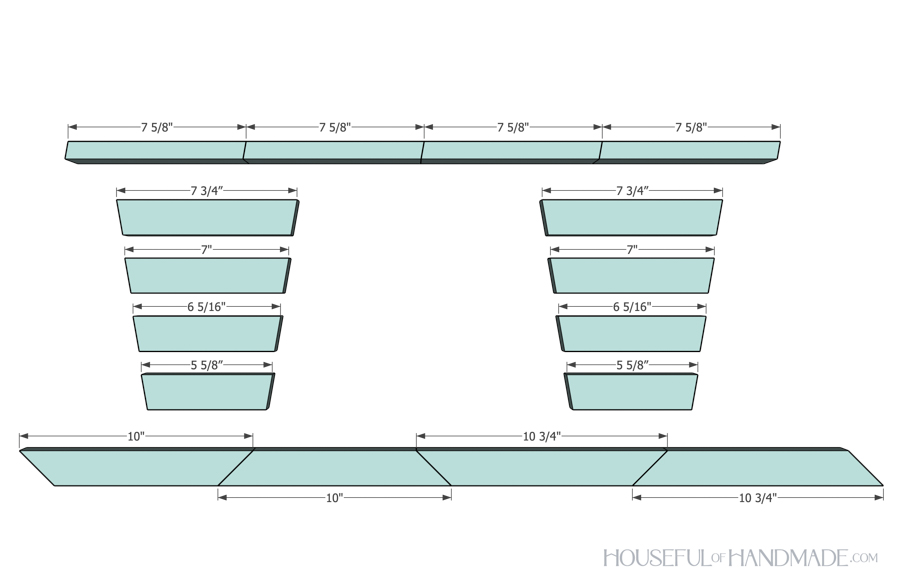
Cut boards with angles
For the Corner pieces: With the board up against the fence on the miter saw, cut both short ends at a 10 degree angle so they are parallel.
For the Front/back top, 2nd, 3rd and bottom pieces: Cut both ends at a 10 degree angle so they are angled toward each other at the bottom.
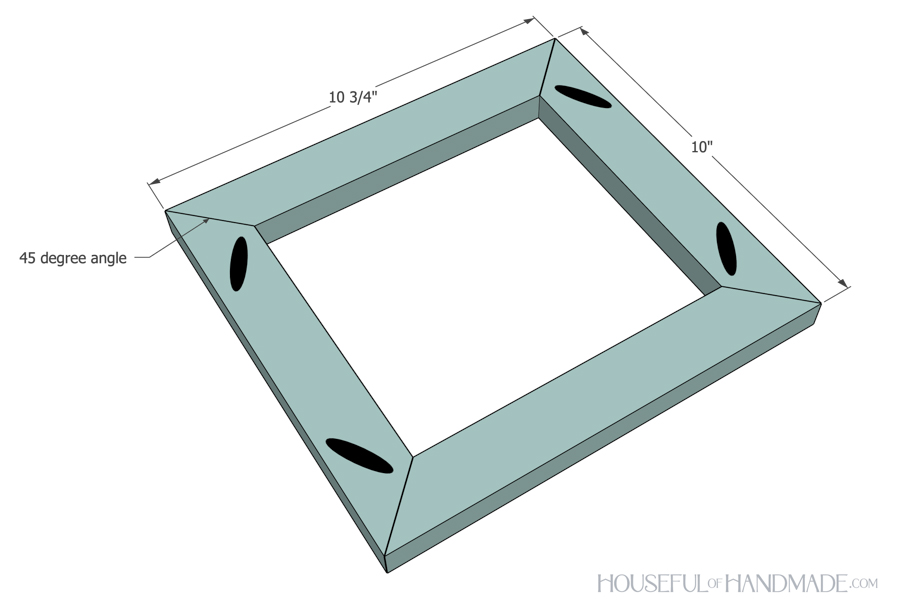
For the Top frame pieces: Cut both ends at a 45 degree angle so they are angled towards each other.
-
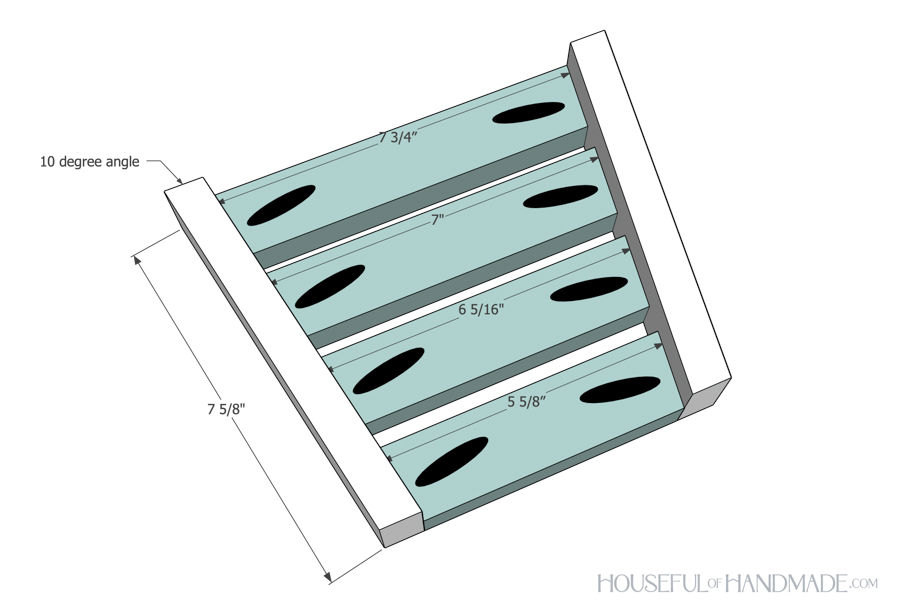
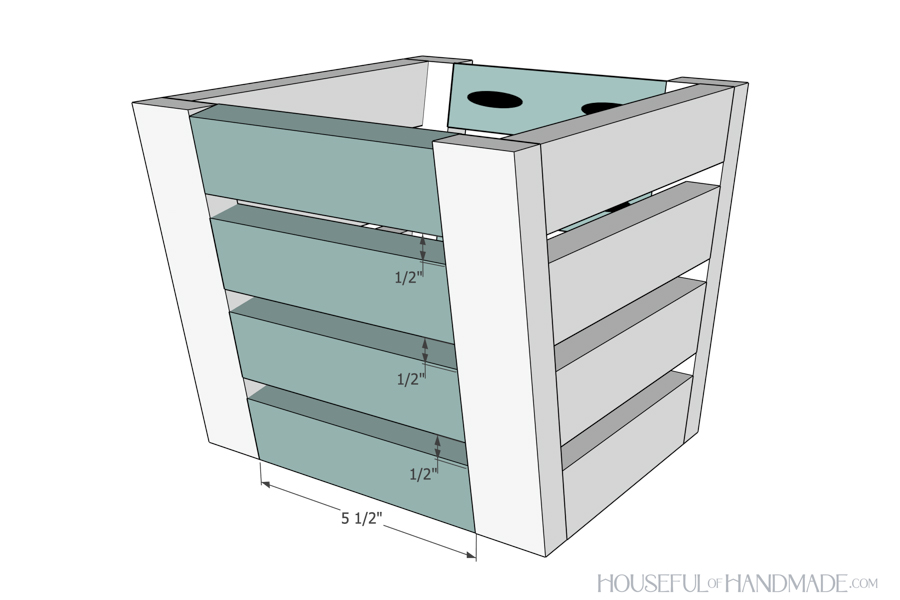
Assemble sides
Set your pocket hole jig for 3/4" thick material. Drill 1 pocket hole in each end of the front/back top, 2nd, 3rd and bottom boards.
Attach the front/back top board between two corner pieces so it is flush with the front and top. Then attach the front/back bottom so it is flush with the front and bottom. Secure with 1 1/4" pocket hole screws and wood glue.
Next, attach the front/back 2nd and 3rd pieces spaced evenly between the top and bottom. Again secure with glue and 1 1/4 pocket hole screws.
Repeat so you have two assembled pieces for the front and back of the planter.
-
Attach sides
Drill 1 pocket hole set for 3/4" thick material in both ends of all the side pieces.
Attach them to corner pieces so they are flush with the front. Space the sides evenly along the corner pieces (you should have ~1/2" between them) and secure with glue and 1 1/4" pocket hole screws.
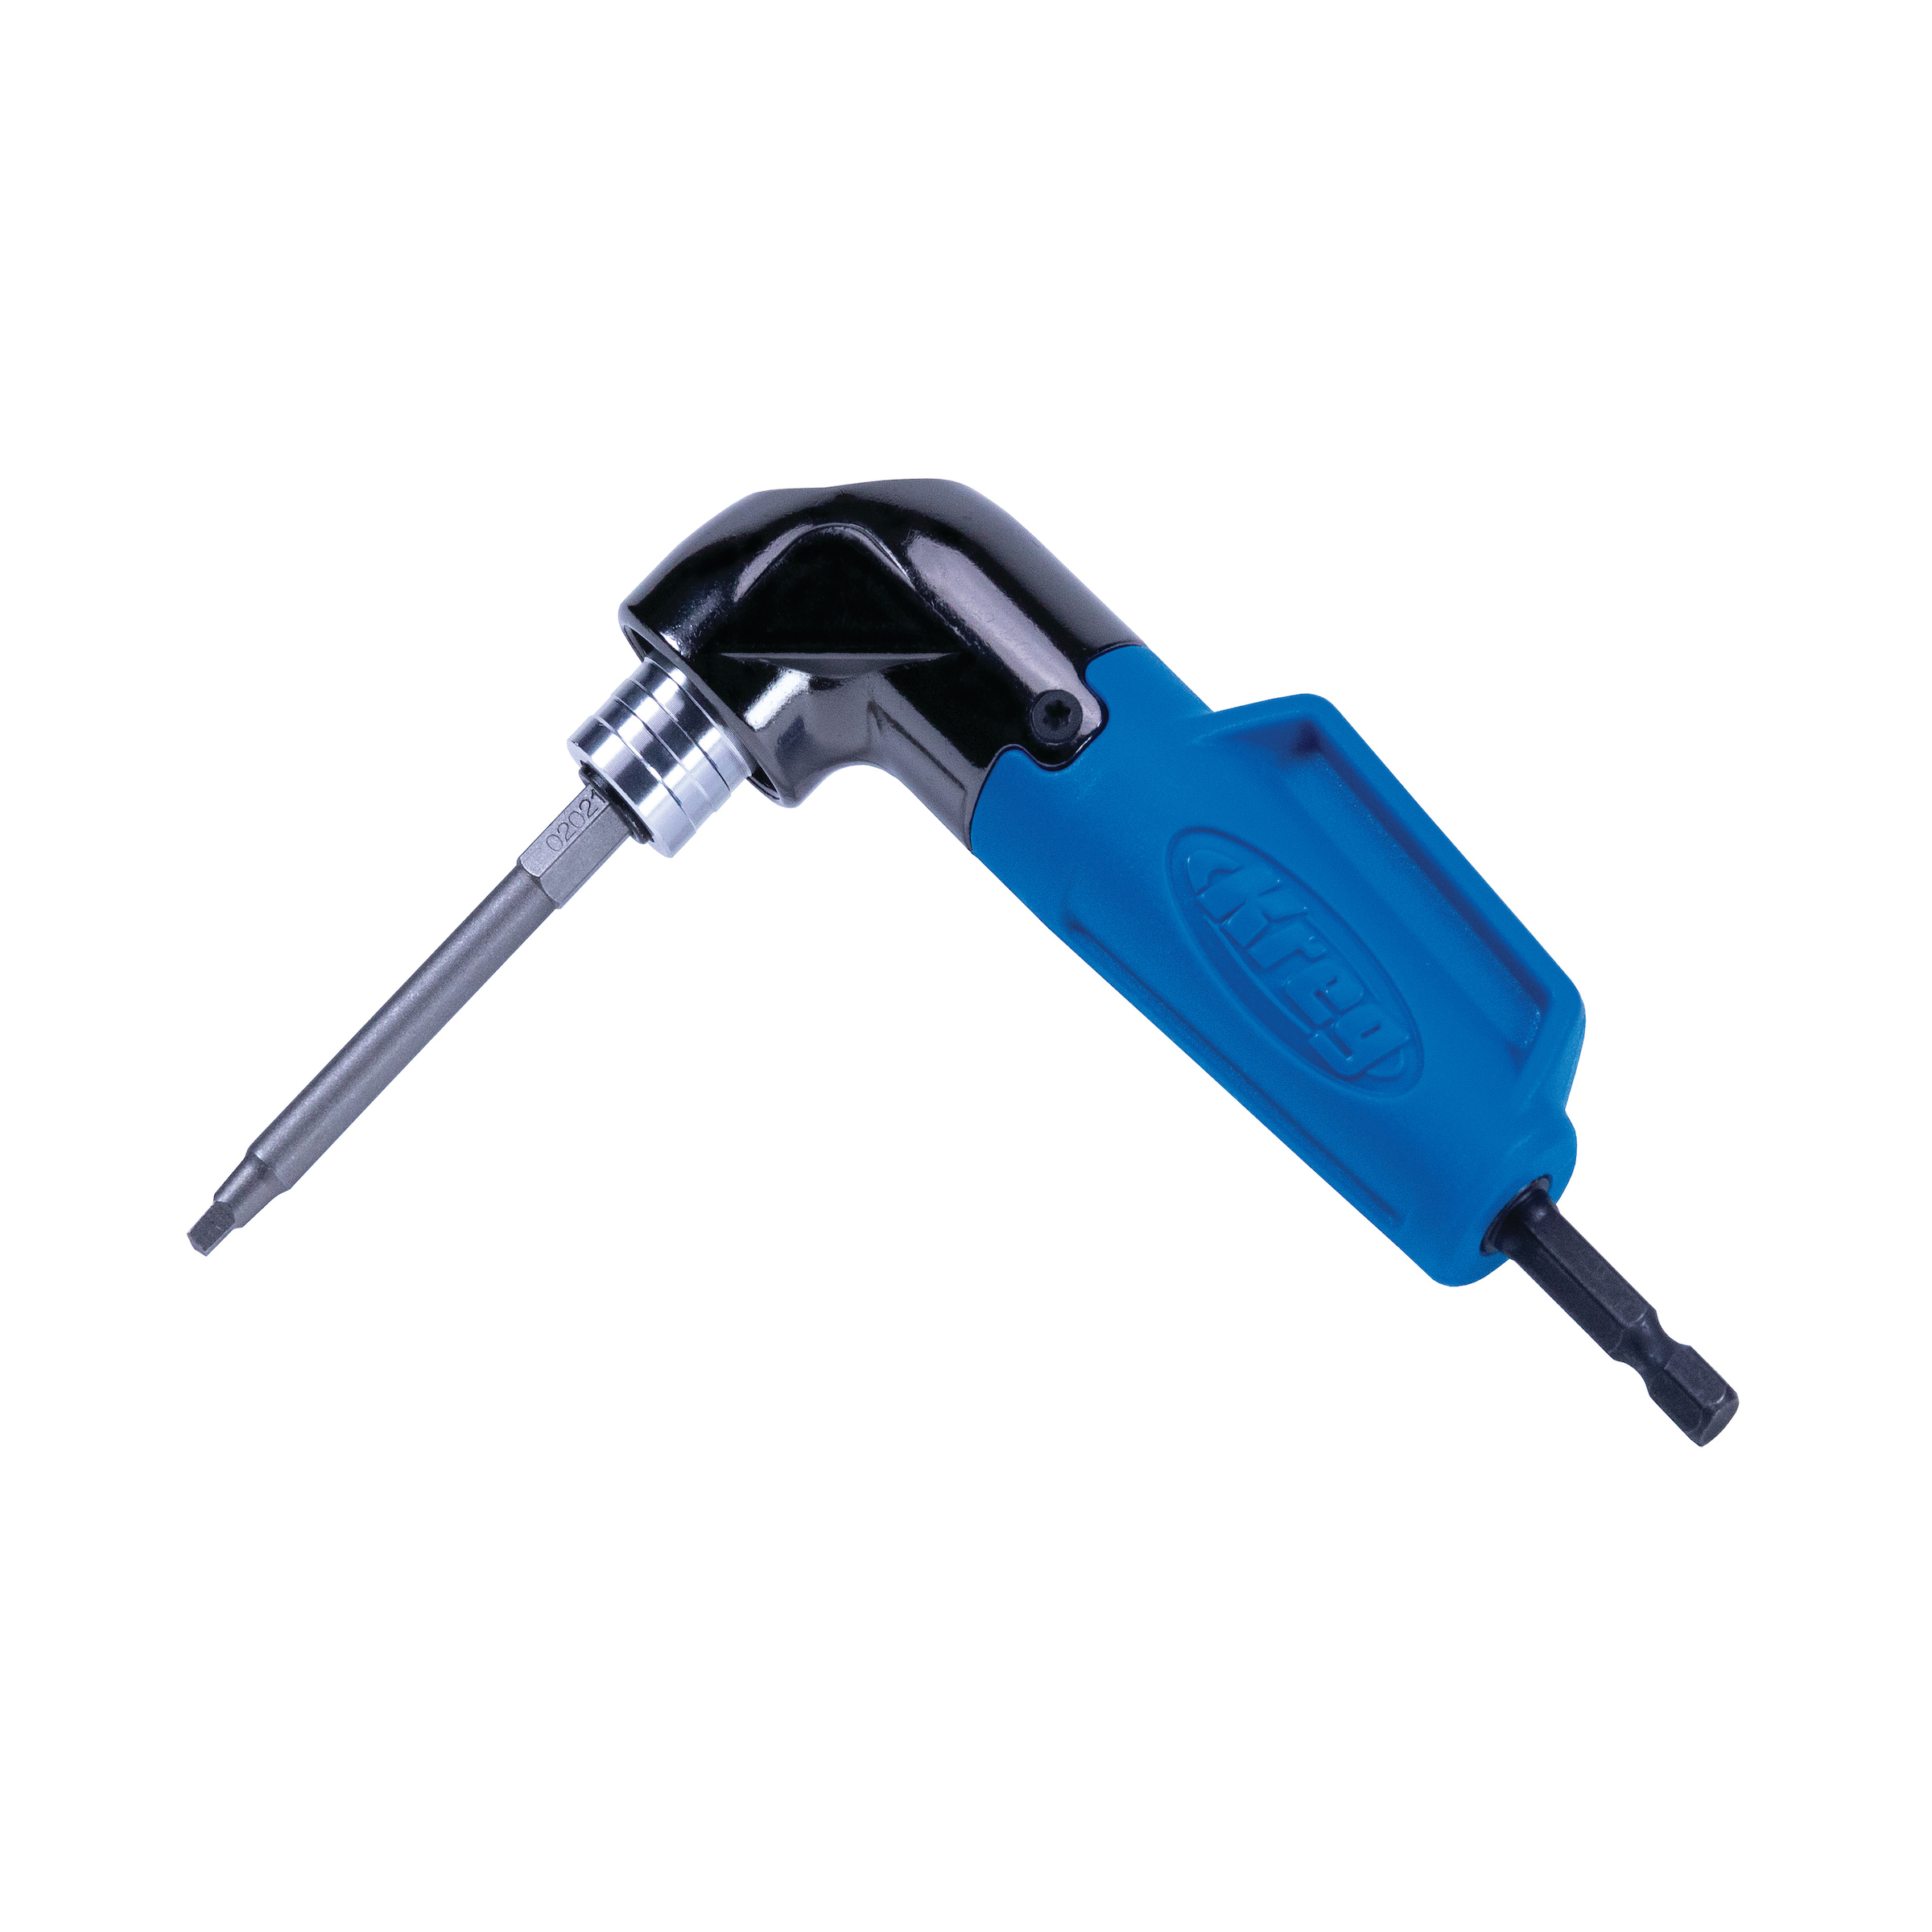
Use 90° Pocket Hole Driver for tight spaces
When attaching the sides to the back and closing in the planter, the regular pocket hole bit will not work. Use the 90° driver to drive the pocket holes in the small space.
-
Build top frame
Add 1 pocket hole set for 3/4" thick material in both ends of the Top frame side pieces.
Attach the sides between the Top frame front and back to create a rectangle with mitered corners. Secure with wood glue and 1 1/4" pocket hole screws.
Pocket holes in mitered angles
Do not angle the pocket hole so it is 90° to the 45° miter cut or the edge of your pocket hole will cut into the outside edge of your board. Instead angle the jig so the entire pocket hole is inside the 1x2 board.
-
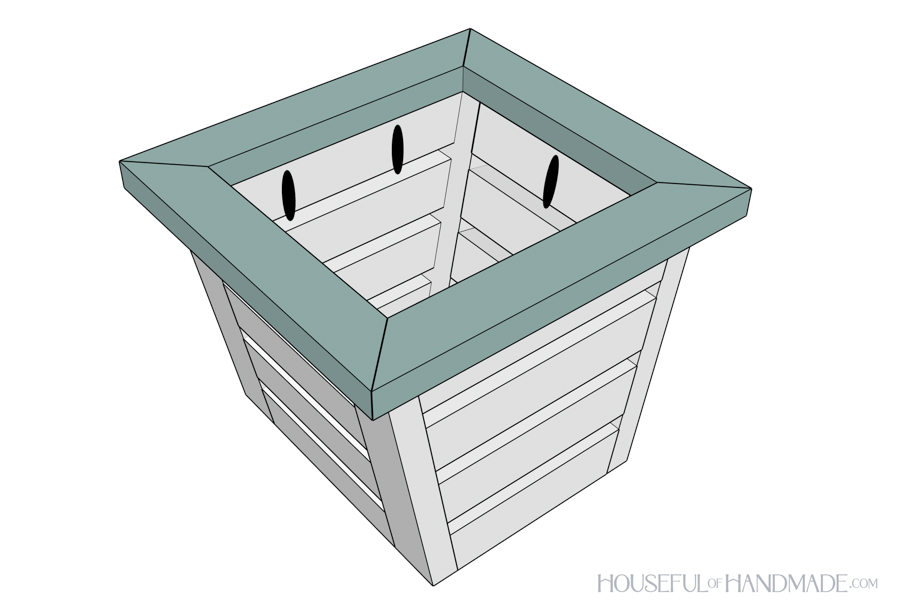
Attach top frame
Add 2 pocket holes to the top of the assembled front and back and 1 to each assembled side.
Lay the frame top down on your workbench. Then center the assembled planter on top of it. Secure the frame to the planter with glue and 1 1/4" pocket holes screws.
-
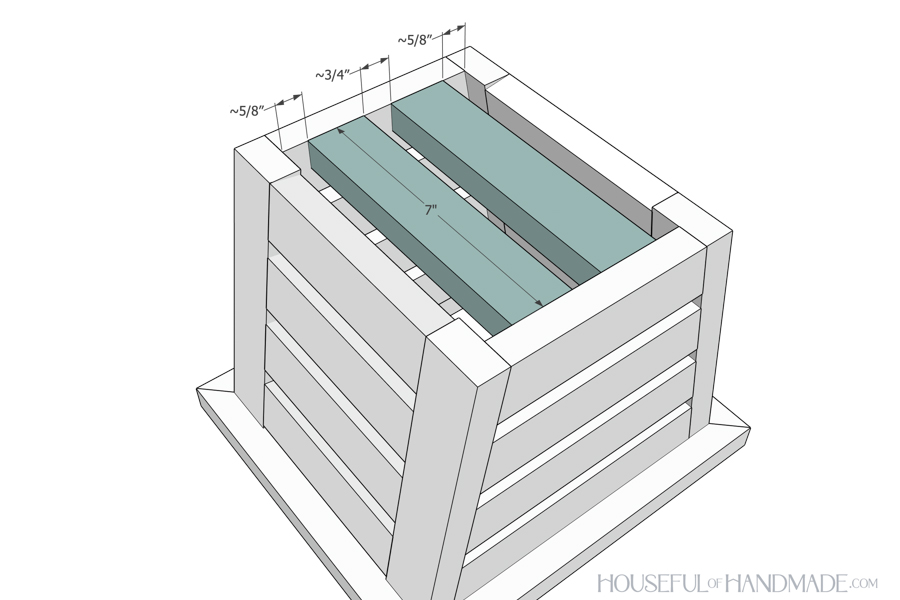
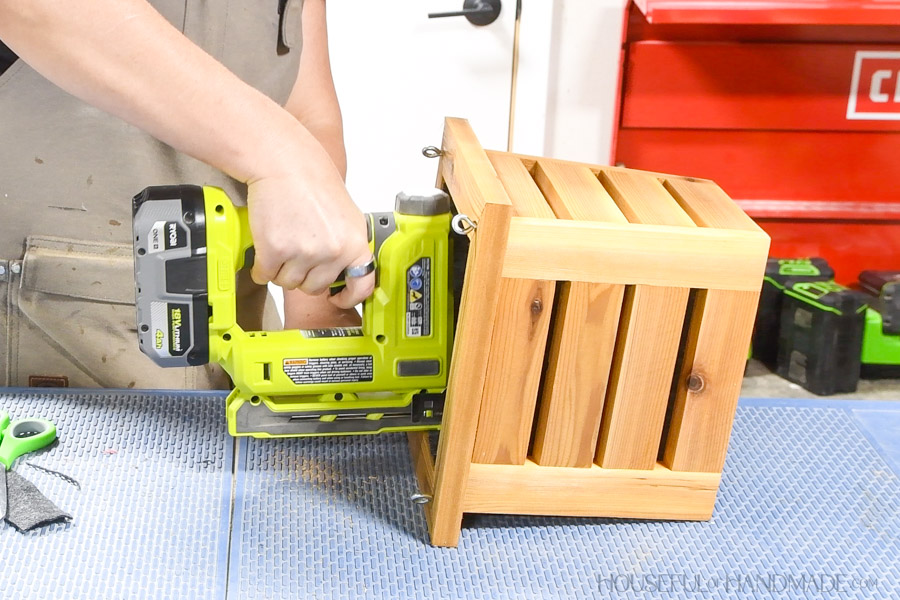
Add bottom slats
Drill 1 pocket hole in each end of the bottom pieces.
Attach them to the bottom of the planter so they are attached to the front and back bottom pieces and spaced evenly. Secure with glue and 1 1/4" pocket hole screws. You will need the 90° driver to secure the pocket hole screws in the tight space.
-
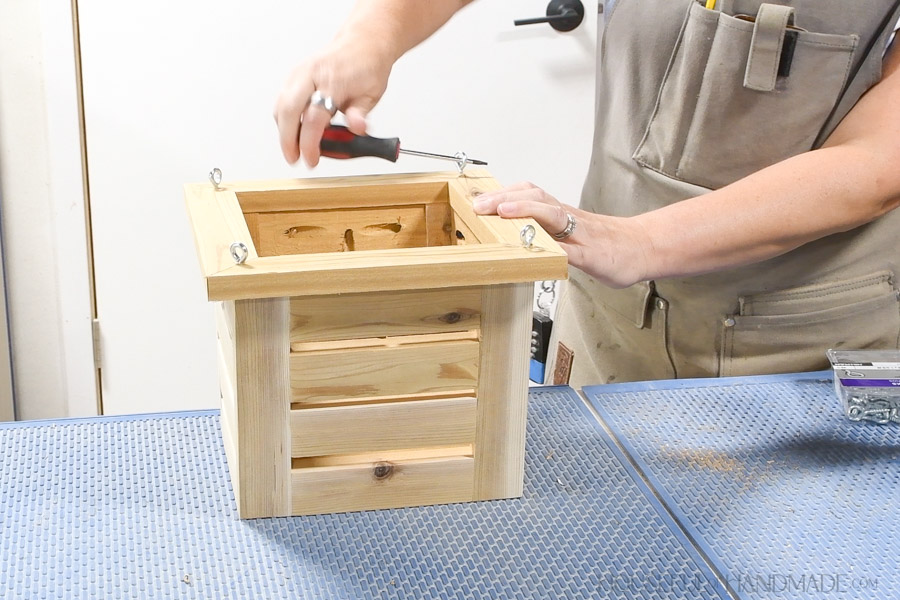
Add screw eye hooks and finish
Predrill holes then twist screw eyes into each corner of the top frame board so the eye hooks go into the corner pieces.
If you are planning to paint or seal your planter, I recommend doing it now before you add the landscape fabric and cord.
-
Add landscape fabric
To prevent soil from falling through the slats, line the inside of the planter with landscape fabric. I used 2 strips of fabric that overlapped in the bottom. Staple the fabric to the inside of the top frame to secure.
-
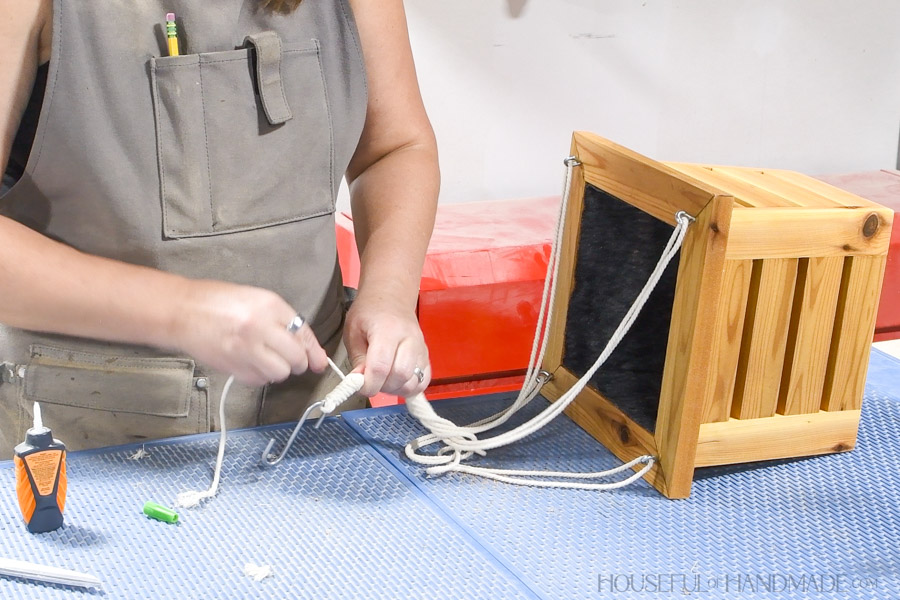
Add rope to hang planter
Cut 2 equal pieces of cording (I used two 80" long pieces). Tie the center of each piece to the bottom of an S-hook. Then feed them through the eye hooks in the planter and pull back to the S-hook.
Use a 10-12" piece of cord and wrap it tightly around the cord right under the S-hook to enclose all the ends. Tie it off and secure ends with super glue.
-
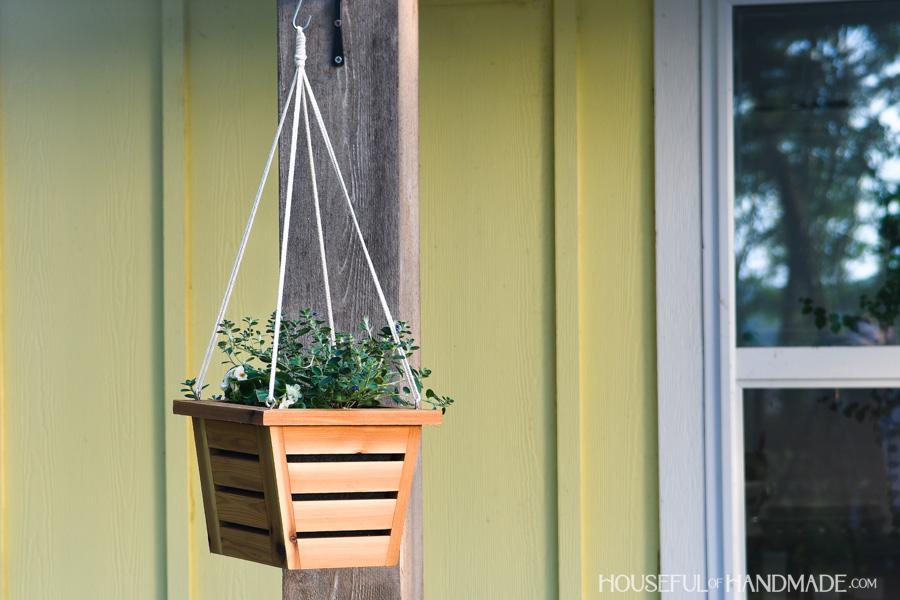
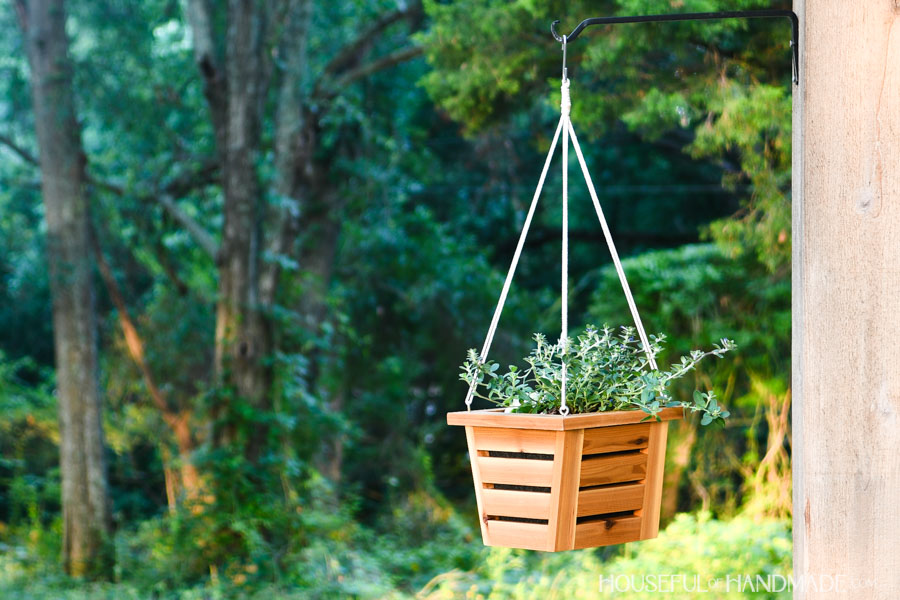
Plant and hang!
Plant your favorite plants or flowers in your new hanging planter. Now you can hang it up and enjoy your beautiful planter that will last way longer than the plastic ones from the nursery.
Then visit me at Houseful of Handmade to find even more beautiful outdoor things to build.