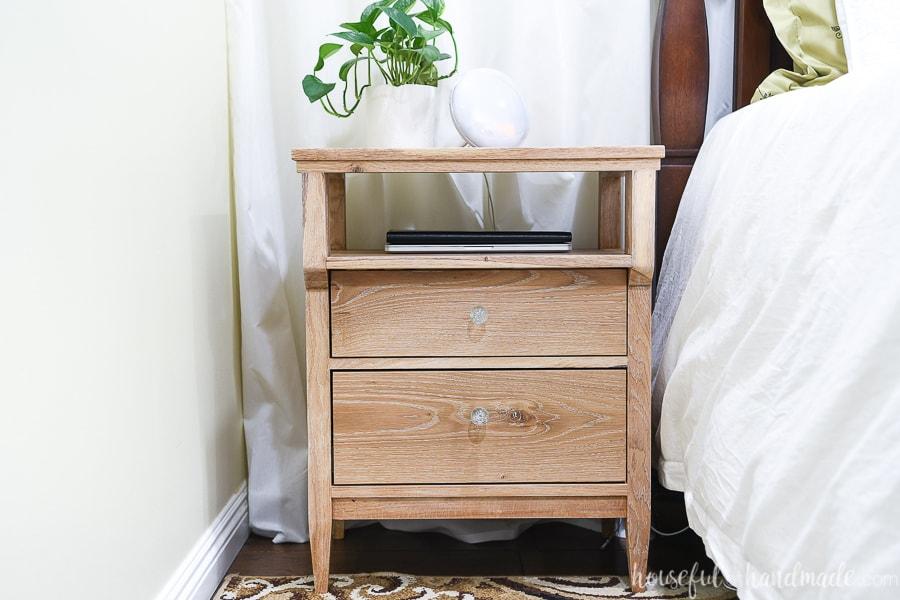
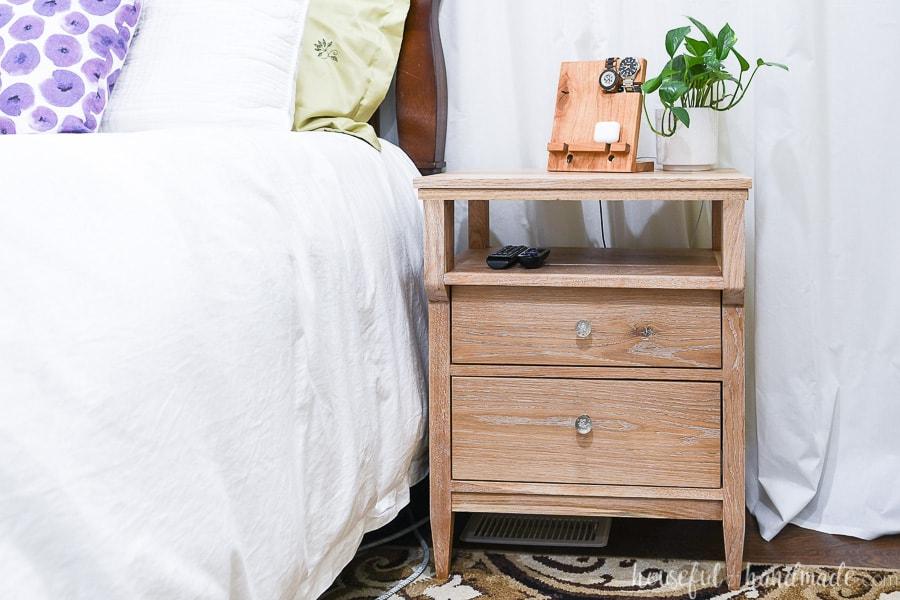
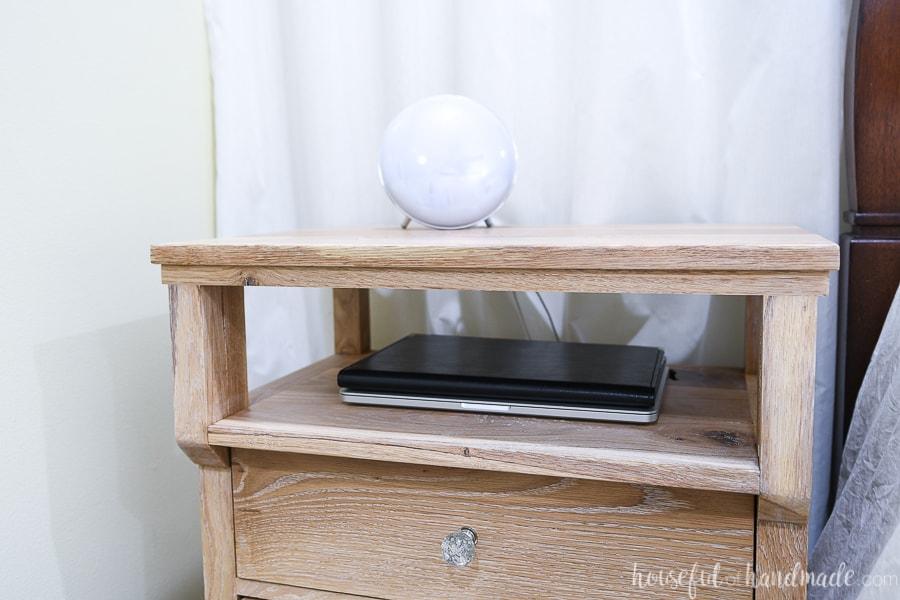
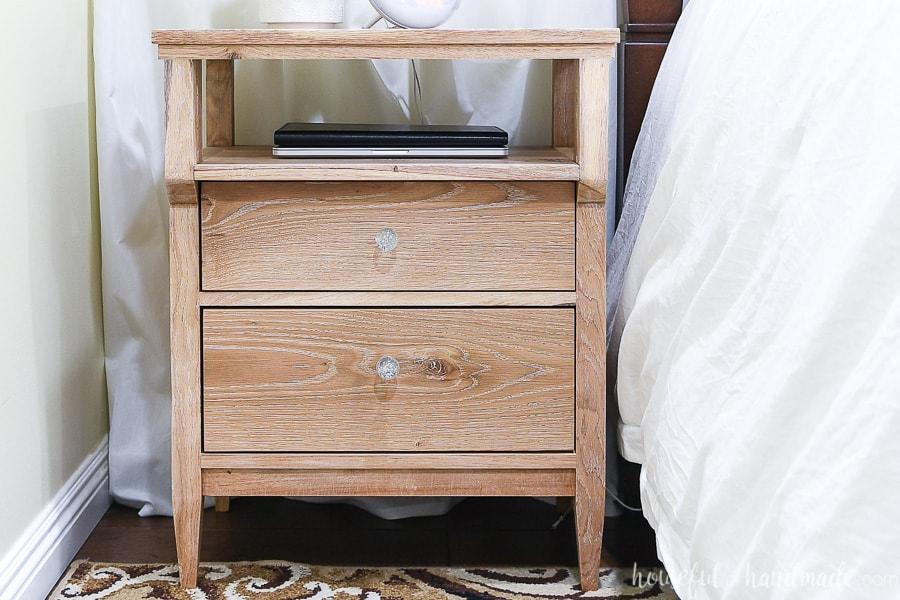


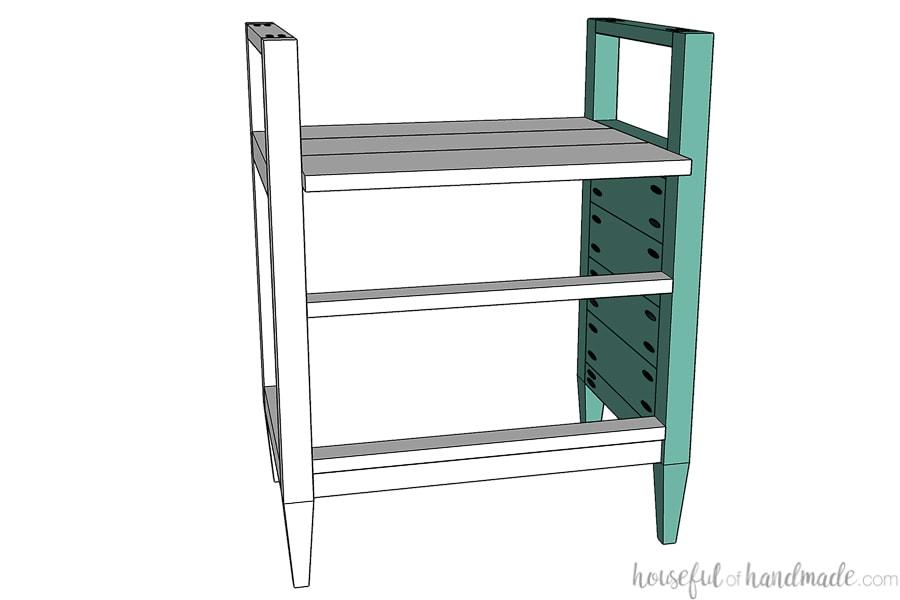
This nightstand is built to comfortably sit next to a taller bed. The open shelf is the perfect place to store your charging electronics, while keeping the top of your nightstand clean. Two drawers offer lots of storage. Extra detail on the front gives the nightstand character and charm.
Tools
Kreg Tools


Other Tools
-
Miter Saw

-
Table Saw
-
Tape Measure
-
Drill (cordless)
-
Impact Driver
-
Nail Gun
-
Sander
-
Shop Vacuum
Materials
Wood Products
- 2 Board , 1x6 , 96"
- 1 Board , 1x4 , 120"
- 1 Board , 1x2 , 120"
- 2 Board , 2x2 , 96"
- 1 Board , 1x8 , 24"
- 1 Plywood , 1/2" Thick , Half Sheet
- 1 Plywood , 1/4" Thick , Quarter Sheet
Hardware & Supplies
- 70 1 1/4" pocket hole screws
- 16 2 1/2" pocket hole screws
- 2 12" drawer slides
- 2 Drawer pulls
- 1 Wood glue
- 10 1 1/4" brad nails
- 4 Figure 8 table fasteners
- 8 1/2" long #6 screws
Directions
-
Cut leg taper
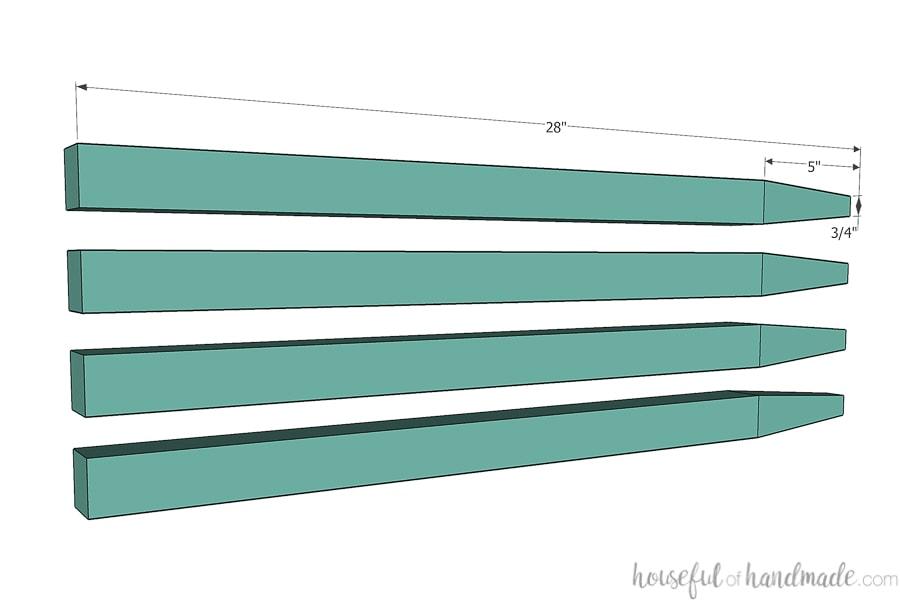
On the four leg pieces, measure up 5" up from the bottom and 3/8" in from the side. Draw a line and cut off the angled piece. Repeat on all 4 sides creating a taper. You can create a tapered leg table saw jig with a few scraps and some clamps to make quick work of cutting leg tapers on the table saw. I will be sharing my tapered leg jig for this build on my blog https://housefulofhandmade.com/.
-
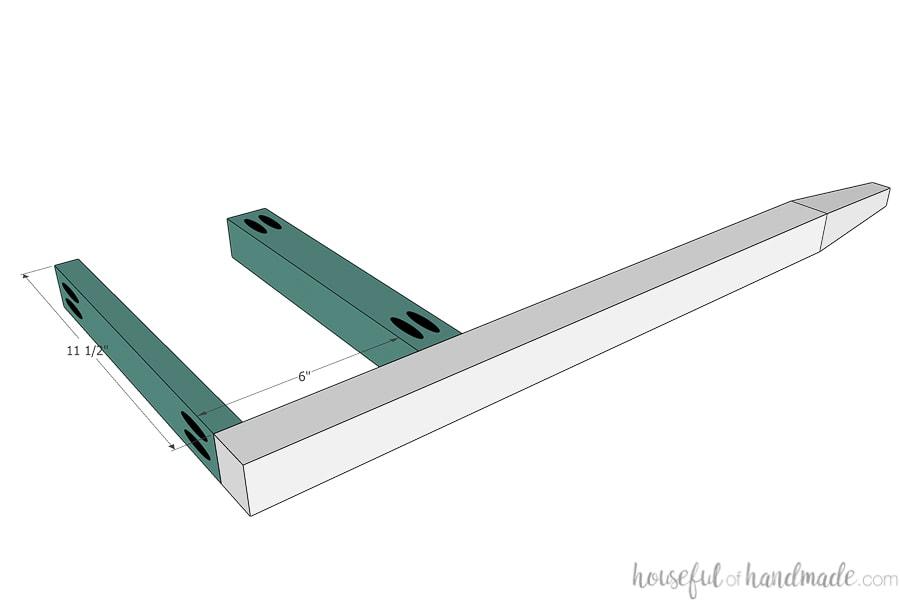
Start building the sides
Drill pocket holes set for 3/4" thick material on both sides of the side top boards. Attach them to the top of one of the leg pieces with wood glue and 1 1/4" pocket hole screws so the pocket holes are facing up. Drill pocket holes set for 1 1/2" thick material in both sides of the side braces. Attach to the legs with the top side boards attached so the top is 6" down from the top of the leg using 2 1/2" pocket hole screws and wood glue.
-
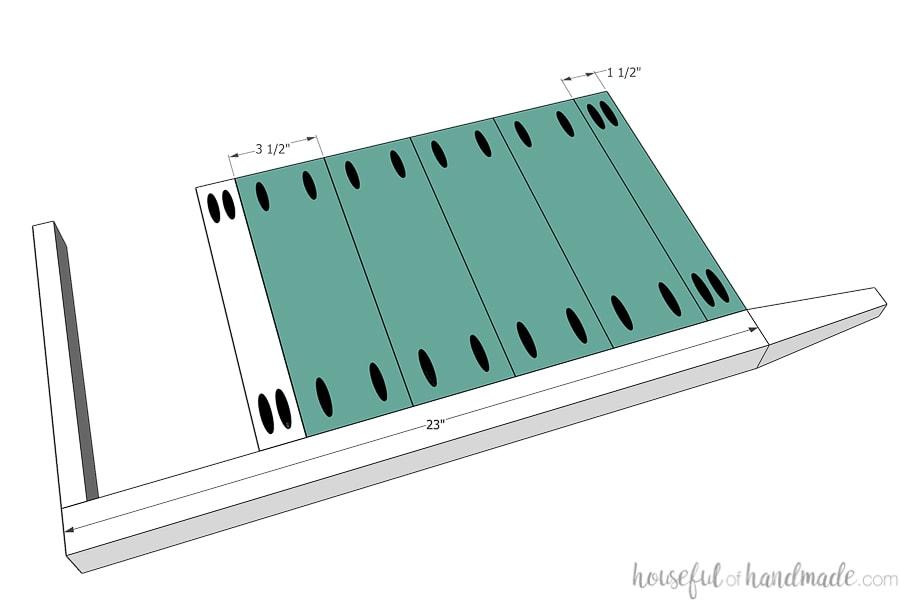
Attach side panels
Drill pocket holes set for 3/4" thick material in both sides of the side panel boards. Attach them to the leg pieces with wood glue and 1 1/4" pocket hole screws. Keep them flush with the inside of the legs and side braces. Clamp them tightly together as you secure them to keep the panels close. Then finish by attach the side brace board at the bottom with 2 1/2" pocket hole screws.
-
Finish the sides
Finish off the sides by attaching the other leg piece. Make sure to line up the pieces and attach as you did on the other side.
-
Build bottom center piece
Drill pocket holes set for 3/4" thick material in both ends of 2 of the center braces. Attach the piece without pocket holes on top of one of the other pieces to create a T shape. Center it so there is a 3/8" overhang on each side. Secure with wood glue and a few finishing nails to hold while the glue dries.
-
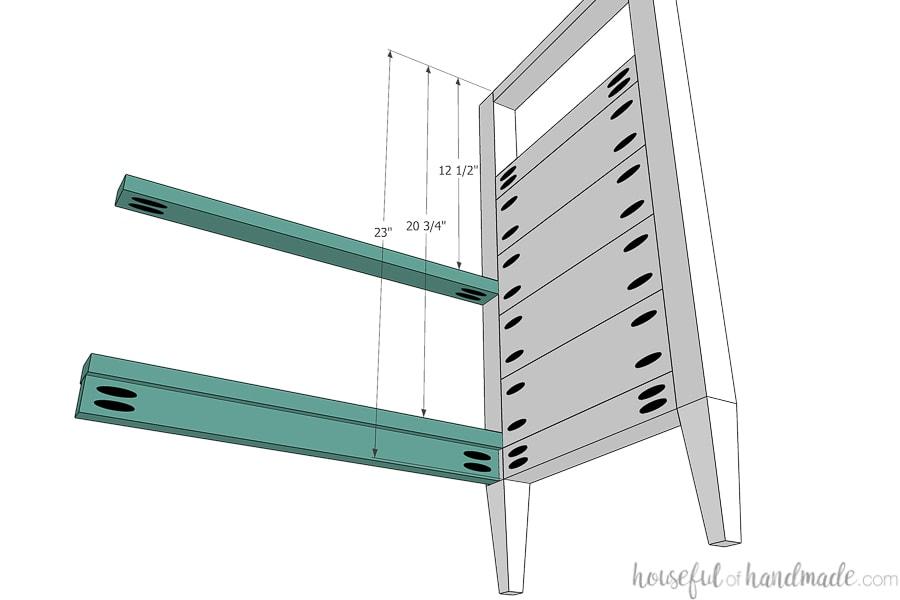
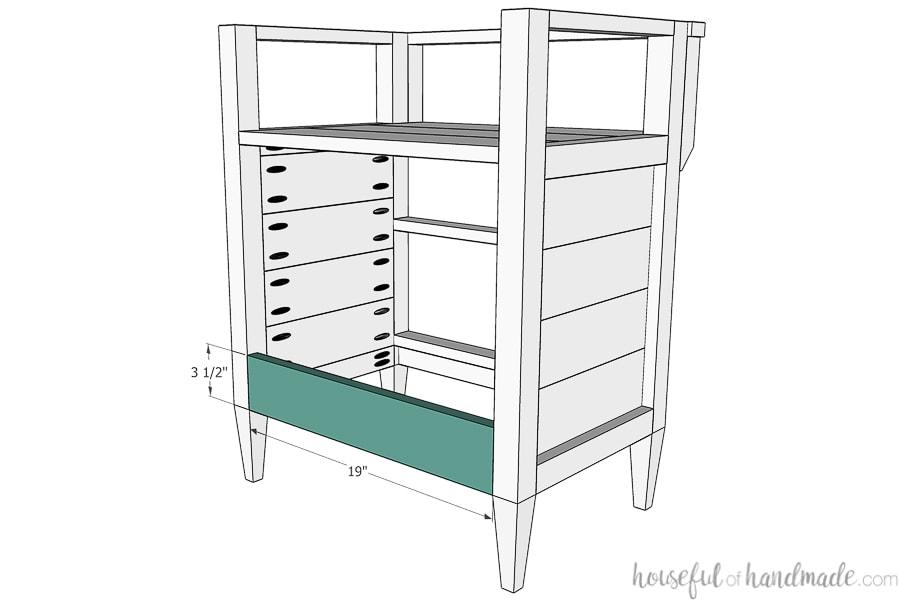
Attach the center braces
Attach the center braces to the front of one side piece. The top center brace should be 12 1/2" down from the top of the legs. The T shaped brace should be 20 3/4" down from the top of the legs. Secure with wood glue and 1 1/4" pocket hole screws.
-
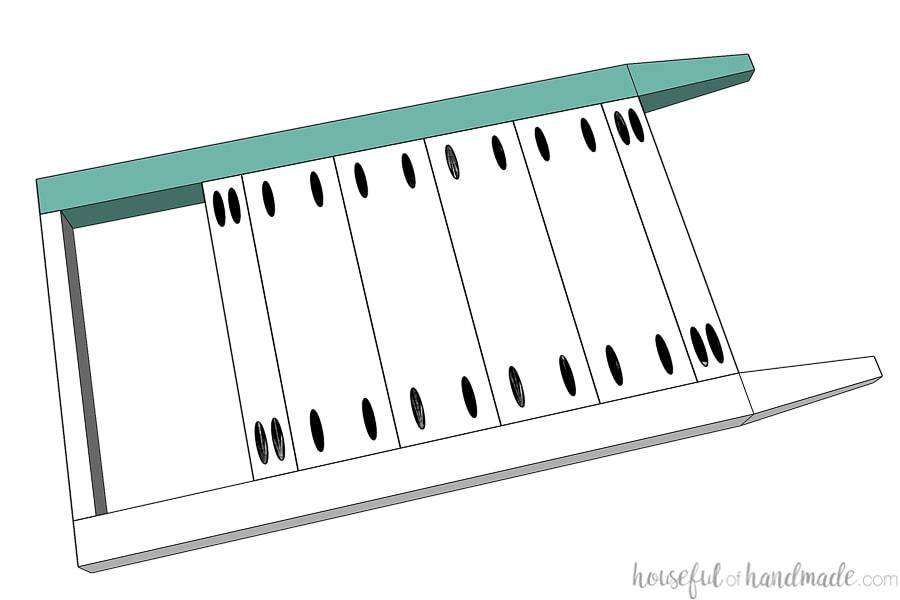
Attach shelf boards
One of the shelf boards needs to be ripped down to 5" wide. Then drill pocket holes set for 3/4" thick material in both ends of the shelf boards. For the front board, make sure the pocket holes are not in the front 2" section. Attach the boards so the front one overhangs the front of the leg 1 1/2" and the top is flush with the top side brace boards.
-
Attach second side
Attach the other built side so it lines up the same. Secure with 1 1/4" pocket hole screws and wood glue.
-
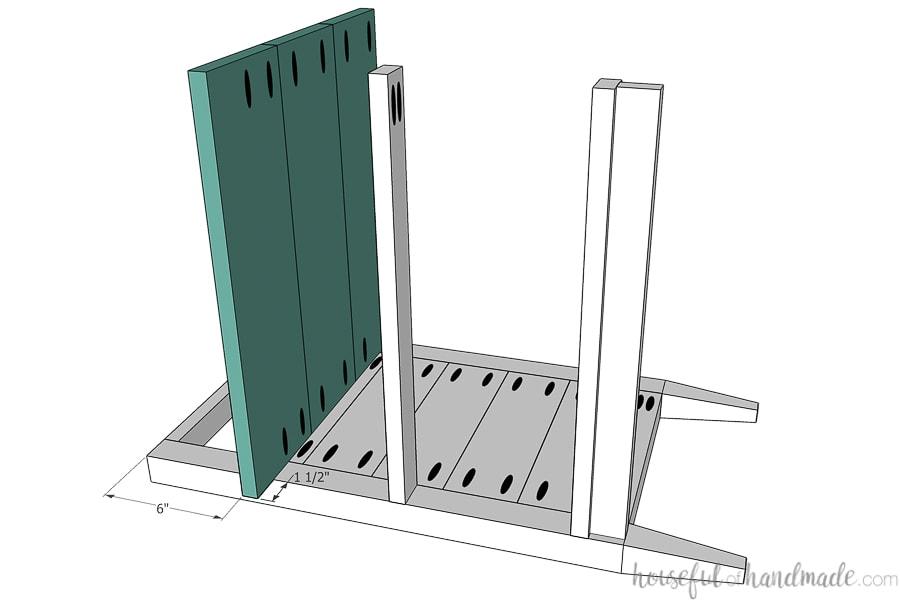
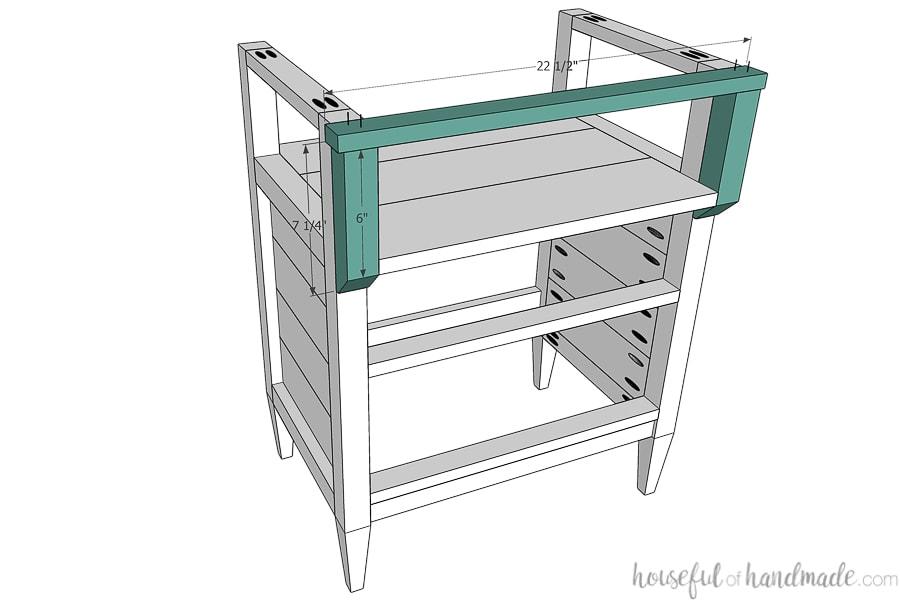
Add front detail
Measure 6" down from the top of the corbels and cut off the front bottom corner at a 45 degree angle on the miter saw. Sand off the sharp edges into a round over if desired. Attach them to the front of the nightstand with wood glues they are 3/4" down from the top of the legs. Clamp until the glue dries. Top off the corbels with the top board attach with wood glue and secure with a couple brad nails into the corbels while the glue dries.
-
Add back support
Drill pocket holes set for 3/4" thick material into both sides of the back support pieces. Attach the back support piece to the back of the nightstand with 1 1/4" pocket hole screws. I put the pocket holes facing toward the center of the nightstand since they will be hidden behind the drawers. If desired, you an add a back panel, but I would recommend not doing that until after you install the drawers to make it easier.
-
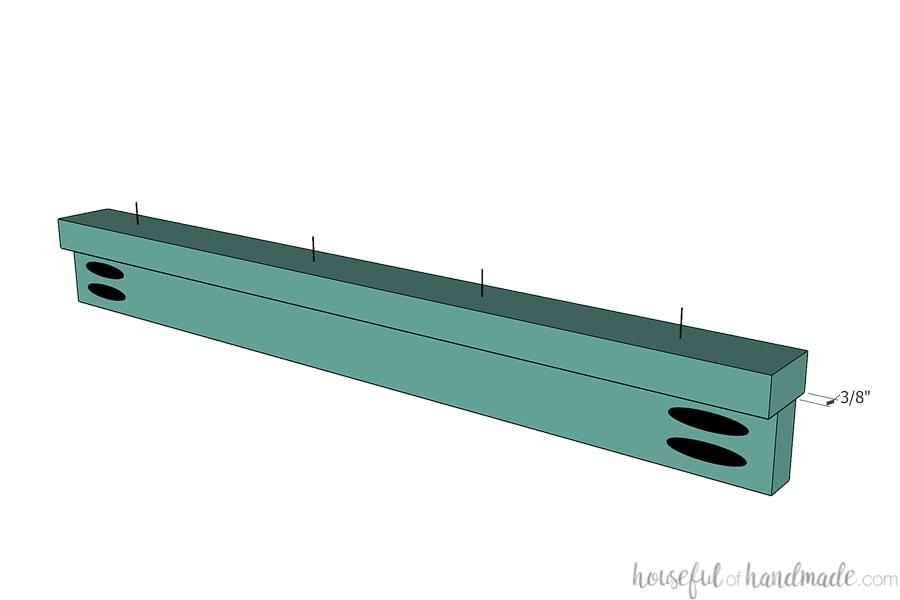
Build the top
Drill pocket holes set for 3/4" thick material in one side of two of the top boards. Attach the three boards together with 1 1/4" pocket holes and wood glue. Use face clamps to keep the boards flush as you attach them to each other.

-
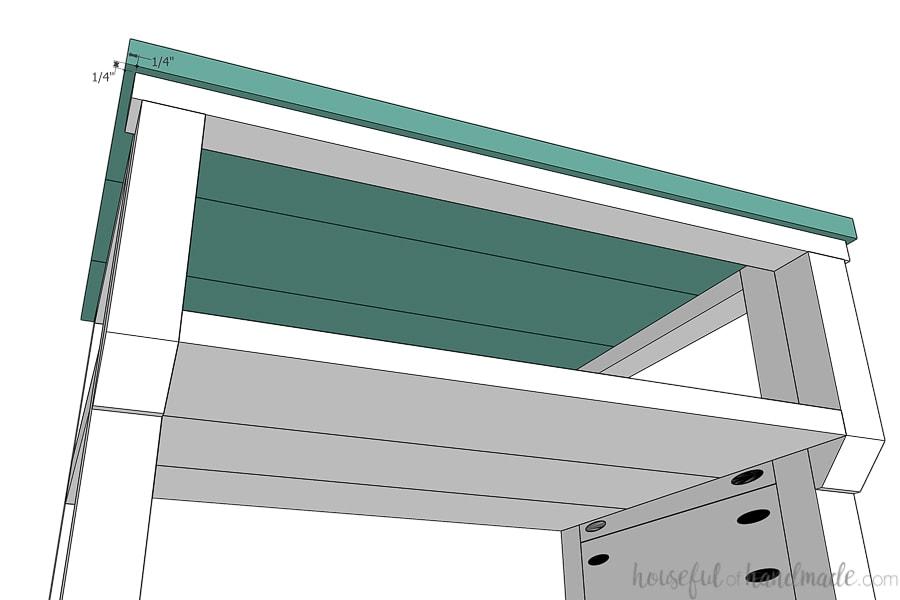
Attach the top
Using a Forstner bit slightly larger than one half of your figure 8 table top fastener. Drill a hole in the top frame of the nightstand as deep as your fastener right on the inside edge of the frame. Cut away any excess between the edge of the frame and the hole to allow the fastener to sit into the hole so one half of the fastener is hanging inside the frame. Secure with a screw. Then lay the top on the frame and line it up so there is 1/4" overhang on both sides of the front. Secure the top with screws through the other side of the figure 8 fastener into the top.
-
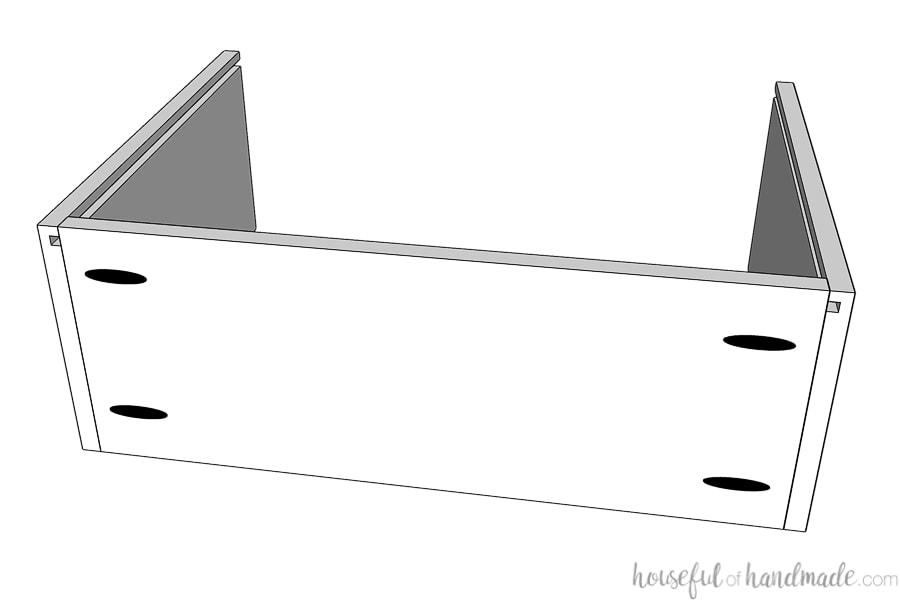
Drawer box step 1
Cut the drawer box pieces and then cut a 1/4" deep x 1/4" wide groove 1/4" up from the bottom of each piece. Drill pocket holes set for 1/2" thick material in both sides of the drawer box front/back pieces. Make sure to drill pocket holes so they are on the opposite side of the board as the groove. Attach the side pieces to one of the front/back pieces with wood glue and 1" pocket hole screws.
-
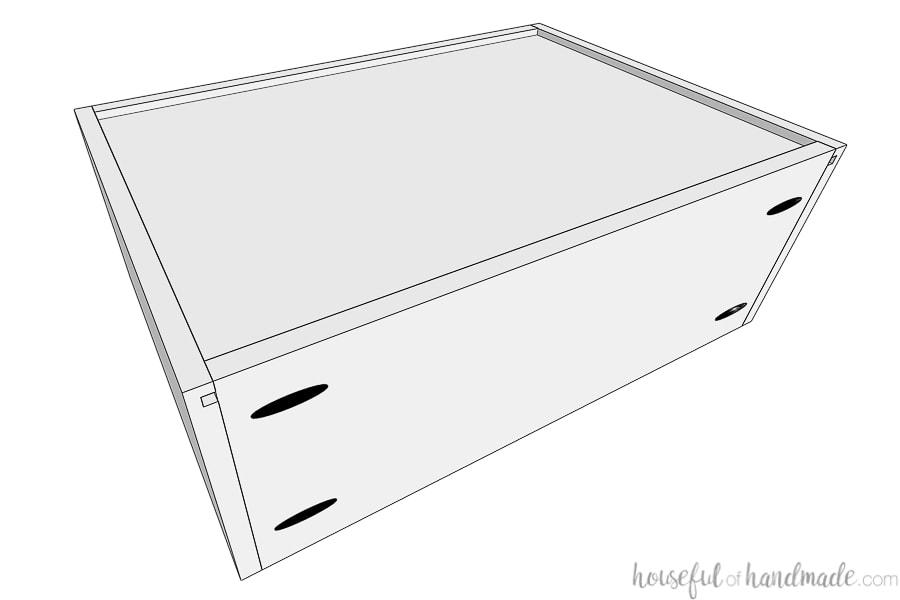
Drawer box step 2
Cut the plywood bottom and slide it into the groove on the drawer box. Check box for square.

-
Drawer box step 3
Attach the other drawer box front/back to close up the box with 1" pocket hole screws and wood glue. Ensure the box stays square.
-
Finish the nightstand
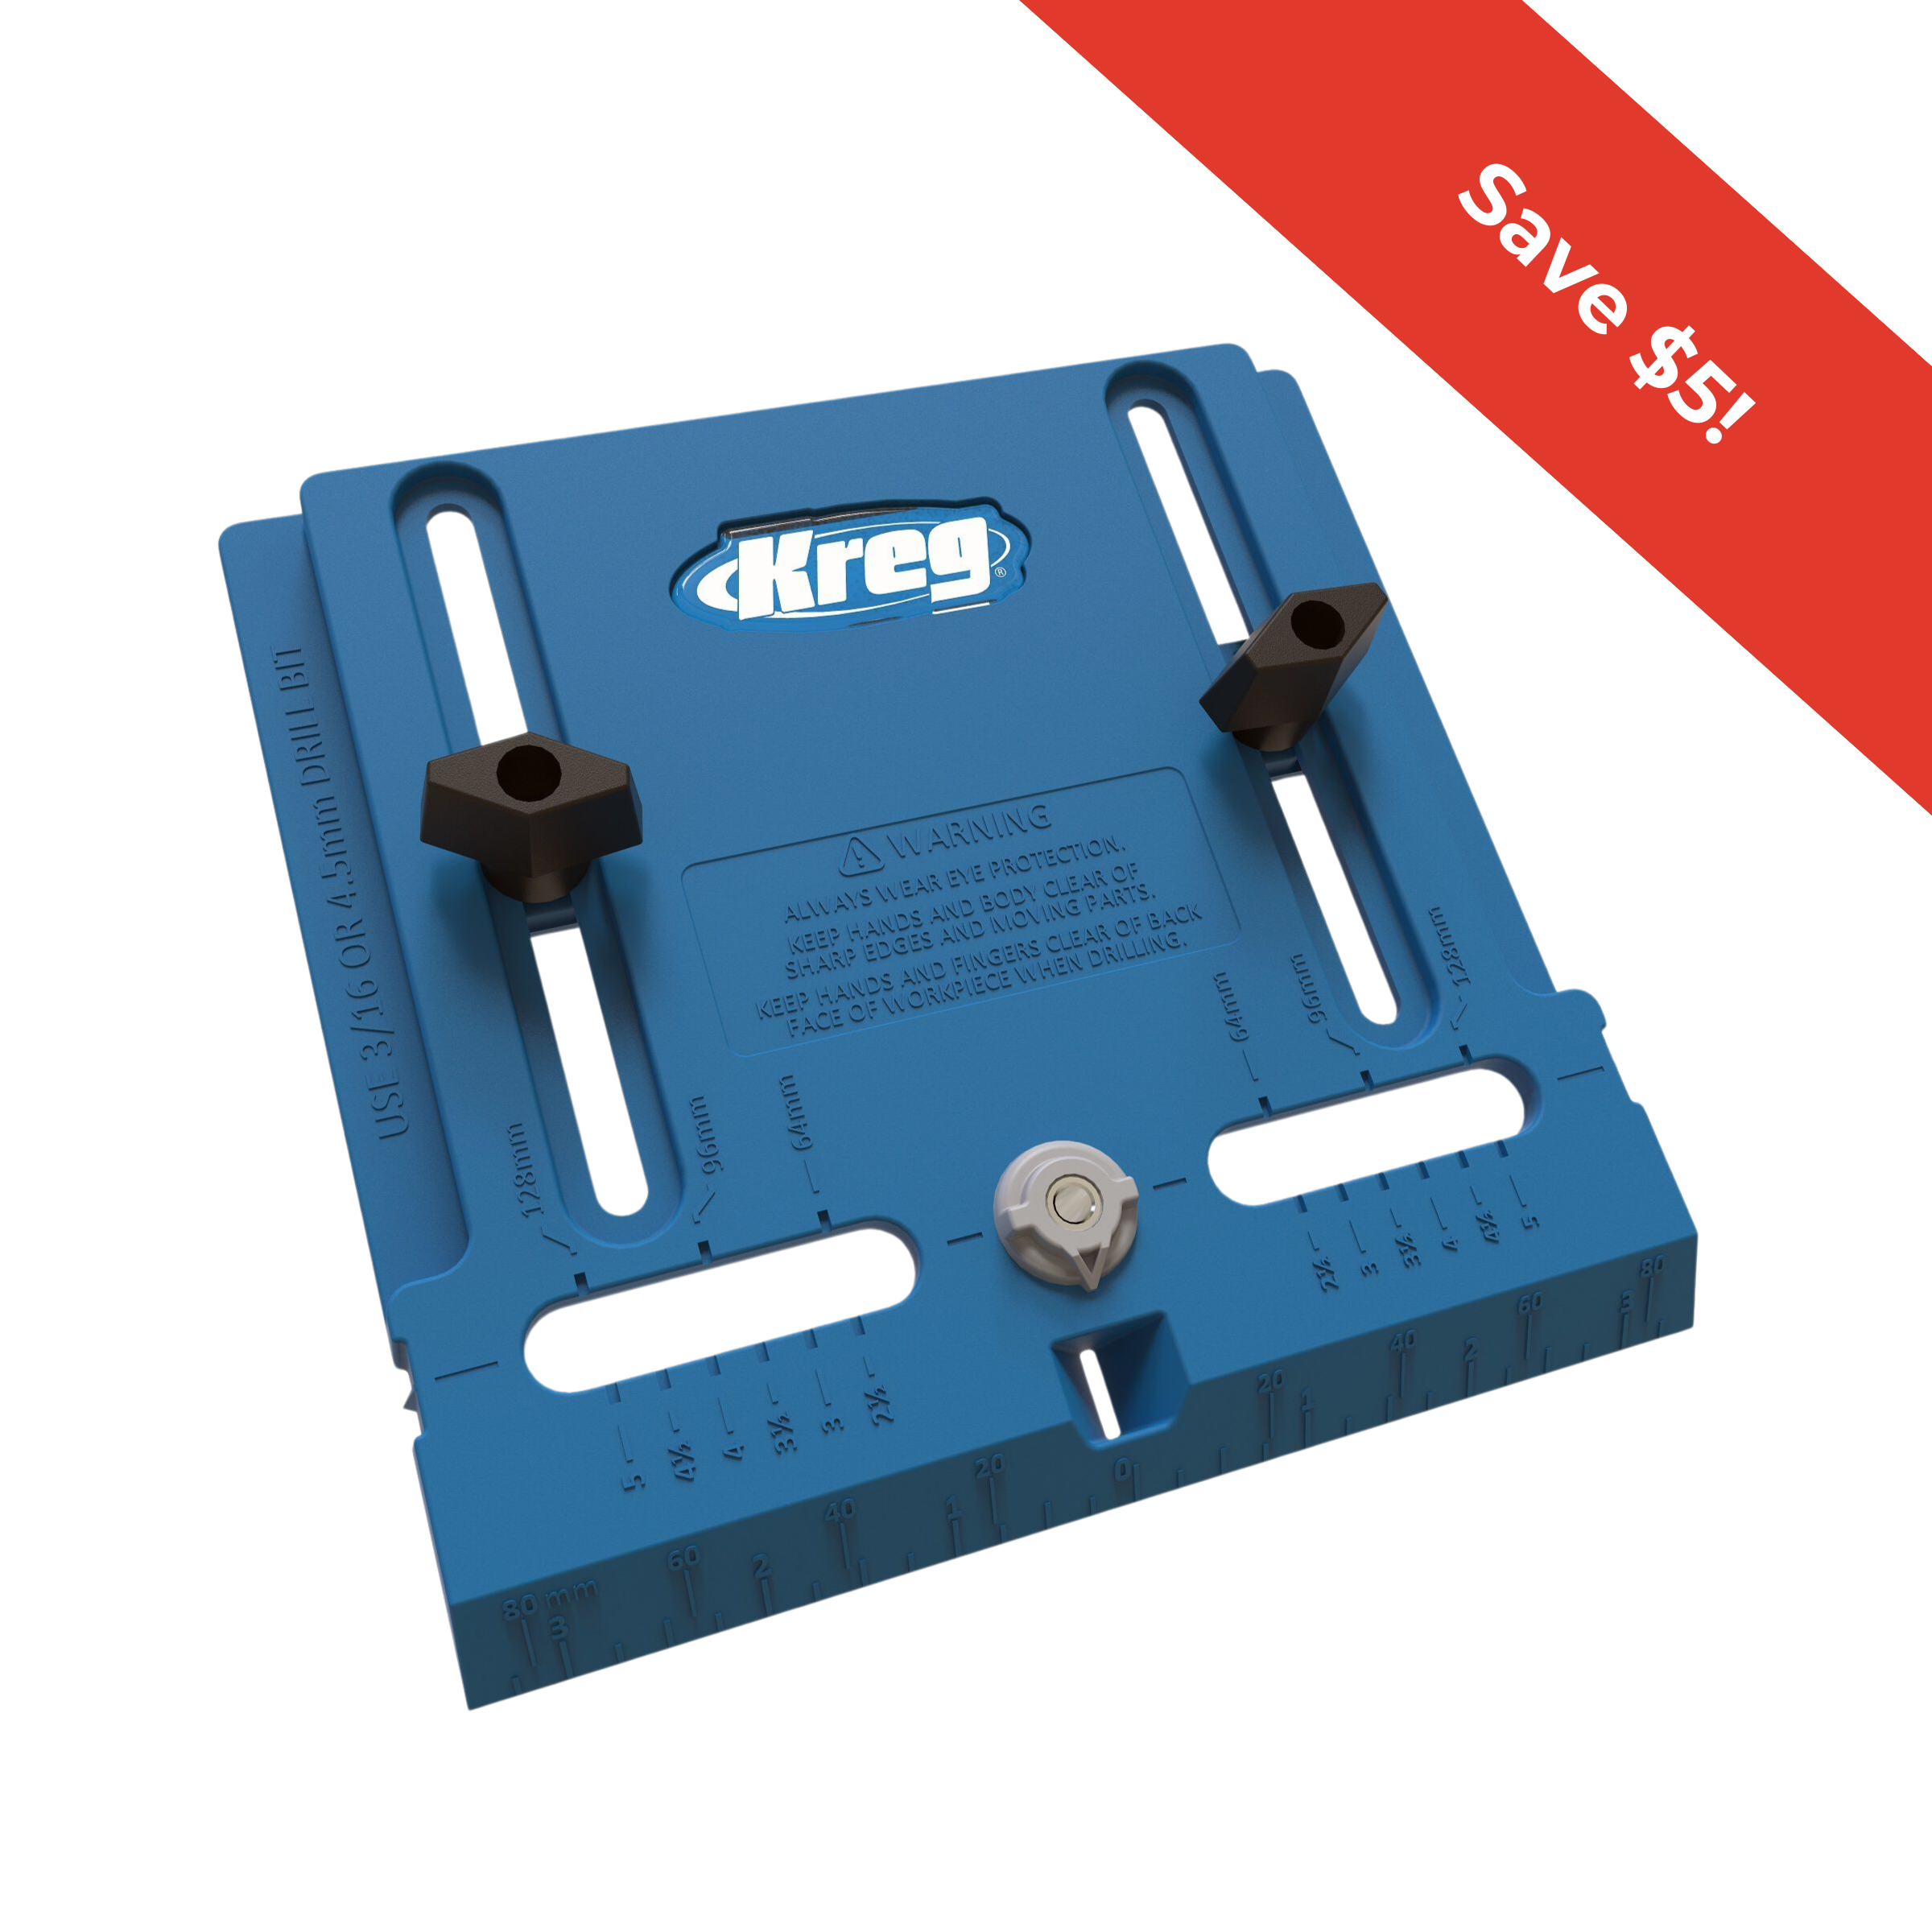
Sand and paint/stain/seal you nightstand. Install the drawers with drawer slides that require 1/2" clearance on each side. Add drawer pulls with the cabinet hardware jig.
-
Enjoy!
Now you are ready to enjoy your new nightstand! Make sure to visit me at Houseful of Handmade for more fun projects and builds for your home.