Stuffed Animal Storage
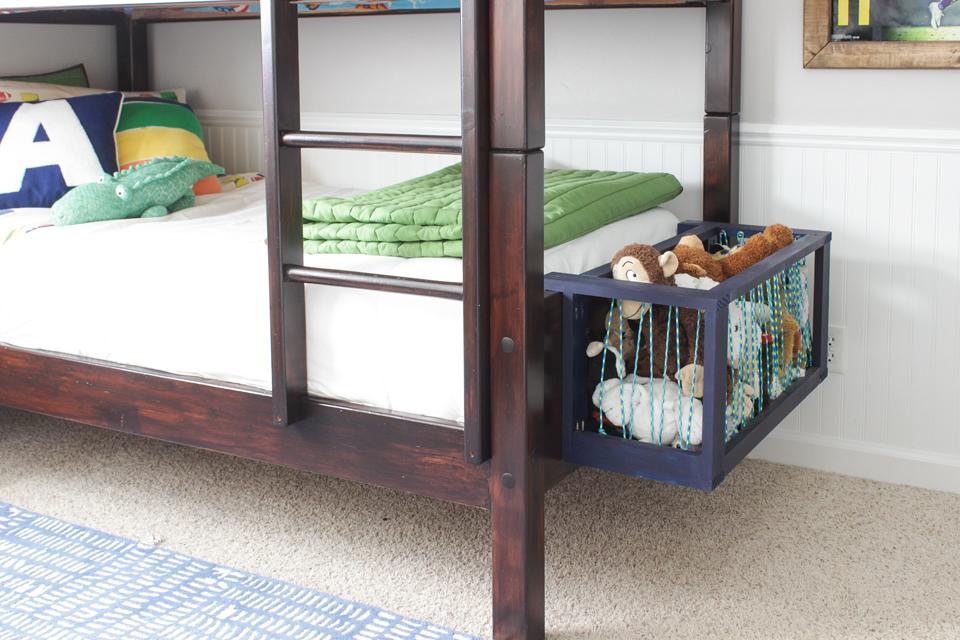
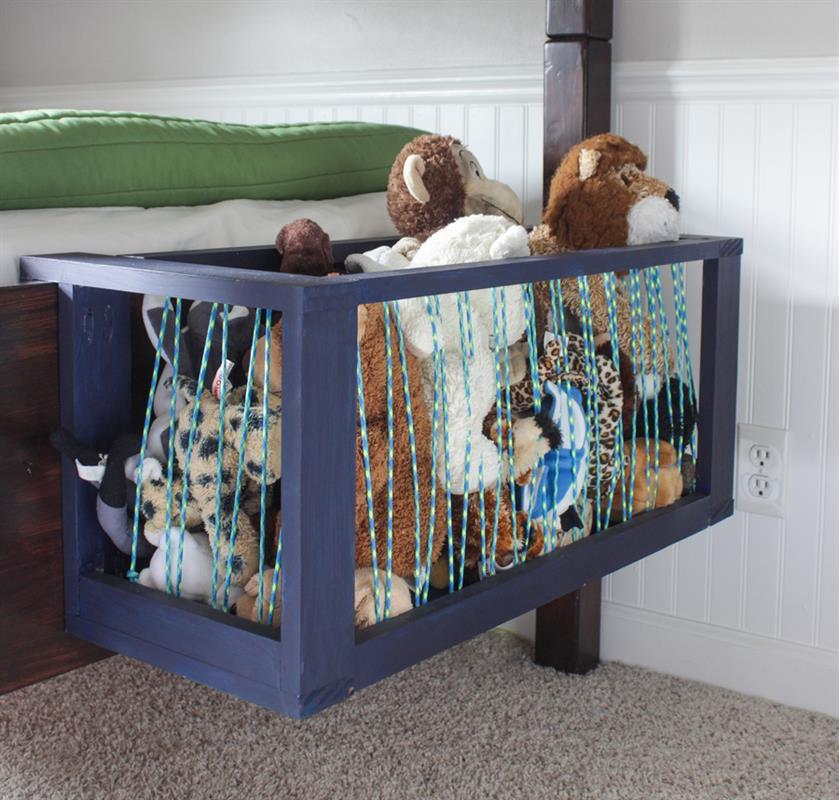
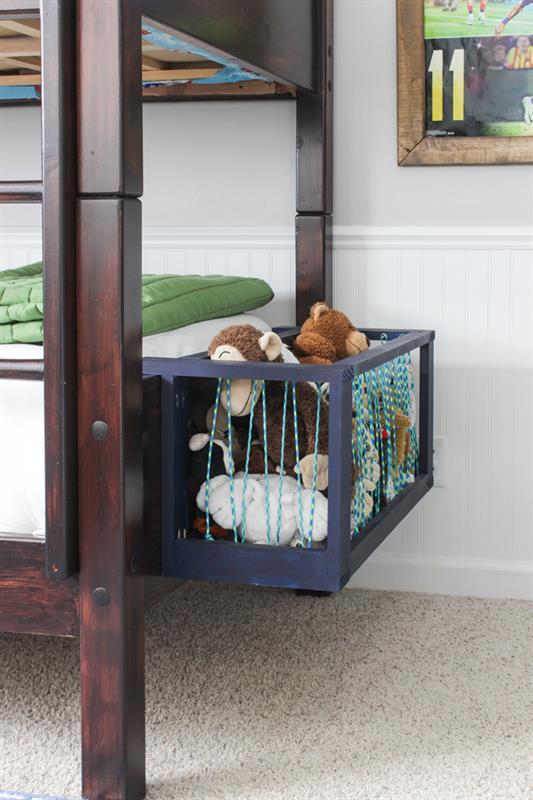
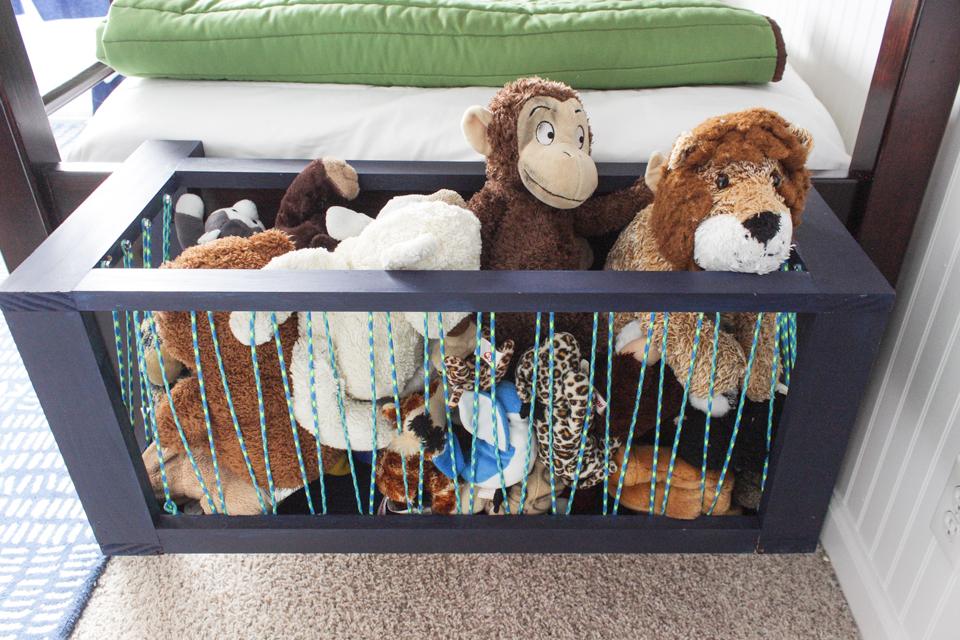
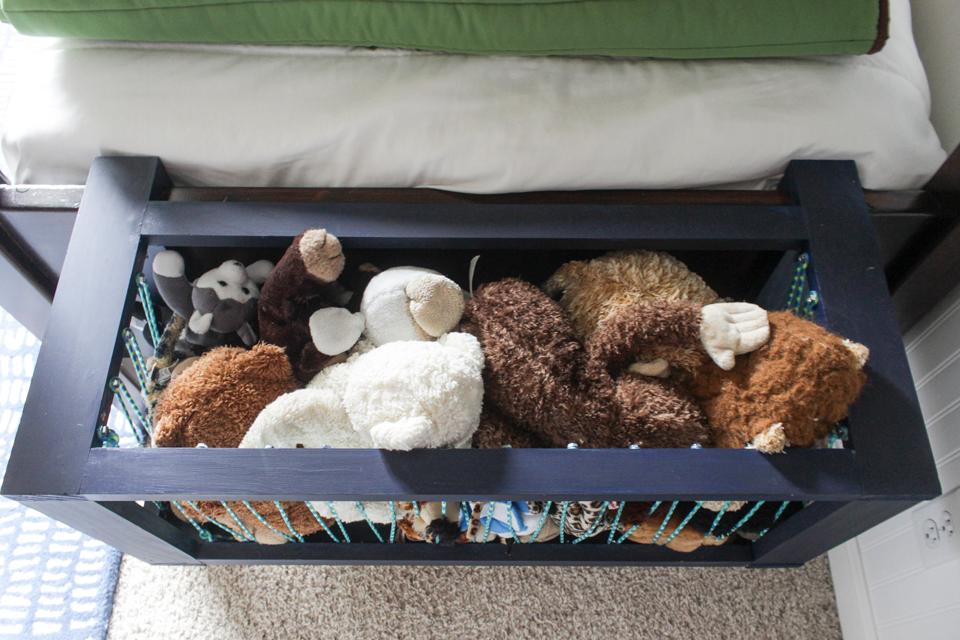
By Shades of Blue InteriorsHow to make a stuffed animal storage or toy box that hooks onto a footboard. Lightweight yet sturdy to hold plenty of stuffed animals, toys or even books, with a bonus of occuping minimal space. 29″ long x 11″ deep x 13″ tall
Directions
-
Lay Out Side Frames
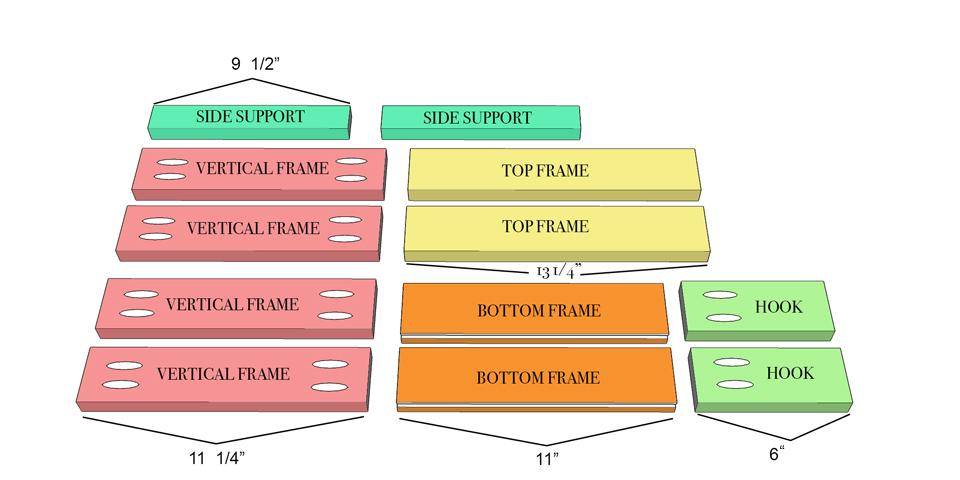
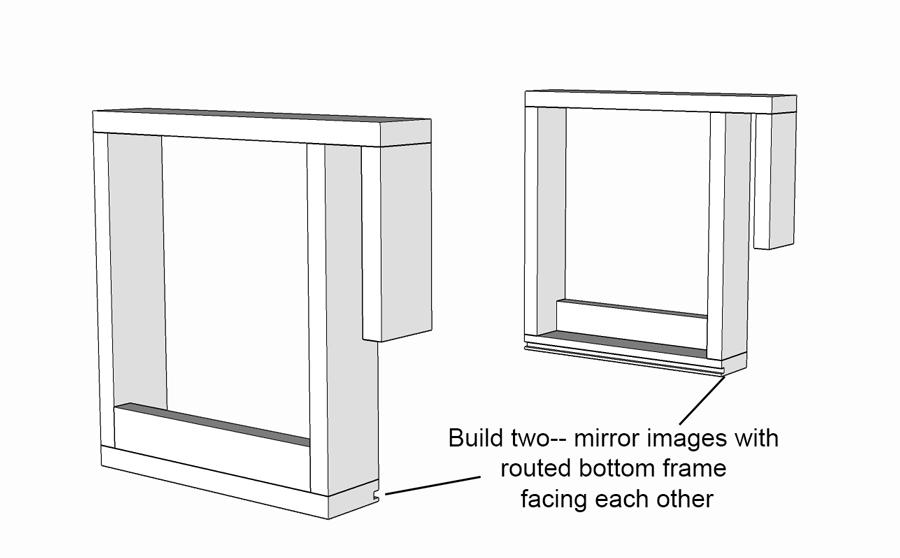
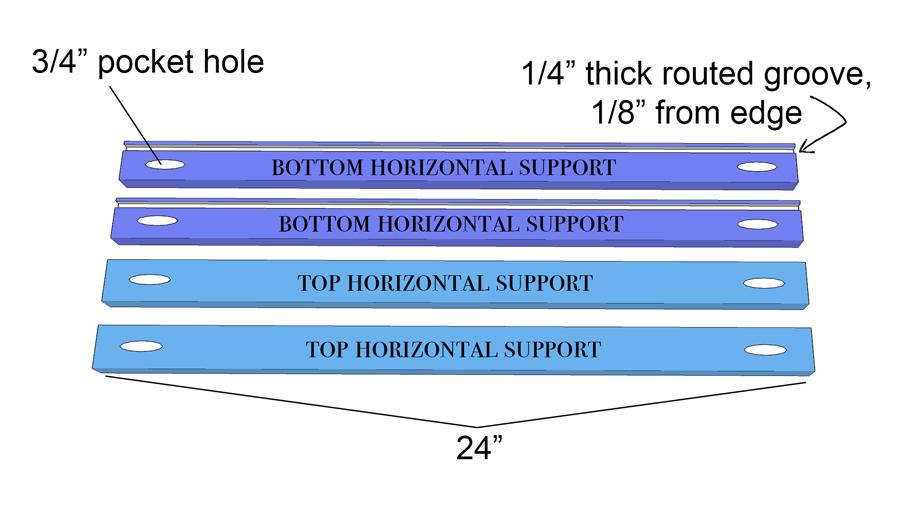
Lay out all the side frame pieces. Drill 2- 3/4" pocket holes on both ends of the vertical frame pieces. Drill 2- 3/4" pocket holes on one end of the hook pieces. Using a 1/4" straight router bit mounted on a router table, set the router depth to 1/4" height and 1/8" from the edge of the wood. Route one side of both bottom frame pieces.
-
Build Frame Square
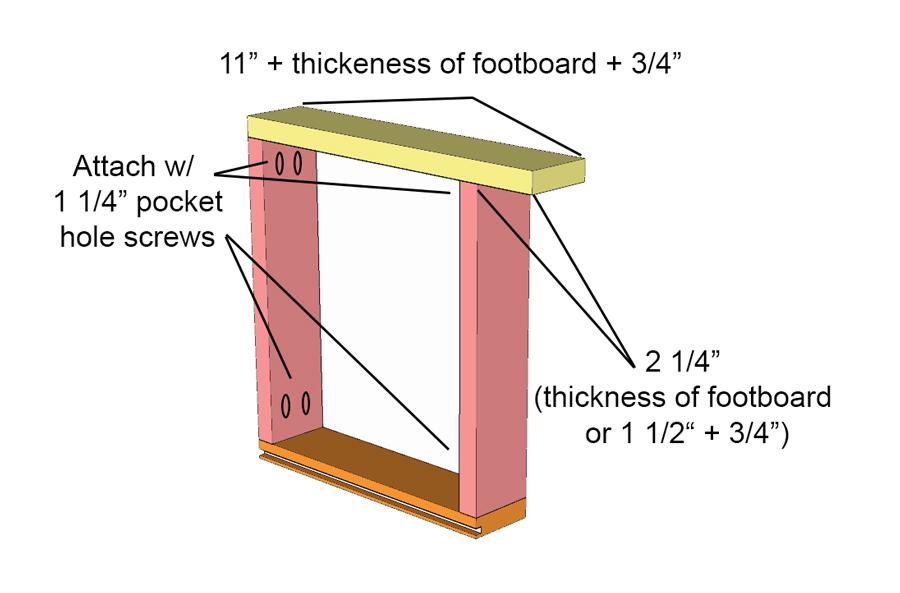
Using wood glue and 1 1/4" pocket hole screws, attach vertical frame pieces between the top frame and the bottom frame piece with pocket holes facing in. One vertical frame should be flush to the ends with the top and bottom, and the other piece should be sitting flush on top of the bottom frame and 2 1/4" in from the edge of the top frame.
*If you want your corral to fit snug on your footboard, measure the thickness of the footboard. Mine was 1 1/2" thick, so the top frame is 11" (depth of corral) + 1 1/2" + 3/4" (wood thickness). You can customize easily by just changing the length of the two top frame pieces. -
Attach Hook and Side Support
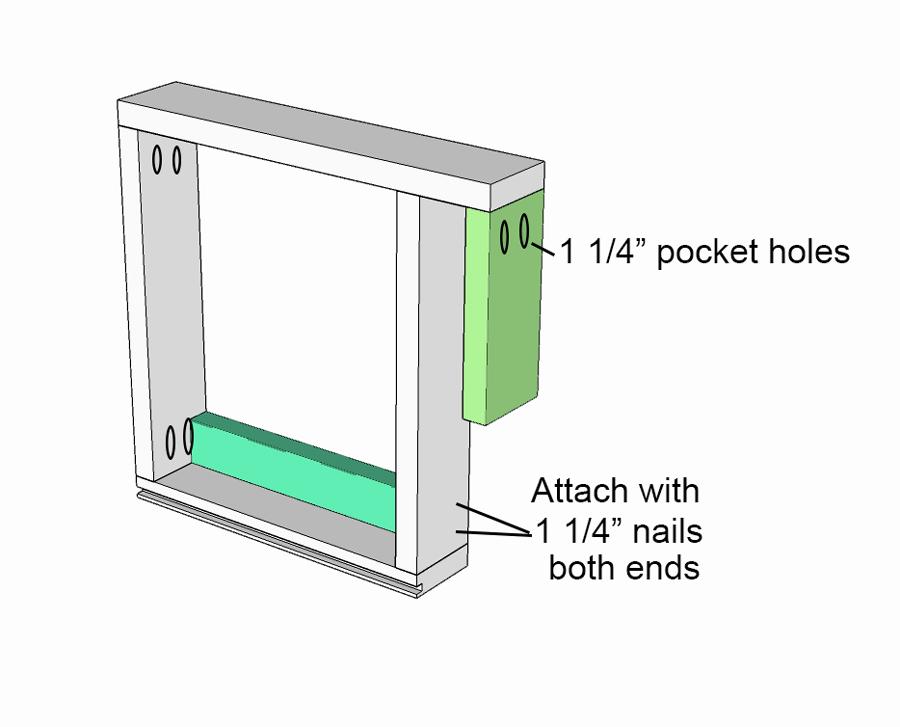
Using 1 1/4" pocket hole screws and wood glue, attach the hook piece of wood to the end of the top frame that is over-hanging 2 1/4". Pocket holes should be facing out, but will be hidden by the mattress and blankets once it is hooked onto footboard. Using wood glue and 1 1/4" nails, attach the side support flush with both vertical frame pieces, making sure it sits on the opposite side of the bottom frame.
-
Build Other Frame Square
Following steps 2-3 build mirror image of the frame square, making sure the side supports are attached on opposite sides, and routed grooves are facing each other.
-
Route and Drill Horizontal Supports
Using the same router measurements as done to the bottom frame pieces in step 1, route 2 of the horizontal supports. Drill a single 3/4" pocket hole in both ends of all 4 horizontal supports. The ones with the routed groove are the bottom horizontal supports and the remaining two are the top.
-
Attach Horizontal Supports
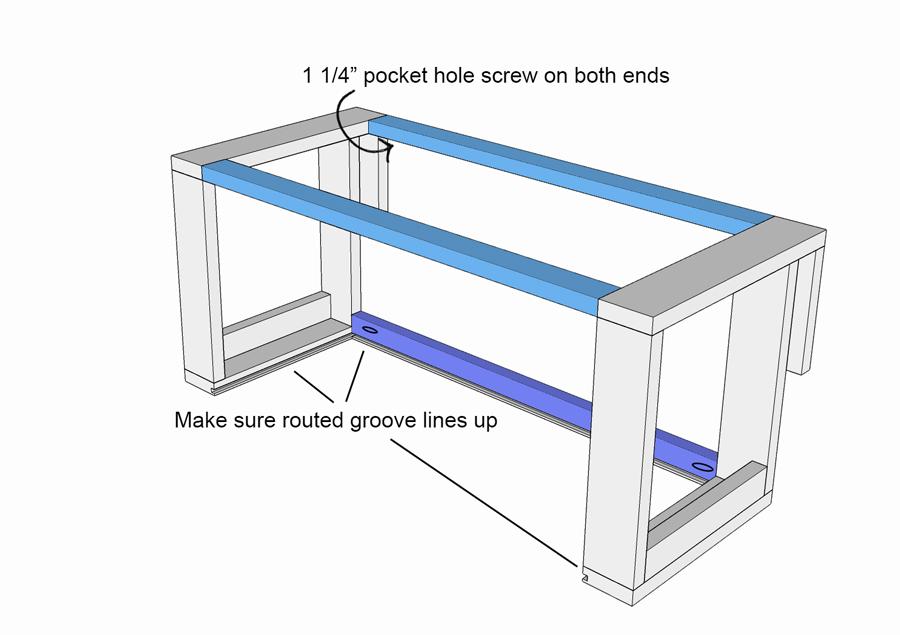
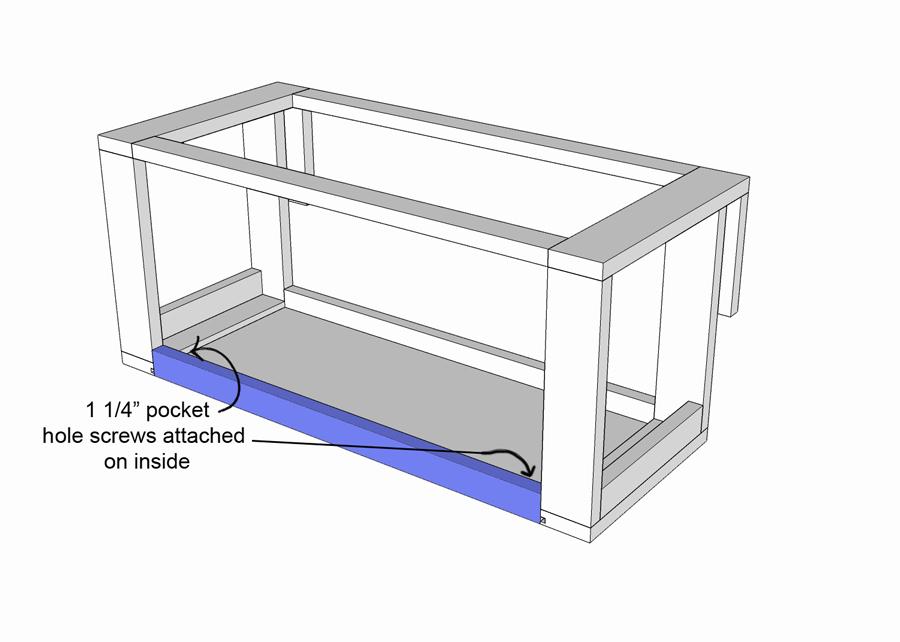
Using 1 1/4" pocket hole screws and wood glue, attach top 2 horizontal supports on both outer corners and between vertical frame pieces on either end. Using 1 1/4" pocket hole screws and wood glue, attach one of the bottom horizontal supports, flush with the corners, making sure the routed groove is facing the inside of the corral.
-
Attach Bottom Corral Bed
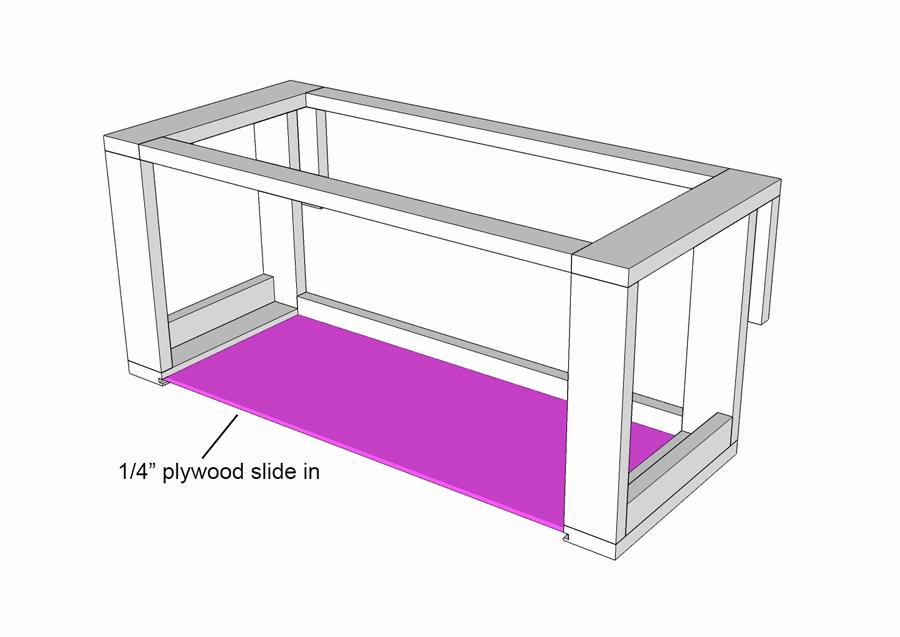
Slide the 1/4" plywood into the routed grooves. Glue is not needed, but can be used.
**Optional-- if you don't have a router, you can attach a 1/2" or 3/4" plywood corral bed instead of using 1/4" plywood, by using pocket holes and pocket hole screws on all sides. If this method is used, you will need a 9 1/2" x 24" rectangle.** -
Attach Bottom Horizontal Support
Slide remaining bottom horizontal support into place and attach it with a 1 1/4" pocket hole screw on either end.
-
Paint/Stain & Attach Screws
Fill nail holes or any cracks with wood filler, let dry and sand entire surface smooth with 220 grit sandpaper. Paint or stain with color of choice.
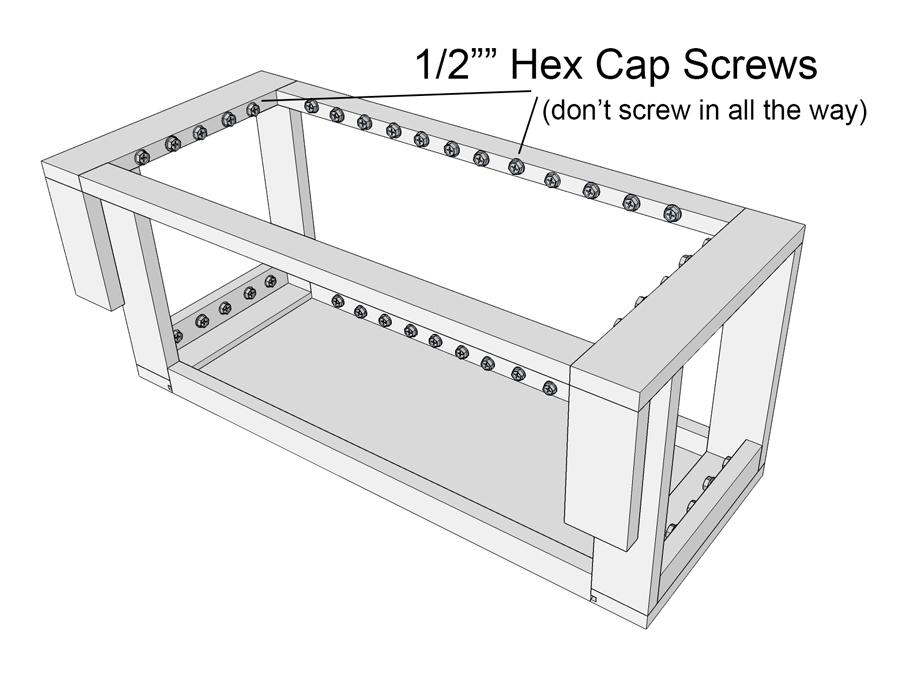
Measure and mark 12 evenly spaced locations for screws on the inside edges of the outer top and bottom horizontal supports (about 1 1/2-2" apart). Stagger the marks from the top and bottom. Mark locations for 5 screws on the inside edge of the top frame and 5 on the inside of the side support. Either use self-tapping screws or pre-drill holes and attach the hex screws on all the marked locations, making sure not to tighten them all the way. Leave a 2-3 threads from flush. Note that the inside 'wall' of the corral won't have screws as it will be against the footboard and doesn't need it. -
Attach Paracord
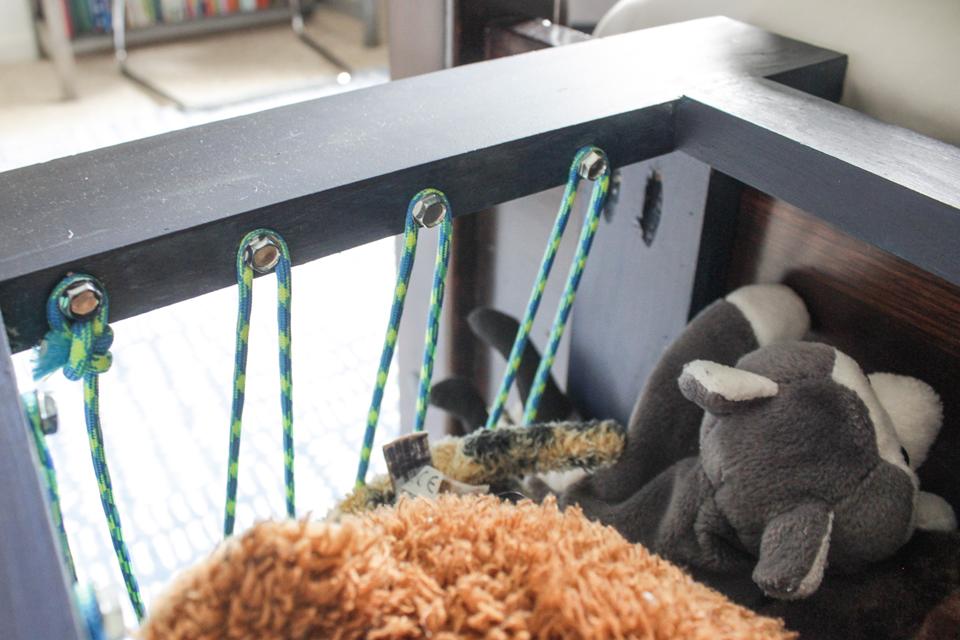
Tie a knot around one screw head with the paracord and run it down to a bottom screw, wrap it around, then run up to the adjacent screw, wrap around and repeat this process until you have a tight but somewhat flexible 'wall' to keep the stuffed animals in. Tie off the paracord on the last screw on each wall and burn the edge so it doesn't fray. Repeat for 3 'walls' leaving the side that will be against the footboard open.


