

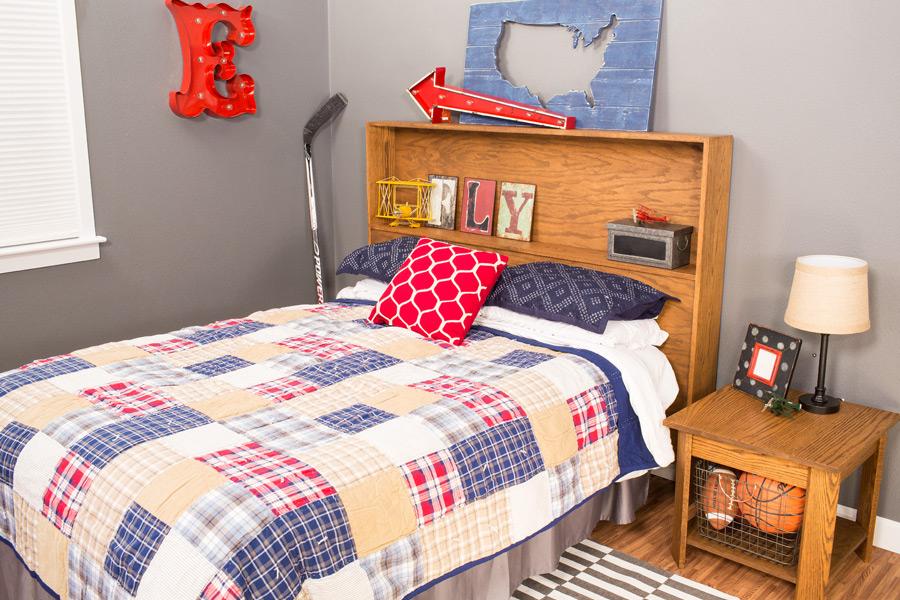
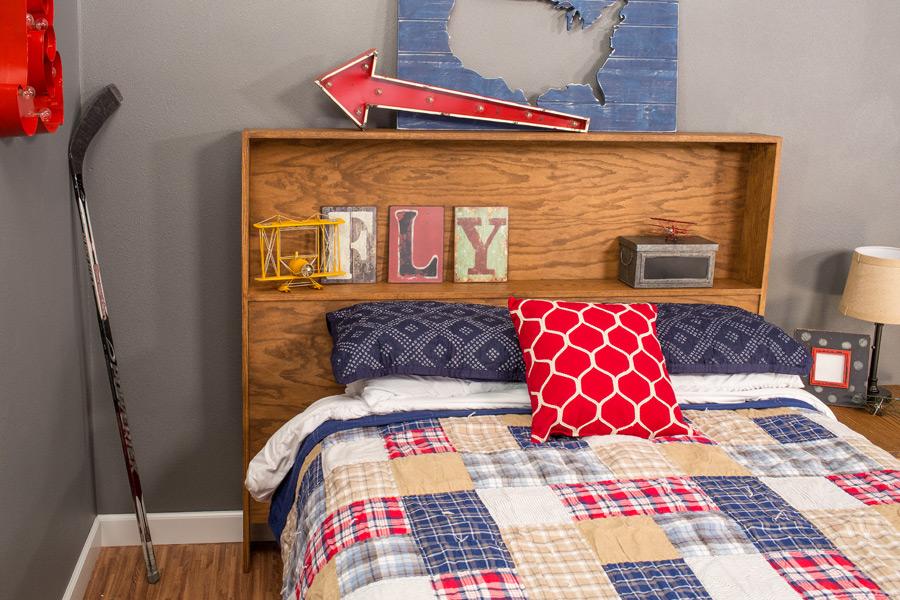
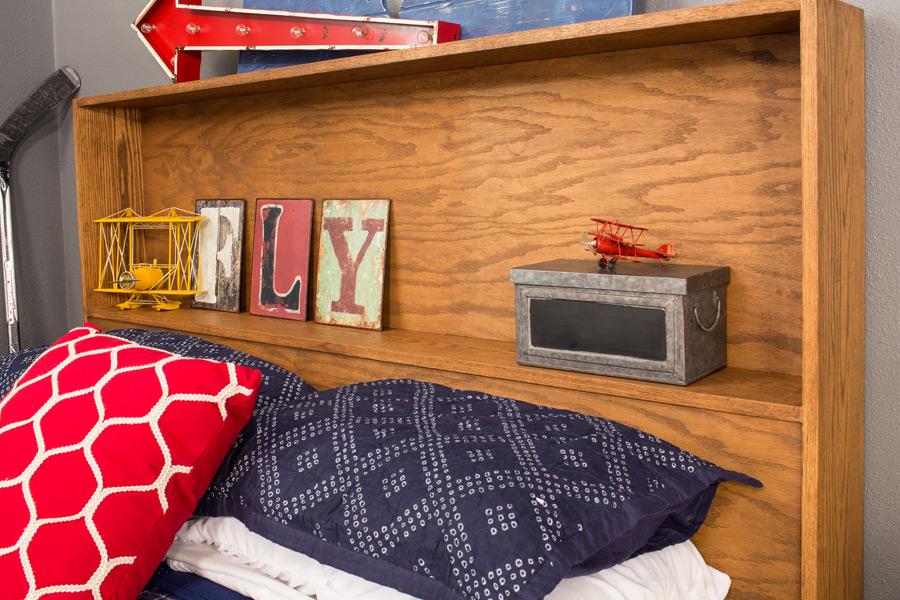
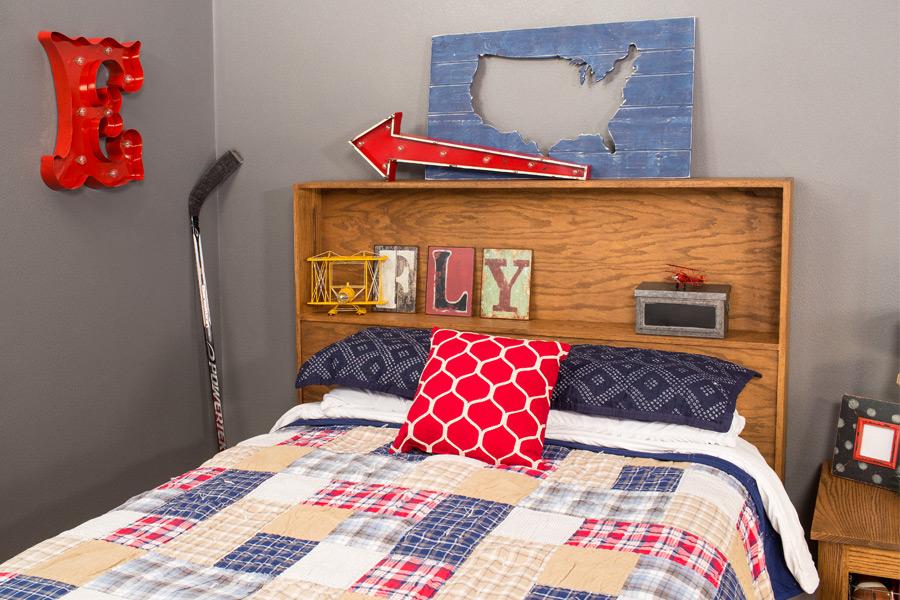


This headboard offers a storage shelf behind your head, plus another up above. It’s made from just 7 parts, which means you can build one easily with a few basic tools. Depending on the type of wood you choose and the finish you apply, you can make it look traditional or contemporary.
Tools
Kreg Tools


Other Tools
-
Miter Saw

-
Tape Measure
-
Tape Measure
Materials
Wood Products
- 1 Board , 1x4 , 96"
- 4 Board , 1x8 , 96"
- 1 Plywood , 3/4" Thick , Full Sheet
Hardware & Supplies
- 60 1 1/4" fine-thread pocket-hole screws
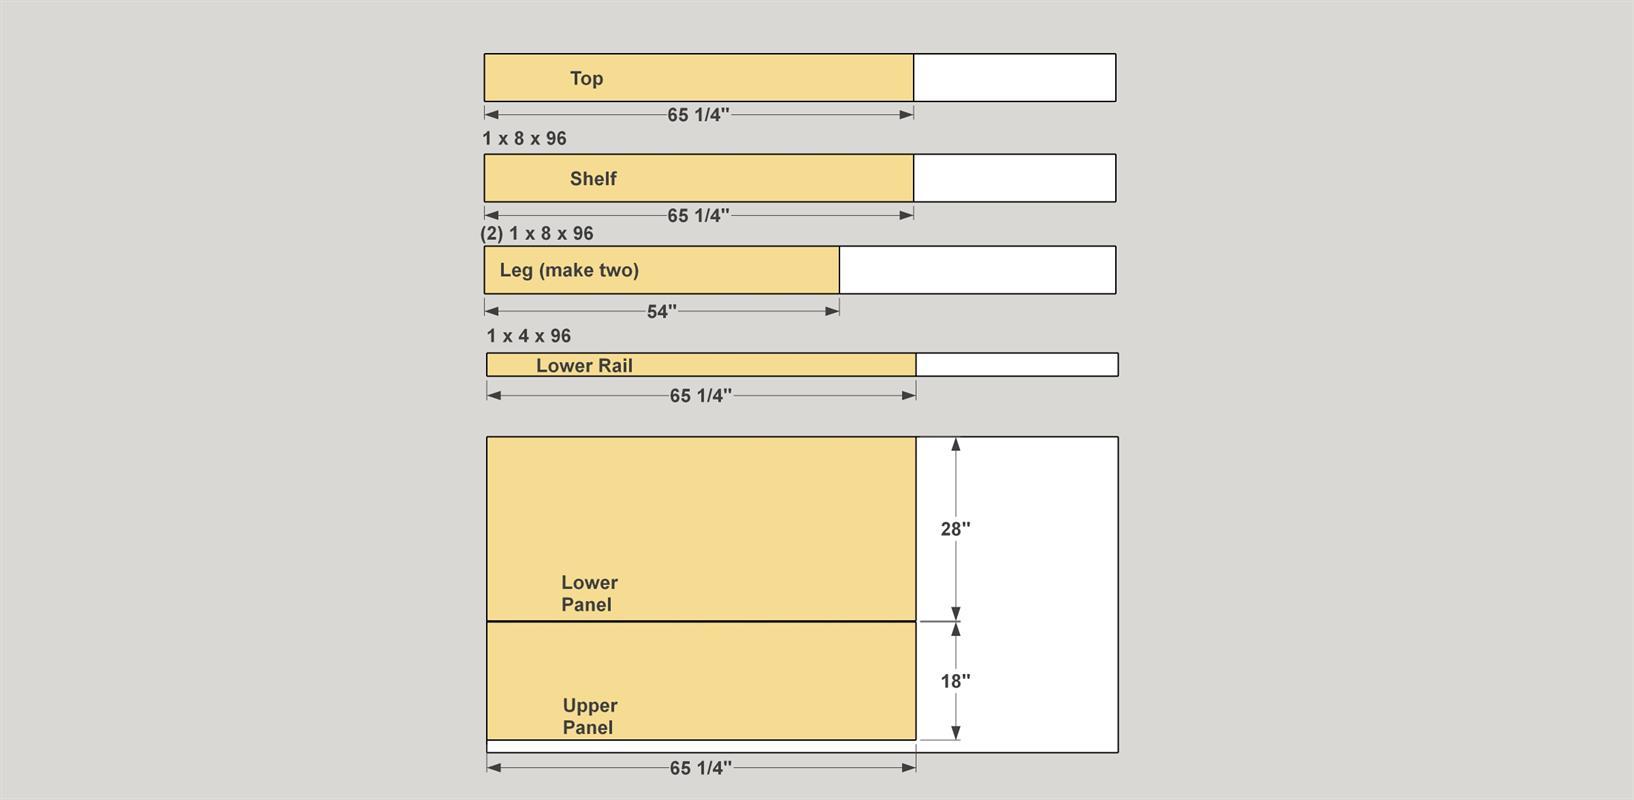
Cut List & Parts
- 2 Legs , 3/4" x 7 1/4" x 54"
- 1 Top , 3/4" x 7 1/4" x 65 1/4"
- 1 Shelf , 3/4" x 7 1/4" x 65 1/4"
- 1 Lower Rail , 3/4" x 3 1/2" x 65 1/4"
- 1 Lower Panel , 3/4" plywood x 28" x 65 1/4"
- 1 Upper Panel , 3/4" plywood x 18" x 65 1/4"
Directions
-
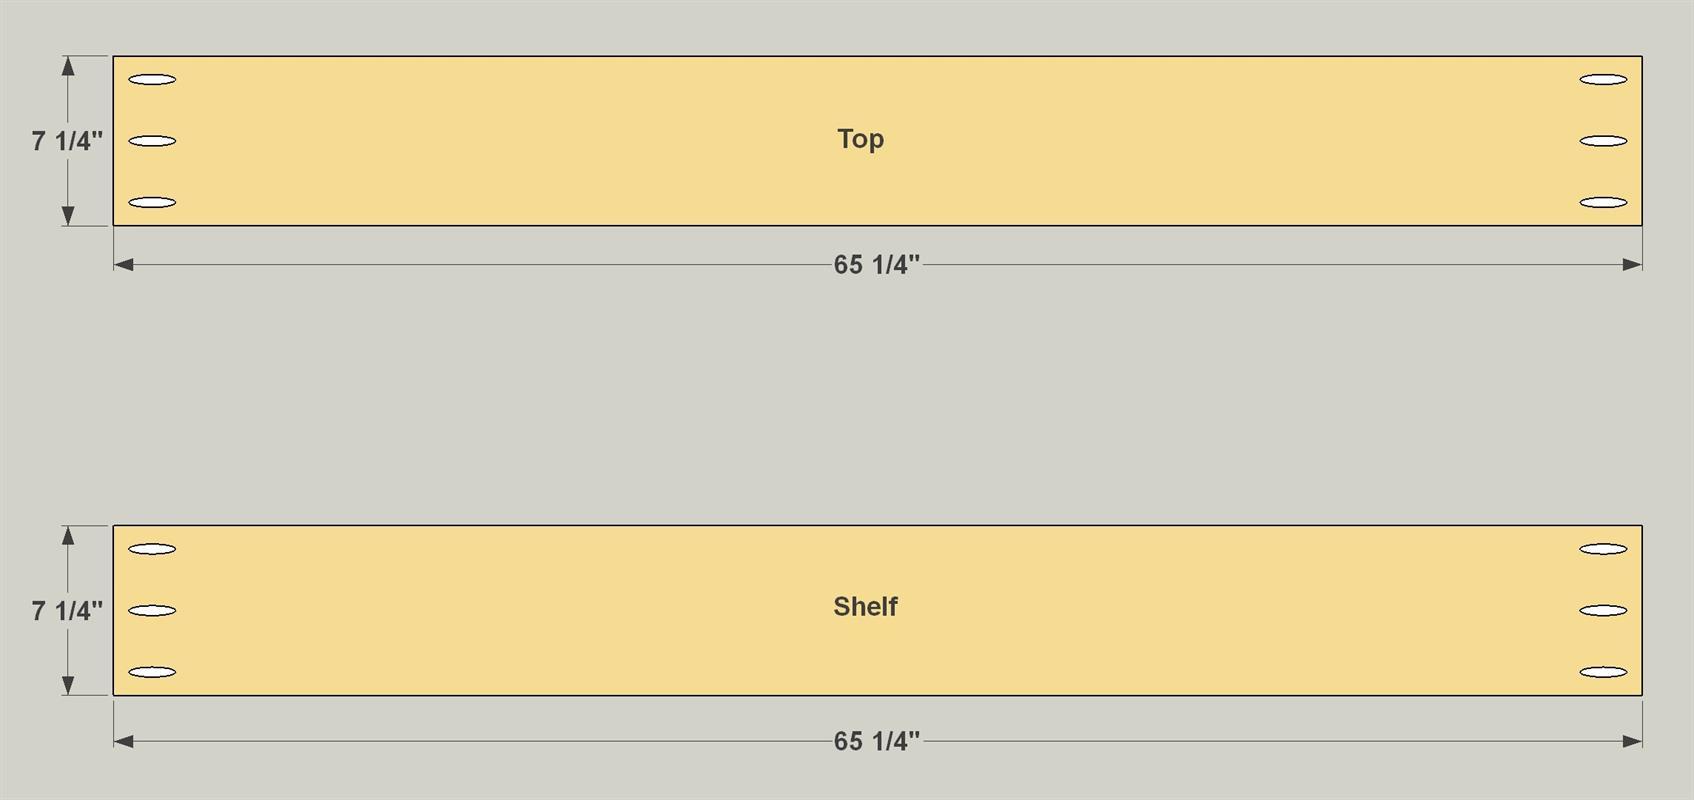
Create the Legs, Top, and Shelf
Cut two Legs, one Top, and one Shelf to length from 1x8 boards, as shown in the cutting diagram. Then drill pocket holes in the Top and Shelf, as shown, with your pocket-hole jig set up for 3/4" material.
-
Make the Lower Rail
Cut one Lower Rail to length from a 1x4 board, as shown in the cutting diagram. Then, with your pocket-hole jig set up for 3/4" material, drill pocket holes in the Lower Rail as shown.

-
Install the Top and Shelf
After sanding the Legs, Top, and Shelf, you can assemble them. To do that, align the Top with the upper ends of the legs, and attach it using 1 1/4" fine-thread pocket-hole screws. Then measure down 18" and install the Shelf, as shown.

-
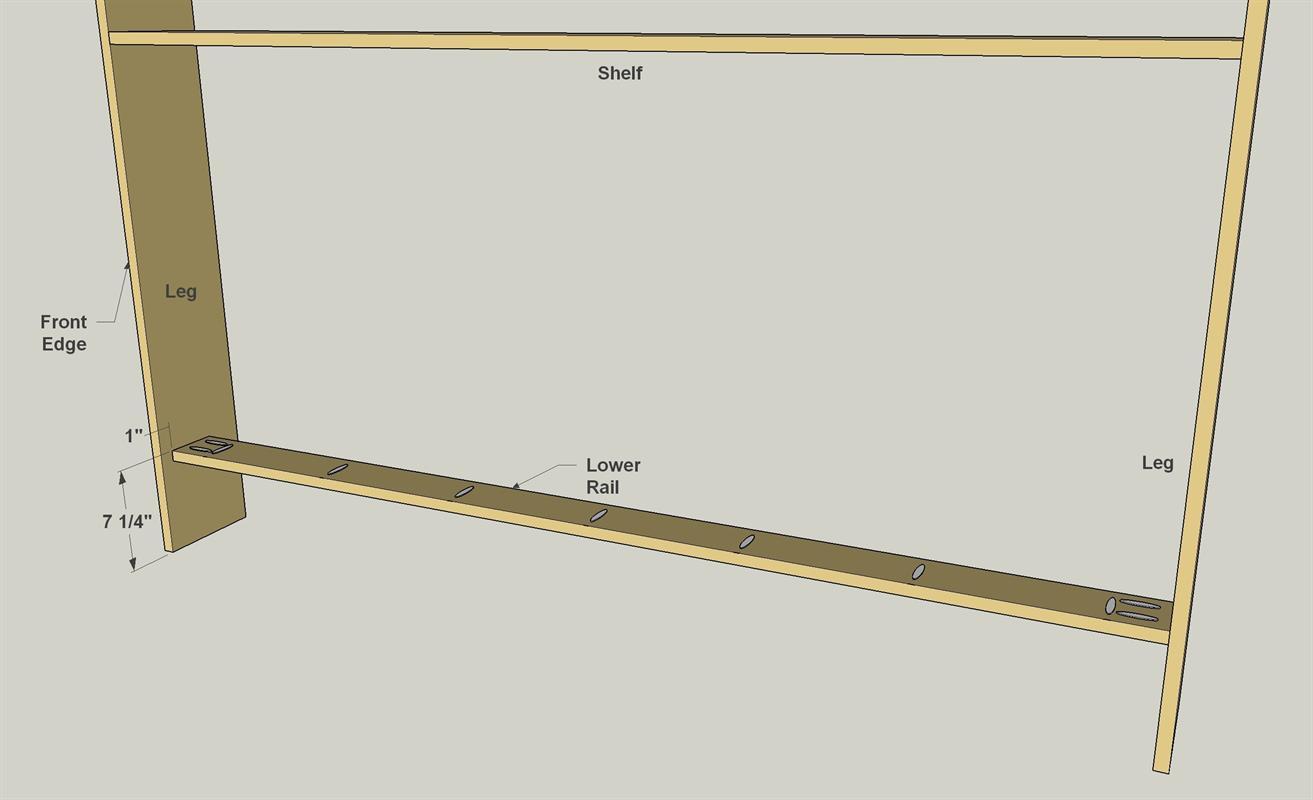
Install the Lower Rail
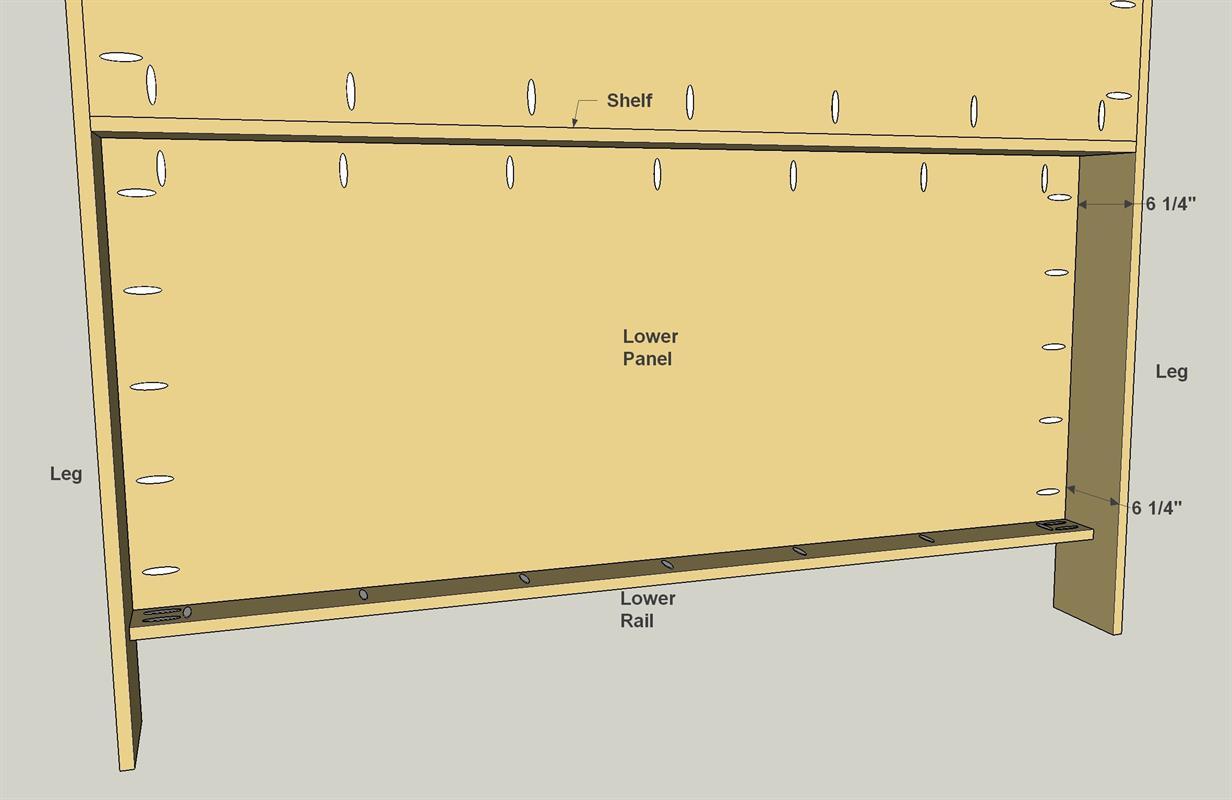
After sanding the Rail, you can attach it using 1 1/4" fine-thread pocket-hole screws. Note that it’s set 1" back from the front edge of the legs, and 7 1/4" up from the lower end of the Legs.
-
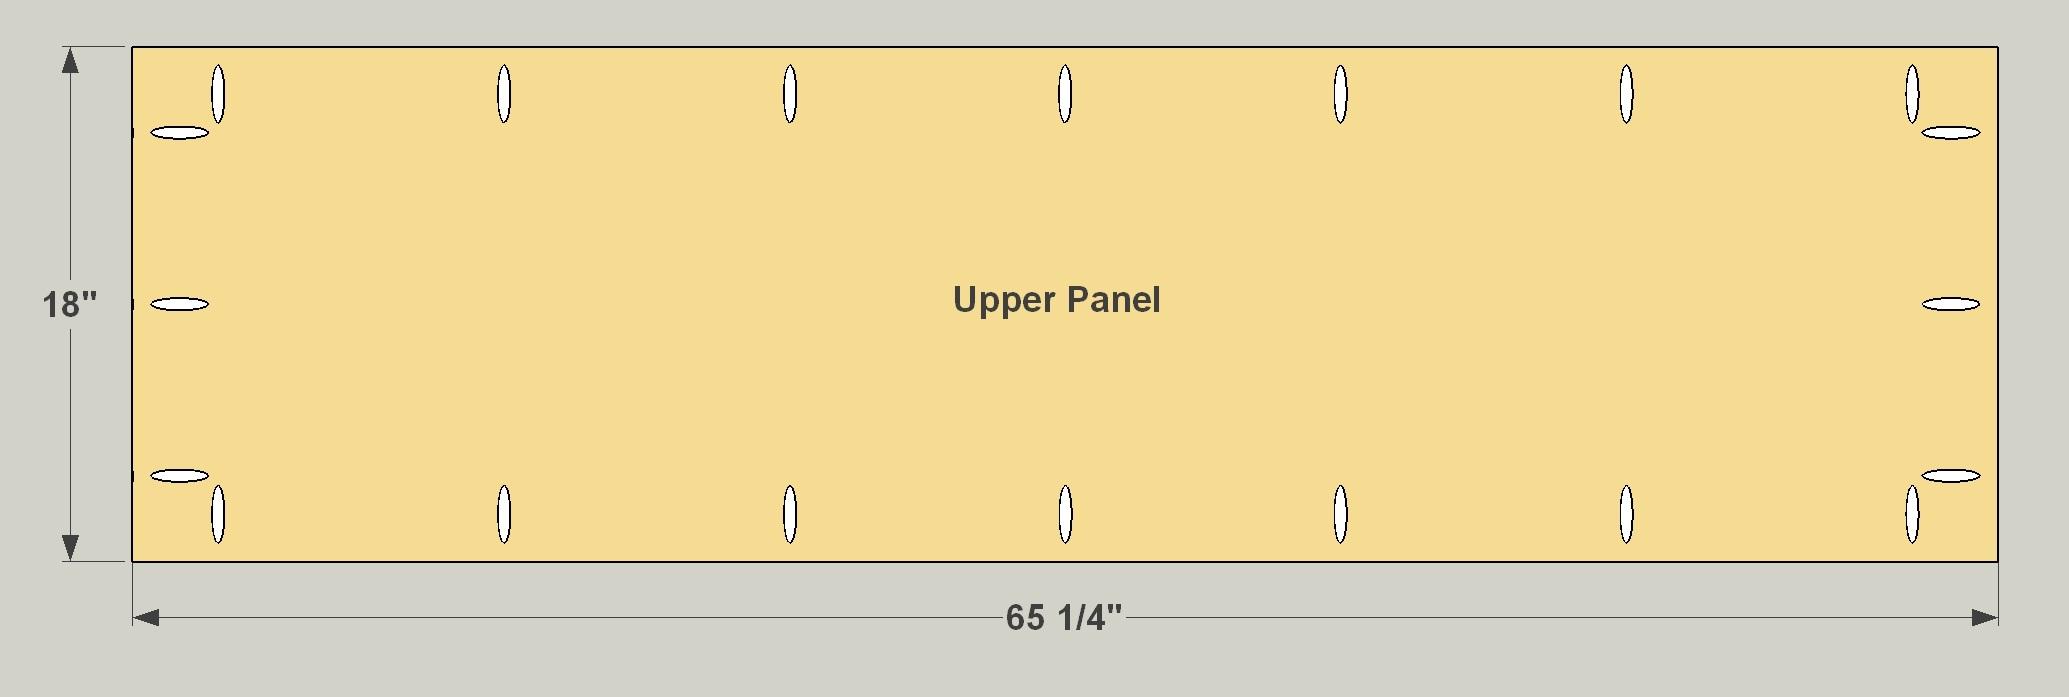
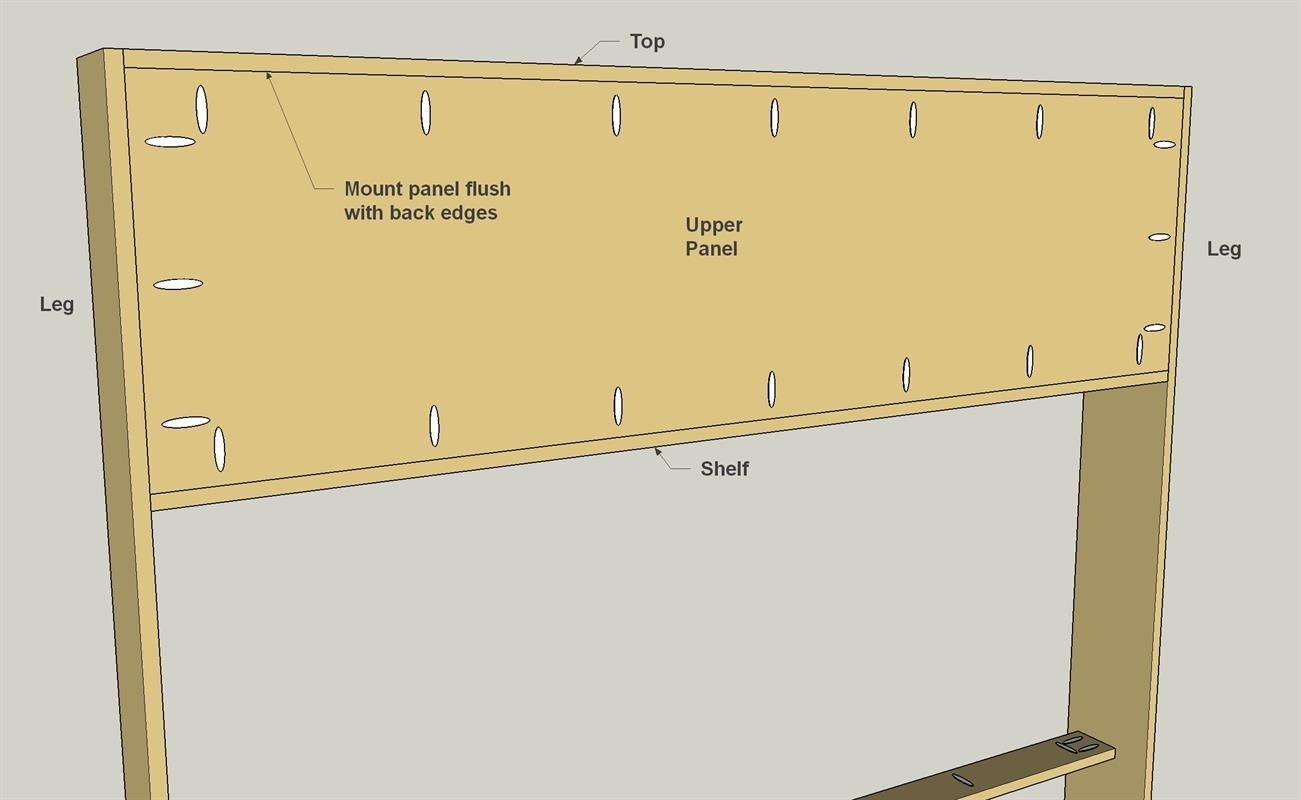
Make an Upper Panel
Cut one Upper Panel to size from a sheet of 3/4" plywood, as shown in the cutting diagram. Then, with your pocket hole jig set up for 3/4" material, drill pocket holes in the Upper Panel as shown.
-
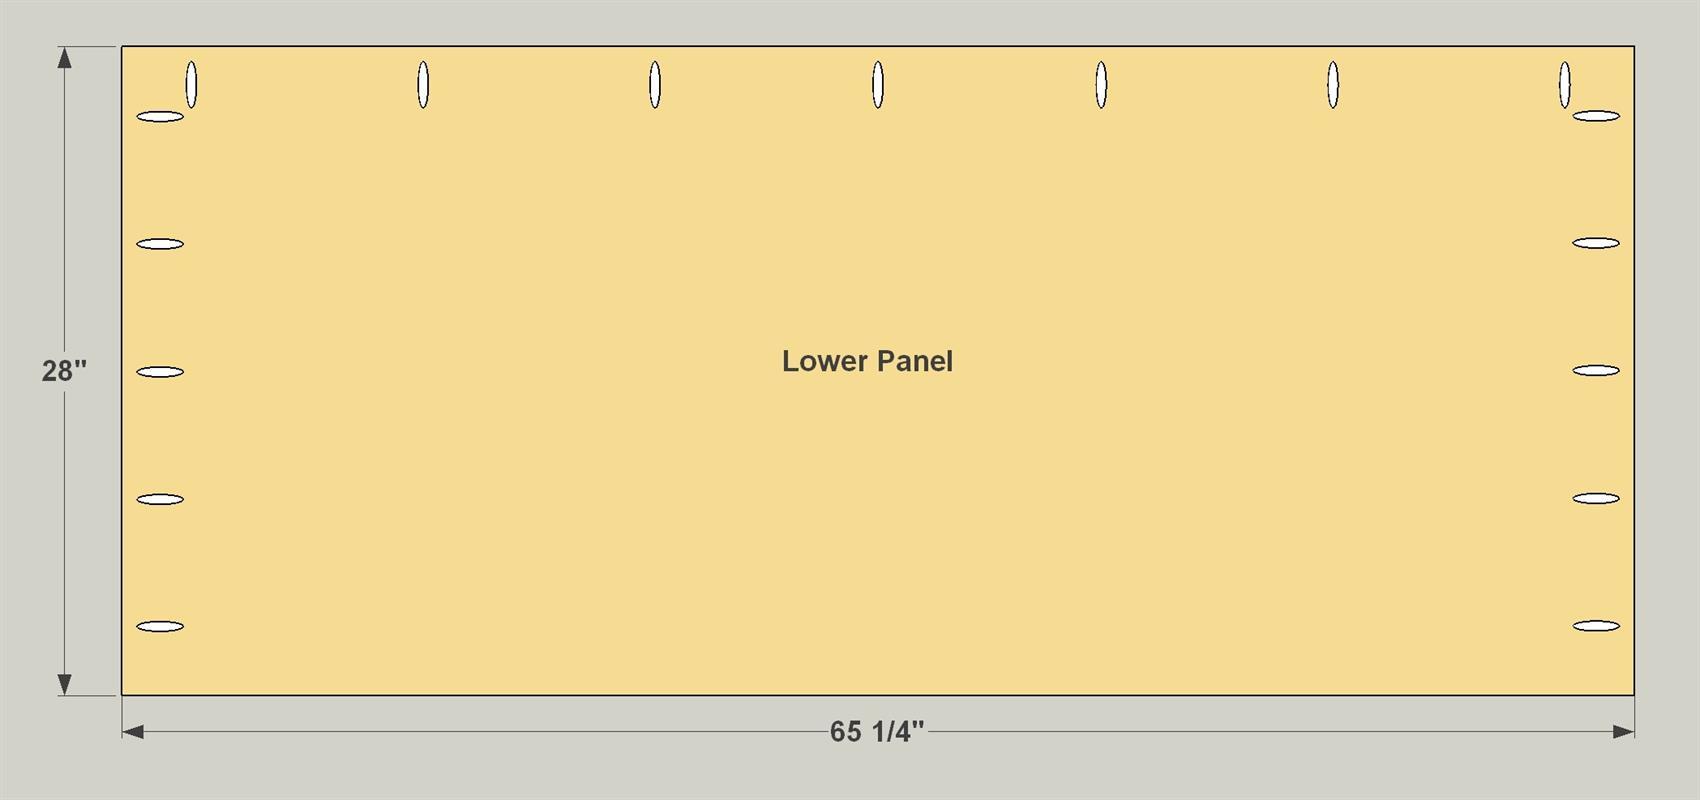
Make a Lower Panel
Cut one Upper Panel to size from a sheet of 3/4" plywood, as shown in the cutting diagram. Then, with your pocket-hole jig set up for 3/4" material, drill pocket holes in the Upper Panel as shown.
-
Install the Upper Panel
After sanding the Upper Panel, you can attach it using 1 1/4" fine-thread pocket-hole screws. The back face of the panel should sit flush with the back edges of the Top, Shelf, and Legs.
-
Install the Lower Panel
After sanding the Lower Panel, you can attach it using 1 1/4" fine-thread pocket-hole screws. Note that, because the Lower Rail sits 1" back from the front edge of the Legs, the Lower Panel will be inset 1/4" in front. Be sure you have it aligned properly when you drive in the screws.
-
Finish and Enjoy
To complete your headboard, do any touch-up sanding that’s needed, and then apply stain, finish, or paint of your choice. When it’s dry, you can mount the headboard to your bed frame. How you’ll do that depends on the type of bed frame you have. You may be able to use screws or bolts, or you may need to pick up some bed-rail hardware at your local home center.