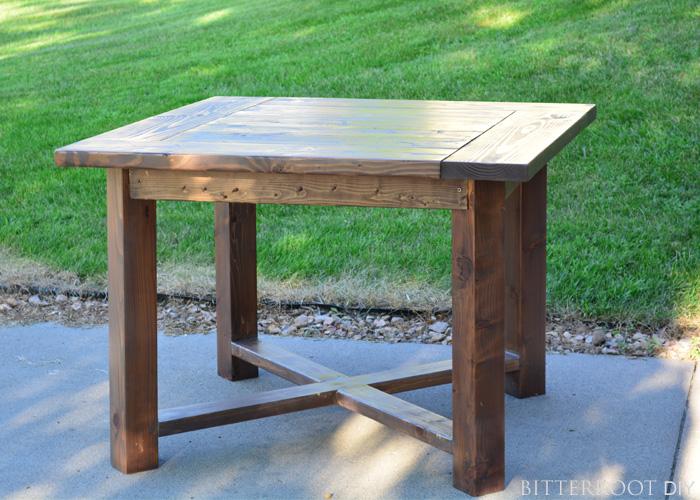


Build a custom farmhouse dining table without breaking the bank! This X Base Dining Table is a quick project to add style and function to your dining room.
Tools
Kreg Tools


Other Tools
-
Miter Saw

-
Tape Measure
Materials
Wood Products
- 2 Board , 2x8 , 72"
- 2 Board , 2x6 , 96"
- 3 Board , 2x4 , 72"
- 1 Board , 2x4 , 96"
- 2 Board , 4x4 , 72"
Hardware & Supplies
- 1 2 1/2" Pocket Hole Screws Box
- 1 Wood Glue
Directions
-
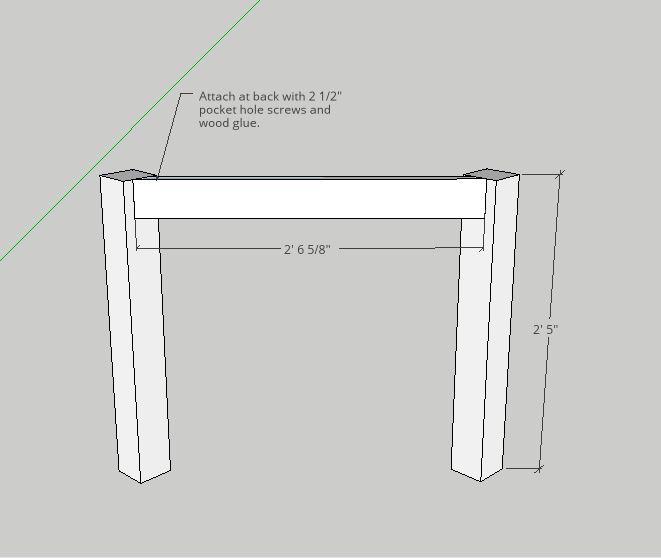
Legs (a
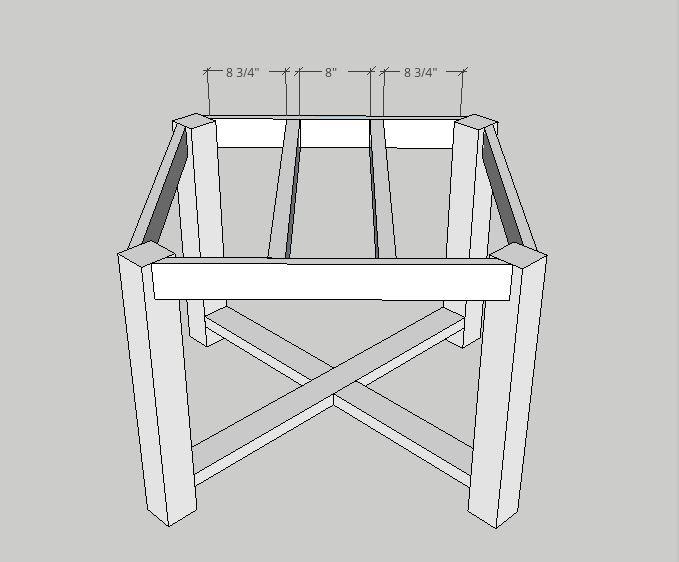
Cut the top braces at a perpendicular 45 miter along the vertical edge of the 2x4. The braces should measure 2' 6 5/8" on the long side. Position one of the top braces in the center of two legs and attach with 2 1/2" pocket hole screws. Place pocket holes toward the inside of the legs to best hide them. Repeat for the second set of legs.
-
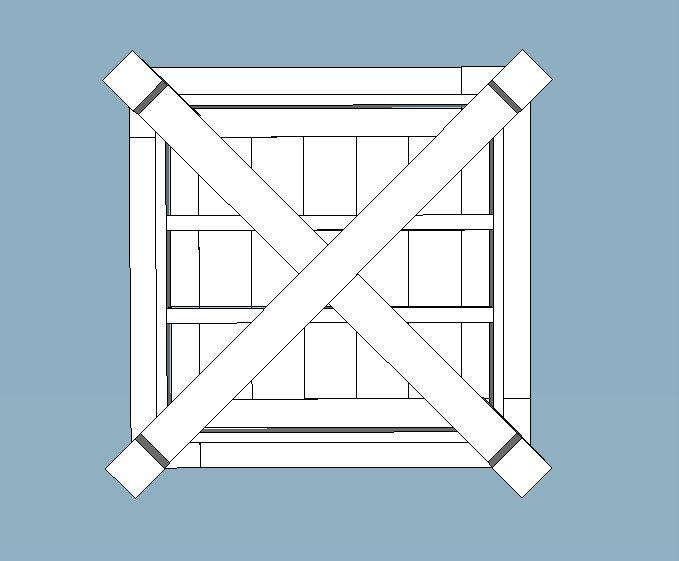
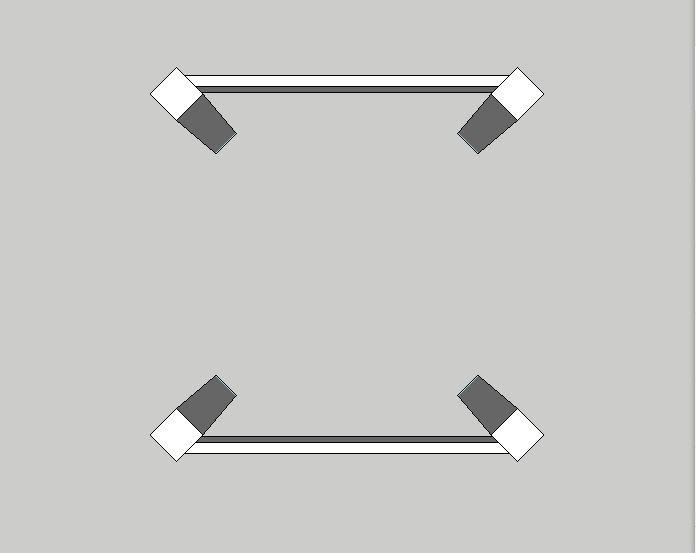
Legs (b
The top view makes it a little easier to see the miter and brace position here. You should have two sets of legs when you're done.
-
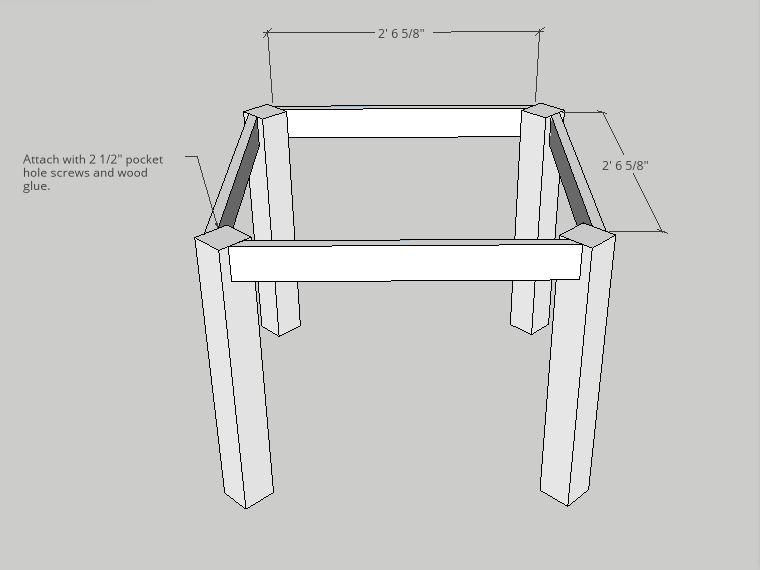
Base
Attach both sets of legs with the remaining top braces. Use 2 1/2" pocket hole screws and wood glue. Place pocket hole screws on the inside edges to best hide them. Flip the table upside down to make the attachments so that the legs and braces are flush for the tabletop to sit on.
-
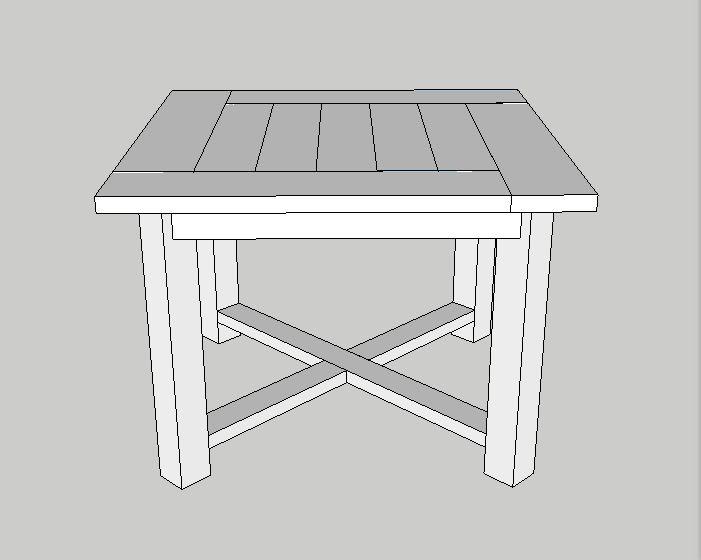
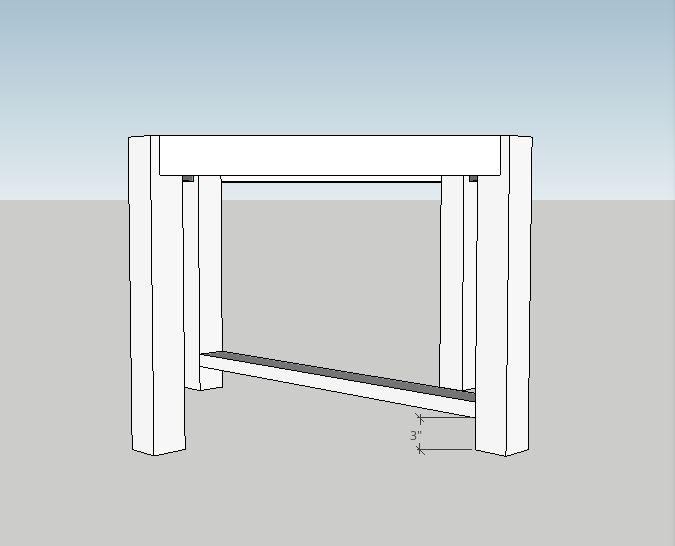
X Brace (a
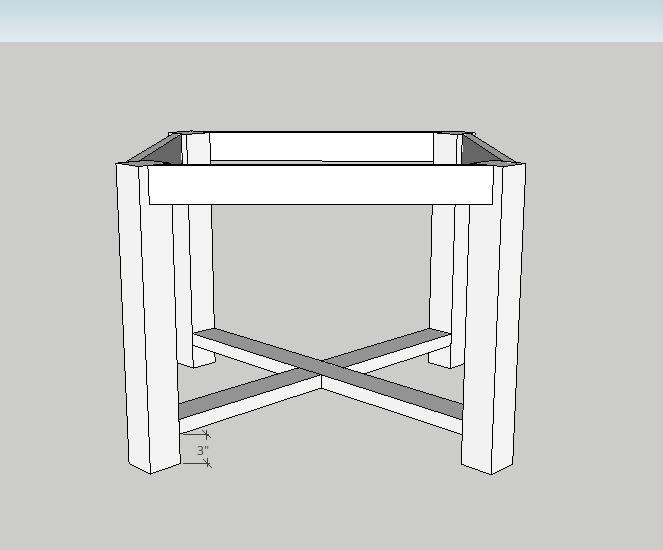
Position and attach the full-length bottom X brace with 2 1/2" pocket hole screws and wood glue. Place pocket holes on the bottom of the brace to best hide them.
-
X Brace (b
Attach the opposite side of the base X brace with 2 1/2" pocket hole screws and wood glue. Again, place pocket holes on the bottom to best hide them.
-
Tabletop Support
Fit the tabletop supports snugly across the top of the base and attach with wood glue and 2 1/2" pocket hole screws.
-
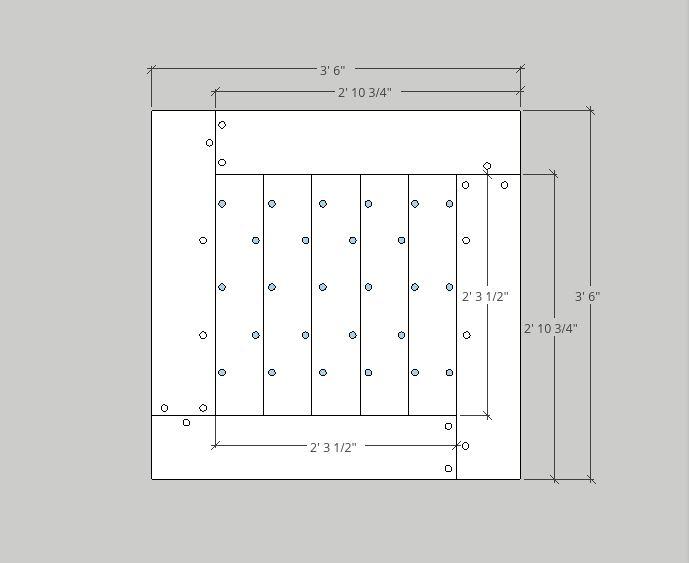
Tabletop
Attach each piece of the tabletop with 2 1/2" pocket hole screws and wood glue according to the diagram. Start with the middle 2x6s. Once they are all glued and attached, add the outer 2x8s.
-
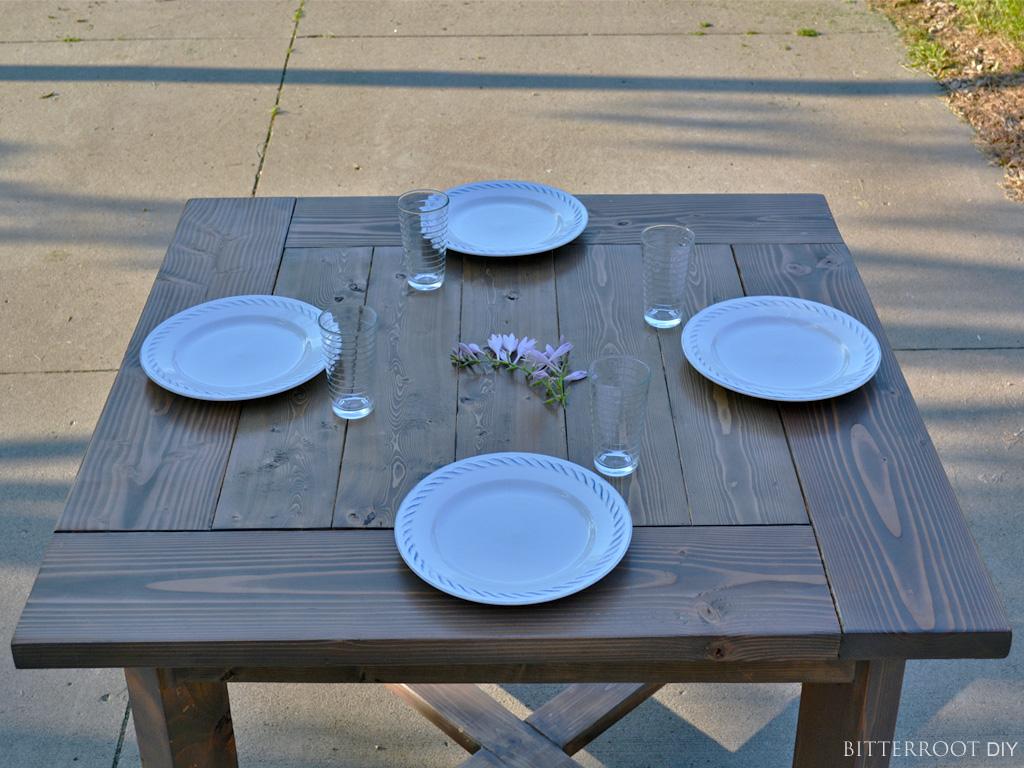
The Grand Finale
Position tabletop 2x6s (center section) perpendicular to the tabletop supports and attach. I used 8 metal corner brackets so that it's easy to get the top off and on if we ever have to move the table. Totally up to you!