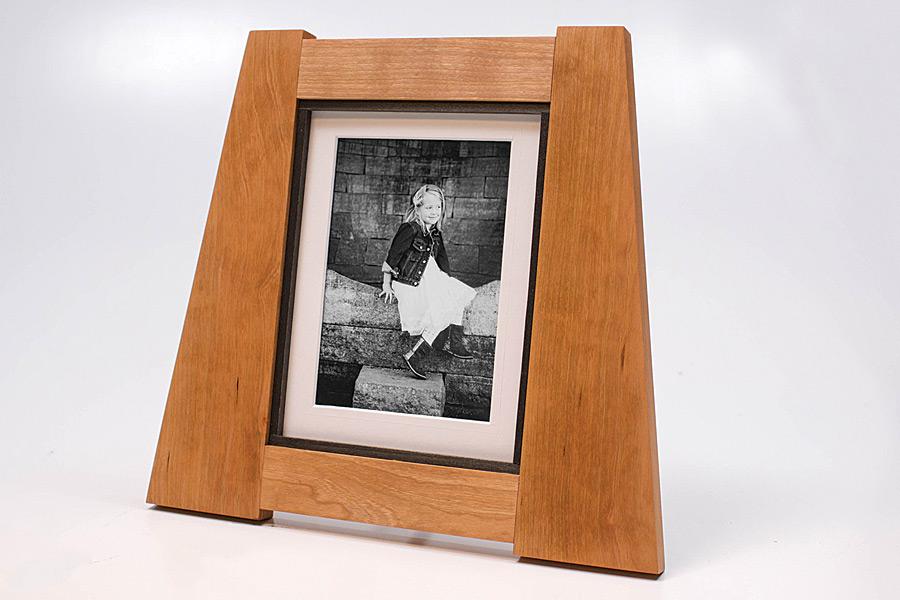

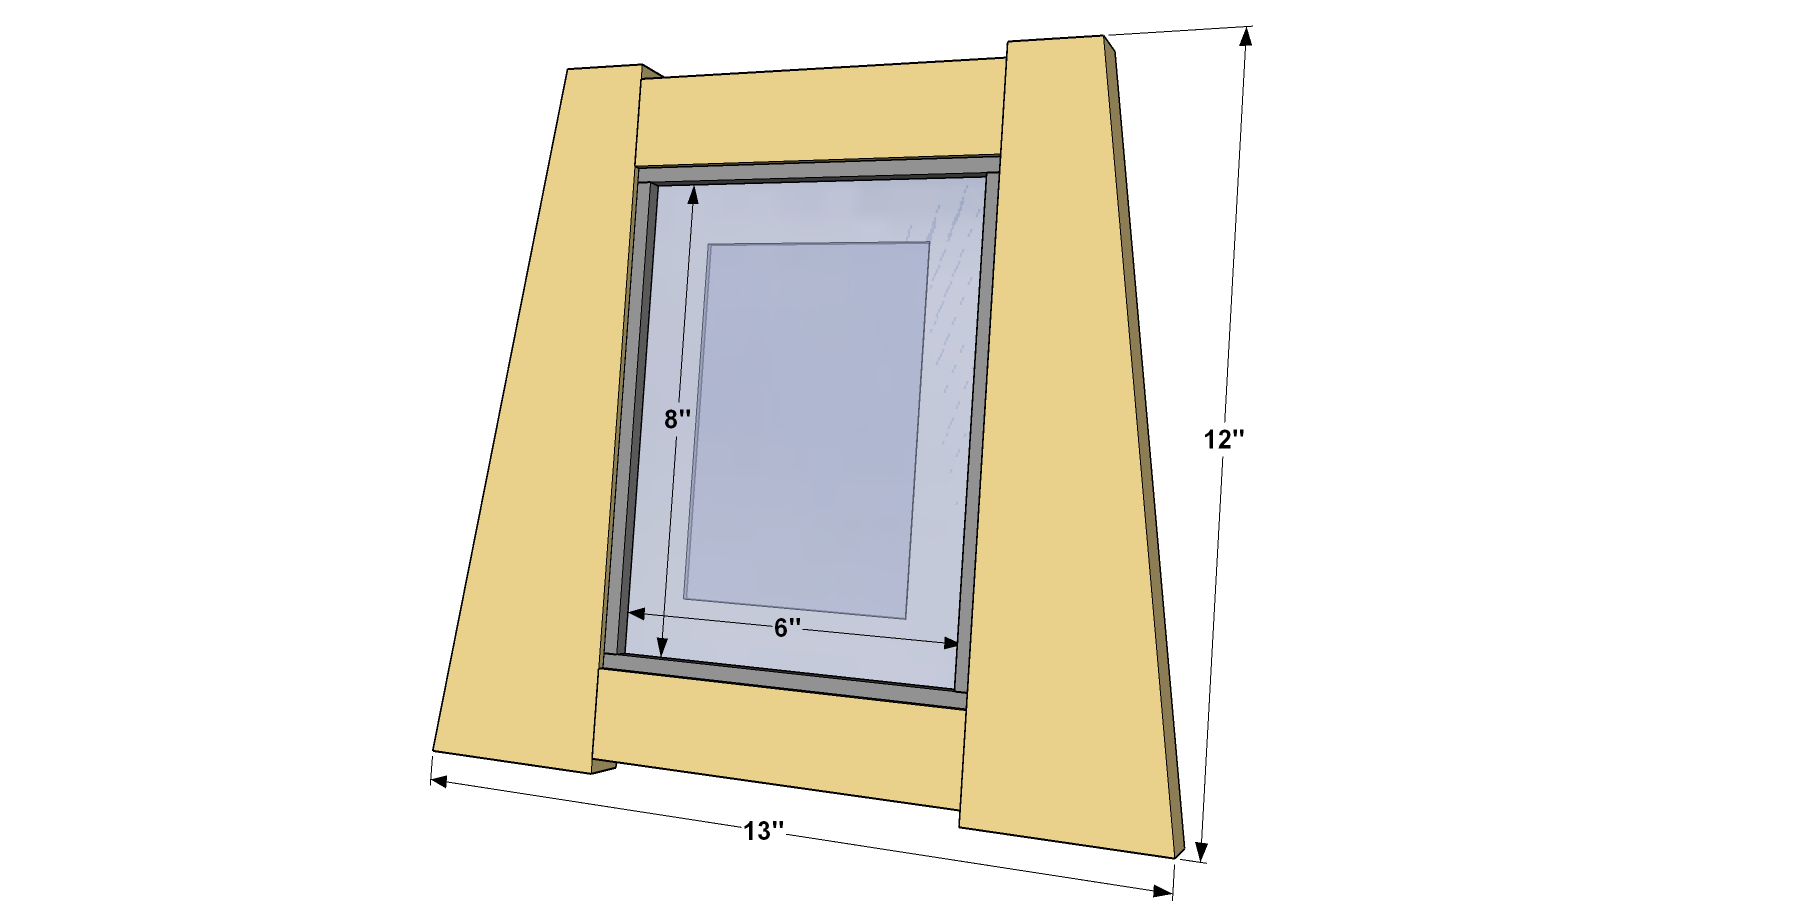


Beautiful photos deserve an equally beautiful frame. This frame, sized to fit a 4"x6" photo plus a mat, fills the bill with tapered sides and contrasting photo surround. That also creates the recess to hold the photo in place, making construction easy. The tapered sides are easy to create, too.
Tools
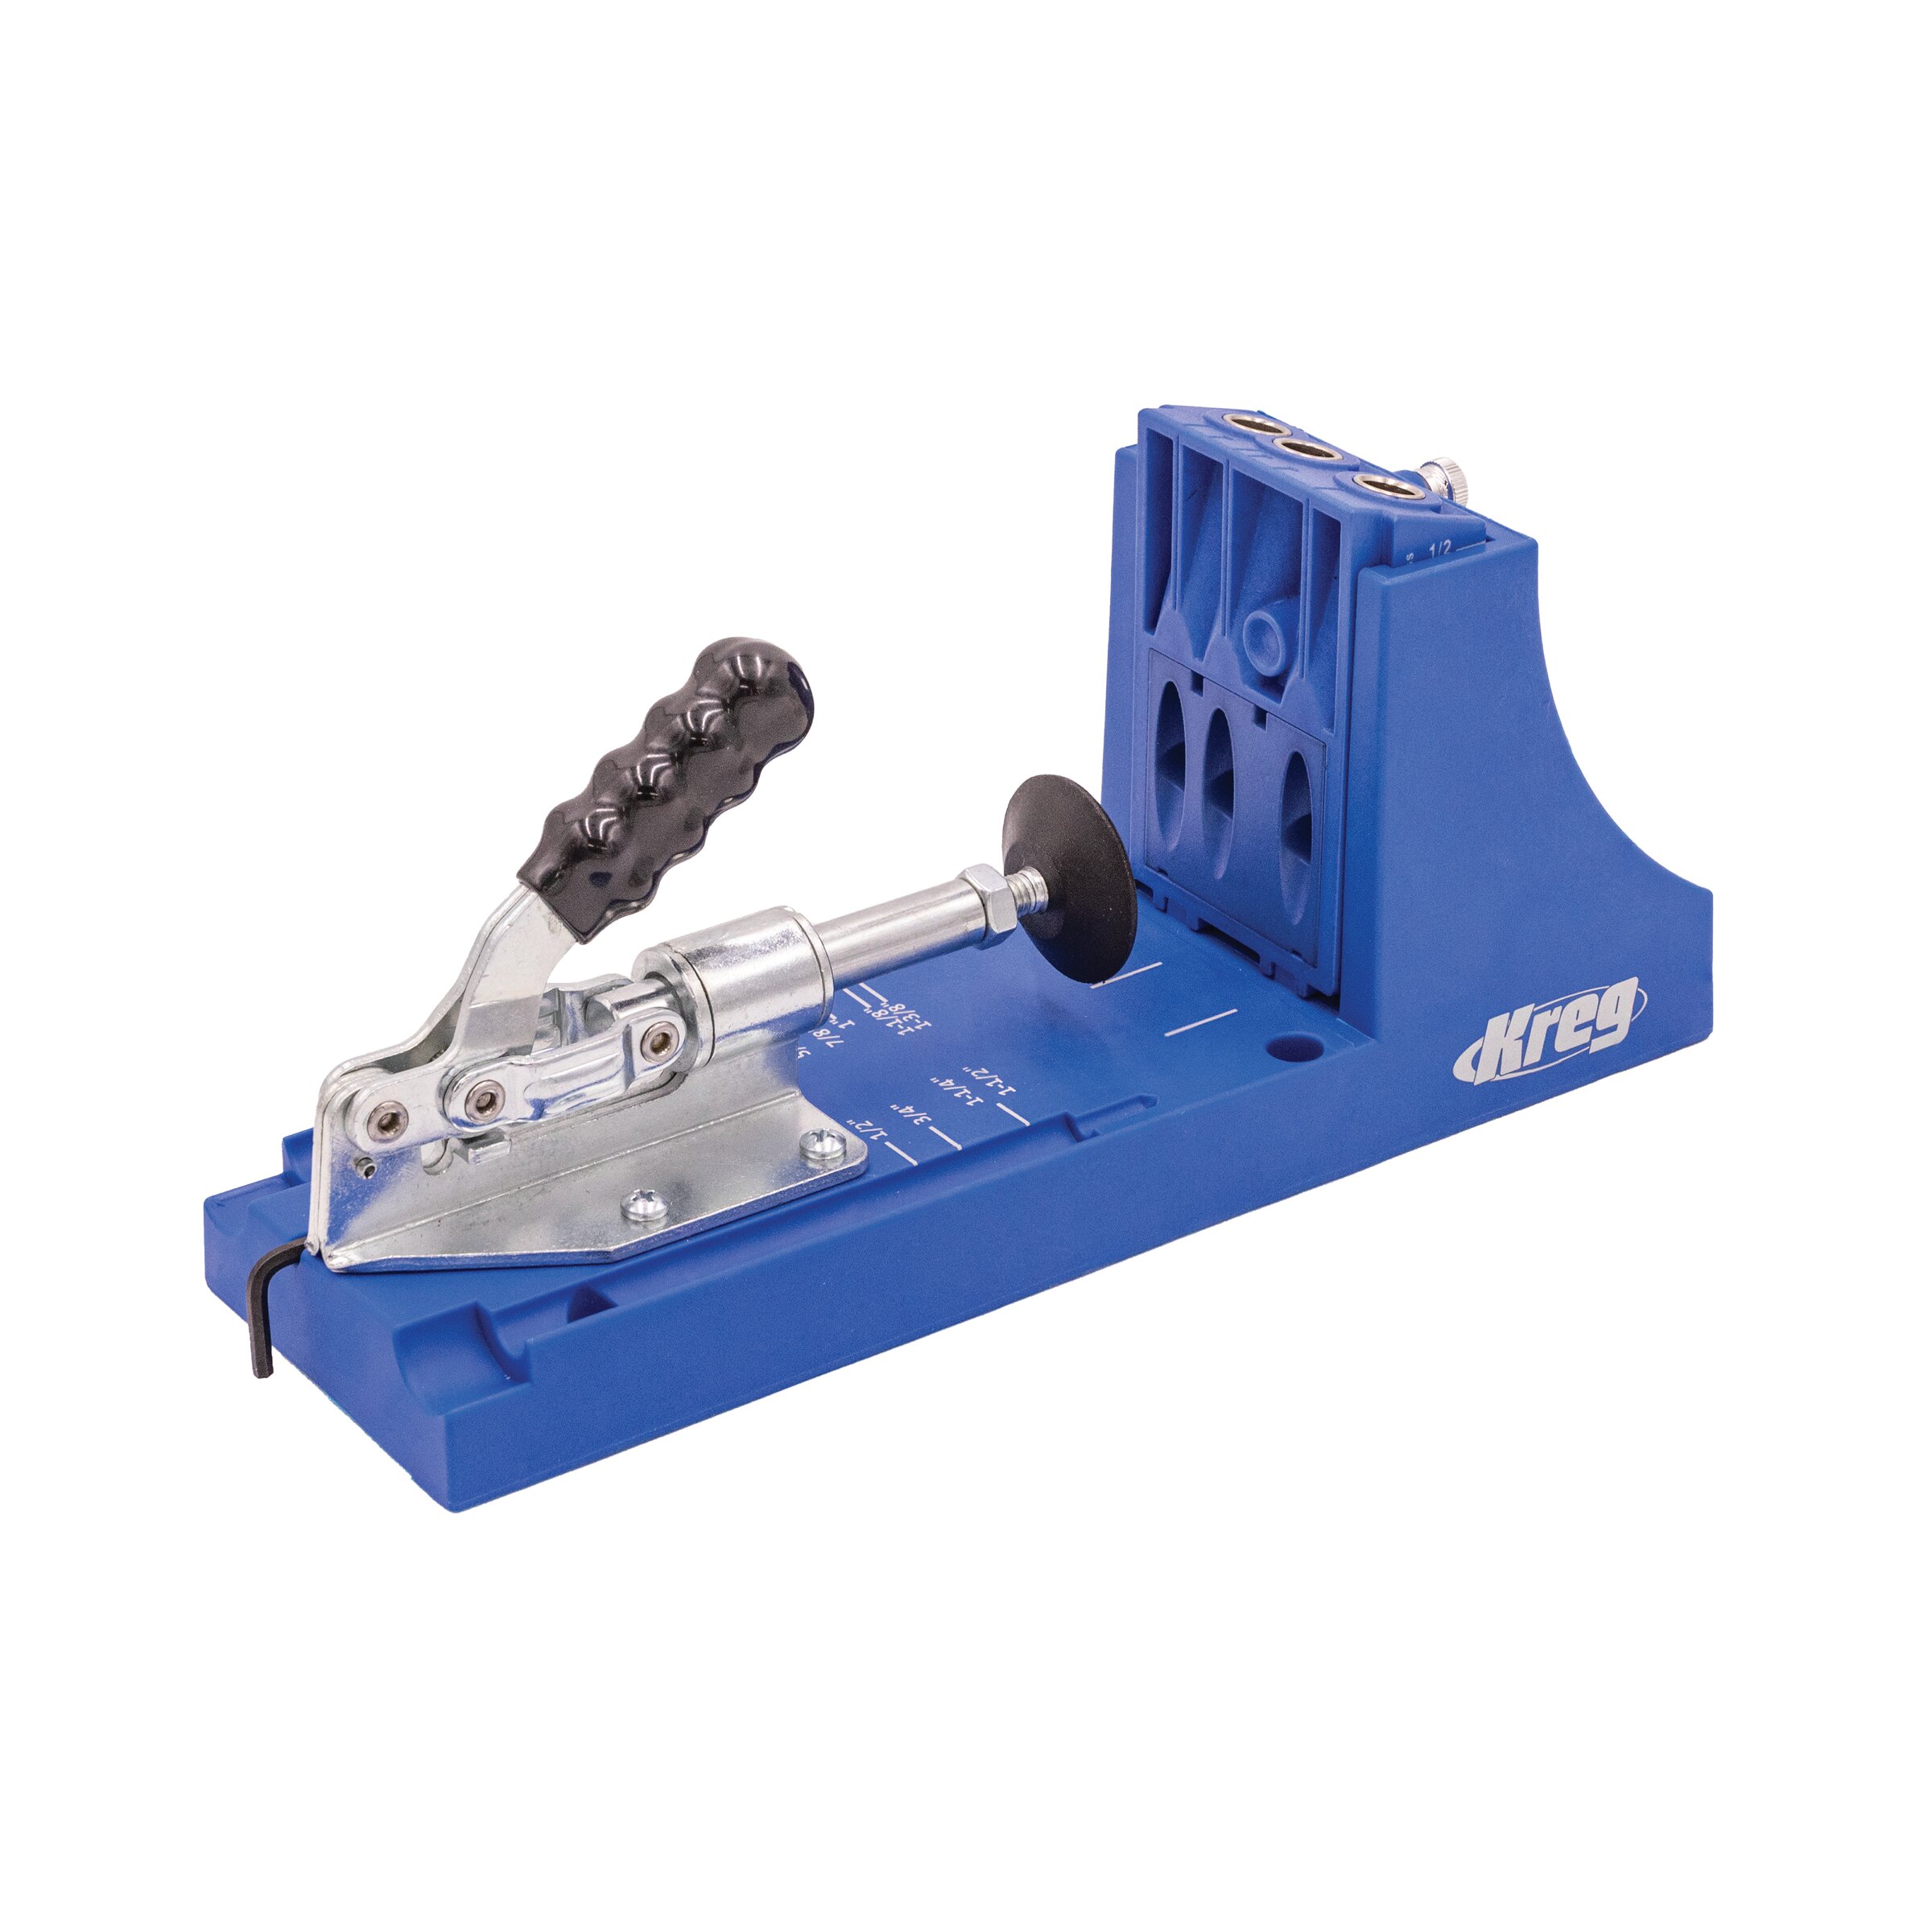
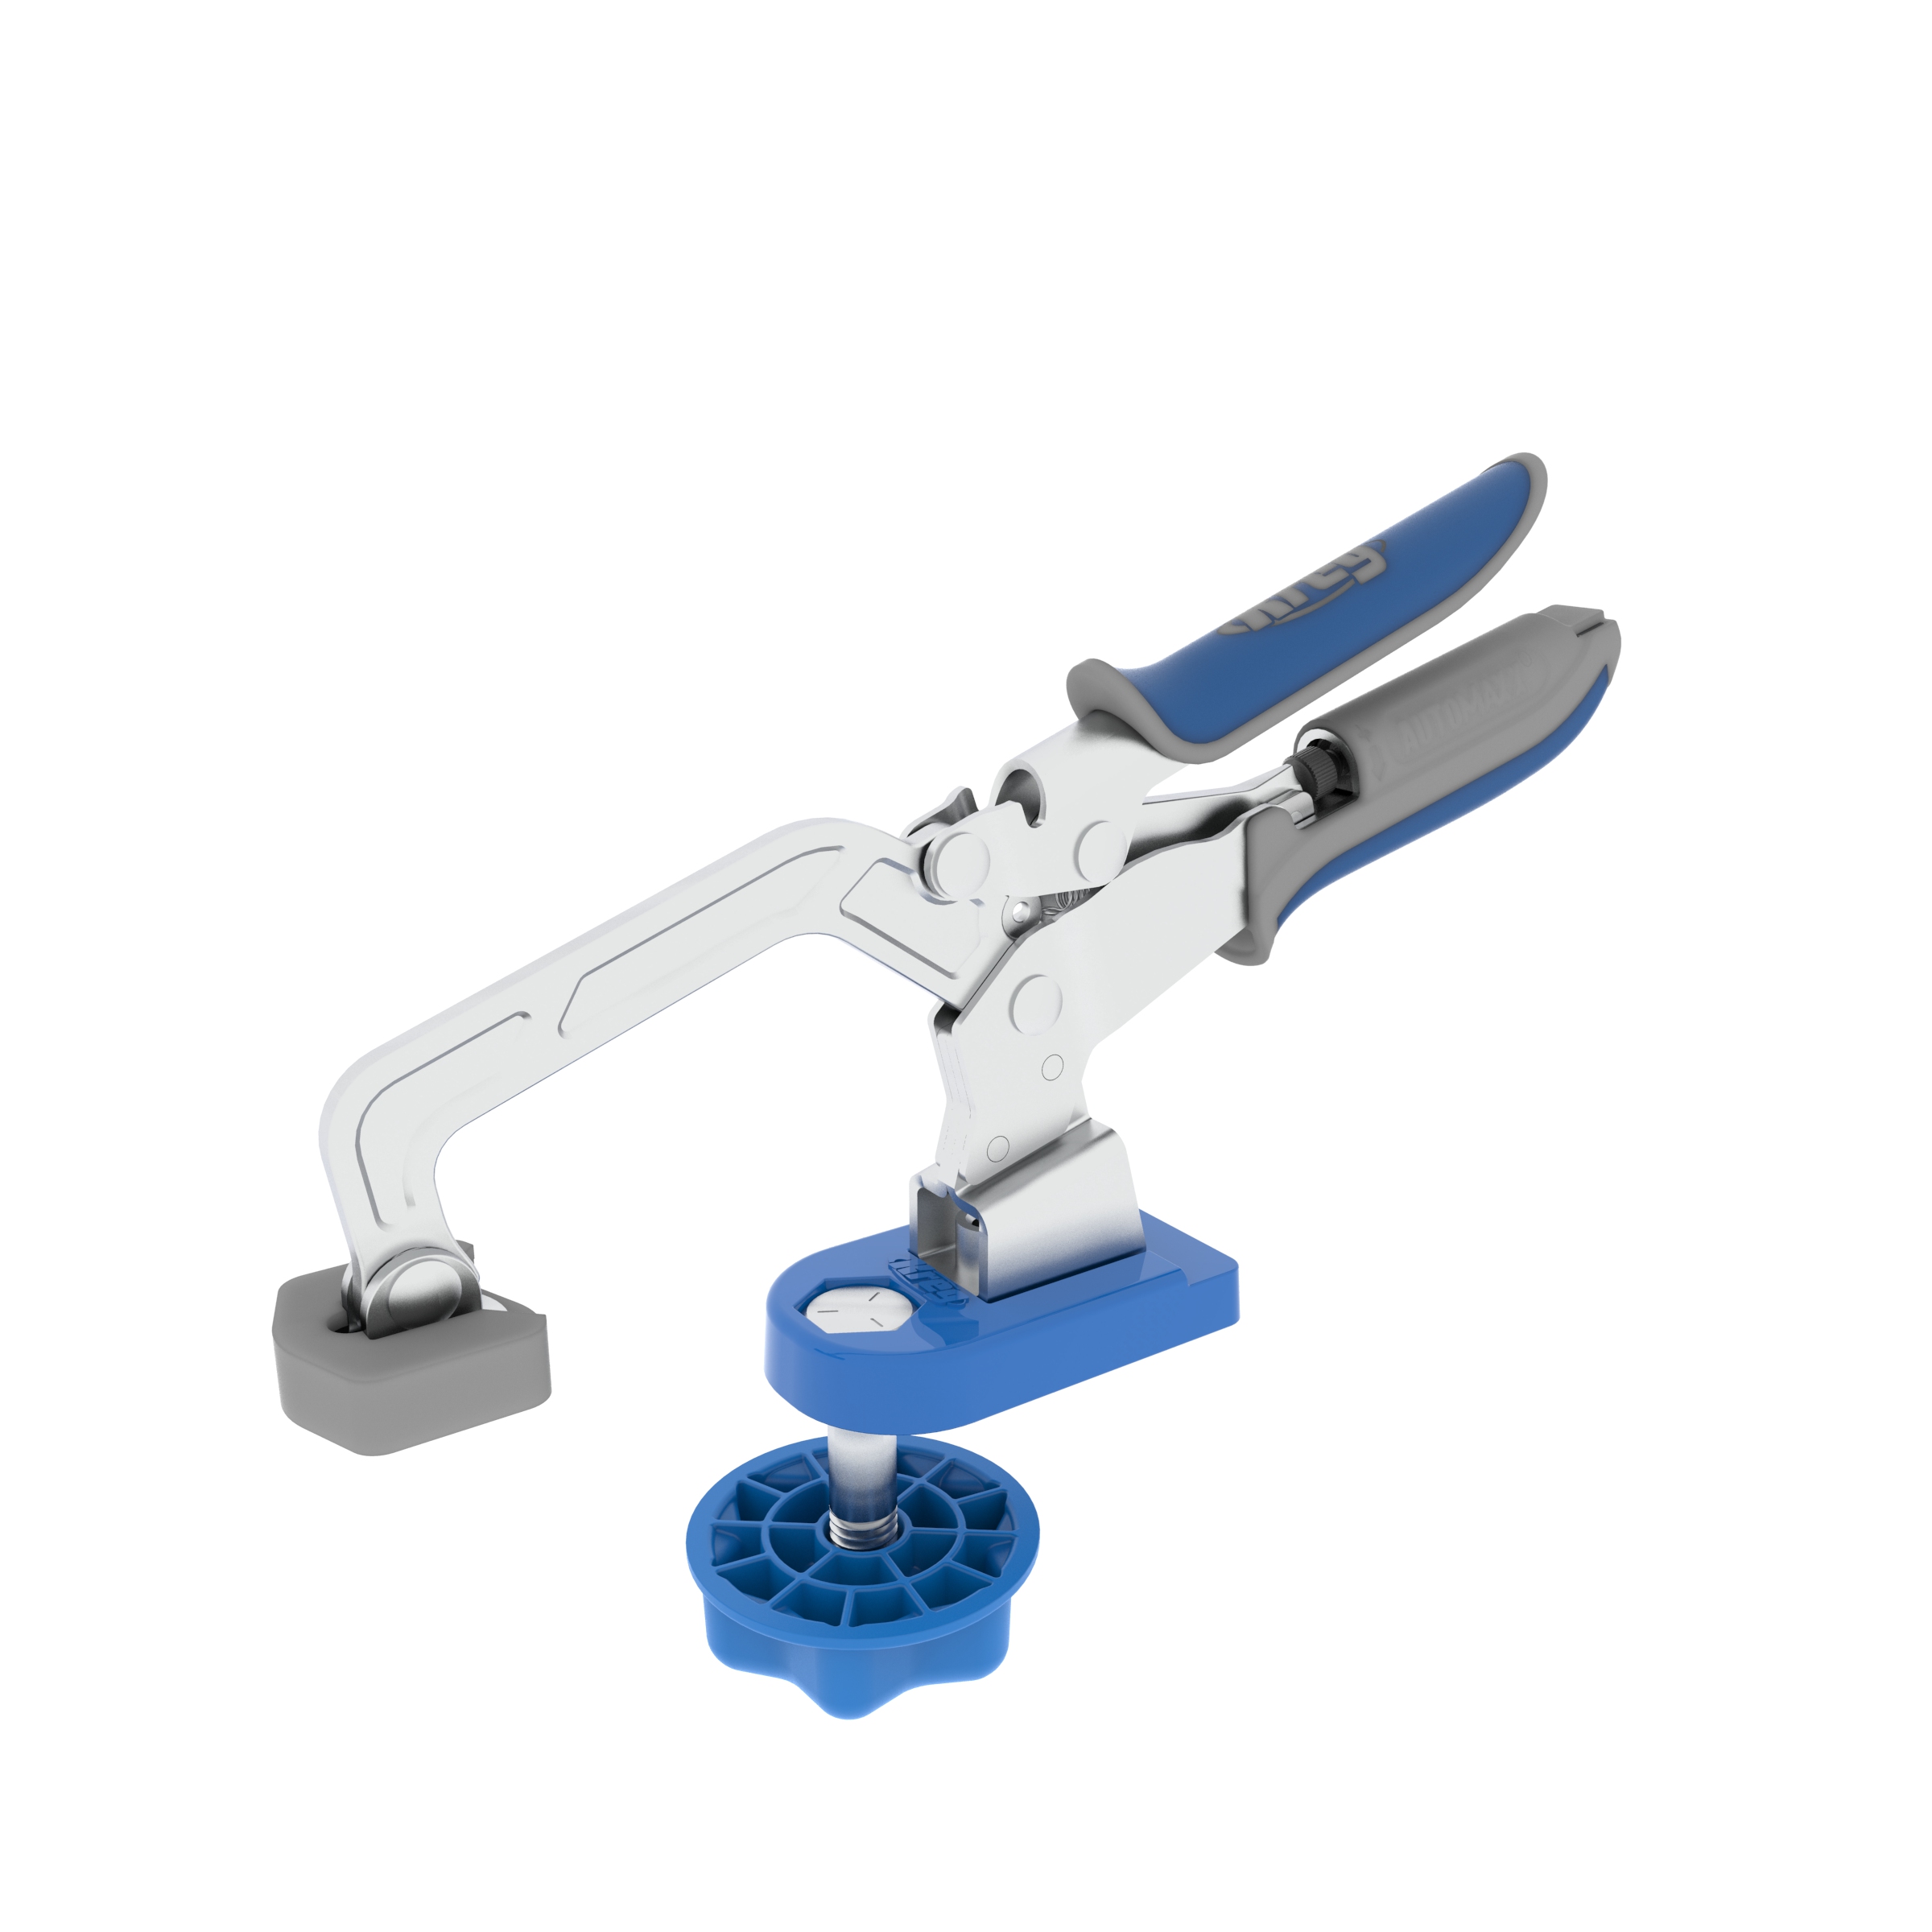
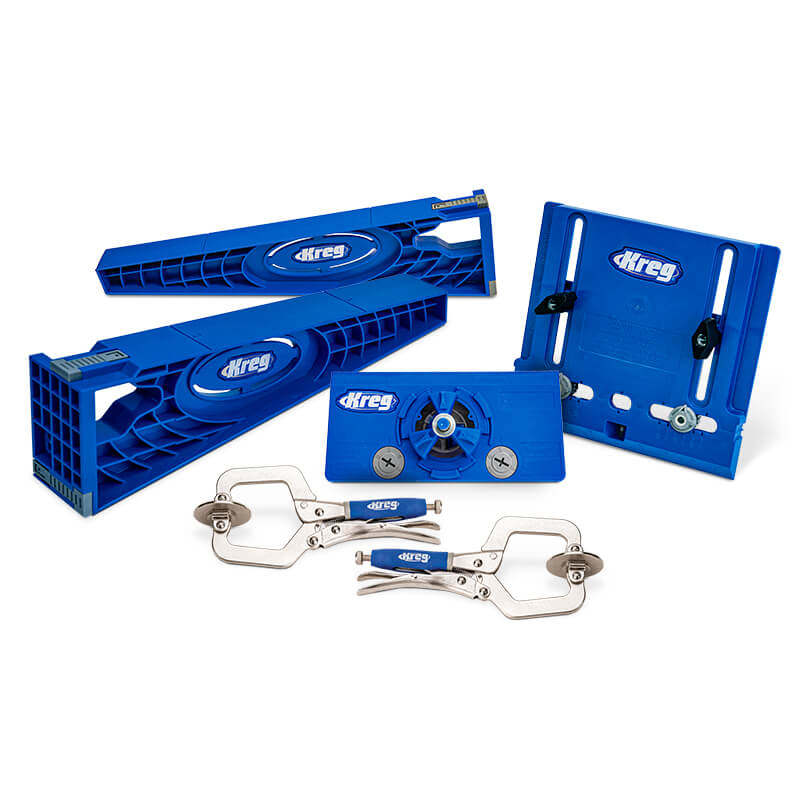
Kreg Tools


Materials
Wood Products
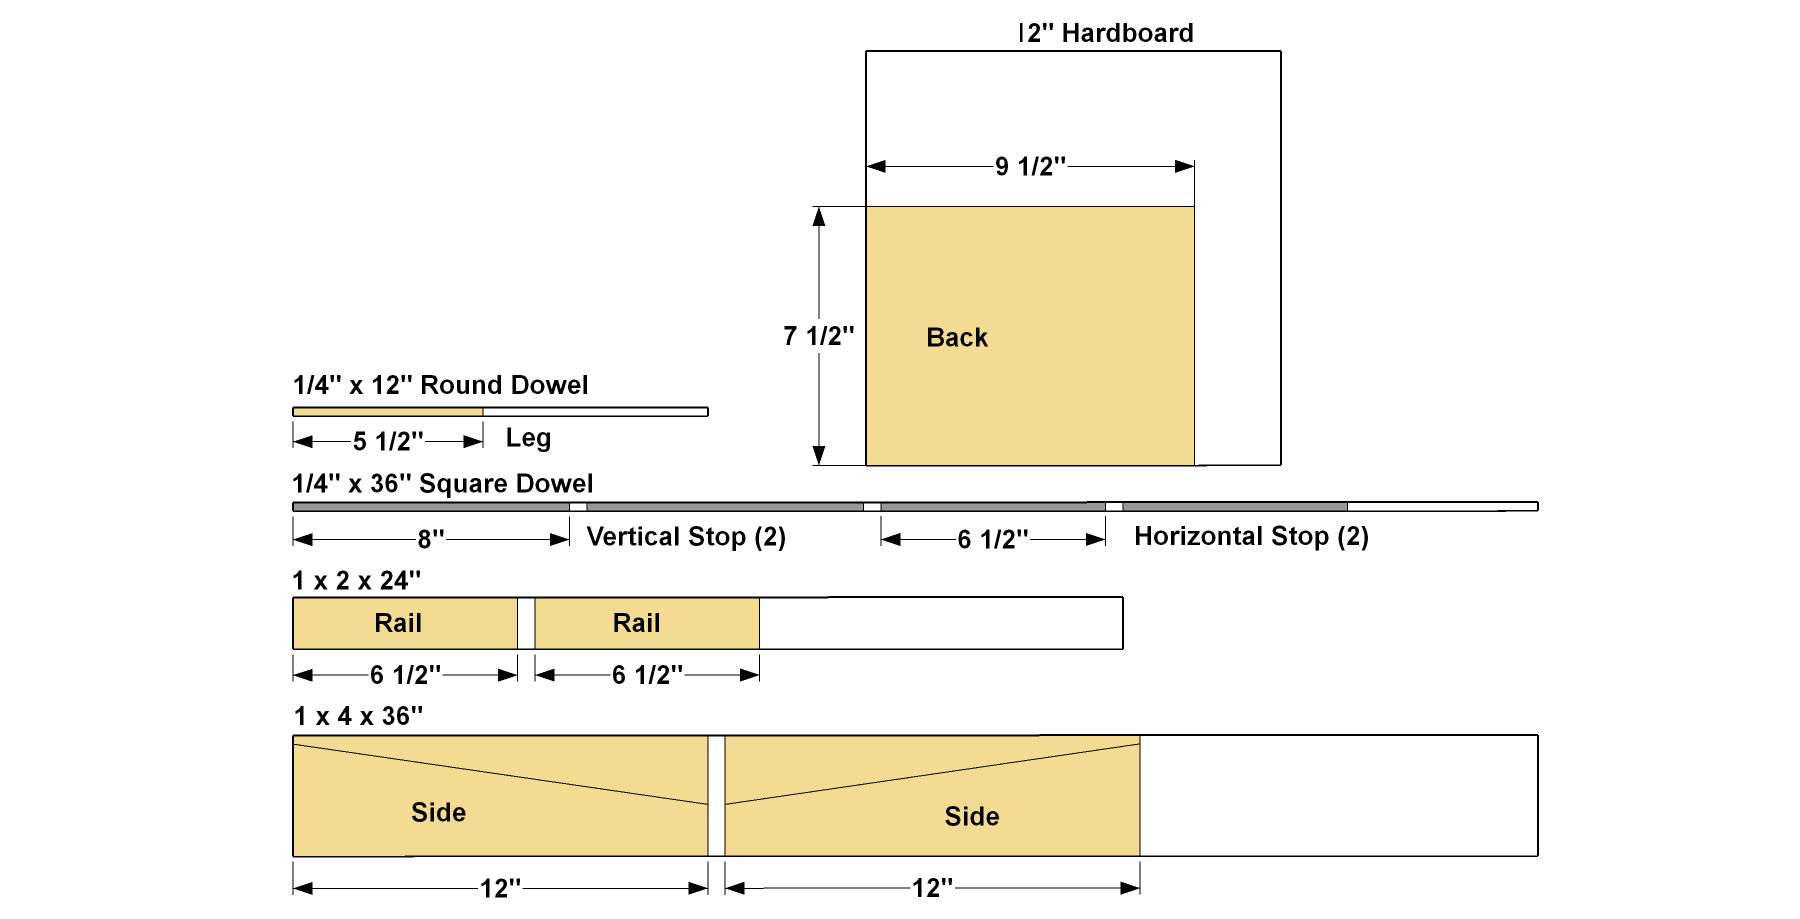
- 1 Cherry board , 1x4 x 36"
- 1 Cherry board , 1x2 x 24"
- 1 Square dowel , 1/4" x 36"
- 1 Round dowel , 1/4" x 12"
- 1 Hardboard , 1/8" x 12" x 12"
Hardware & Supplies
- 8 1 1/4" fine-thread Kreg Pocket-Hole Screws
- 10 #6 x 5/8" flathead wood screws
- 1 6 7/16" x 8 7/16" single-strength glass
- 1 Photo mat board
- 1 Wood glue
Cut List & Parts
- 2 Side , 3/4" x 3 1/4" x 12"
- 2 Rail , 3/4" x 1 1/2" x 6 1/2"
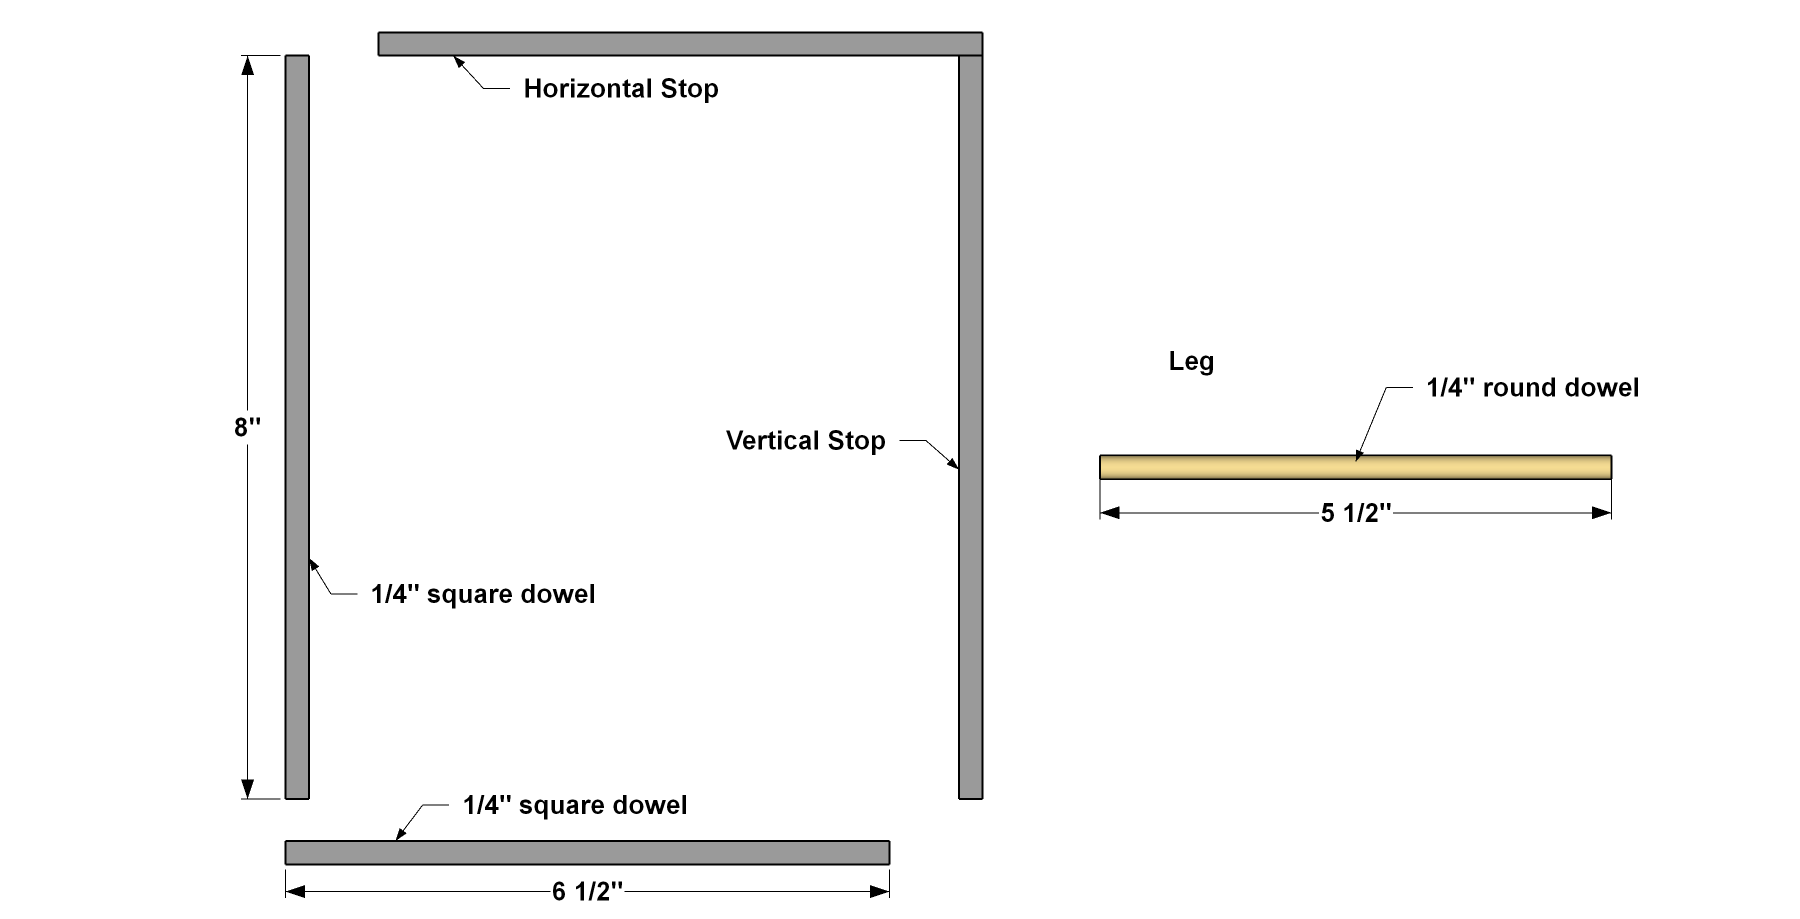
- 2 Vertical Stop , 1/4" x 1/4" x 8"
- 2 Horizontal Stop , 1/4" x 1/4" x 6 1/2"
- 1 Leg , 1/4" dia. x 5 1/2"
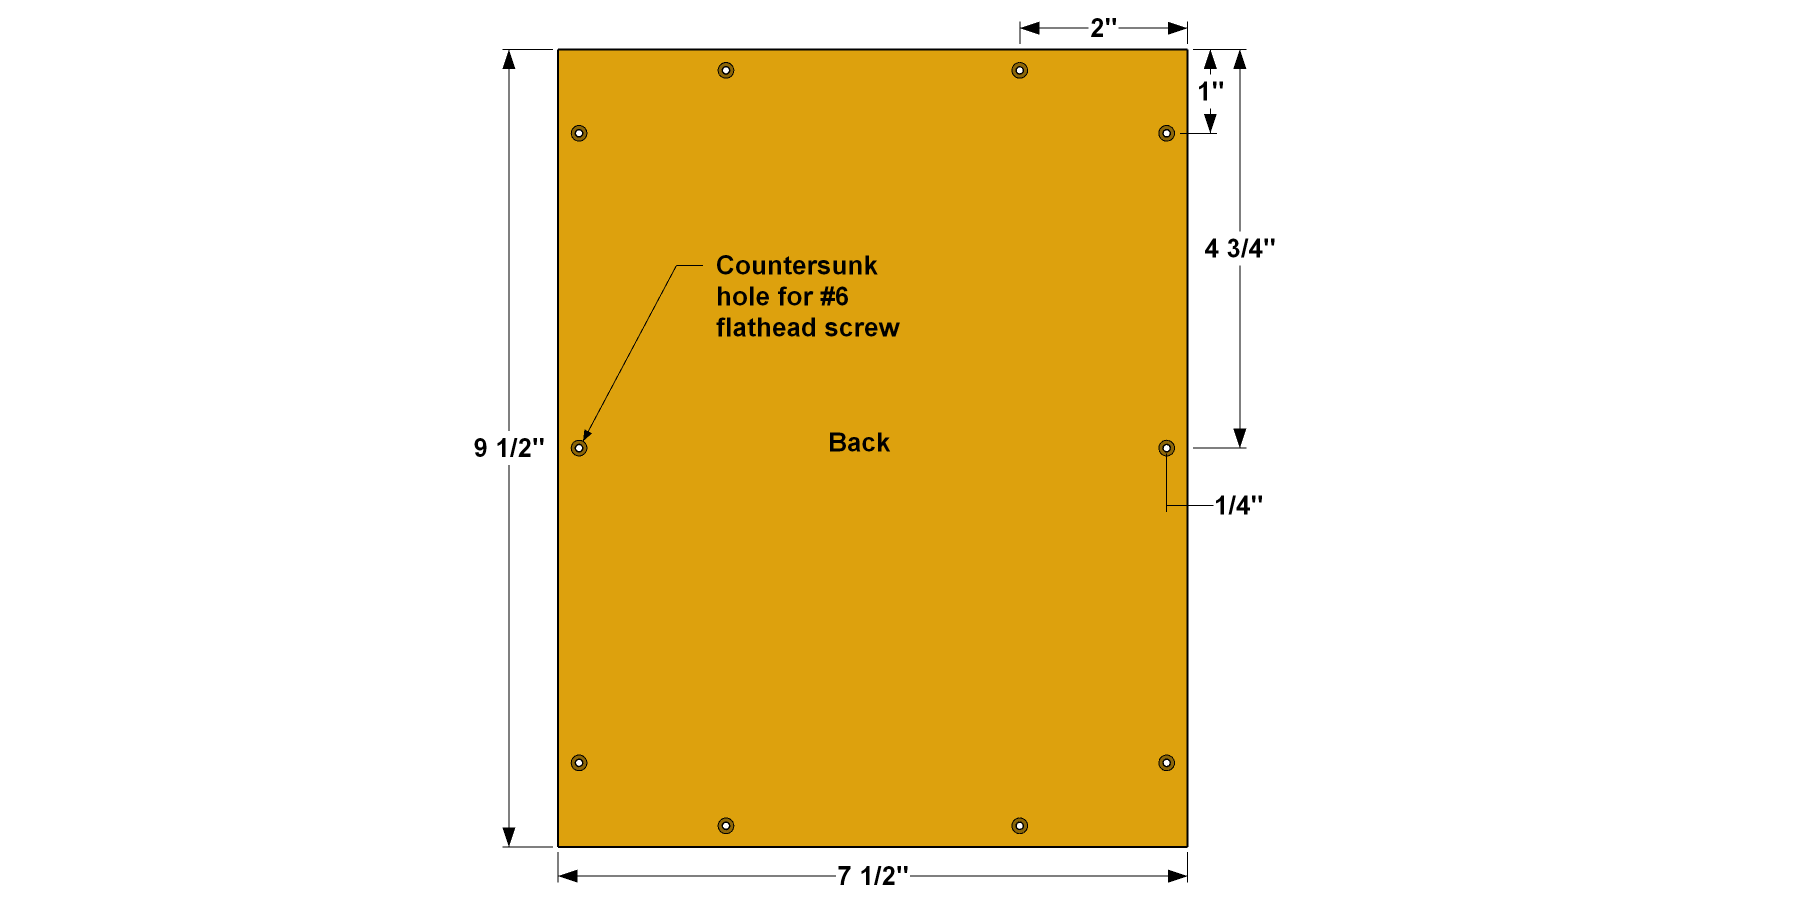
- 1 Back , 1/8" x 7 1/2" x 9 1/2"
Directions
-
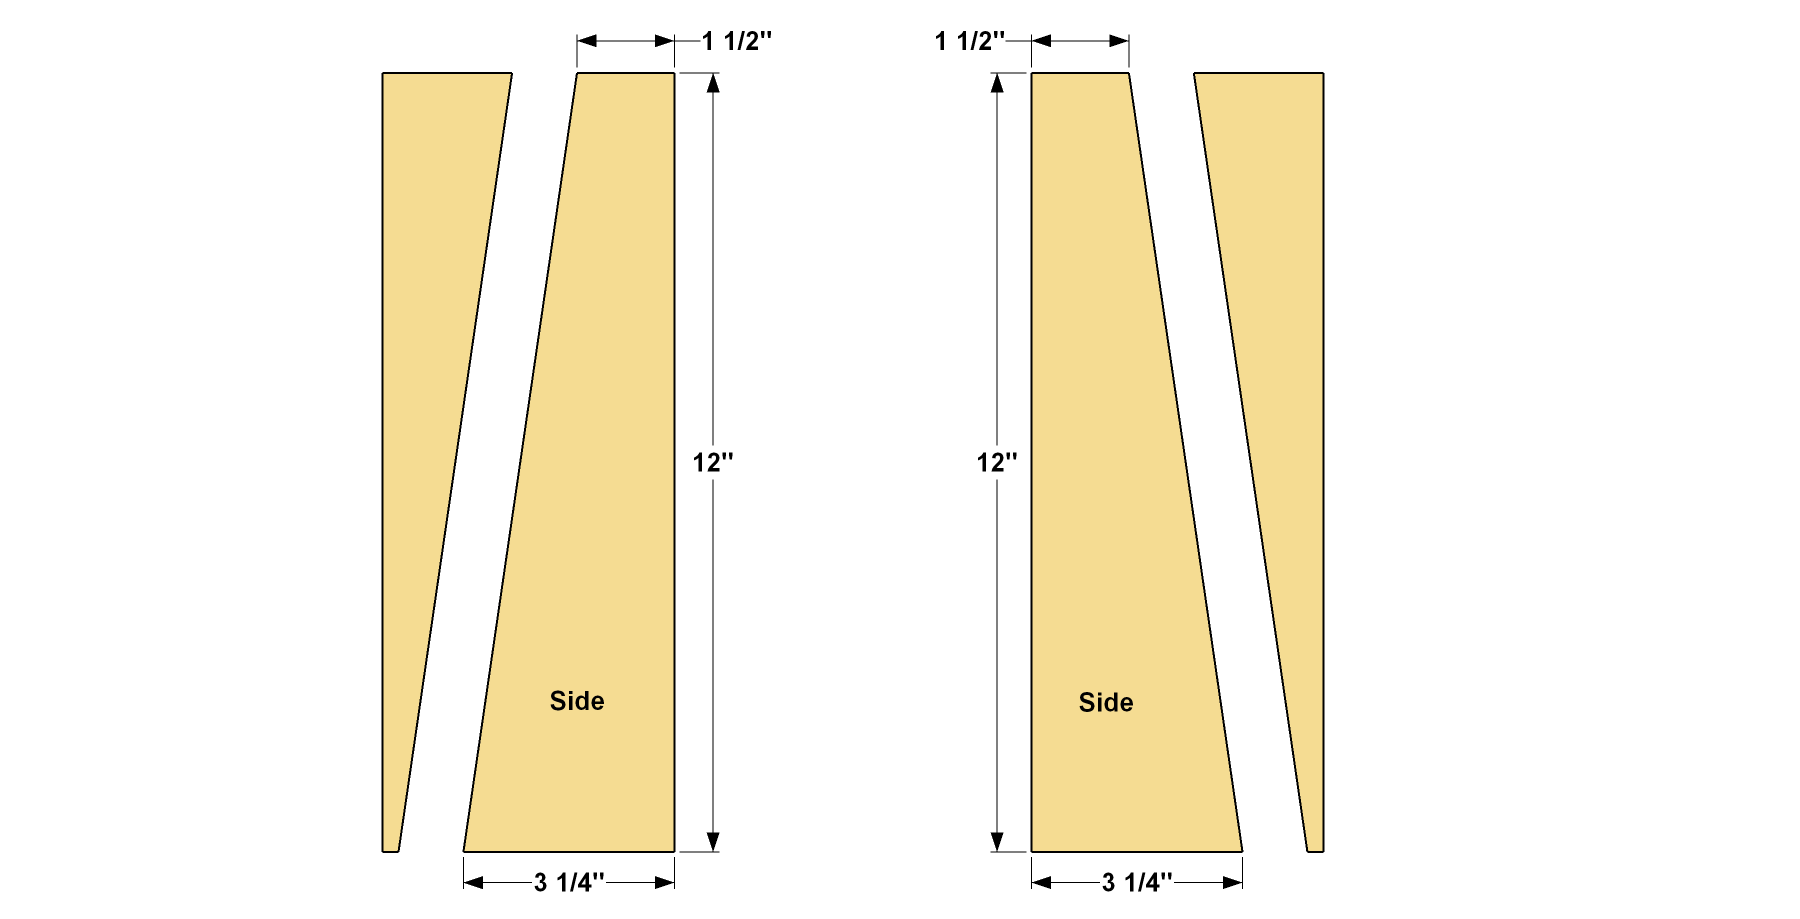
Cut the Sides and Form the Tapers
Cut the Sides to length from a 1x4 board (we used cherry), as shown in the cutting diagram. To make sure the parts are exactly the same length, measure and mark carefully and use a stop block on your miter saw. Then mark the tapers on the parts and cut just outside the lines with a jigsaw fitted with a fine-tooth wood-cutting blade. Then sand the cut edges smooth.
-
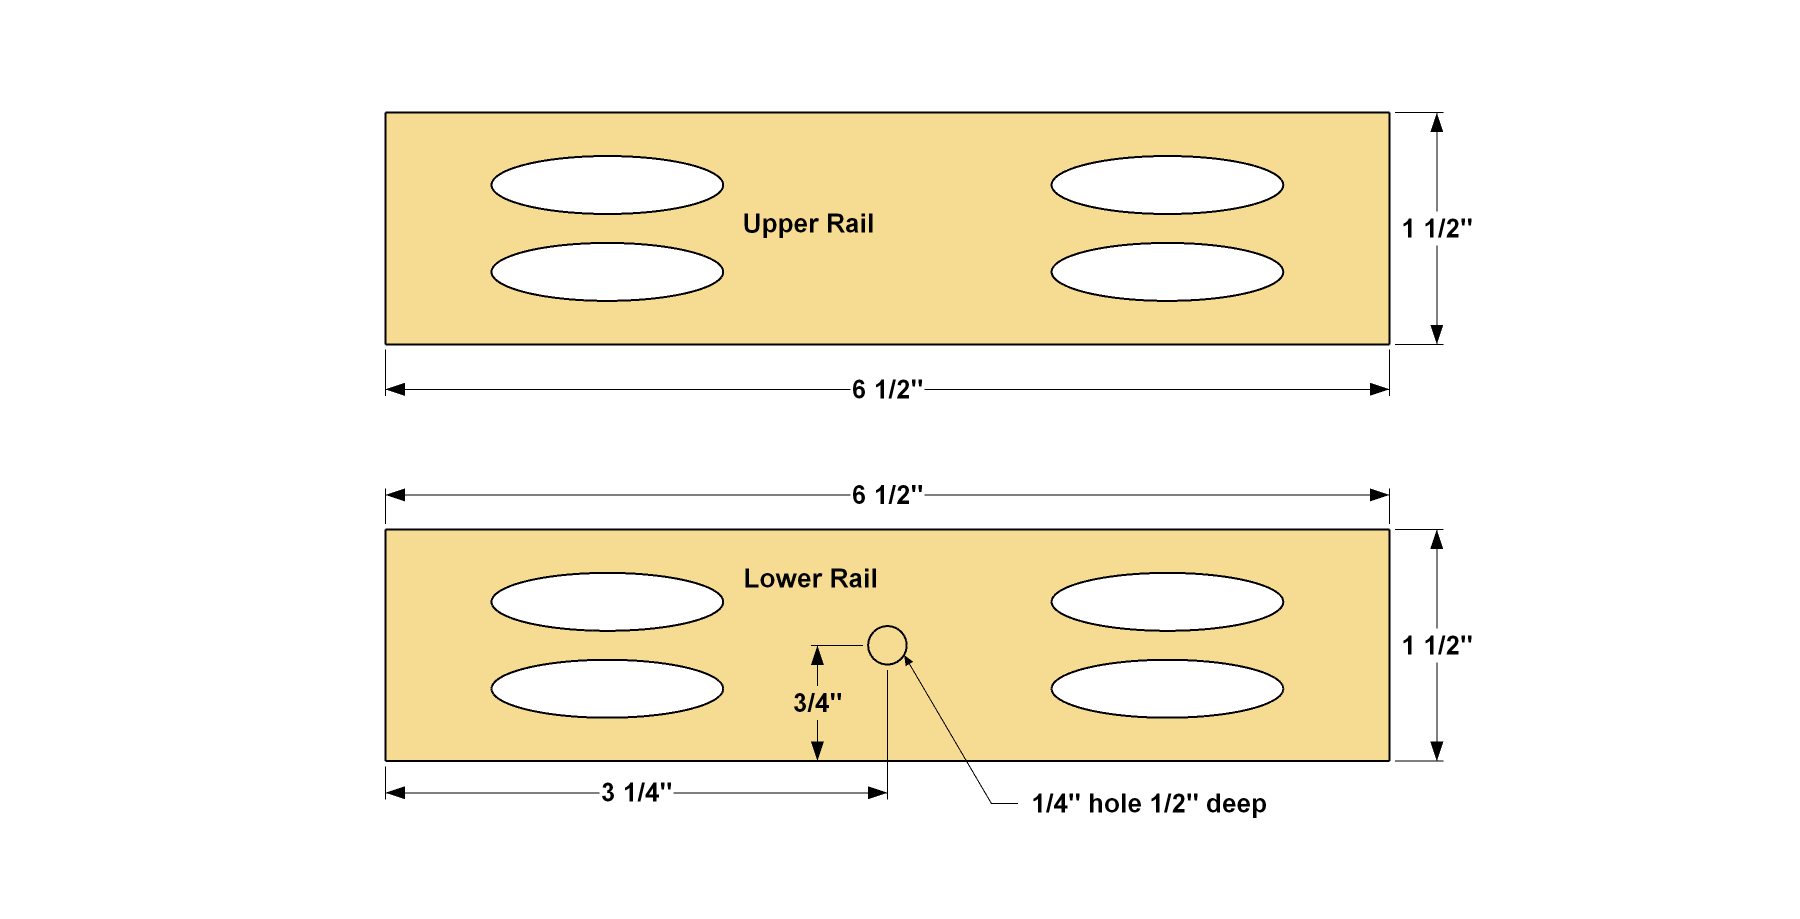
Make the Rails
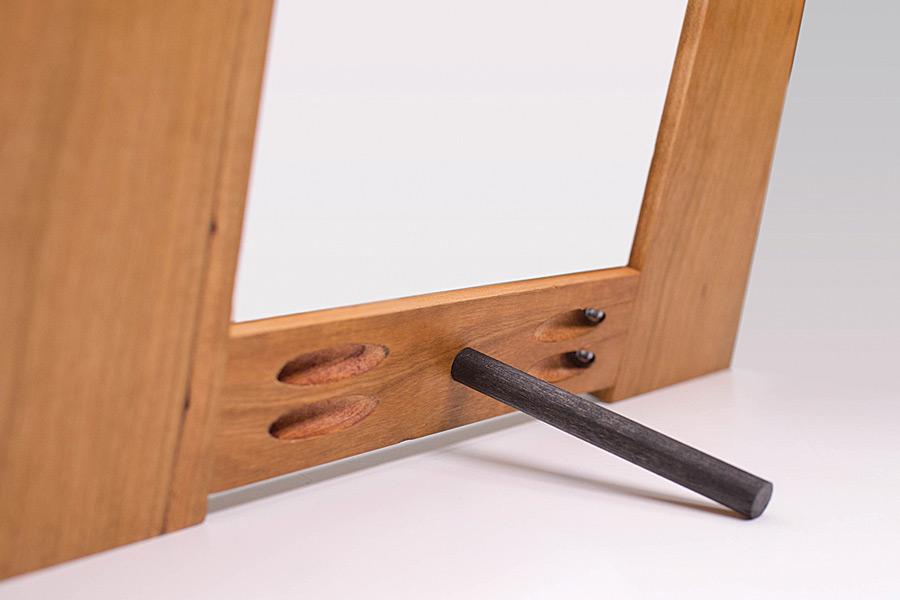
Cut the Rails to length from a 1x2 board, as shown in the cutting diagram. With your Kreg Pocket-Hole Jig set up for 3/4"-thick material, drill pocket holes at the ends of each Rail, as shown. To accept the Leg, drill a 1/4" hole 1/2" deep where shown in the lower Rail.
-
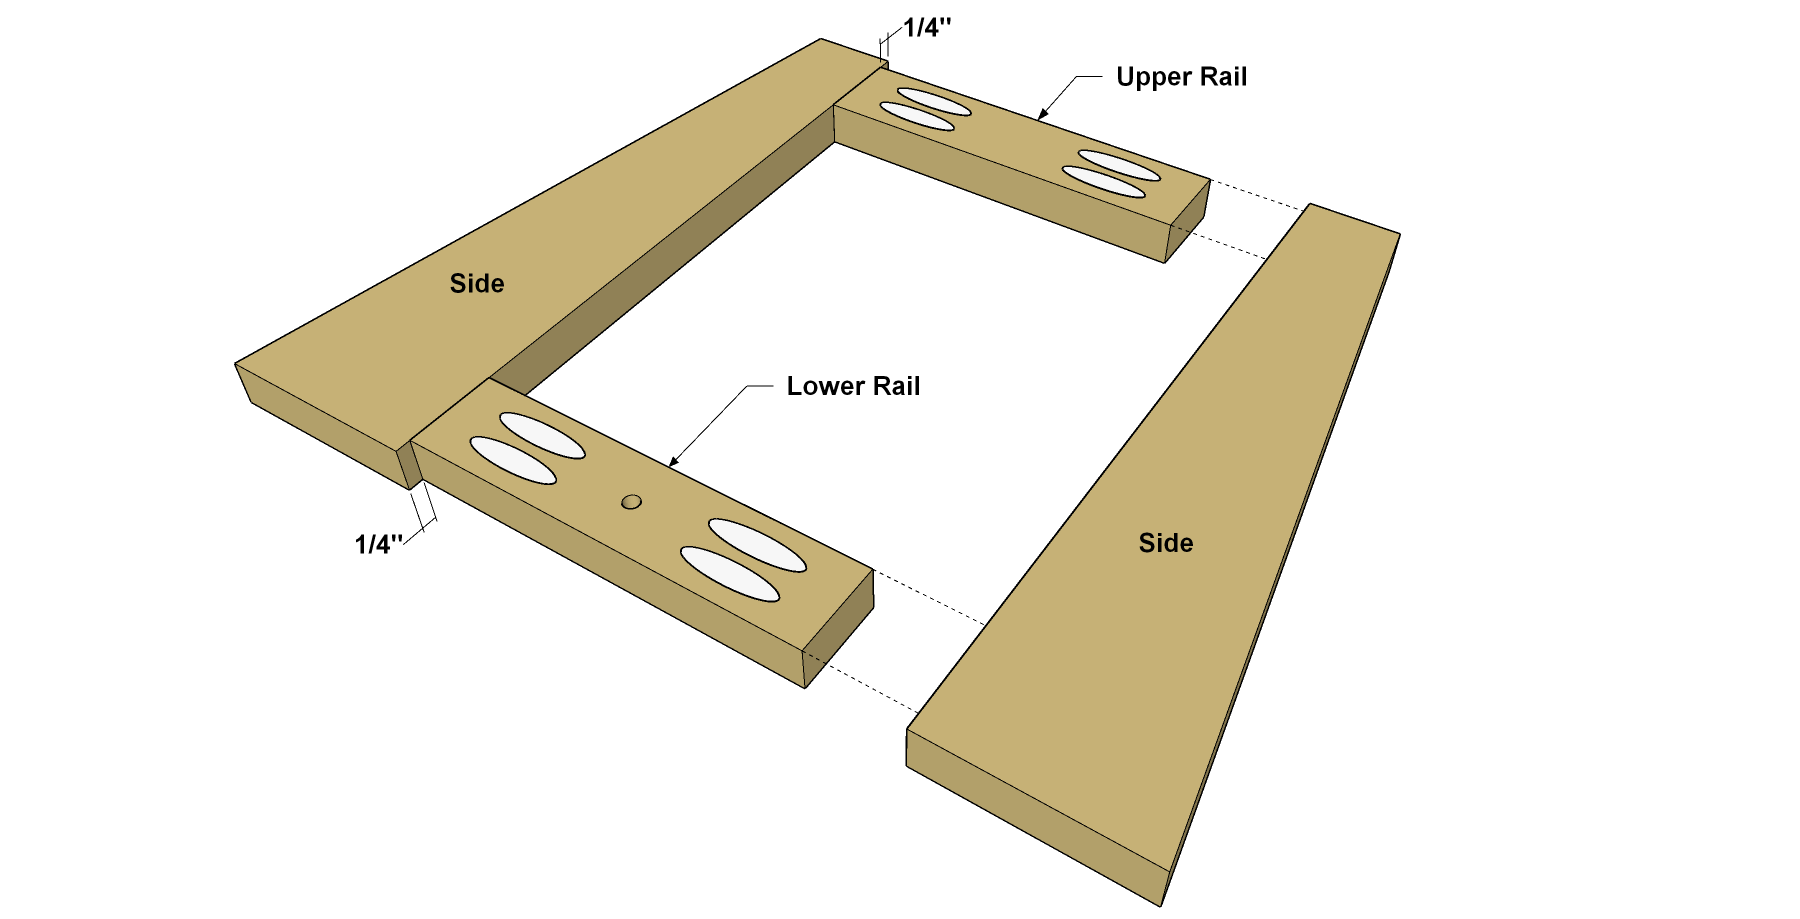
Assemble the Rails and Sides
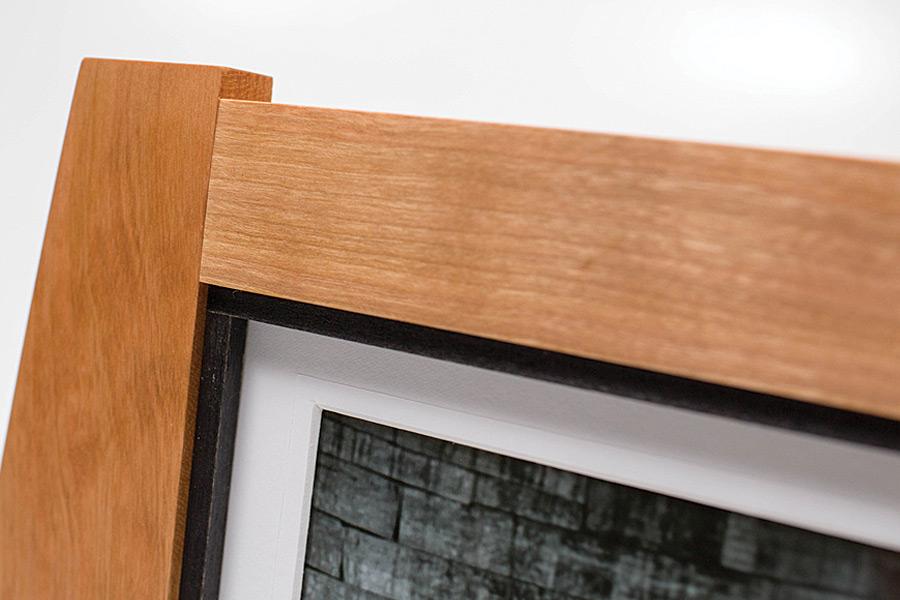
Now you can position the Rails against the Sides as shown—inset 1/4" from the ends, and then attach the Rails using 1 1/4" fine-thread Kreg Pocket-Hole Screws. Sand the frame with fine sandpaper, and ease the all of the exposed edges.
-
Cut the Stops and Leg
Cut two Horizontal Stops and two Vertical Stops to length from a 1/4" square dowel, as shown in the cutting diagram. Measure your frame opening carefully at cut the dowels so they have a snug fit. Start with the Horizontal Stops, fitting them between the Sides—but only temporarily for now. Don’t glue them in. Then proceed to the Vertical Stops, fitting them between the Horizontal Stops. Cut the Leg to length from 1/4" round dowel, as shown in the cutting diagram.
-
Stain the Stops Before Assembly
Color the Stops and the Leg with a black stain, and then let the Stops dry thoroughly. It’s much easier to do this before you attach them to the frame. Even the smallest can of black stain is more than you need to color the Stops. If you don’t already have stain on hand, you can simply use a permanent black felt-tip marker instead. Application is quick and clean and the marker ink dries quickly.
-
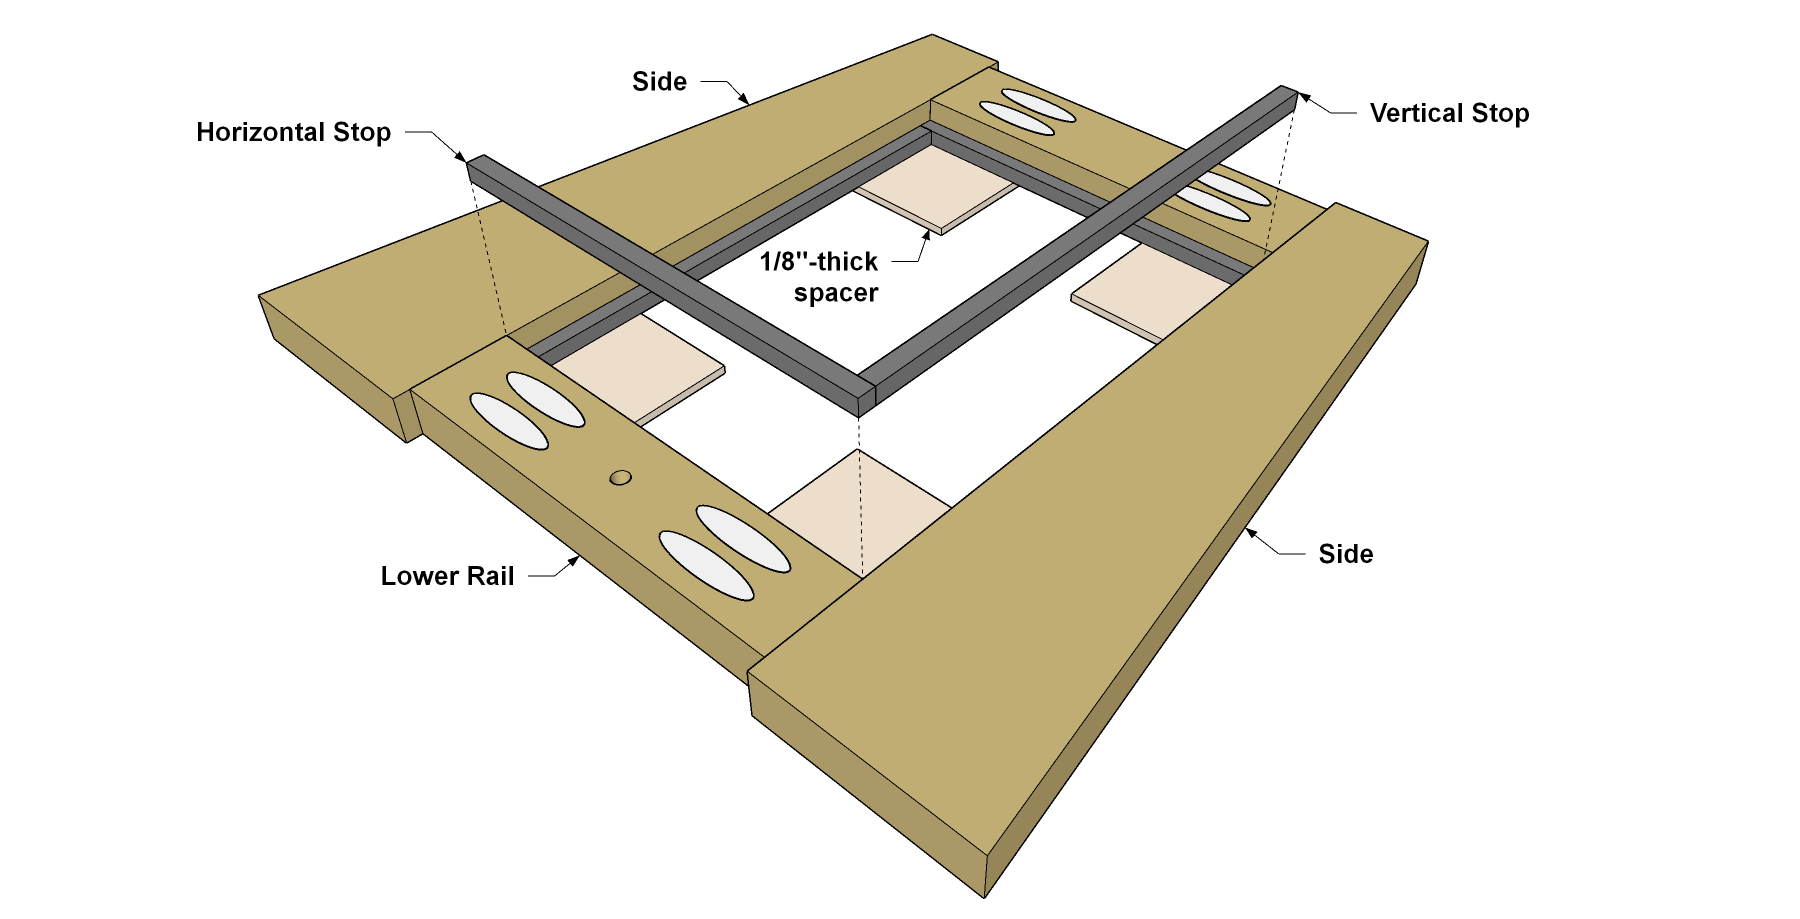
Install the Stops
Cut four spacers, approximately from 1/8"-thick hardboard. These will be used to help position the Stops. Place the frame face-down on a flat surface and position the spacers in the interior corners. Apply a very thin bead of glue to the Horizontal Stops and glue them in place first. Try to avoid having glue squeeze out and make sure the Stops are resting against the spacers. Then glue in the Vertical Stops the same way. Use masking tape or small clamps to hold the Stops in place while the glue dries. Scrape away any squeezed-out glue just after it begins to harden, but before it dries completely.
-
Make the Back
Cut the Back to size from 1/8" hardboard, as shown in the cutting diagram. Sand the edges smooth. Then drill countersunk holes for #6 flathead wood screws where shown.
-
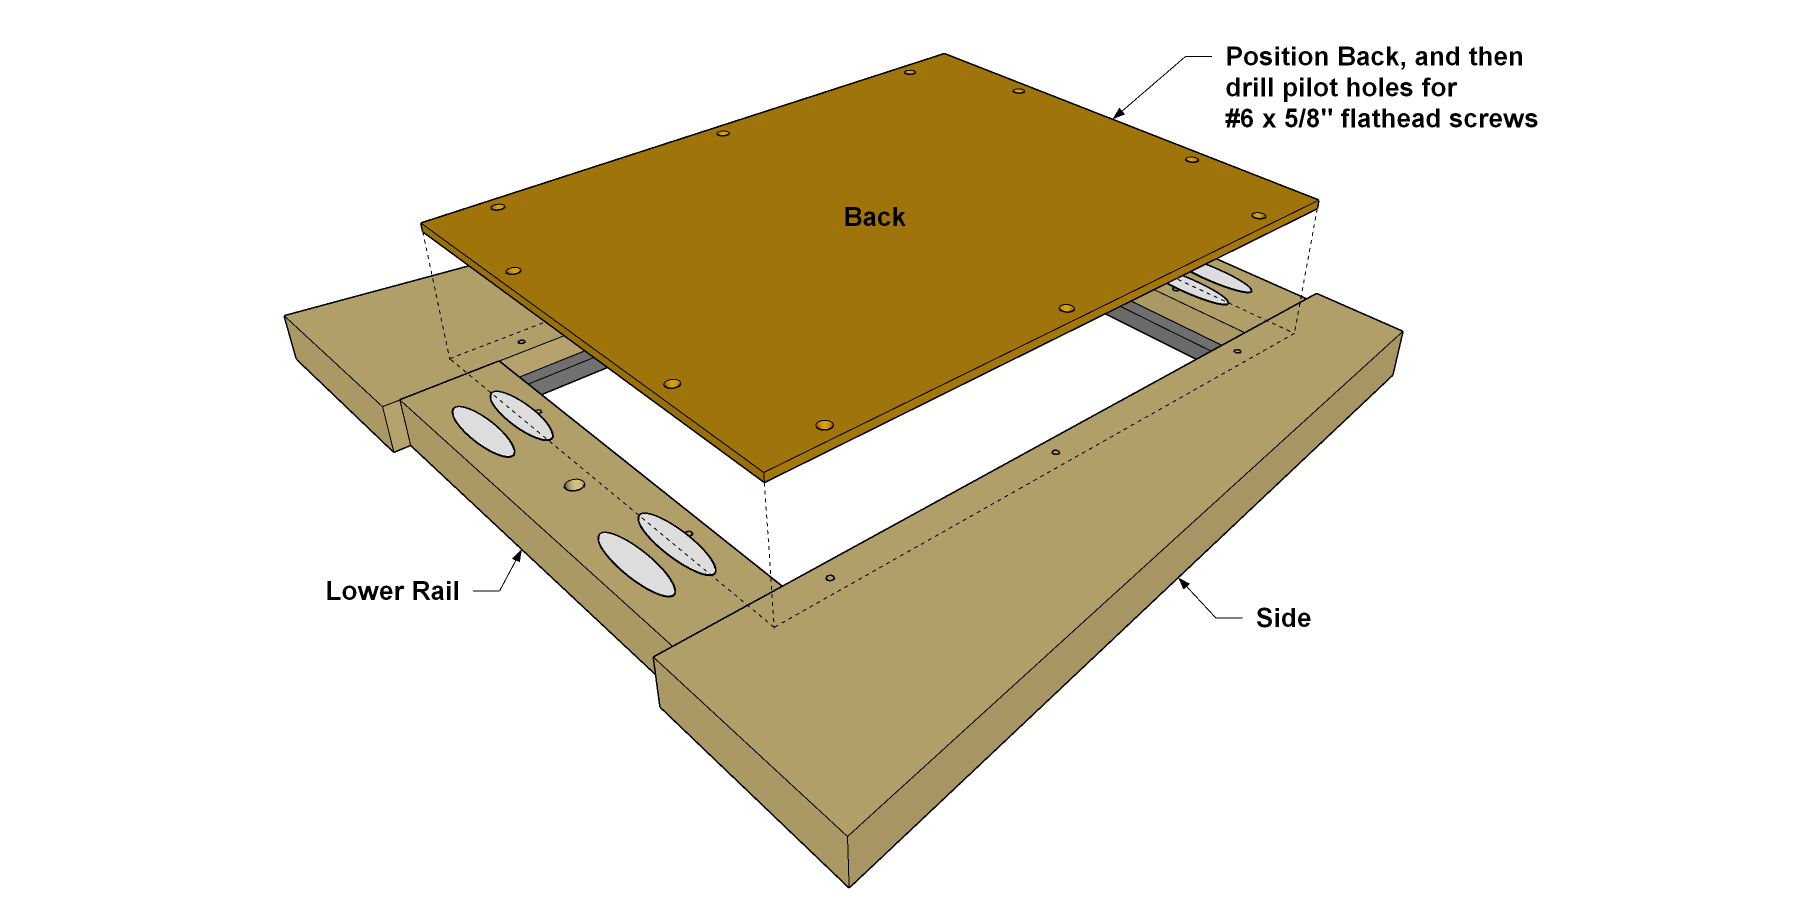
Fit the Back and Apply the Finish
With the frame face-down, center the Back over the opening. Using the countersunk holes in the Back as guides, drill pilot holes for #6 x 5/8" flathead wood screws into the frame. Drive the screws. Remove the Back. To make reassembly easy, mark the top of the Back on the inside face. Inspect the frame and finish-sand where needed. Apply a clear finish to all parts. We applied two coats of a wipe-on oil finish, following the instructions on the can. Allow the finish to dry thoroughly.
-
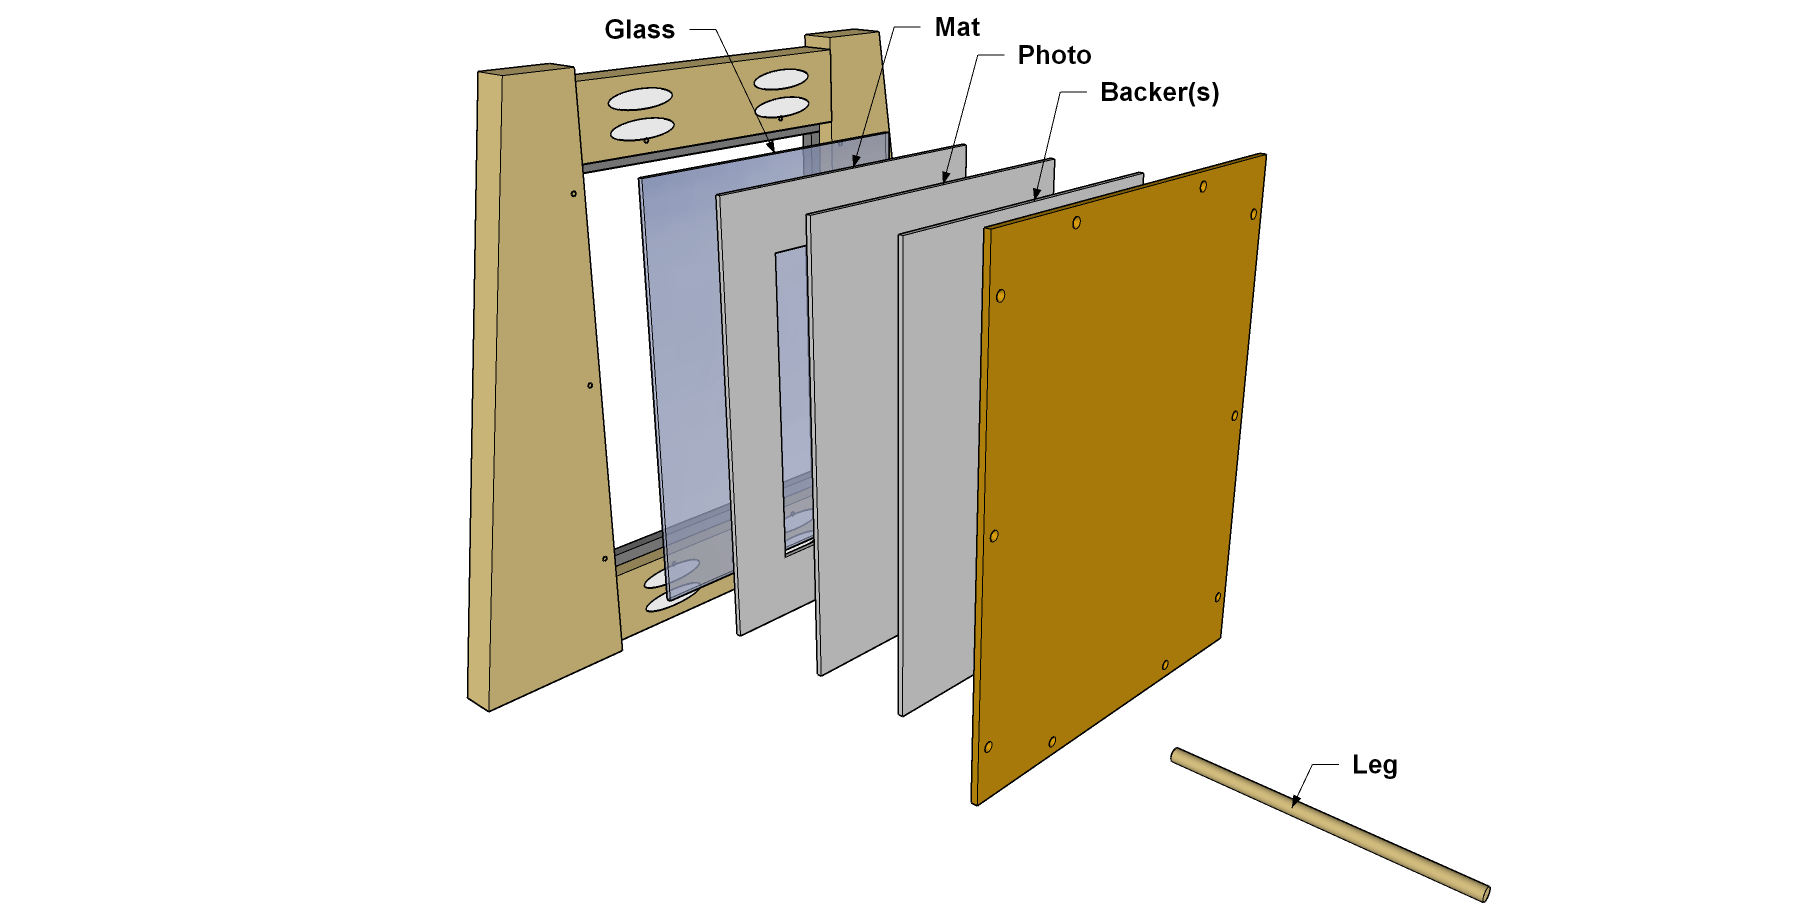
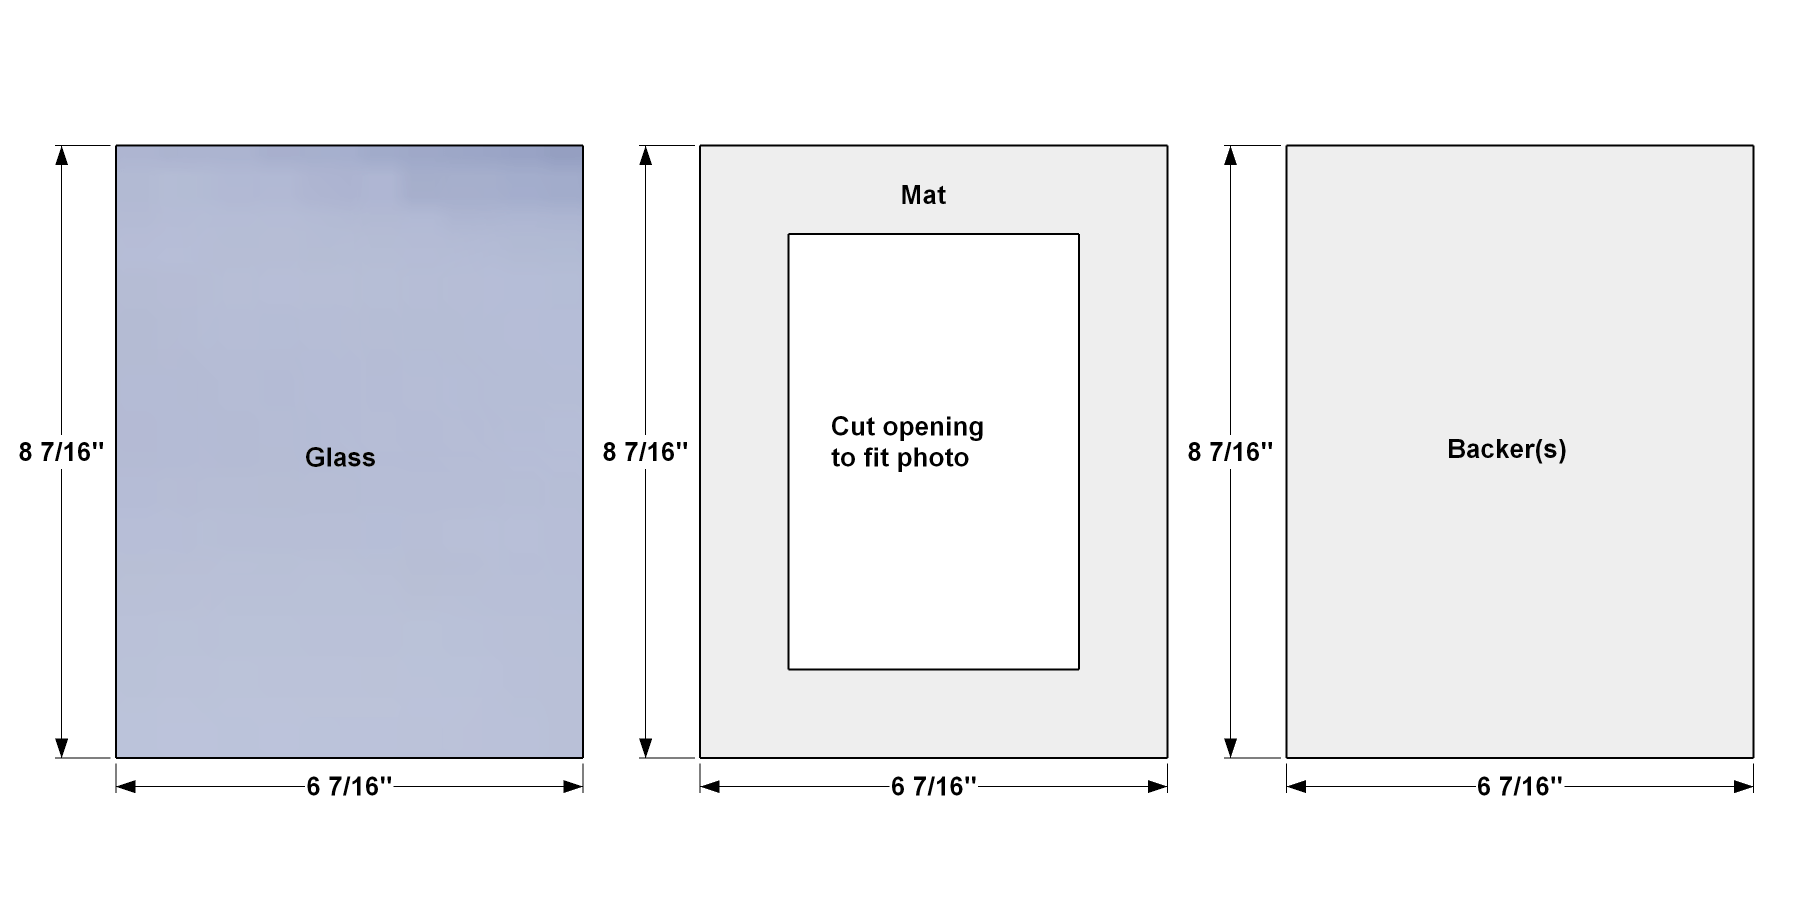
Add Glass, Mat, and Backers
Have a piece of single-strength glass (standard window glass) cut to fit the frame. Note that the glass dimensions are just slightly smaller than the opening in the frame. If you’d like to add a mat, cut one to fit with an opening to fit your photo. (The frame is sized to fit a 4" x 6" photograph.) Cut cardboard Backers as needed to fill in the space behind your photo and mat.
-
Add a Photo and Assemble It All
In order, place the Glass, Mat, Backer with mounted picture, and additional Backers in the frame recess. Position the Back and drive the screws. Insert the Leg into the hole in the lower Rail. The frame tilts back at about a 10-degree angle, perfect for viewing.