

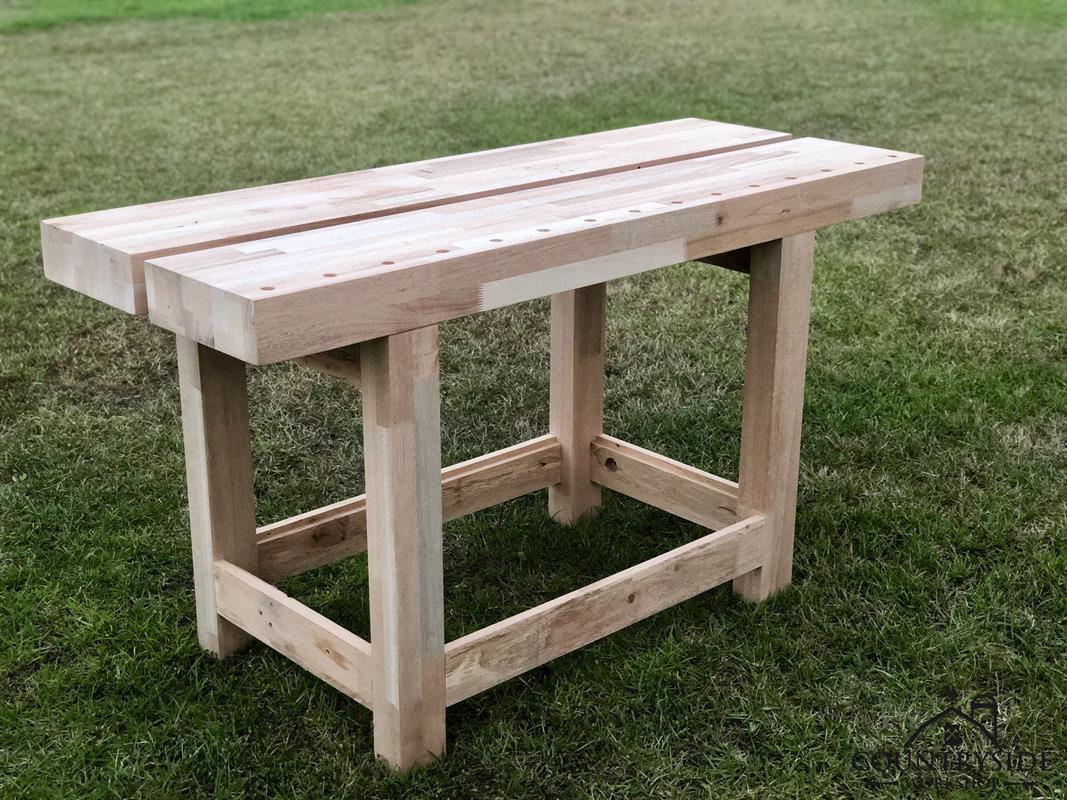


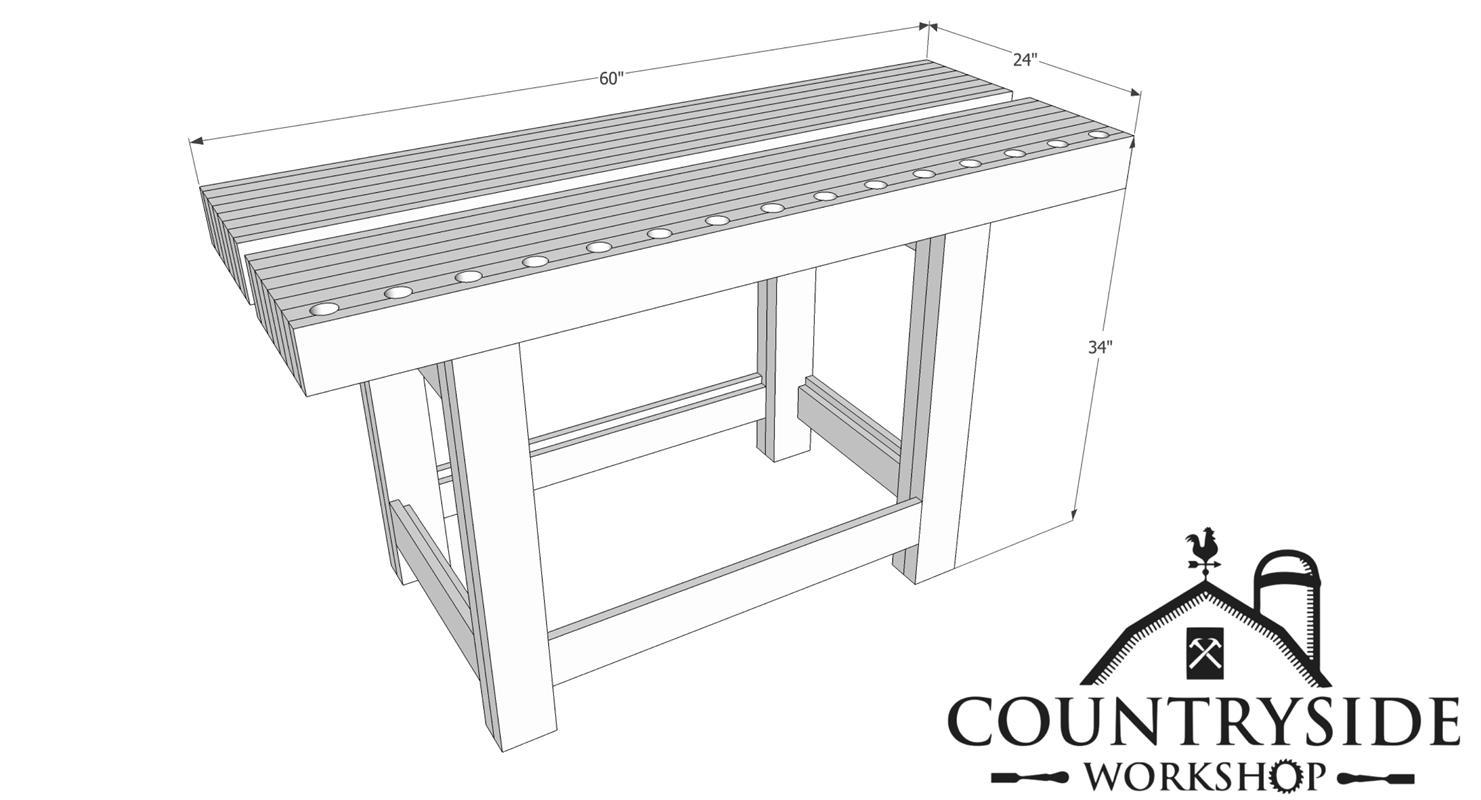
Roubo workbenches are based off an 18th century french design from a craftsman named André Jacob Roubo. Traditionally it is a very complicated design with pinned mortise and tenons and dovetails. Although this makes a very sturdy work surface it also isn’t easy to build. So I simplified the joinery.
Tools
Kreg Tools


Other Tools
-
Square

-
Table Saw
-
Tape Measure
-
Thickness Planer
-
Clamps
-
Domino 500
-
Shop Vacuum
Materials
Wood Products
- 20 Board , 2x6 , 96"
Hardware & Supplies
- 1 Titebond II Wood Glue
- 1 80 Grit Sandpaper
- 1 120 Grit Sandpaper
- 1 220 Grit Sandpaper
- 24 10x50mm Dominos
- 12 Kreg HD Pocket Hole Screws
- 8 5" Spax Lag Screws
- 1 Quart Maker Brand, Co. Simple Finish w/ Wax
Cut List & Parts
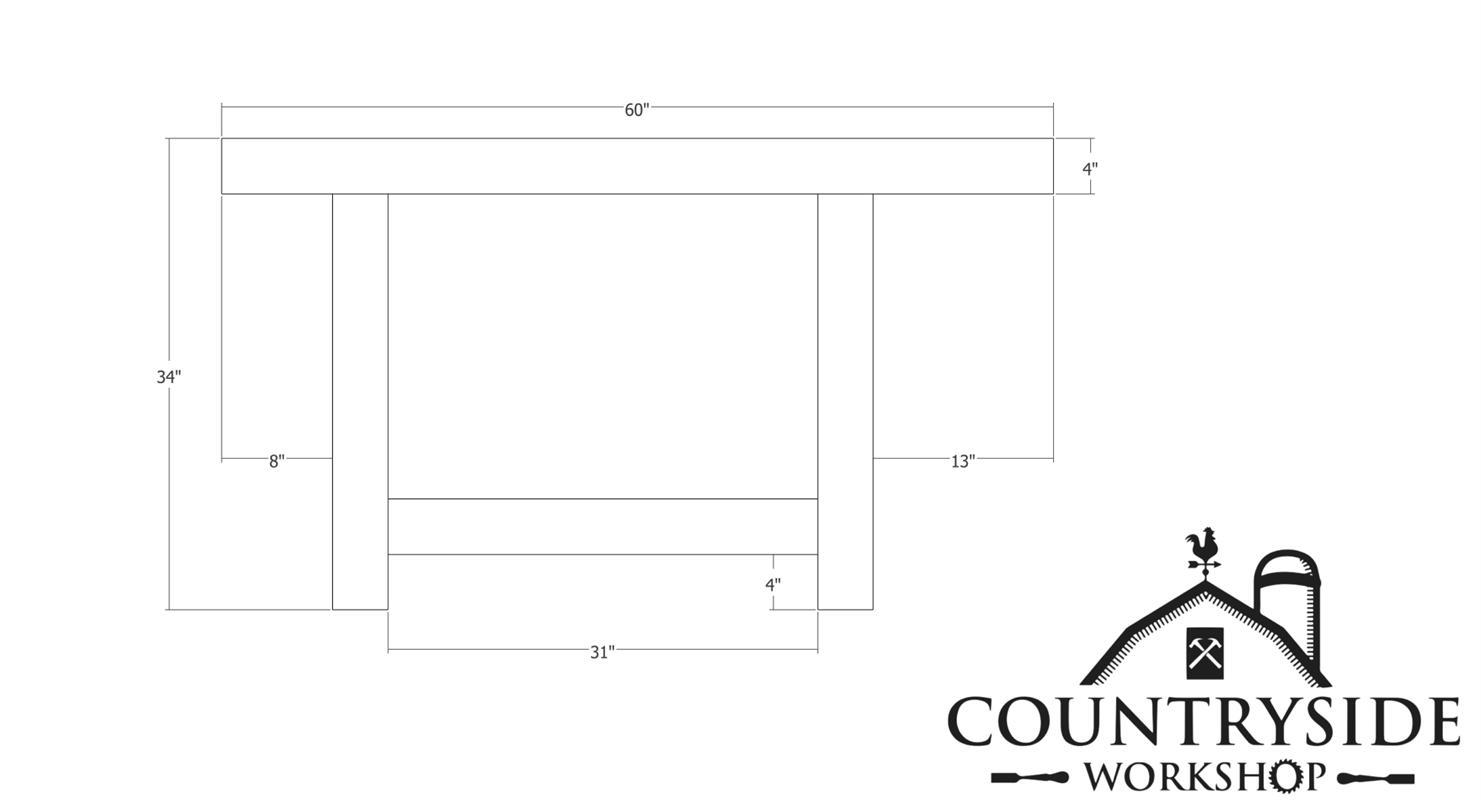
- 8 Legs , 1.5" x 30" x 4"
- 2 Long Aprons , 1.5" x 31" x 4"
- 4 Short Aprons , 1.5" x 18" x 4"
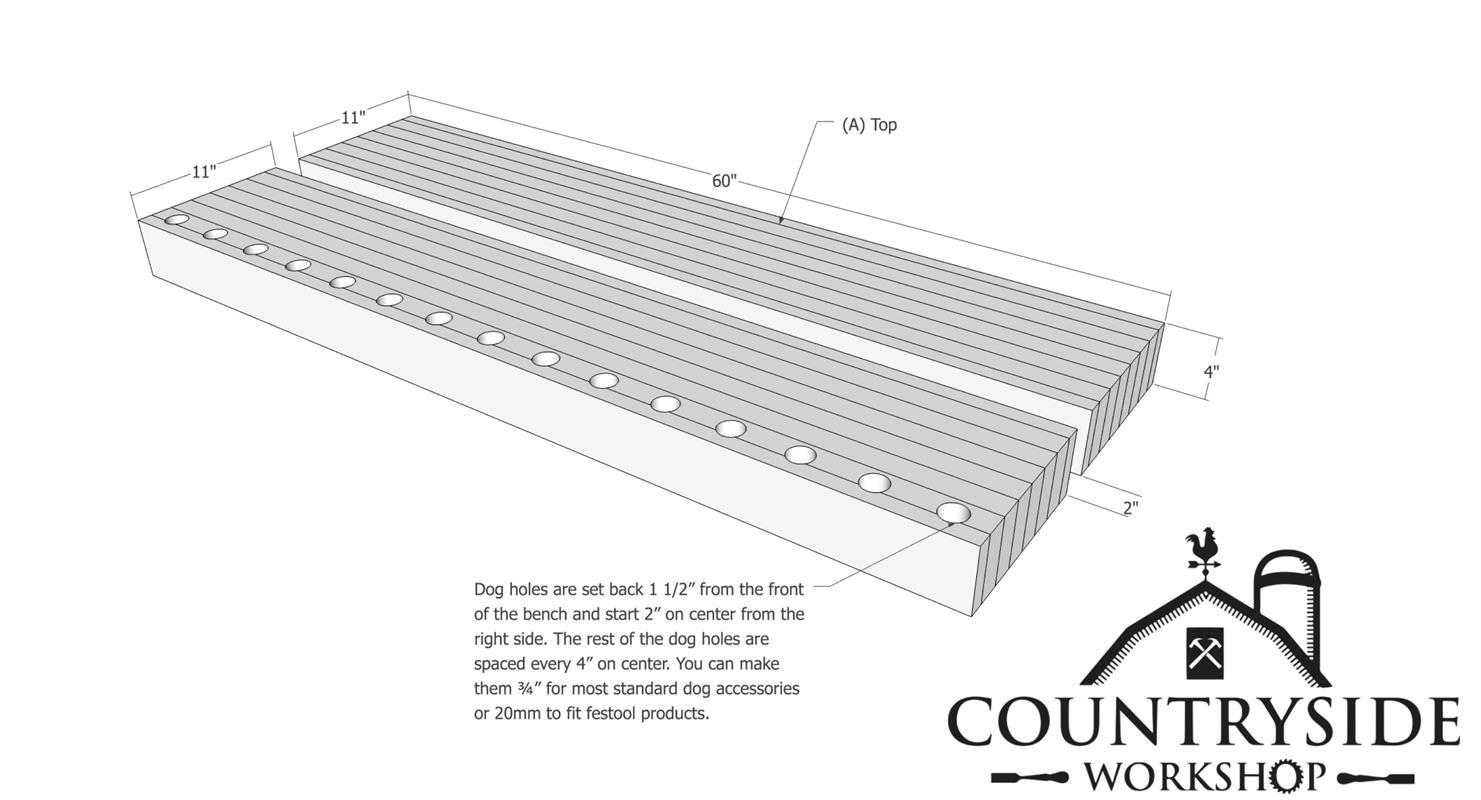
- 16 Top , 1.5" x 60" x 4"


Directions
-
Cut Parts to Size
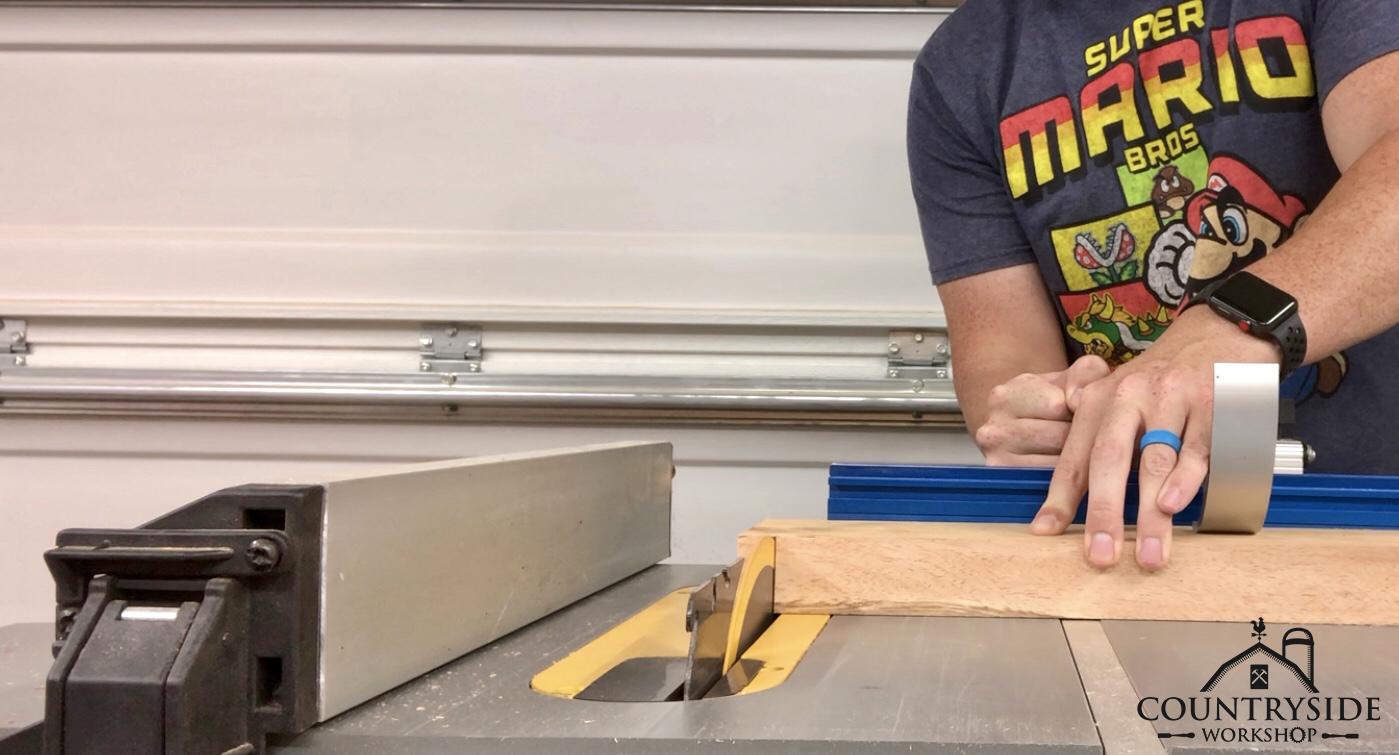
Using the provided cut list cut all your parts down to size. It is easier to get all the parts cut at one time so you can concentrate on assembly. It is best to keep all your parts a little larger right now so you can bring down to final size during assembly. (When cutting the boards for the top it is best to cut the rounded end off one side of the 2x6 before ripping to size).
-
Glue Legs
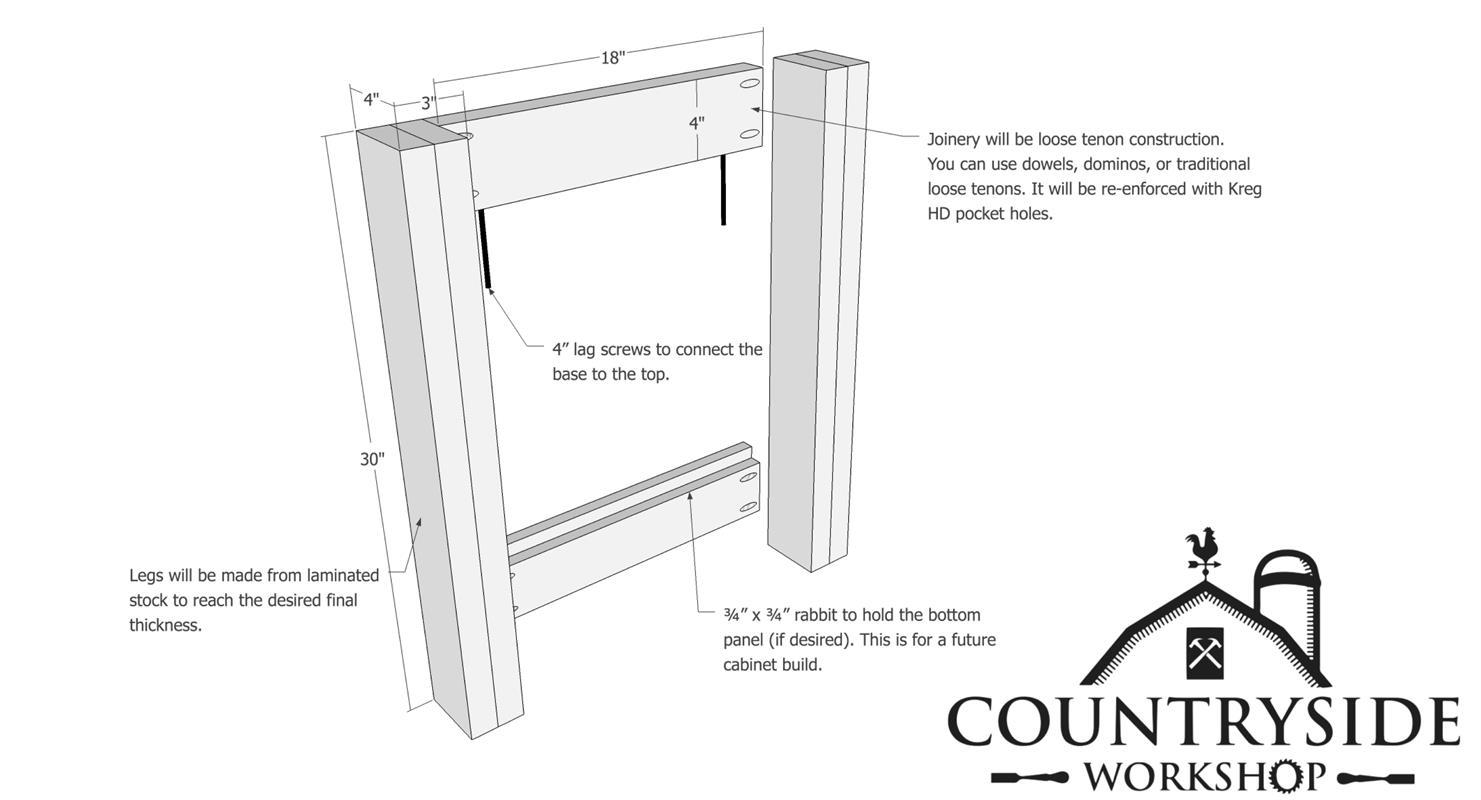
You legs will be made up of 2 pieces laminated together. Using your favorite wood glue, glue the 2 pieces together to create 4 legs.
-
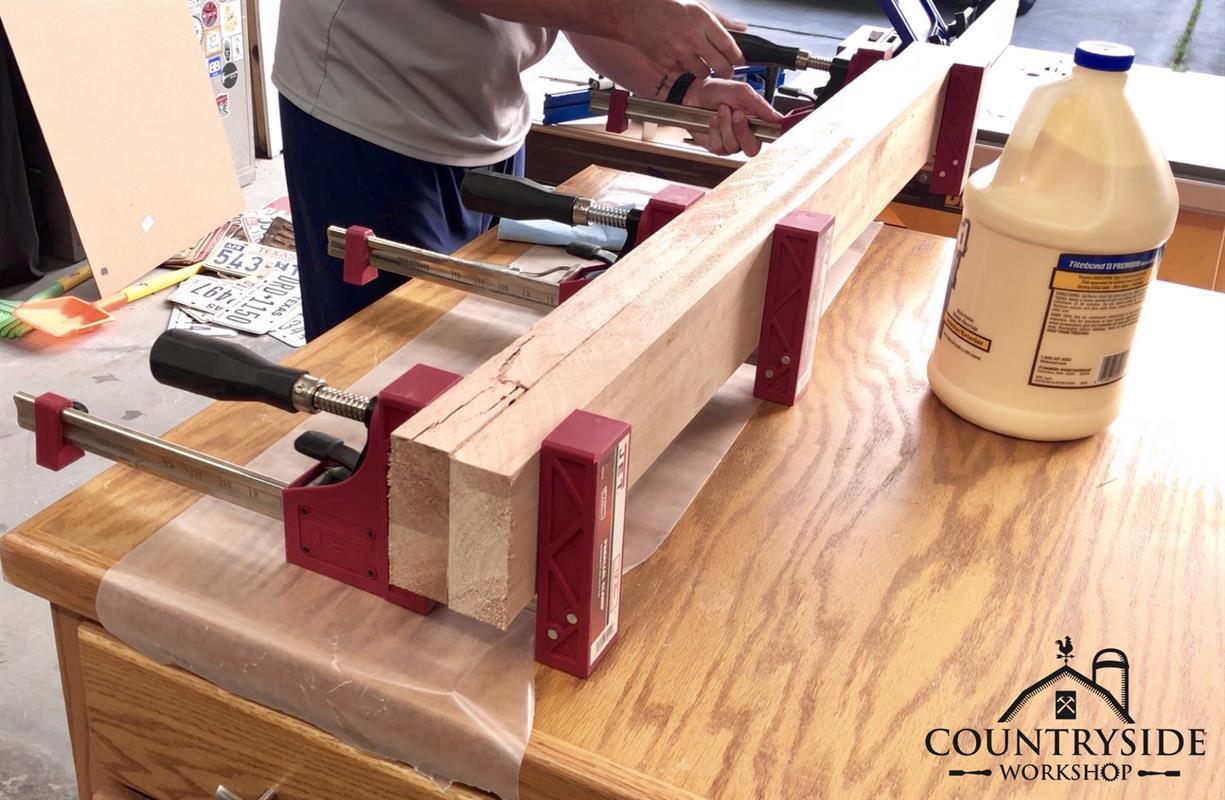
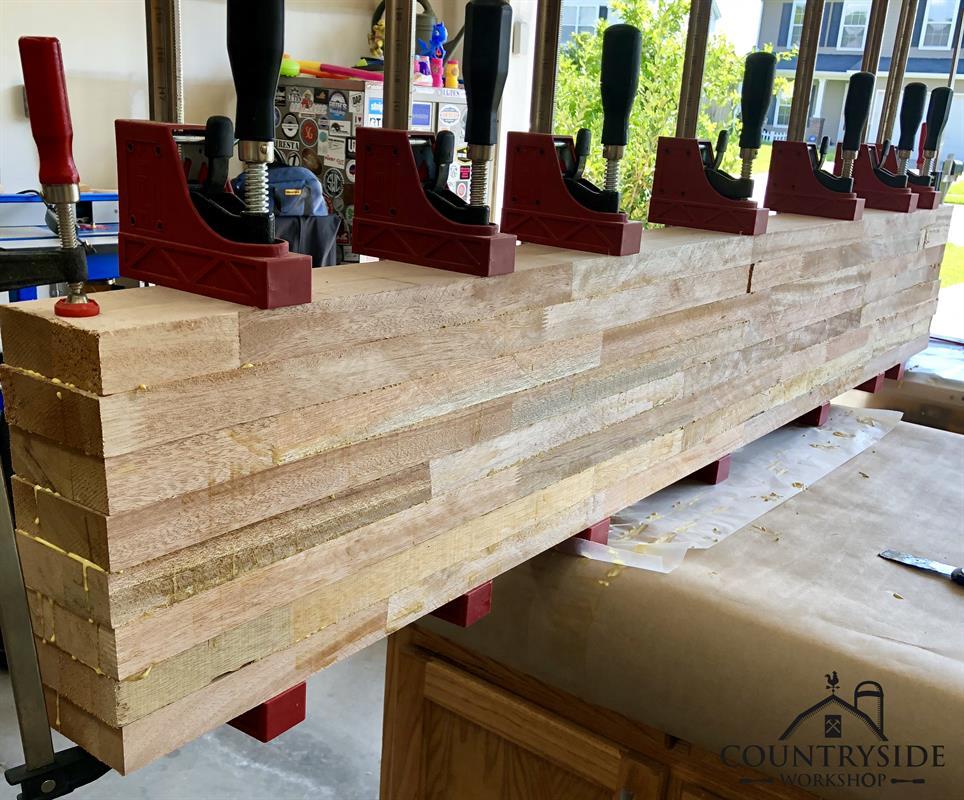
Glue Top Sections
Just like the legs you will need to glue the two tops sections up. Each section is made up of 8 pieces. You may want a second pair of hands here as each top section plus the clamps is really heavy.
-
Cut legs/stretchers down to size
Following the dimensions in the cut list bring all parts down to their final dimensions and ensure the legs are square.
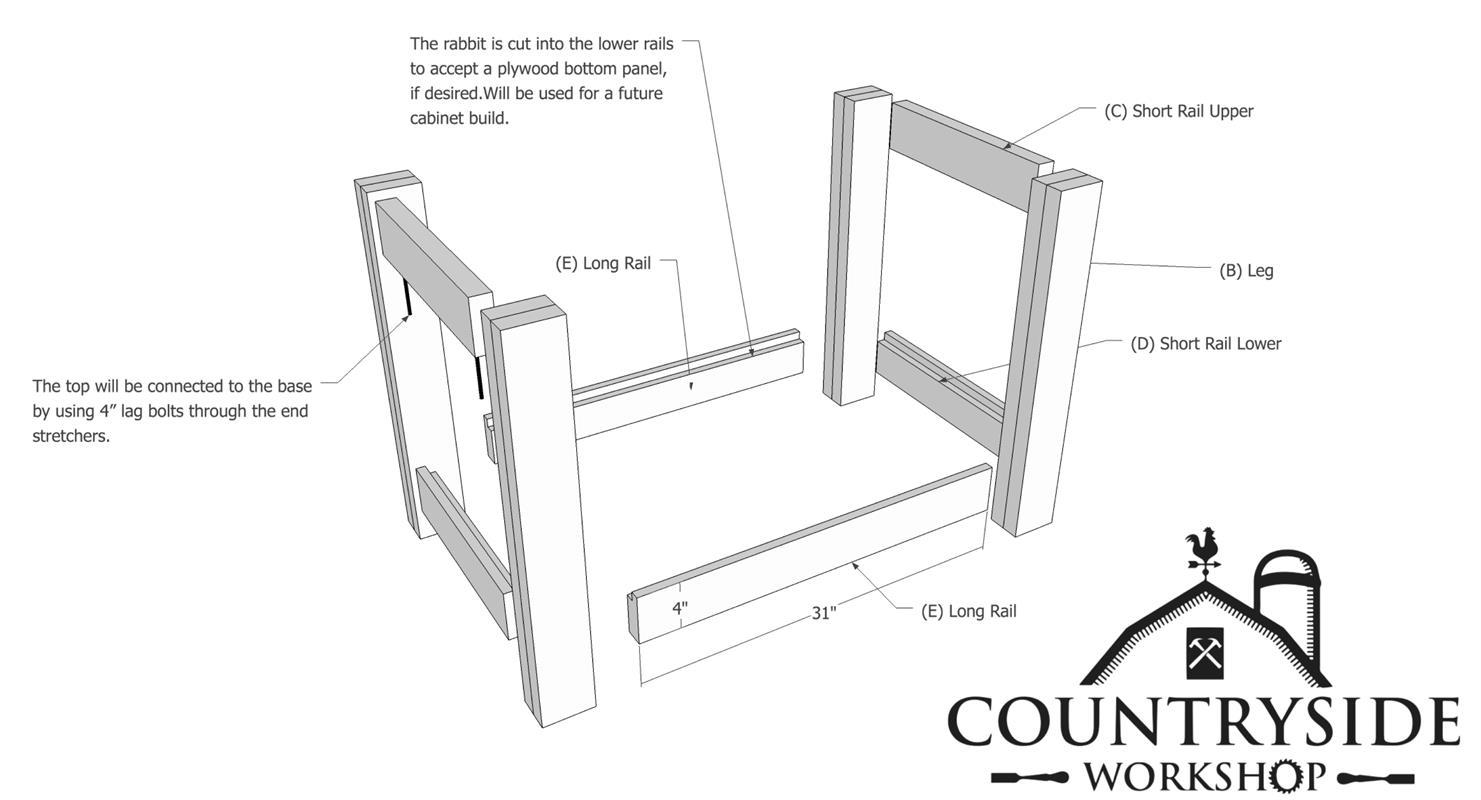
Cut a ¾" x ¾" rabbit on the top inside edge of the lower rails if you want to build the lower cabinet at a later time.
-
Flat & Dimension Top
This part is pretty important if you do not want to spend extra time later flattening the top. You can use a router sled, belt sander, or planer to get your top flat. If you do not have a saw with a big enough blade (12" tablesaw or a 10" beam saw) then you make multiple cuts with a circular saw and straight edge. You will want to cut half way through the top and then flip the piece over and the other have. If your cuts weren't perfect then you can flatten them with a belt sander.
-
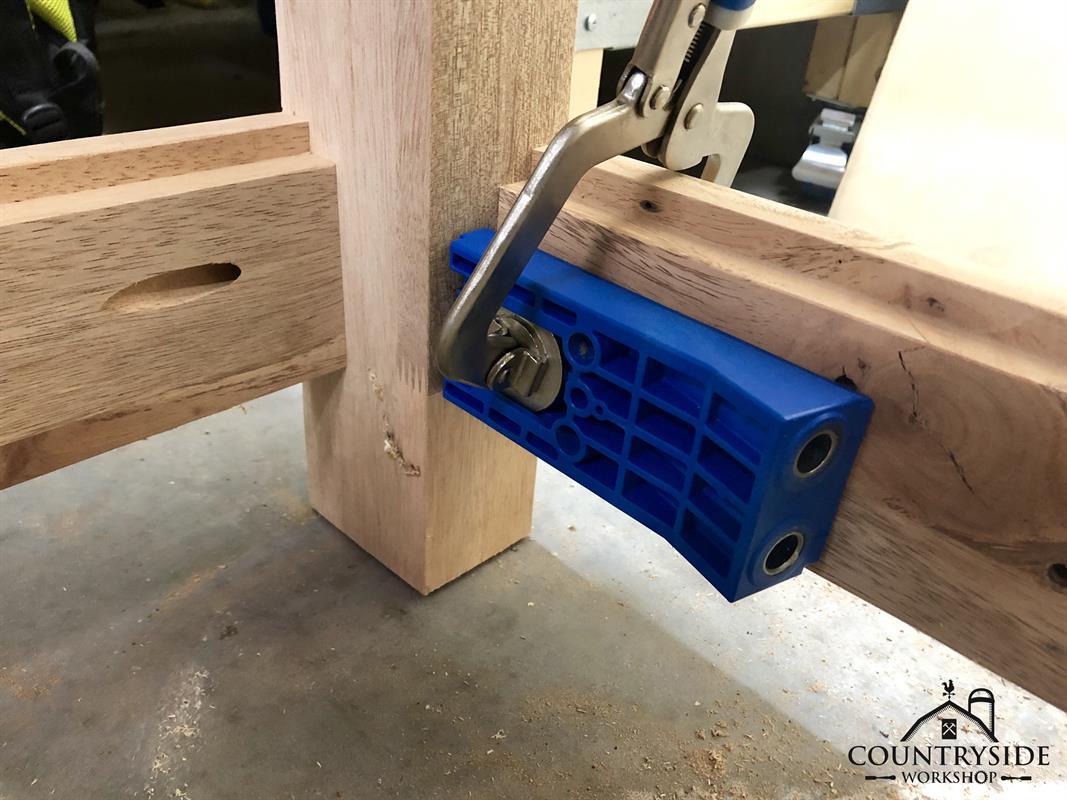
Cut Joinery
It is time to decide what joinery you want to use. For this plan I use loose tenons reenforced with Kreg HD Pocket Hole screws. I used the Festool Domino to create 2 loose tenons on the end of each piece but if you do not have the domino then you can use dowels or create your own loose tenons with a router by cutting the mortise with an uncut spiral bit and make matching tenons. I opted to use one pocket hole because it is supplementing the tenons. If you do not have the HD jig then use the two 2 ¼" coarse thread screws.
(I forgot to drill the pocket holes so I did this after they were assembled).
-
Drill Lag Screw Holes
It is easier to drill the counter sunk holes for the 5" lag screws now rather than when it is already assembled. I use 2 screws per top section for a total of 4 screw per side.

-
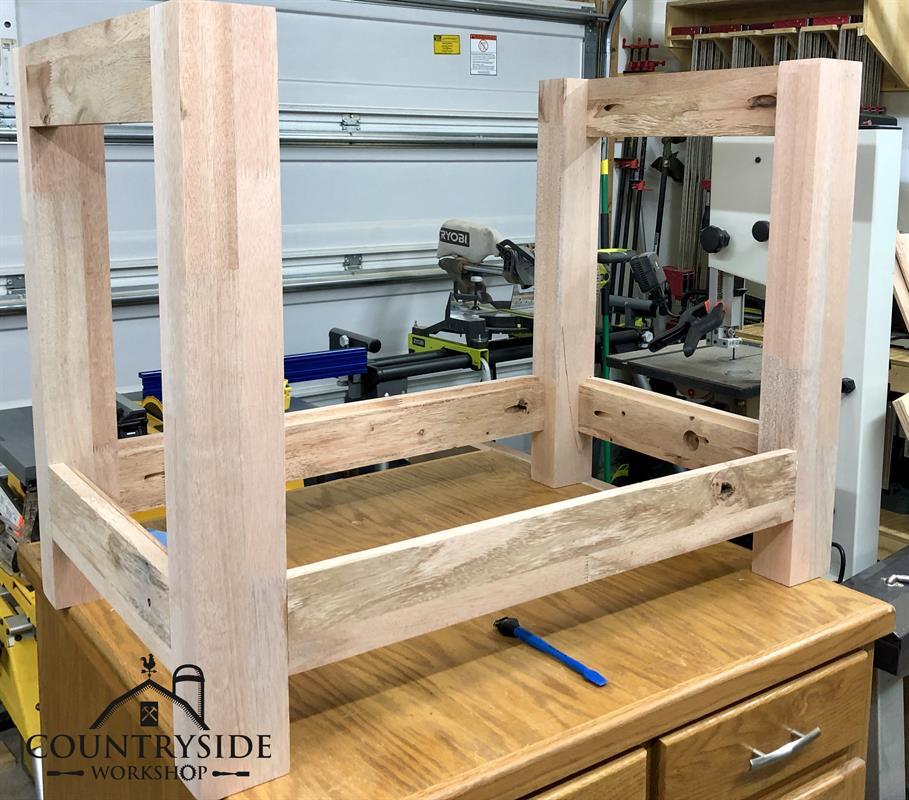
Assemble the Base
We will assemble the base in 3 sub-assemblies. Assemble the left side and right side with glue and use the pocket screws to draw the joint tight and eliminate the need to keep them in clamps. Once the sides are assembled then attach the front and back long rails to each side using glue and pocket screws.
-
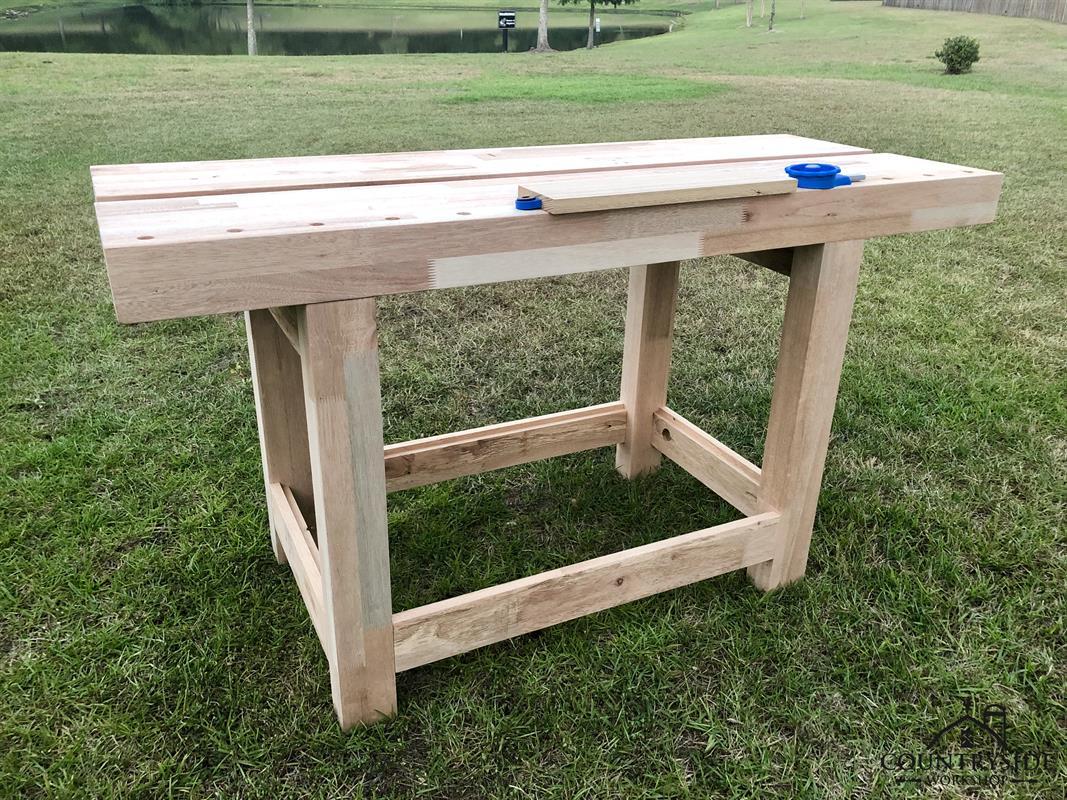
Attach the Top
When you attach the top you will want to keep each section flush with the front and back rails as this will create your 2" section between the top pieces. You can choose your own offset or you can choose to keep the top perfectly centered left to right. I wanted a larger offset on the right side so I could sit at the bench and my legs would sit under the top.
I opted not to use glue to attach the top so it would allow me to remove the top if it needs heavy resurfacing or replacing.

-
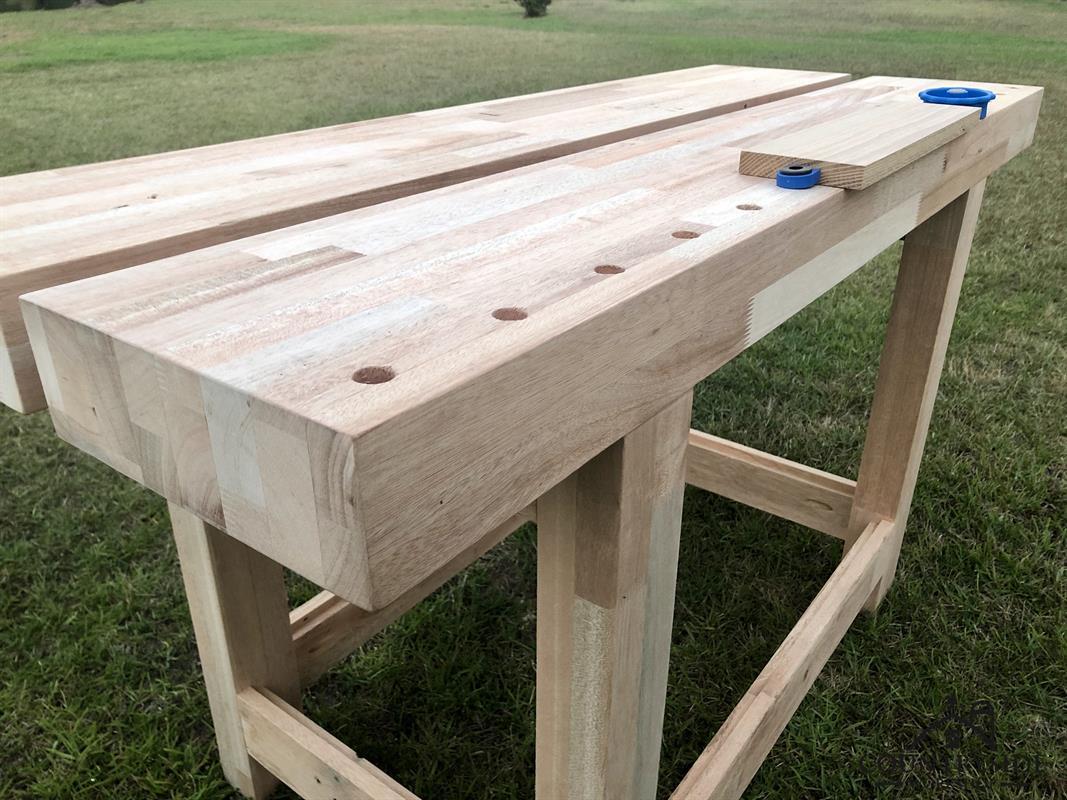
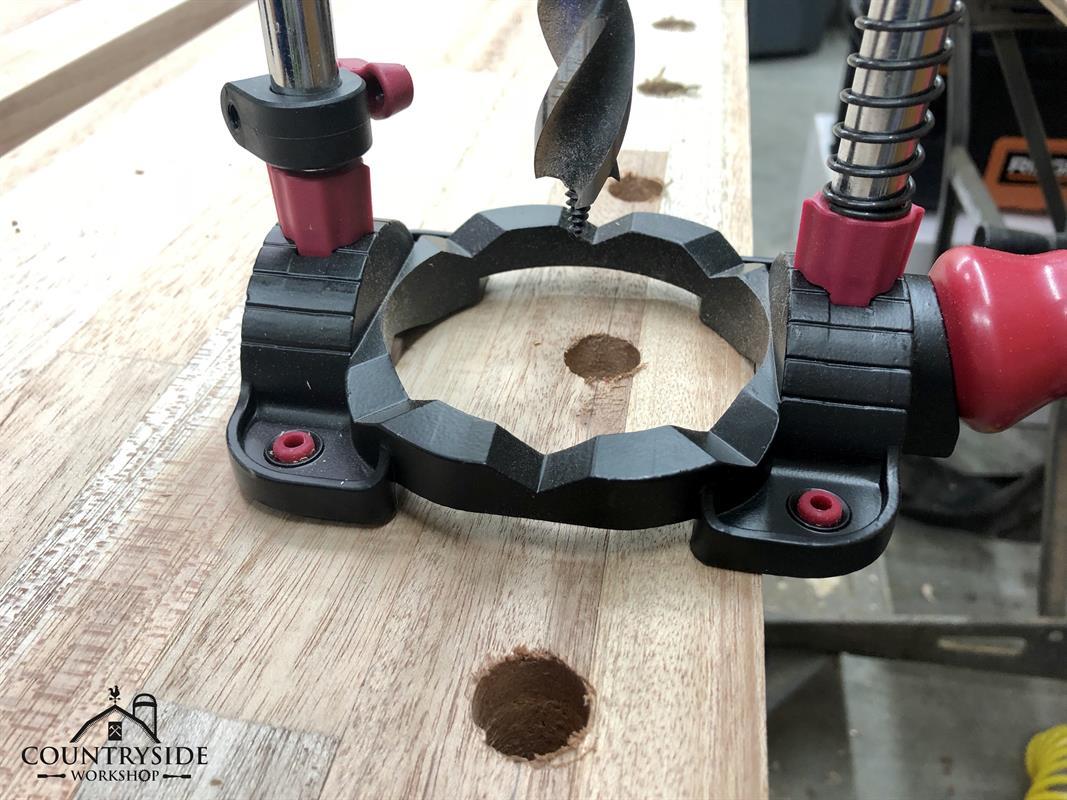
Dog Holes
**Optional**
If you want dog holes for accessories like bench dogs or in-line clamps, you will need to drill ¾" holes. I choose to set them back 1 ½" back from the front edge (to the center of the hole) and 2" from the right edge (to the center of the hole). Every other hole is spaced 4" from center of the previous hole.
I used the Irwin Speed Bore drill bit and the Milescraft Drillmate to drill straight holes. Make sure to use a backer board to prevent massive tear out on the under side.
-
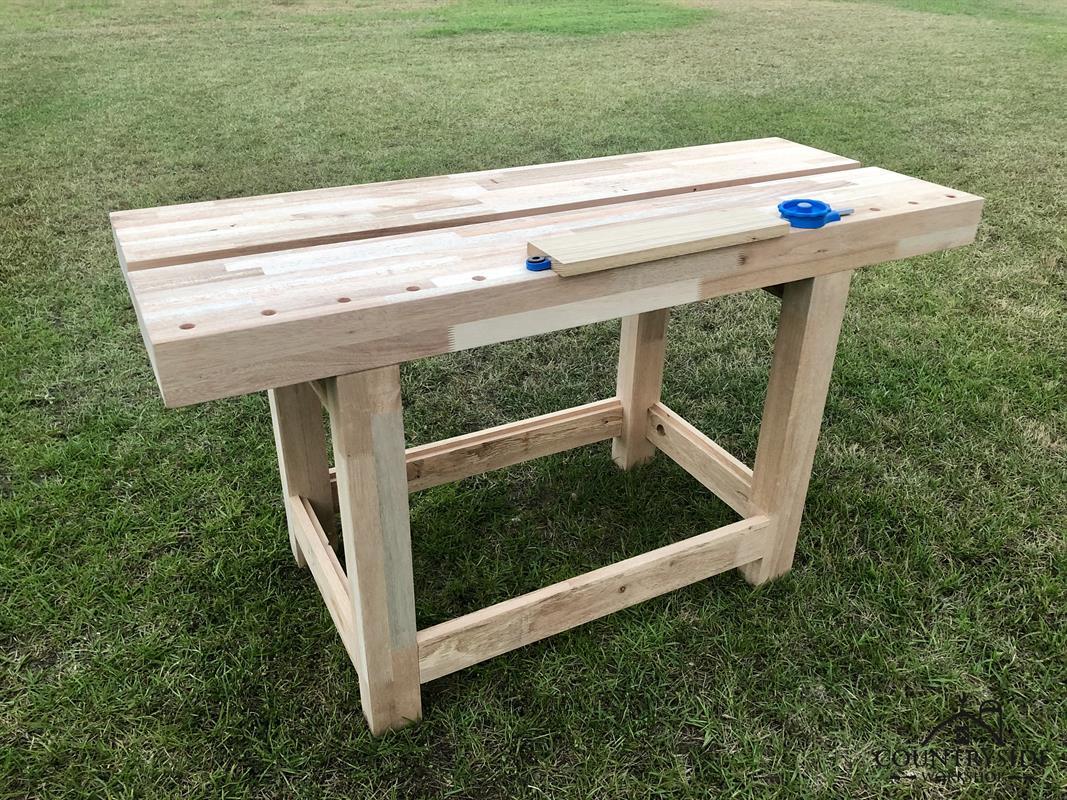
Sand & Finish
**Optional** This is a piece of shop furniture so you can skip this step if you want.
Now is the time to do your final sanding and smoothing of the top and apply the finish of your choice. This is the perfect project to test out a new finish. I used Maker Brand, Co.'s Simple Finish w/ Wax. The wax provides an extra layer of protection against glue or finish drips.
If you choose not to do this step be aware that your bench will be susceptible to stains.