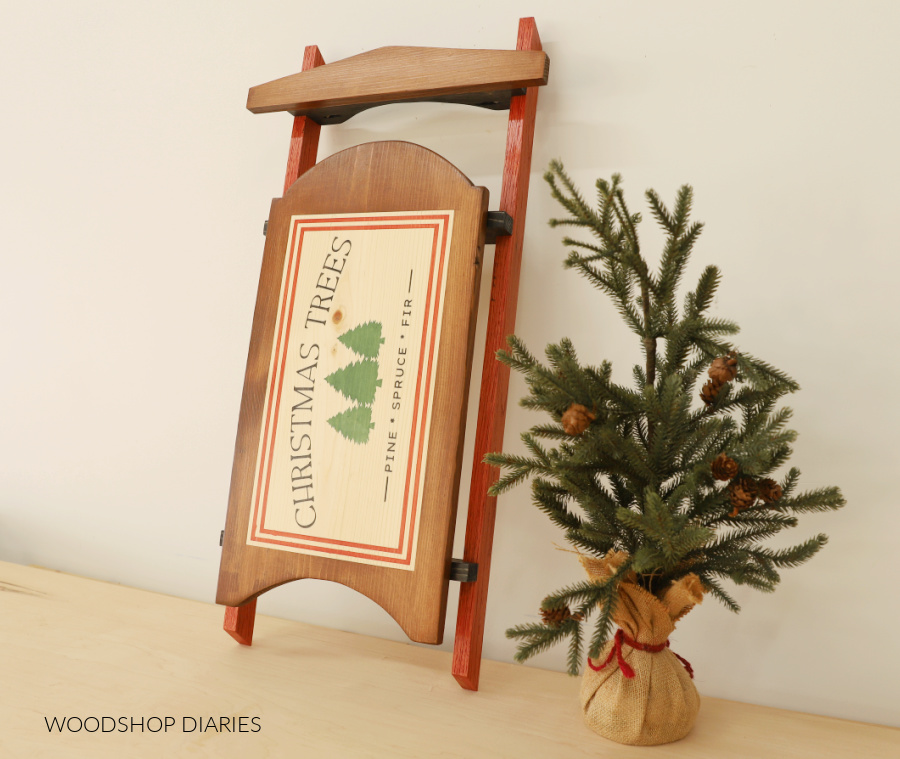
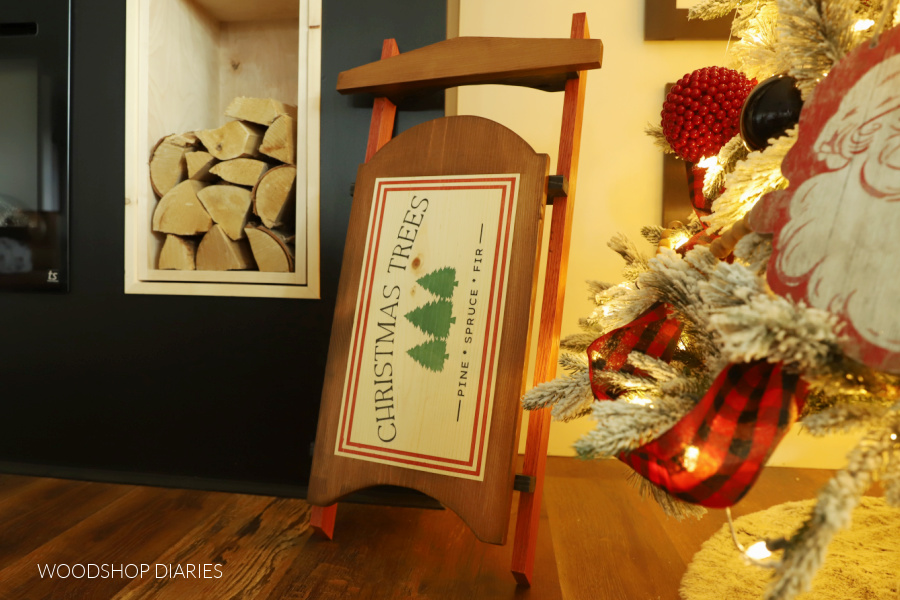


This adorable wooden sled is the perfect scrap wood project to use as a Christmas centerpiece, or as décor next to the tree! Customize it with a logo, design, or monogram to add a festive touch. Hang it up, set it down, or simply lean it against the wall as your new favorite Christmas decoration!
Tools
Kreg Tools


Other Tools
-
Miter Saw

-
Tape Measure
-
Brad Nailer (optional)
Materials
Wood Products
- 1 1x12 , 3/4" x 11 1/4" , 2' long board
- 1 1x2 , 3/4" x 1 1/2" , 6' long board
- 1 1x3 , 3/4" x 2 1/2" , 6' long board
Hardware & Supplies
- 6 1 1/4" pan head pocket hole screws
- 1 Wood Glue
- 6 1 1/4" long Brad nails (optional)
Directions
-
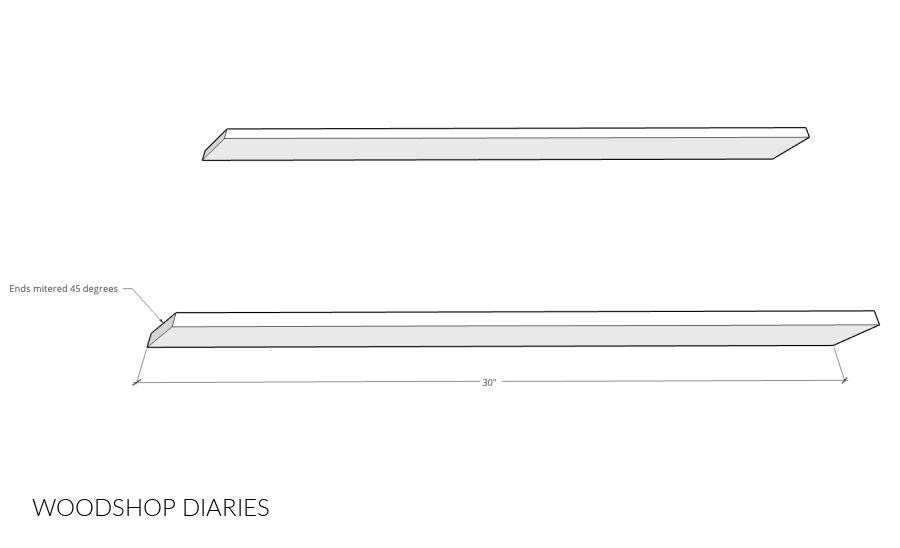
Cut Sled Rails
Cut two (2) pieces of 1x2 to 30" long. Note that both ends should be mitered 45 degrees NOT parallel to each other. These will be the sled rails. Sand and stain/paint as desired.
-
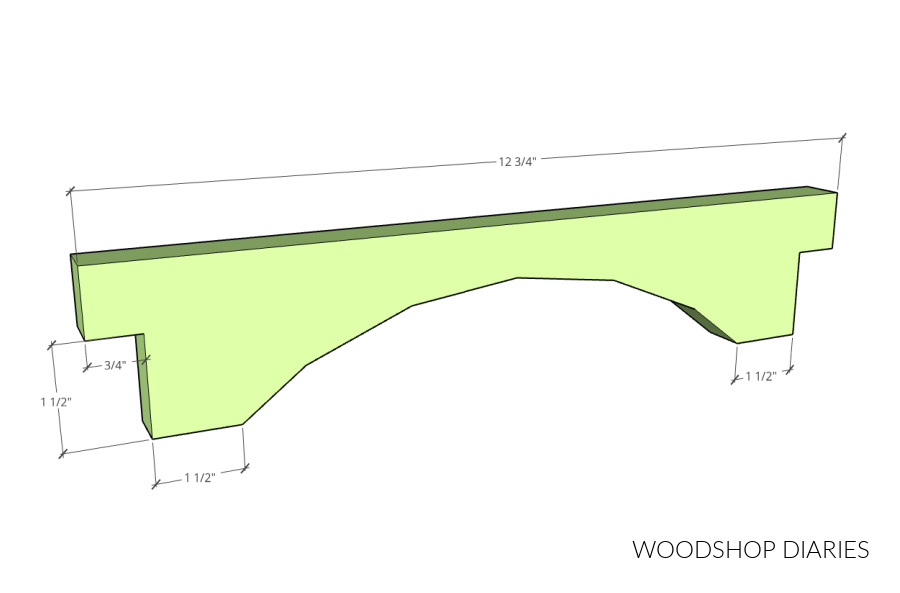
Cut Sled Runners
Cut three (3) pieces of 1x3 to 12 3/4" long. Use a jig saw to cut 3/4" x 1 1/2" notches as shown in the diagram on each piece. Then, cut an arch if desired (this is optional, but adds some extra character).
Cutting the Arch
I marked in from each edge like shown about 1 1/2", then used the lid of a 5 gallon bucket to trace an arch between these lines. That lid seemed to be the perfect size for all the curves in this project. Feel free to freehand your arch or just leave the boards straight.
-
Cut Sled Front Brace
Cut a piece of 1x3 to 16" long. Mark the center of each edge (1 1/4" from the bottom), then mark the center along the top (8" from each edge). Draw lines between these marks and cut along them with a jig saw. Sand and stain/paint as desired.

-
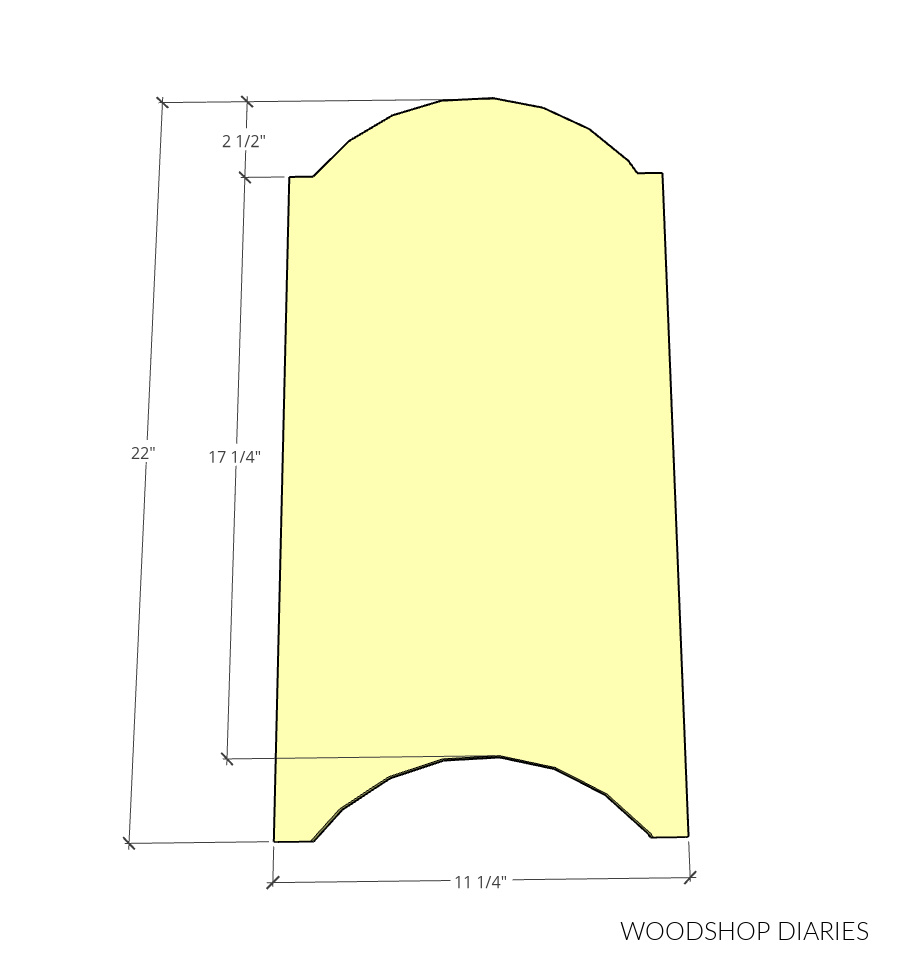
Cut Sled Seat
Cut a piece of 1x12 to 22" long. If desired, draw an arch at the top and bottom like shown and cut with a jig saw. Sand and stain/paint as desired.
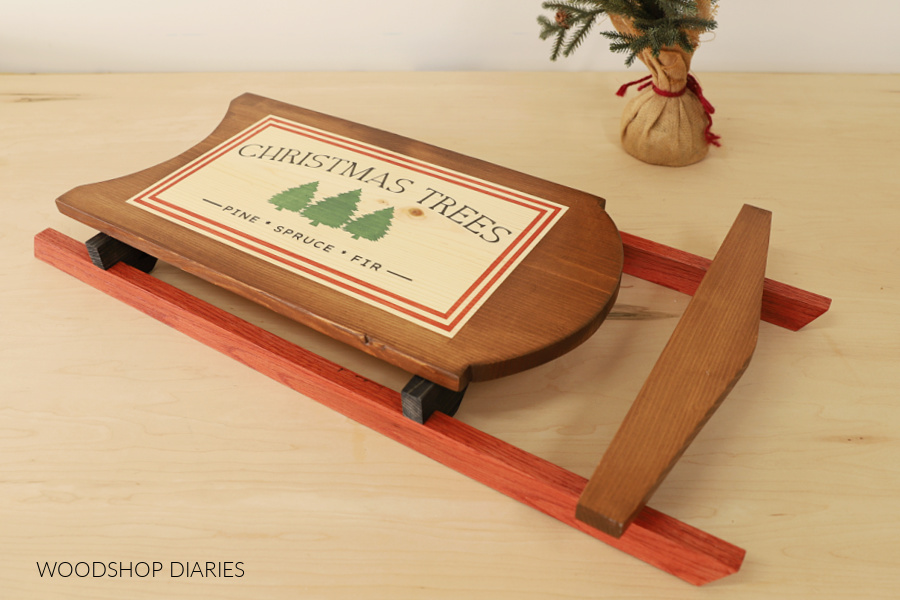
I created and cut a vinyl stencil using my Cricut machine to apply to this piece and stained the design and lettering onto it. Feel free to customize your sled seat however you'd like. Check out the link below for more details on the stencil.
Cutting the Arches
Just like for the sled runners, I used the lid to a 5 gallon bucket to trace these arches.
-
Drill Pocket Holes in Sled Runners
Use a Kreg Micro Pocket Hole Jig to drill 3/4" pocket holes into the ends of the 3 sled runners like shown in the image. Note that these pocket holes are drilled onto the notched portion of the runners.
Once the holes are drilled, sand and stain/paint these pieces as desired.

-
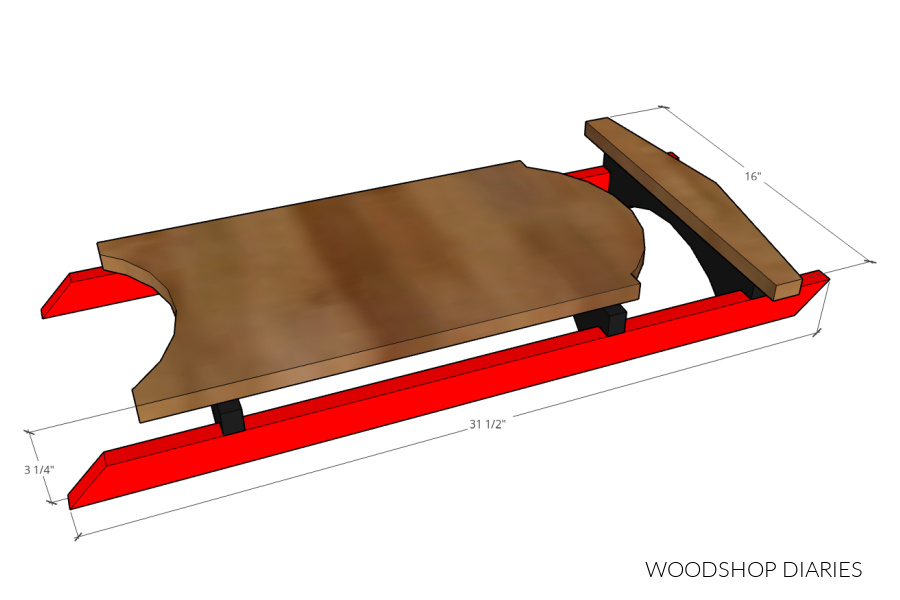
Assemble Sled Rails
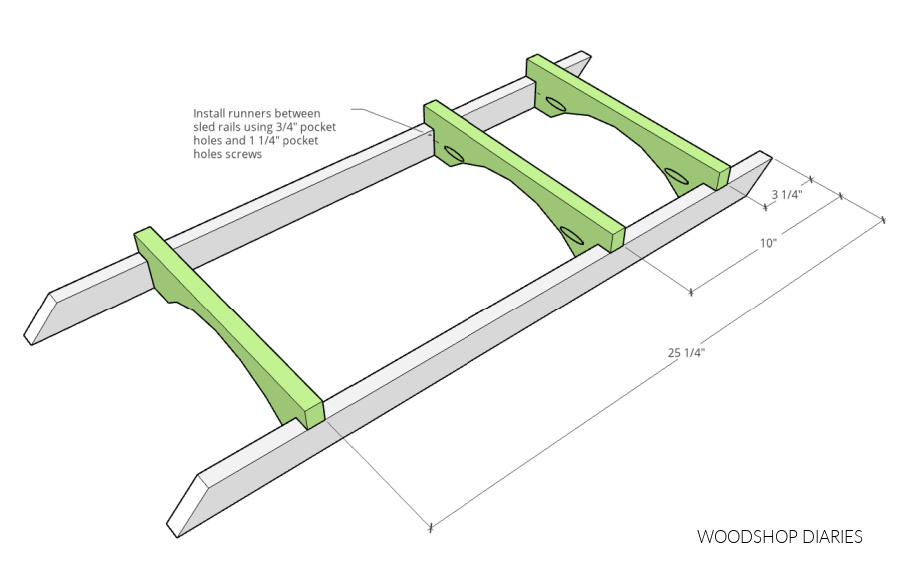
Space the runners between the rails like shown in the diagram and secure using 1 1/4" pan head pocket hole screws.
Rail Placement
The rails should set inside the notches of each runner.
-
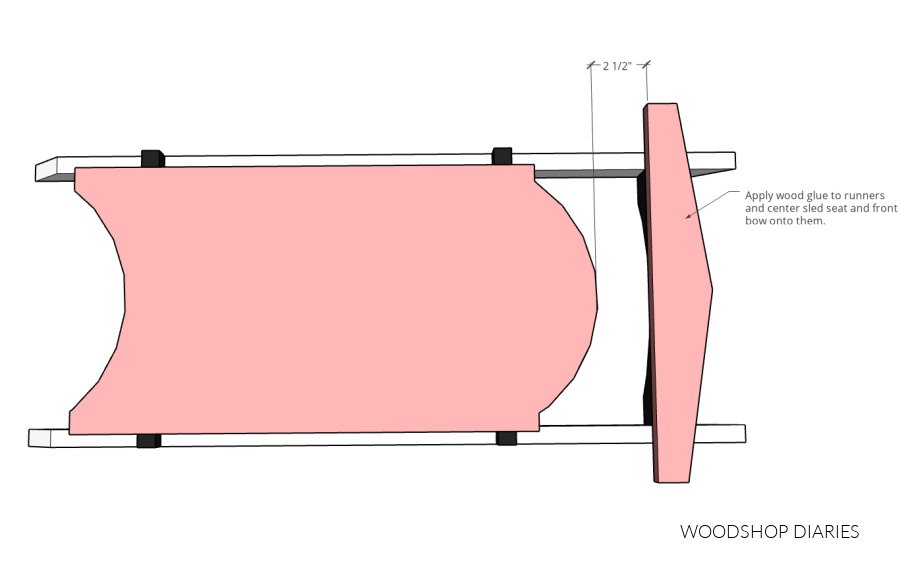
Attach Sled Seat and Front Brace
Apply wood glue to the tops of the sled runners, then place the sled seat and front brace onto them like shown below. Make sure both pieces are centered and space them approximately 2 1/2" apart (this doesn't have to be exact--feel free to space however you think looks best as long as they're on top of the runners). Clamp until the glue dries OR use a few brad nails through the top to secure.
Finish
Once assembled, touch up any paint/stain as needed and apply a clear coat as desired. If you'd like, add a simple rope through the top brace for extra decoration.