

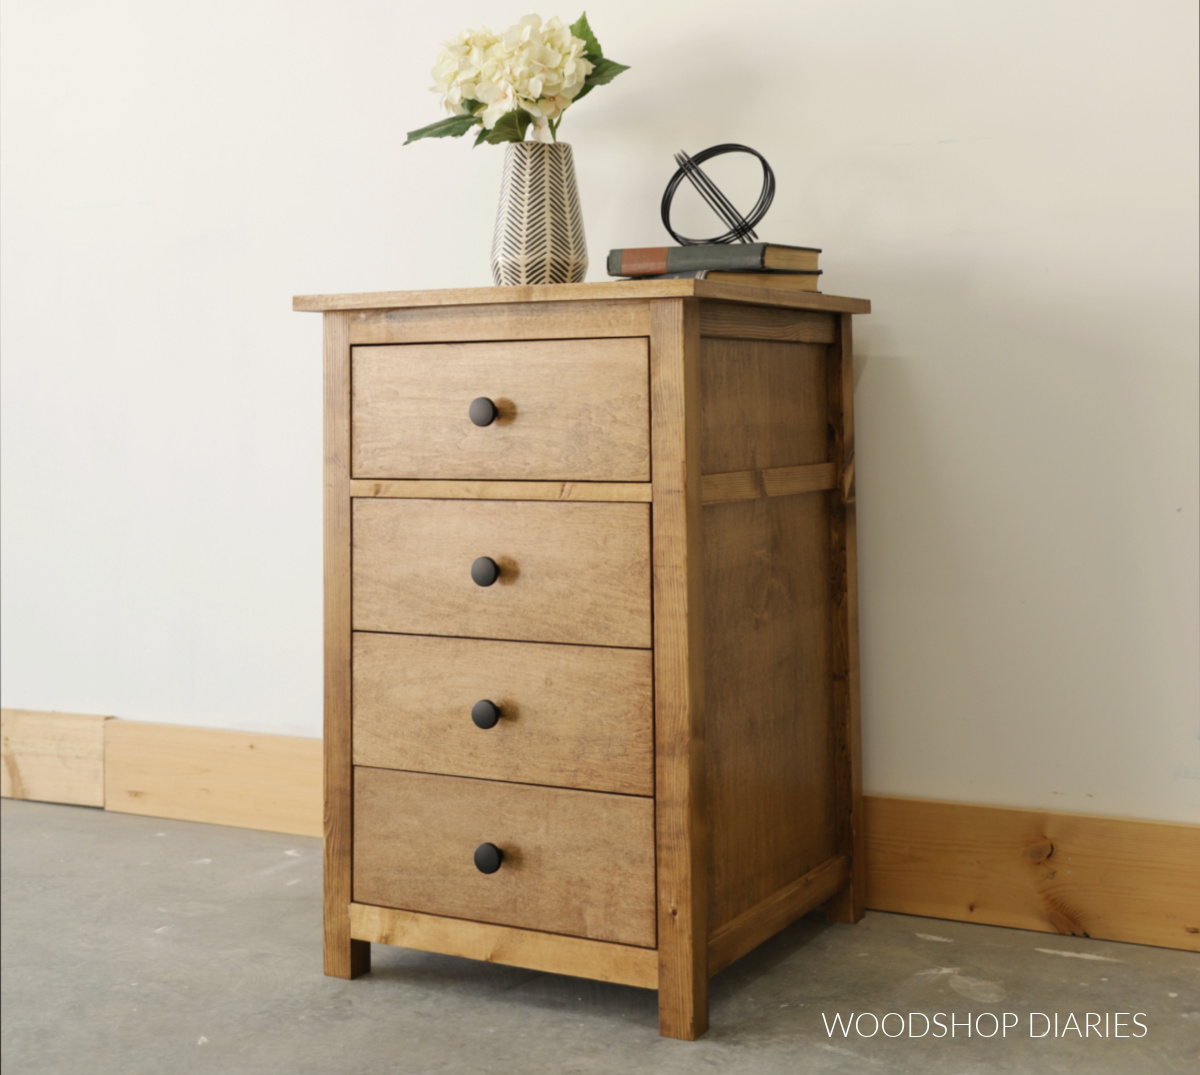
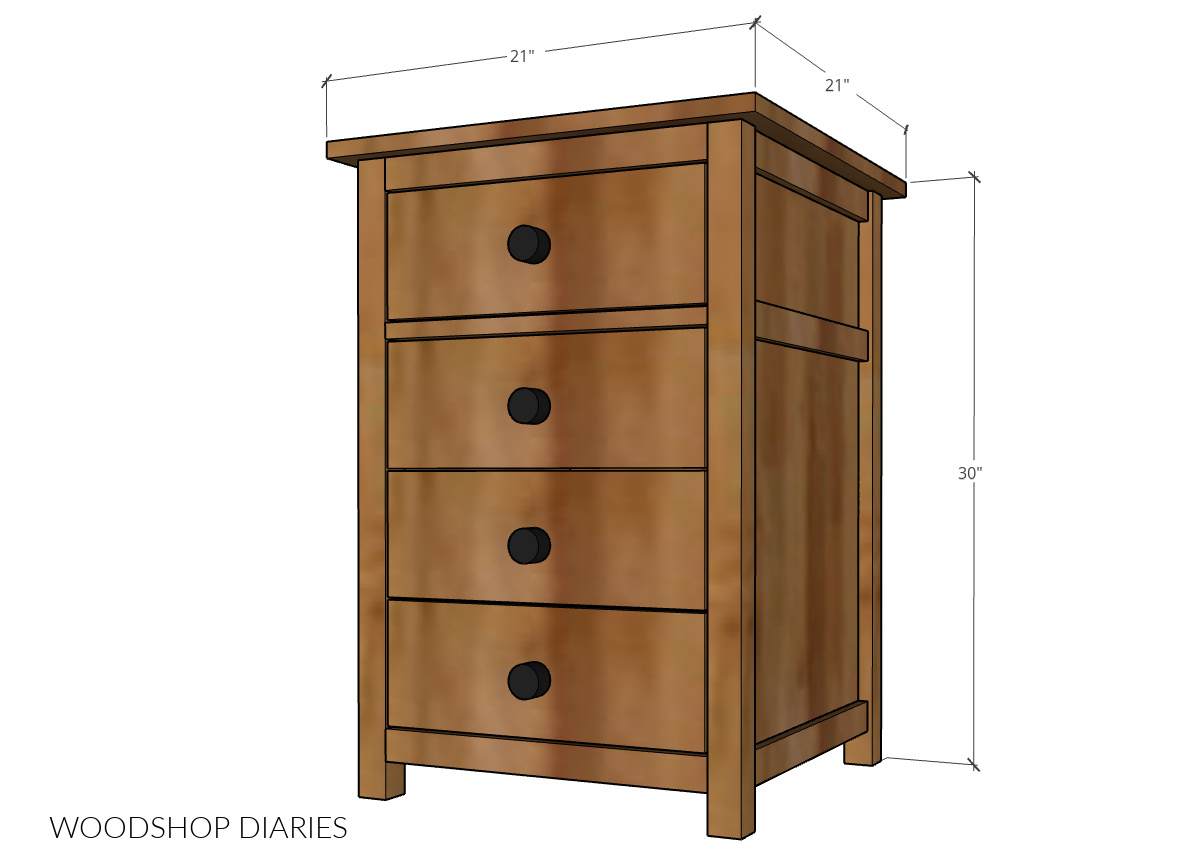


This simple 4 drawer end table is the perfect size for adding a little extra storage next to your desk, couch, or even your bed. A basic, versatile design makes this table not only practical, but easy to build, too with just a few basic tools and materials.
Tools
Kreg Tools


Other Tools
-
Miter Saw

-
Brad Nailer
-
Square
-
Measuring Tape
Materials
Wood Products
- 1 4x8 sheet 3/4" plywood
- 1 4x4 sheet 1/4" plywood
- 2 2x2x8 board , 1 1/2" x 1 1/2" x 96"
- 2 1x2x8 board , 3/4" x 1 1/2" x 96"
Hardware & Supplies
- -- 1 1/4" pocket hole screws
- -- 2 1/2" pocket hole screws
- -- 1 1/4" brad nails
- 4 Pair 16" ball bearing drawer slides
- -- Edge banding
- -- Wood glue
- -- 5/8" wood screws (to install slides)
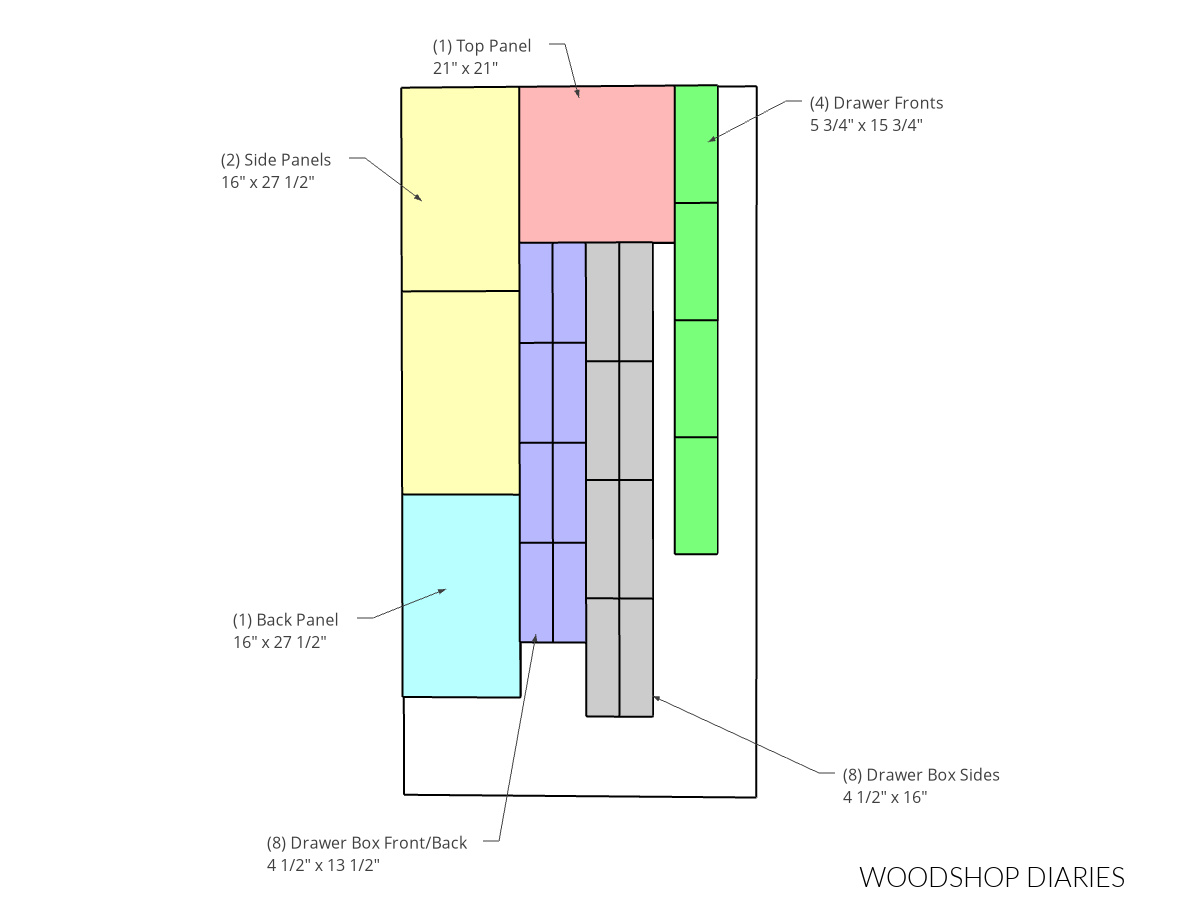
Cut List & Parts
- 4 Table Legs (2x2) , 1 1/2" x 1 1/2" x 29 1/4"
- 2 Side Panels (3/4" plywood) , 3/4" x 16" x 27 1/2"
- 1 Back Panel (3/4" plywood) , 3/4" x 16" x 27 1/2"
- 2 Top/Bottom Front Frame (2x2) , 1 1/2" x 1 1/2" x 16"
- 1 Drawer Divider (1x2) , 3/4" x 1 1/2" x 16"
- 8 Drawer Box Sides (3/4" plywood) , 3/4" x 4 1/2" x 16"
- 8 Drawer Box Front/Back (3/4" plywood) , 3/4" x 4 1/2" x 13 1/2"
- 4 Drawer Bottom Panel (1/4" plywood) , 1/4" x 14" x 15"
- 4 Drawer Fronts (3/4" plywood) , 3/4" x 5 3/4" x 15 3/4"
- 1 Top Panel (3/4" plywood) , 3/4" x 21" x 21"
- 9 Side Trim (1x2) , 3/4" x 1 1/2" x 16"
Directions
-
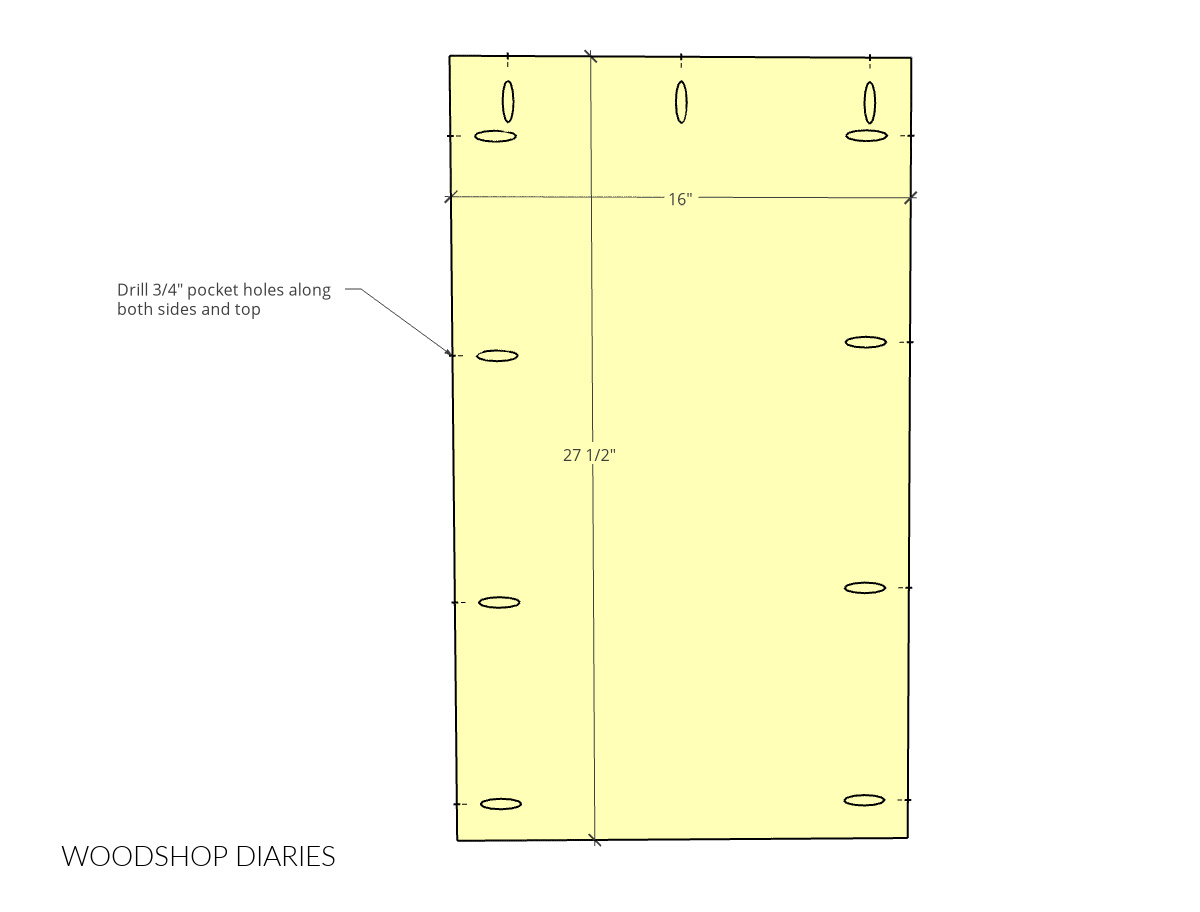
Prepare Side and Back Panels
Use circular saw with Kreg Rip Cut and Kreg Accu-Cut (or other preferred method) to cut the side and back panels from the plywood sheet. See plywood cut diagram. Use Kreg pocket hole jig to drill 3/4" pocket holes along the sides and tops of each panel like shown. Note that these pocket holes should be on the INSIDE of the panels.
Learn how to easily cut plywood sheets using a circular saw and Kreg cutting guides
-
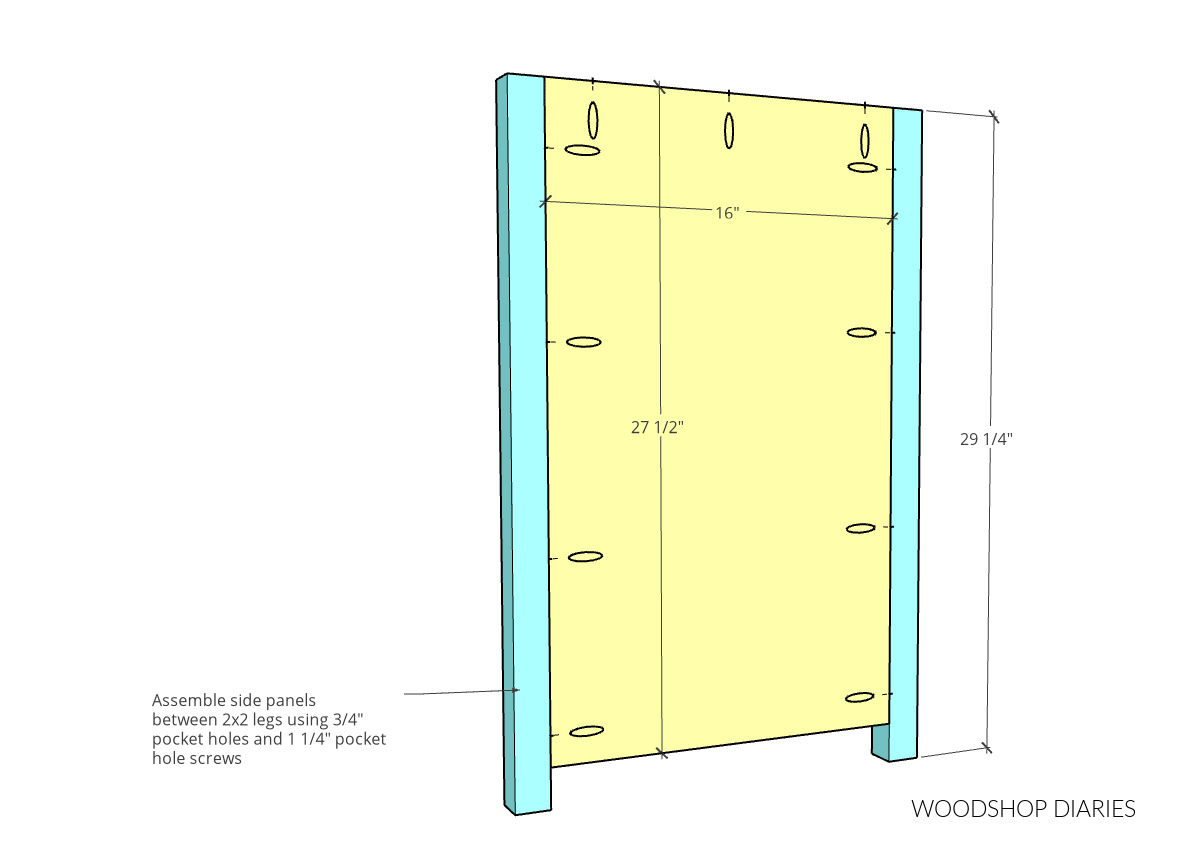
Assemble Sides
Cut (4) 2x2 legs according to the cut list. Using two of the panels from step 1, assemble two sides like shown using 1 1/4" pocket hole screws. The plywood panel should be flush to the INSIDE of the 2x2 legs and the pocket holes drilled on the end should be at the top.
-
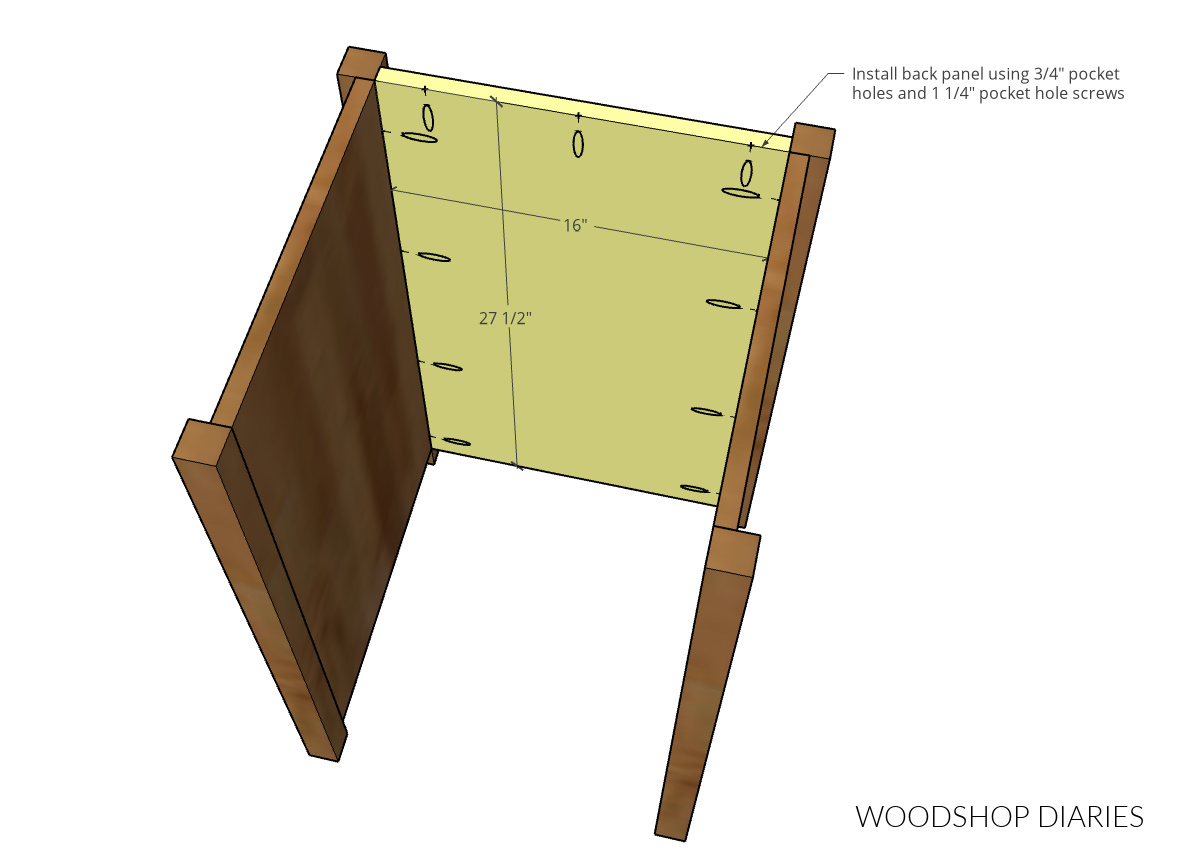
Install Back Panel
Install the 3rd panel from step 1 between the two side panels from step 2 like shown using 1 1/4" pocket hole screws. Note that the back panel should be flush to the INSIDE of the 2x2s and the pocket holes drilled in the end should be at the top.
-
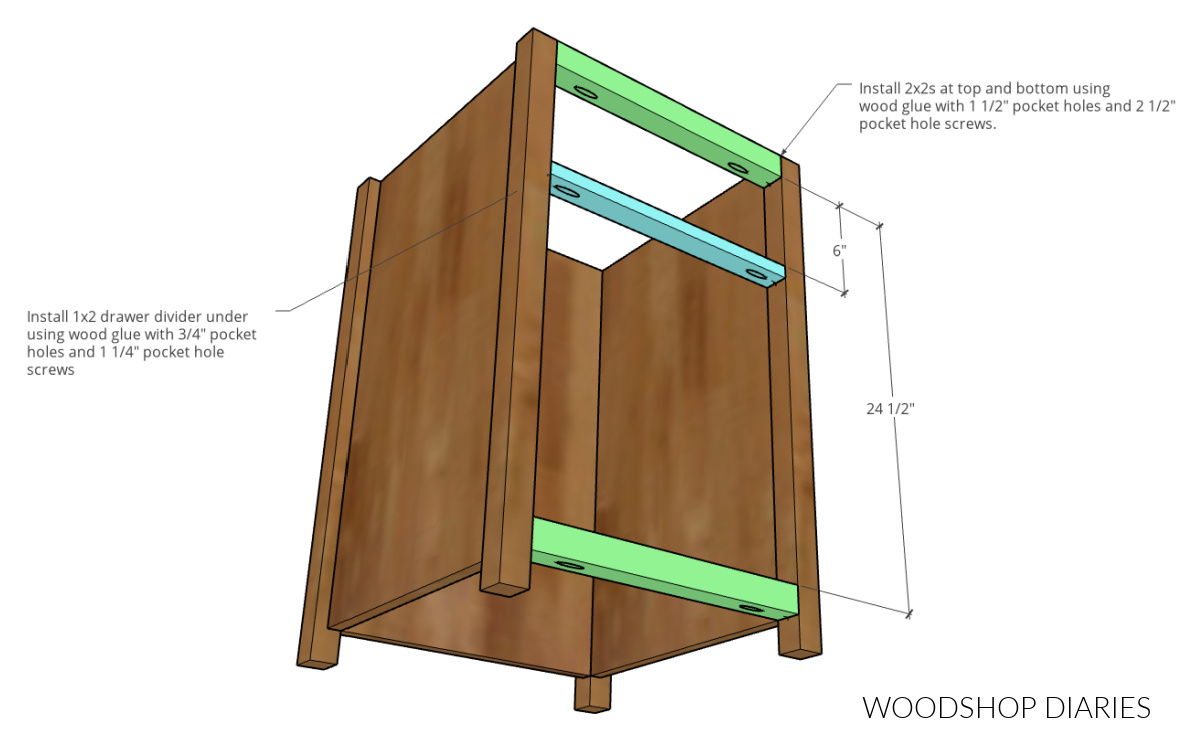
Install Front Framing
Cut (2) 2x2 pieces and (1) 1x2 piece to 16" long according to the cut list for the front framing and drawer divider. Drill 1 1/2" pocket holes into the ends of the 2x2s and 3/4" pocket holes into the end of the 1x2.
Install the 2x2s using wood glue and 2 1/2" pocket hole screws. Install the 1x2 using wood glue and 1 1/4" pocket hole screws.
Note that the top 2x2 is flush to the top and there is 24 1/2" space between it and the bottom 2x2. The 1x2 should be installed with 6" space between it and the top 2x2 and should be turned so that the 1x edge is at the front.
-
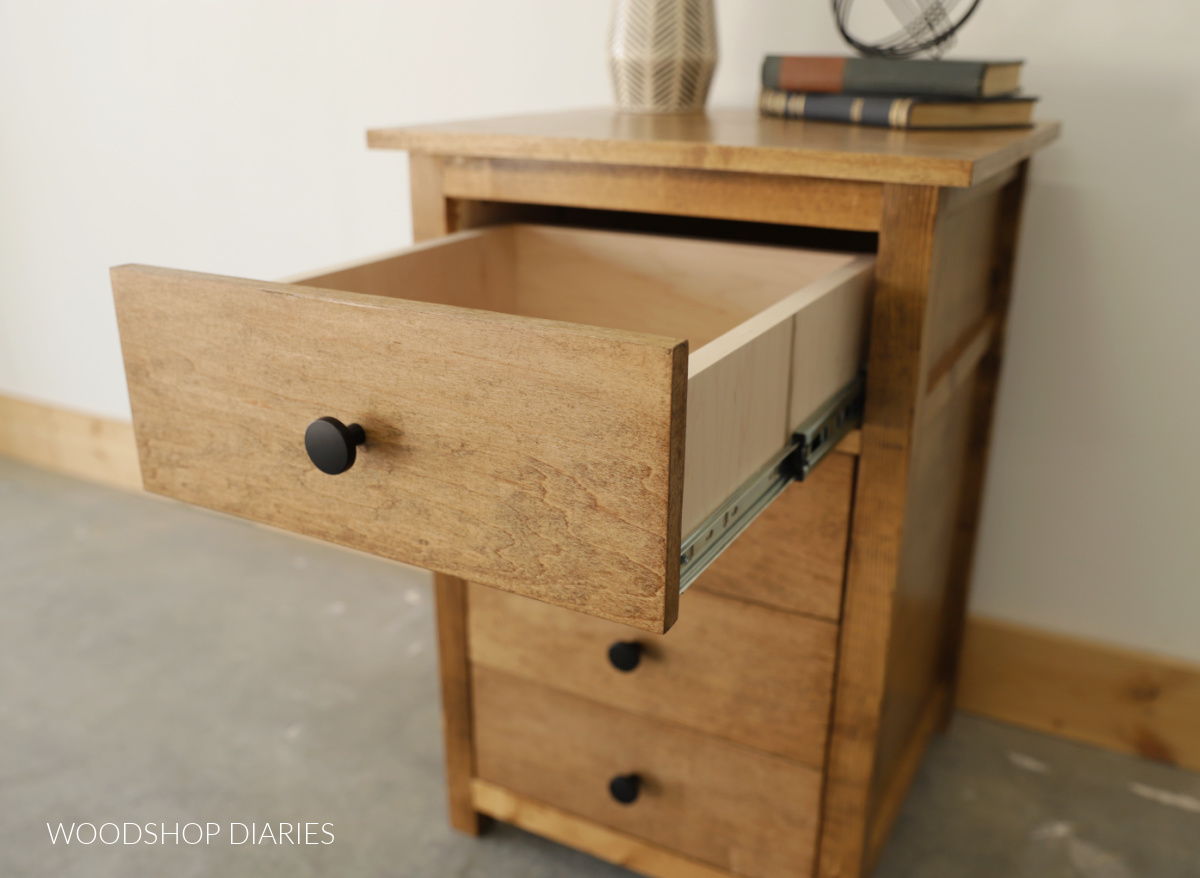
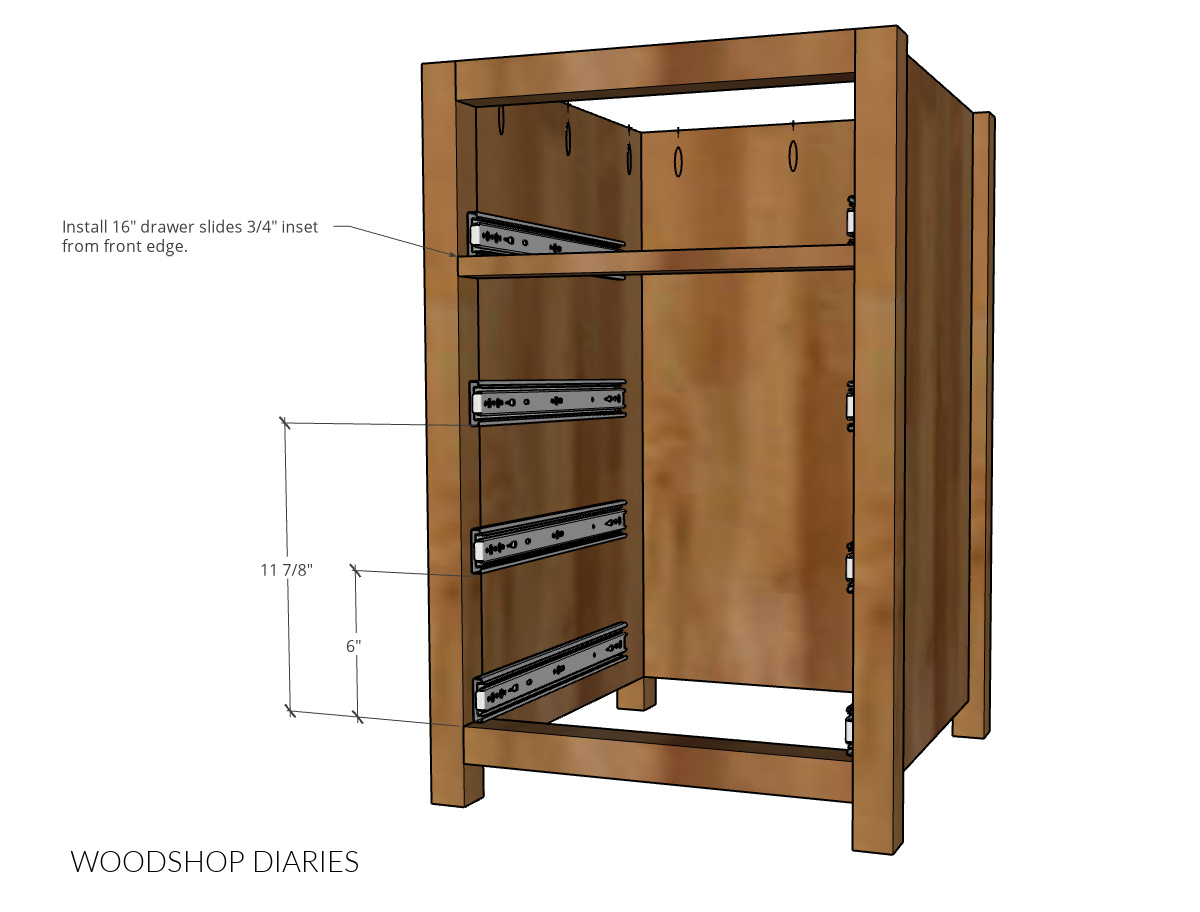
Install Drawer Slides
Install four (4) pair of 16" ball bearing side mount drawer slides into the cabinet 3/4" inset from the front edge.
Install the top and bottom slides so that the bottom edge is directly on top of the framing below it. Install the middle slides at the locations shown in the diagram.
-
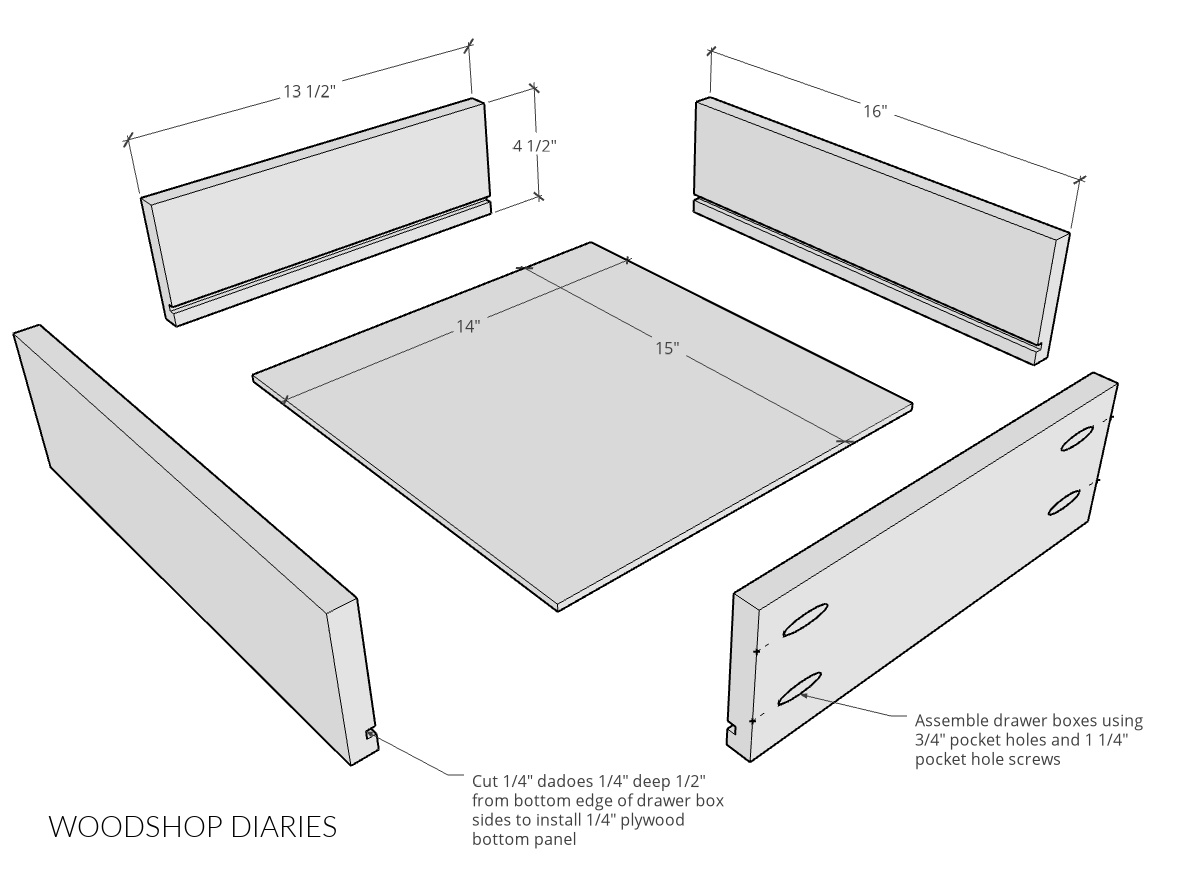
Assemble Drawer Boxes
Cut 3/4" plywood for the drawer box sides and 1/4" plywood for the drawer bottom panels according to the cut list.
Cut 1/4" dadoes 1/4" deep 1/2" up from the bottom edge of each of the 4 sides of the drawer box pieces to install the bottom into.
NOTE: If you don't want to cut dadoes, you can simply glue and screw (or staple) the bottom panel onto the bottom of the box instead. However, if you do that, you'll need to cut the bottom panel 1" larger in both dimensions.
Assemble 4 identical drawer boxes like shown using 3/4" pocket holes and 1 1/4" pocket hole screws through the front and back pieces. See link for tips on building drawer boxes.Learn how to build a simple drawer box here.
-
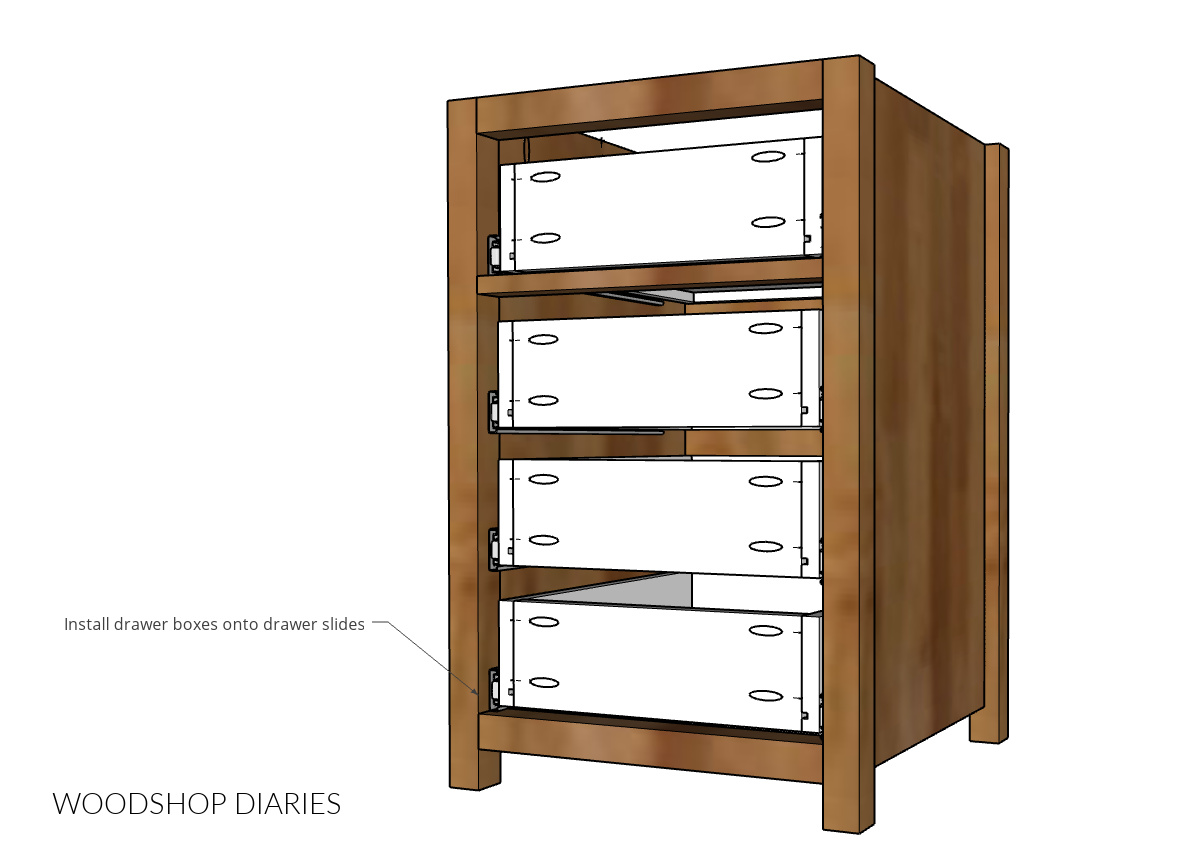
Install Drawer Boxes into End Table
Install the drawer boxes onto the slides so that the front edges are 3/4" inset from the front edge of the table.
Make sure the top and bottom drawers are 1/4" up from the framing below and leave 1 1/2" space between the bottom three drawers.
Tips on Installing Drawers
Use 1/4" plywood scraps as spacer blocks to install the top and bottom drawers 1/4" up off the framing below them. Use scrap 2x2s as spacer blocks between the bottom three drawer boxes to help keep spacing consistent.
-
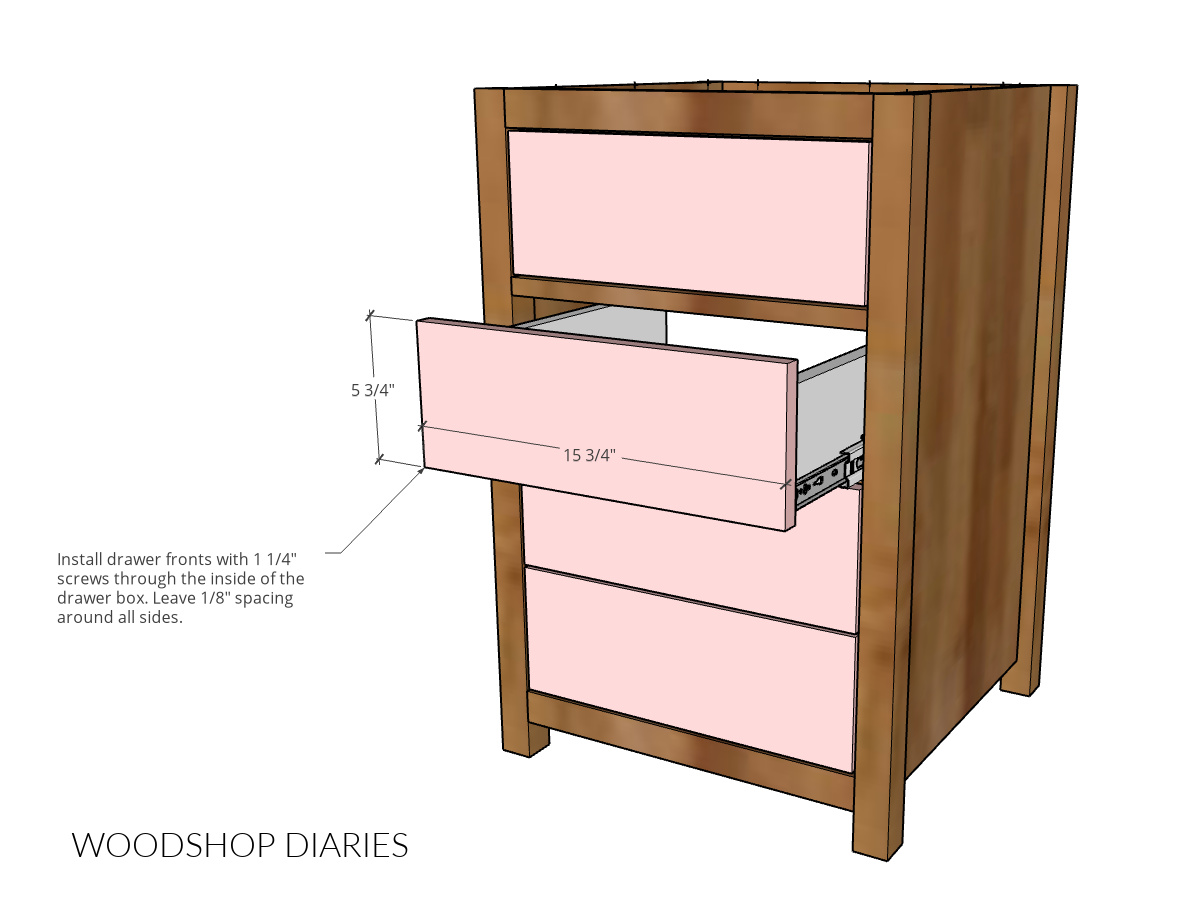
Attach Drawer Fronts
Cut (4) drawer fronts from 3/4" plywood according to the cut list. Apply iron on edge banding around the sides if desired. Install onto the drawer boxes using 1 1/4" wood screws from the inside. Leave 1/8" gaps around all sides and between drawer fronts.
-
Install Top Panel
Cut the 3/4" plywood top according to the cut list and apply iron on edge banding if desired. Remove the top 1-2 drawers as needed to access the inside of the cabinet. NOTE: To remove the drawers, use the tabs on the sides of the slides that allows you to separate the two sections.
Use 2" wood screws through the top front 2x2 and 1 1/4" pocket hole screws through the pocket holes in the side and back panels to secure.
NOTE: Make sure the panel is centered before securing--there should be 1" overhang on all sides.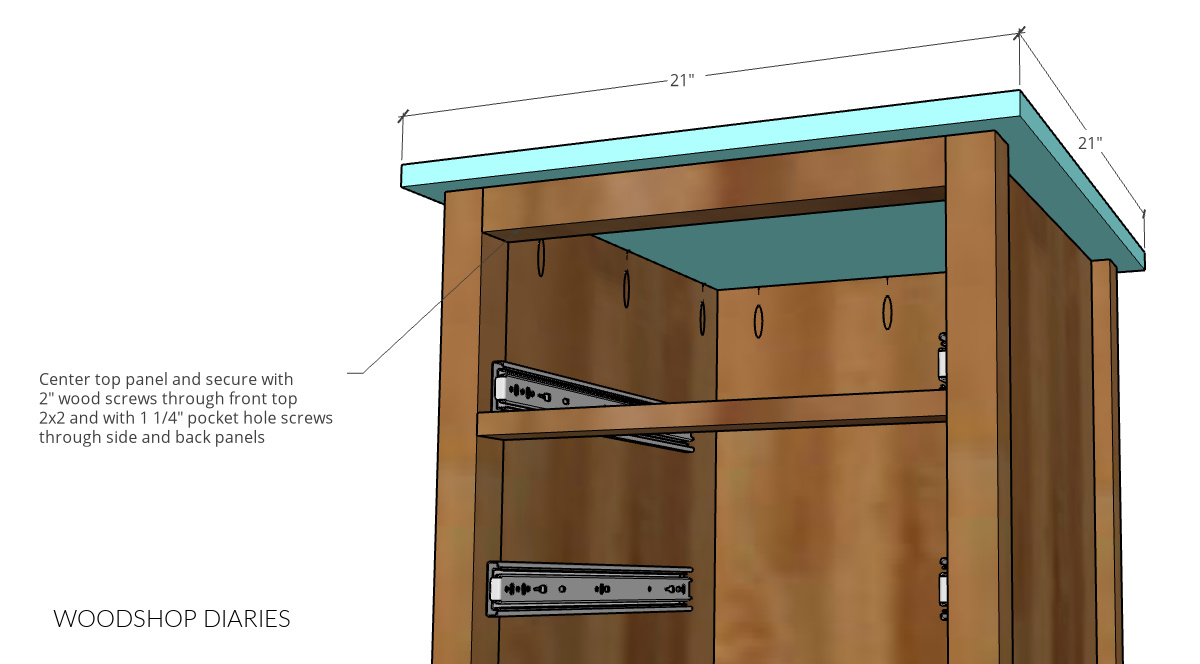
-
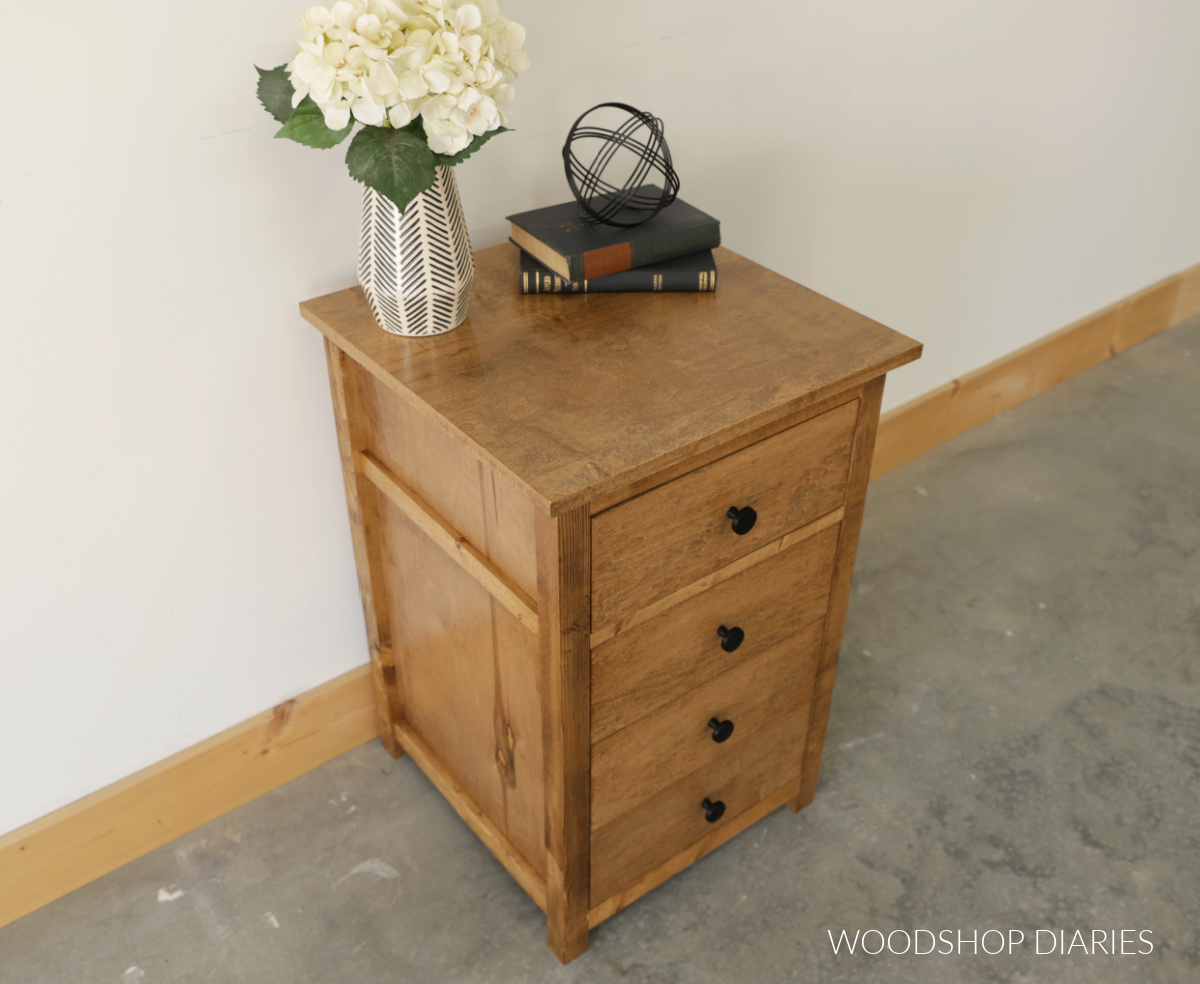
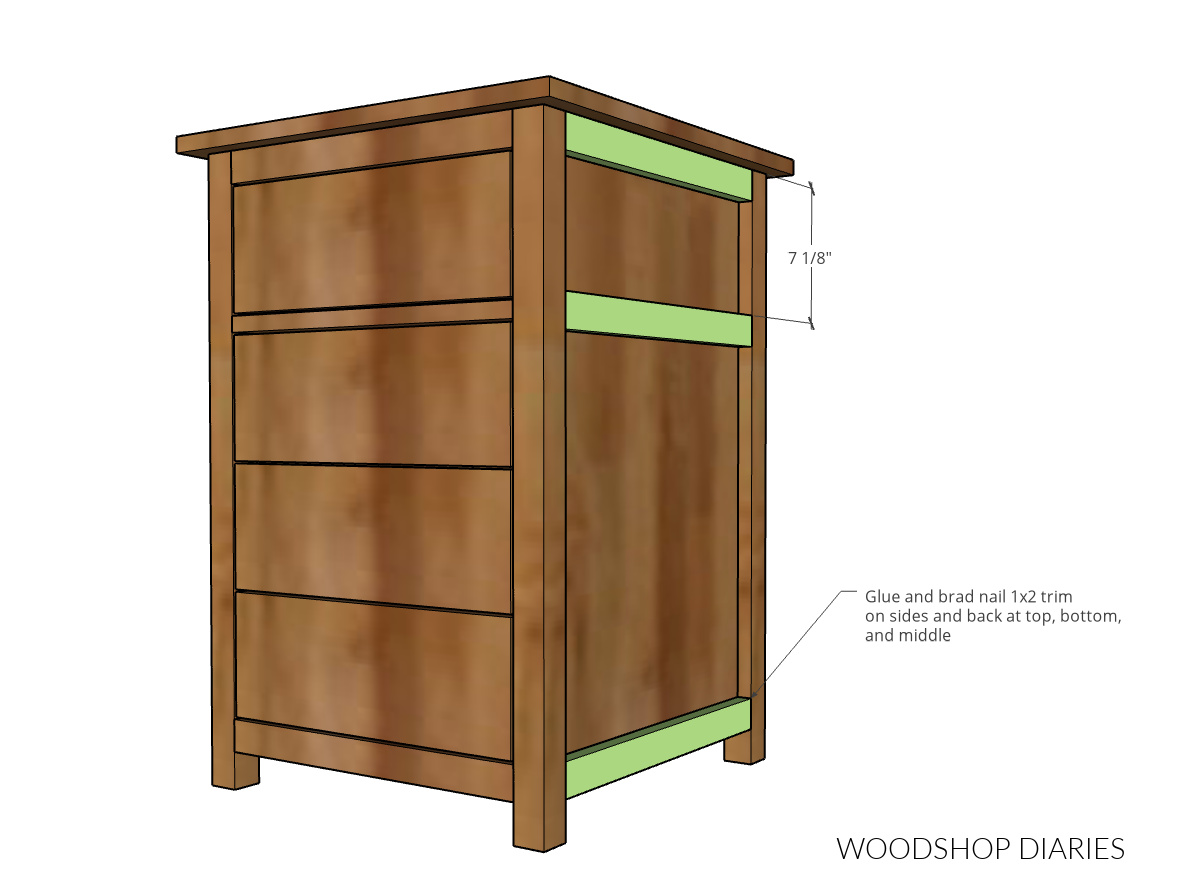
Install Side Trim
Cut to fit 1x2 pieces to trim out the side and back panels like shown. Use wood glue and brad nails to secure pieces at the top, bottom and middle as desired.
-
Finish
Paint and/or stain and finish as desired and add knobs or drawer pulls.