

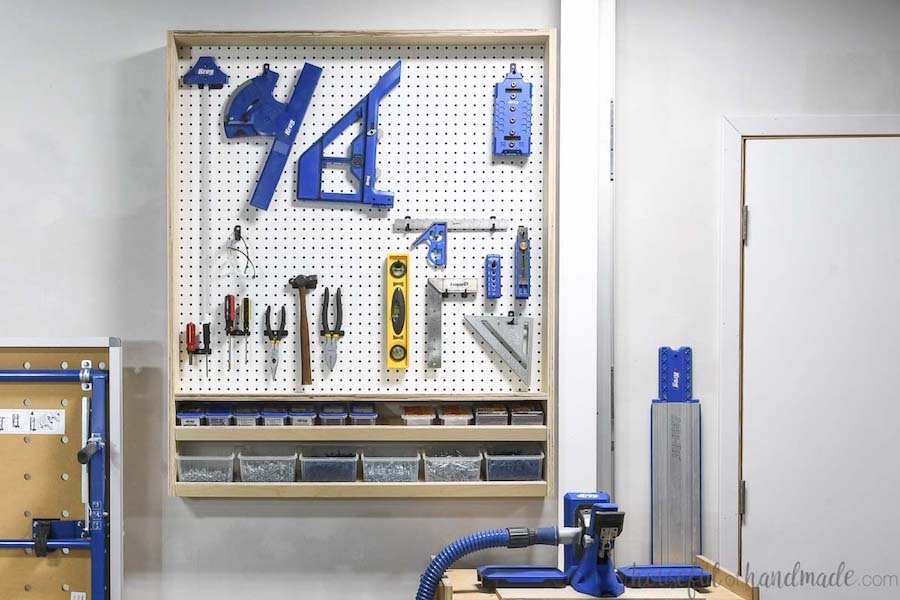


Organize and keep all your favorite Kreg Tools in reach with this handy pegboard storage cabinet. The simple to build cabinet has shelves to organize your most used screws on the bottom and a pegboard back for organizing your tools above.
Tools
Kreg Tools


Materials
Wood Products
- 1 Sheet plywood , ¾” thick, 4x4
- 1 Sheet pegboard , 4x4
Hardware & Supplies
- 1 Box of 1 ¼” Kreg Pocket Hole Screws (see tools list)
- 1 Box of 2 ½” Kreg Pocket Hole Screws (see tools list)
- 1 Wood glue
Directions
-
Cut your pieces
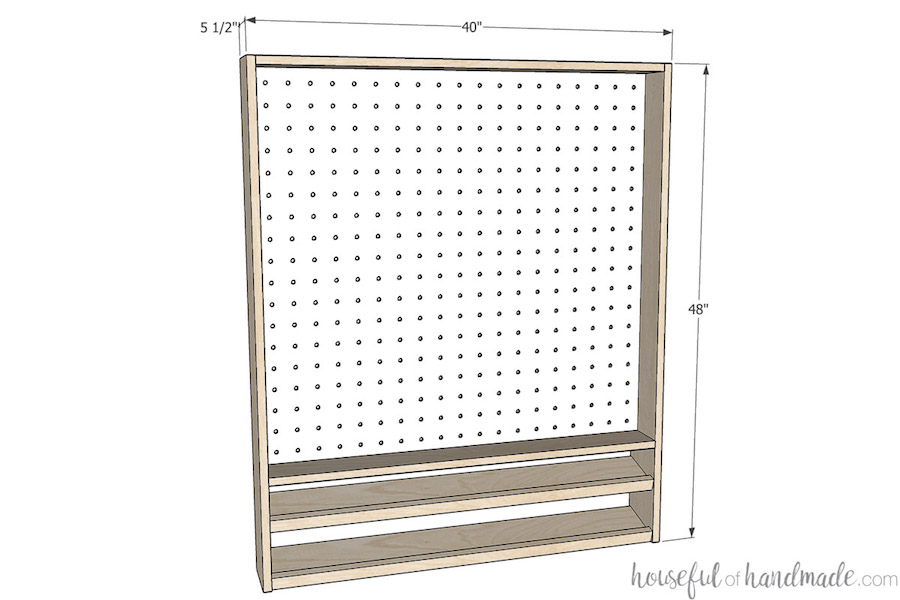
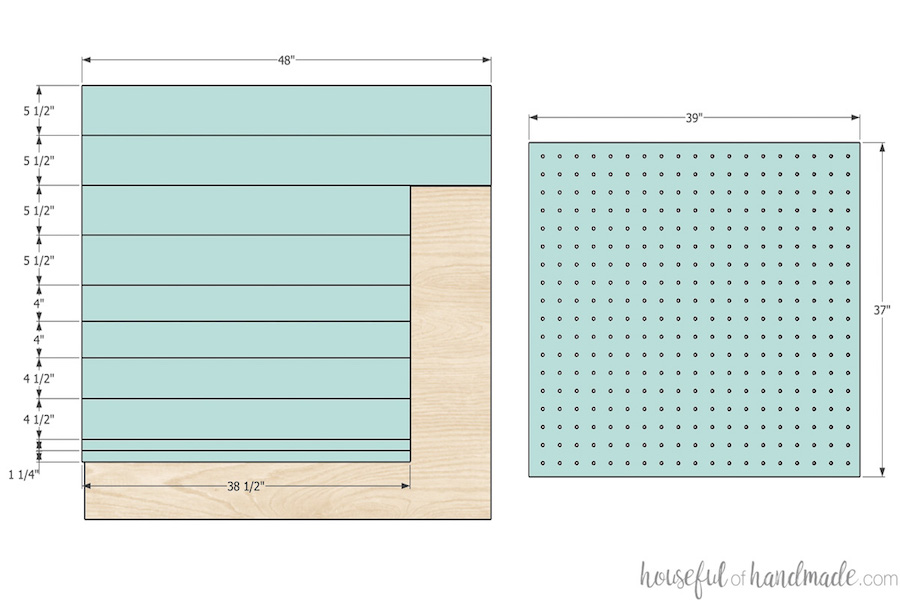
Cut the pieces out of your plywood according to the plywood diagram.
-
Add grooves for pegboard
Set your saw blade on the ACS so it will only cut ¼” into the wood. It is better to be slightly deeper than ¼” than shallower so that your pegboard has enough room. Cut the grooves according to the diagram. Run the saw through the board and then adjust so the blade will cut just to the side of the first cut and run the saw through again. Check to see if your pegboard will fit, if not, repeat with another cut next to the others until your pegboard fits into the groove.
-
Build the shelves
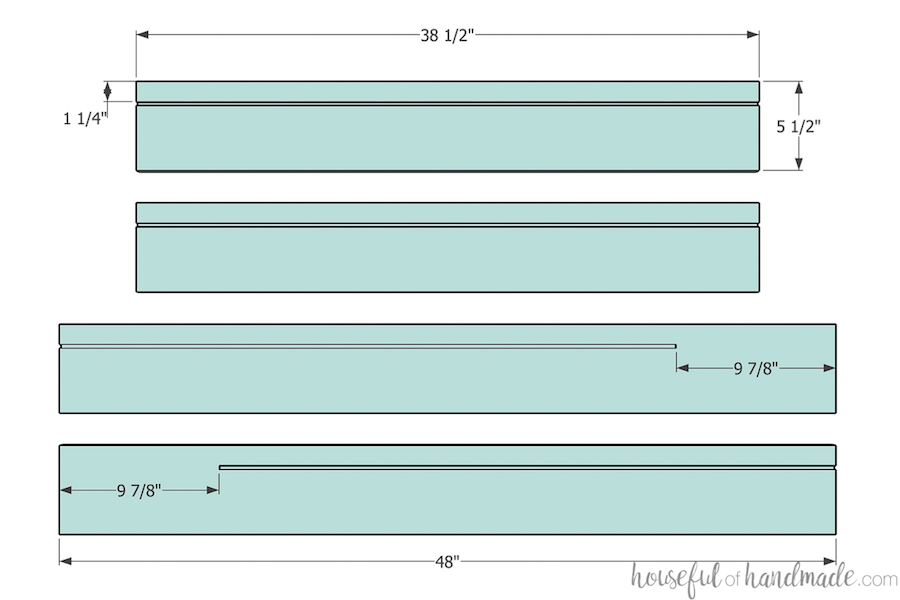
Set your Kreg pocket hole jig to drill pocket holes in ¾” thick material. Drill 2 pocket holes on both ends of the shelf board and drill pocket holes along one side of each board. Attach the shelf fronts to the front of the shelf boards so they are flush at the bottom creating a lip at the top. Secure with 1 ¼” pocket hole screws and wood glue.
-
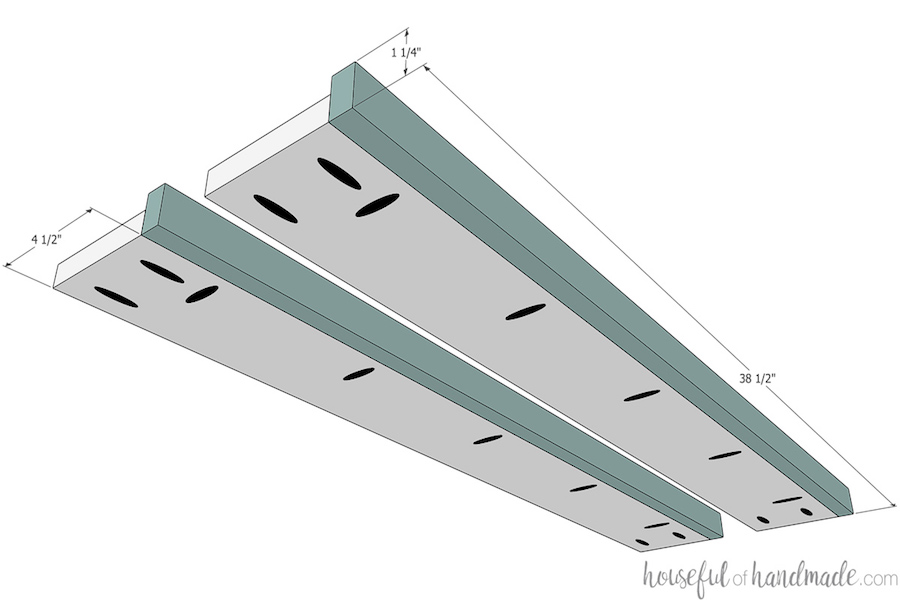
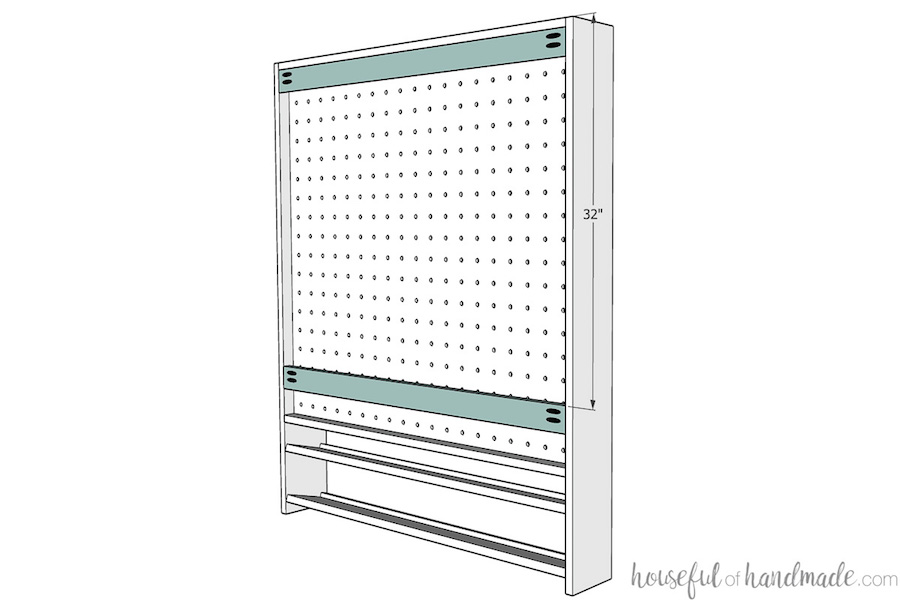
Attach the top/bottom
With your Kreg pocket hole jig still set for ¾” thick material, drill 3 pocket holes in each end of your top/bottom boards on the opposite side as the groove. Position the pocket holes so they are not over the groove. Then attach the top/bottom to one side board so the grooves line up according to the diagram. Secure with wood glue and 1 ¼” pocket hole screws.
-
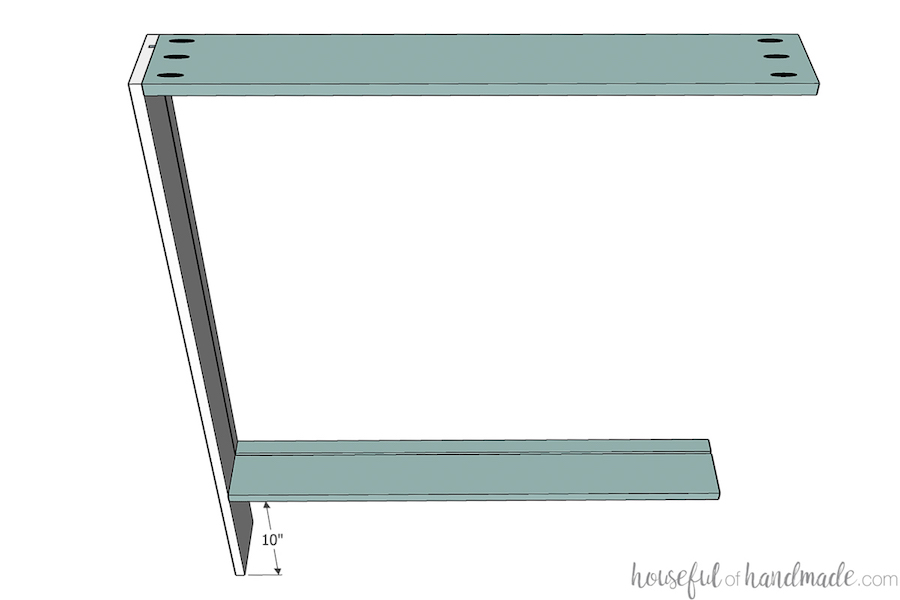
Attach the shelves
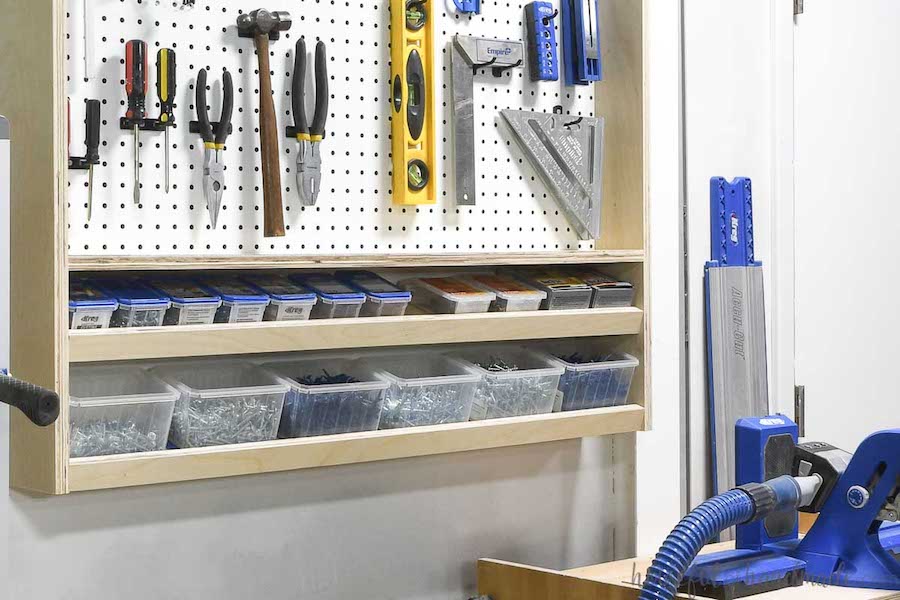
Attach the shelves to the bottom of the sides below the bottom board at a 15 degree angle. Line the bottom of the lower shelf up with the bottom of the sides and the upper shelf 5 ¾” up from the front of the bottom. Secure with wood glue and 1 ¼” pocket hole screws.

-
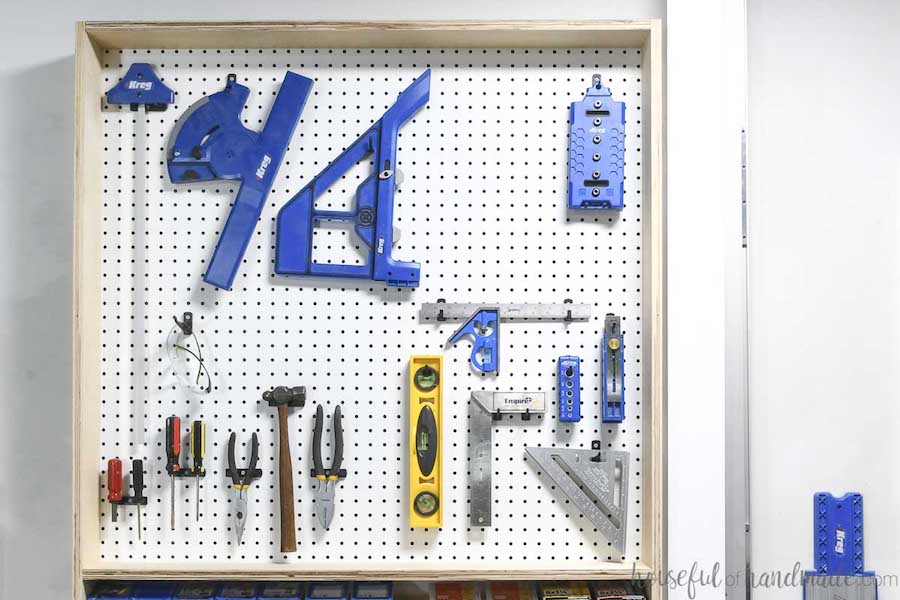
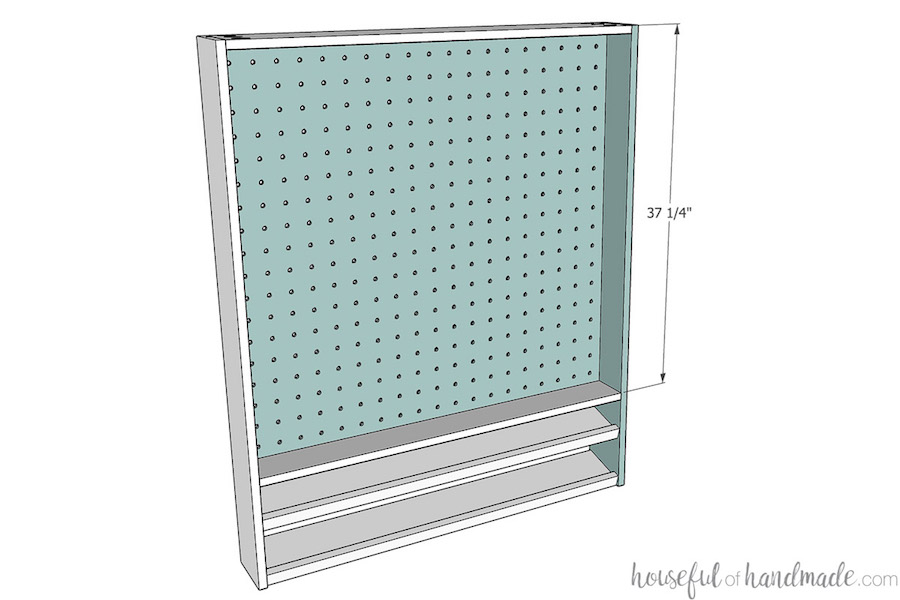
Add the pegboard
Paint pegboard if desired. Slide it into the grooves of the cabinet. Then attach the second side of the cabinet and secure with 1 ¼” pocket hole screws and wood glue. Make sure to line up the top/bottom and shelves to line up with the other side.
-
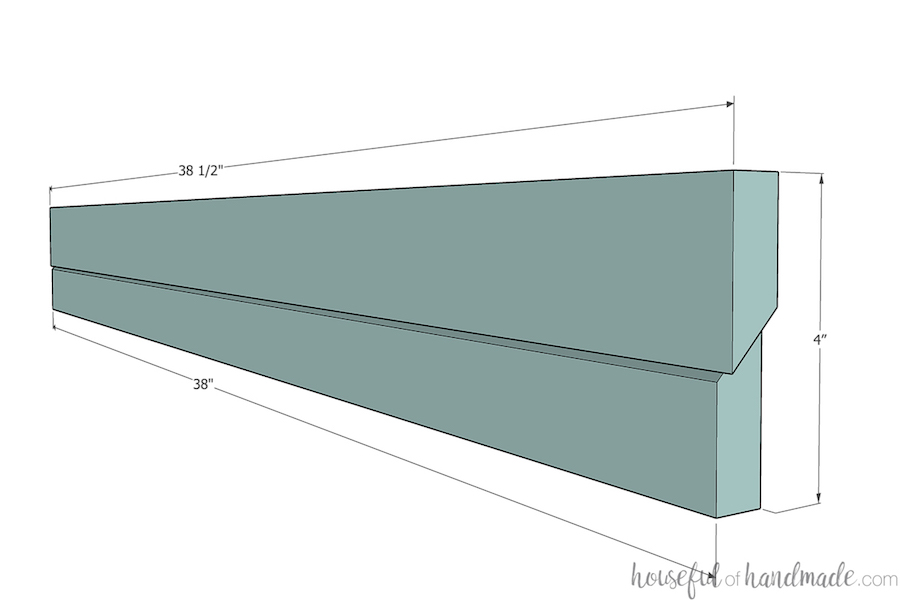
Cut french cleat
Rip the french cleat pieces down the center at a 45 degree angle to make two interlocking pieces. Cut one of the pieces down ½” for the cleat piece that is attached to the wall. This will give you some wiggle room when attaching the cabinet to the wall.
-
Attach cleat to cabinet
Drill 2 pocket holes for ¾” thick material to the ends of the non-trimmed cleat pieces on the longer side. Attach the pieces to the back of the cabinet according to the diagram so the longer side is flush with the back of the cabinet. There will be a gap between the cleat and the pegboard so you can still use the pegboard in front of the cleats.
-
Hang cabinet on wall
Attach the trimmed cleat pieces to the wall where you want the pegboard cabinet to go. Make sure the short side is up against the wall and the angle is facing up. Secure it to the wall into studs with the 2 ½” pocket hole screws. Use the Kreg Quick flip tool to countersink the screws into the cleat. Then lift the cabinet onto the cleat pieces and the two cleats pieces should slide together locking the cabinet into place on the wall.
-
Enjoy!
Load your pegboard up with your favorite tools. Place smaller screw containers on the upper shelf and larger boxes on the lower shelf. And enjoy having your tools organized and within reach on your next project. Then make sure to visit Housefulofhandmade.com for more builds to get you organized this year!