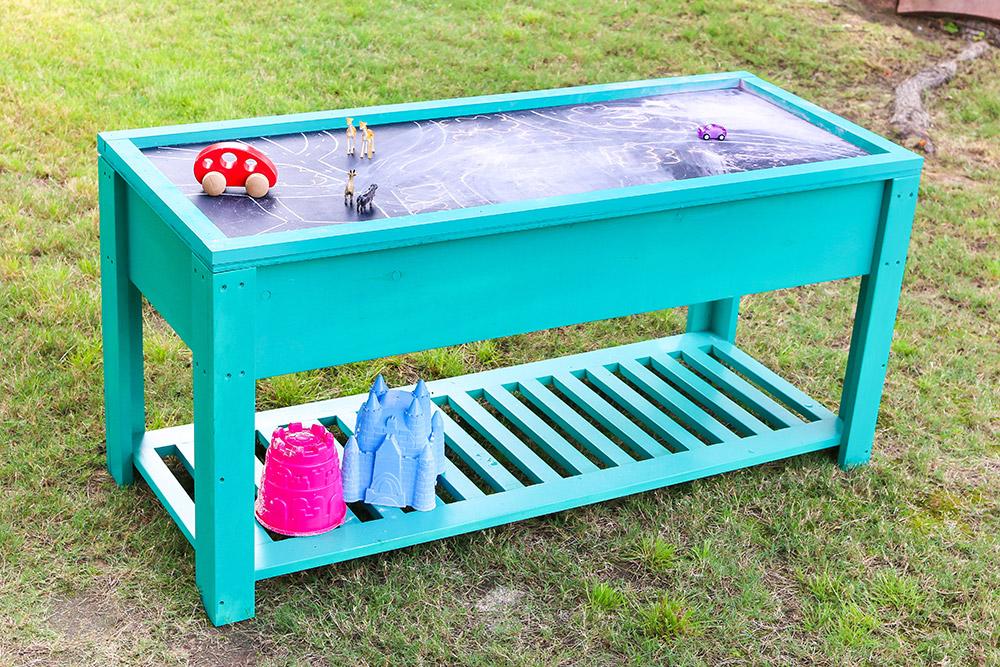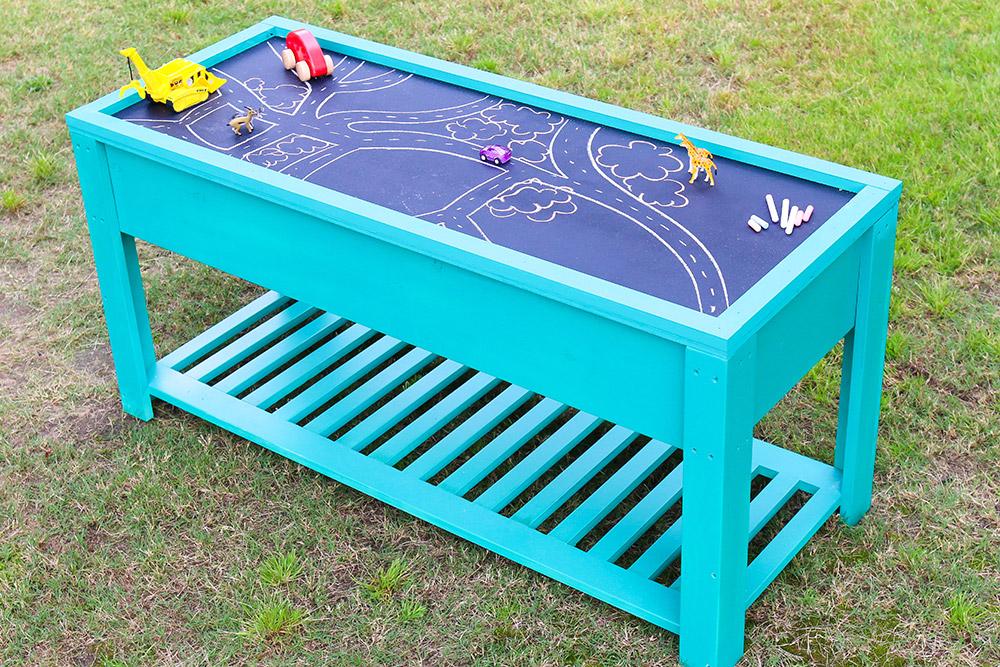
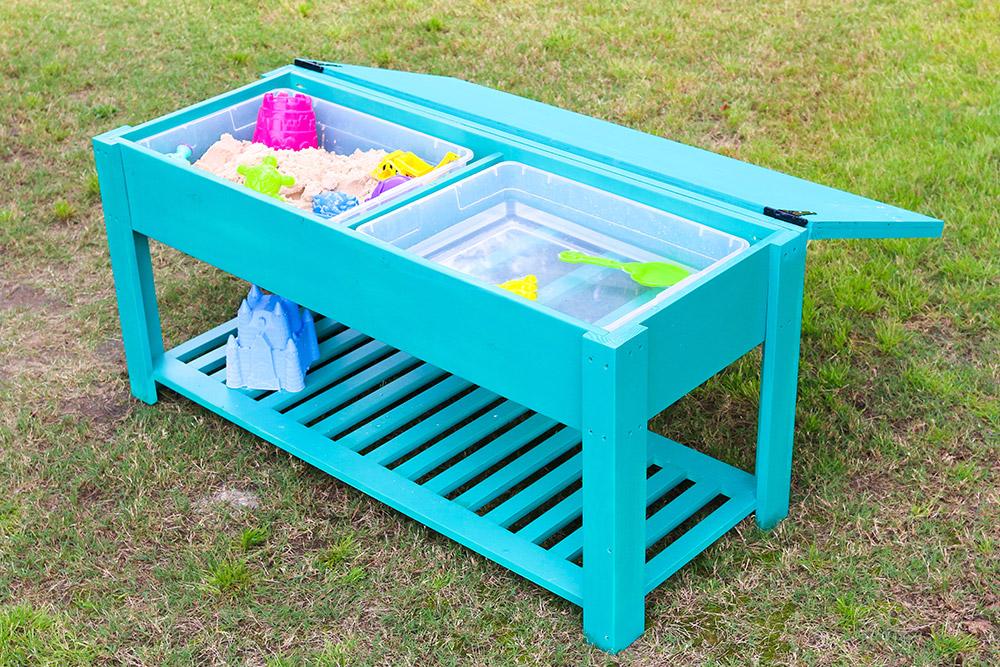
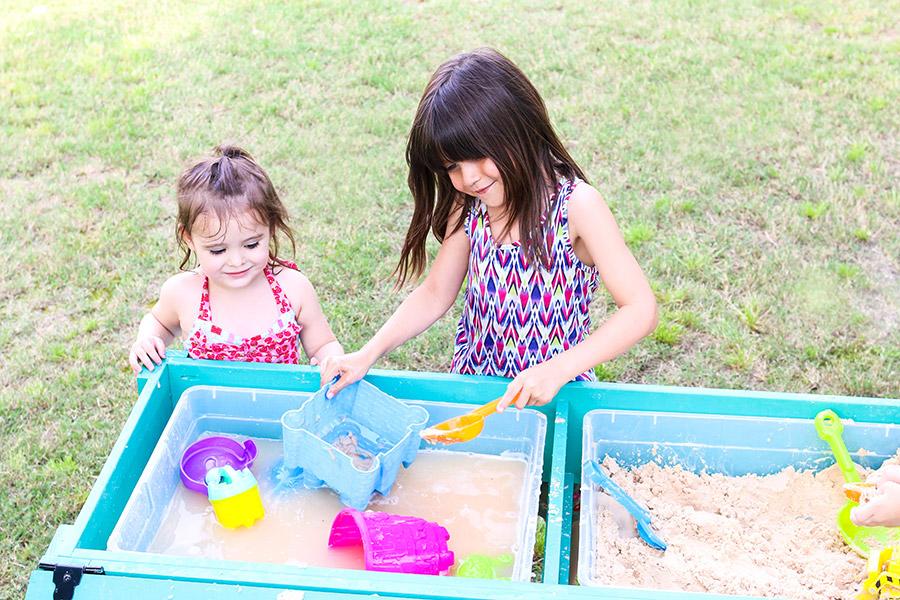
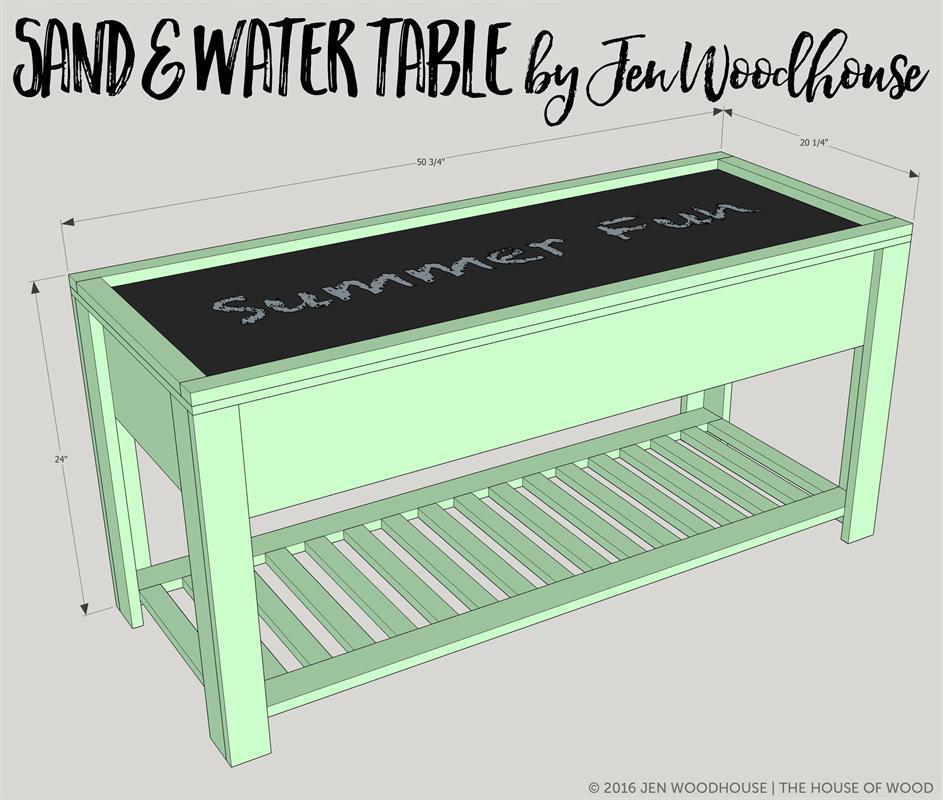
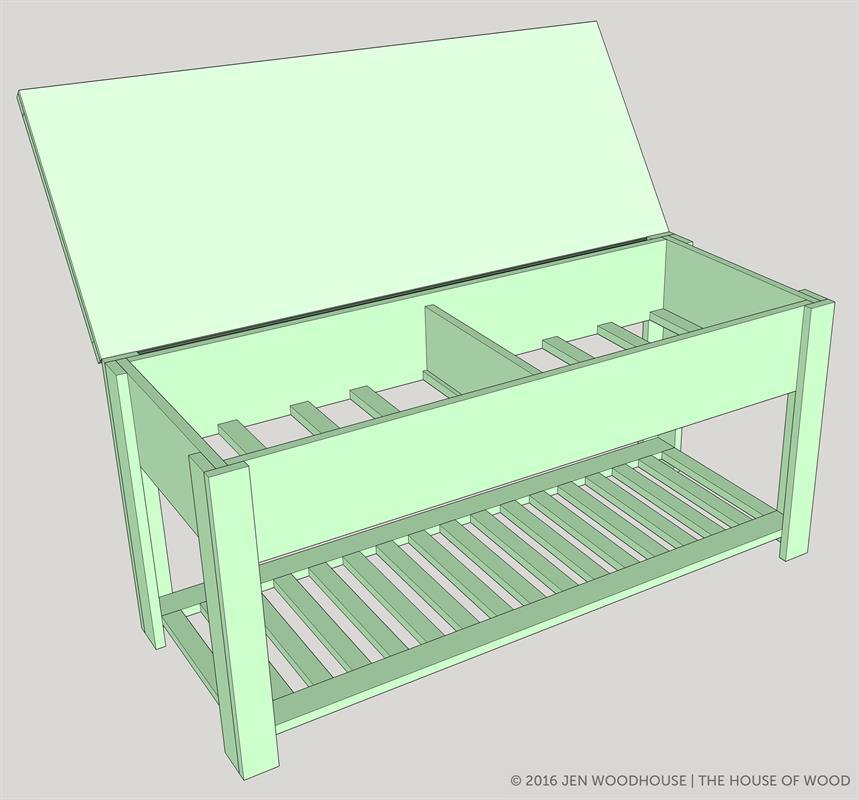


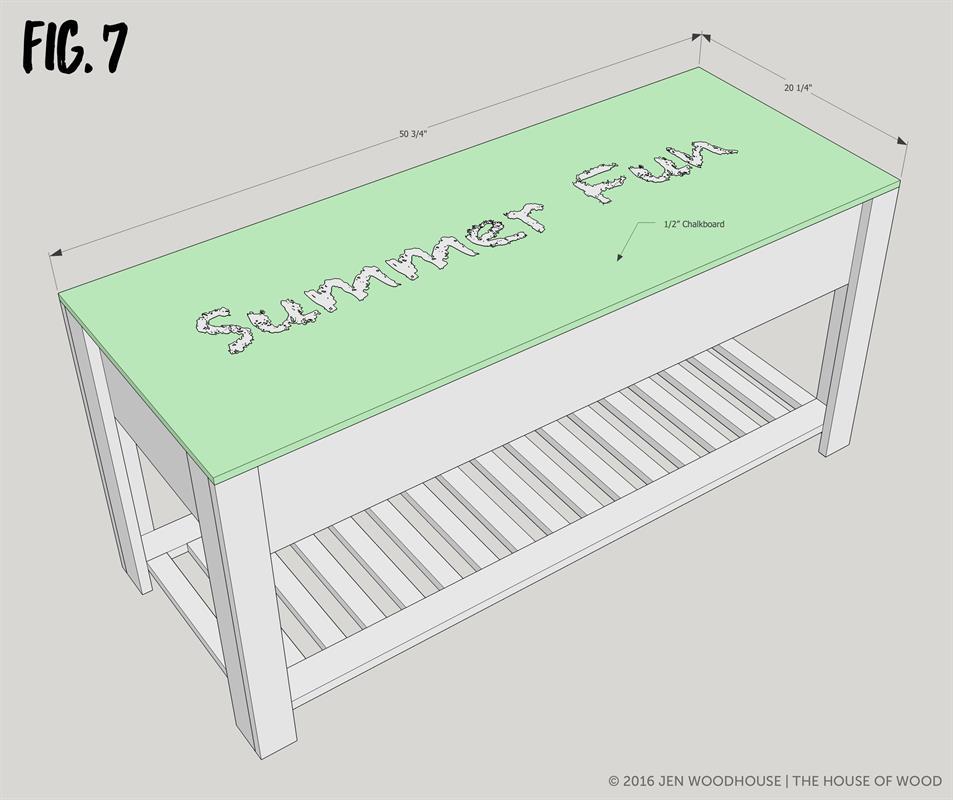
Your kids will love playing with this sand and water table. Complete with a chalkboard lid, the possibilities for imaginative play are endless! This sand and water table accommodates two store-bought 28-quart tubs and the hinged lid covers the sand and water when not in use.
Tools
Kreg Tools

Other Tools
-
Tape Measure

-
Nail Gun
Materials
Wood Products
- 2 Board , 1x8 , 96"
- 1 Board , 1x6 , 24"
- 4 Board , 1x3 , 96"
- 7 Board , 1x2 , 96"
- 1 Plywood , 1/2" Thick , Full Sheet
Hardware & Supplies
- 2 Torsion Hinges
- 1 1-1/4" Kreg Blue-Kote Pocket Hole Screws
- 1 1-1/4" Exterior Wood Screws
- 1 1-1/4" Brad Nails
- 1 Chalkboard Paint
- 1 Exterior-Grade Finish
Directions
-
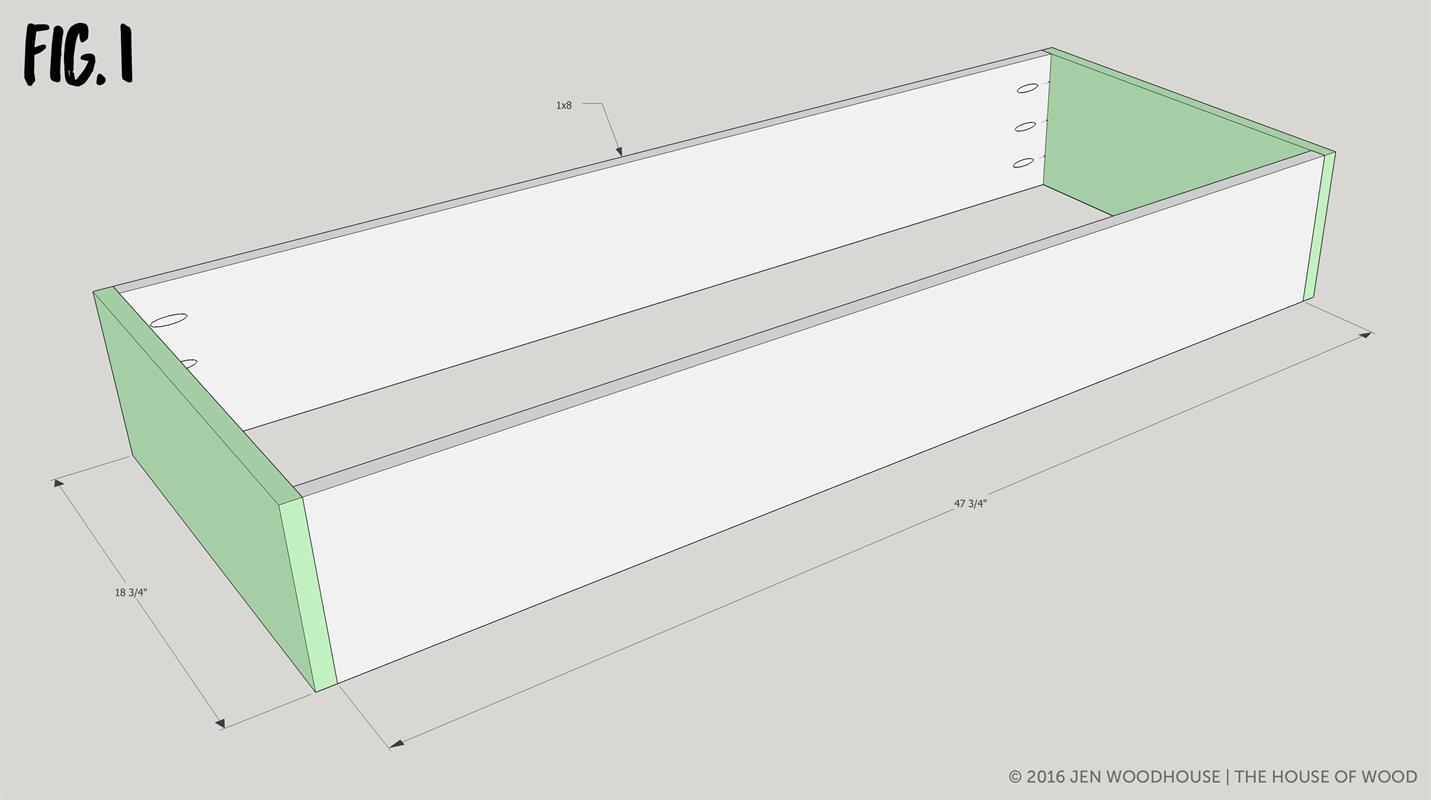
Build the Box
Drill 3/4" pocket holes as shown and construct the box with 1-1/4" pocket hole screws and wood glue.
-
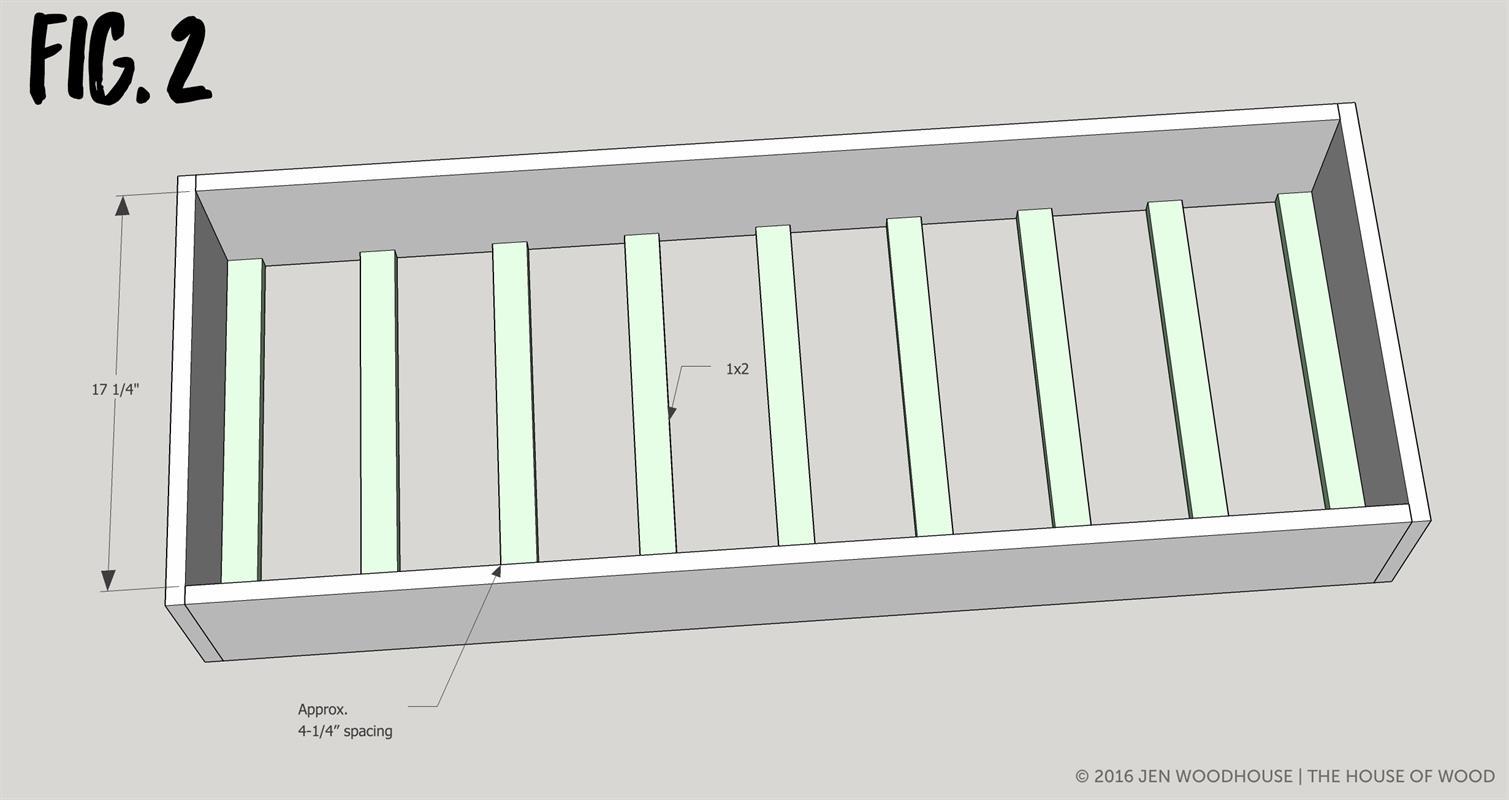
Add the Slats
Drill 3/4" pocket holes into the 1x2 support slats and attach to the box with 1-1/4" pocket hole screws and wood glue. Space the slats approximately 4-1/4" apart.
-
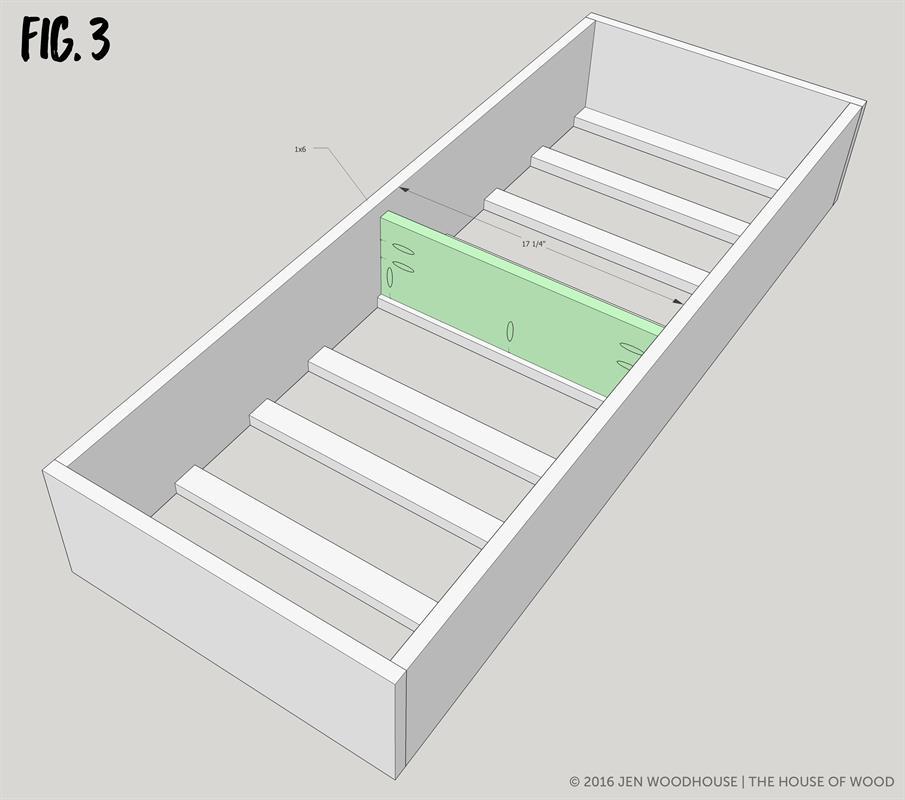
Attach the Divider
Drill 3/4" pocket holes into 1x6 divider and attach as shown with 1-1/4" pocket hole screws and wood glue.
-
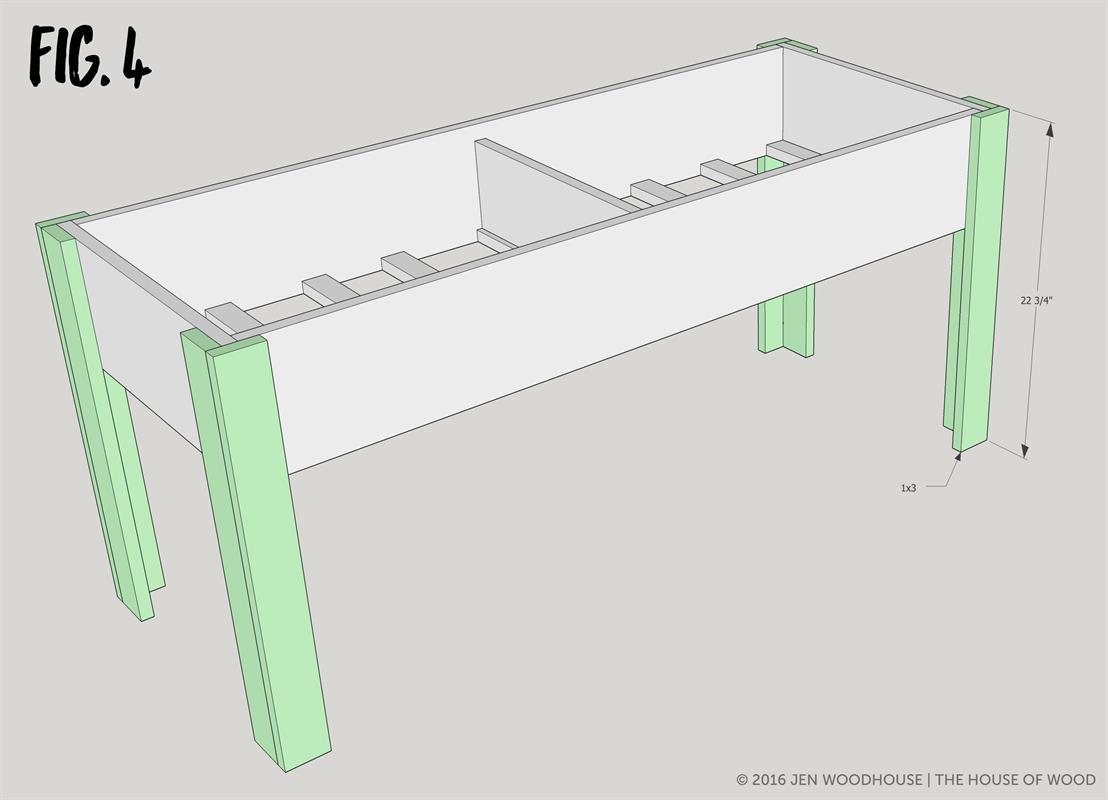
Add the Legs
Pre-drill pilot holes and drive 1-1/4" wood screws to attach the legs to the box as shown.
-
Construct the Bottom Shelf
Drill 3/4" pocket holes and construct the bottom shelf as shown with 1-1/4" pocket hole screws and wood glue. Space slats approximately 1-1/2" apart.

-
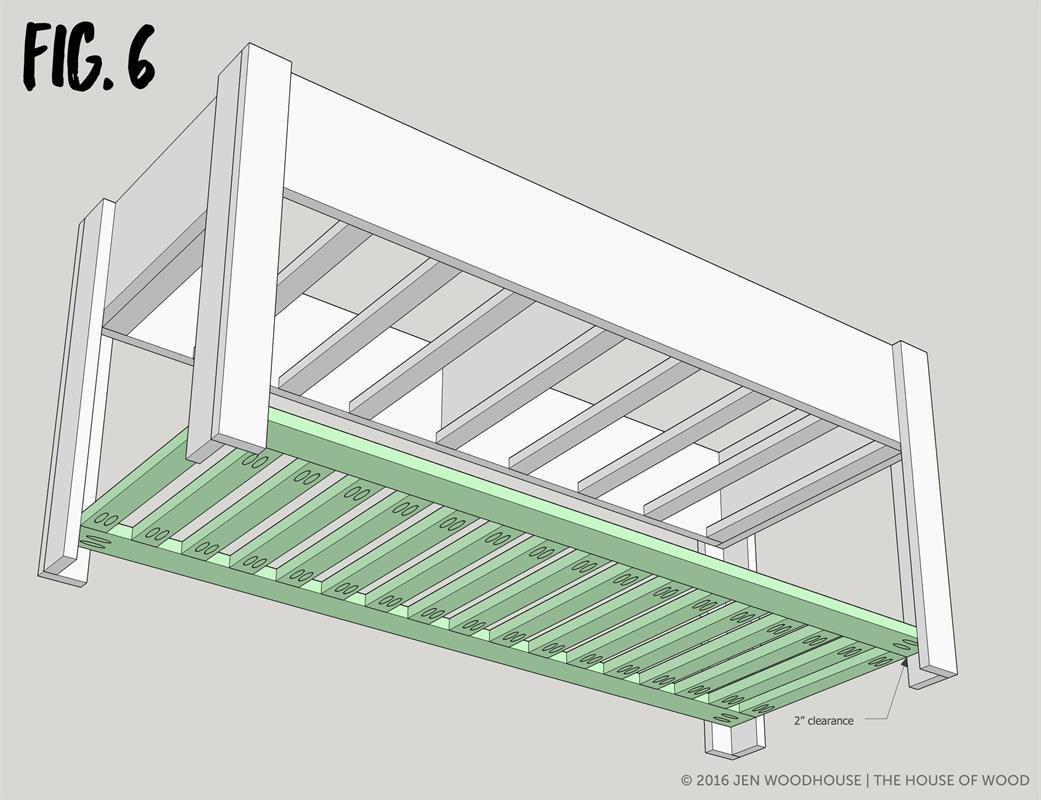
Attach the Bottom Shelf
Attach the bottom shelf with 1-1/4" pocket hole screws. The bottom shelf is 2" from the ground.
-
Attach the Top
Install hinges to attach the top to the play table. Note: torsion hinges are recommended to keep the lid from slamming down on tiny fingers.
-
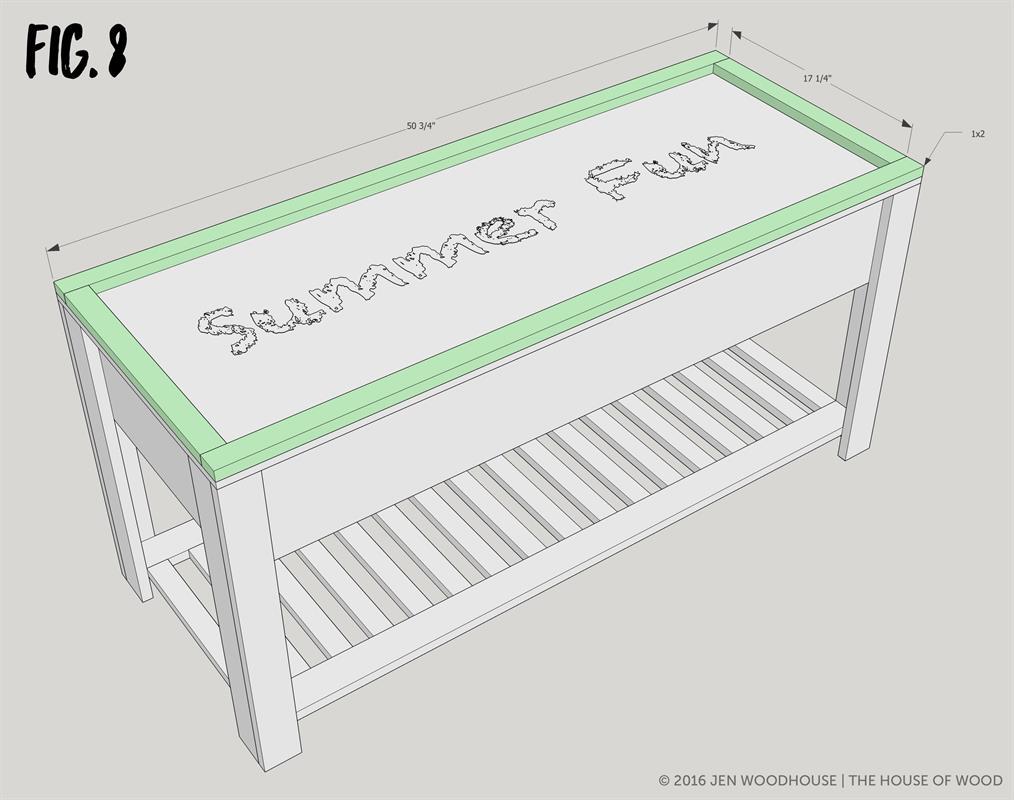
Add Trim
Attach 1x2 trim to the top with 1-1/4" brad nails and wood glue.
-
Visit JenWoodhouse.com
For more DIY project ideas and free building plans, please visit JenWoodhouse.com

-
Sand, Stain/Paint, and Finish
Sand, stain or paint, and finish with an exterior-grade top coat as desired. Because plywood is not suitable for outdoor use, I recommend storing the play table in a garage or under a covered area when not in use to protect it from outdoor elements.