Rustic Industrial Wall Mounted Desk
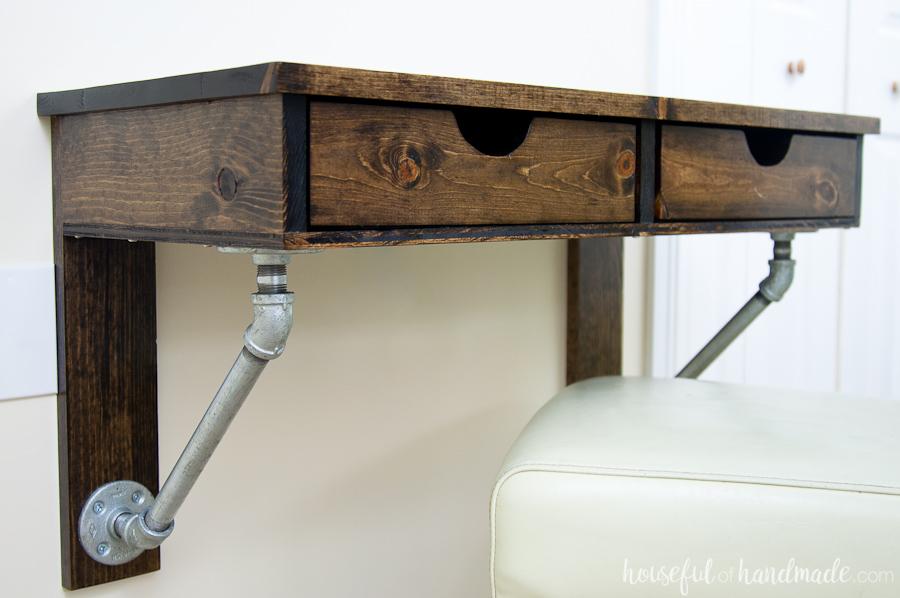
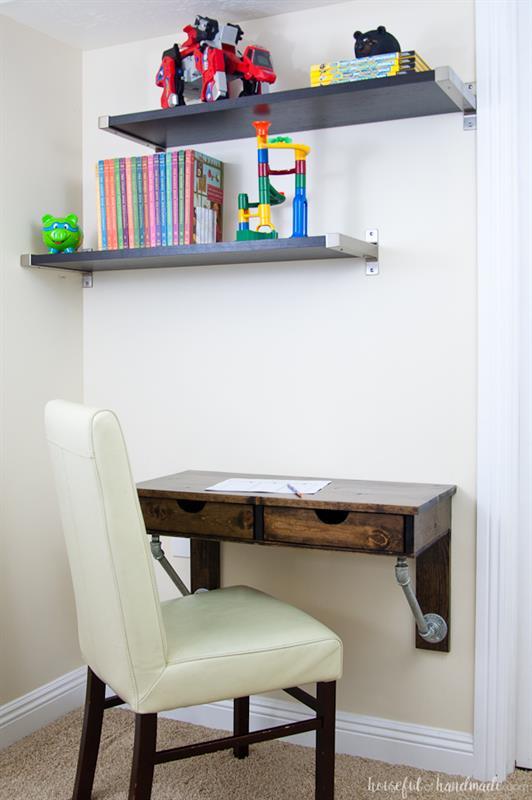
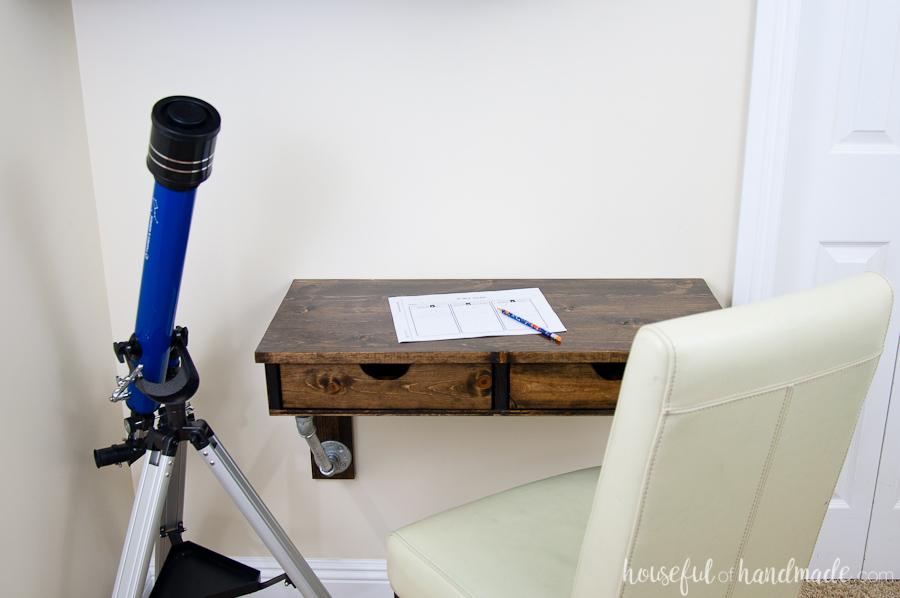
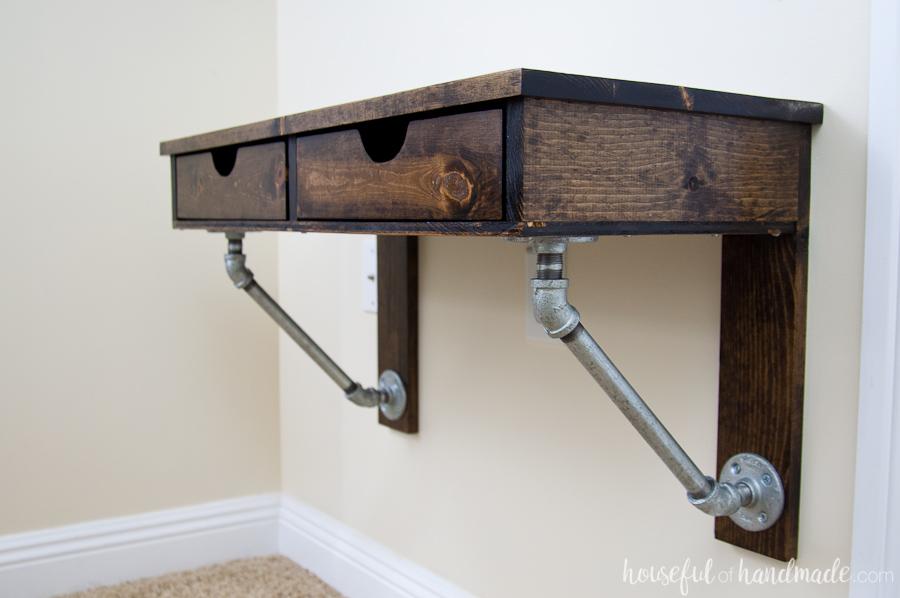
By Houseful of HandmadeA wall-mounted desk perfect for small spaces or kids rooms. The desk is supported with galvanized plumbing pipe for an industrial accent. Includes two drawers perfect for office supplies.
Directions
-
Dimensions
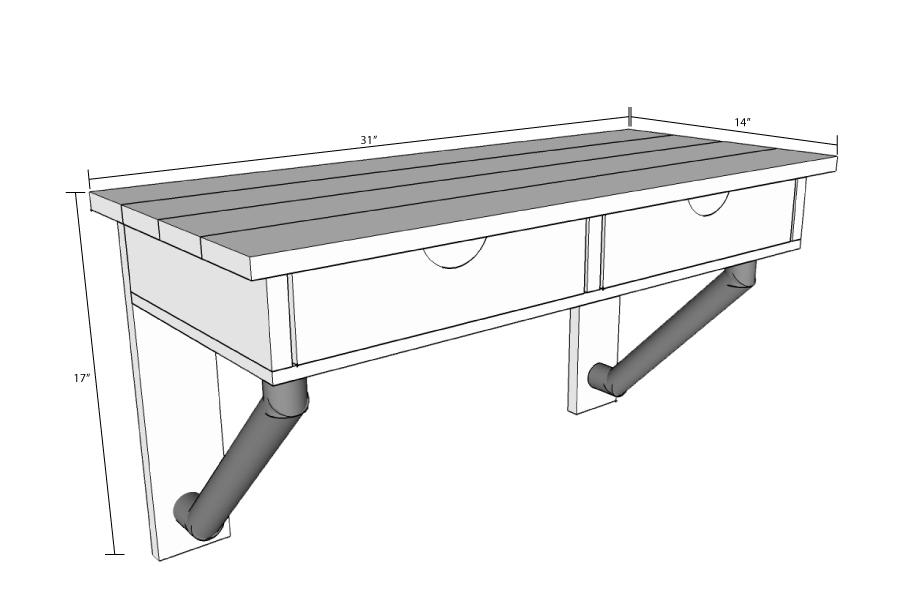
The completed desk will be 31" wide by 14" deep and 17" tall. The desk is made to be mounted on the wall.
-
Attach desk sides
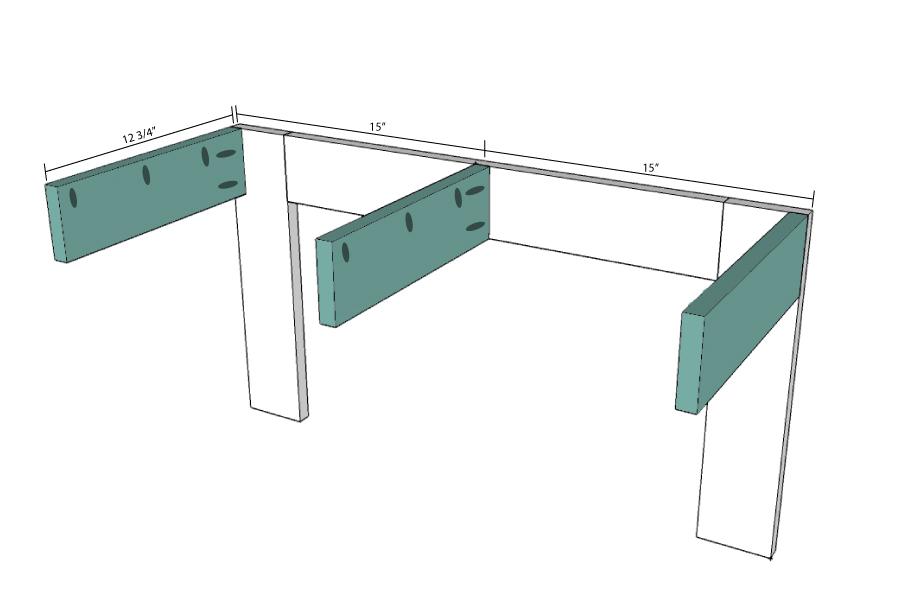
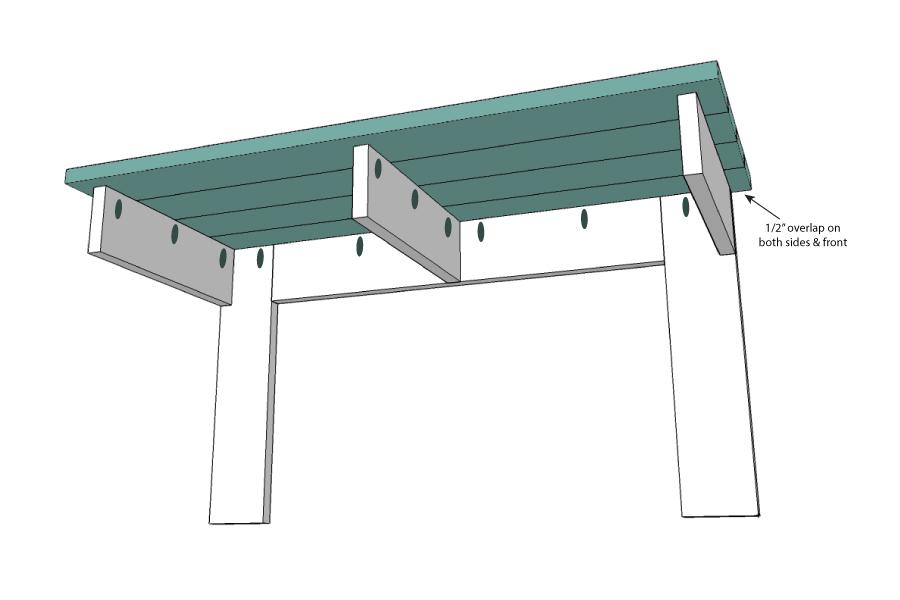
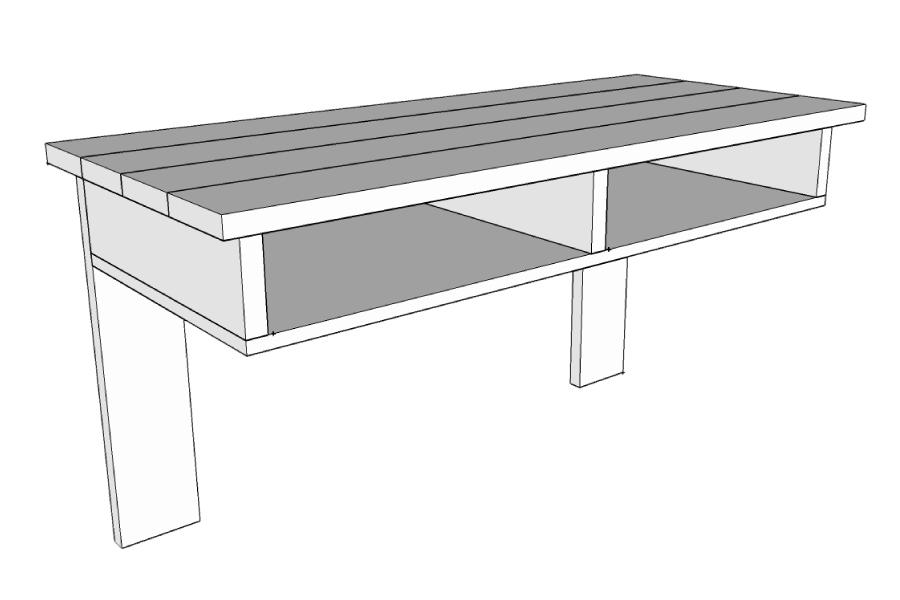
Add pocket holes to the back and top of the desk sides. Make sure that the pocket holes will be hidden on the inside of the desk when assembled. Attach the desk sides to the front of the desk support with 1 1/4" pocket hole screws. The two outer sides should be flush with the outside of the desk support and the center one should be centered on the desk support.
-
Build the desk top
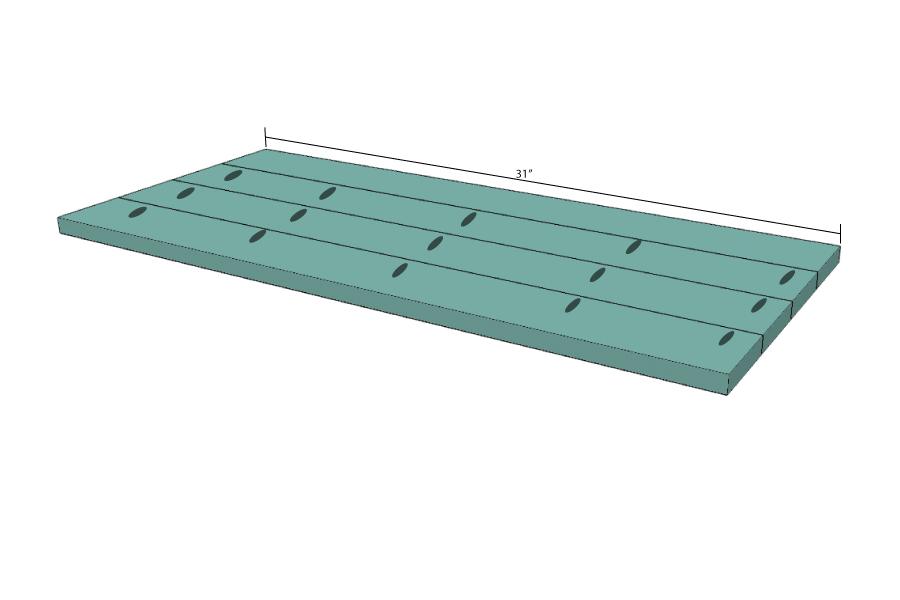
Add pocket holes to the side of 3 of the desk top pieces. Using 1 1 /4" pocket hole screws, combine the 4 desk top pieces together to create one 14" wide piece of wood.
-
Attach the desk top
Attach the desk top to the desk using the pocket holes you already added to the top of the desk sides and the desk support with 1 1/4" pocket hole screws.
-
Attach the desk bottom
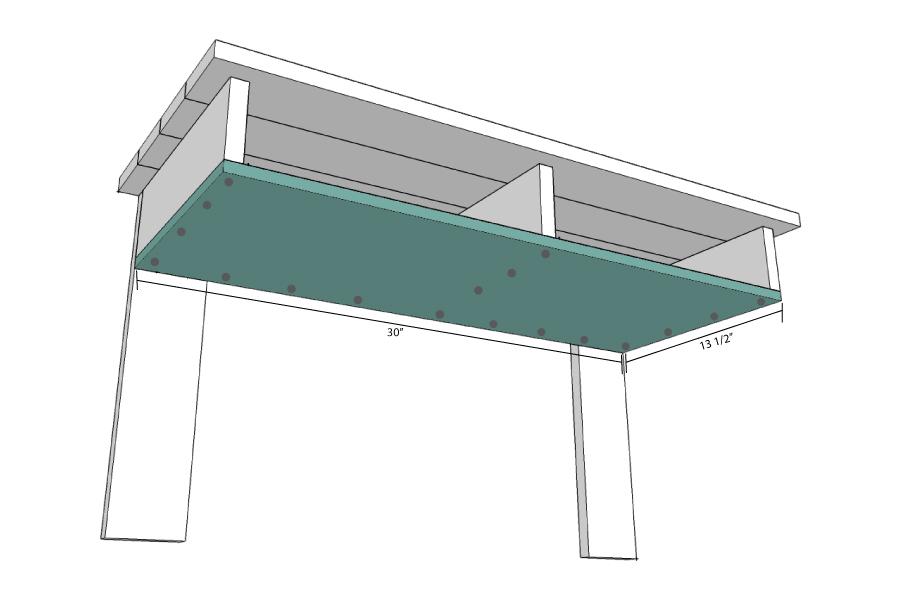
Using a jig saw, cut notches out of the desk bottom to fit around the leg supports. Attach the desk bottom to the desk. I used 1 1/4" pocket hole screws because they are self tapping and the washer head gives an industrial look to the bottom of the desk.
-
Cut the notch for the drawer front
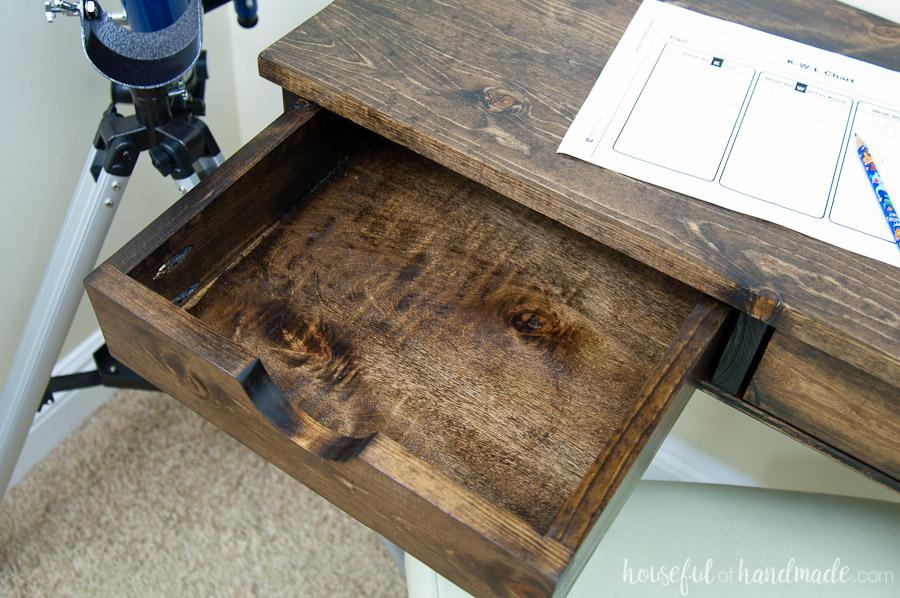
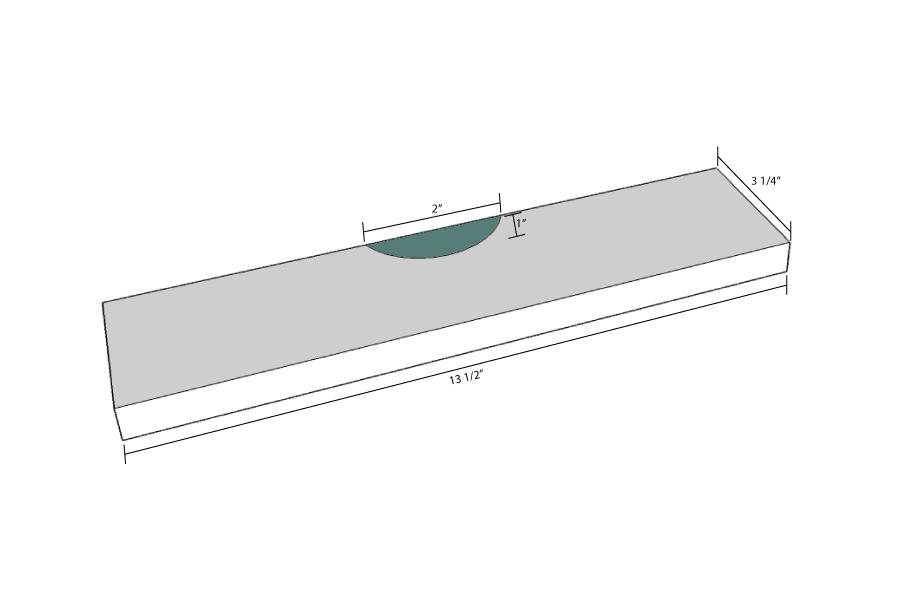
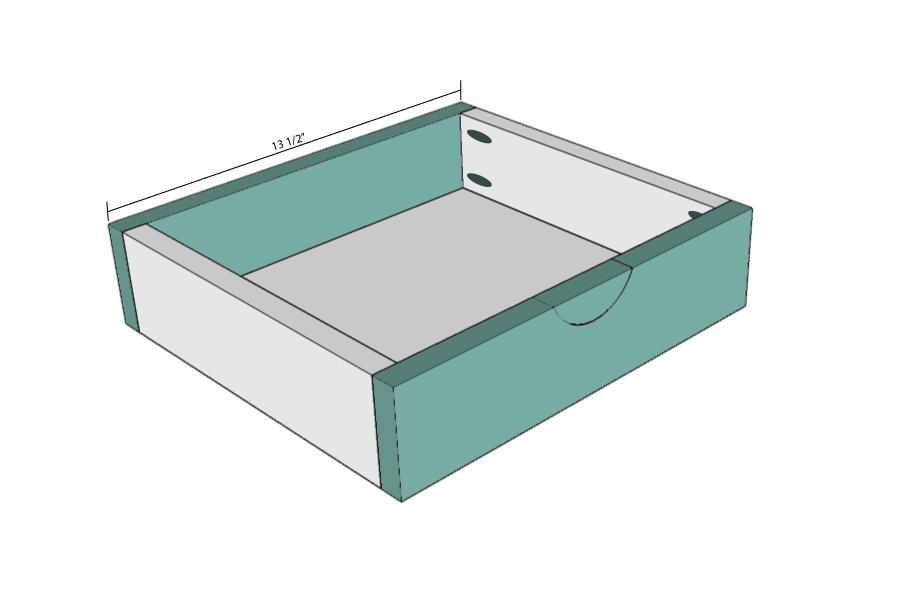
Rip down the 1x4 boards for the drawer fronts/backs/sides to 3 1/4 inches wide on a table saw. If you do not have a table saw, you can use 1x3 boards for the drawers, they will just be much shorter drawers than shown. Using a jigsaw, cut a half circle on the top center of 2 of the drawer front/back boards to create a handle to open the drawers.
-
Attach the drawer sides
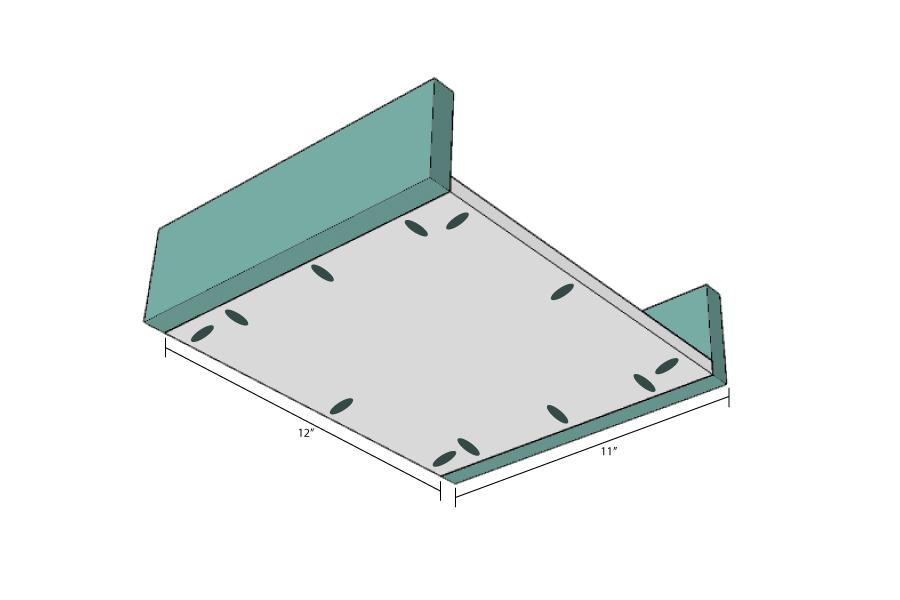
Add pocket holes on all sides of the bottom of the plywood drawer bottoms. Add pocket holes to the ends of the drawer sides. Attach the drawer sides to the drawer bottom with 1" pocket hole screws.
-
Attach the drawer fronts/backs
Attach the drawer fronts and backs to the drawer boxes using 1" pocket holes screws in the pocket holes in the plywood of the drawer bottom and using 1 1/4" pocket holes screws in the pocket holes in the edges of the drawer sides.
-
Build the desk support
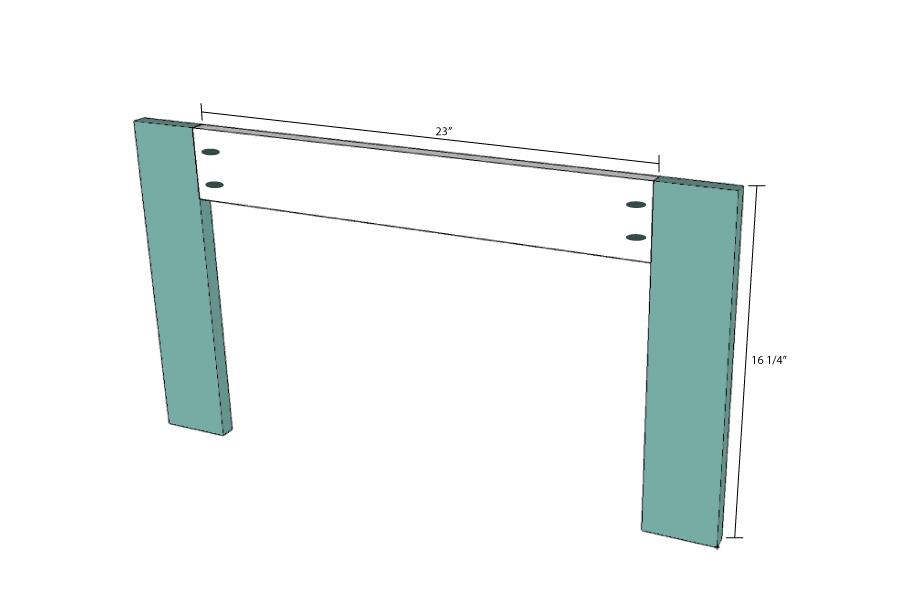
Add pocket holes to the top and sides of the back support piece. Attach the leg supports to the sides of the back support with 1 1/4" pocket hole screws. Make sure the top of the leg supports are flush with the top of the back support. Note that the side of the desk support that has the pocket holes will be the back of the desk that is up against the wall.
-
Finish the desk and mount to wall
Sand the desk and drawers. Apply a coat of wood stain. I used Minwax Walnut. Once dry, apply 2 coats of polyurethane protective finish.
Using heavy duty wood screws, mount the desk to the wall through the back and leg supports. Make sure to attach it to wall studs. Standard height for a desk is 30" off the ground, double check the measurement with your chair and adjust as needed.
-
Attach galvanized desk braces
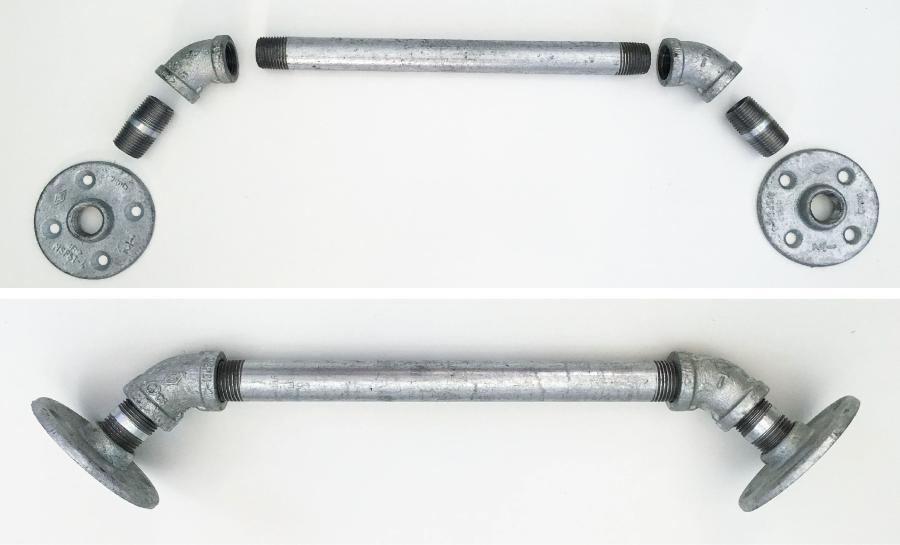
Screw together the galvanized pipe pieces as shown in the photo. Attach it to the bottom of the desk and the leg supports using the #10 wood screws.
-
Install drawers
The drawers are made to just slide into the desk without drawer glides. Instead using spray adhesive, glue the felt to the bottom of the drawers to allow them to slide in and out easily. Then slide the drawers into the openings.


