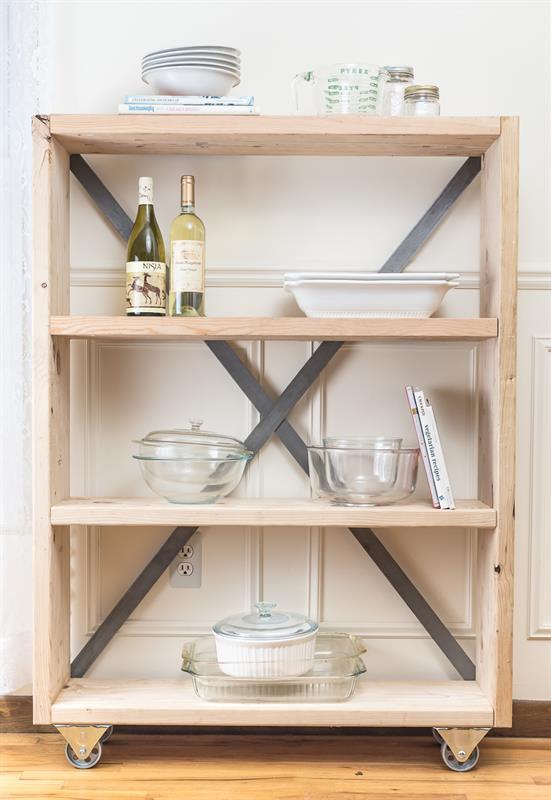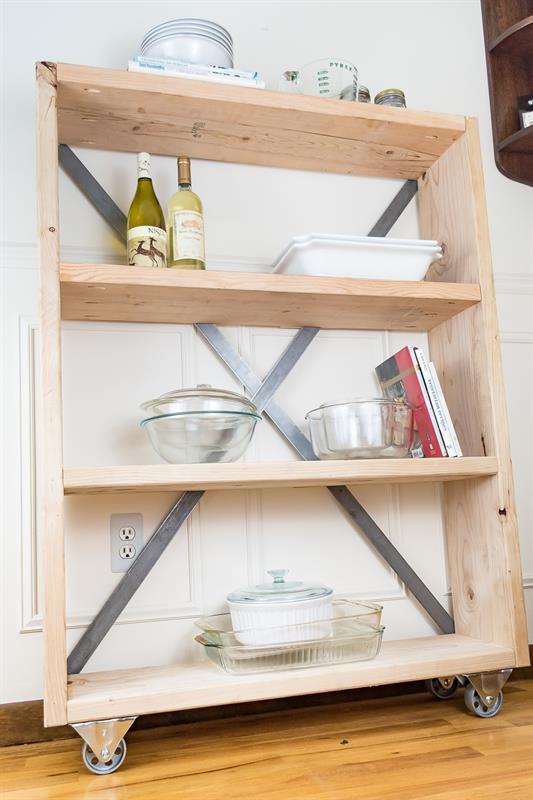


Are you looking for a ton of storage in a small space? This is the perfect farmhouse industrial bookshelf for any room. Use it for extra storage in your kitchen, or for added flair in your dining room or bedroom. This narrow shelf has minimal steps for a huge impact in your rustic industrial home.
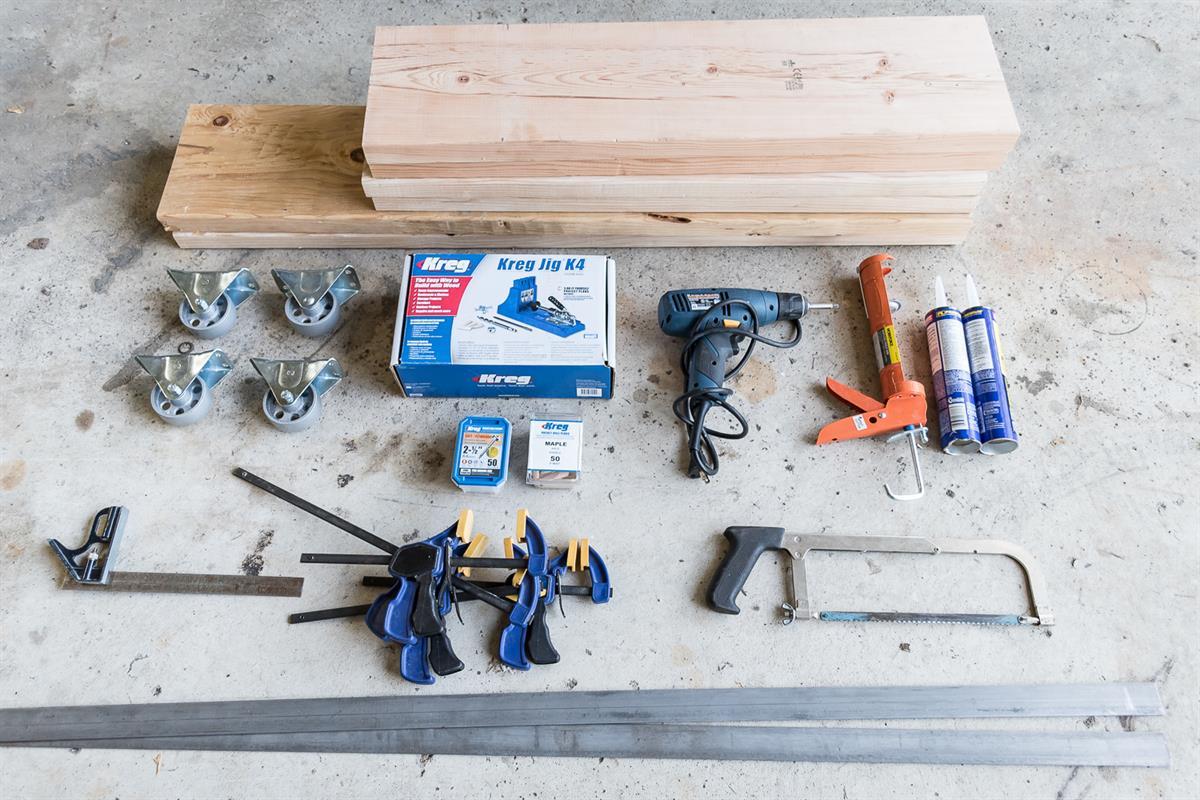
Tools
Kreg Tools


Other Tools
-
Hacksaw

-
Clamps
-
Glue Gun
Materials
Wood Products
- 2 Board , 2x10 , 48"
- 4 Board , 2x10 , 36"
Hardware & Supplies
- 1 Box of 2" Kreg Screws
- 1 Box of Kreg Plugs (if desired)
- 1 Tube of Construction Adhesive
- 16 Screws for wheels of your choice
- 4 Wheels of your choice
- 2 1 inch wide 'weldable steel slats'
Cut List & Parts
- 1 See 'Materials' for full cut list and materials list! , 2x10
Directions
-
Drill Pocket Holes
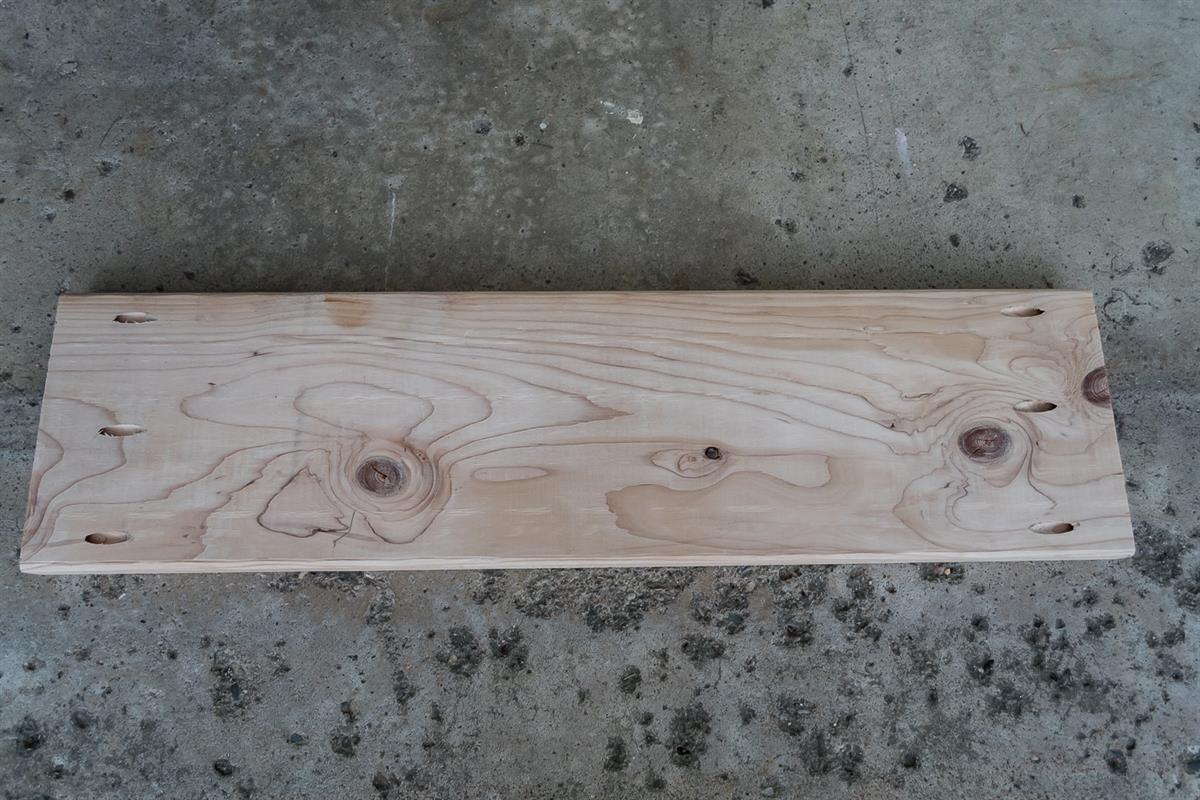
Select your 36 inch boards. these will be your horizontal boards for the shelf Each of your (4) 36 inch boards will need (3) pocket holes on each side. One on each end, and one in the center. See the photo for details.
-
Attach First Shelf (Top)
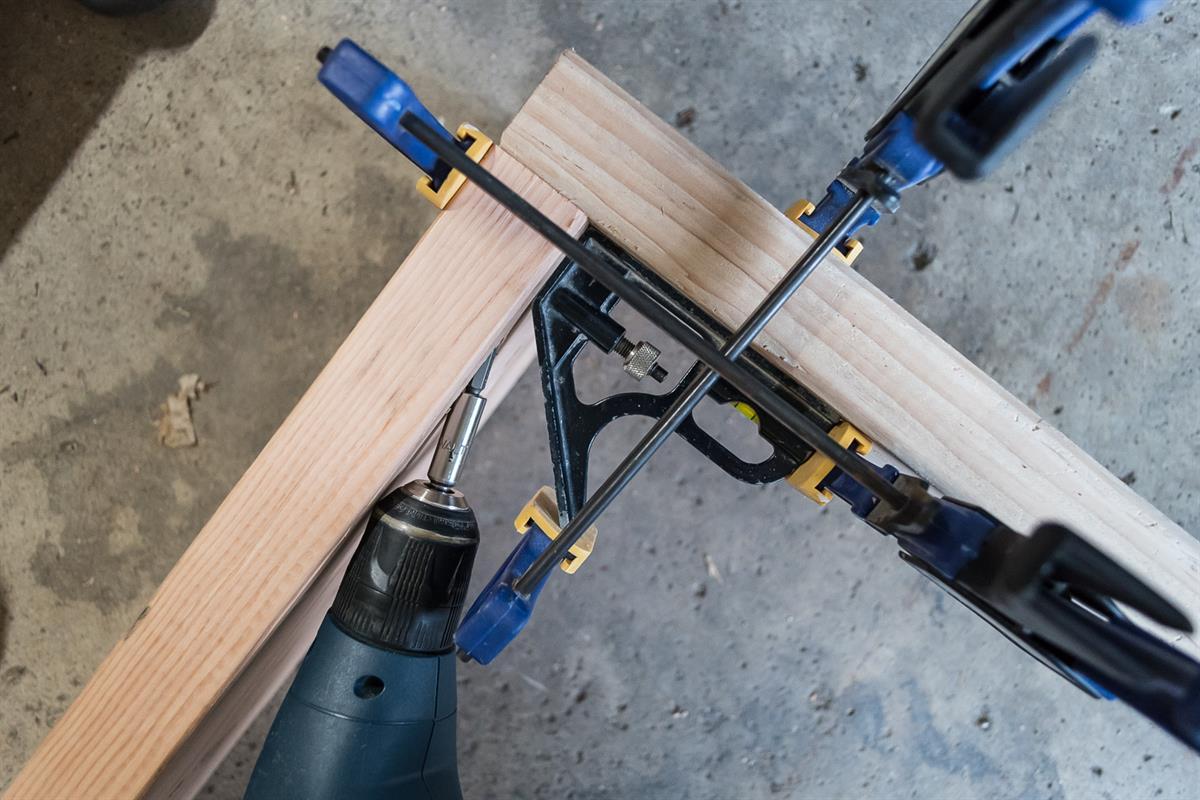
Using Kreg Screws, and adhesive of your choice, attach one 36 inch ' shelf' board to your 48 inch 'side'. Be sure to use a square and clamps for accuracy.
-
Attach second shelf (Bottom)
Repeat step 2
-
Attach Center Shelves
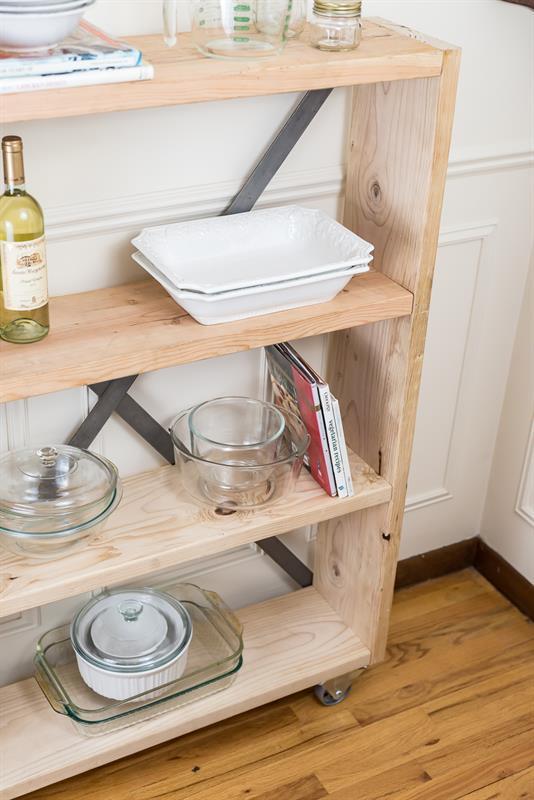
Once your frame is secure, add in your center shelves in your desired location by repeating Step 2. For this shelf, I chose to add my center shelves at 15 inches and 30 inches from the top.
-
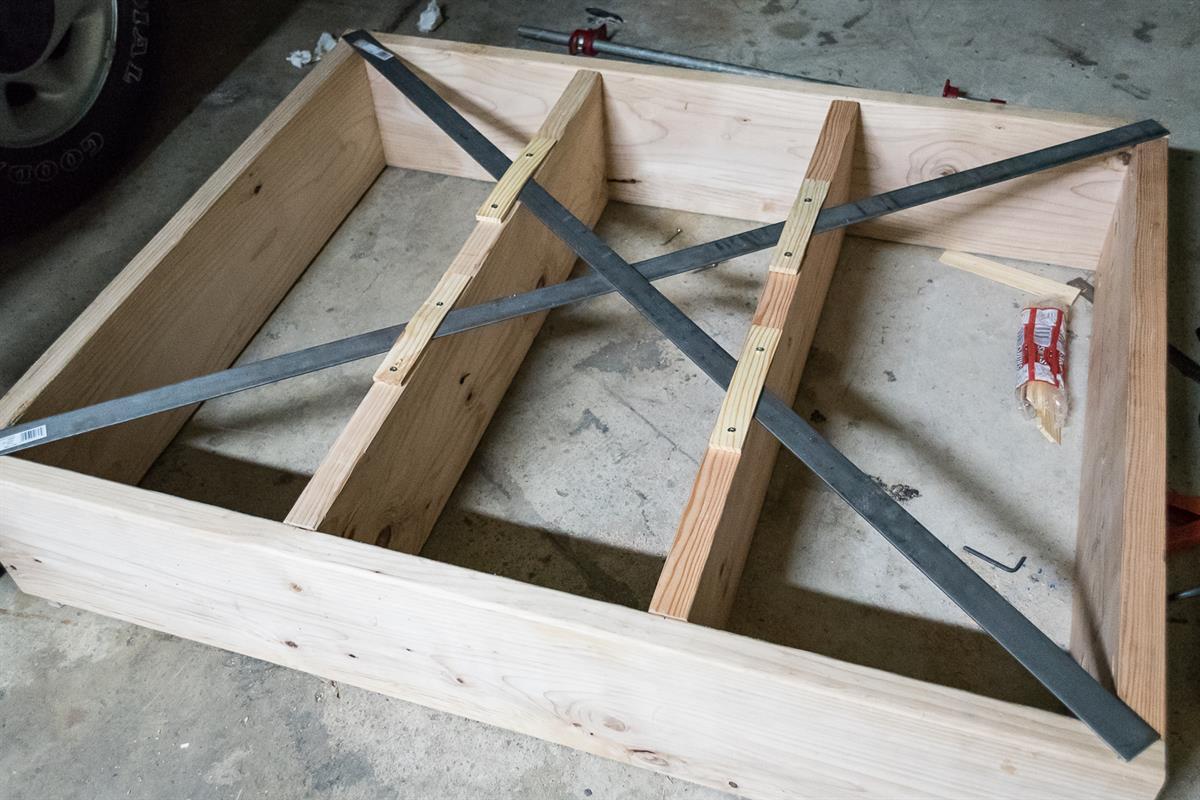
Cut Metal Slats
Using a hacksaw, cut your metal slats to fit along the diagonal of your shelf.

-
Position Metal Slats
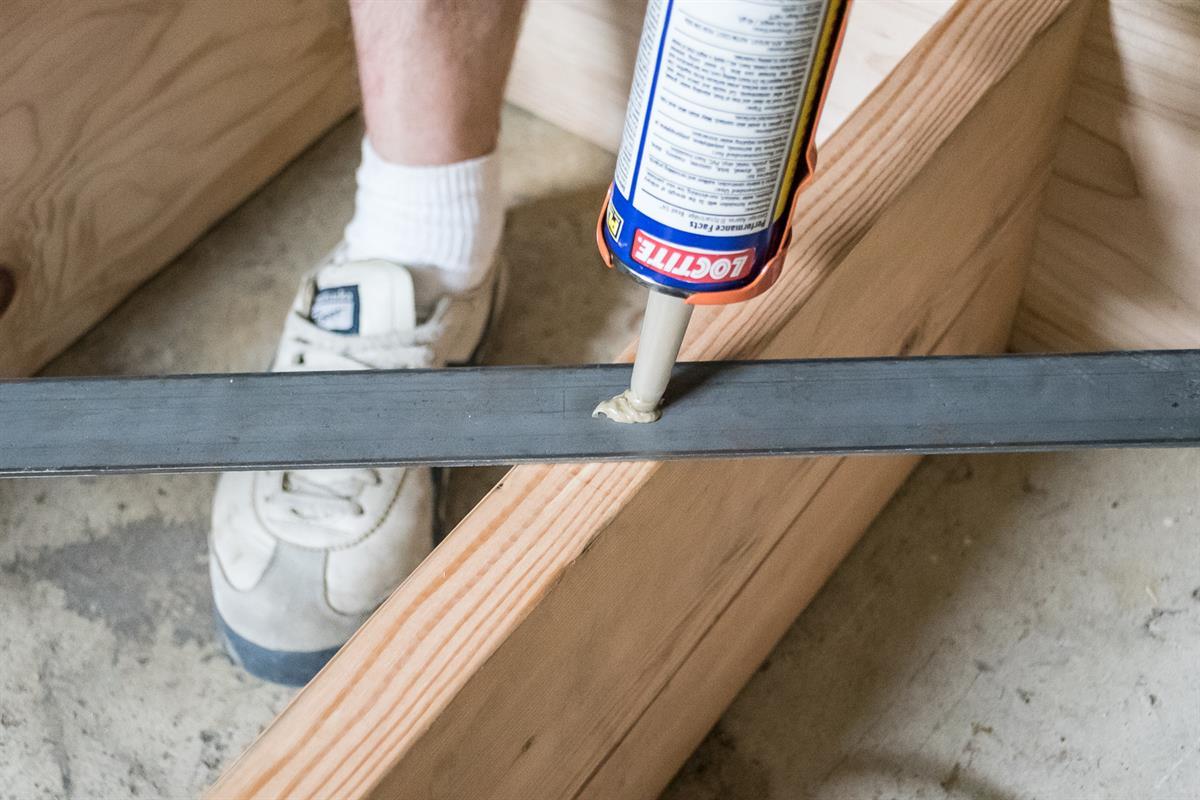
Lay your metal slats along the back of your shelf. Add a small amount of glue where the slats will overlap each of your shelves.
-
Attach Metal Slats
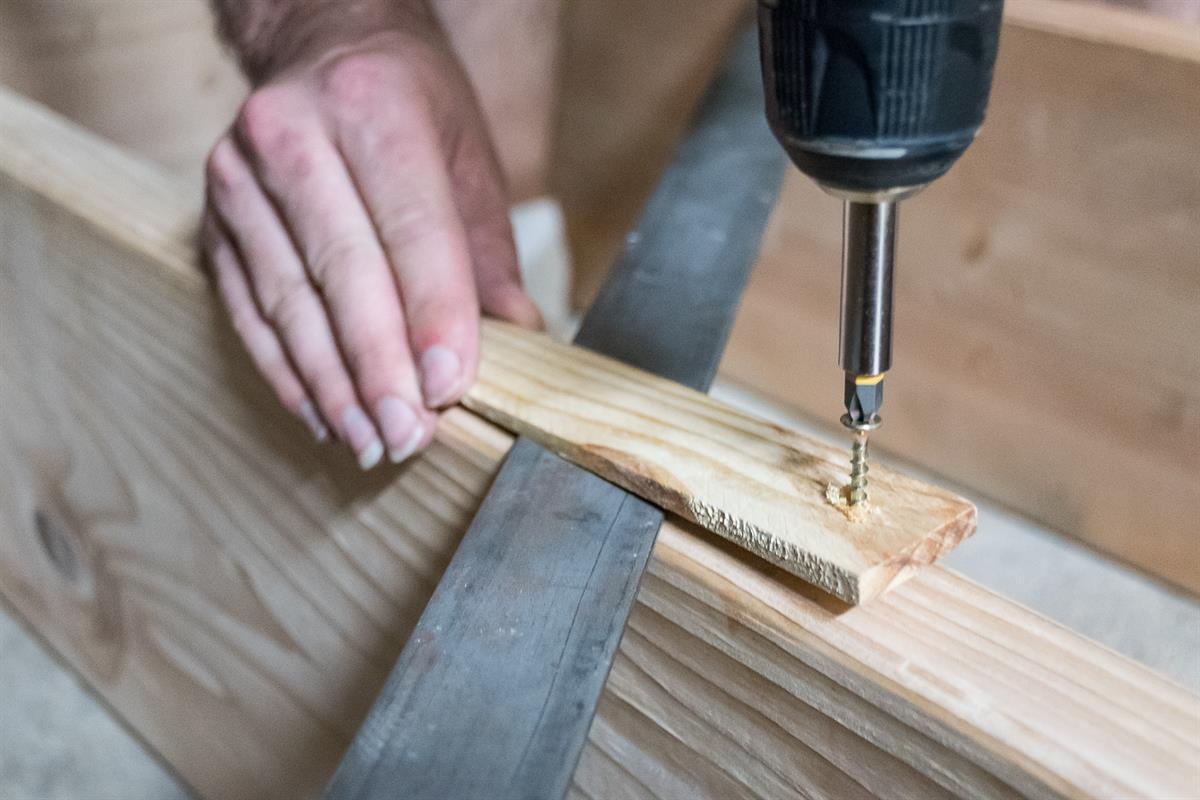
Screw the slats into place using scrap wood or shims to hold them until the glue dries. You may remove this after the glue dries. You may also screw the metal slats directly into your shelf, but this way was easier for the sake of time.
-
Tadaaa
All you have to do now is add your wheels and finish with your favorite stain! I chose to forgo stain. This wood had great natural pigment.
-
Fill pocket holes (if desired)
Fill pocket holes if desired. They are barely visible, so I left mine. If you are building a taller shelf, you may want to fill in the pocket holes

-
Secure Shelf to the Wall
This shelf was made to be attached to a wall. The depth of the boards and addition of the wheels does not allow for proper stability. This shelf was made to fit a small, narrow space and therefore needed to be narrow. You may also use wider boards to help with stability. But I highly recommend securely attaching any tall shelf to a wall, especially if you have children who may be capable of climbing or knocking into things.