

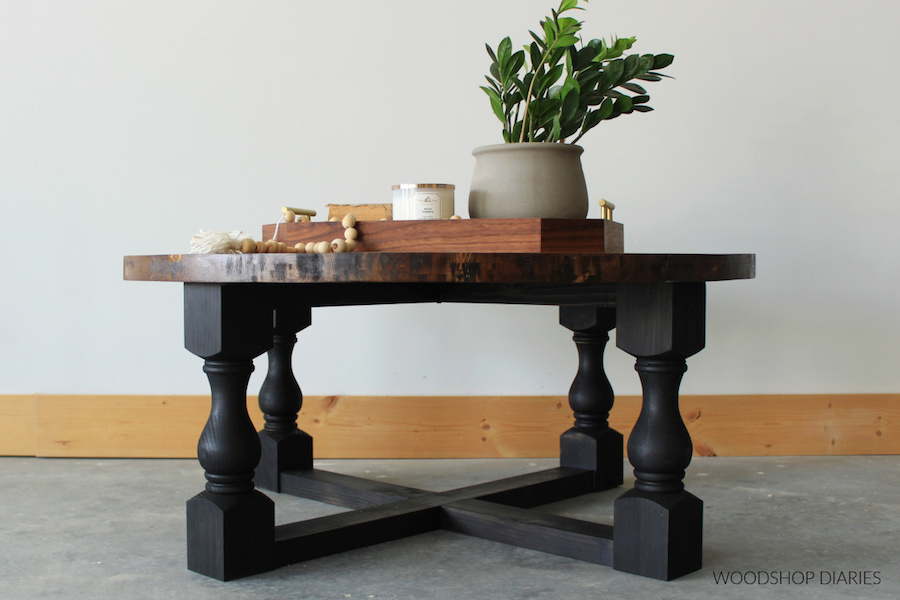
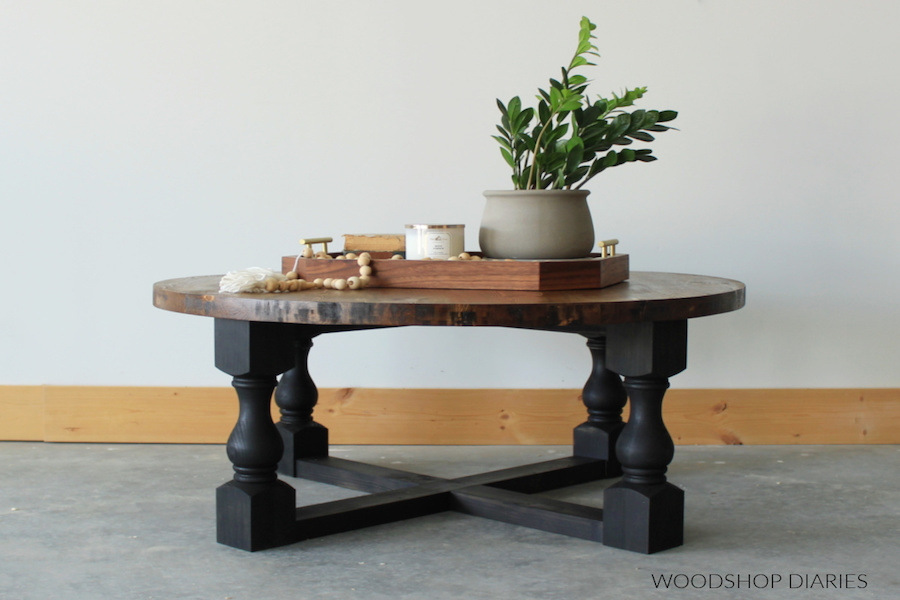


This simple round coffee table will be the focal point of your living space and fits in with any décor style! Built using just a few basic boards and some decorative legs, you can complete it in just one weekend.
Tools
Kreg Tools


Other Tools
-
Miter saw

-
Clamps
Materials
Wood Products
- 2 Boards , 2x12x8
- 2 Boards , 2x4x8
- 4 Coffee Table Legs
Hardware & Supplies
- 1 Box of 2 ½” pocket hole screws (see tools list)
- 4 Washers, Z Clips, or Figure 8 Fasteners (to attach top)
- 1 Wood glue
Directions
-
Assemble Coffee Table Top
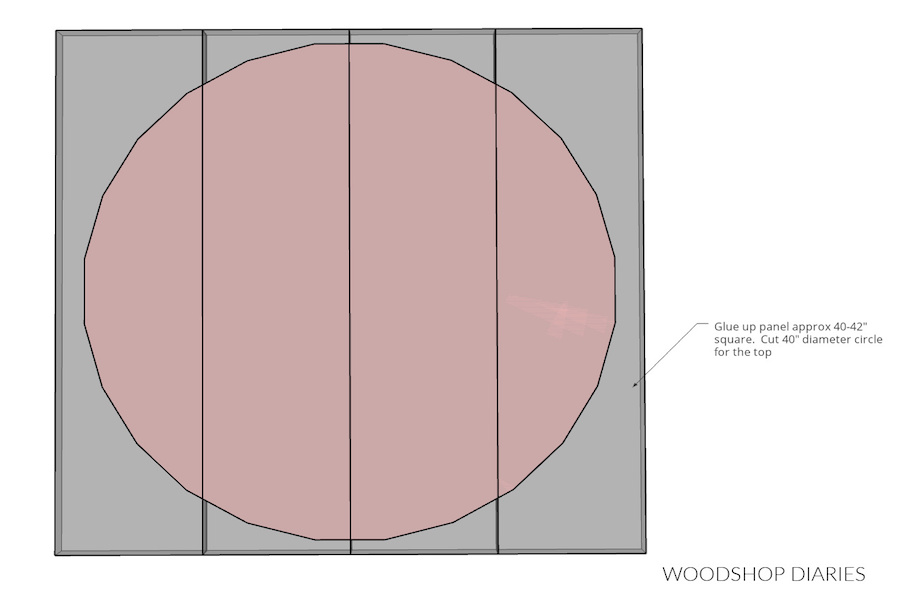
Glue up a solid wood 1 ½” thick panel approx. 40-42” square to cut the table top from. You can glue up any combination of 2x material (2x construction lumber is 1 ½” thick) to create your panel, but 4 pieces of 2x12 works well as shown below. If desired, square off the rounded board edges on a table saw or jointer before gluing.
You can use both glue and 1 ½” pocket holes with 2 ½” pocket hole screws to assemble the boards into a panel if you don’t want to wait for the glue to fully dry before moving on. The pocket hole screws will act as a clamp until the glue dries. However, glue alone will work just fine if you keep the boards clamped until glue is fully dry.
Once dry, cut a 40” diameter circle from the panel. You can use a jig saw or a router and a circle jig to cut.
-
Assemble X Frames
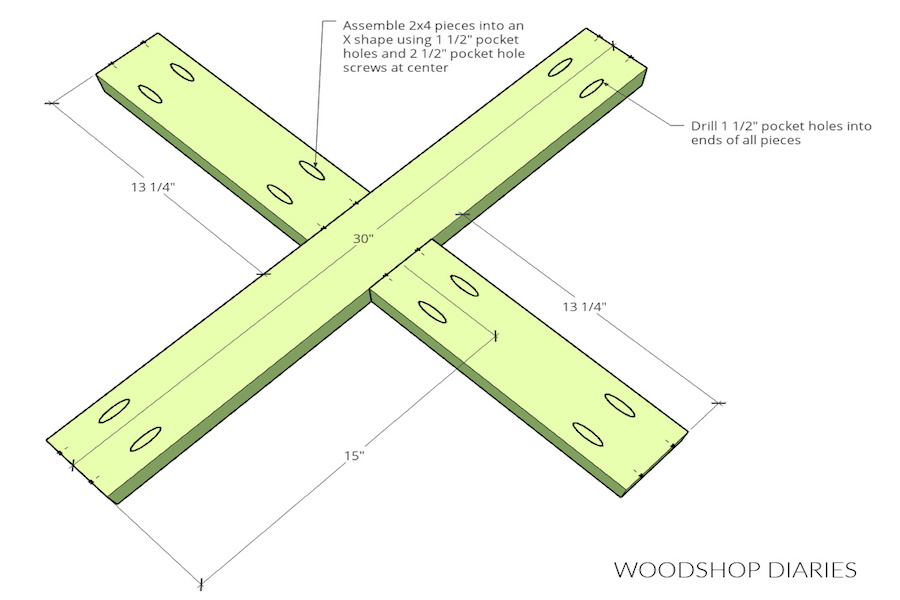
Assemble 2 identical “X” frames like shown below. For each frame, cut (2) 13 ¼” long 2x4s and (1) 30” long 2x4. Drill 1 ½” pocket holes into both ends of each piece. Mark the center on the edge of 30” long piece (15” from the end) and also mark the center of the ends of the shorter pieces. Line up these centers so the short piece is centered on the long piece and attach using 2 ½” pocket hole screws.
-
Attach Legs
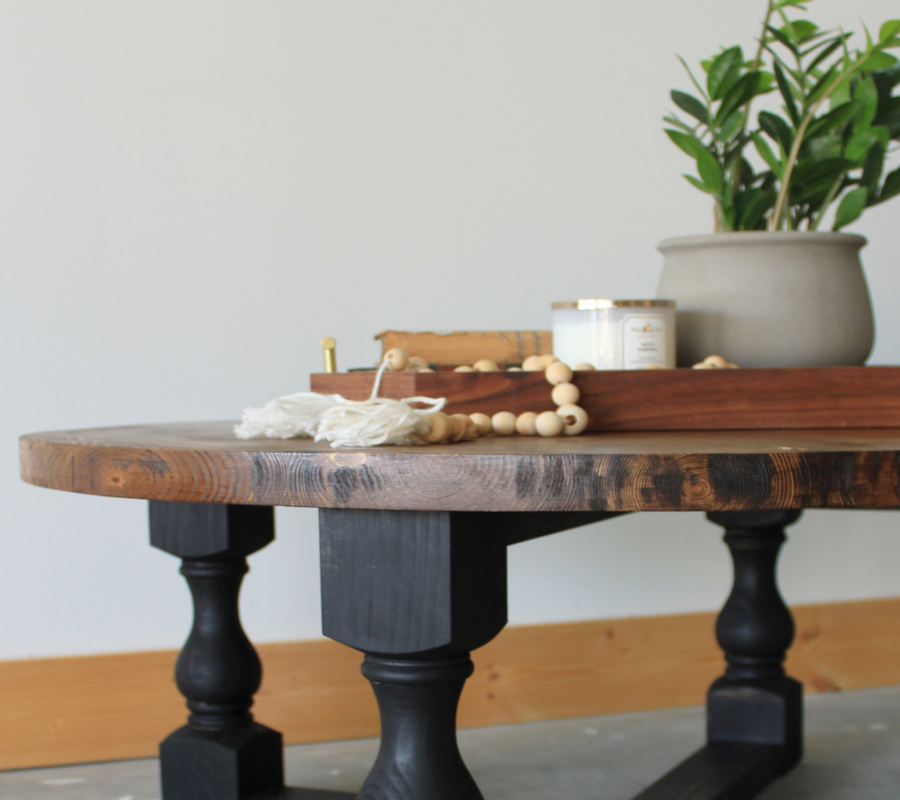
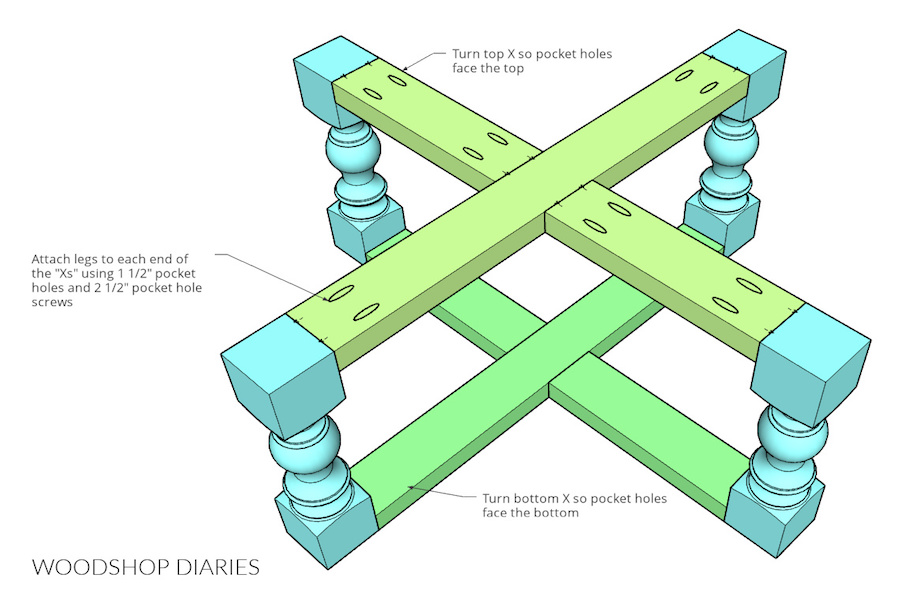
Use the 1 ½” pocket holes on the ends of each X frame from step 2 along with 2 ½” pocket hole screws to attach the legs. Face the pocket holes on the top X piece toward the top and the pocket holes on the bottom X piece toward the bottom. This way, the pocket holes won’t be seen in the finished project.
Attach X frame pieces flush to the top and bottom ends of the legs at each corner.
-
Attach Base to Top
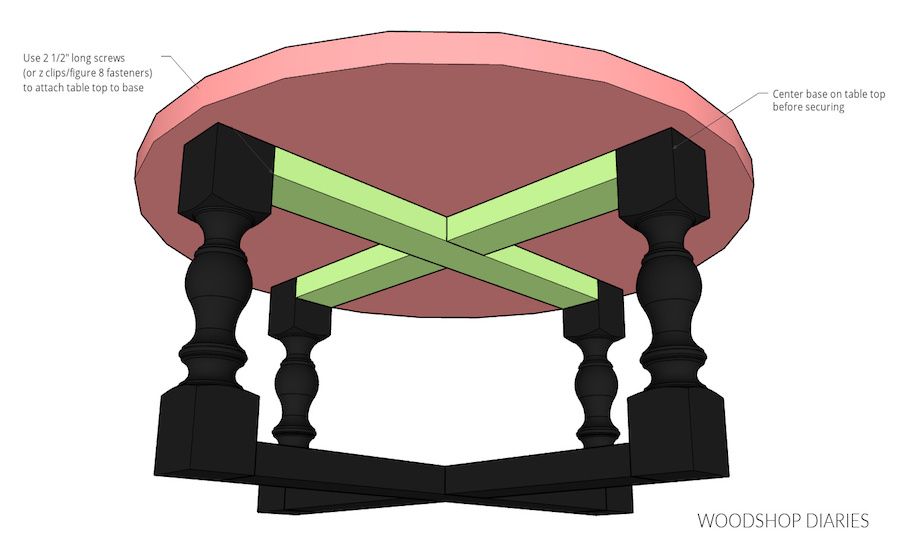
Center the table base from step 3 on the top from step 1. I found it easiest to flip the table upside down for this step. To allow for wood movement, you can use z clips or figure 8 fasteners to attach the table top to the top of the base. OR, you can simply drill some oversized holes through the top X piece on the base and use 2 ½” wood screws through these holes with washers to attach. Predrilling oversized holes through the base will allow the top to move with seasonal changes, but still stay secured on the base.
Secure the top to the base at each corner (just behind each leg) and in the center of the X as well.
-
Finish
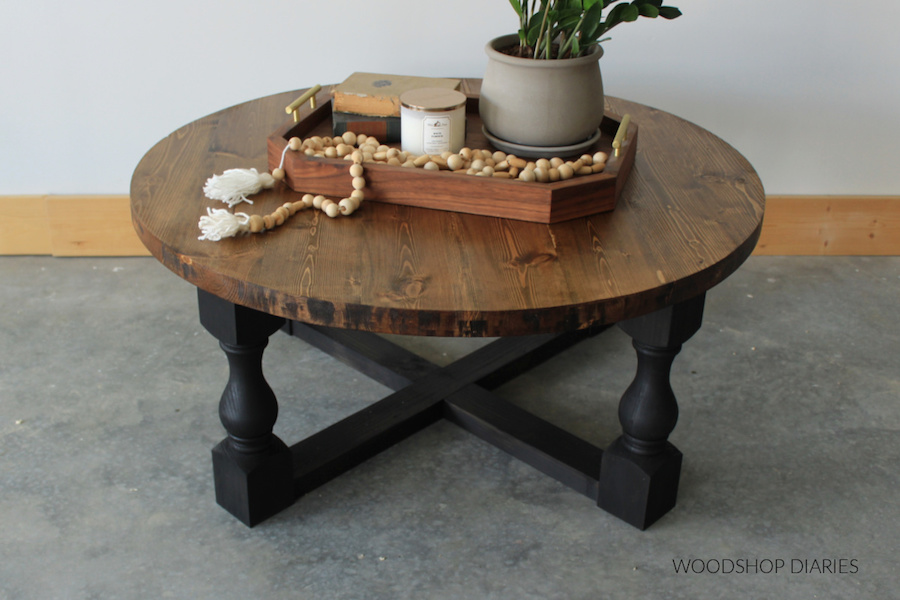
Stain, paint, seal as desired to complete. Stain used here: Varathane Ebony on the base, Minwax Provincial on the top.