


Project No. 7 of our "12 Projects Of Christmas" series continues with one of the easiest projects to build in our series - our rolling Lego tray with handles. If your child is a Lego fanatic, this is one thing they will get excited about being under the tree this year!
Tools
Kreg Tools


Other Tools
-
Miter Saw

-
Tape Measure
-
Nail Gun
Materials
Wood Products
- 1 Plywood , 1/2" Thick , 24" x 24"
- 1 Board , 1x3 , 96"
Hardware & Supplies
- 2 Metal Handles With Screws
- 4 1" Swivel Wheels
- 1 15" x 15" Lego Plate
- 1 Wood Screws - 1/2"
- 1 Kreg Screws - 1"
- 1 Brad Nails - 1-1/2"
- 1 Liquid Nails
- 1 Stain - Classic Gray
Cut List & Parts
- 1 Plywood - Base Of Tray , 1/2" x 15" x 15"
- 2 Short Trim Sides , 1" x 3" x 15-1/8"
- 2 Long Trim Sides , 1" x 3" x 16-5/8"
Directions
-
Step 1:
1. Cut your 1/2" - 24" x 24" plywood down to 15" x 15"
2. Cut your 1" x 3" trim down to (2) at 15-1/8" and (2) at 16-5/8"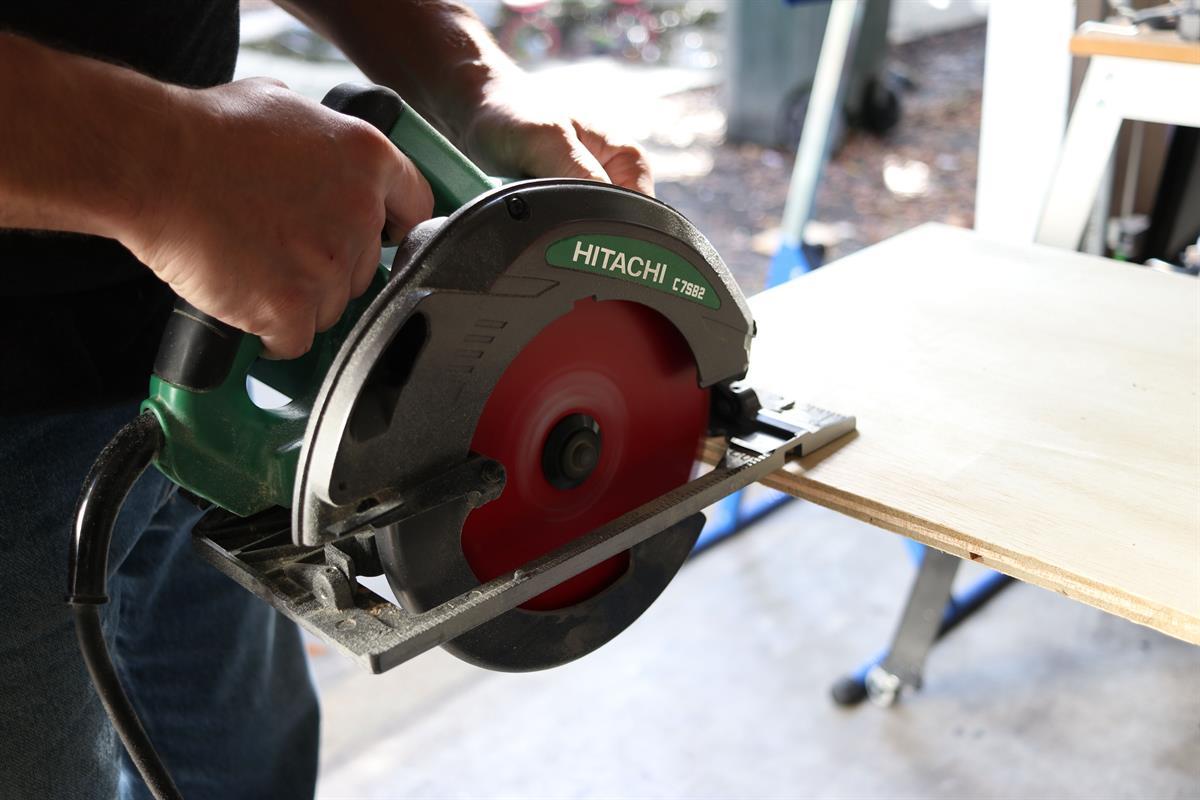
-
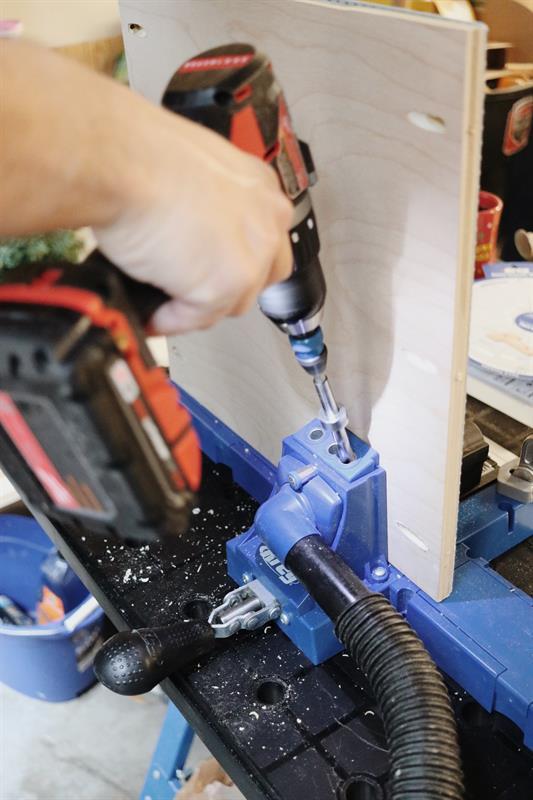
Step 2:
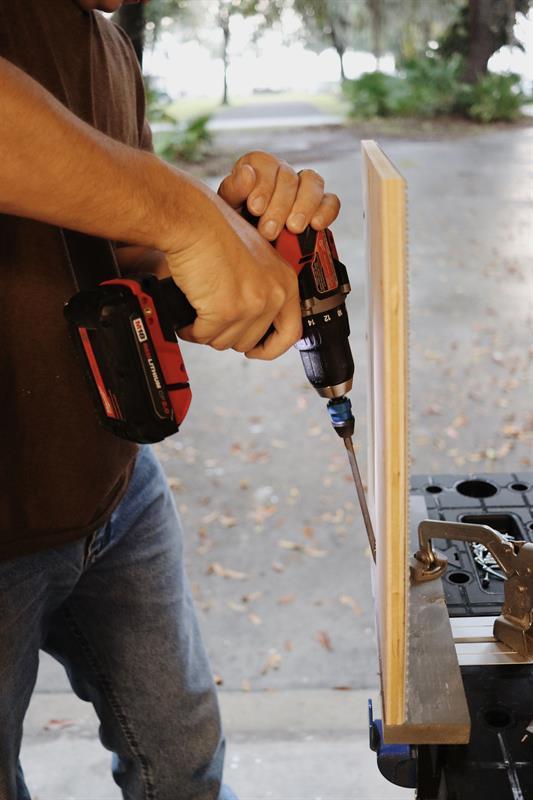
Begin drilling the pocket holes into your 15" x 15" plywood using the Kreg Jig K5 set to 1/2"
-
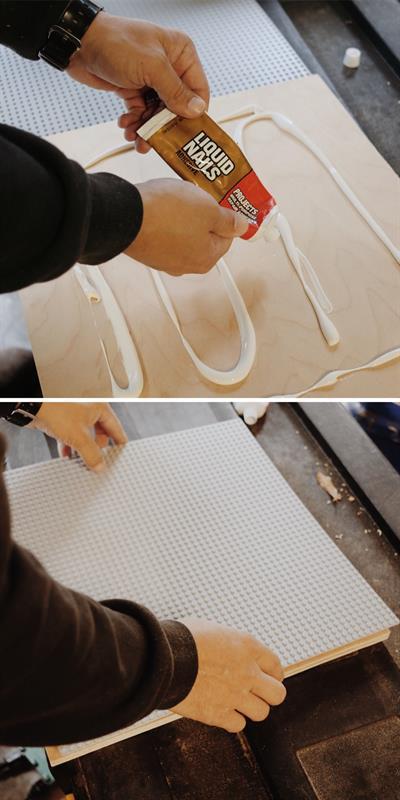
Step 3:
Attach your Lego plate to the front of your plywood using liquid nails. Press the board down firmly once flush then clamp in place and let dry for 24 hours before moving onto the next step.
-
Step 4:
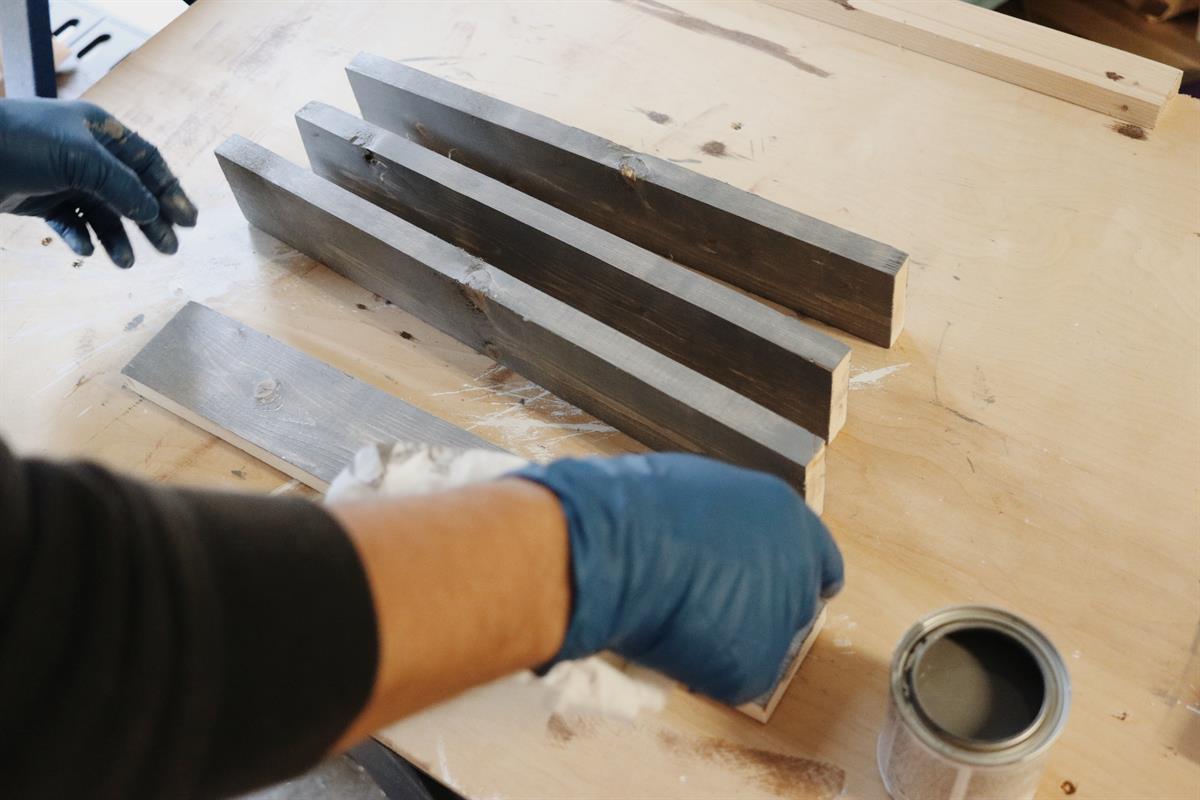
While you are waiting for the liquid nails to dry, stain your (4) pieces of trim before attaching. We used classic gray for this project.
-
Step 5:
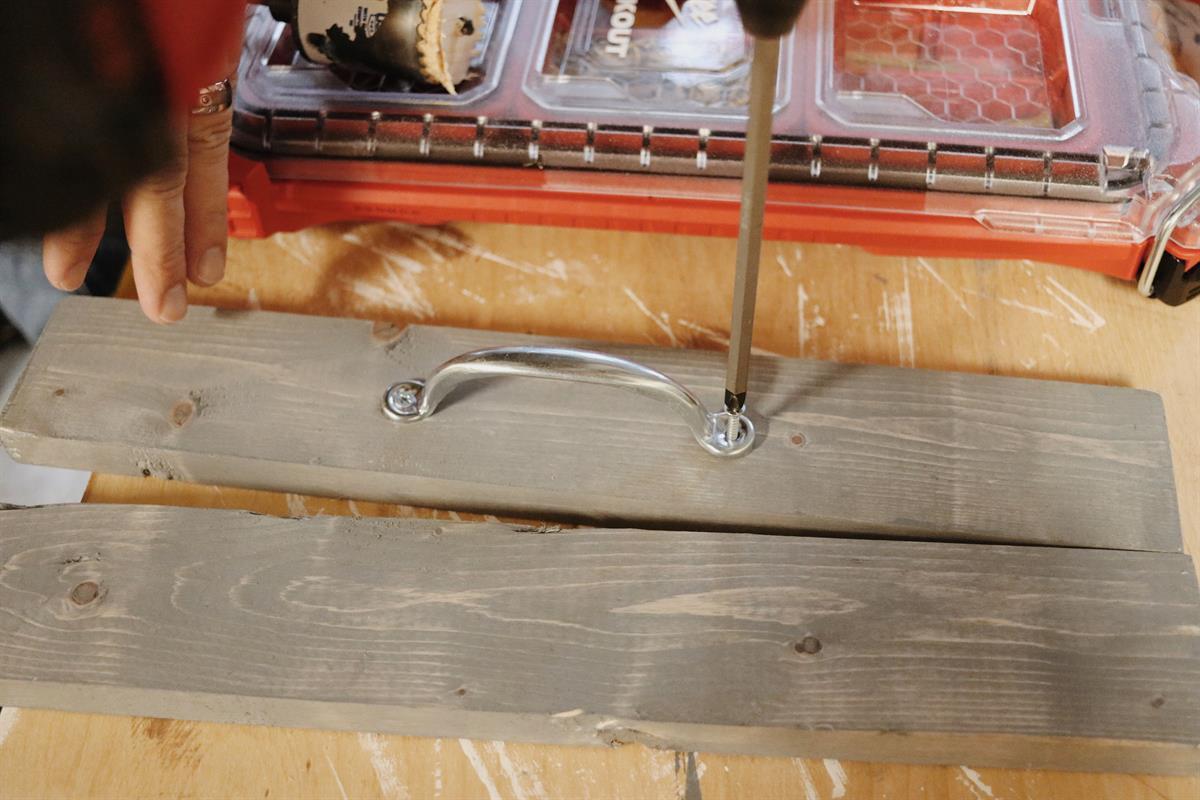
Attach the handles on the (2) short pieces of trim. We found our handles at Home Depot and used the screws that came in the packaging with them to attach them.
-
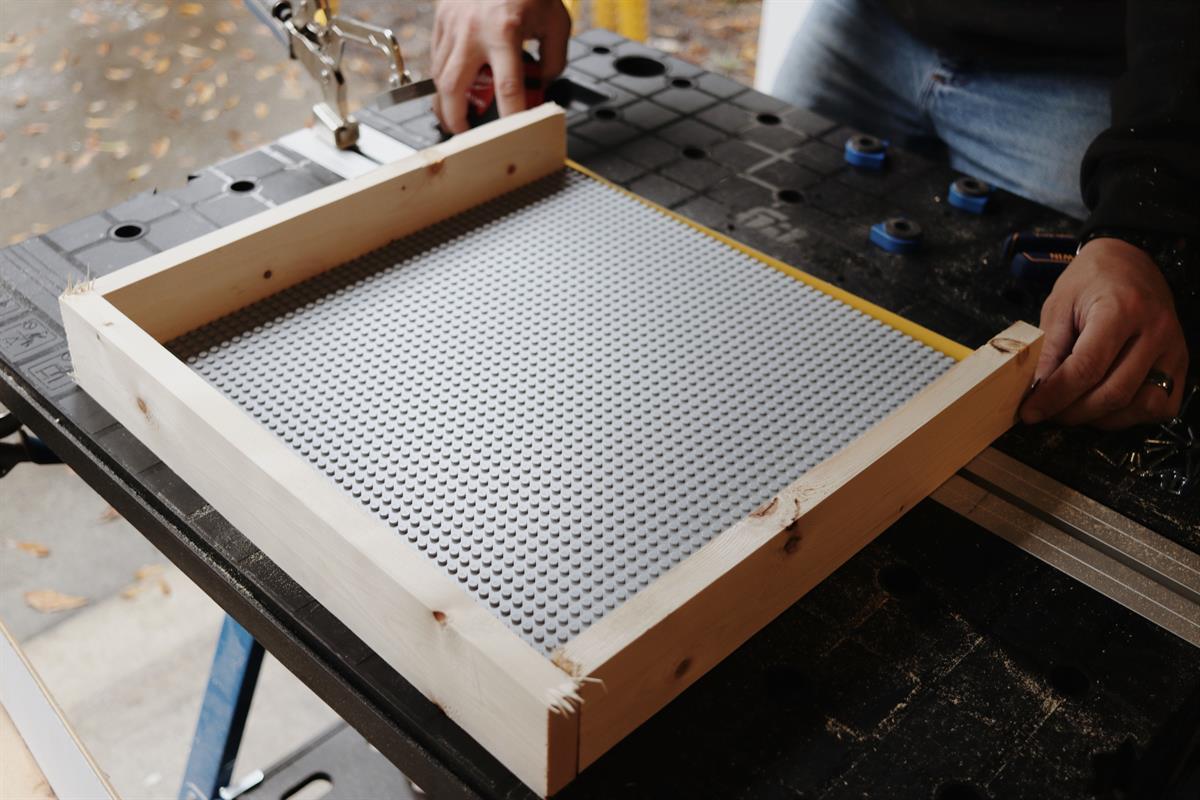
Step 6:
After your Lego plate and handles are attached, you are ready to attach your trim side pieces to your plywood. Attach the (2) shorter sides of trim first (with handles attached), then add your (2) longer trim pieces, using 1" Kreg screws.
-
Step 7:
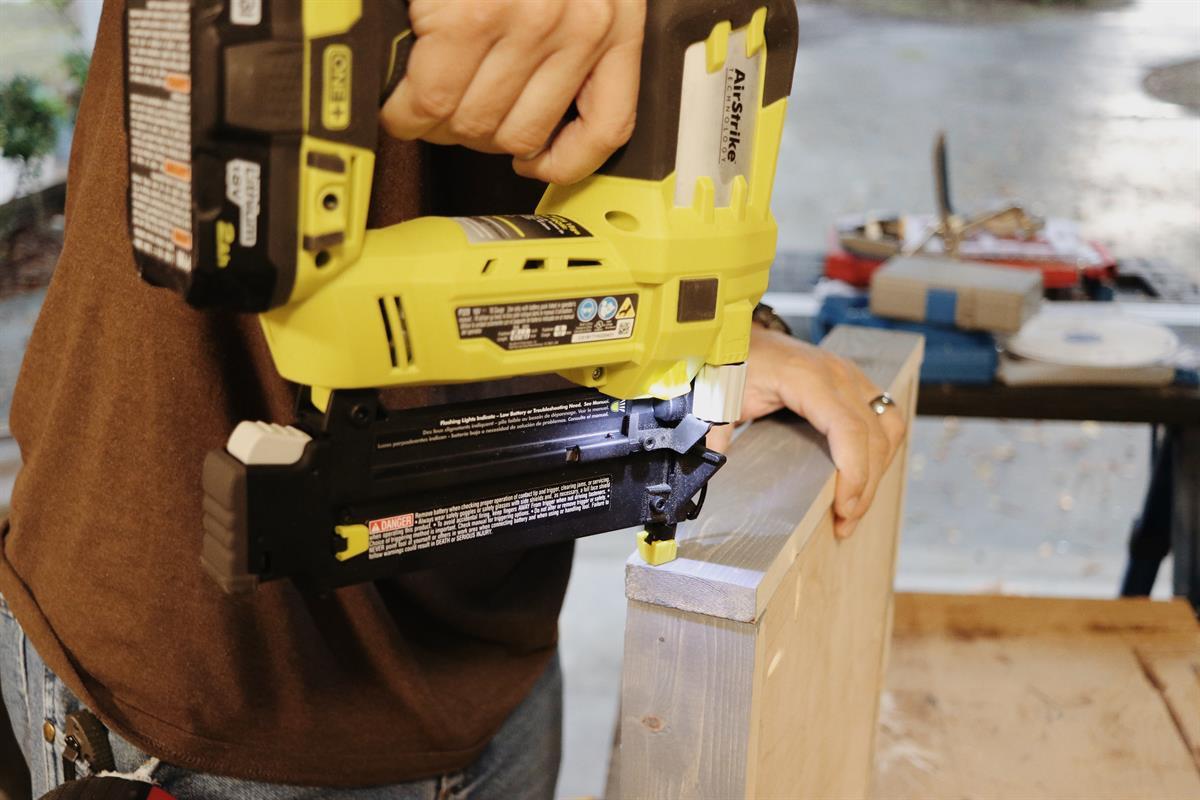
After your trim is attached, secure the ends of your trim together using 1-1/2" brad nails and your brad nailer.
-
Step 8:
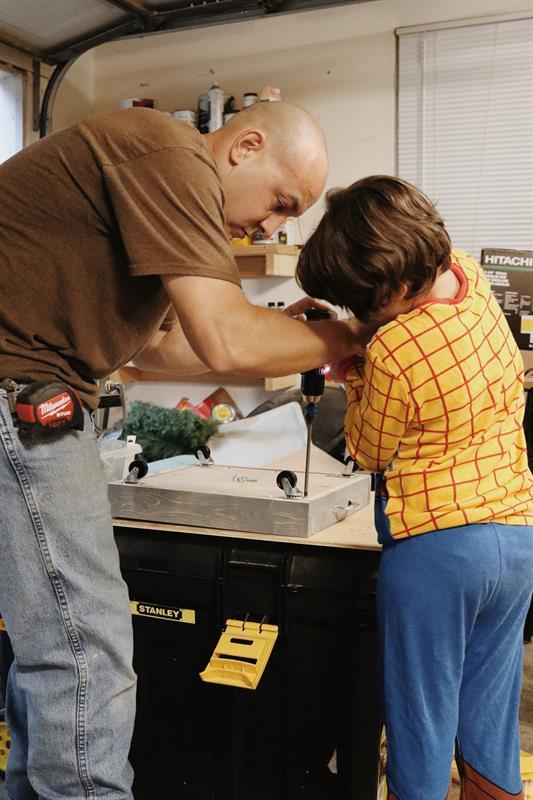
With your tray completely assembled, you are now ready for the final step - attaching your (4) wheels to make your tray mobile. We found our 1" wheels at Home Depot then attached them using 1/2" wood screws. Our little one loves watching us build and of course she couldn't help herself but getting into the action with helping on this one, even while being in pajamas. Daddy guided her as she screwed on the wheels herself!
-
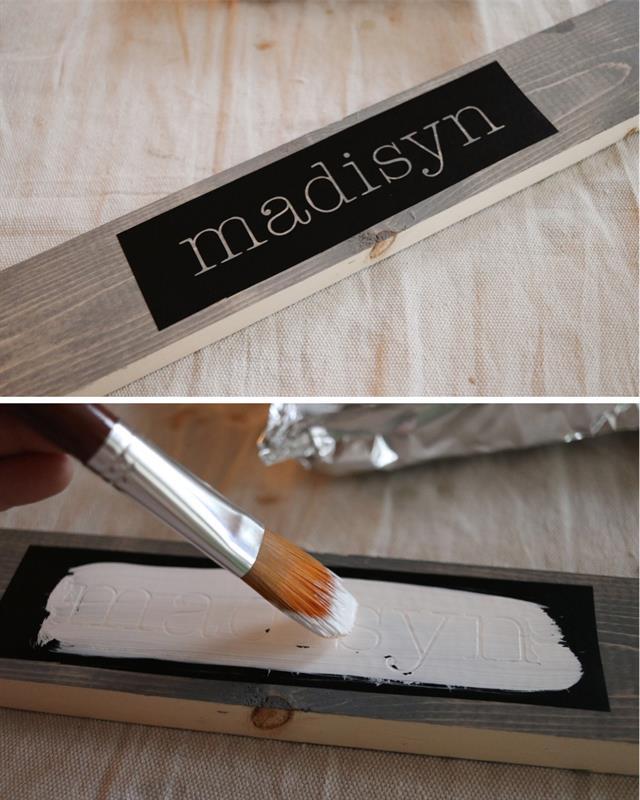
Personalize It:
Adding the finishing touch to make it extra special is always my favorite. I used my Silhouette Cameo and Silhouette Studio to design and create a vinyl template for my daughter's name, then placed the vinyl stencil on the longer trim side and painted.
-
Ready For Gifting:
That's it! Your Lego tray is now ready for hours of imaginative building! Add on a new Lego set, place the tray under your tree and this Christmas you will have one happy kid!
