

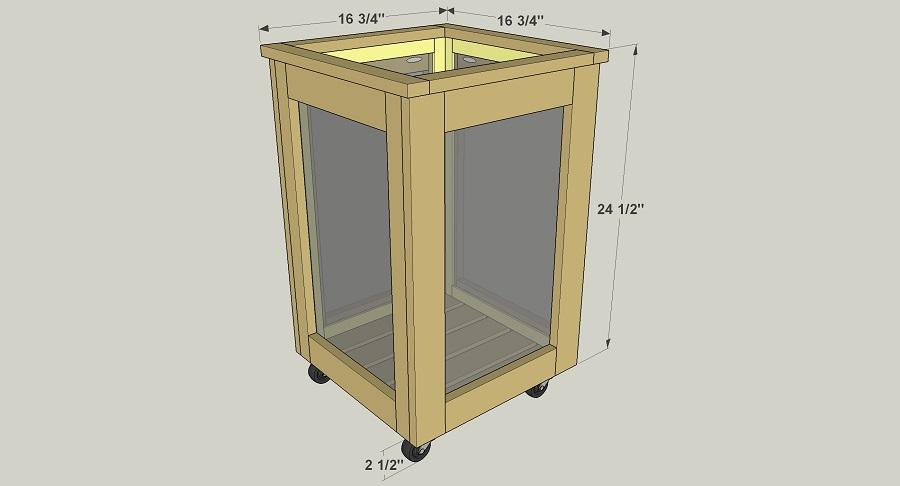
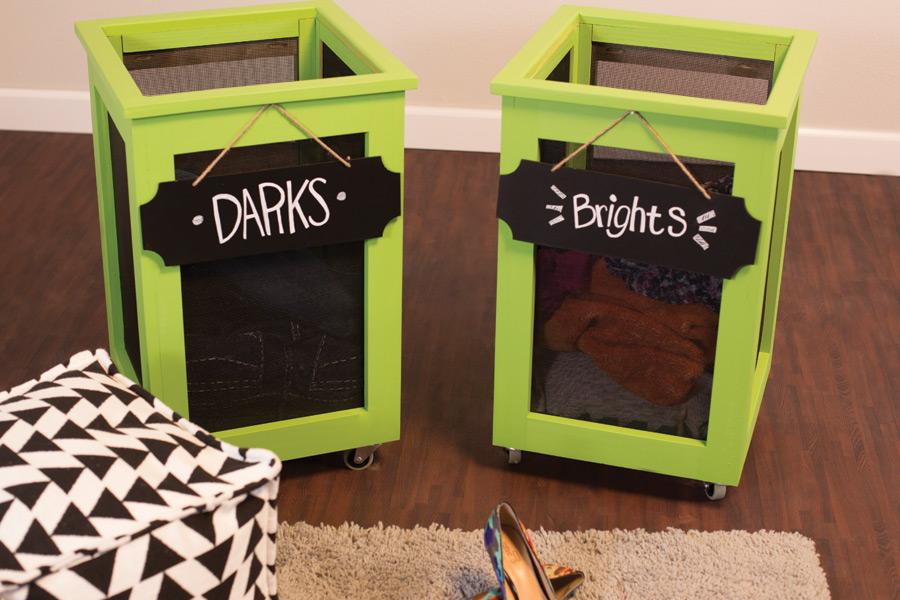
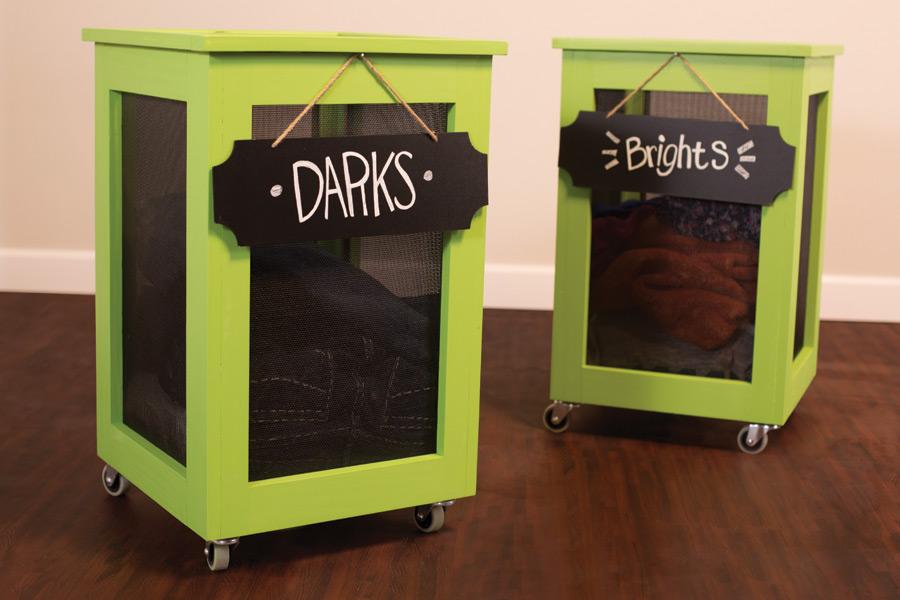


Sorting laundry doesn’t rank high on anyone’s list. So, anything that makes it easier is welcome. If functionality can mix with style, that’s even better. This hamper holds loads of laundry, fits in a closet, and looks great. It’s built from pine boards, lattice molding, and screen.
Tools
Kreg Tools


Other Tools
-
Miter Saw

-
Tape Measure
-
Utility Knife
-
Nail Gun
-
Staple Gun
-
Air Compressor
Materials
Wood Products
- 2 Board , 1x2 , 96"
- 3 Board , 1x3 , 96"
- 4 Pine Lath or Lattice Molding , 1/4" x 1 1/8" , 96"
Hardware & Supplies
- 64 1 1/4" coarse-thread pocket hole screws
- 4 2" swivel casters
- 16 #8 x 5/8" Pan-head wood screws
- 48 18-gauge 1 1/2" brad nails
- 88 18-gauge 3/4" brad nails
- 88 3/8" staples
- 1 36" x 84" roll of pet-resistant screening
Cut List & Parts
- 4 Wide Vertical , 3/4" x 2 1/2" x 23 3/4" pine
- 4 Narrow Vertical , 3/4" x 1 1/2" x 23 3/4" pine
- 4 Long Horizontal , 3/4" x 2 1/2" x 11 1/2" pine
- 4 Short Horizontal , 3/4" x 2 1/2" x 11" pine
- 5 Bottom Slats , 3/4" x 2 1/2" x 14 1/2" pine
- 2 Long Cap , 3/4" x 1 1/2" x 16 3/4" pine
- 2 Short Cap , 3/4" x 1 1/2" x 13 3/4" pine
- 8 Vertical Lath , 1/4" x 1 1/8" x 23" pine lath
- 4 Long Horizontal Lath , 1/4" x 1 1/8" x 12 1/4" pine lath
- 4 Short Horizontal Lath , 1/4" x 1 1/8" x 11 3/4" pine lath
- 4 Screen Panels , 14" x 22 1/2" screen

Directions
-
Cut the Verticals
Cut four Wide Verticals from a 1x3 board and four Narrow Verticals from a 1x2 board, as shown in the cutting diagram.
-
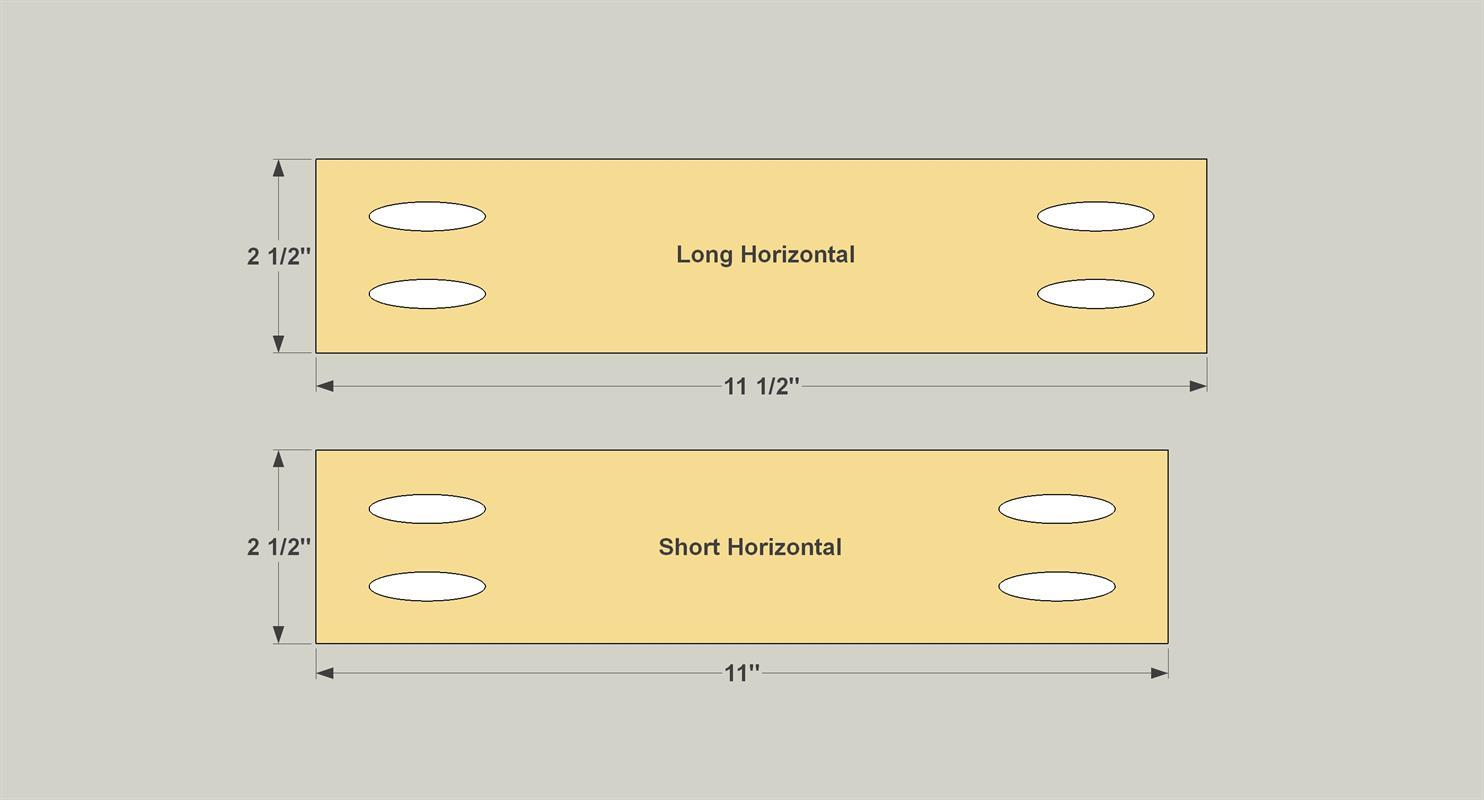
Make the Horizontals
Cut four Short Horizontals (11" long) and four Long Horizontals (11 1/2" long) parts from 1x3 boards, as shown in the cutting diagram. With your pocket hole jig set up for 3/4" material, drill two pocket holes in each end of all of the Horizontals.
Mark the Parts to Prevent Confusion
This project is made up of multiple parts that look similar, but actually have slightly different lengths or widths. To keep everything straight, it’s a good idea to mark each part with its name. If you’re planning to paint, you can simply write the name on with pencil. If you are worried about the pencil marks, apply masking tape, and then write the part name on the tape.
-
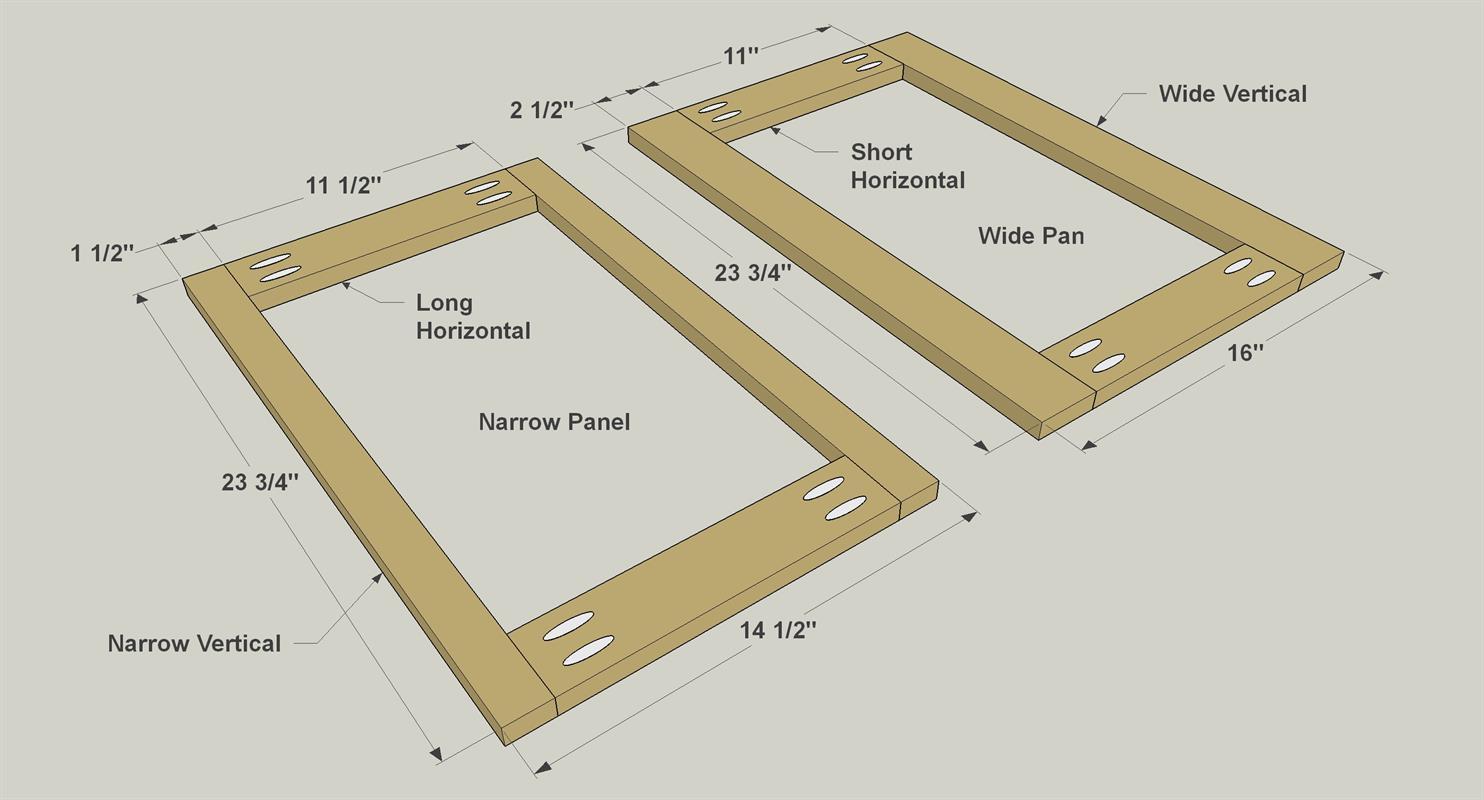
Build the Panels
Now you need to assemble the panels. Create a pair of narrow panels by joining two Narrow Verticals and two Long Horizontals. Then create a pair of wide panels that are made up of two Wide Verticals and two Short Horizontal boards. Secure the panels with 1 1/4" coarse-thread pocket hole screws.
-
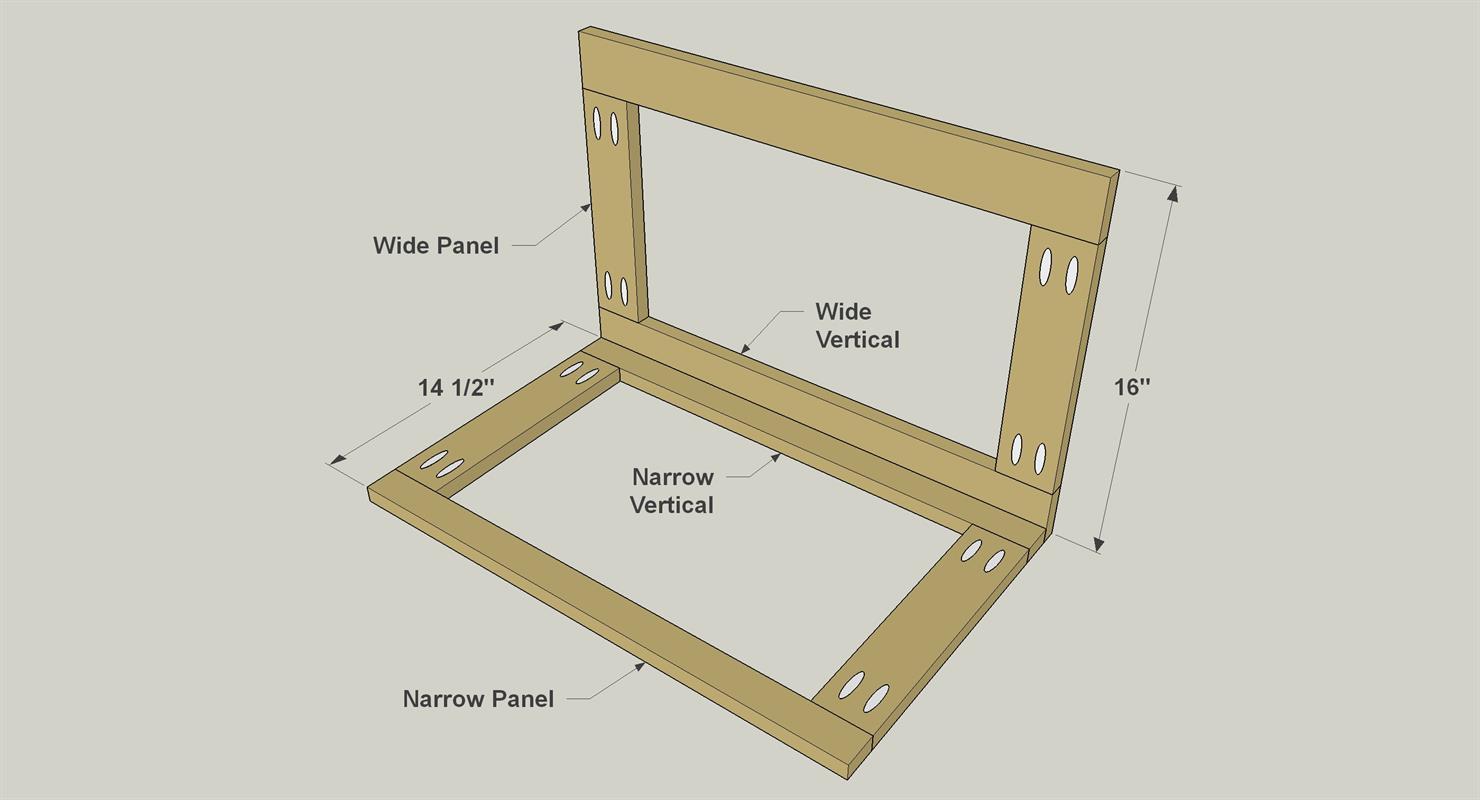
Create the Frame
Now you can assemble the laundry sorter frame by joining the panels together. Start with one narrow panel and one wide panel. Glue and nail them together as shown. 7 or 8 nails should be plenty. A brad nailer works best for this. If you don’t have access to one, you can 1 1/2" brads and a hammer. If you’re using a hammer and nails, be sure to drill pilot holes first to prevent splitting the wood. Add the two other panels in the same manner to complete the frame.
-
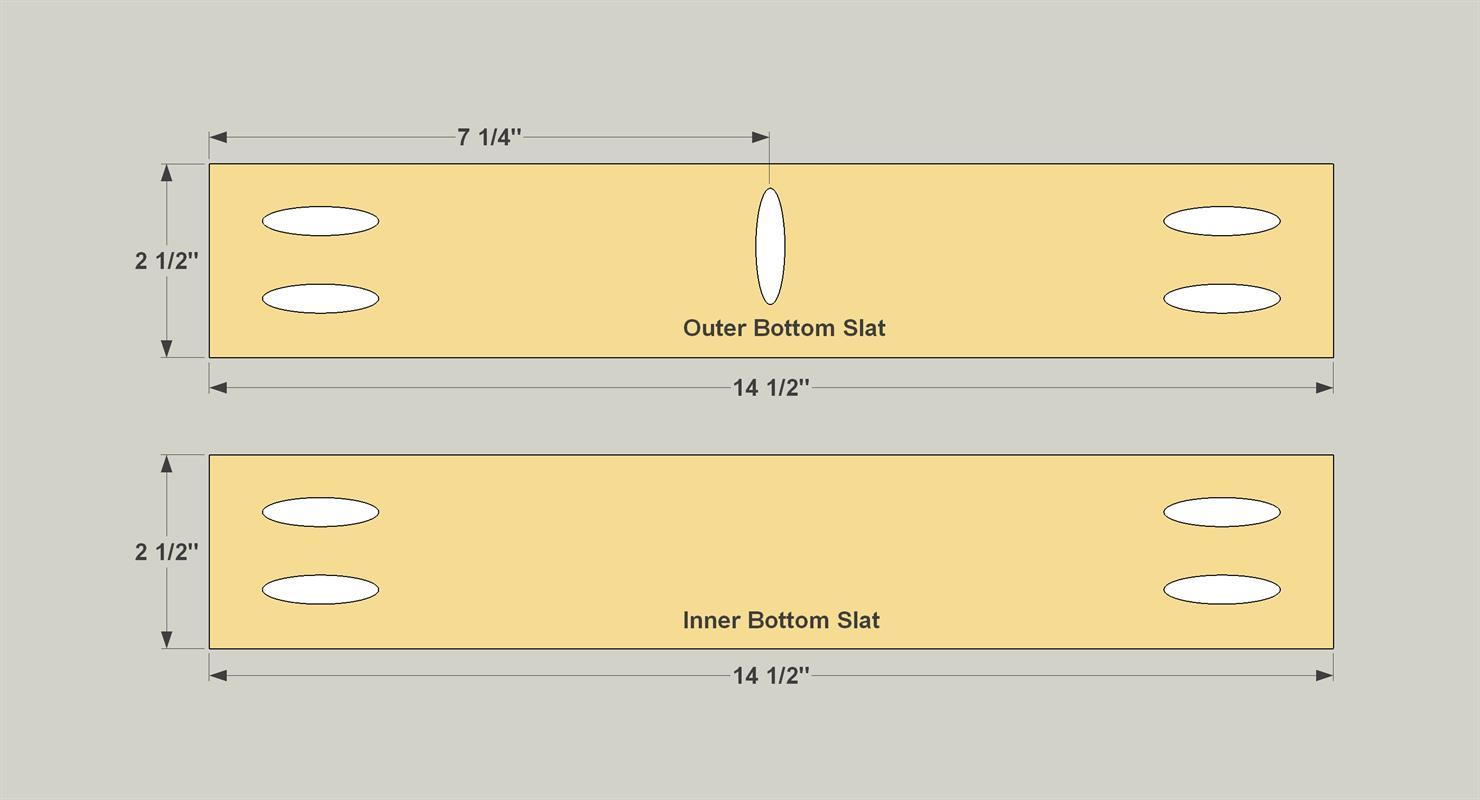
Create the Bottom Slats
Cut two Outer Bottom Slats and three Inner Bottom Slats to length from 1x3 boards. Drill pocket holes in the ends of all the boards. Then, in just the Outer Bottom Slats, drill one pocket hole along the center of one edge as shown.
-
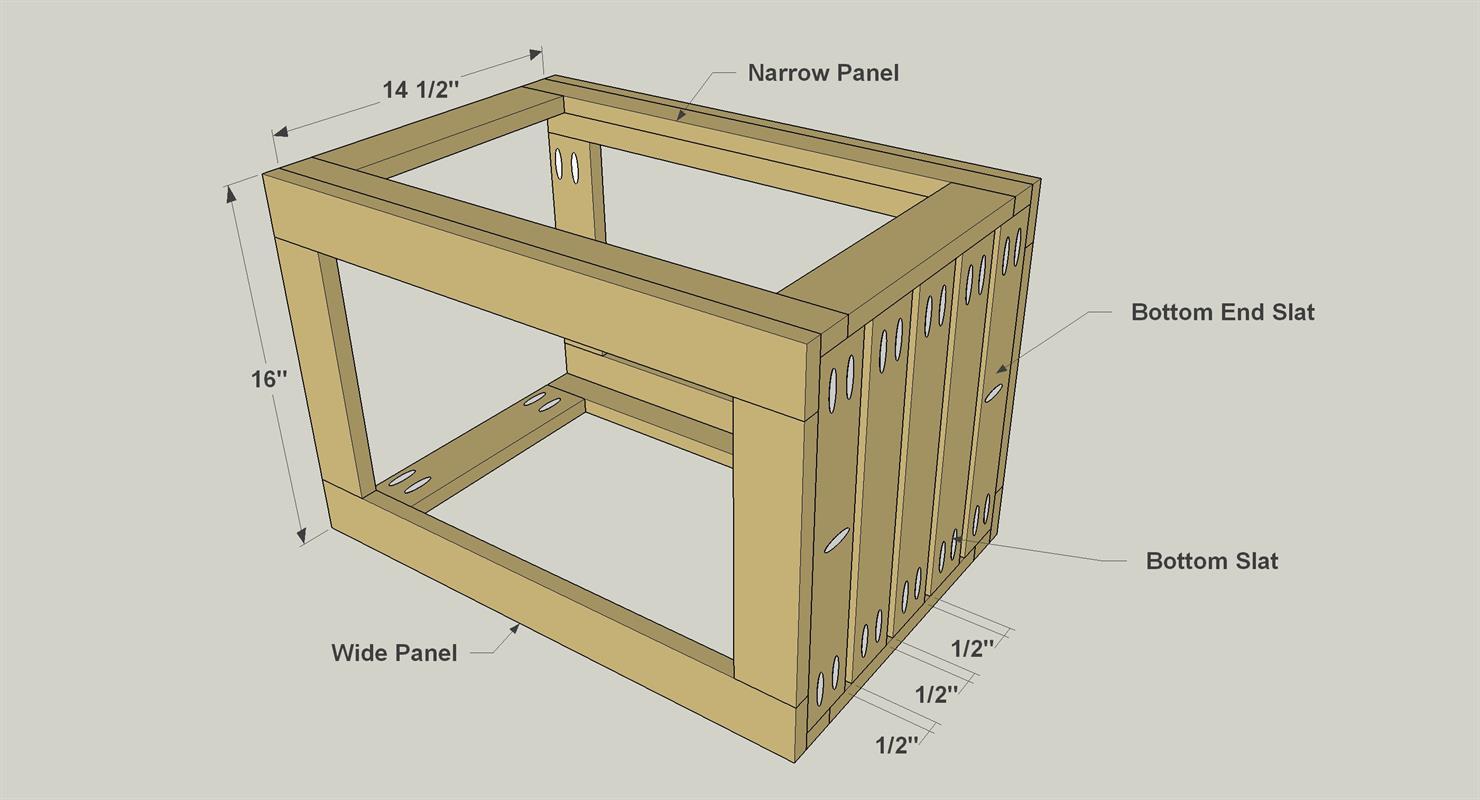
Install the Slats
Attach the five Bottom Slats in place on one end of the Frame. Set the two Bottom End Slats tight to each side and equally space the others, about 1/2". Secure the Slats with 1 1 /4" coarse-thread pocket hole screws.
-
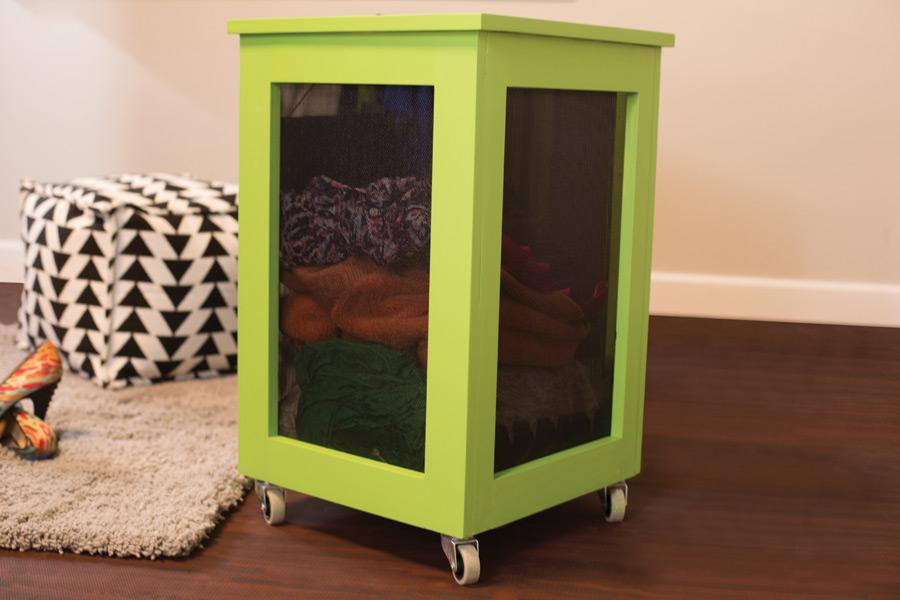
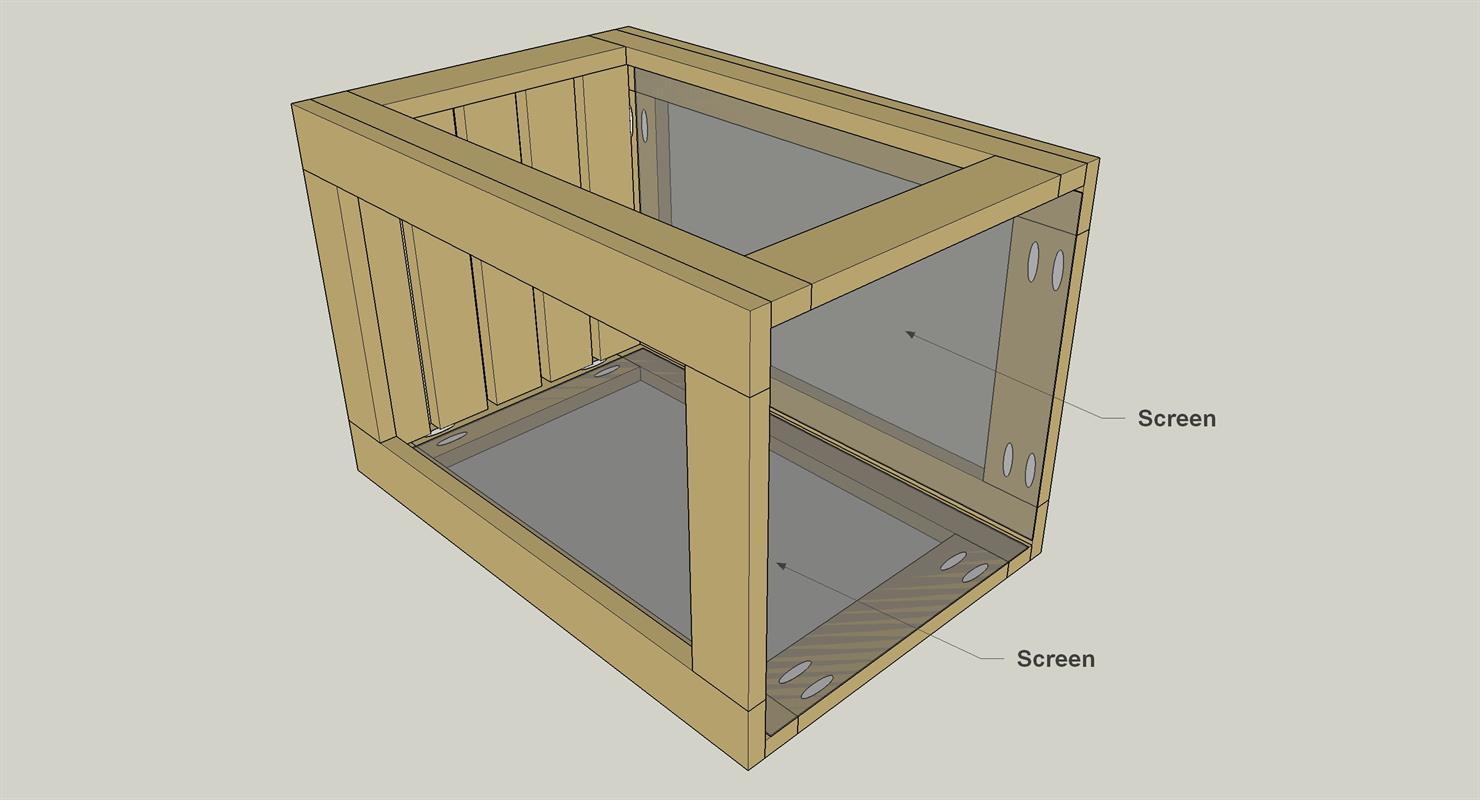
Add the Screen
Cut four Screen Panels to 14" x 22 1/2" from a roll of pet proof screen 36" x 84" using a straight edge and a sharp utility knife. Install the Screen Panels with a staple gun and 3/8" staples, placing a staple about every four inches. Double check the staples are flat before proceeding to the next step. If not, tap them down with a hammer.
-
Add the Lath
Cut eight Vertical Lath, four Short Horizontal Lath and four Long Horizontal Lath to length from 1/4" x 1 1/8" pine lath (or lattice molding), as shown in the cutting diagram. Install the Lath with brad nails in the positions shown.

-
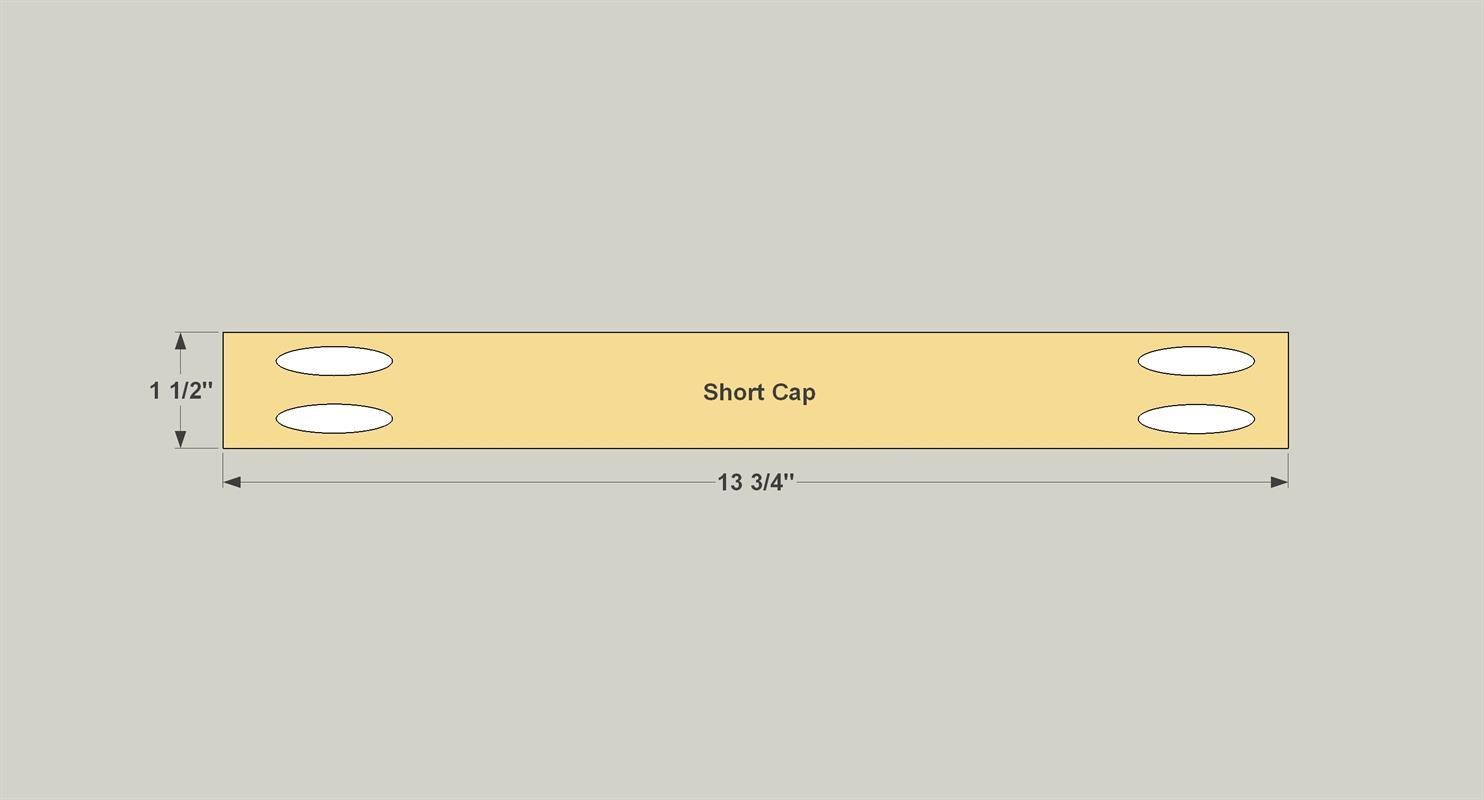
Create the Top Cap Parts
Cut two Long Caps and two Short Caps to size from 1x2 boards, as shown in cutting diagram. Drill pocket holes on both ends of the Short Caps, as shown.
-
Assemble the Top Cap
Assemble the cap using 1 1 /4" coarse-thread pocket hole screws.

-
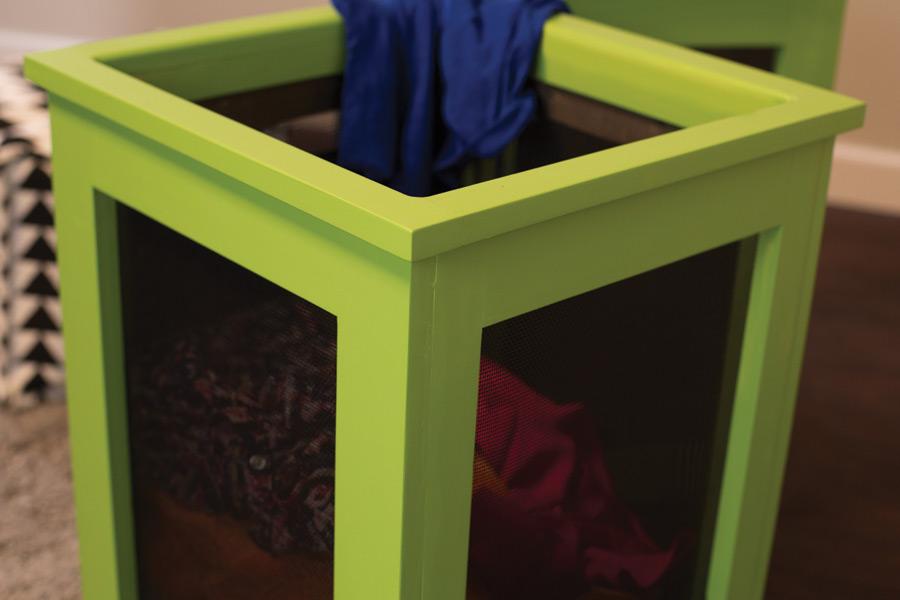
Attach the Top Cap
Spread glue on the top edge of the frame, and then position the Top Cap so it overhangs the frame equally on all sides. Secure the cap using 1 1/2" brad nails.

-
Finish and Add the Casters
Fill and sand any holes on the outside of the frame, and then paint or stain with your favorite finish. When the finish is dry, attach the casters with #8 x 5/8" pan-head wood screws.