

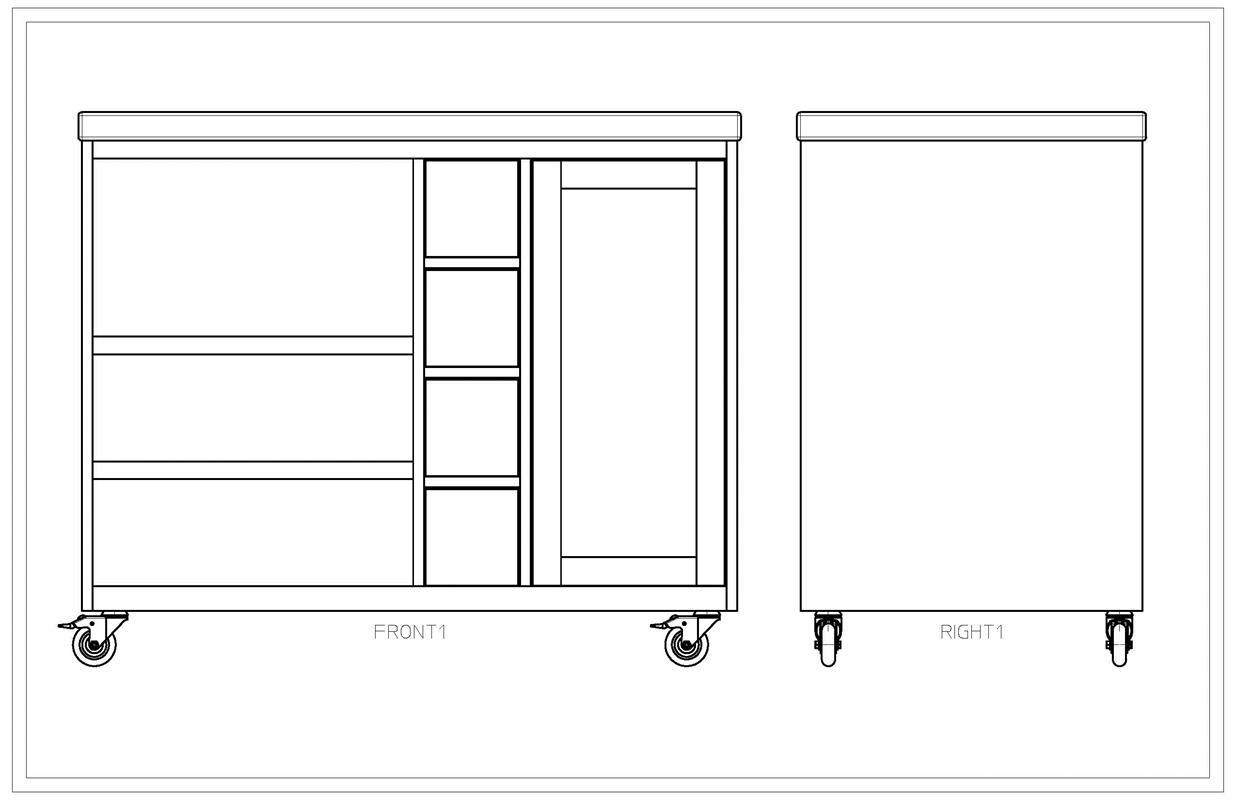

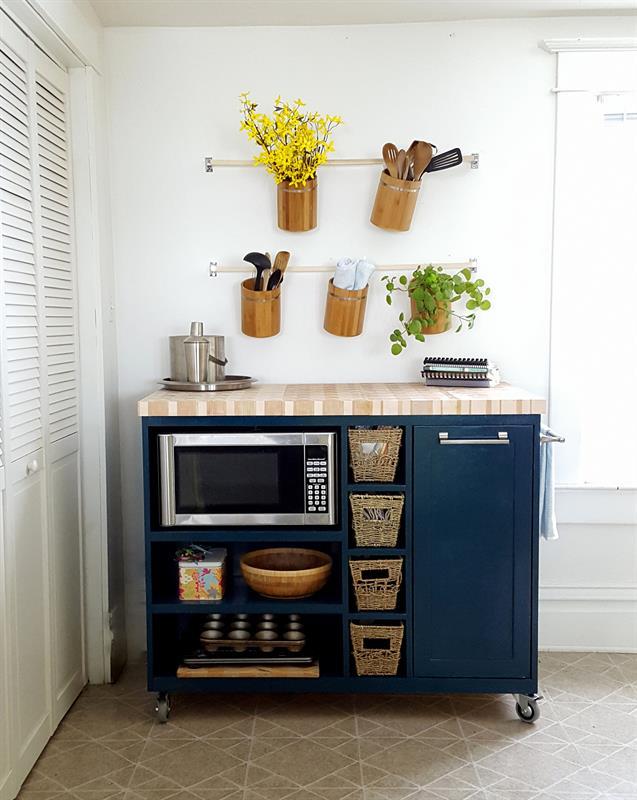
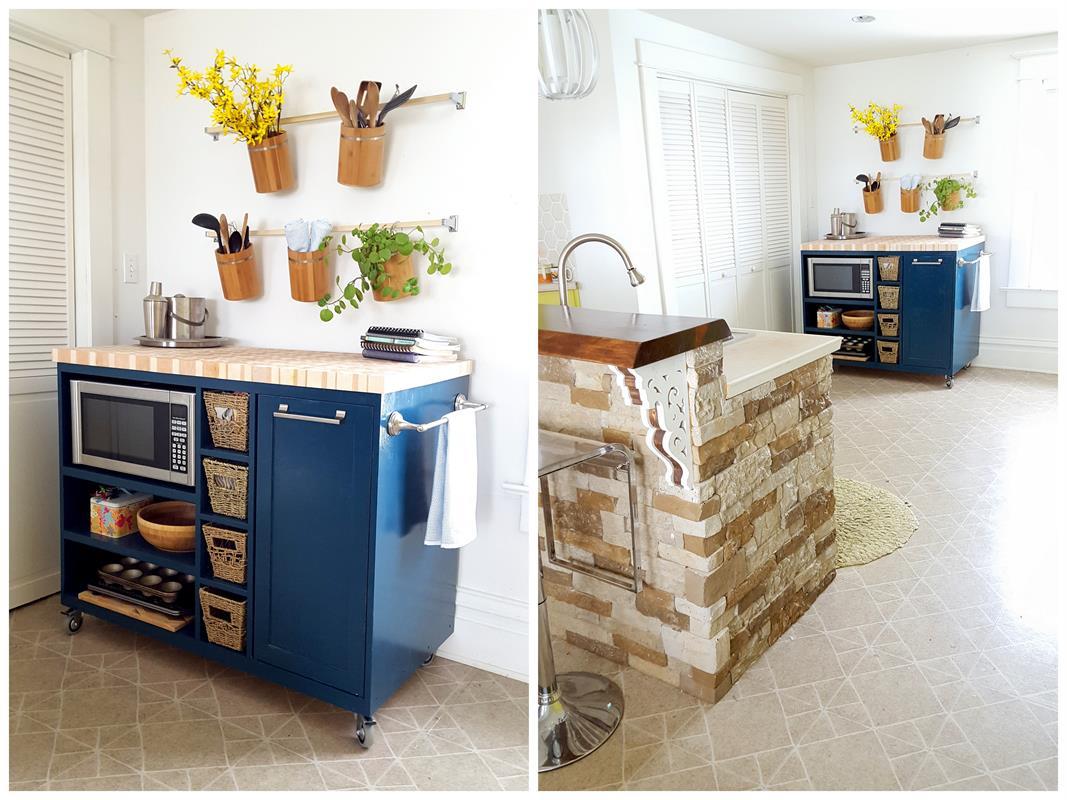


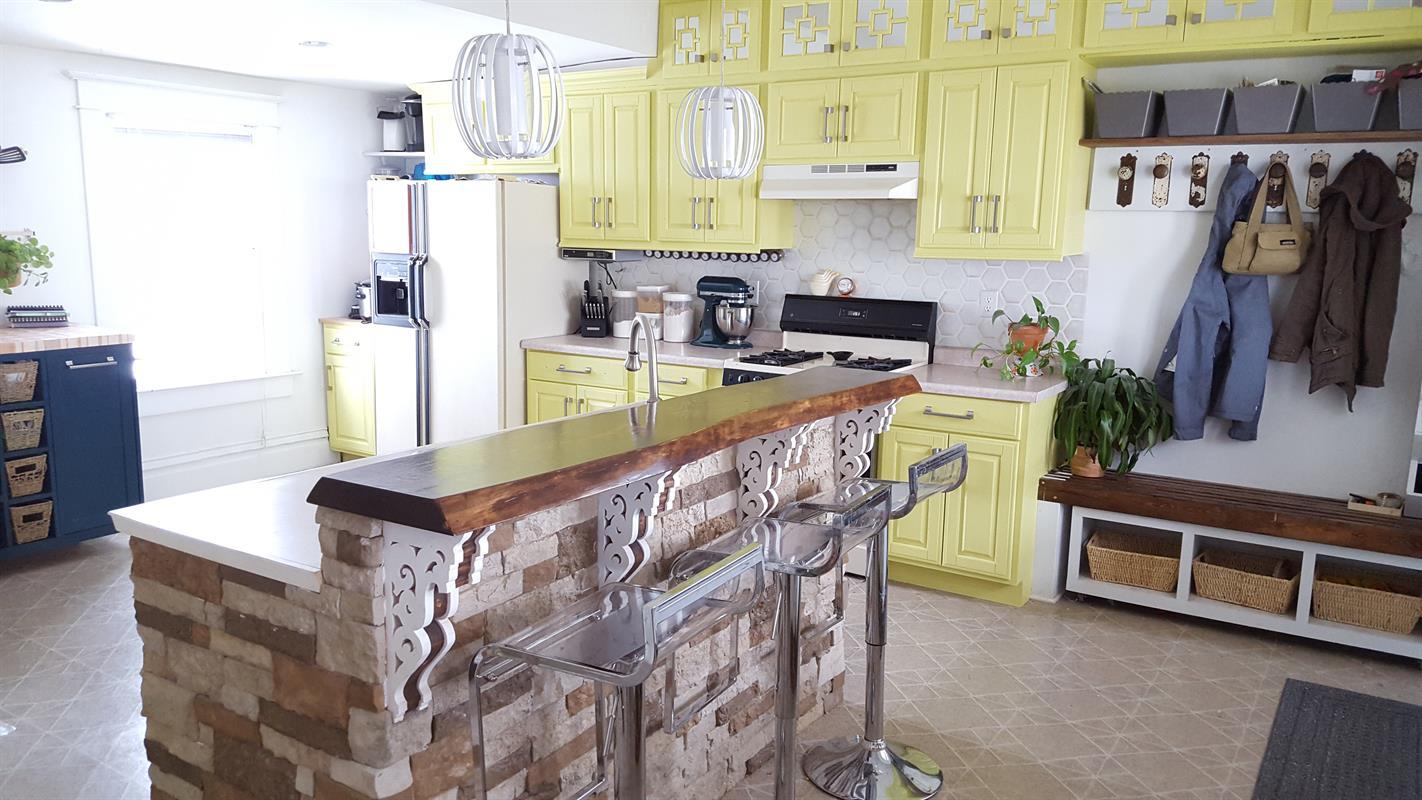
Sturdy rolling kitchen island with butcher block top and place for microwave and garbage/trash can!
Come on over to our blog for the full post and more reveal pics! >> http://realitydaydream.com/2016/02/custom-diy-rolling-kitchen-island.html
Tools
Kreg Tools


Other Tools
-
Miter Saw

-
Square
-
Table Saw
-
Tape Measure
-
Thickness Planer
-
Clamps
-
Nail Gun
-
Shop Vacuum
Materials
Wood Products
- 2 Plywood , 3/4" Thick , Full Sheet
- 1 Plywood , 1/2" Thick , Half Sheet
- 1 Plywood , 1/4" Thick , Half Sheet
- 1 Board , 1x8 , 96"
Hardware & Supplies
- 2 Hickory Hardware
- 4 3" Swivel Caster
- 1 18" towel bar
- 60 1 1/4" Fine Thread Kreg Screws
- 75 1 1/2" #2 SQ Dr Pan Head Kreg Screws
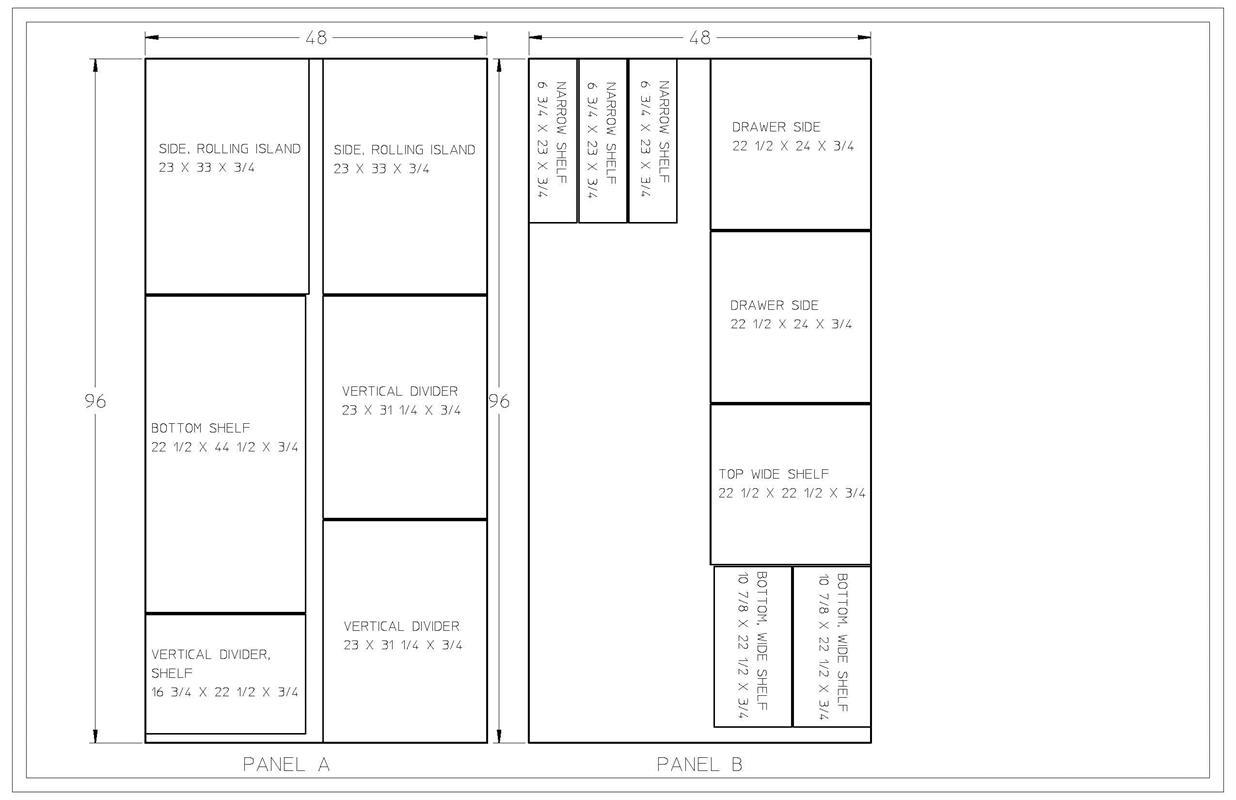
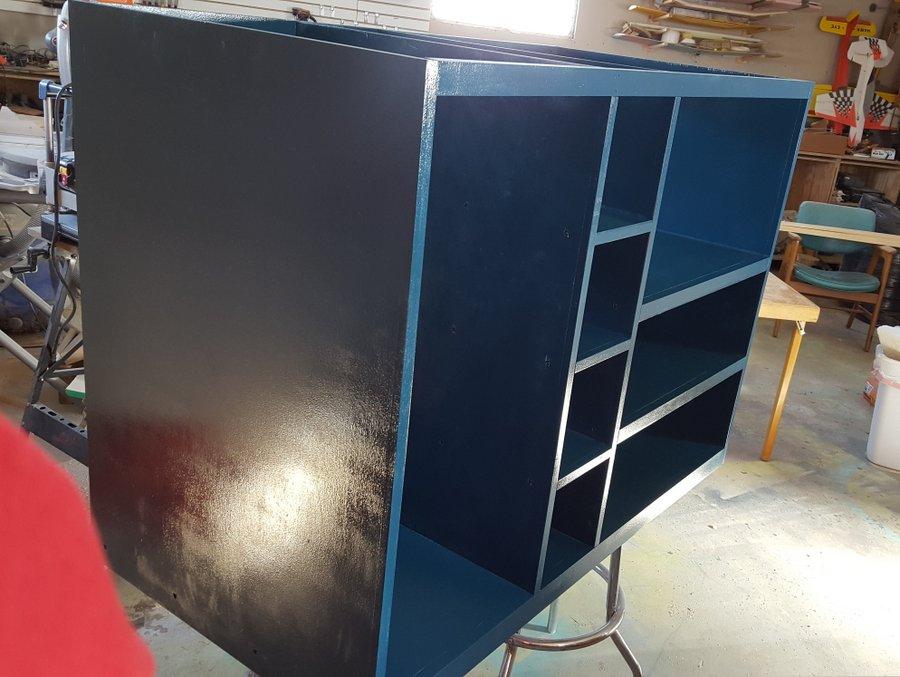
Cut List & Parts
- 2 Panel A & Panel B , 3/4" X 4' X 8'
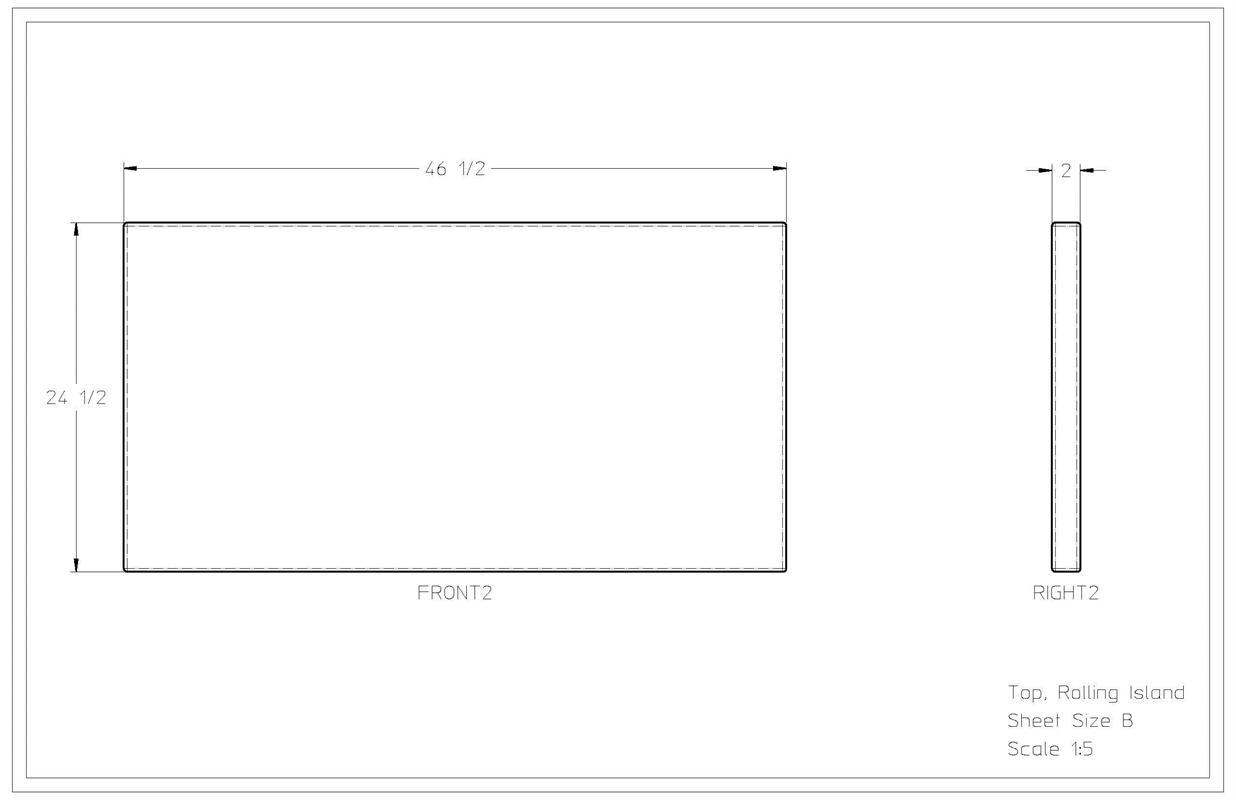
- 1 TOP, ROLLING ISLAND , 2" X 24 1/2" X 46 1/2"
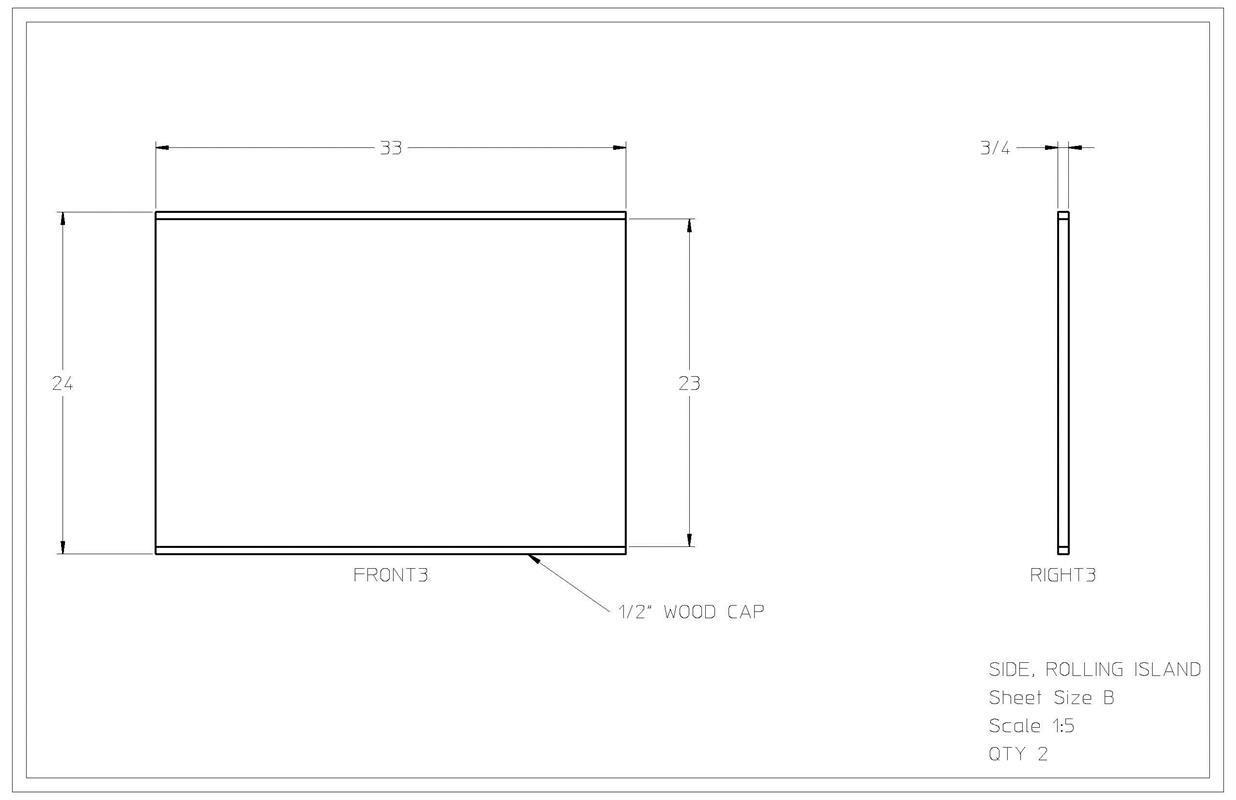
- 2 SIDES, ROLLING ISLAND , 3/4" X 33" X 24"
- 2 VERTICAL DIVIDERS, ROLLING ISLAND , 3/4" X 31 1/4" X 24"
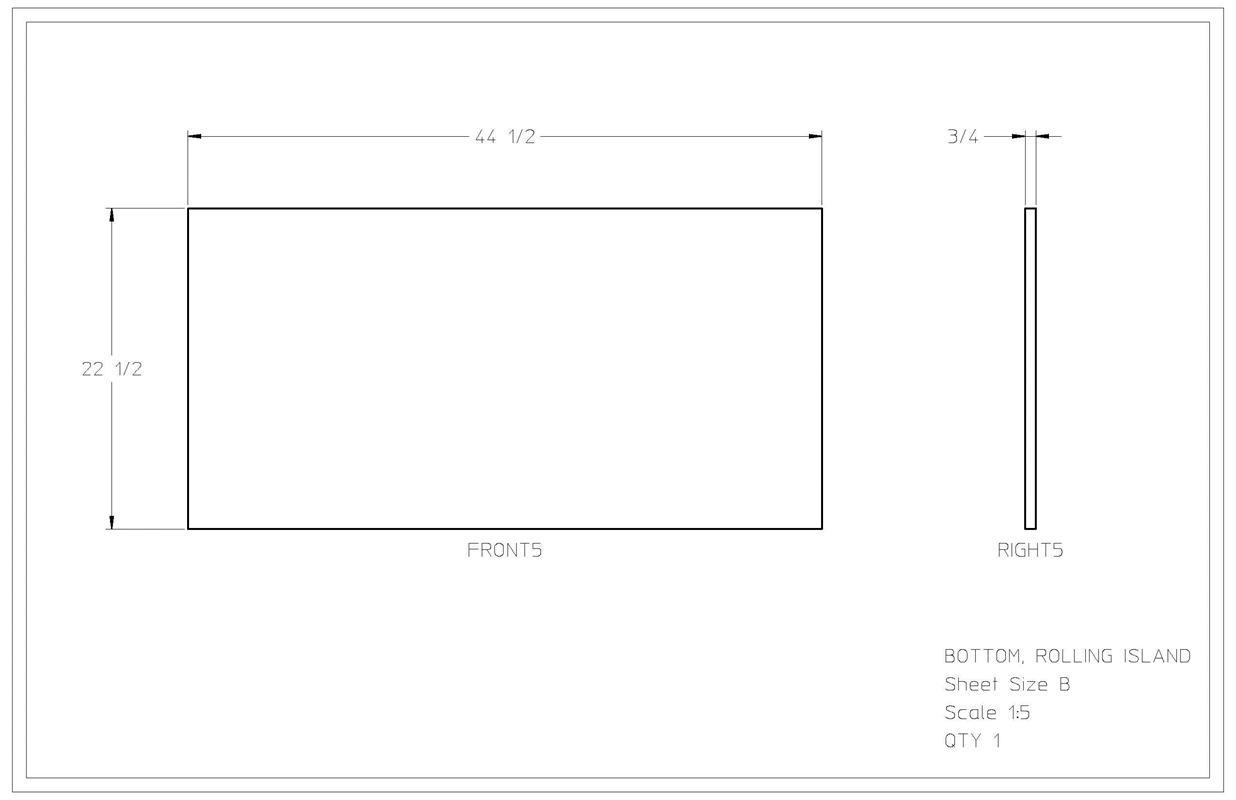
- 1 BOTTOM, ROLLING ISLAND , 3/4" X 44 1/2" X 22 1/2"
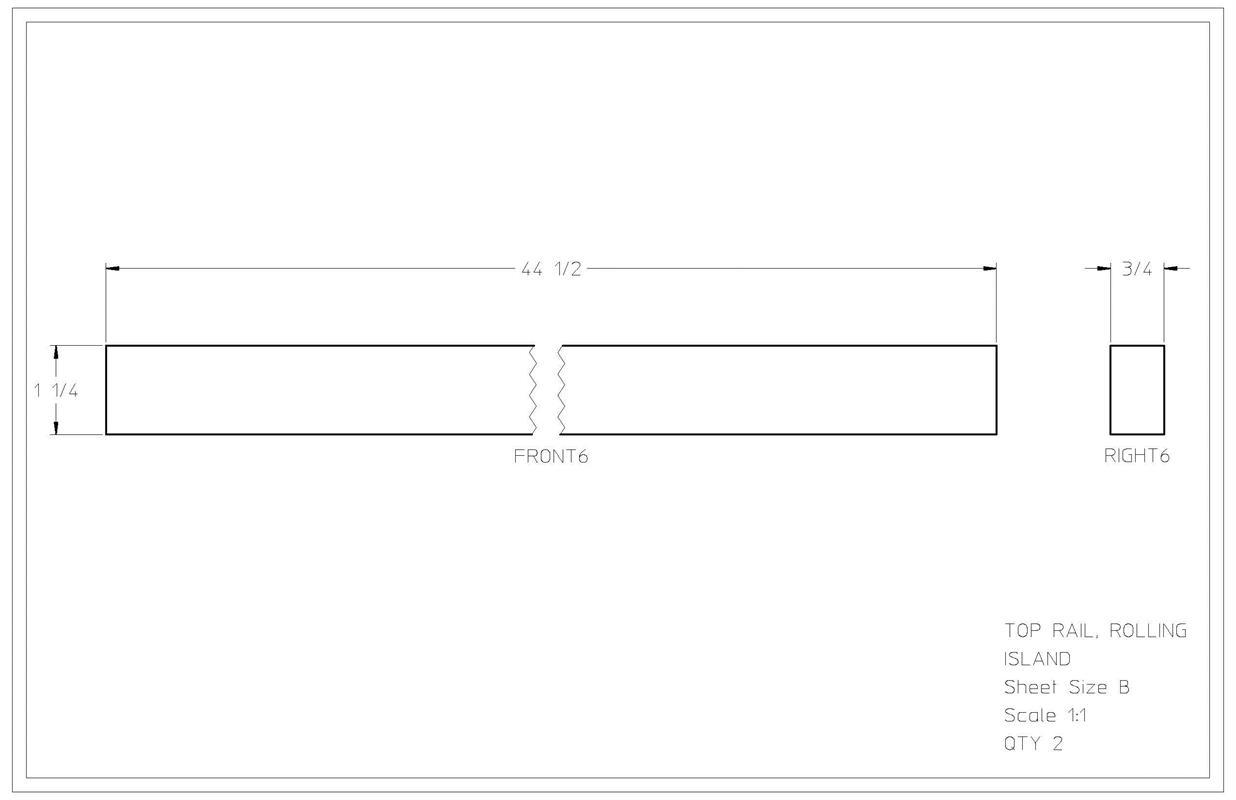
- 2 TOP RAIL, ROLLING ISLAND , 3/4" X 44 1/2" X 1 1/4"
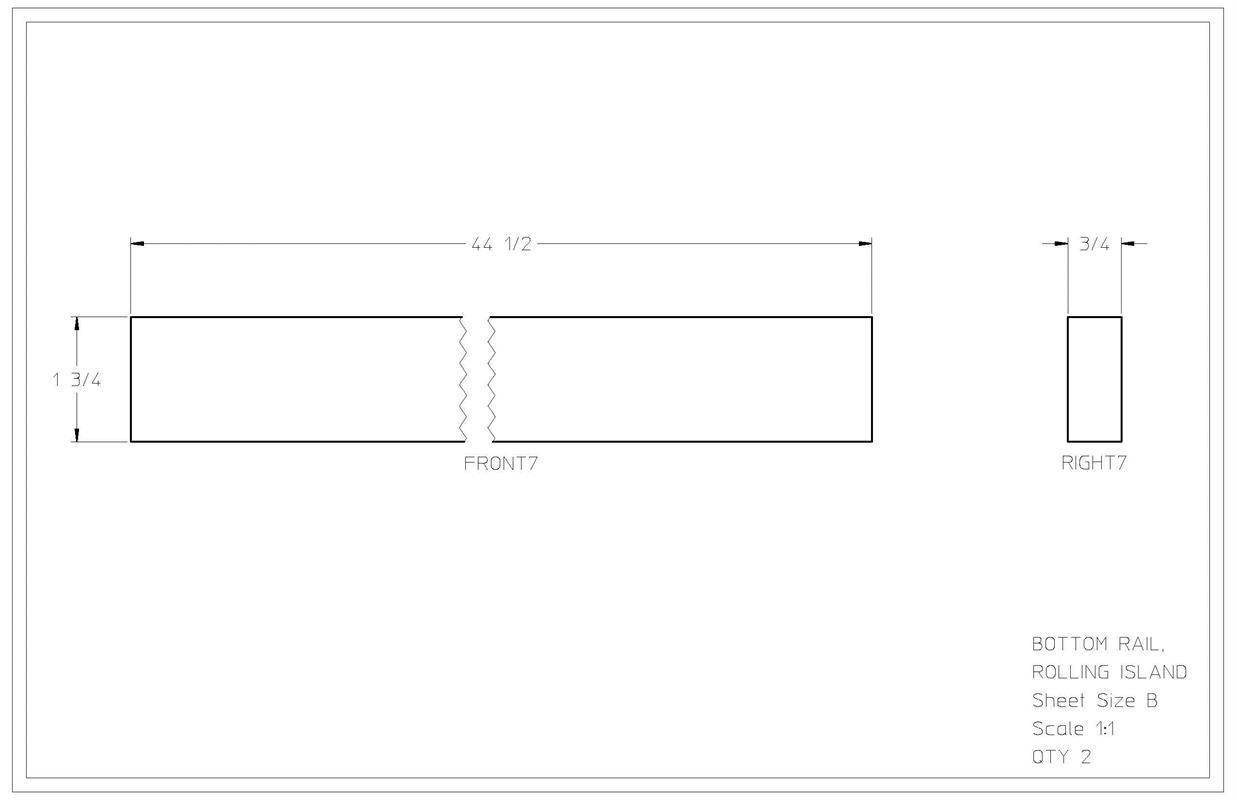
- 2 BOTTOM RAIL, ROLLING ISLAND , 3/4" X 44 1/2" X 1 3/4"
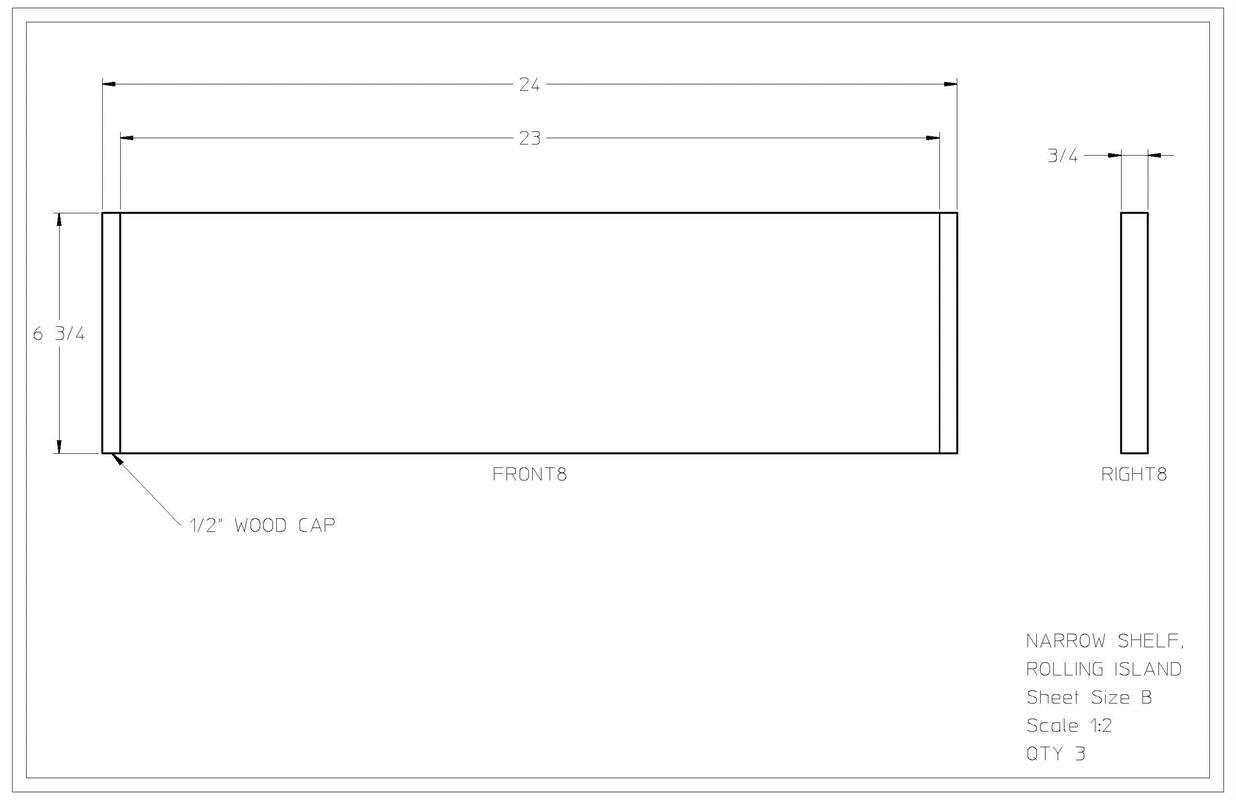
- 3 NARROW SHELF, ROLLING ISLAND , 3/4" X 6 3/4" X 24"
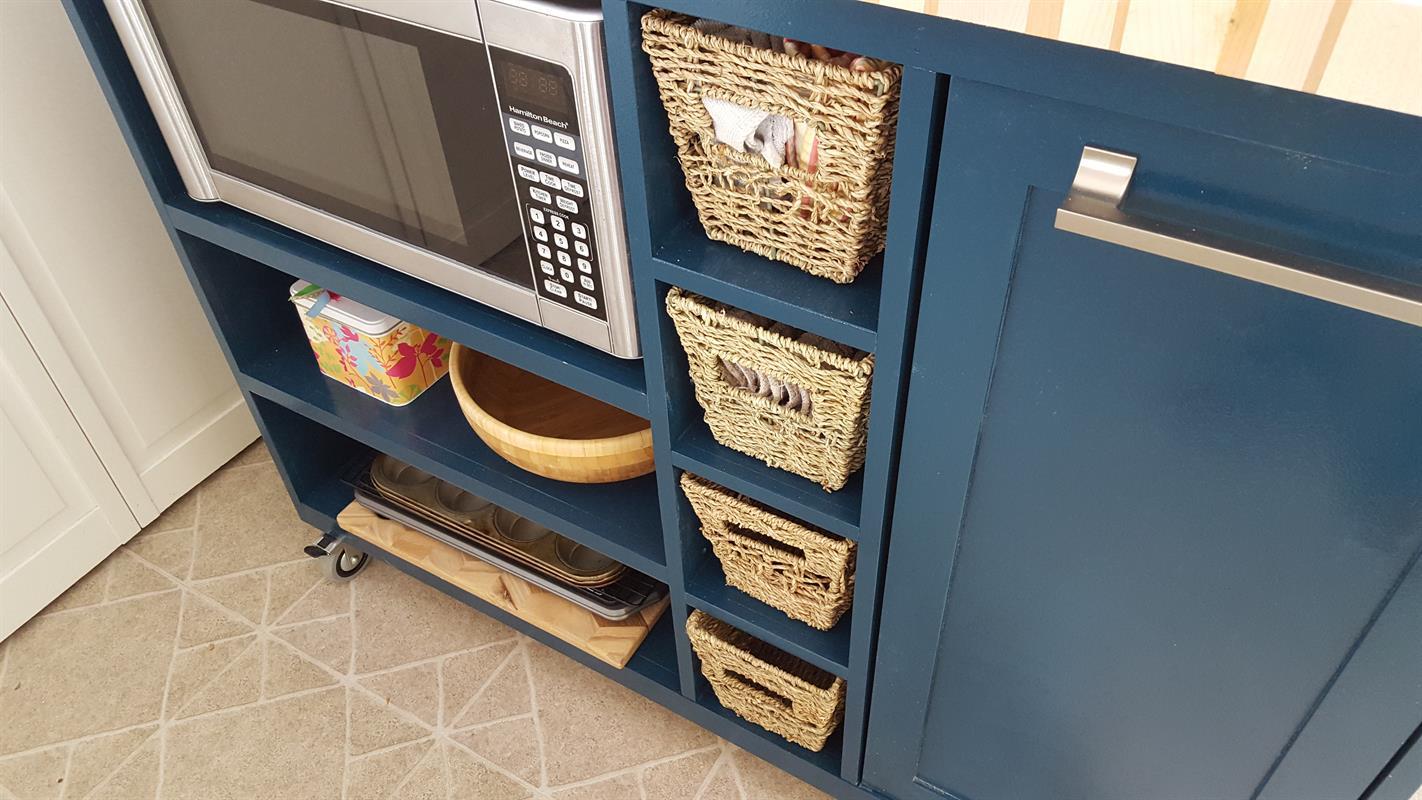
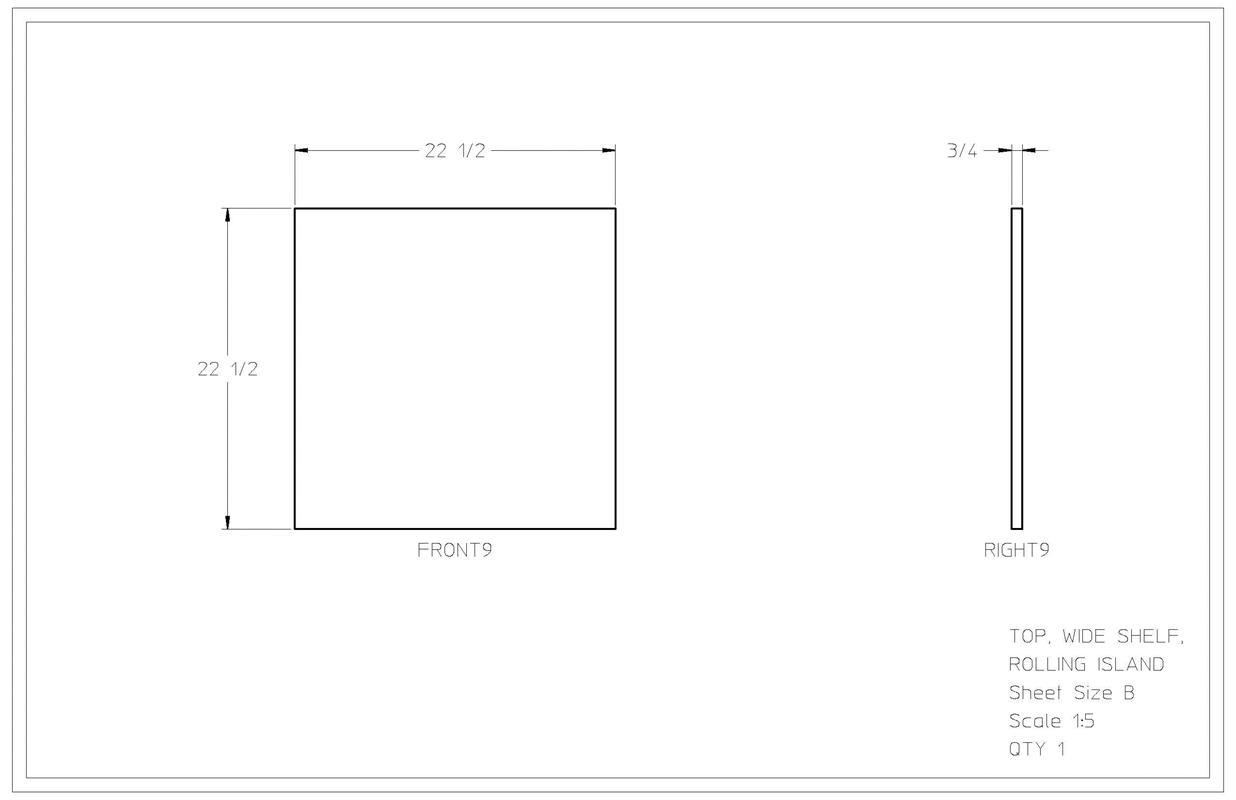
- 1 TOP, WIDE SHELF, ROLLING ISLAND , 3/4" X 22 1/2" X 22 1/2"
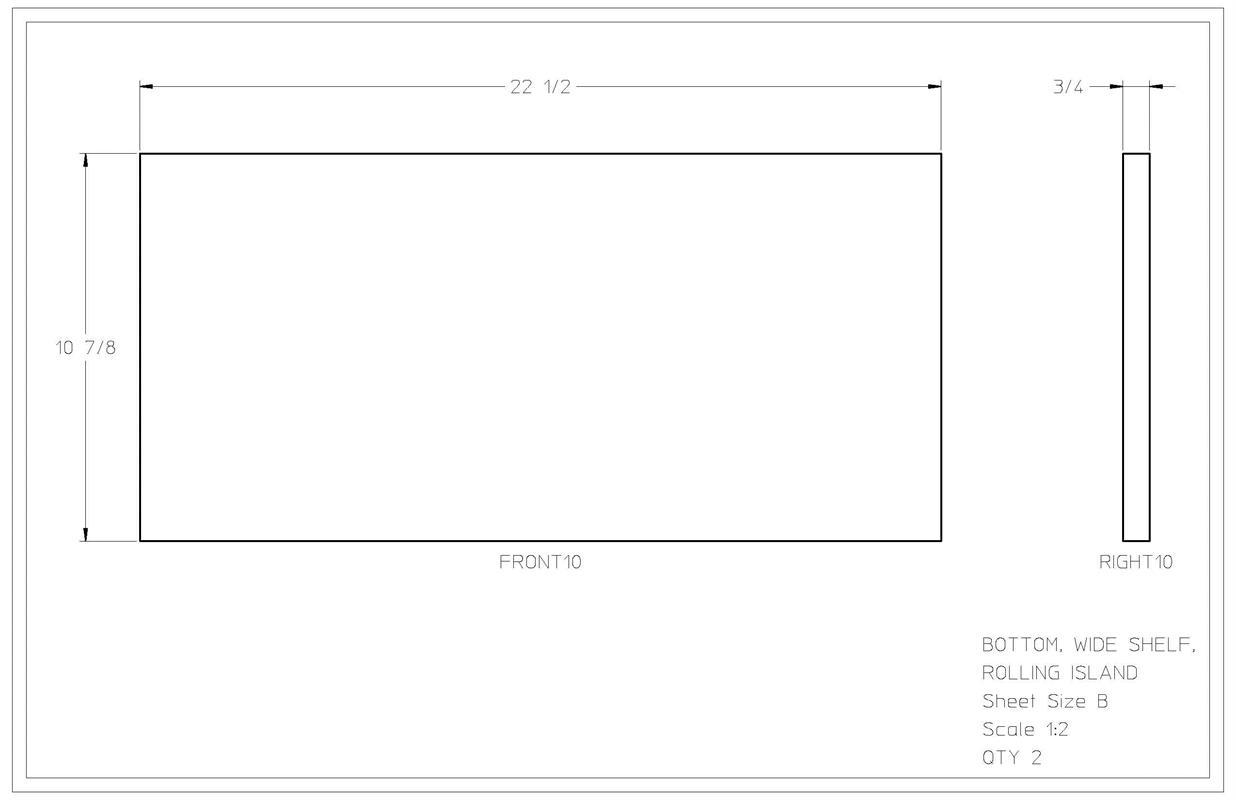
- 2 BOTTOM, WIDE SHELF, ROLLING ISLAND , 3/4" X 22 1/2" X 10 7/8"
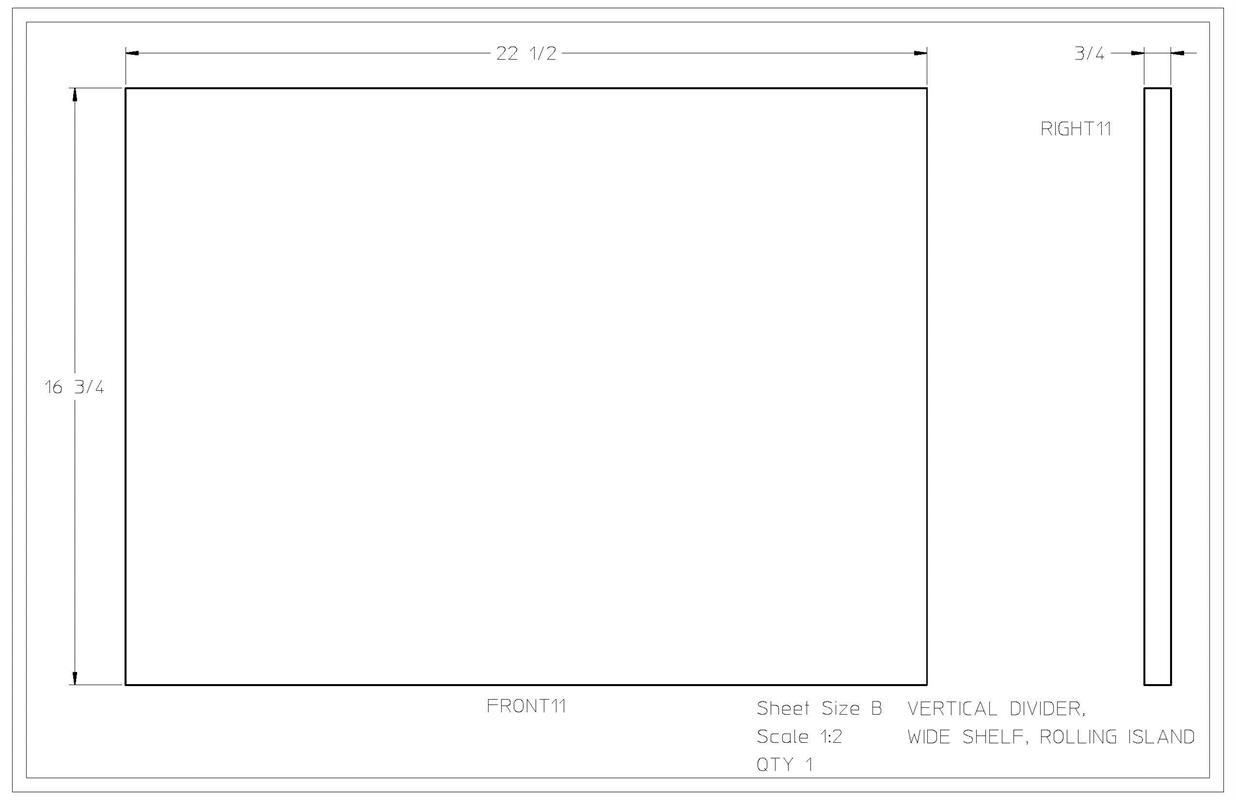
- 1 VERTICAL DIVIDER, WIDE SHELF, ROLLING ISLAND , 3/4" X 22 1/2" X 16 3/4"
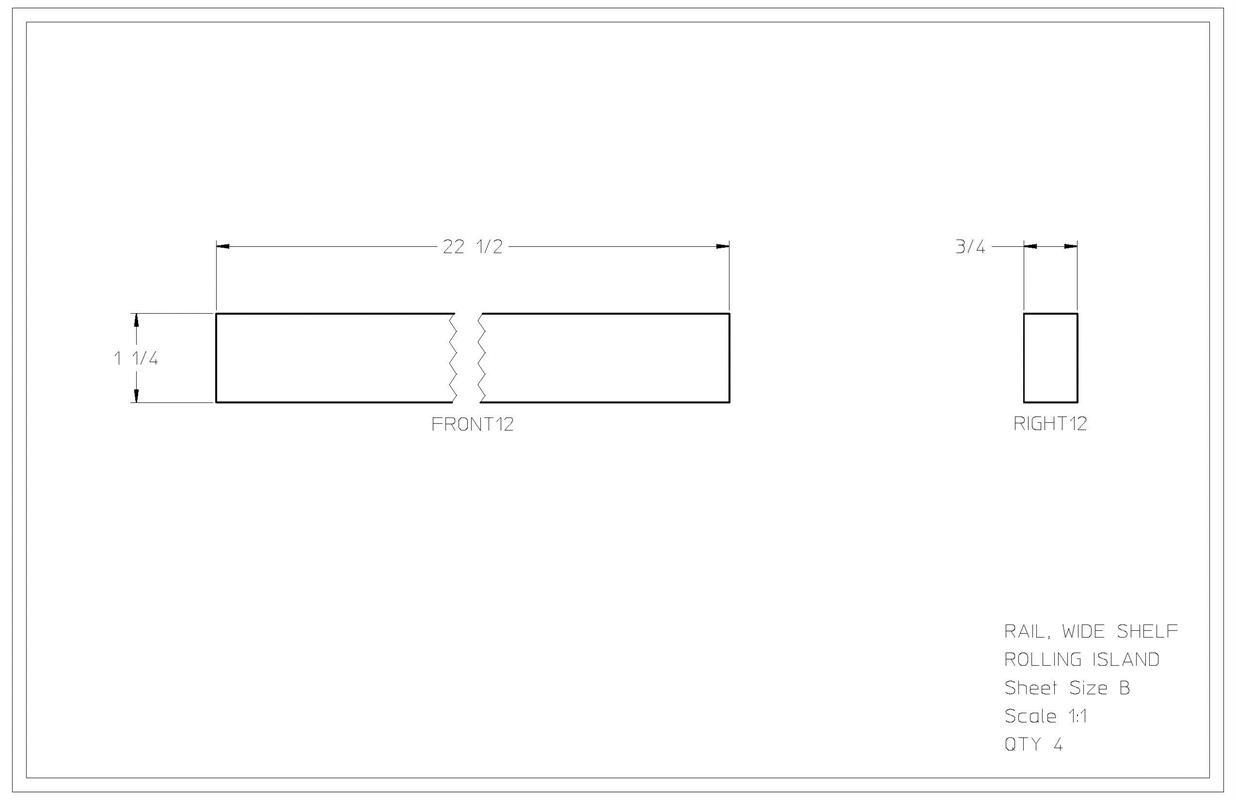
- 4 RAIL, WIDE SHELF, ROLLING ISLAND , 3/4" X 1 1/4" X 22 1/2"
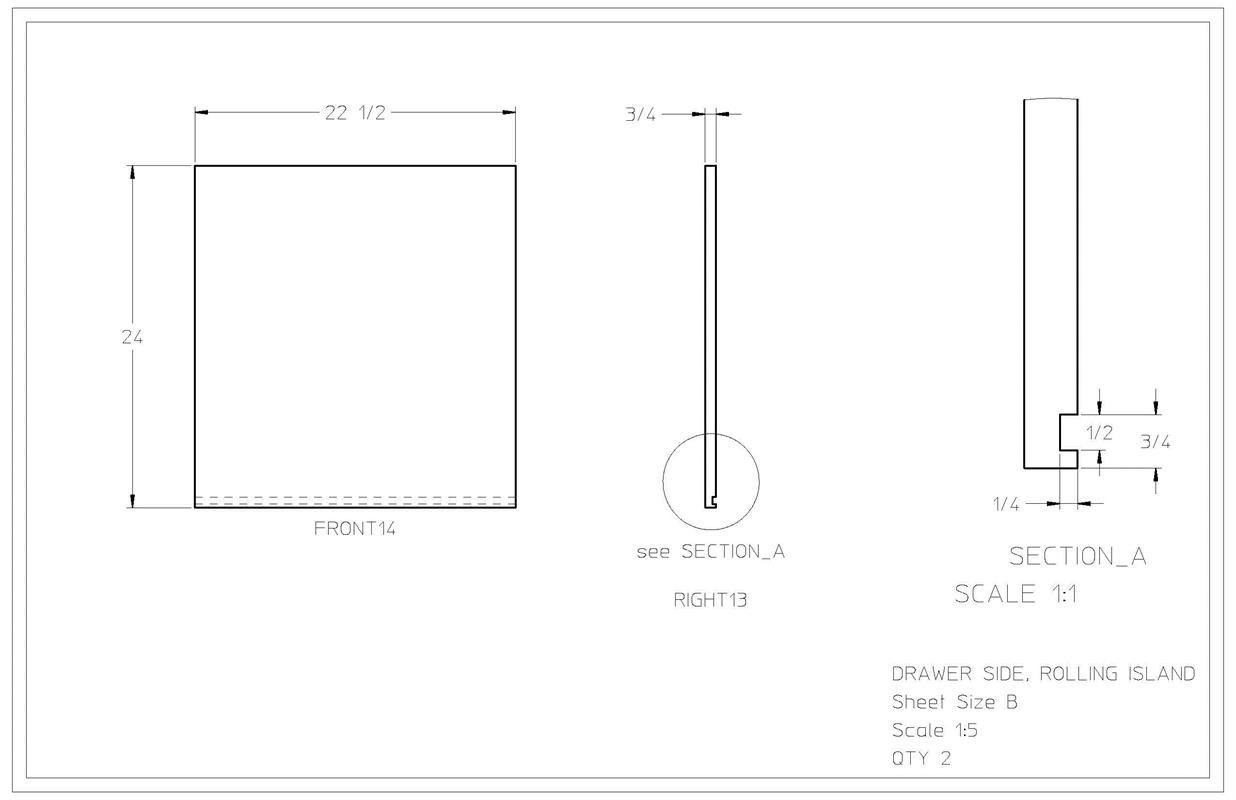
- 2 DRAWER SIDES, ROLLING ISLAND , 3/4" X 24" X 22 1/2"
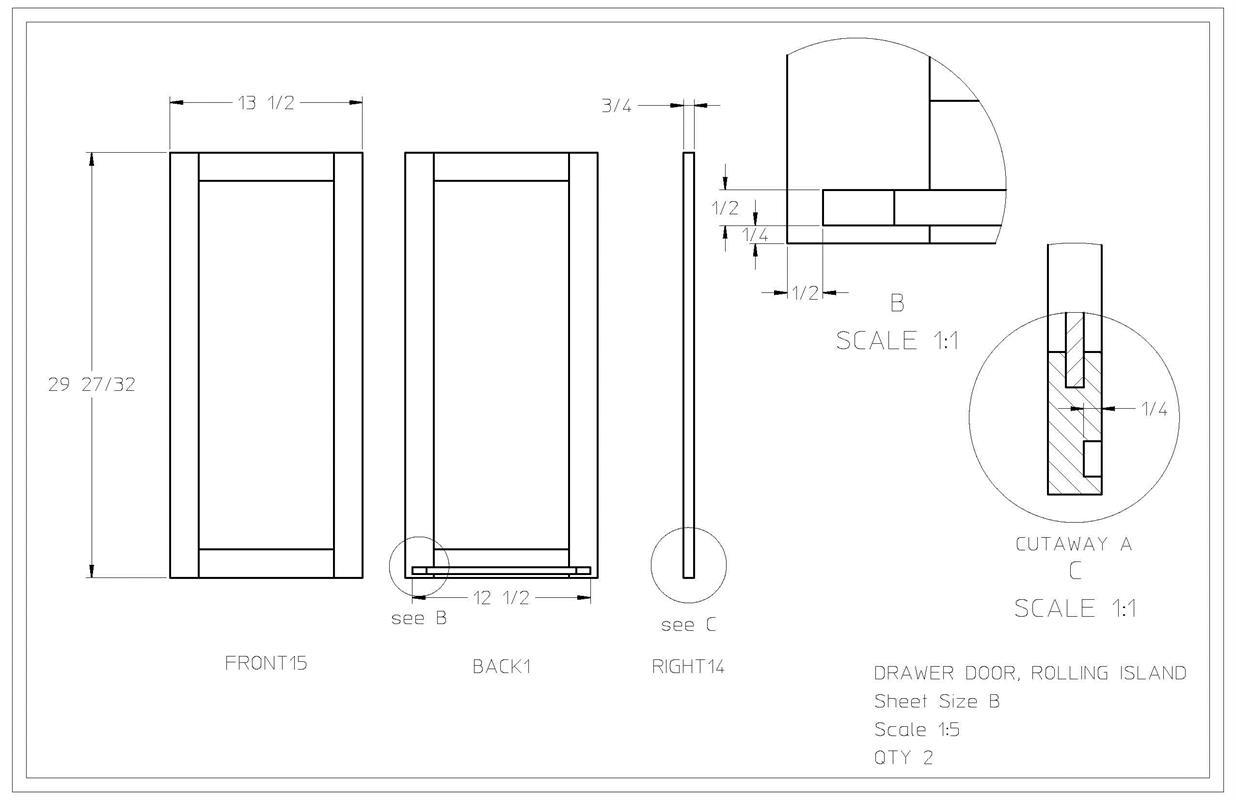
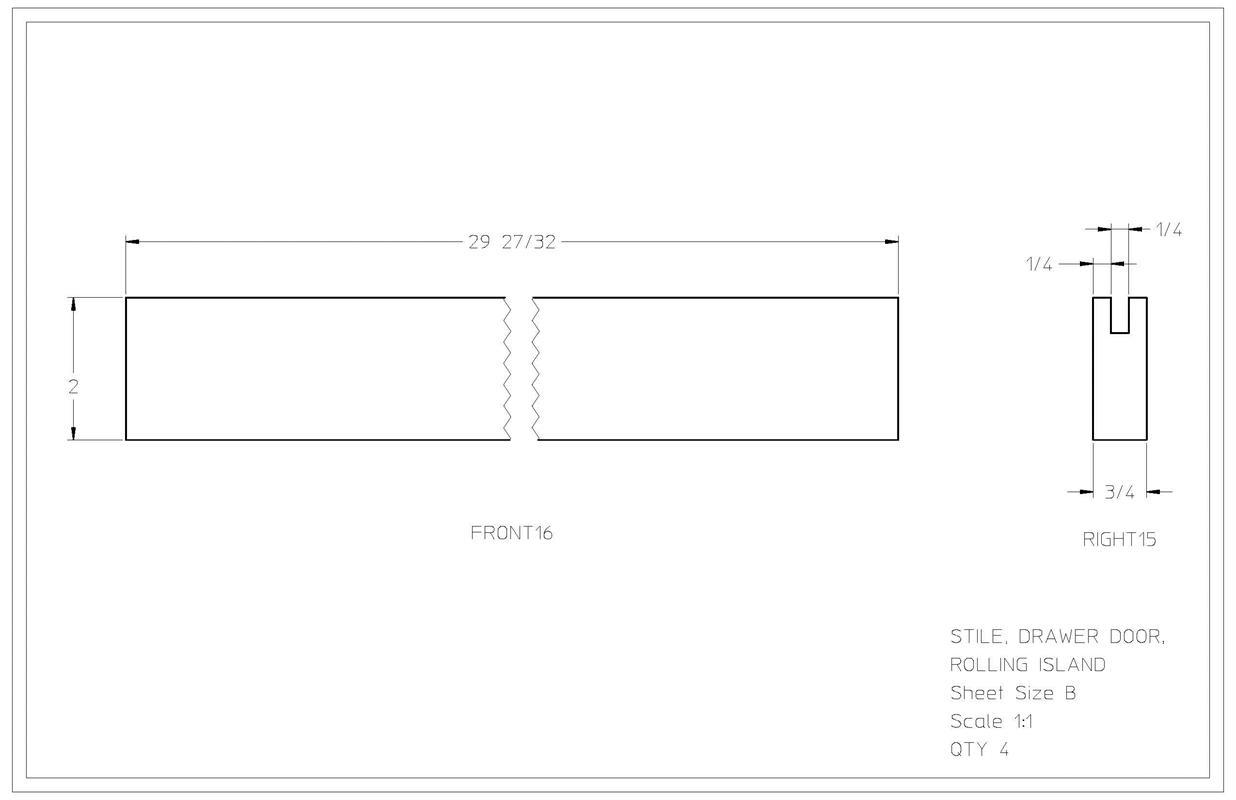
- 4 STILE, DRAWER, ROLLING ISLAND , 3/4" X 2" X 29 27/32"
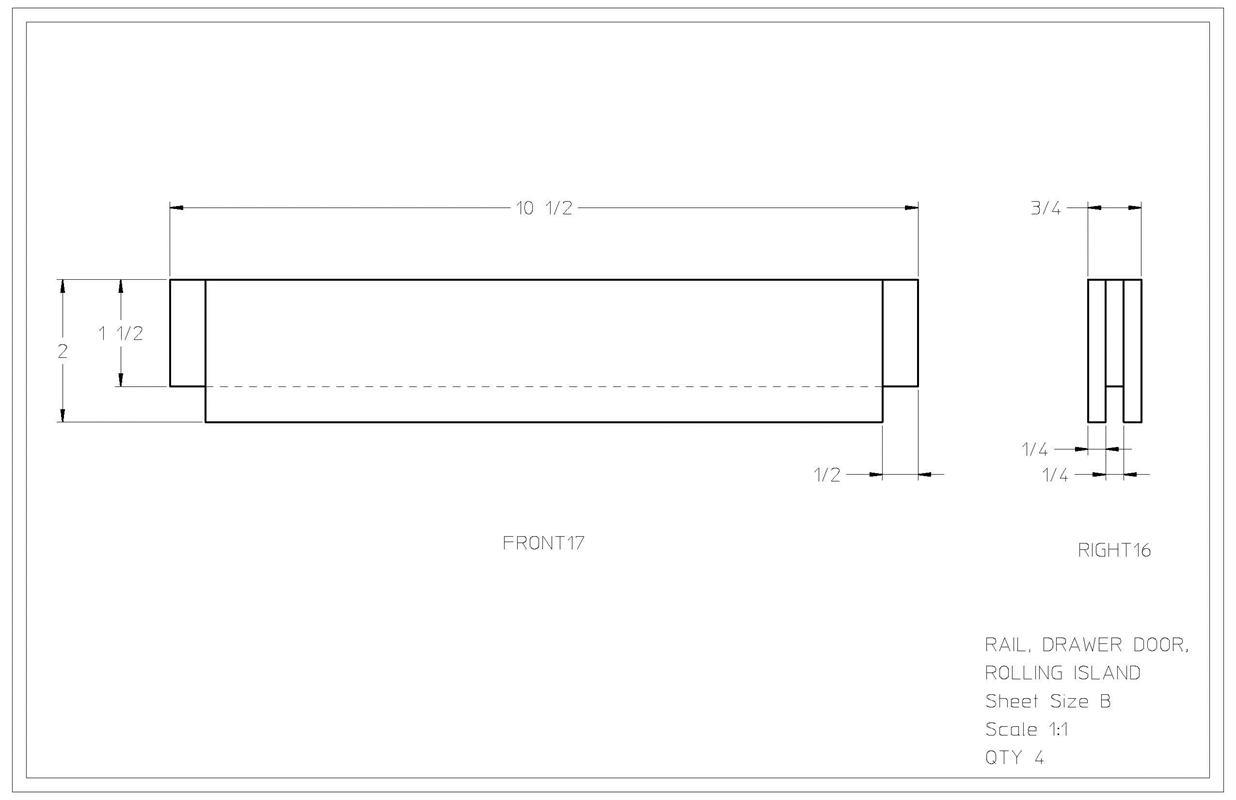
- 4 RAIL, DRAWER, ROLLING ISLAND , 3/4" X 2" X 10 1/2"
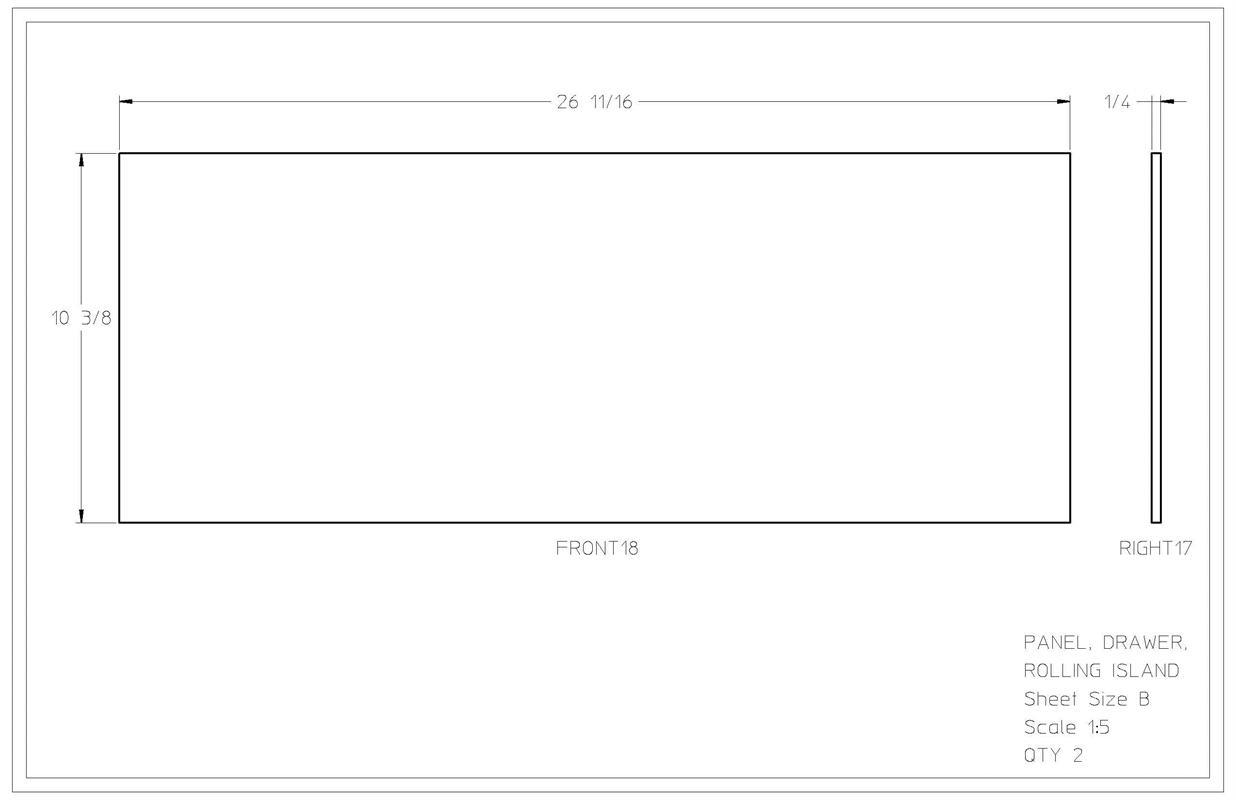
- 2 PANEL, DRAWER, ROLLING ISLAND , 1/4" X 26 11/16" X 10 3/8"
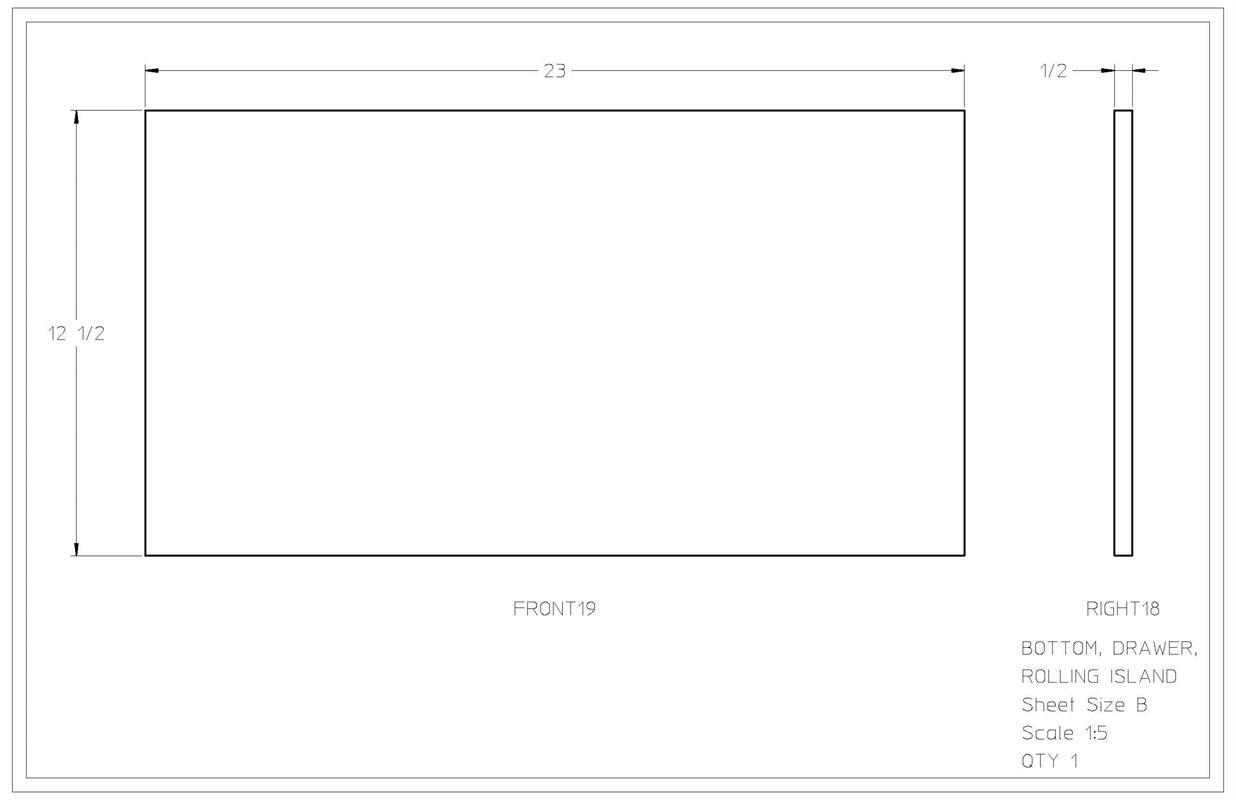
- 1 BOTTOM, DRAWER, ROLLING ISLAND , 1/2" X 23" X 12 1/2"

Directions
-
Review plan
Come on over to our blog for the full post and more reveal pics! >> http://realitydaydream.com/2016/02/custom-diy-rolling-kitchen-island.html
Take a look at the plans to help map your way through the project. You Can download a PDF of the plans in the EXTRA section
-
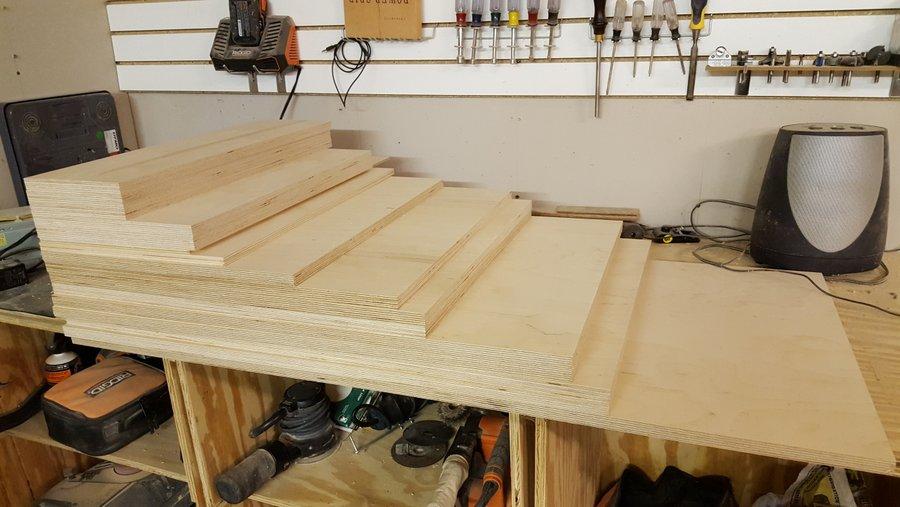
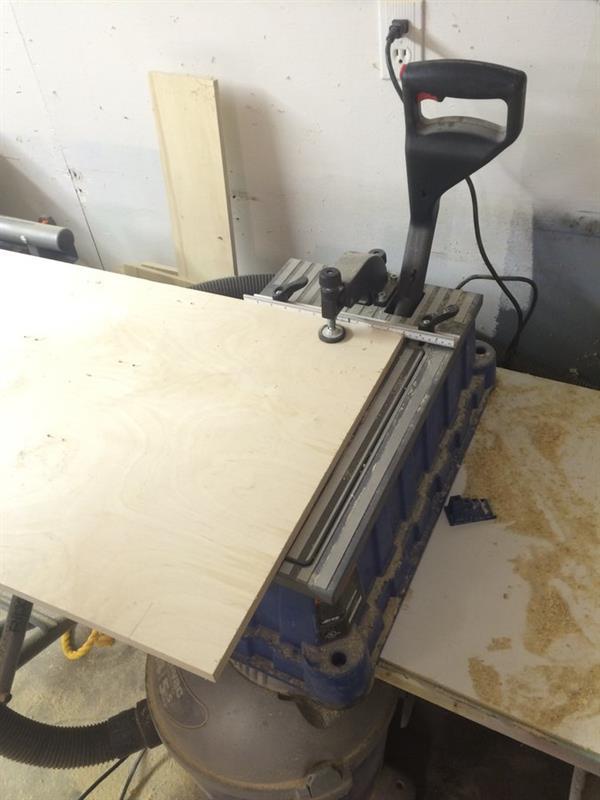
Cut sheet goods
Cut the sheet goods, you will notice on the print that we capped most things with a 1/2" of poplar. If you don't want to do this it is fine but you will need to make some adjustments to the cut diagram.
-
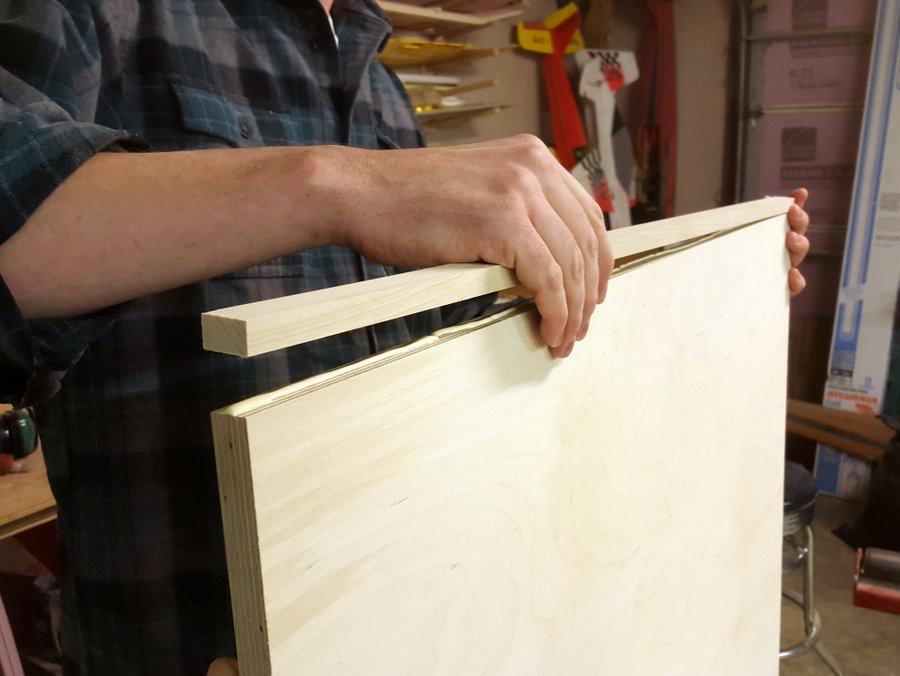
Cap plywood
Cut 1/2" Stripes of Poplar and cap required pieces of plywood.
-
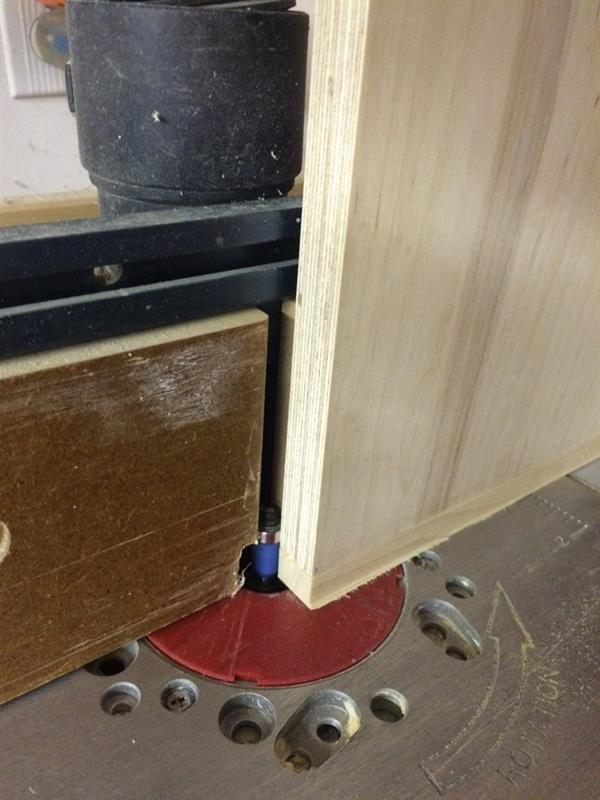
Flush caps
Using a flushing bit on a router, flush trim all the poplar caps.
-
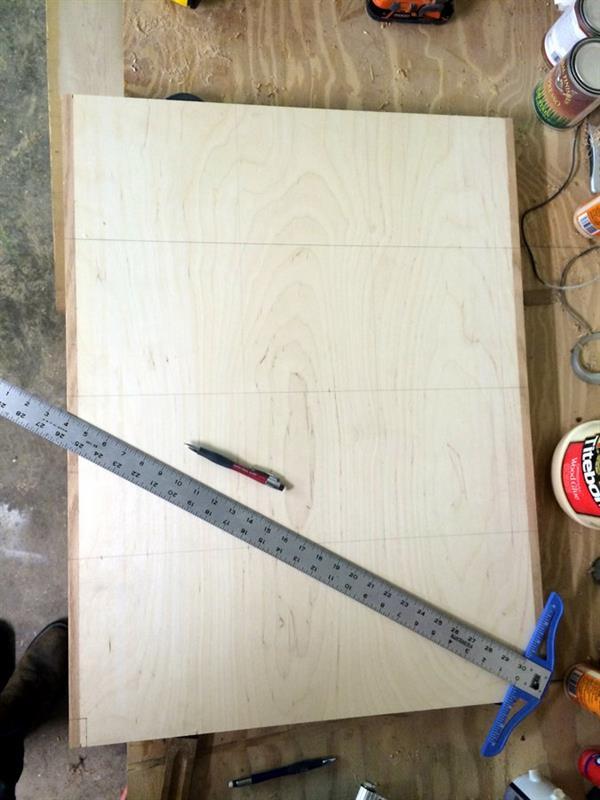
Layout drilling locations
Using a "T" square, mark locations for drilling per drilling instructions in the prints.
-
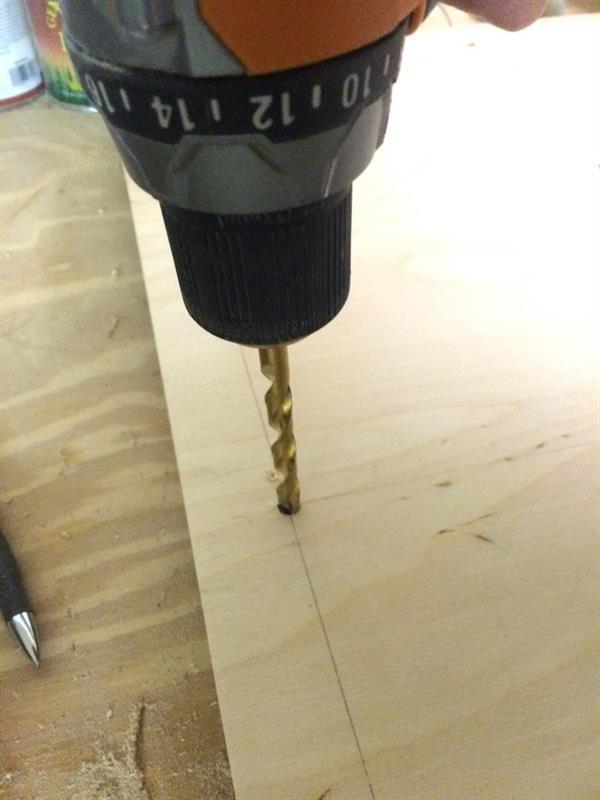
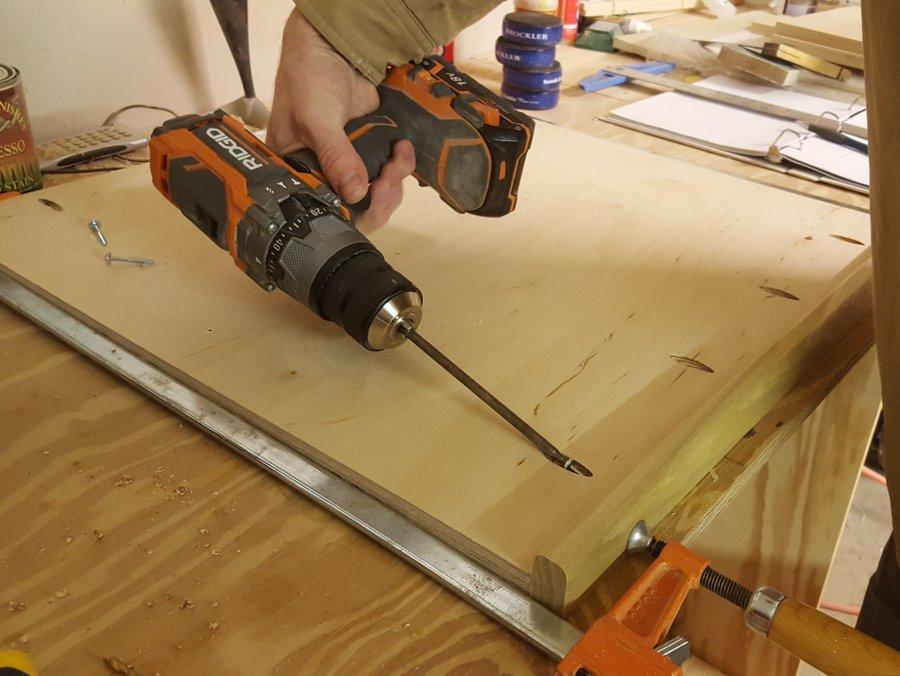
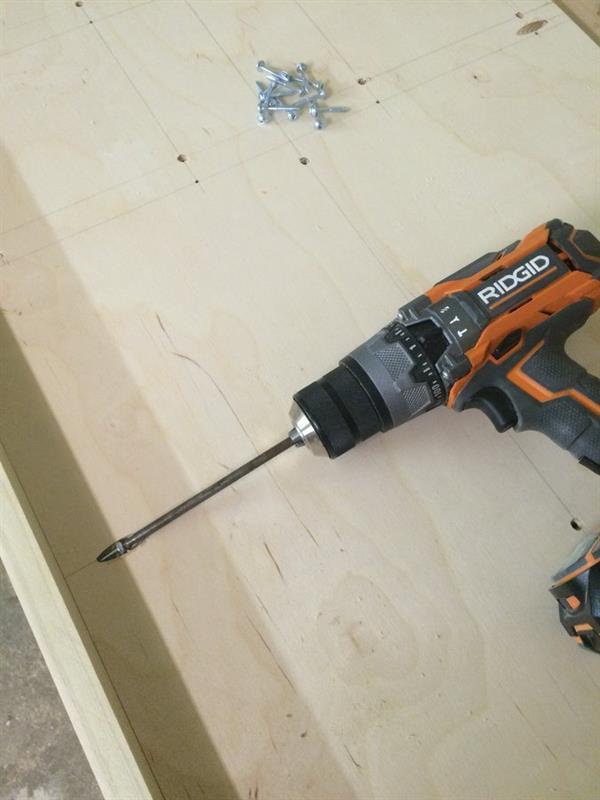
Drill through holes
Drill the through holes and counterbores per prints.
-
Drill pocket holes
We uses a Kreg Foreman to drill the required pocket holes.
-
Cut fronts for wide shelves
Cut the four rails for the wide shelves. Then route the bottom edges with a 1/4" round over bit.
-
Attach the shelf fronts
Glue and screw the fronts onto the shelves. You may need to clean up the ends with a table saw.
-
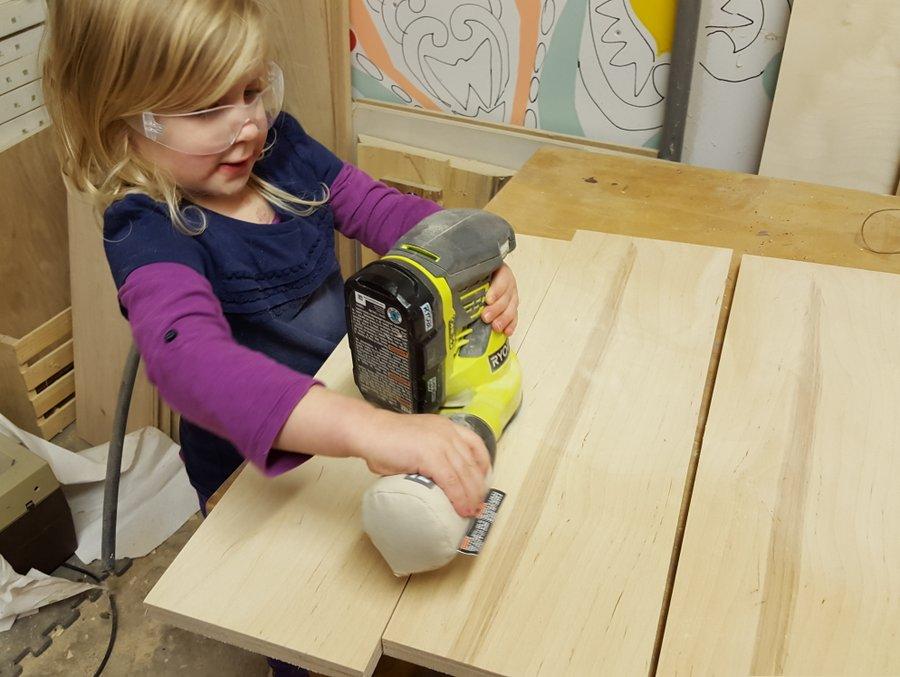
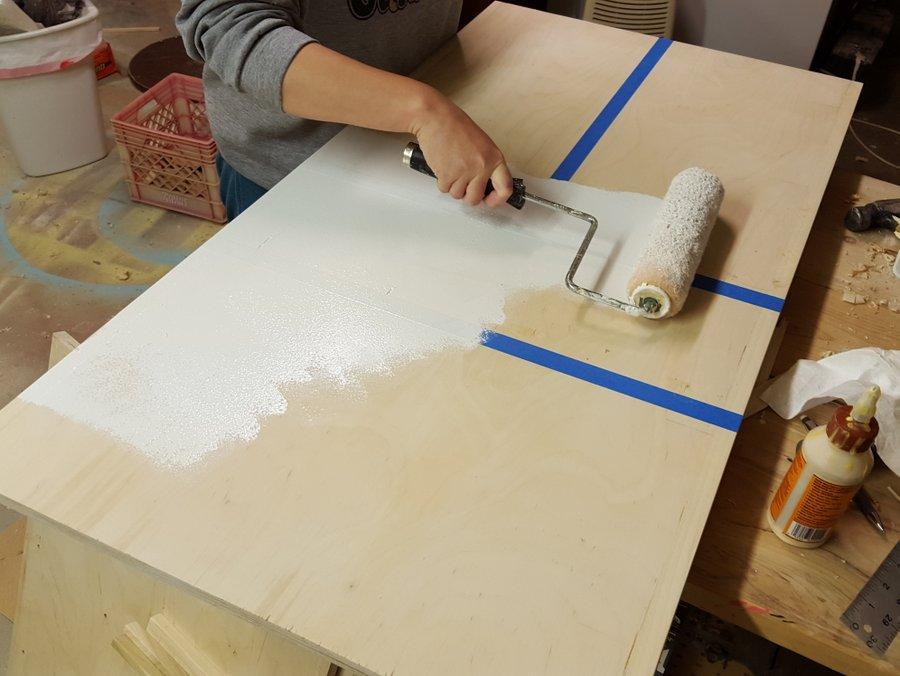
Sand
We chose to sand and prime/paint prior to assembly. If you have helpers this is a great project for them.
-
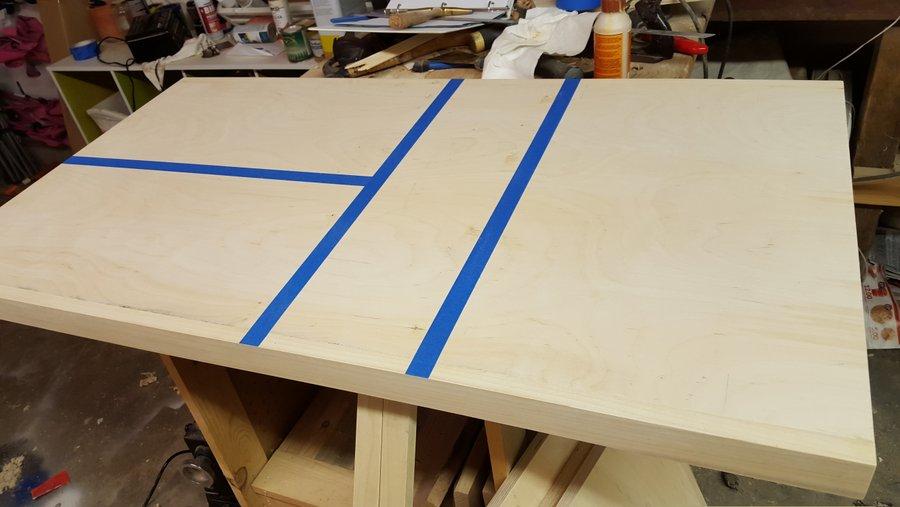
layout
Mark off where all the boards go using a "T" square and measuring out 3/8" both ways from the drilling locations you marked out earlier.
-
Tape
Tape off where the boards will be going.
-
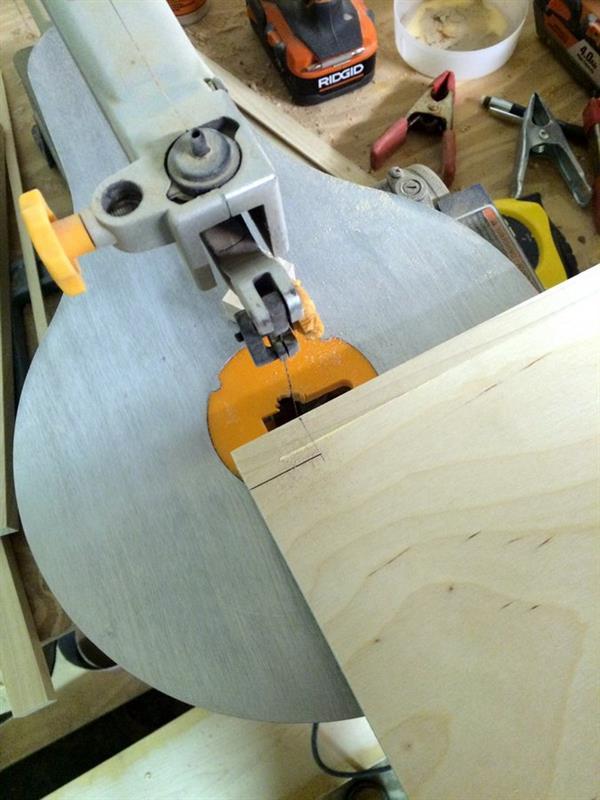
Cut Notches
Cut notches per the print out of the two vertical dividers.
-
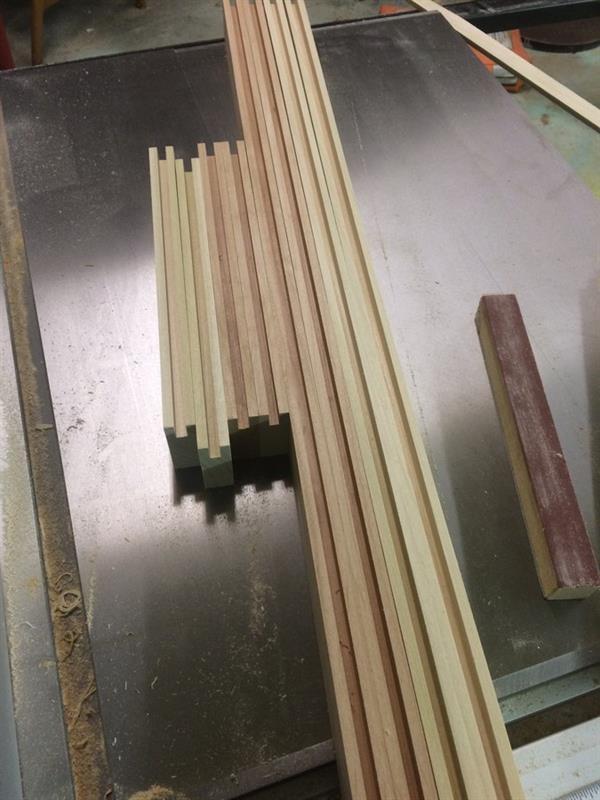
Stiles and Rails
Cut the stiles and rails out of poplar.
-
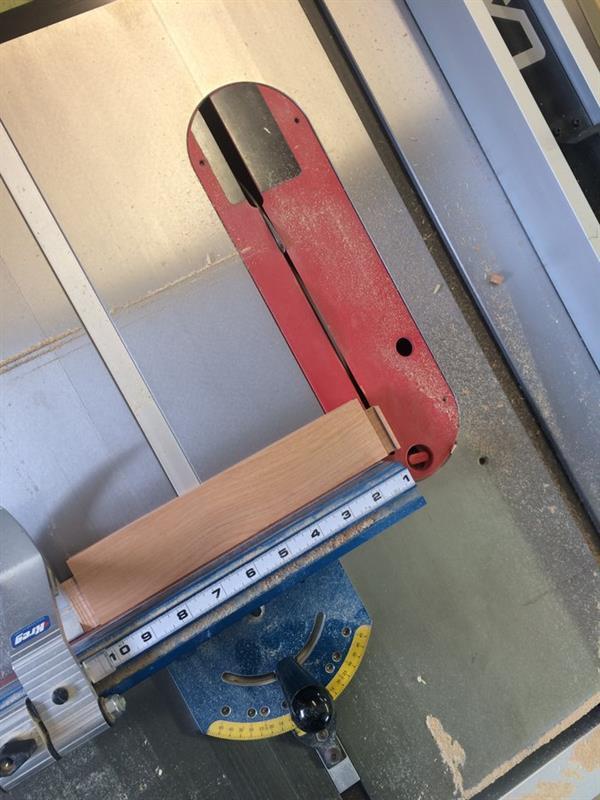
Stub Tenon
Cut the Stub tenons with a Precision miter gauge.
-
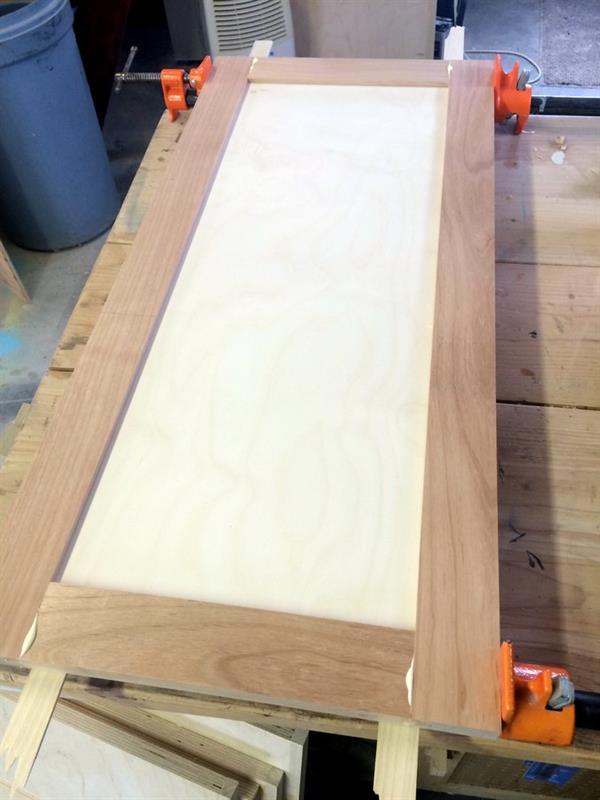
Glue drawer fronts
Glue stub tenons and clamp drawer fronts.
-
Prime
Prime parts
-
Paint smaller areas
paint smaller, hard to reach areas like the narrow shelves.
-
Cut the Upper and Lower Rails
Cut the Upper and lower Rolling island rails.
-
Attach Lower Rail
Attach the lower rails to the bottom shelf. If either of the rails overhang you will want to trim them up on the table saw.
-
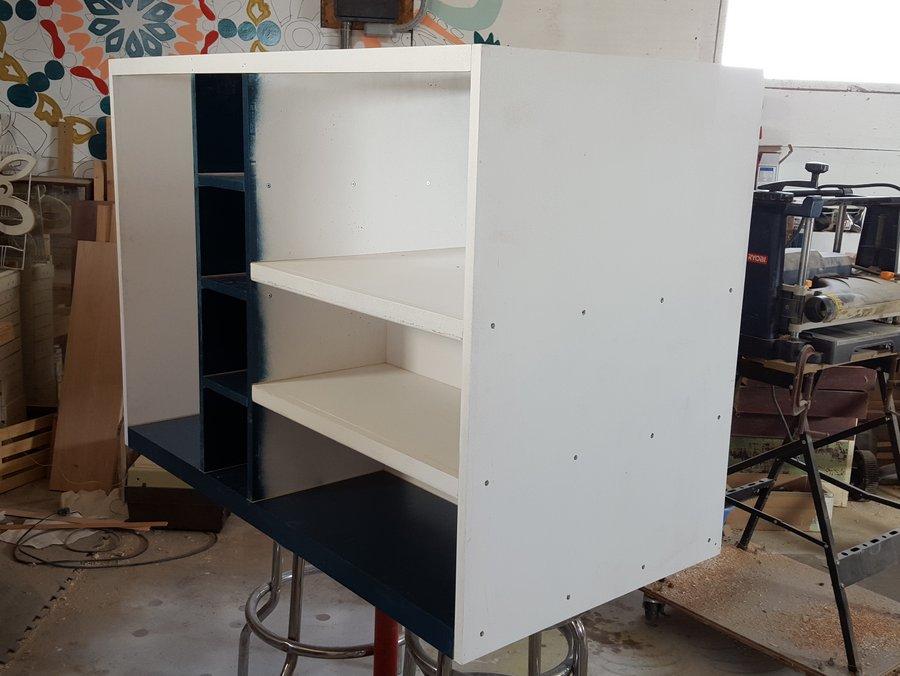
Assemble
Remove the tape, and start to assemble.
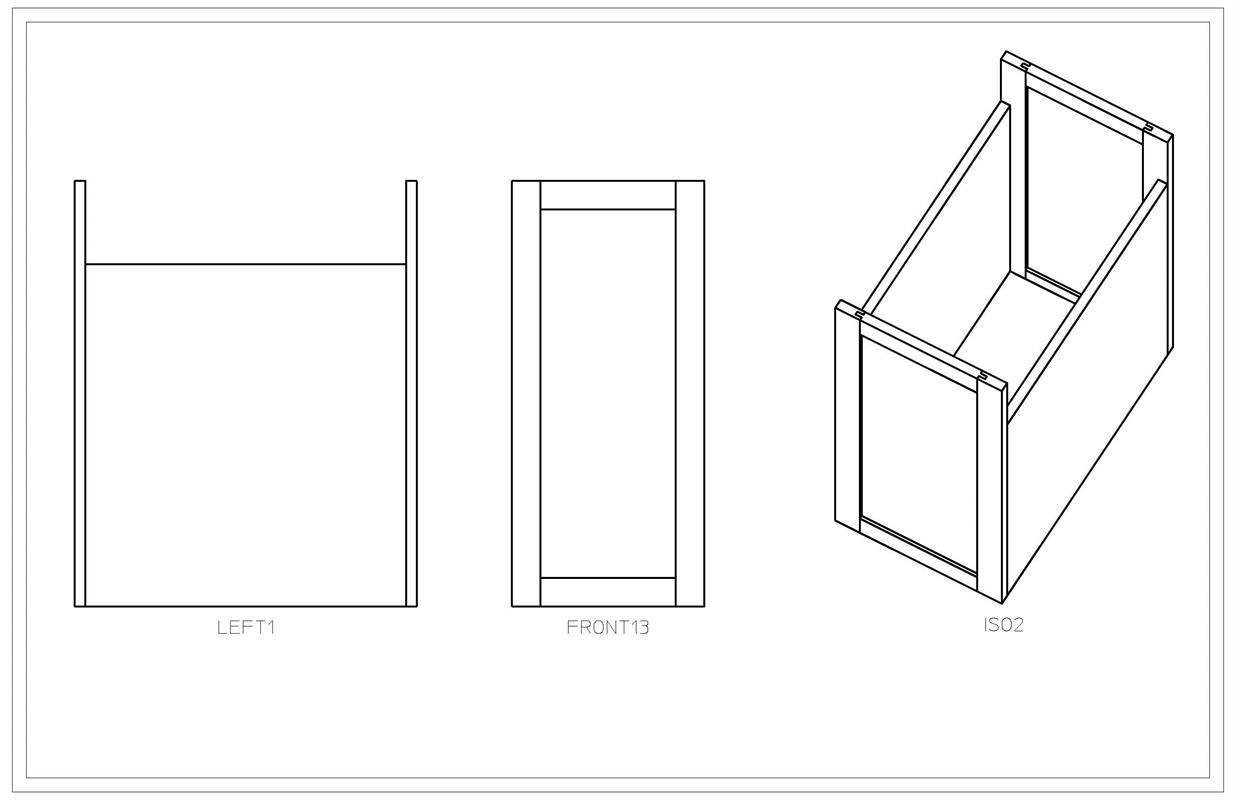
we started with the narrow shelves. Assembling them to the left vertical divider.
Then we attached the left side the the bottom of the rolling cabinet.
Next we attached the wide shelves and the vertical divider between them.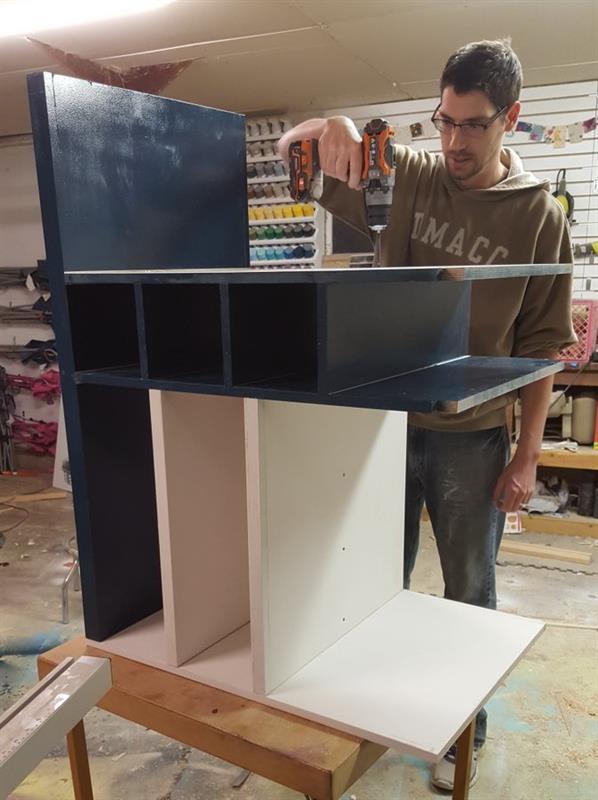
-
Assemble
Then attach the right side and the two top rails.
-
Paint
Paints
-
Drawer
Cut a 1/2" groove in the drawer sides and drawer fronts.
-
Assemble drawer
Assemble drawer. We used a teflon tape on the bottom of the drawer to reduce friction.
-
Add Butcher Block Top
The choices for tops on this rolling island are virtually endless. We will be posting about ours sometime in the future at www.thesawdustmaker.com.
-
Wheels
using a 1" thick piece of wood as a spacer attach the 4 wheels to make the cart mobile.