

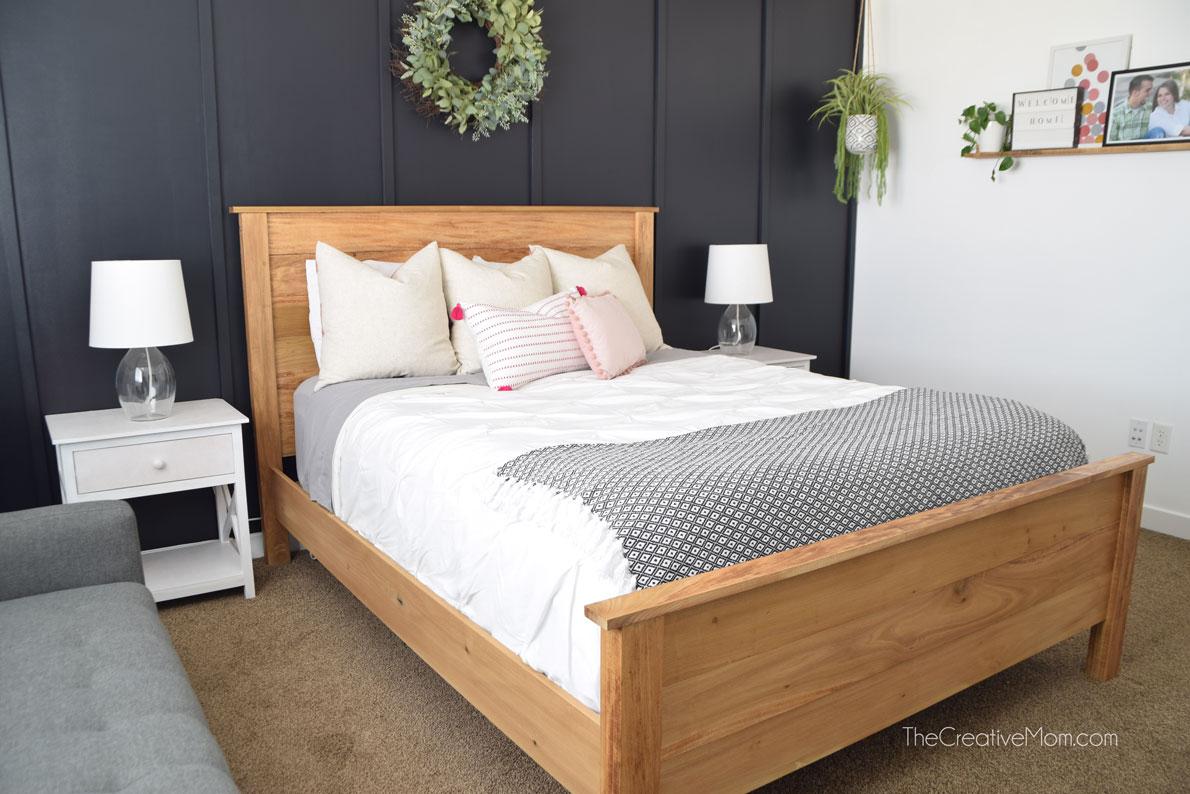
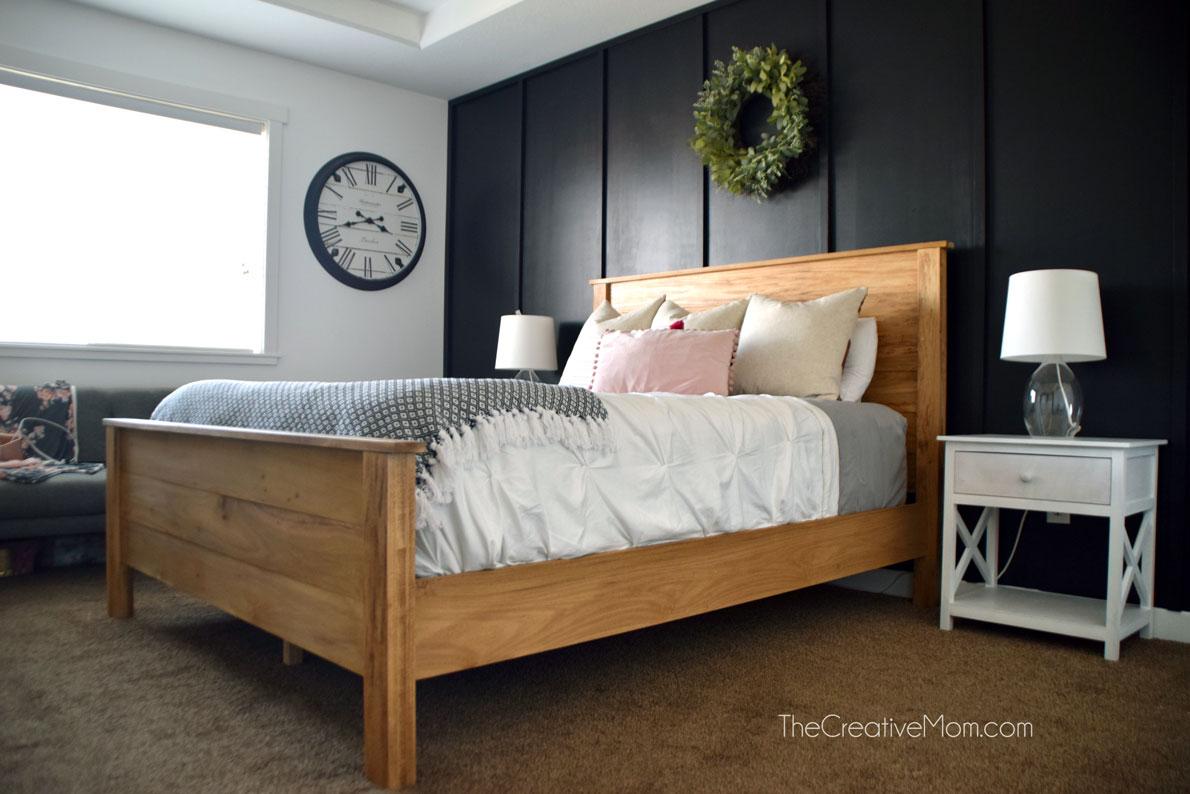


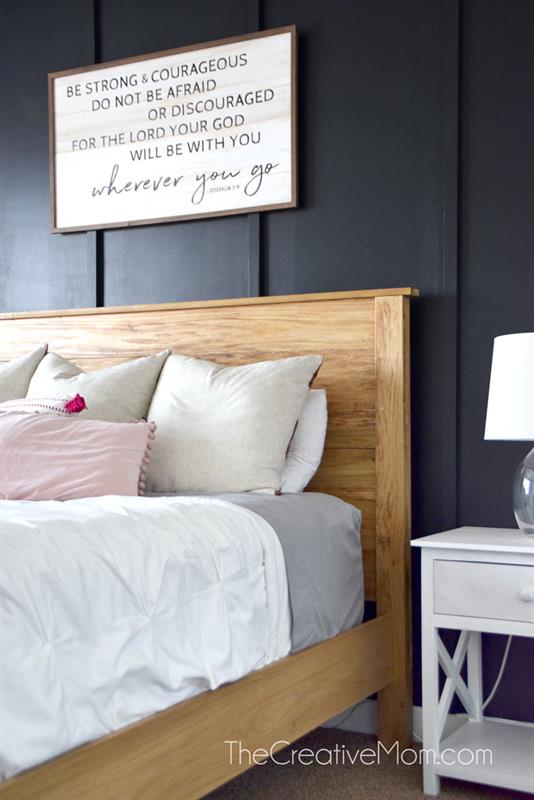
These plans are for a modern farmhouse queen sized bedframe- including headboard, footboard, side rails, and supports. This plan is on the advanced side, as it does require some glue ups. But it is a very quick build, and with all square joinery, it is actually rather simple.
Tools
Kreg Tools


Other Tools
-
Miter Saw

-
Thickness Planer
-
Tape Measure
Materials
Wood Products
- 6 Board , 1x4 , 96"
- 2 Board , 1x3 , 72"
- 8 Board , 1x6 , 72"
- 2 Board , 1x8 , 96"
- 5 Board , 2x2 , 72"
- 2 Board , 2x2 , 96"
Hardware & Supplies
- 50 1 1/4" pocket hole screws
- 1 Bed Rail Hardware Set
- 20 2 1/2" wood screws
- 20 1 3/4" wood screws
- 1 Wood Glue
Directions
-
Build Legs
Start with 4- 1x4 boards. Two will be 50" and two will be 23 1/2". You will need to make two sets of legs, two for the headboard, and two for the footboard.
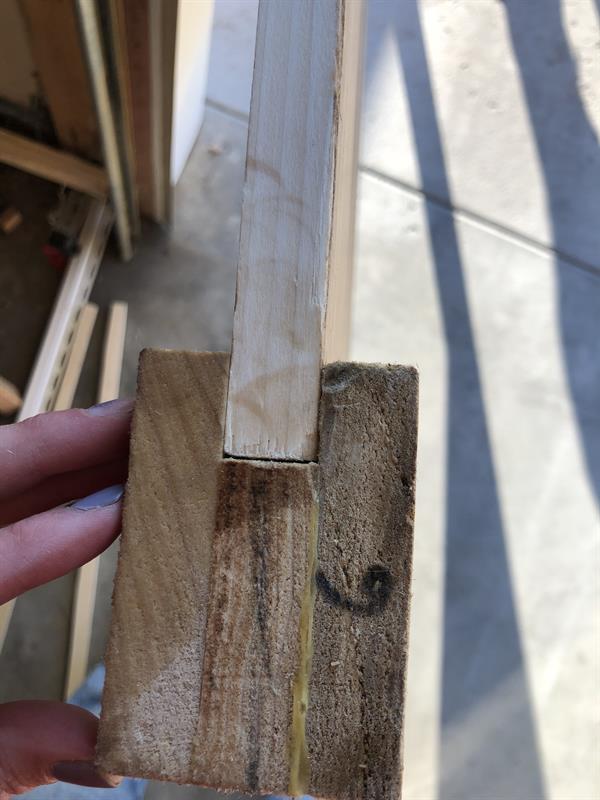
Using a circular saw, jigsaw, or table saw, cut a notch out of each leg. See plans for dimensions.
These 4 boards will each be sandwiched between two whole boards, so they won't be visible. But they will offer stability and support for the headboard and footboard.
***** Please note: If you wish to avoid gluing up your legs, you could use a post, cut to size, with a 3/4" dado instead. *****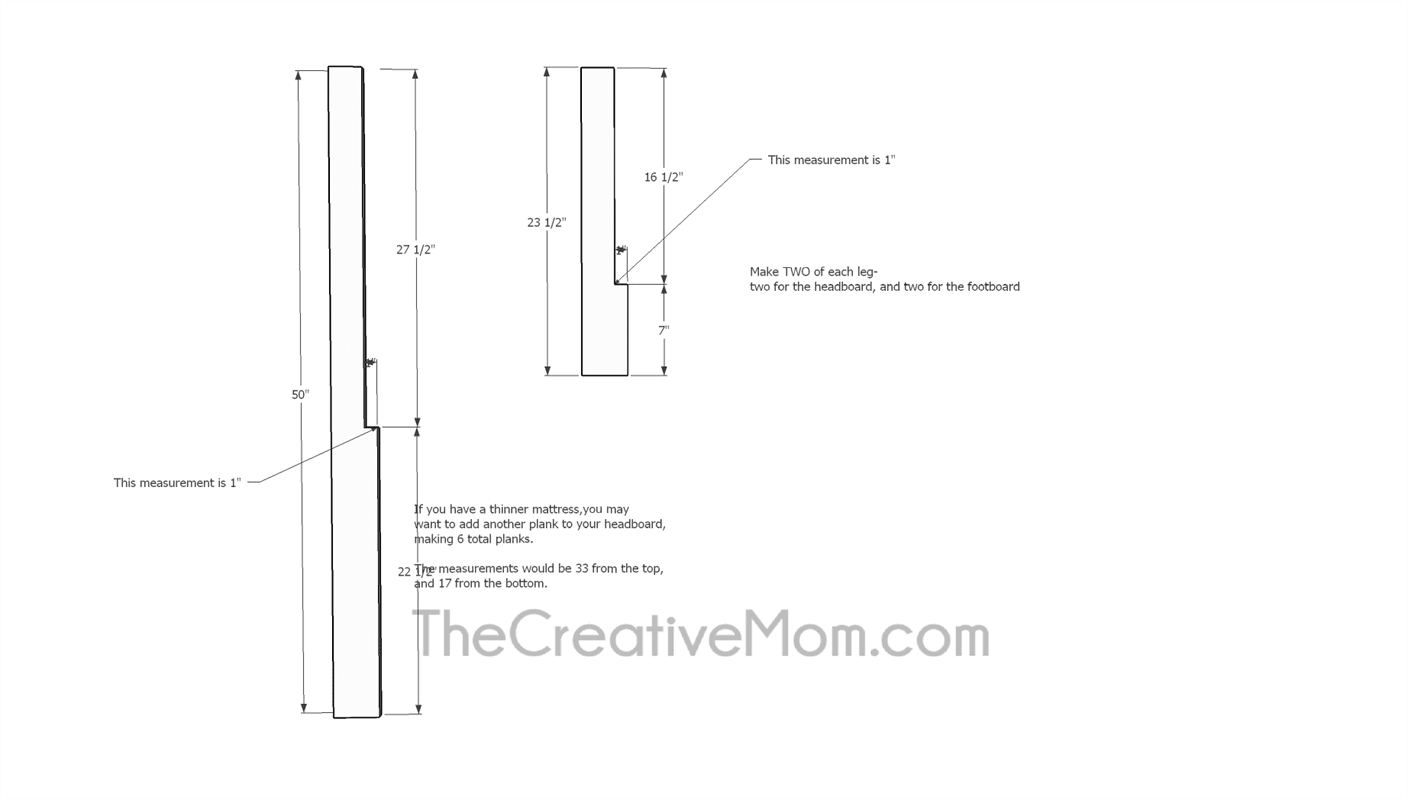
-
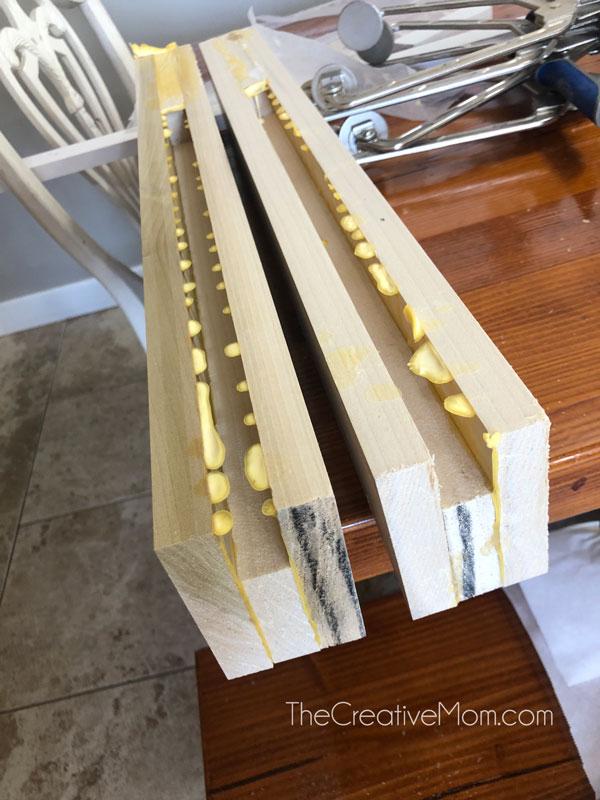
Glue up Legs
Cut 4- 50" 1x4's, and 4- 23 1/2" 1x4's.
Take the leg you just cut with a notch, and sandwich it in between these boards. Using plenty of wood glue and strong clamps, glue up the legs.
Be careful not to get an excess amount of glue in the notched out part of the leg. You will be sliding your planks into this space later, so you want it to be free from any glue build-up.
Remember, you will need 2 of each leg- 4 legs total.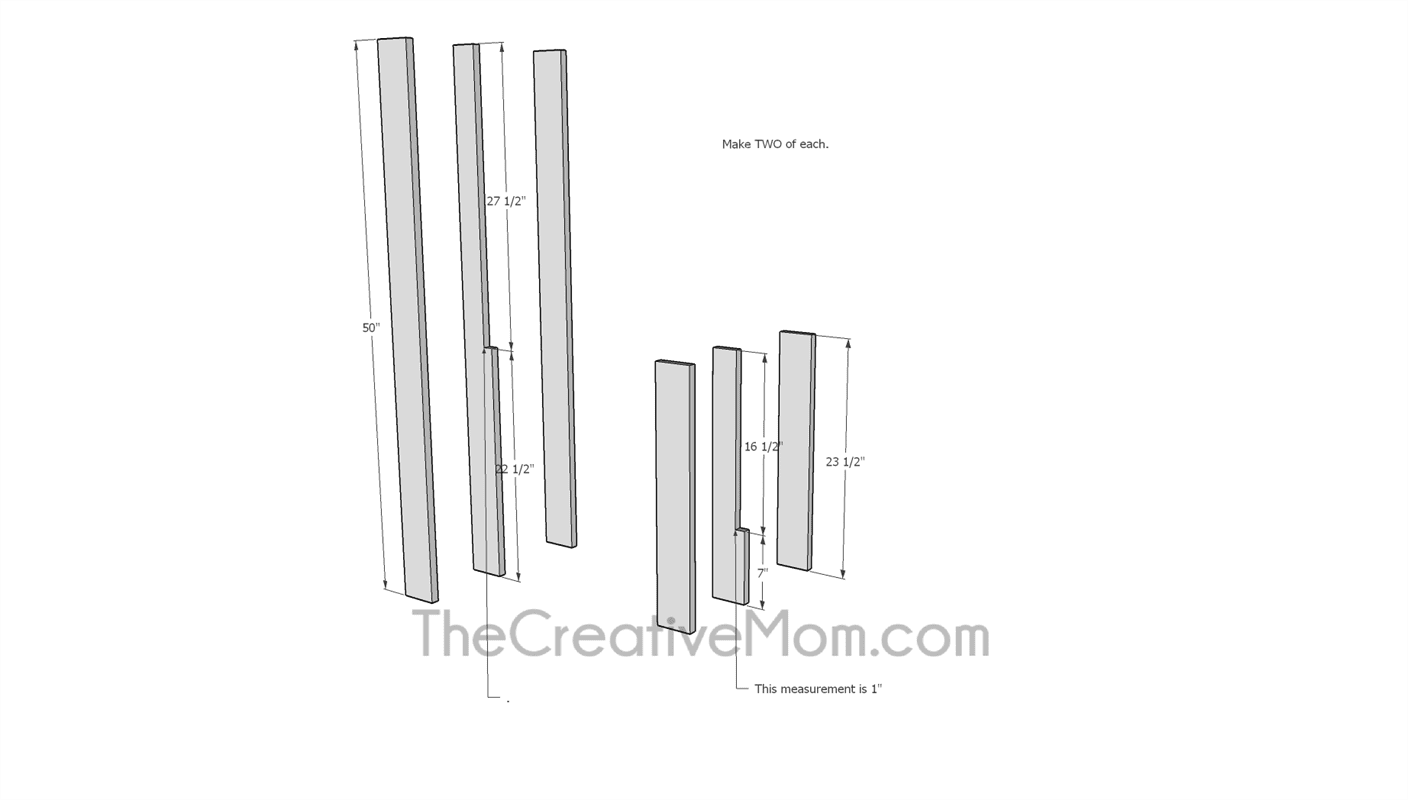
-
Finish Legs
Let the legs dry and then sand or plane the legs down until they are square and even. Make sure to remove any excess glue from the notched out area.
-
Legs
You should now have a total of 4 legs, ready to go.
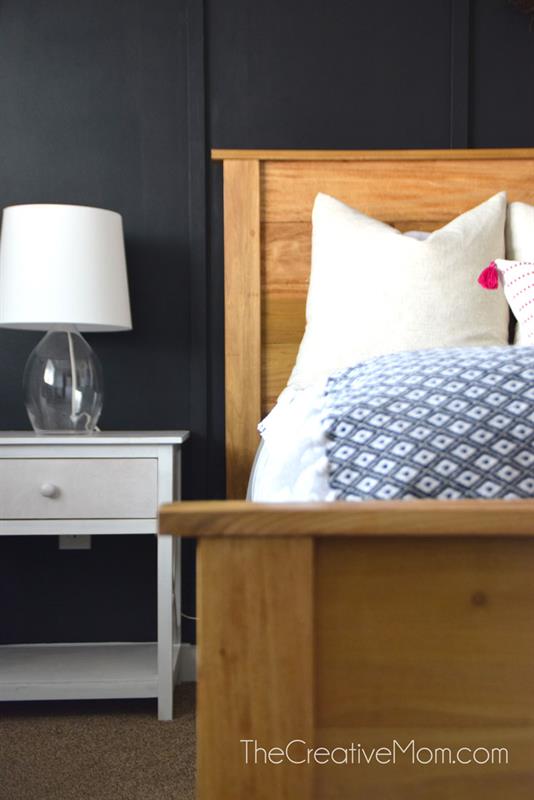
Please note: You can paint or stain the bed pieces at any time. I recommend staining or painting each piece of the bed as you go, and especially before assembly.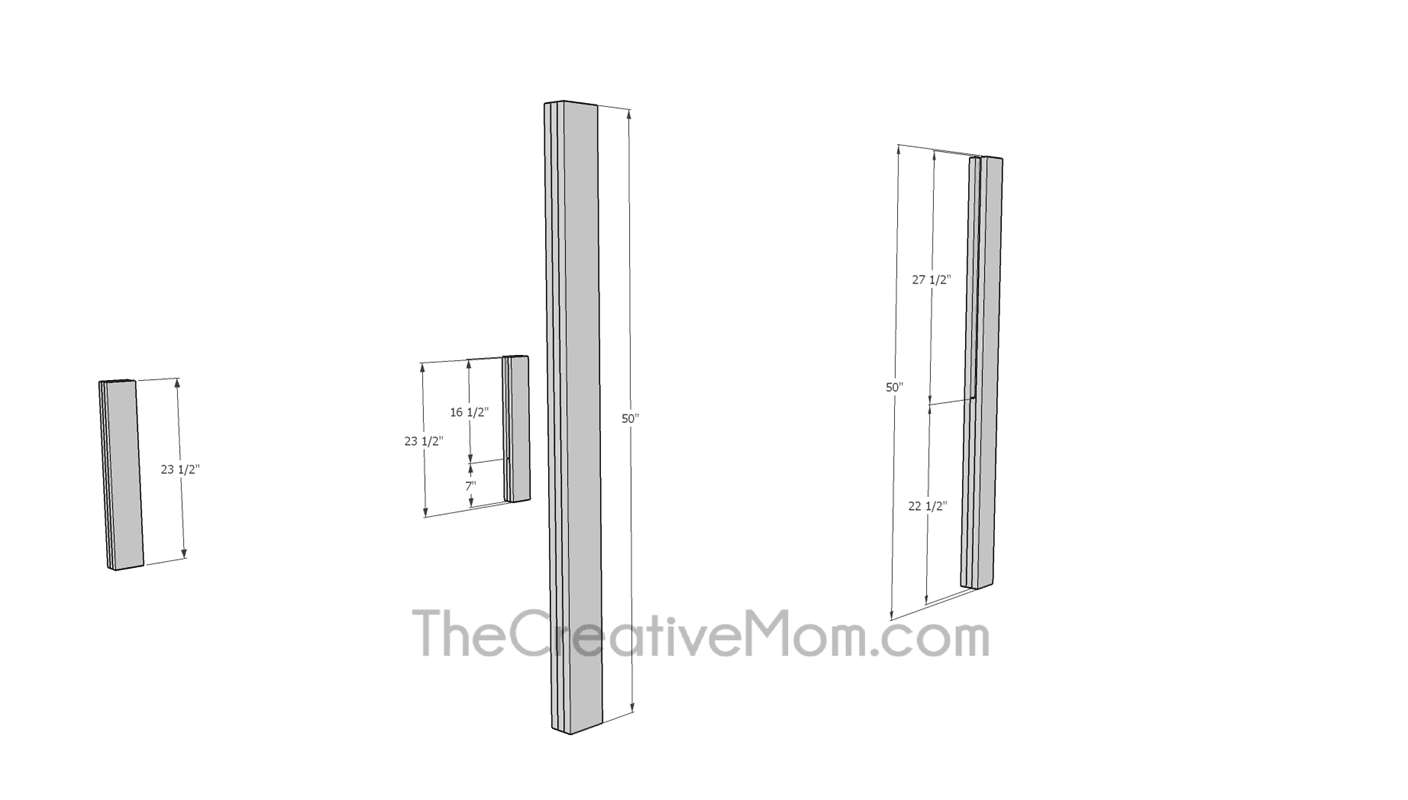
-
Add Planks
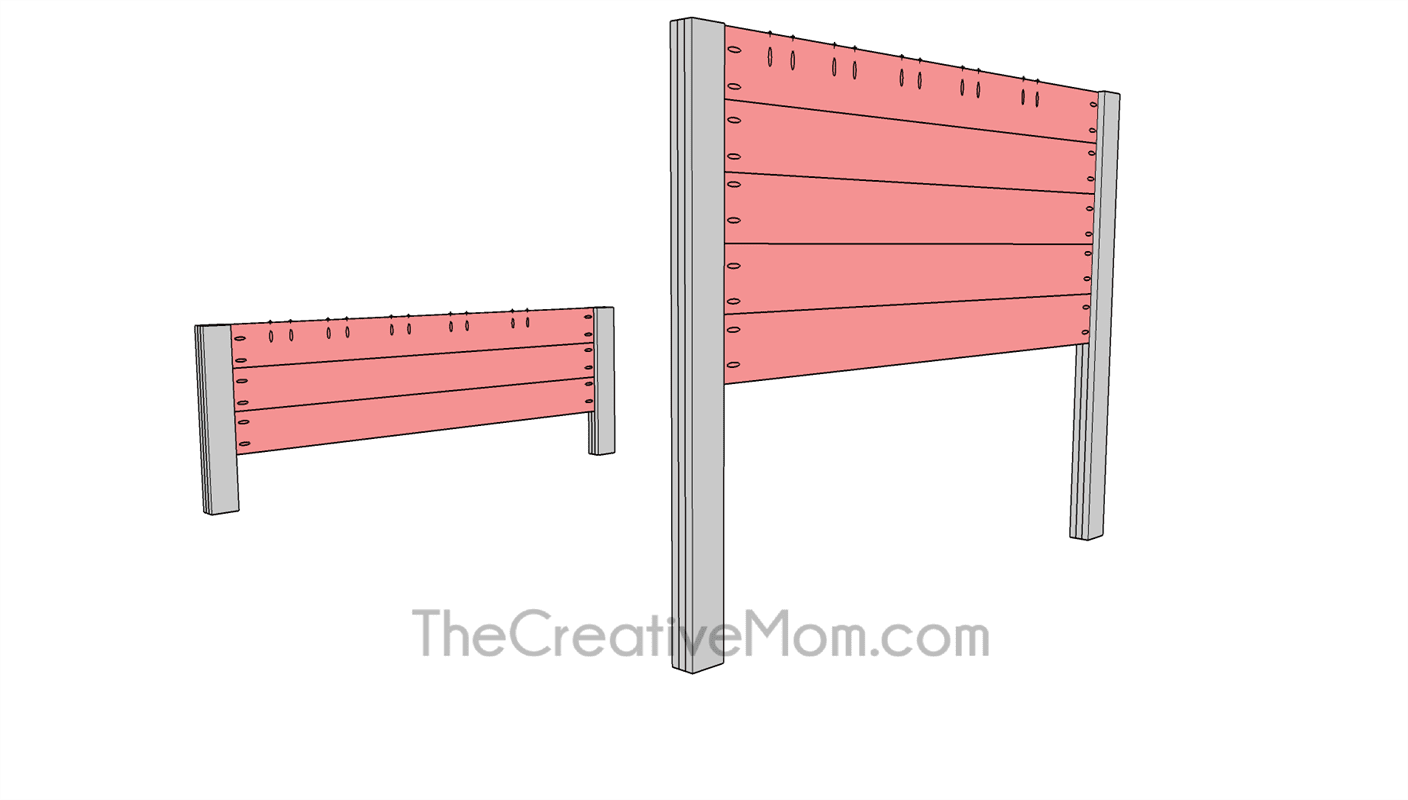
Cut 8- 62" 1x6 boards. Drill pocket holes on each end of each board.
Two of the planks will have pocket holes drilled on one edge as well.
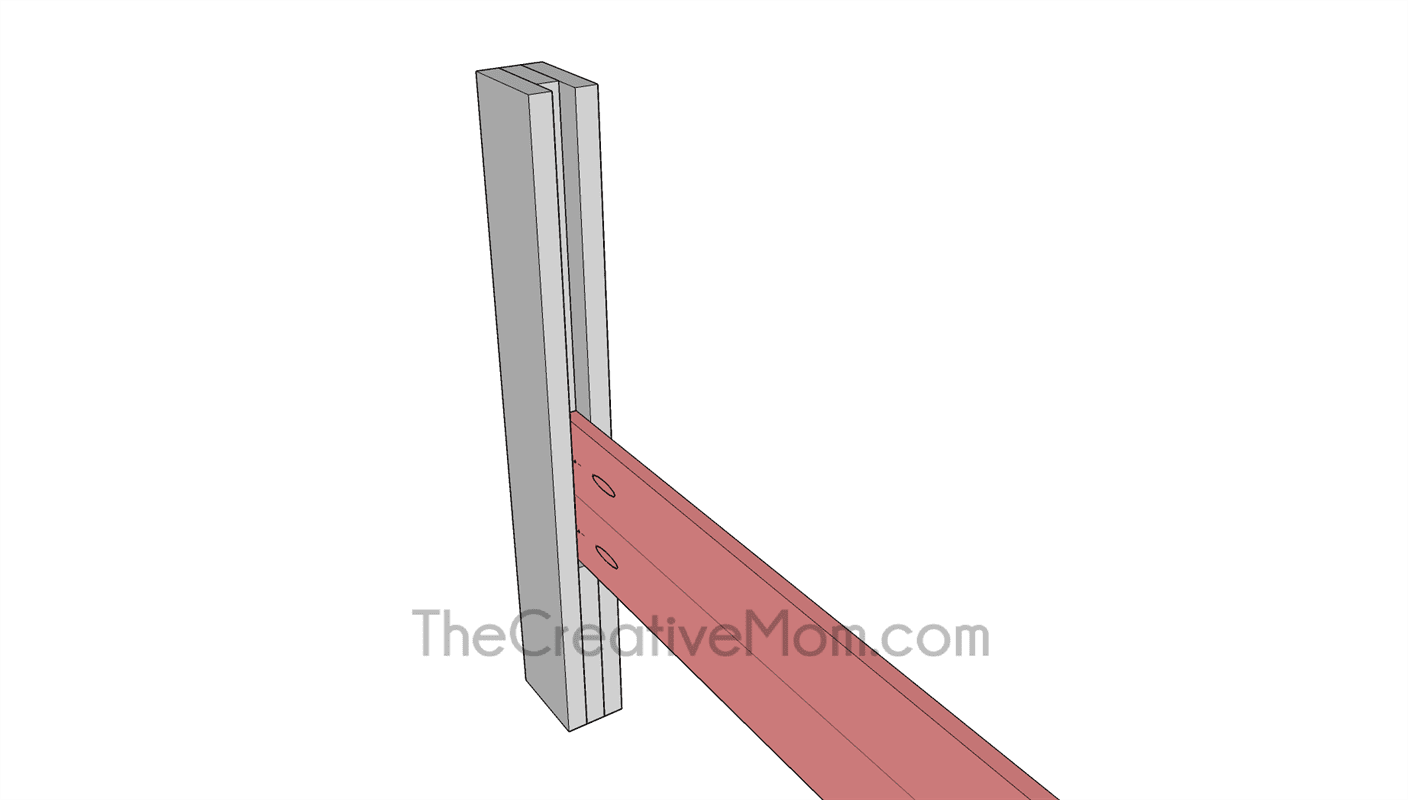
Using wood glue in the notch of your legs, slide your 1x6 planks into the notch.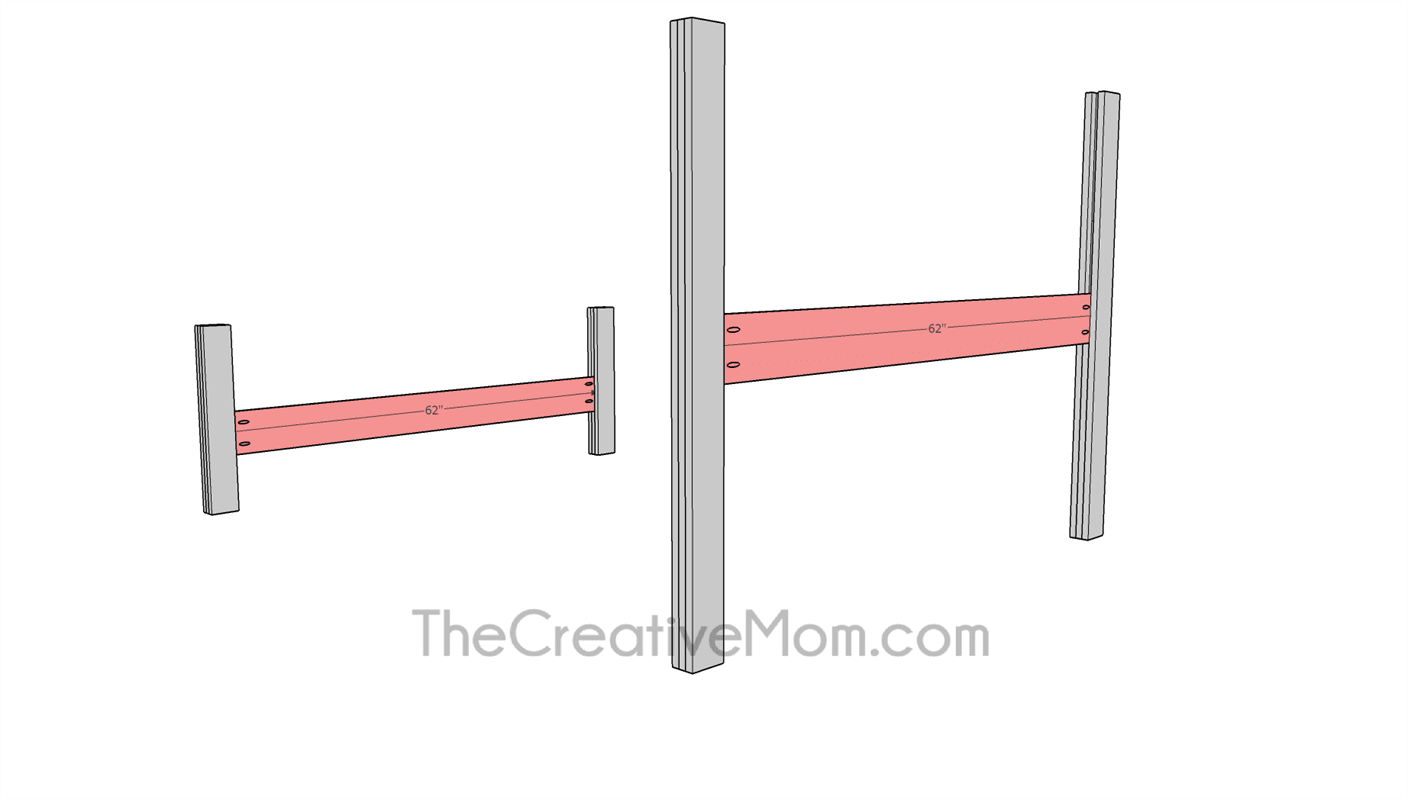
-
Planks
You may need to use a rubber mallet to get your planks to fit snuggly in the notch of your legs. Start with the bottom plank and work your way up.
-
Finish Adding Planks
Your top planks should be the ones with pocket holes on one edge. Make sure these pocket holes are facing up.
-
Attach with Pocket Hole Screws
Once your planks are all in place, use 1 1/4" pocket hole screws to secure the boards into place. The pocket hole screws should pull the planks in nice and tight and keep them securely in place.
-
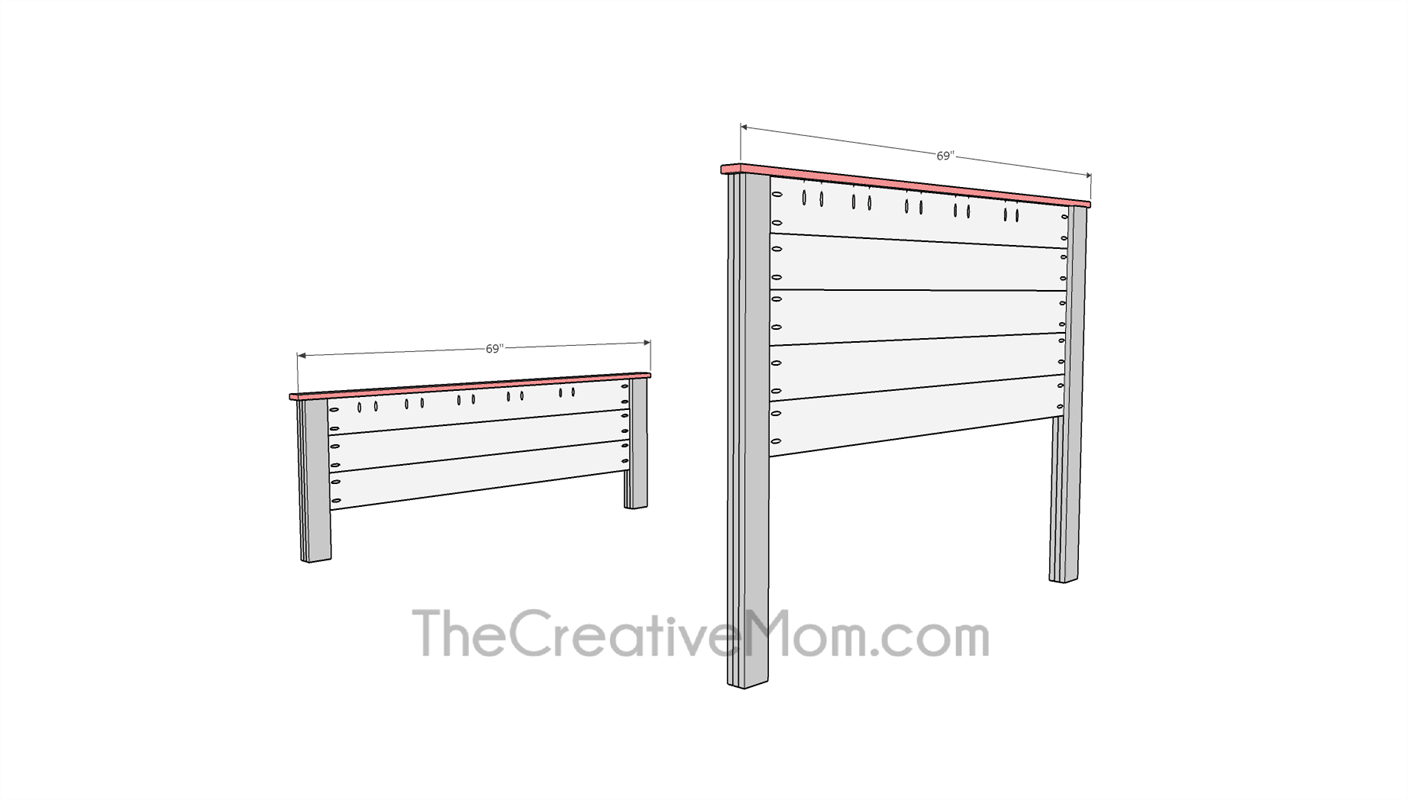
Add Top Cap
Cut 2- 69" 1x3 boards. Attach the board with wood glue and 1 1/4" pocket hole screws. You will use the pocket holes on the top of your top planks. Center the boards on the legs, and overhang each edge by one inch,
-
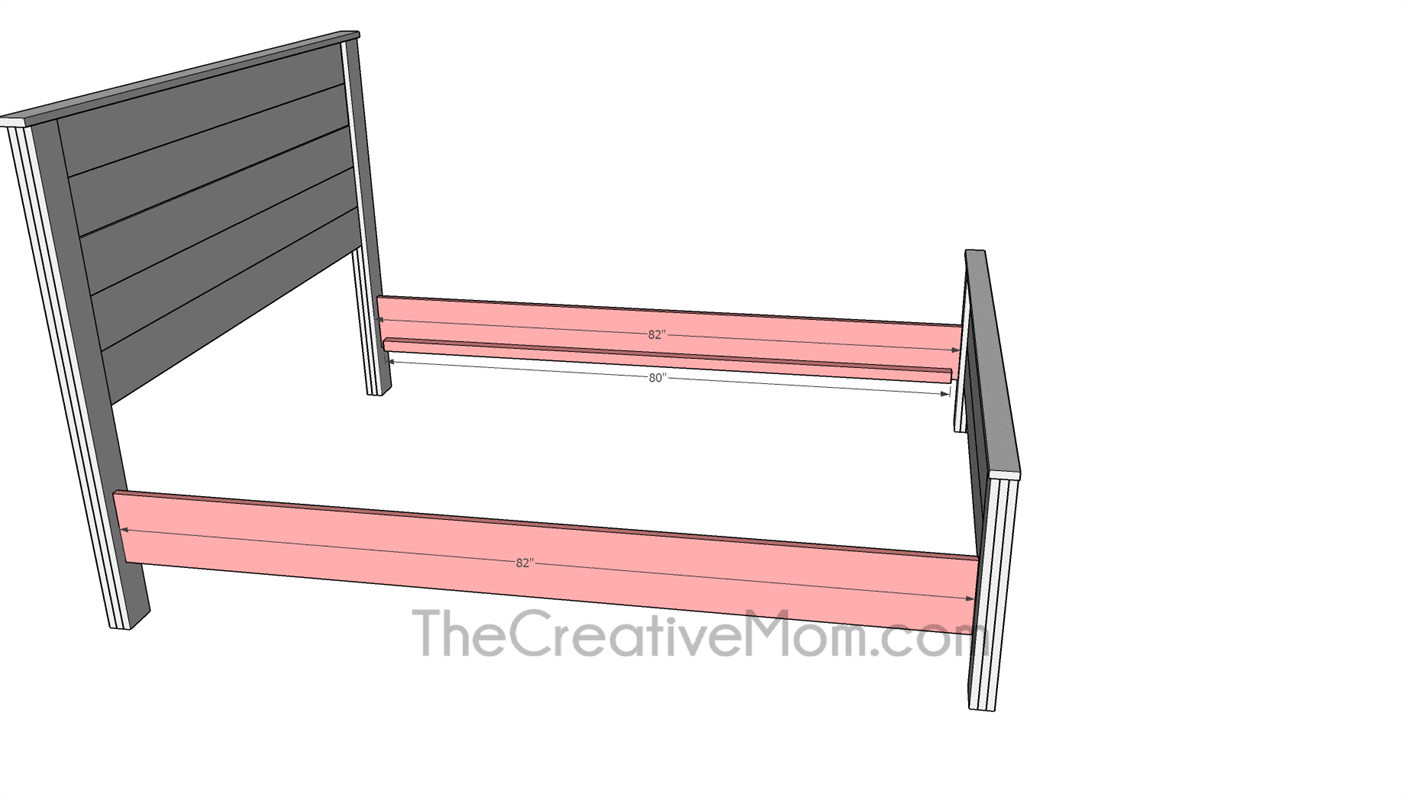
Build Bed Rails
Cut two 82" 1x8 boards. Cut two 80" 2x2 boards.
Measure 1" above the bottom edge of the rail. Predrill holes every 10 inches, and attach the 2x2 boards to the 1x8 boards using wood glue and 1 3/4" wood screws.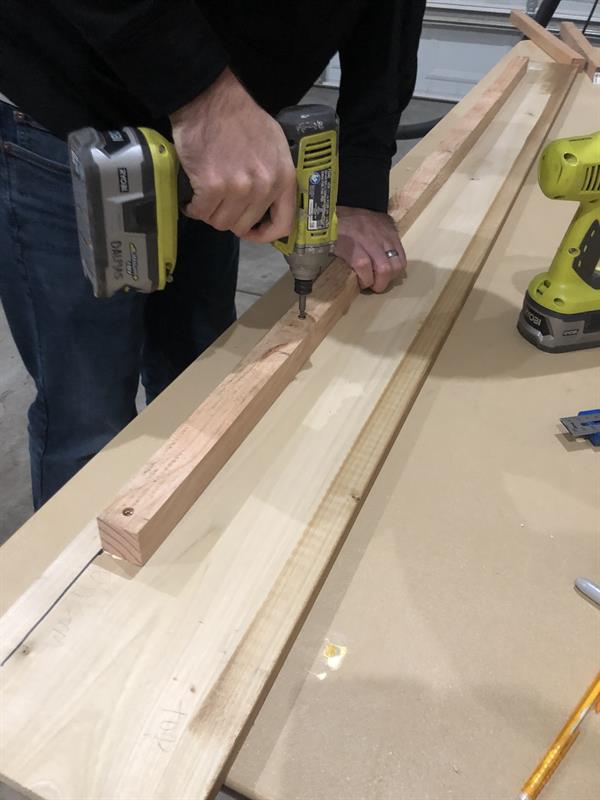
-
Attach Bed Rails
Using bed rail hardware (linked in the extras section of these building plans), attach the bed rails to the headboard and footboard. Since all bed rail hardware is different, follow the instructions on the package. You will want to make sure to keep the bed platform at 63" wide.
-
Build Supports
Cut 5- 63" 2x2 boards. Cut 5- 9" boards. Predrill holes in the center of each 63" board. Attach the 9" boards using wood glue and 2 1/2" wood screws.
Space the boards evenly on the base of your bed. Attach these support boards to the 2x2's on the bed rails, using 2 1/2" wood screws. Make sure to predrill to avoid splitting the wood.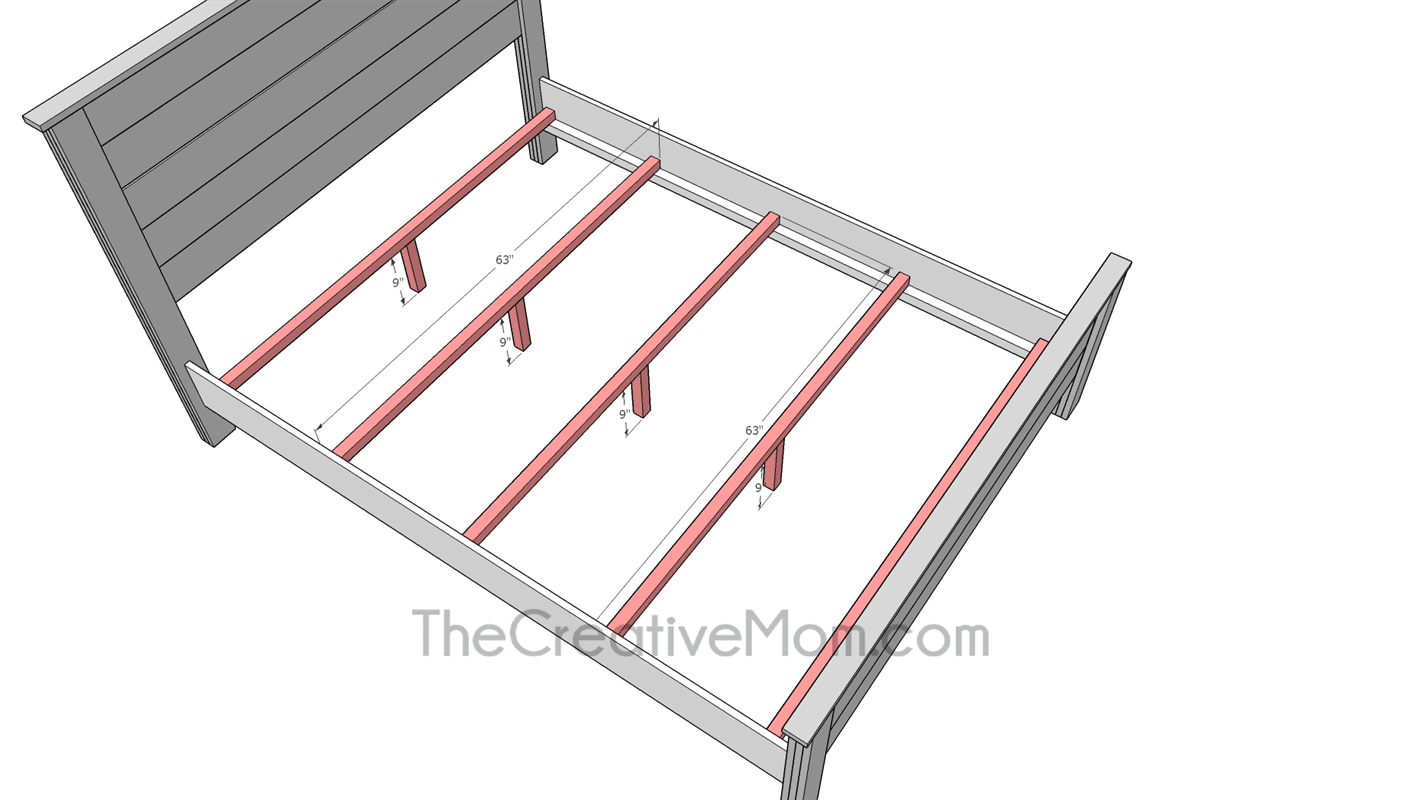
-
Add Plywood Base
This step is optional, but suggested if you don't use a box springs.
Cut plywood to size (80" x 60") and place on top of your support boards. This will give extra stability and prevent the mattress from sagging.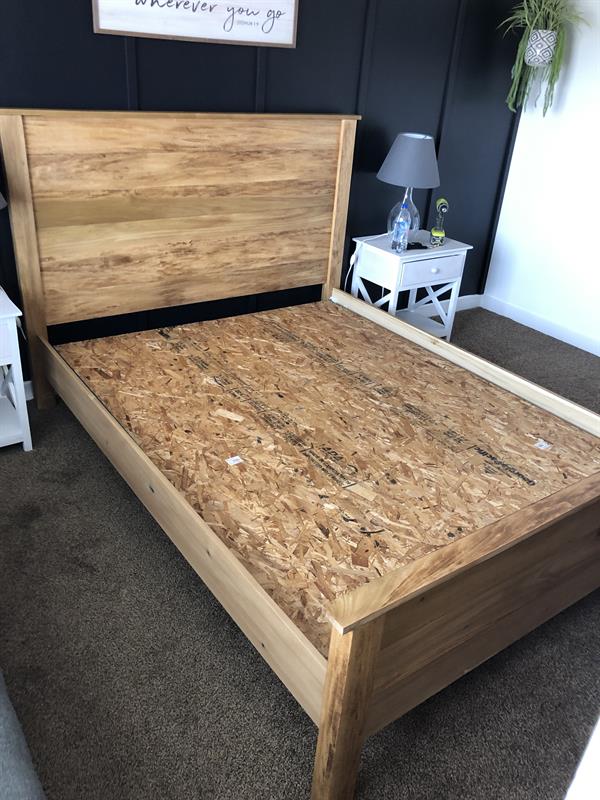
-
Add Mattress
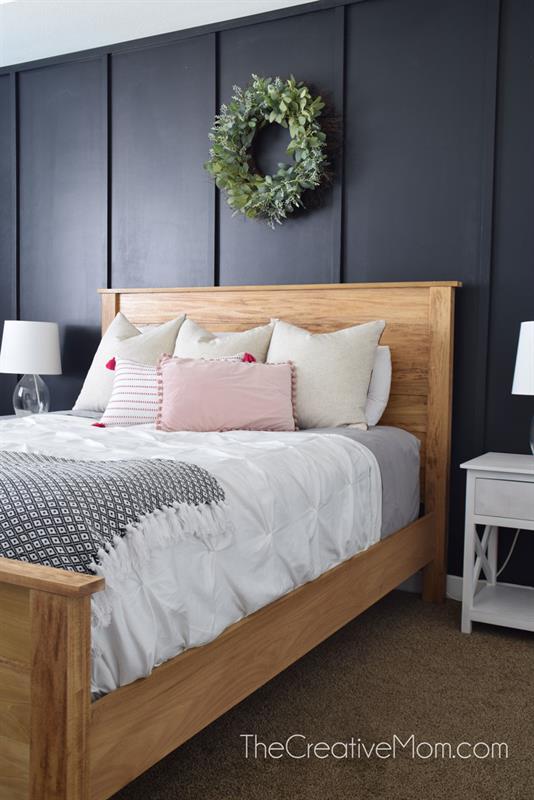
A queen sized mattress will fit in this bedframe easily. You should have about an inch around each edge for ease in making the bed!
Link to bed rail hardware – https://amzn.to/3NbsUcb