


These DIY planter boxes are the perfect entry level project and can be made with very basic materials from the home center!
Tools
Kreg Tools

Other Tools

Materials
Wood Products
- 5 Cedar Dog-Ear Fence Picket , 19/32 in. D x 5-1/2 in. W x 6 ft. H
Hardware & Supplies
- -- 1" Pocket Hole Screws
- -- 1" Brad Nails
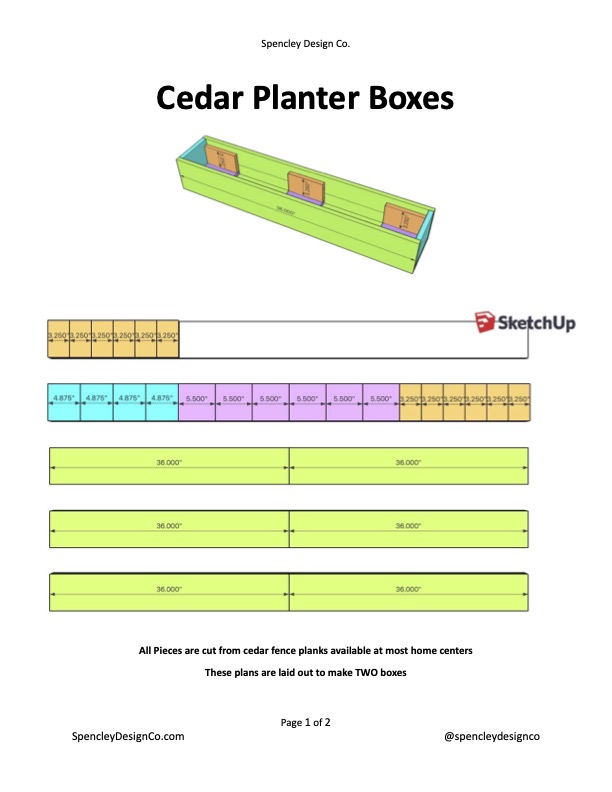
Cut List & Parts
- 12 Side Supports , 3 1/4" x 5 1/2" x 19/32"
- 6 Bottom Supports , 5 1/2" x 5 1/2" x 19/32"
- 4 Ends , 4 7/8" x 5 1/2" x 19/32"
- 6 Exterior Pieces , 36" x 5 1/2" x 19/32"
Directions
-
Cut Parts
Using the cut list provided, cut down all of the pieces needs for the planters
Note
Please note that these plans are outlined to make TWO planter boxes
-
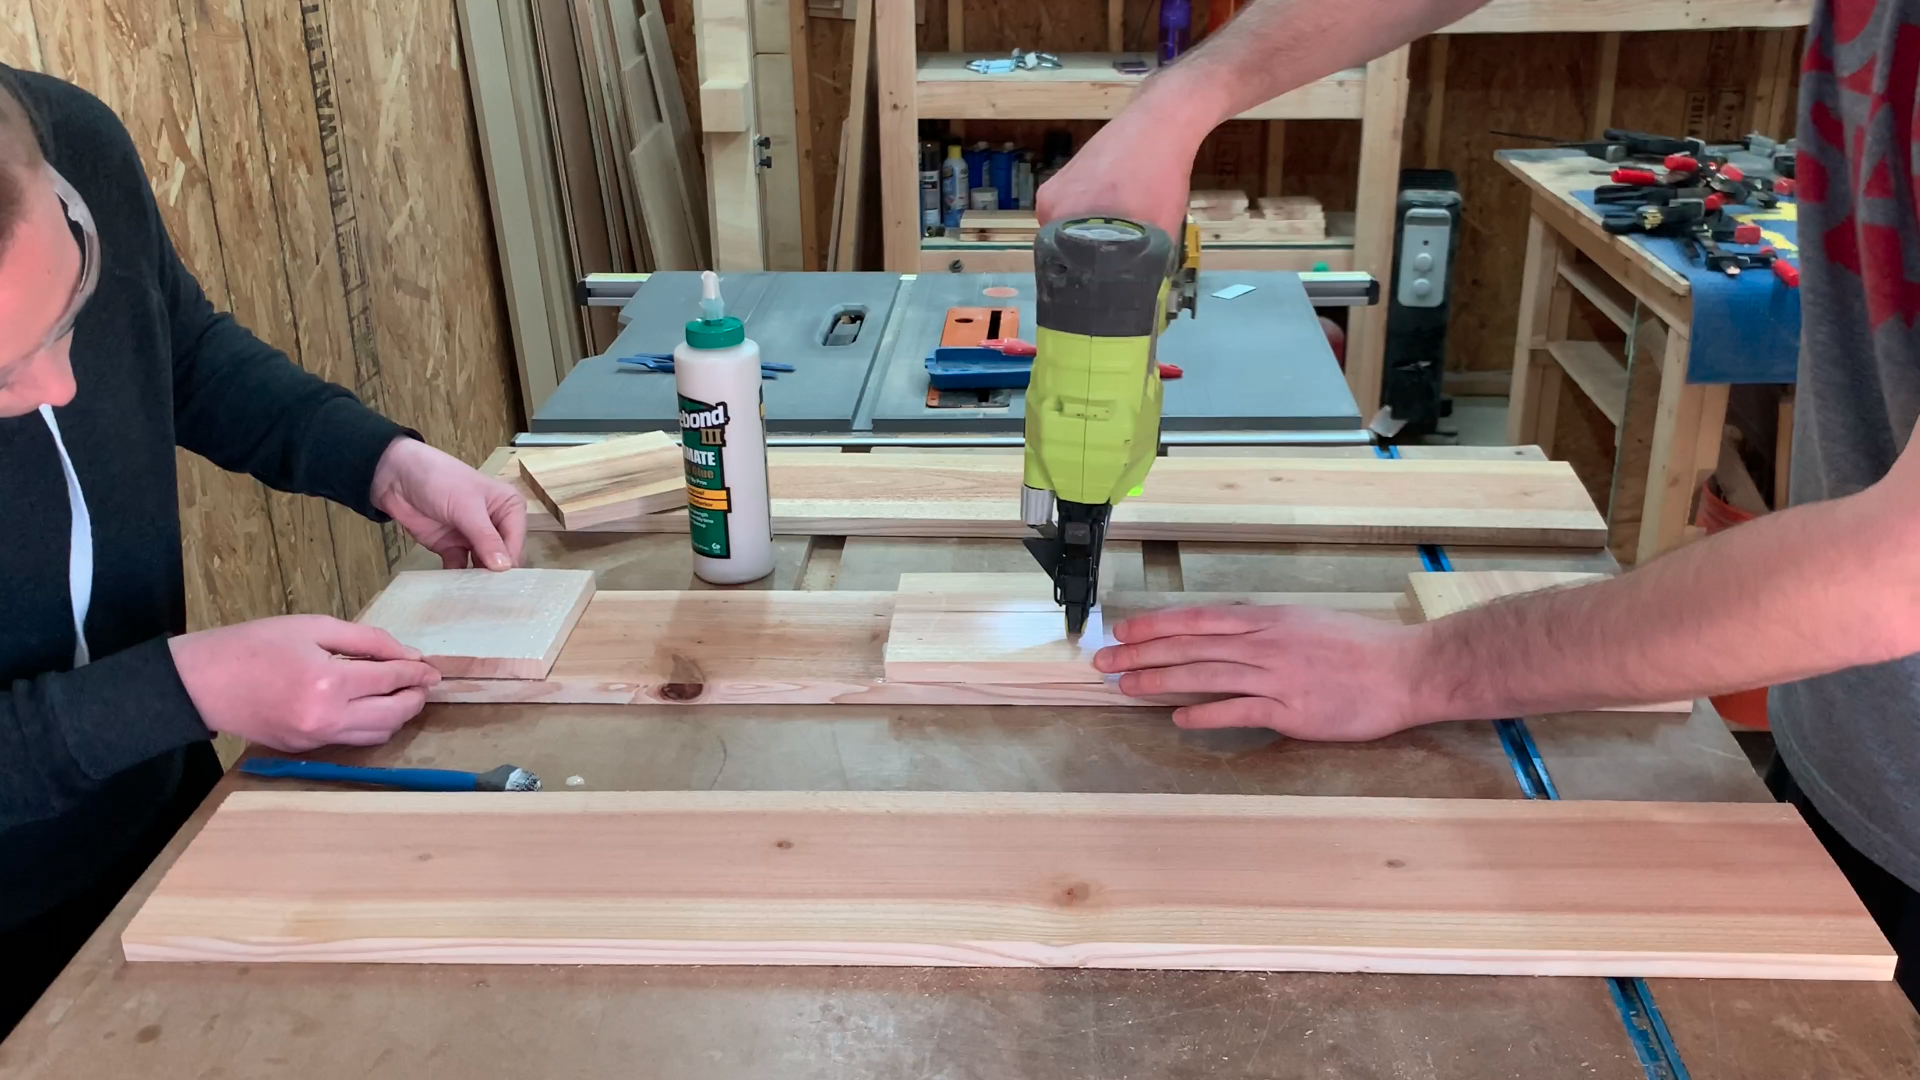
Attach Bottom Supports
Using brad nails or screws, attach the bottom supports to one of the exterior pieces
-
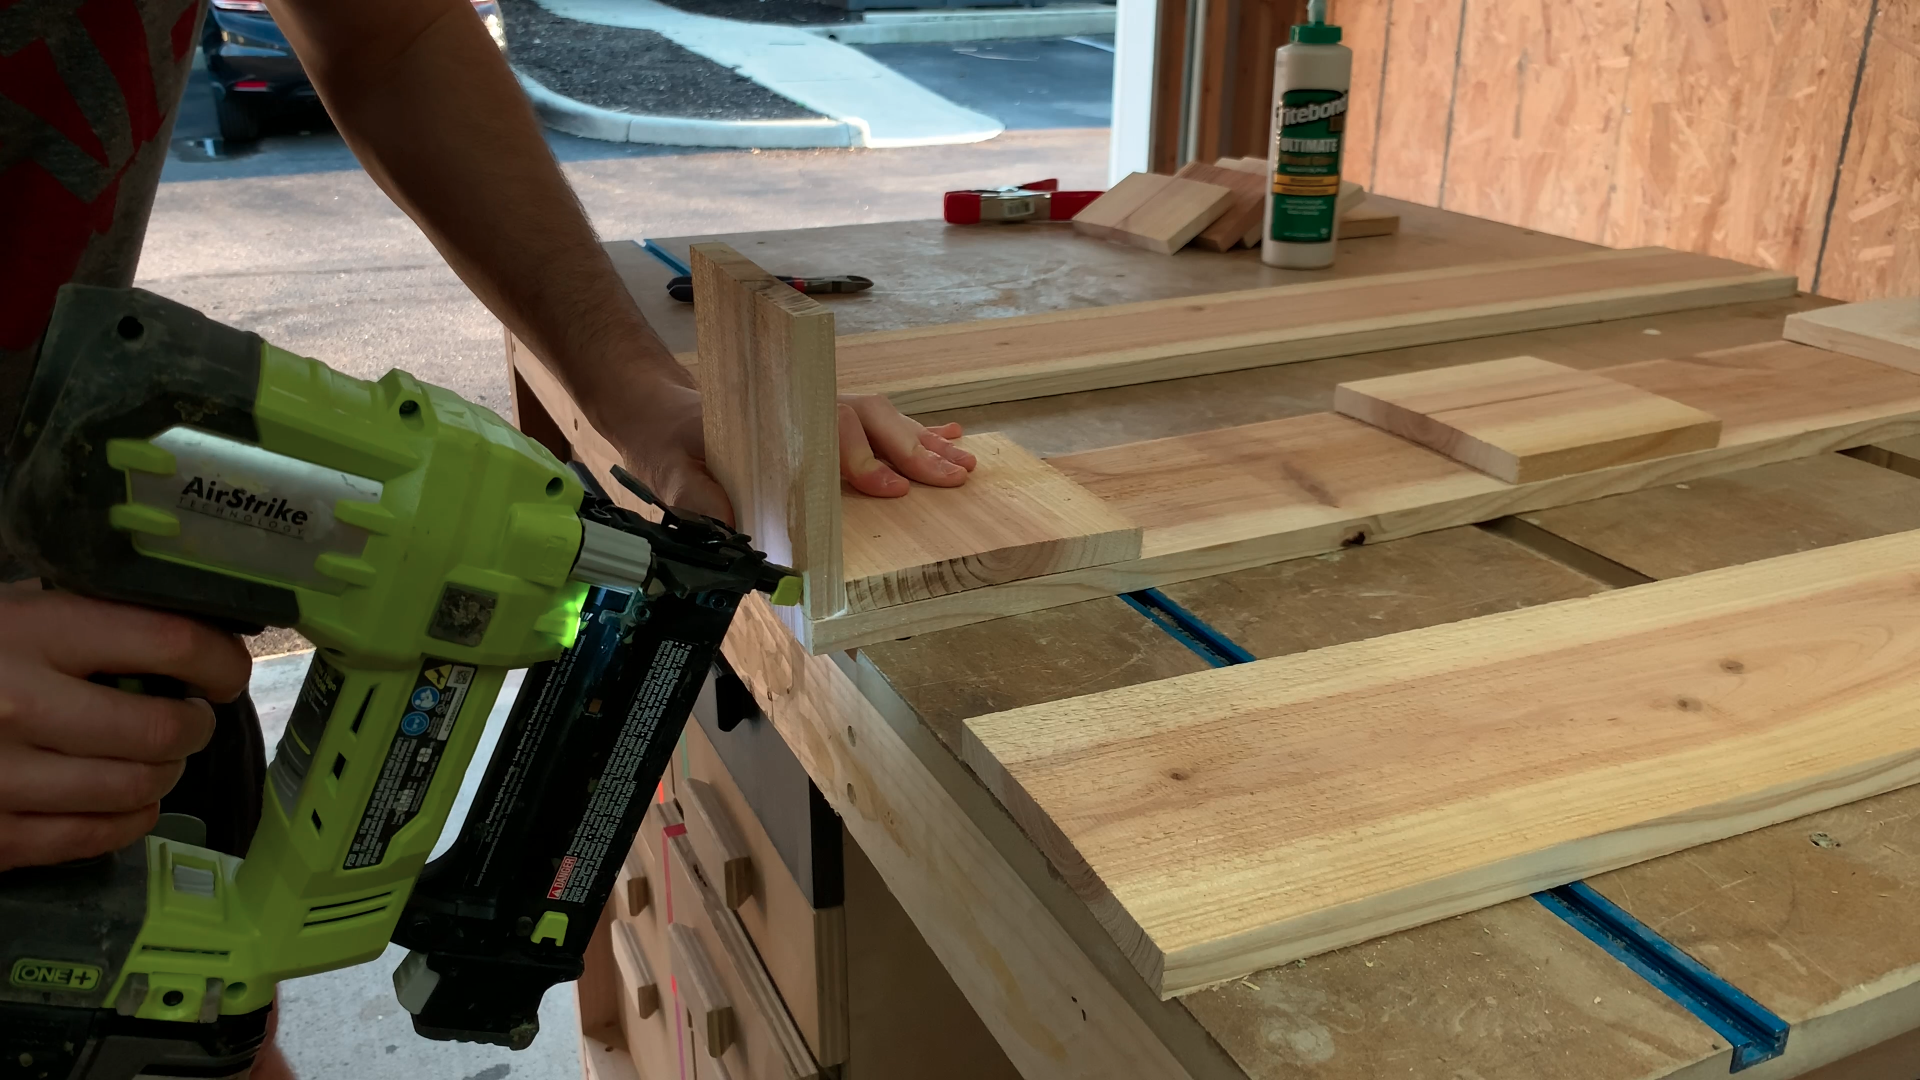
Attach Sides
Using brad nails or pocket hole screws, attach the sides to the bottom support and exterior piece
-
Attach 1 Exterior Side
Using brad nails or pocket hole screws, attach one exterior side to the bottom support and bottom exterior piece
-
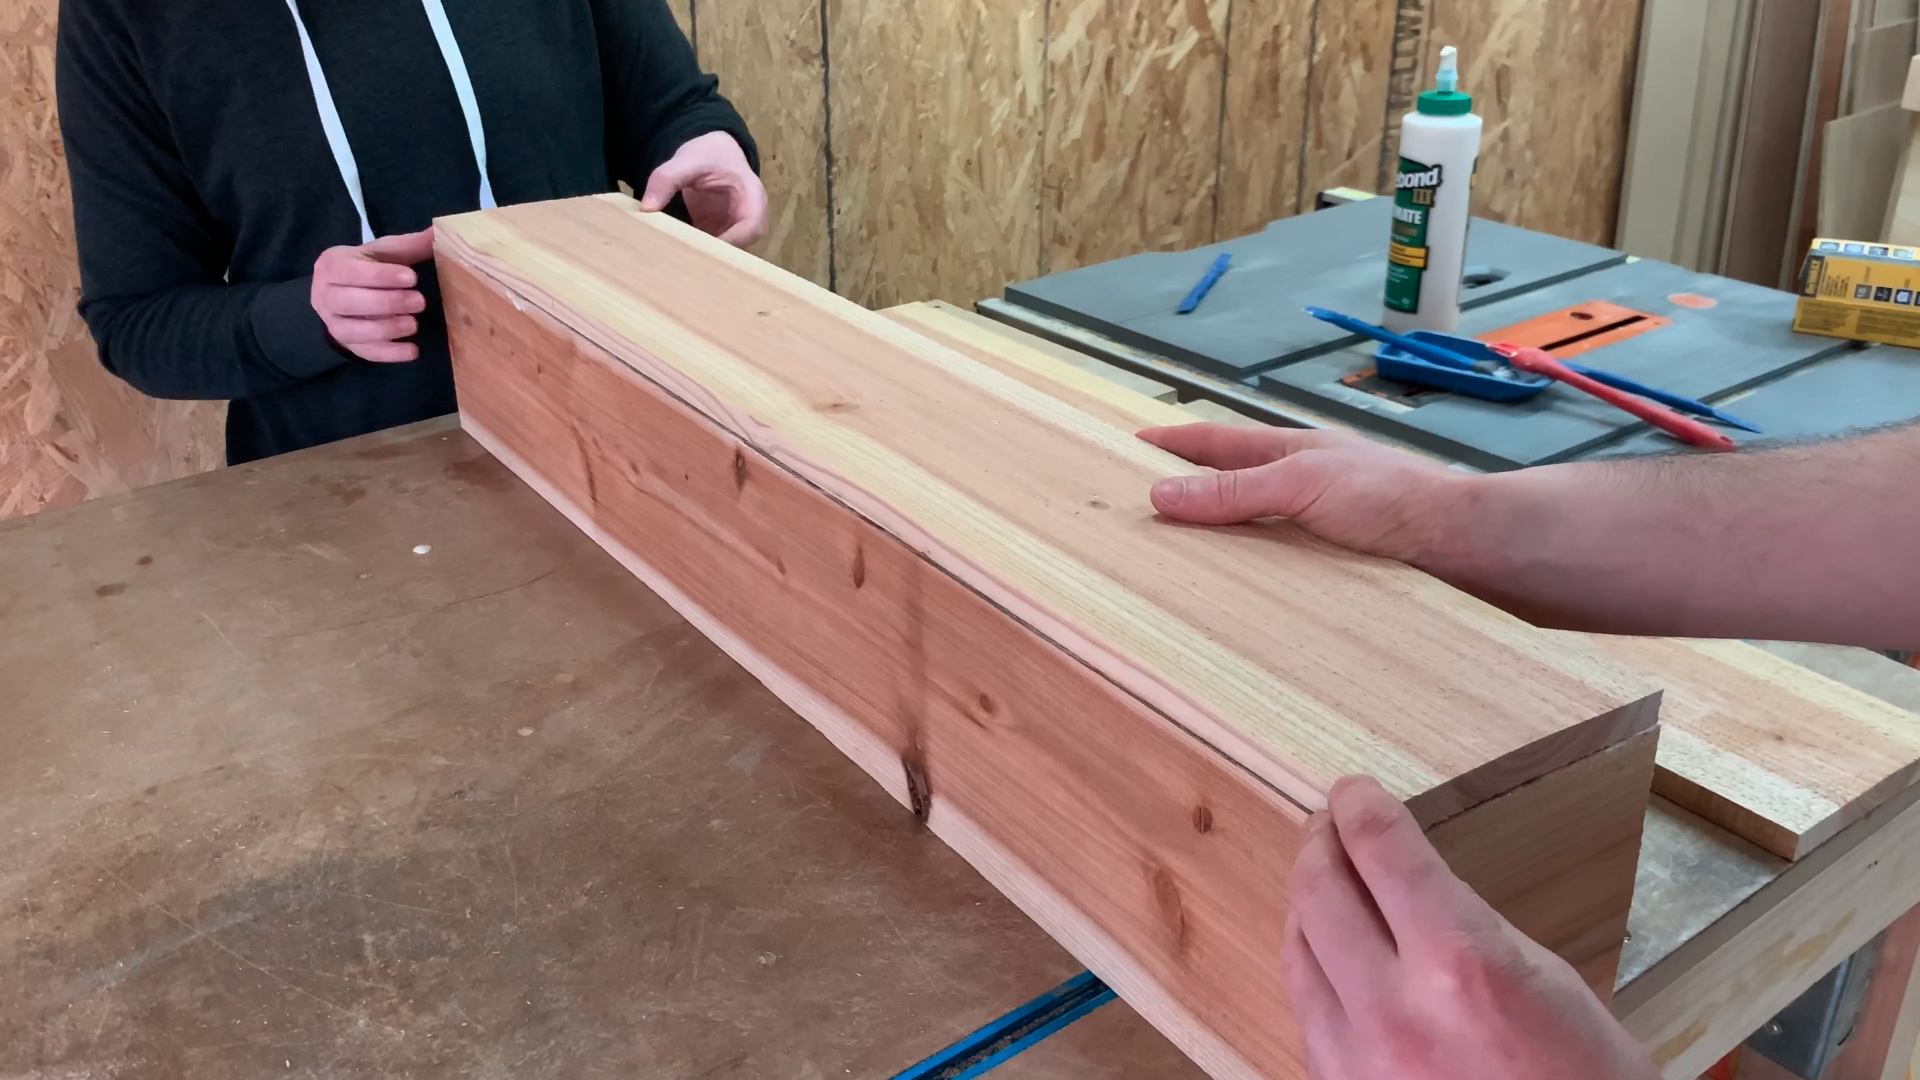
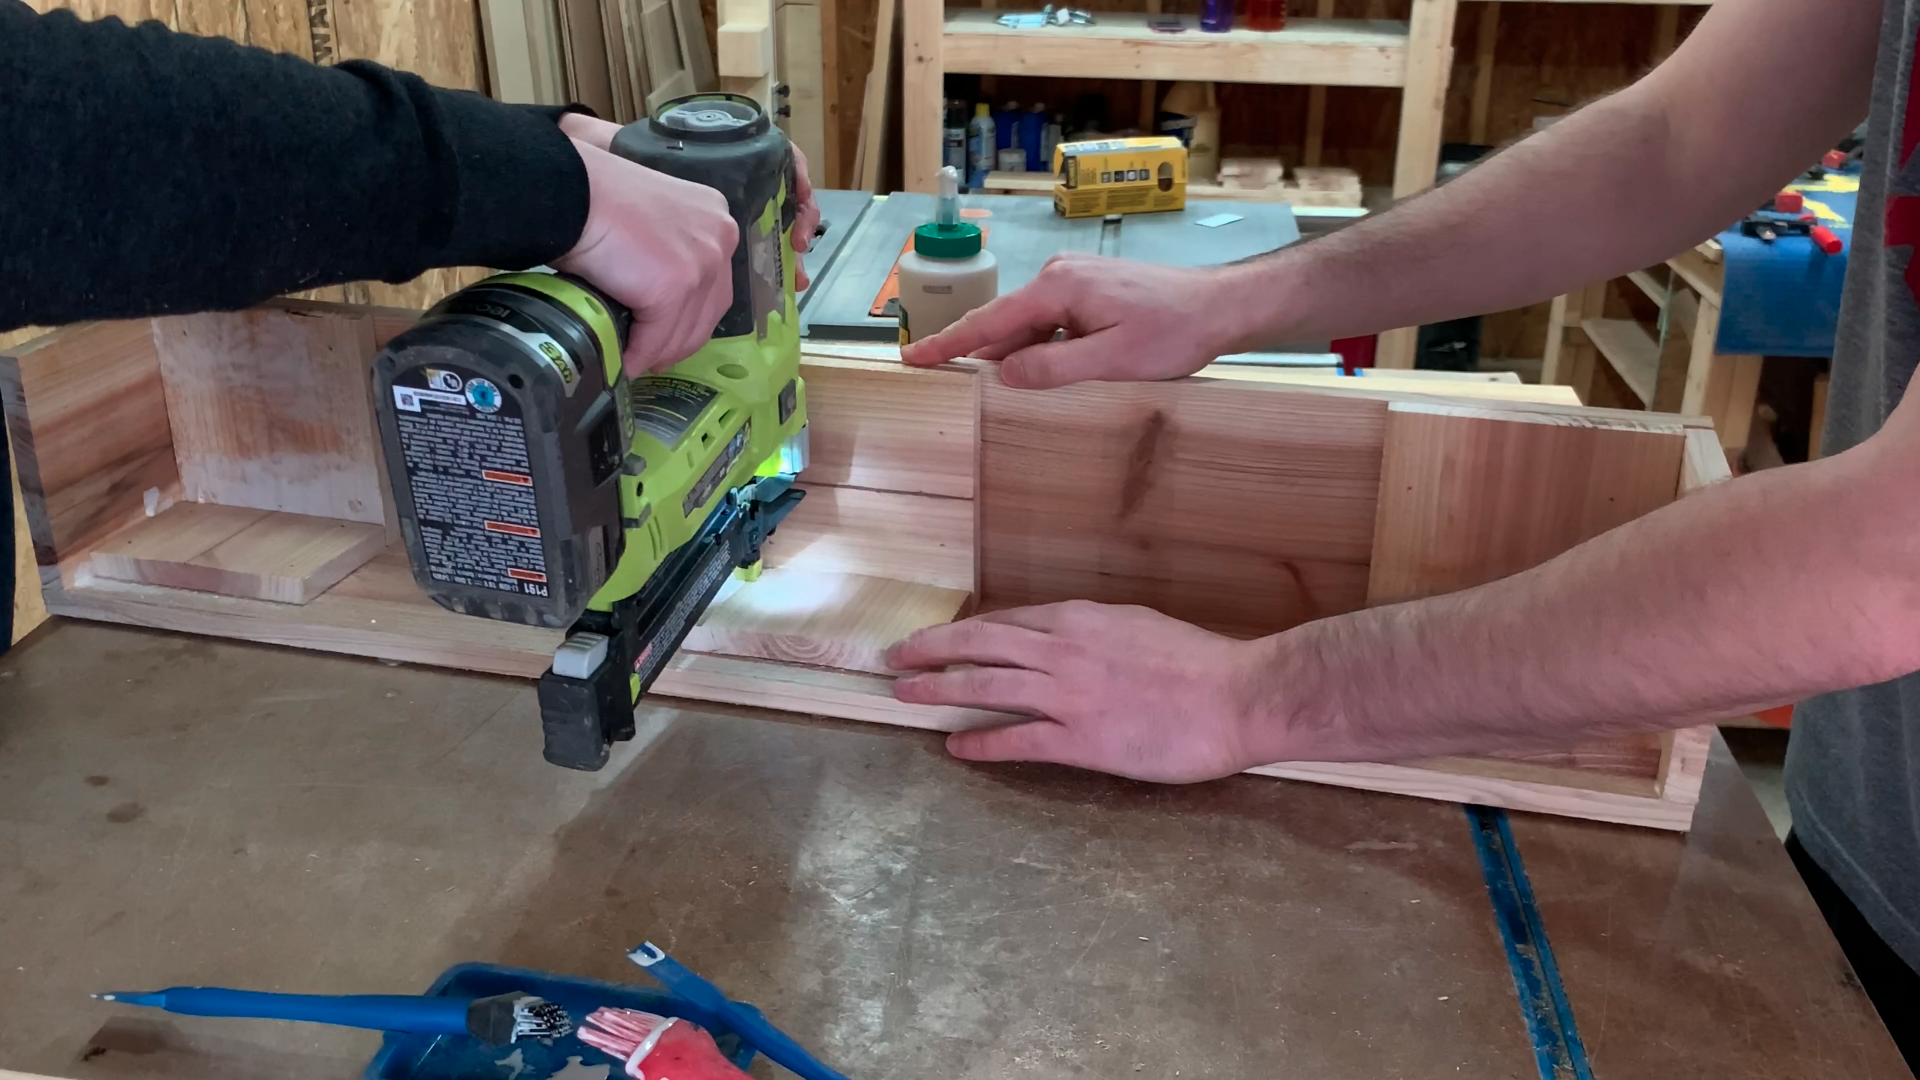
Attach Side Supports
Using brad nails or pocket hole screws, attach the sides to the side supports to the exterior pieces
-
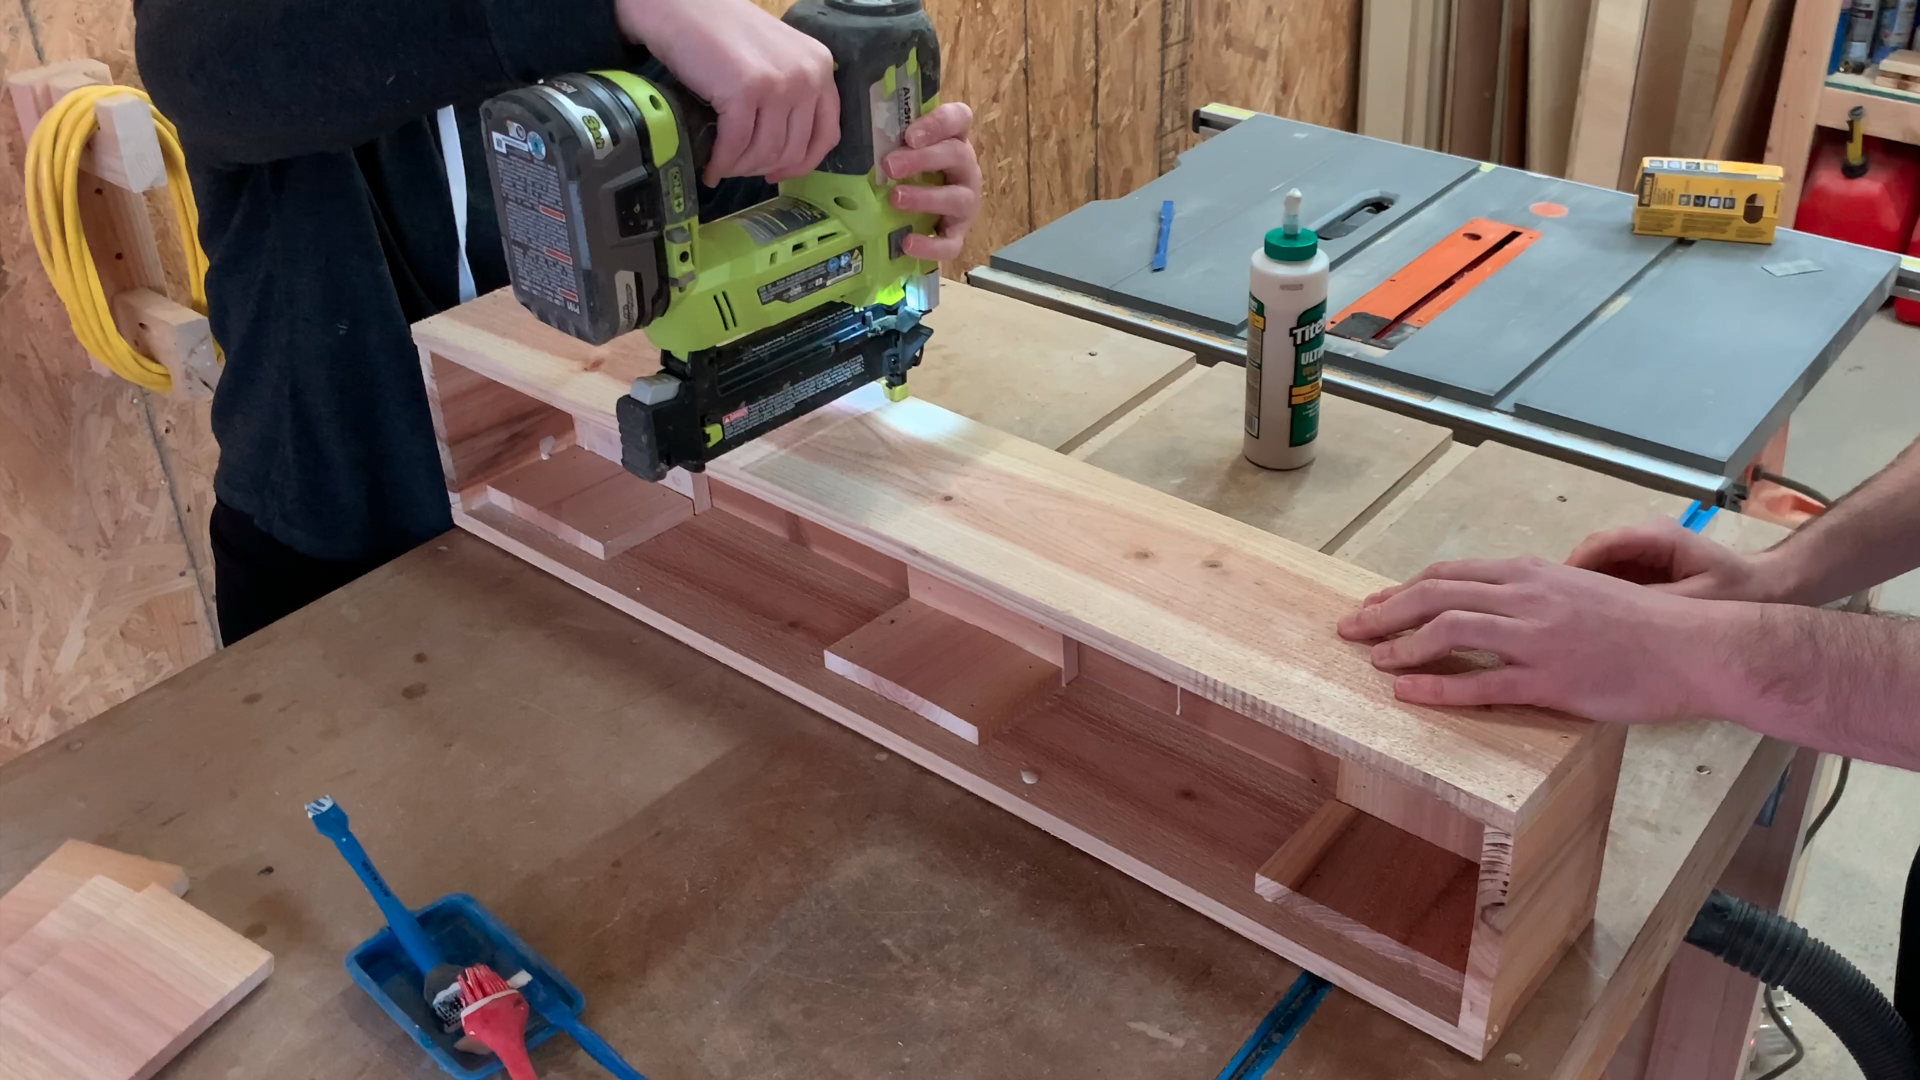
Attach Other Side
Using brad nails or pocket hole screws, attach the last exterior piece to close in the side
-
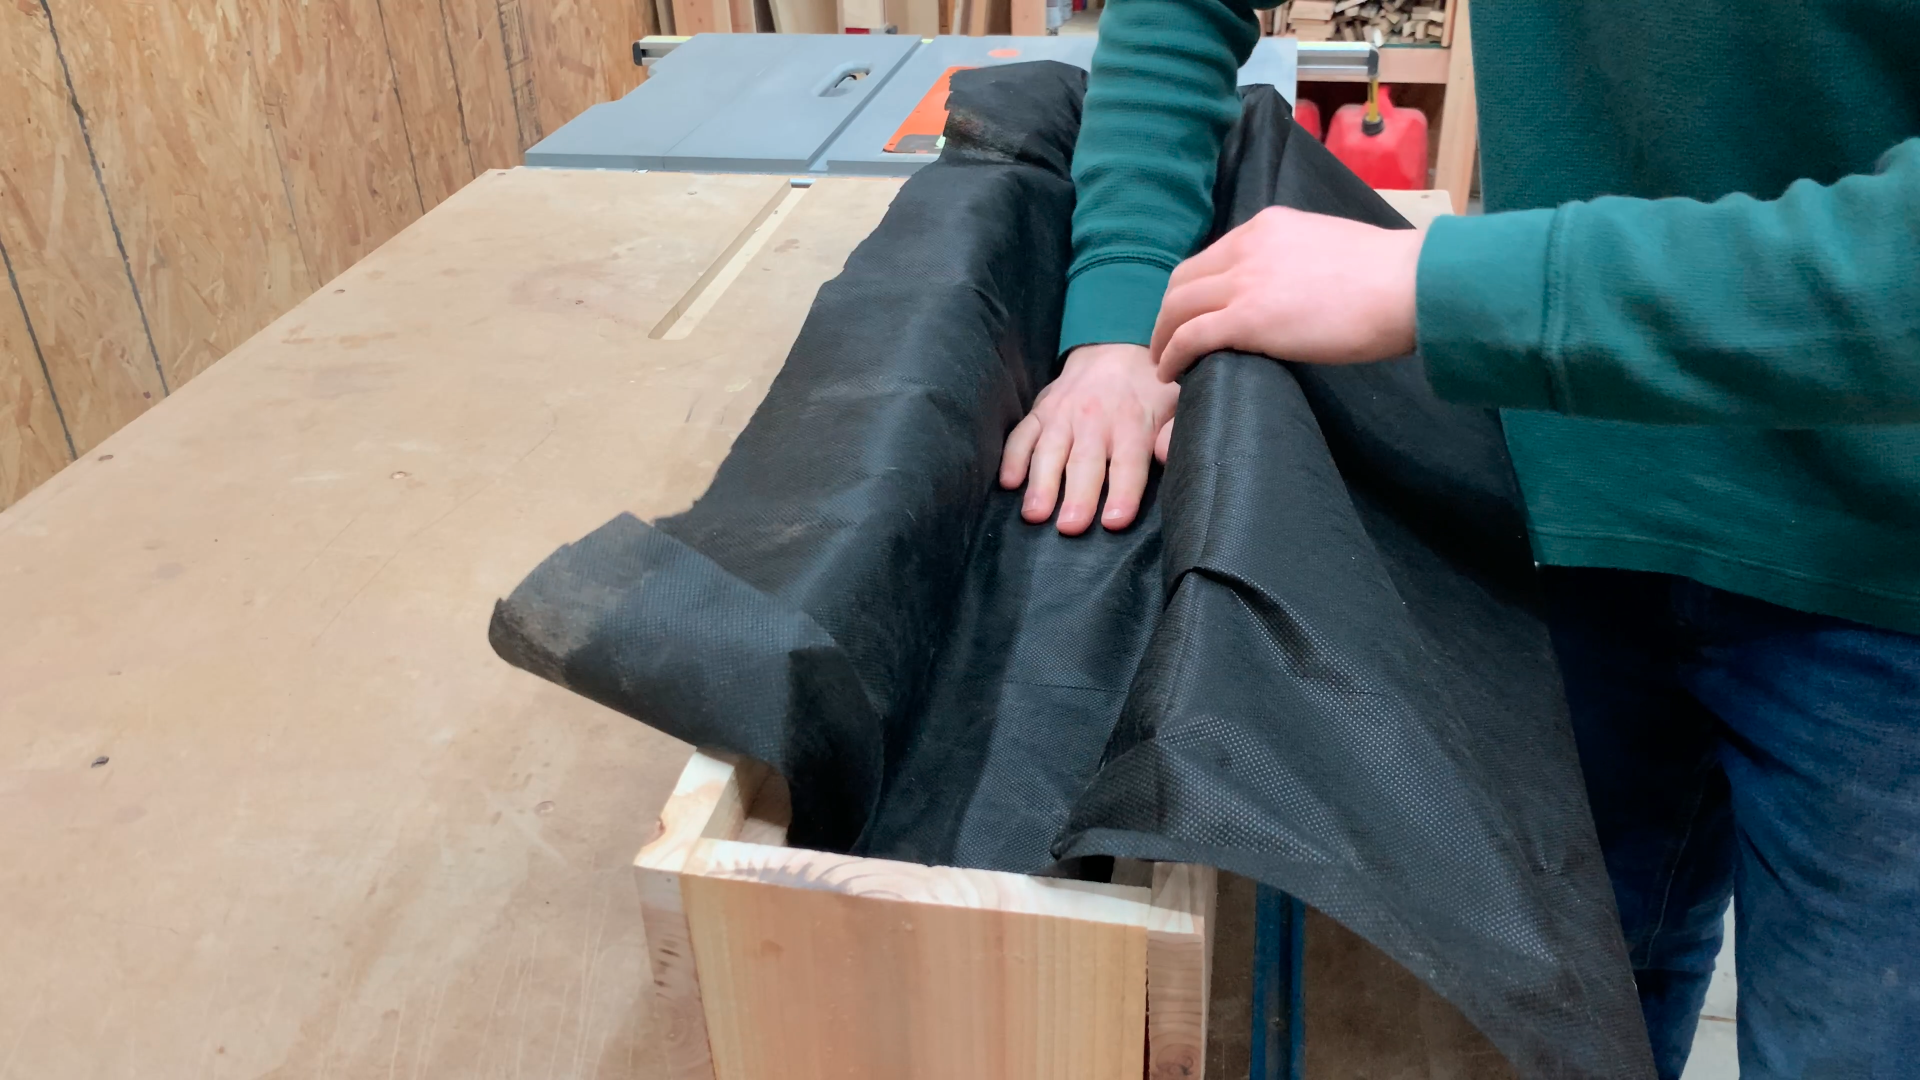
Attach Landscape Fabric
Using staples, attach the landscape fabric to prevent all of the soil from being washed away during watering and rain
-
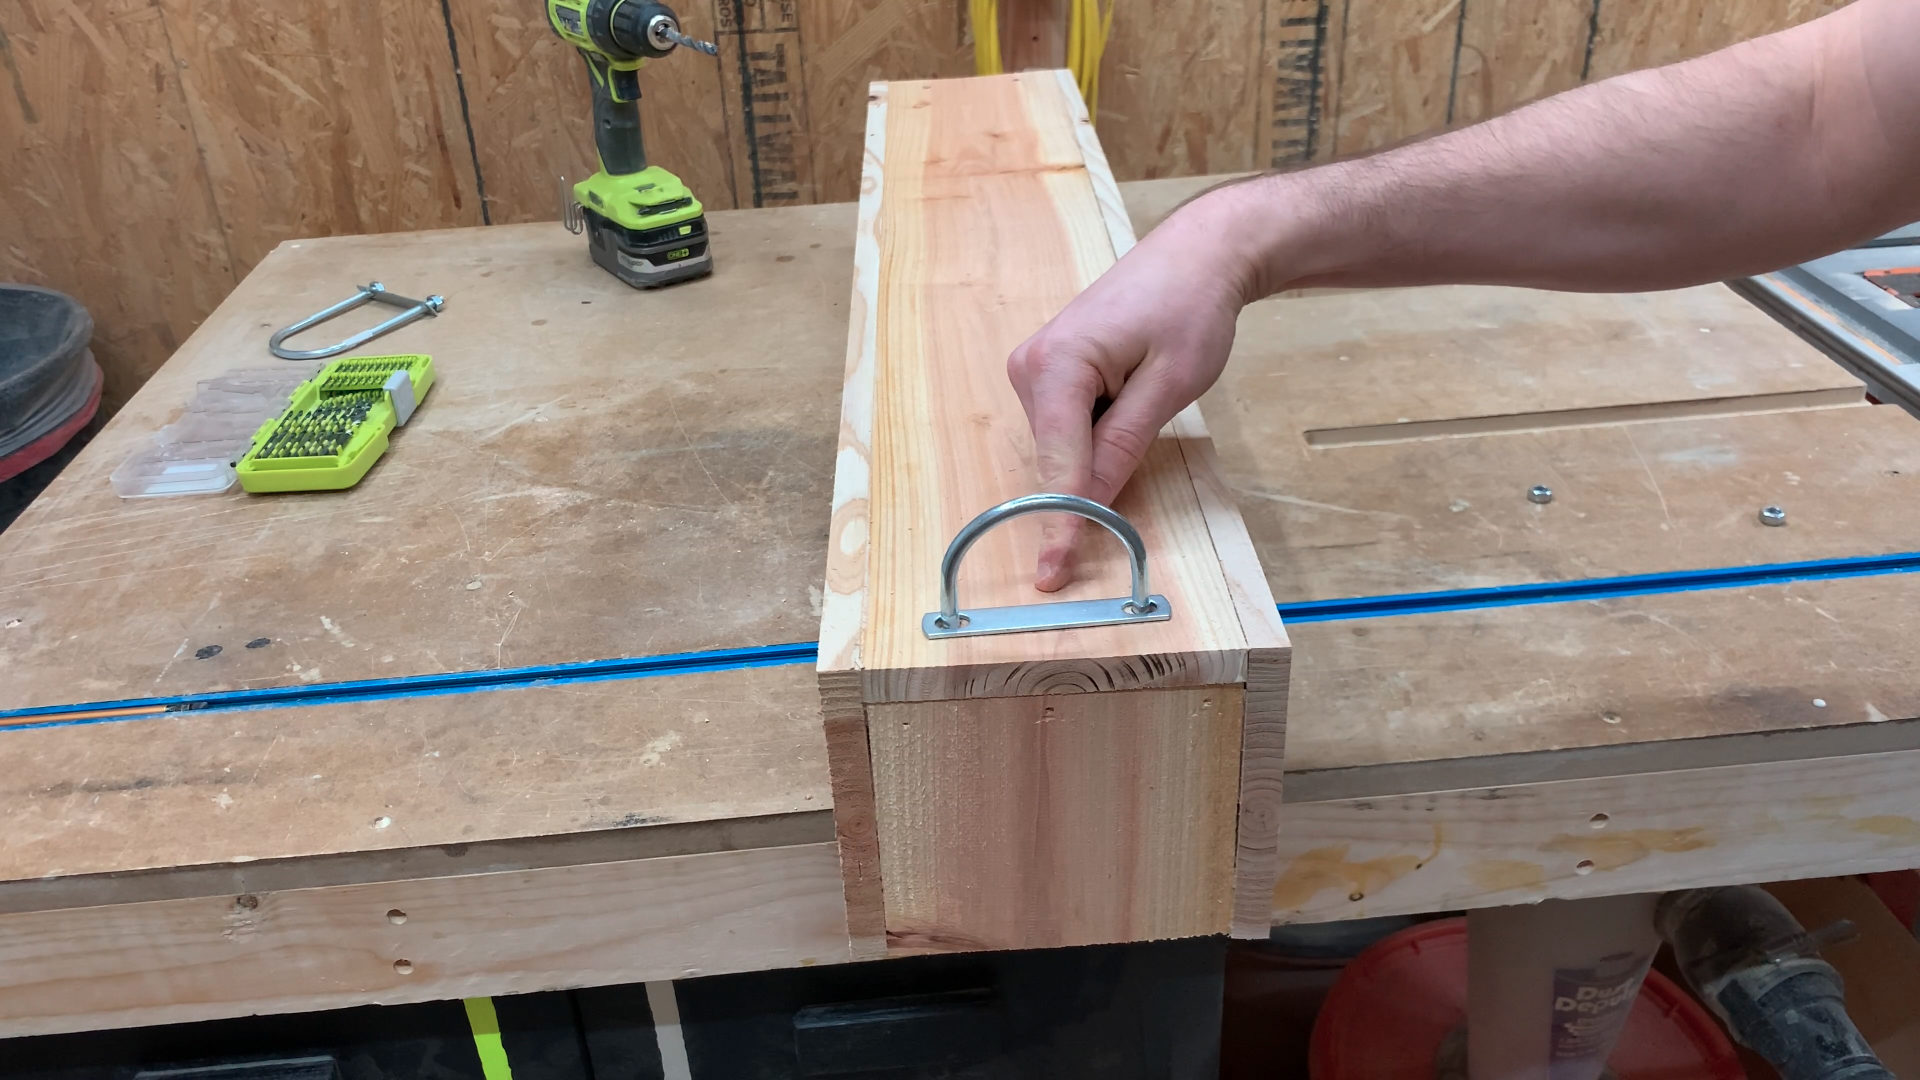
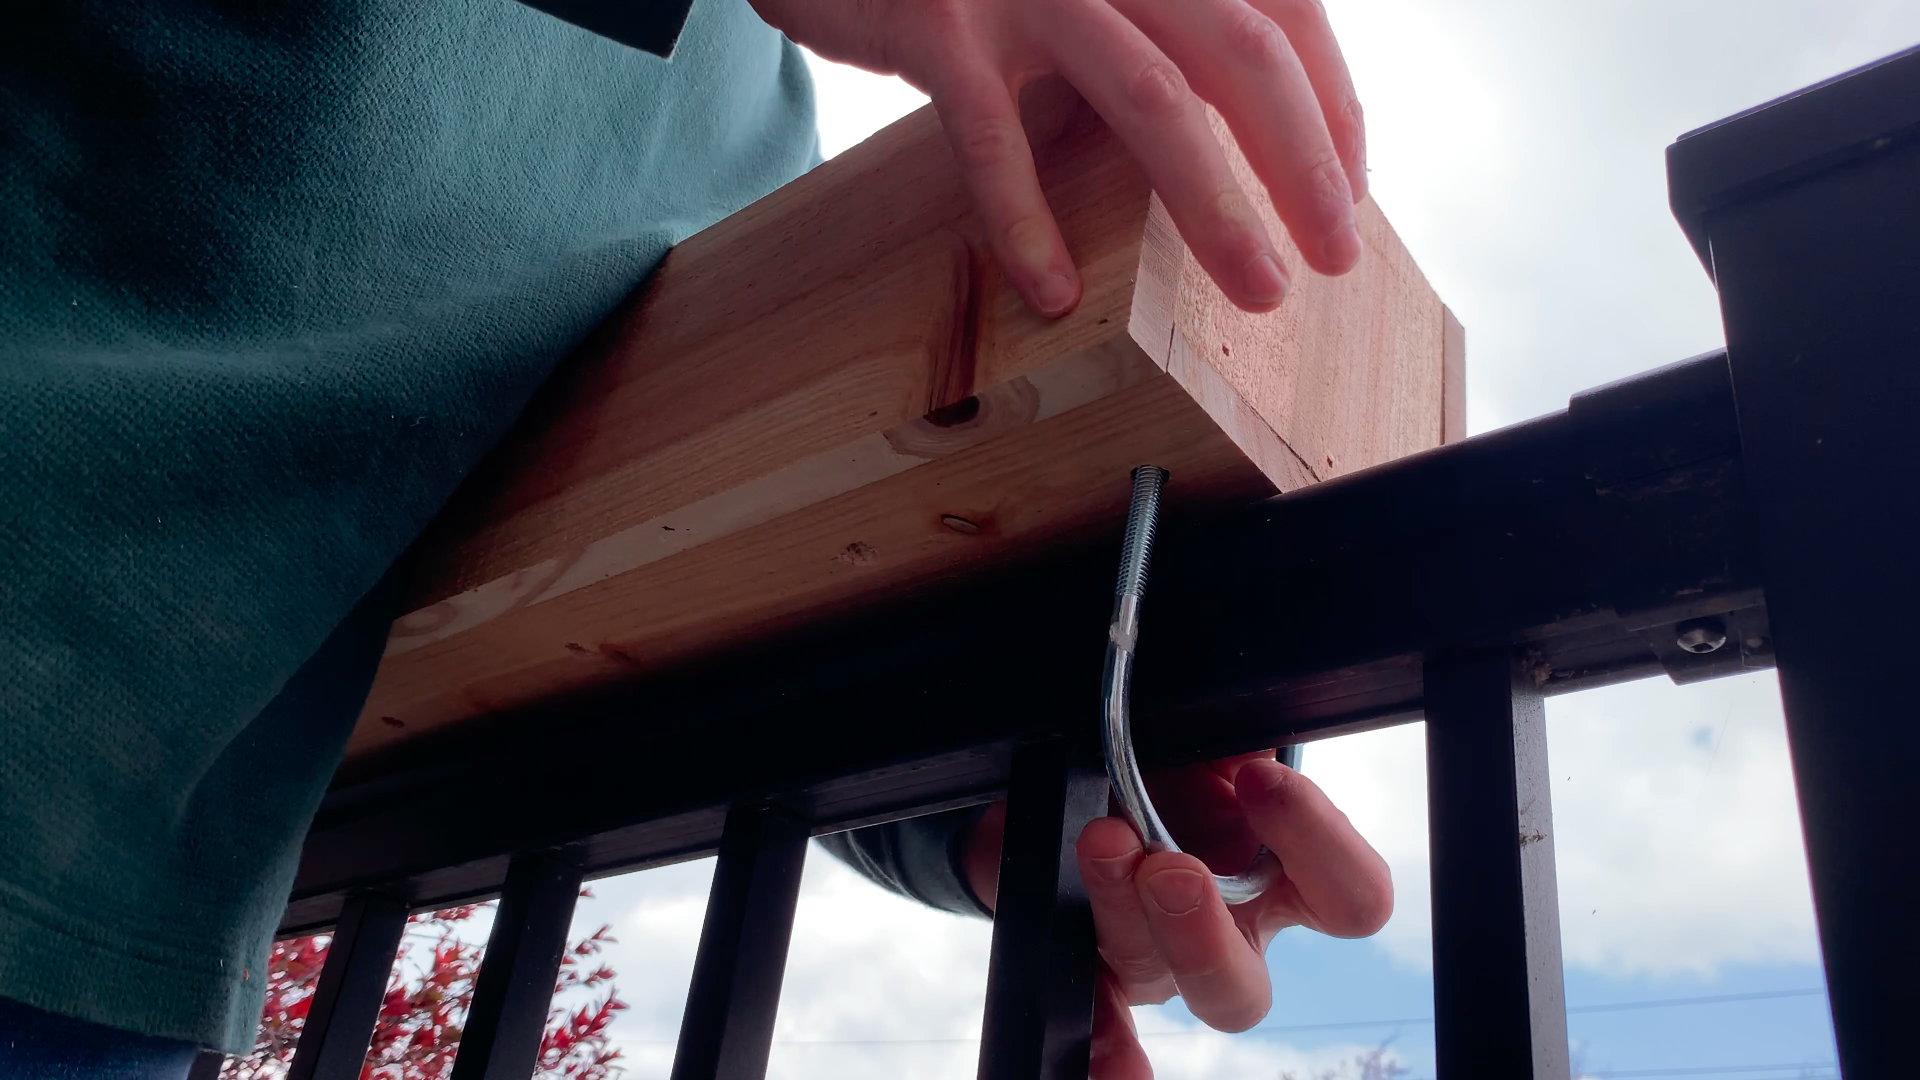
Attach Hardware
Drill out holes in the bottom of the planter box to accept the hardware to attach to the railing
-
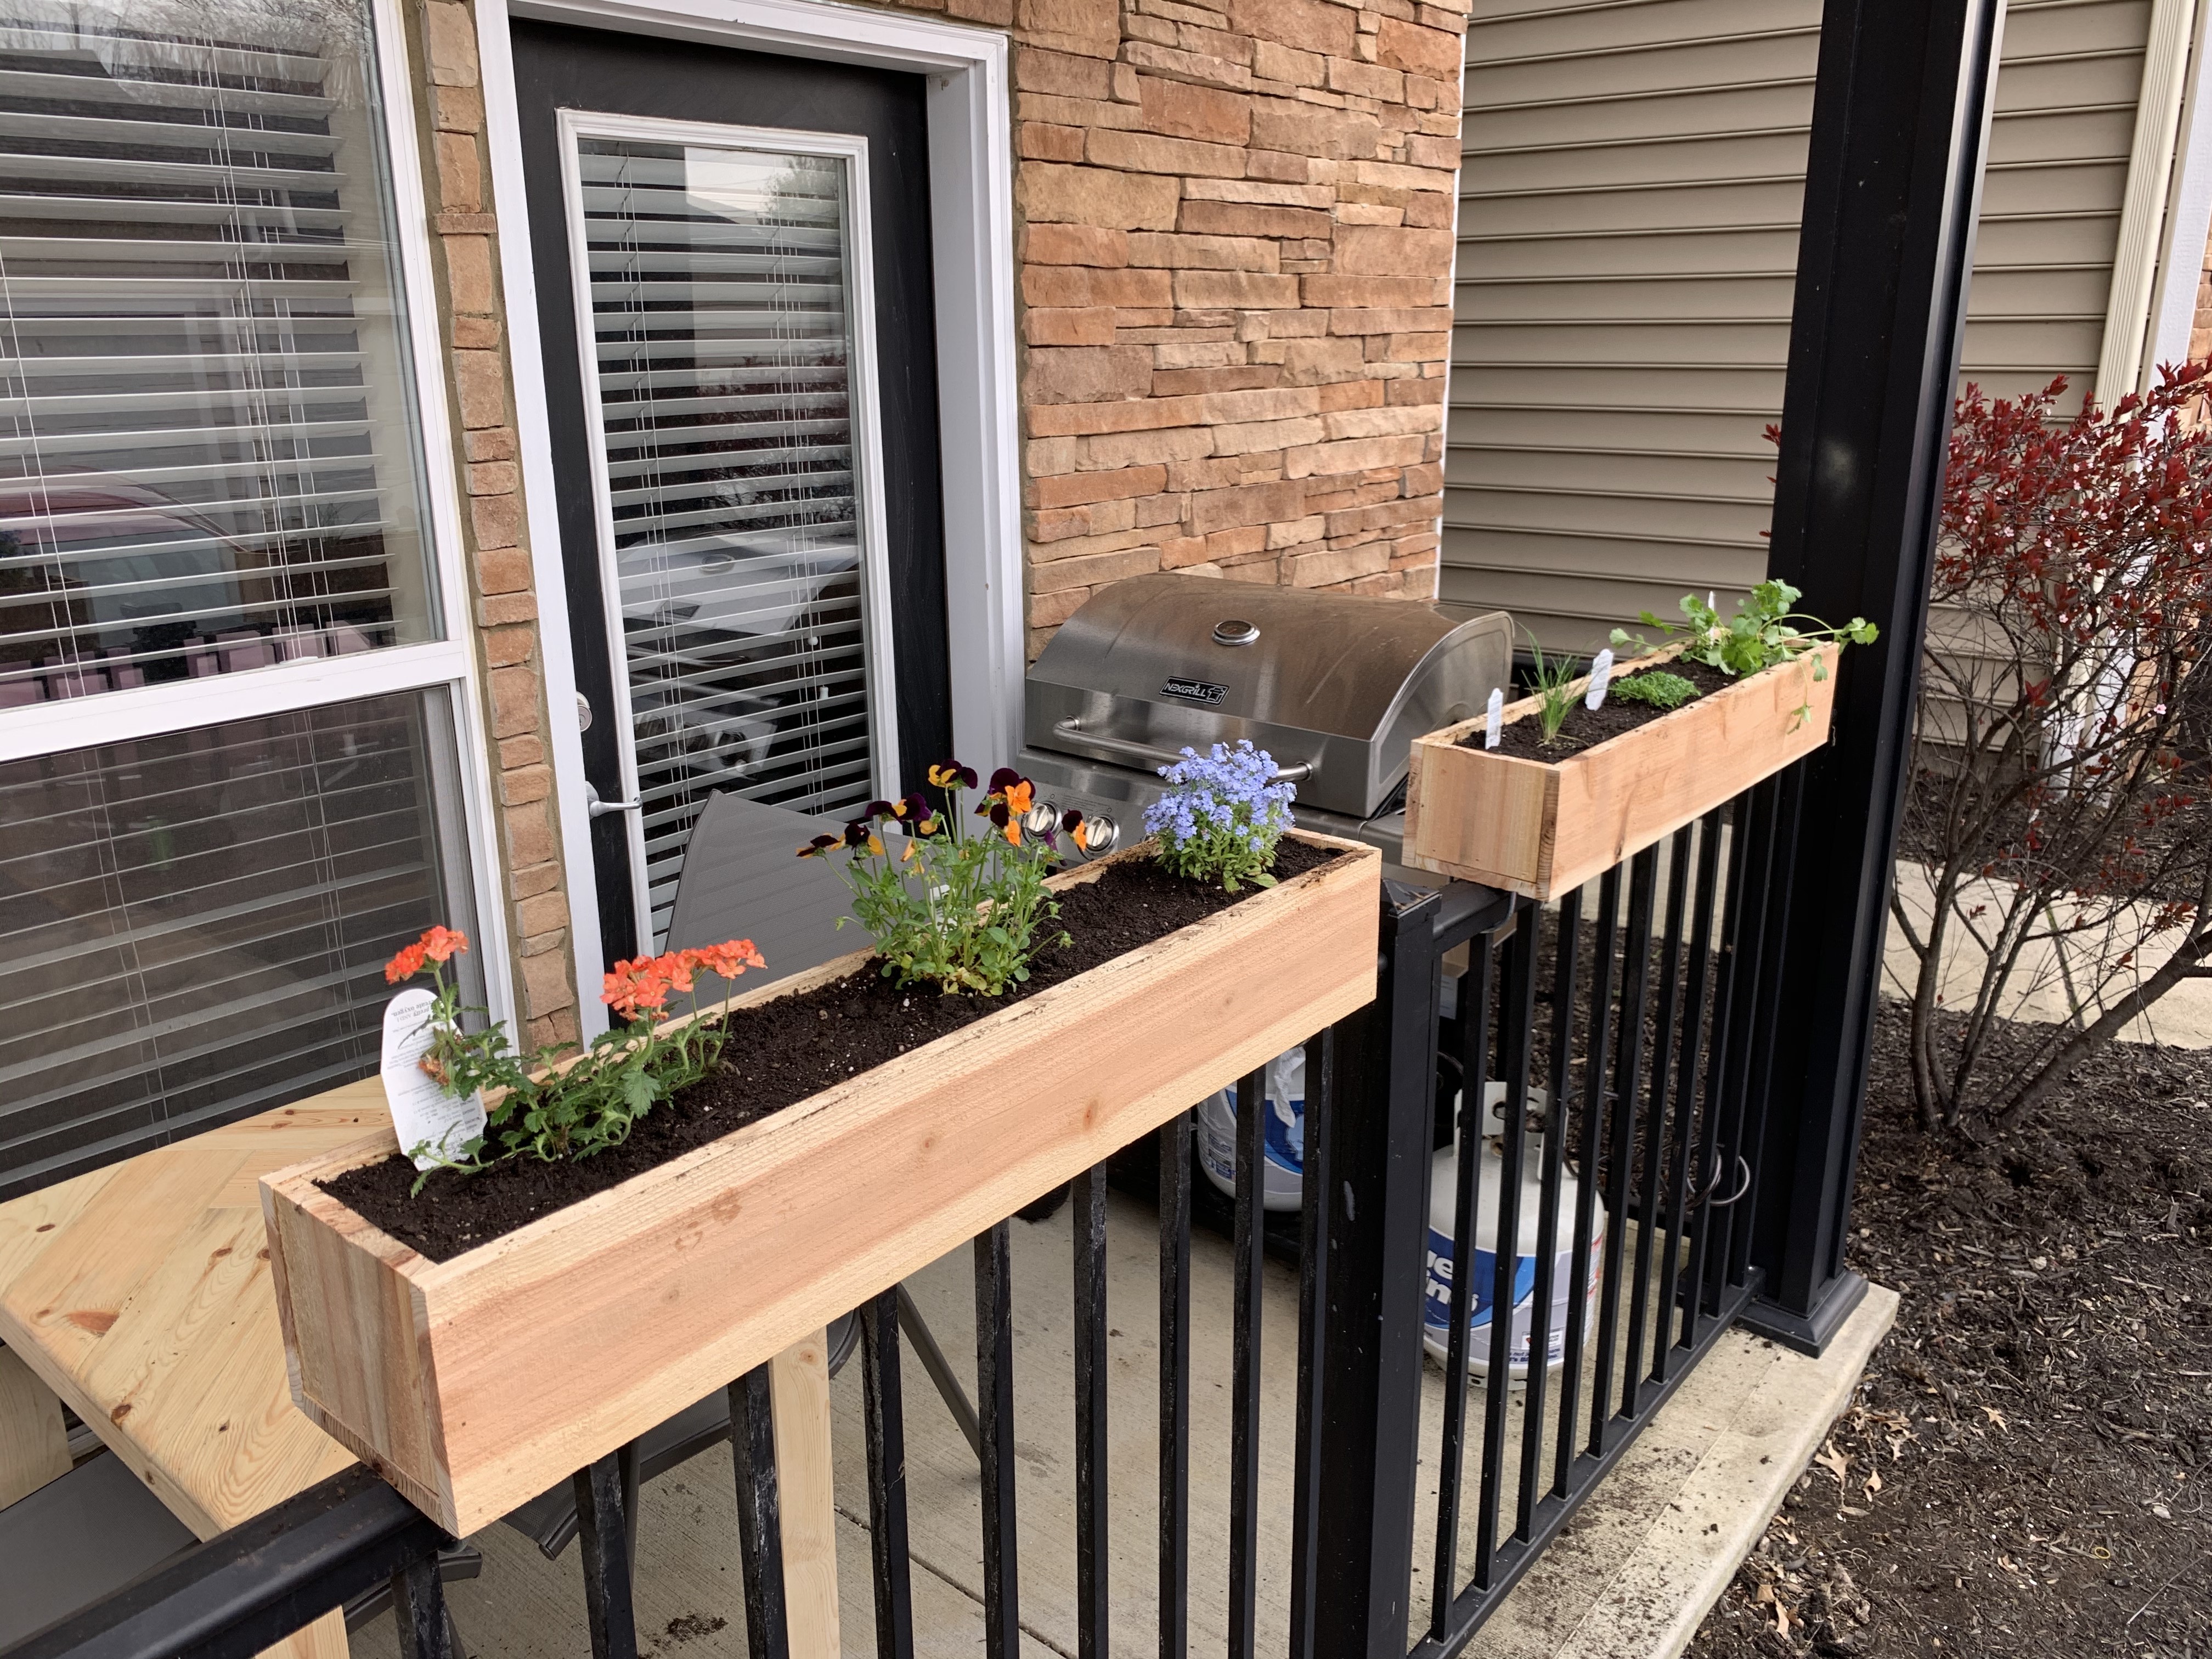
Attach to Railing
Using the hardware from the previous step, attach the planter boxes over the railing
-
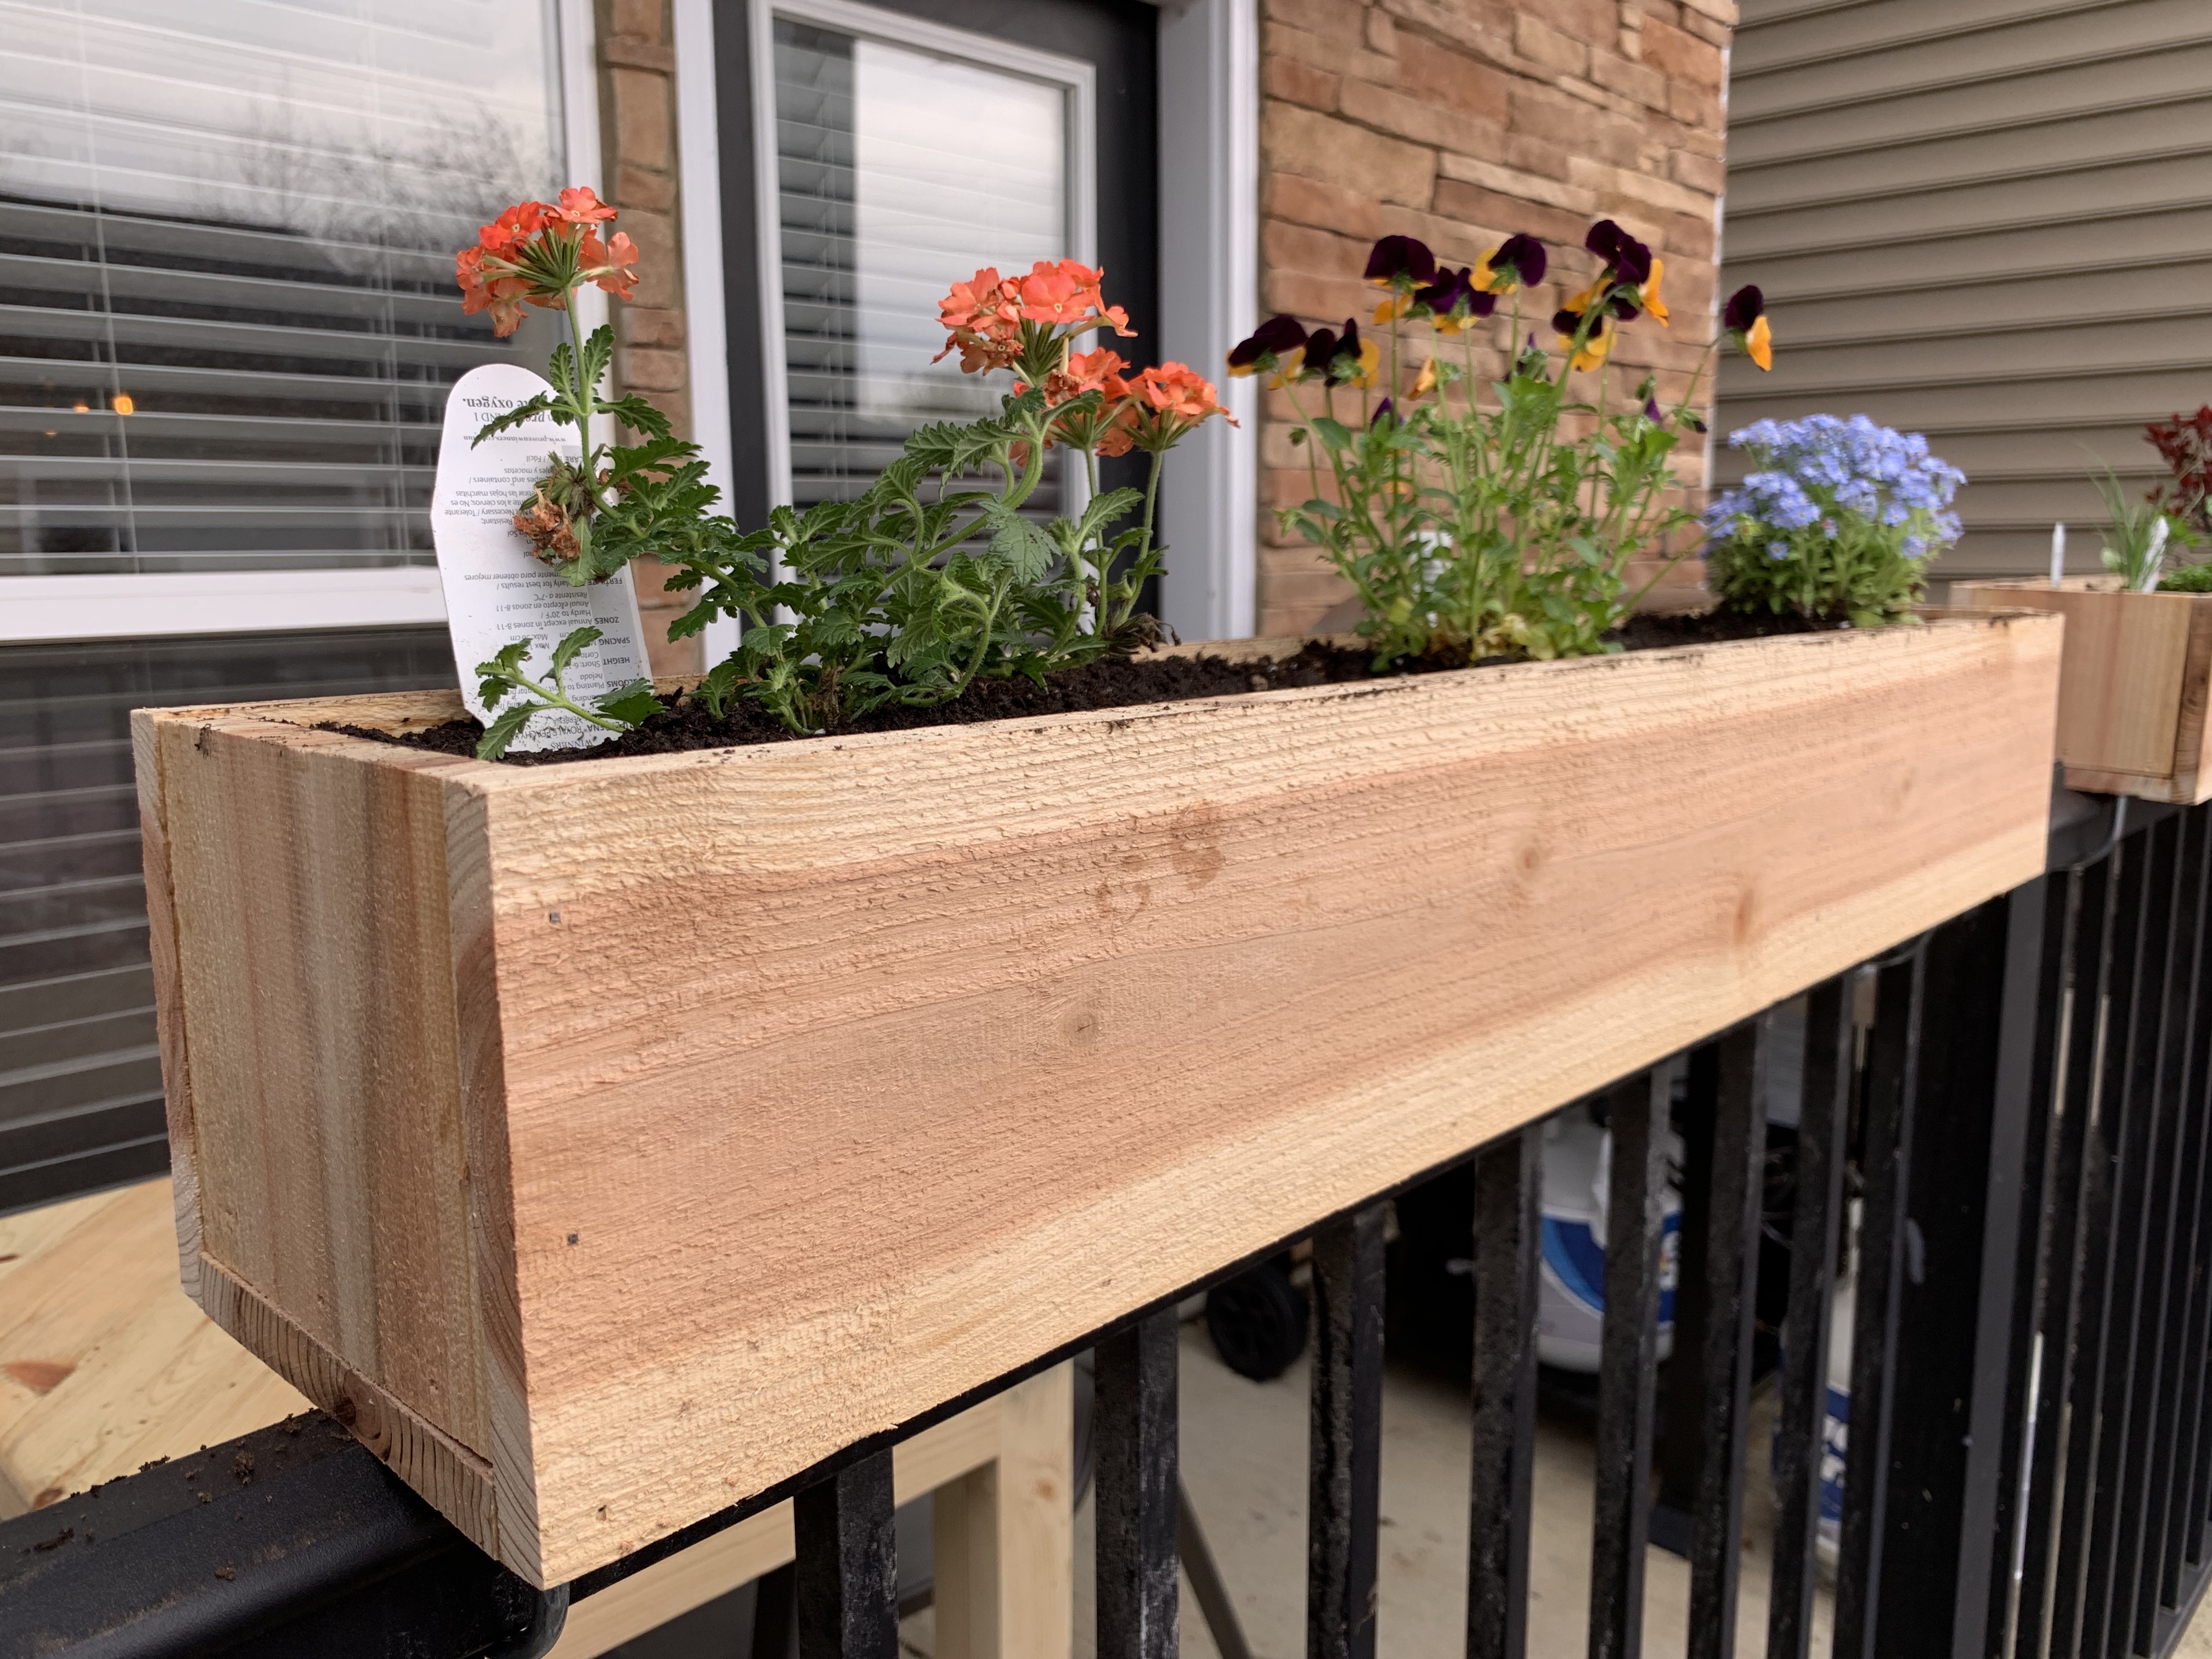
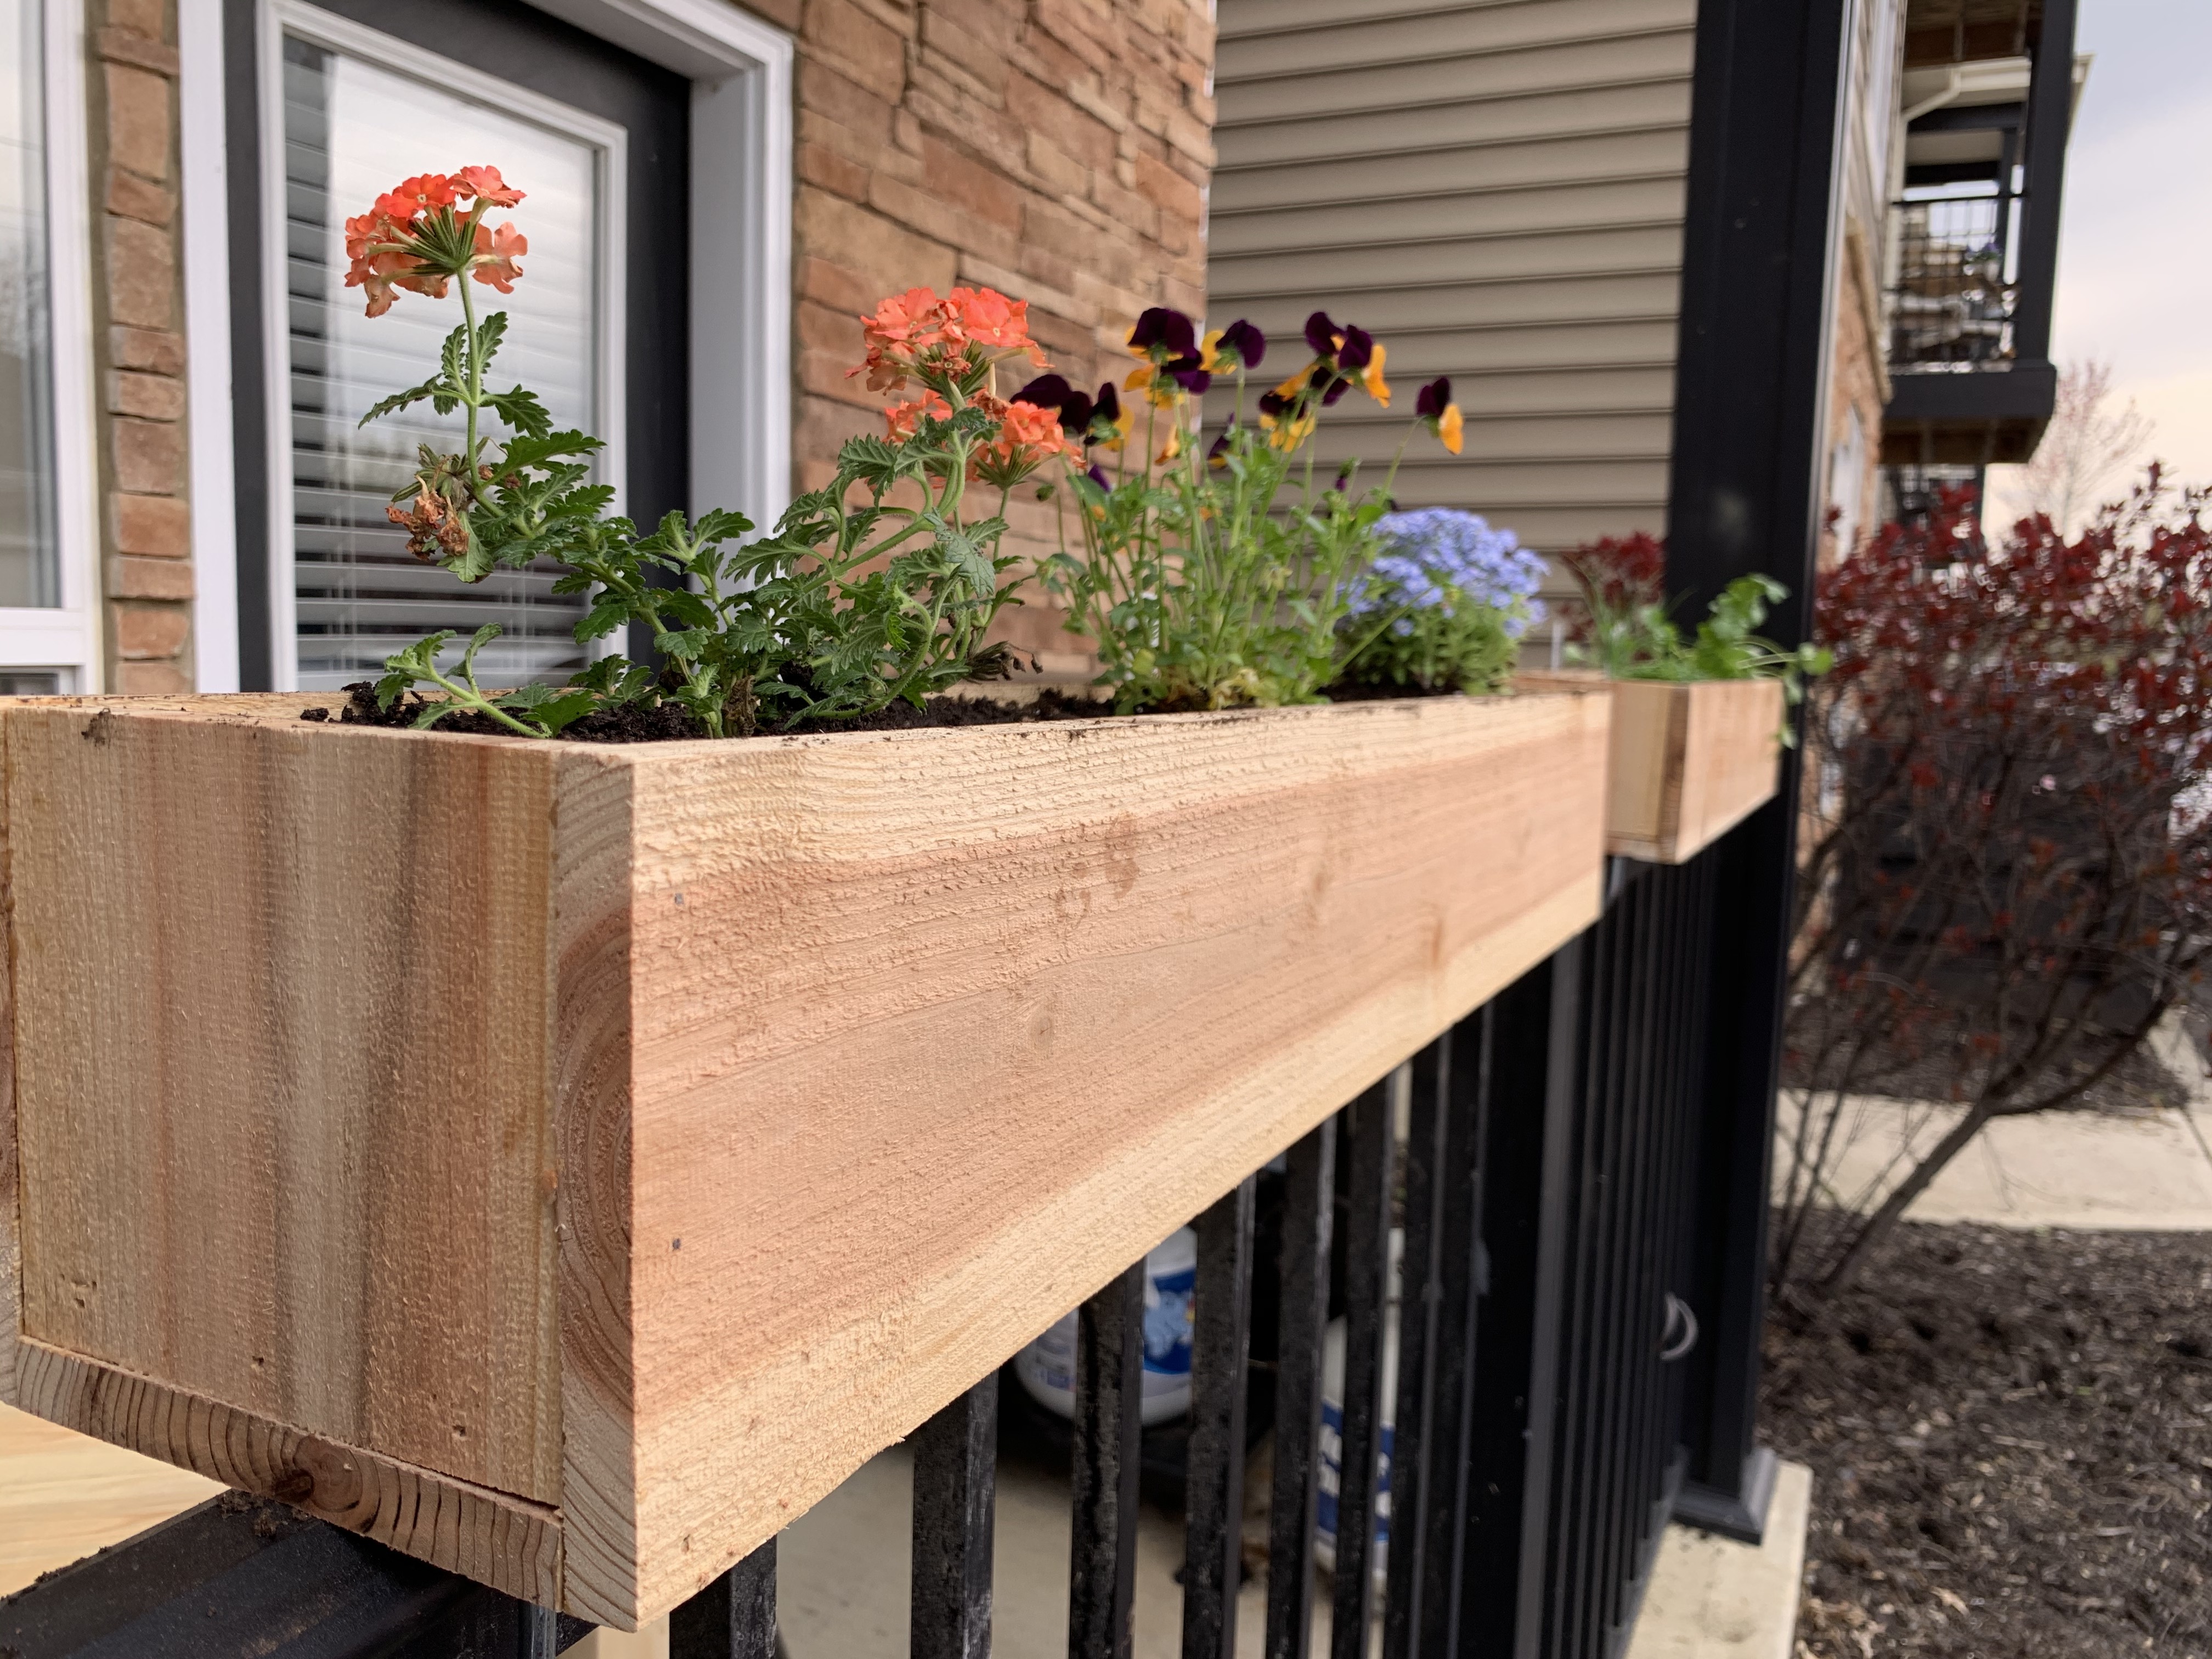
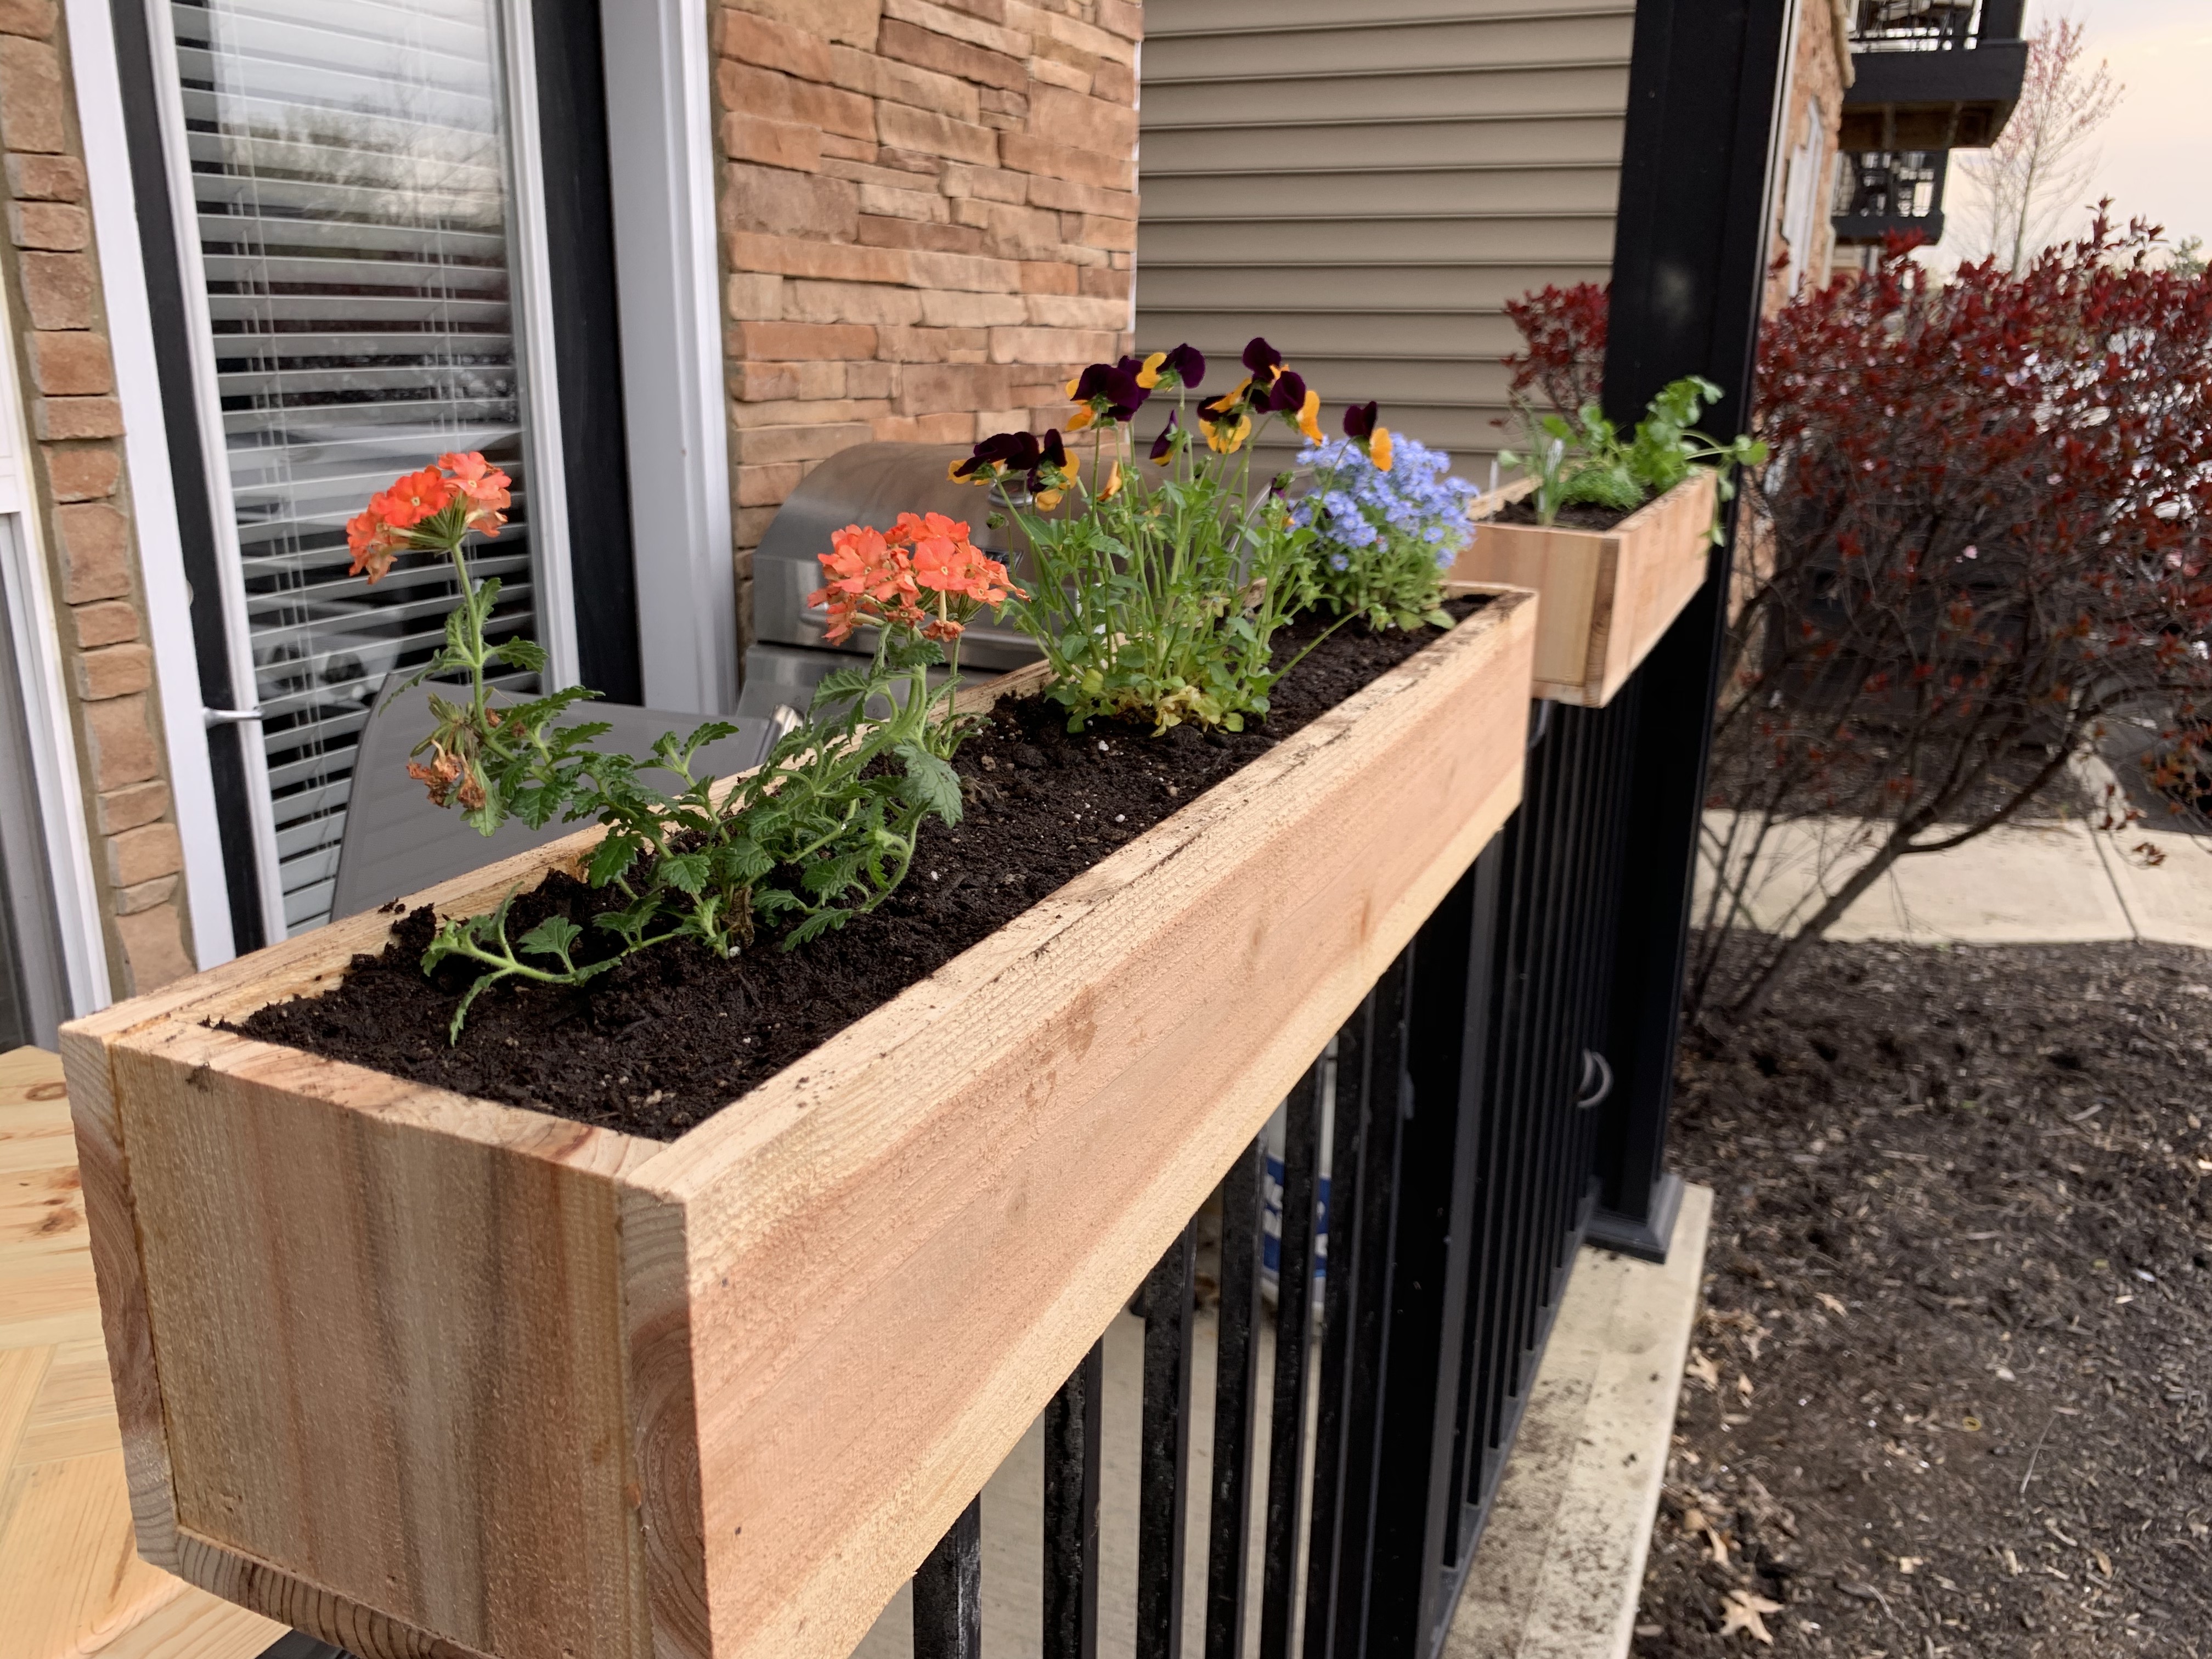
Start Gardening!
Your planter boxes are now done and ready for you to plant anything you want!
- Find More Projects at SpencleyDesignCo.com
- https://www.spencleydesignco.com/all-videos
- Spencley Design Co on YouTube
- https://youtube.com/spencleydesignco
- Spencley Design Co on Instagram
- https://www.instagram.com/spencleydesignco/?hl=en
- Spencley Design Co on TikTok
- https://www.tiktok.com/@spencleydesignco
- Spencley Design Co on Facebook
- https://www.facebook.com/spencleydesignco