Outdoor Ping-Pong Table
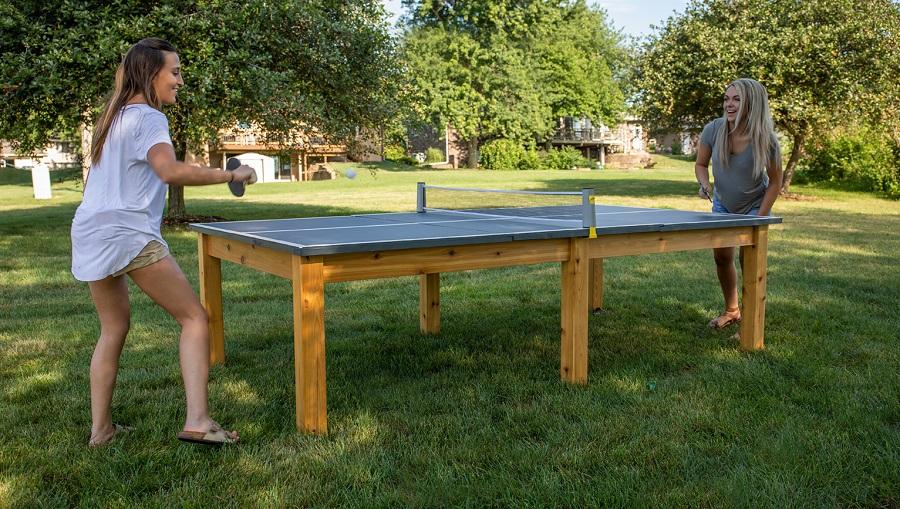
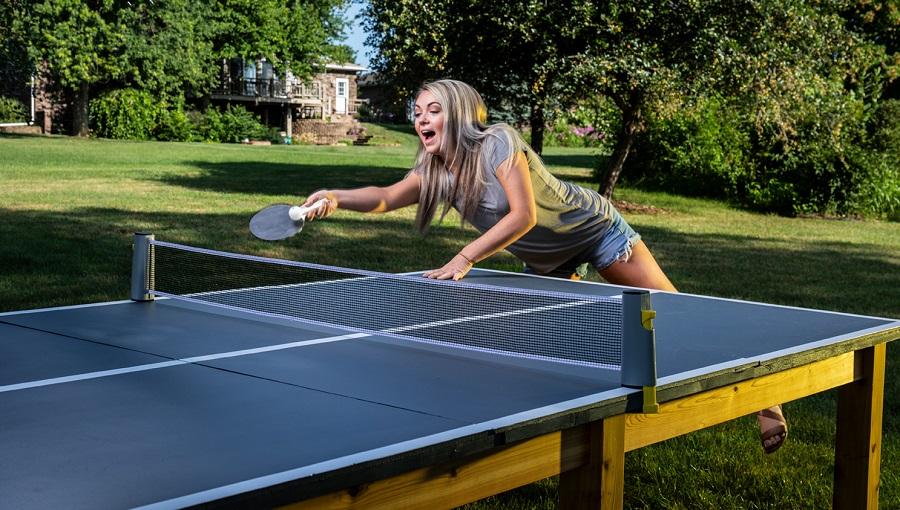
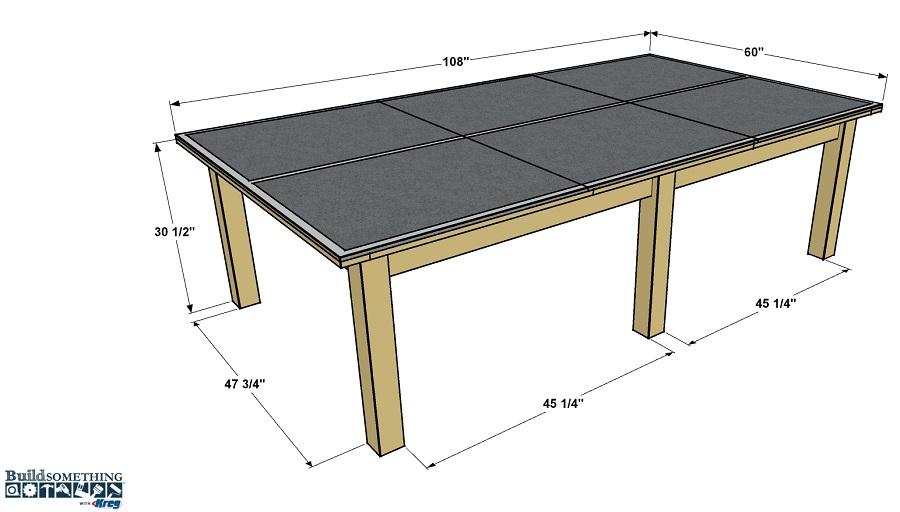
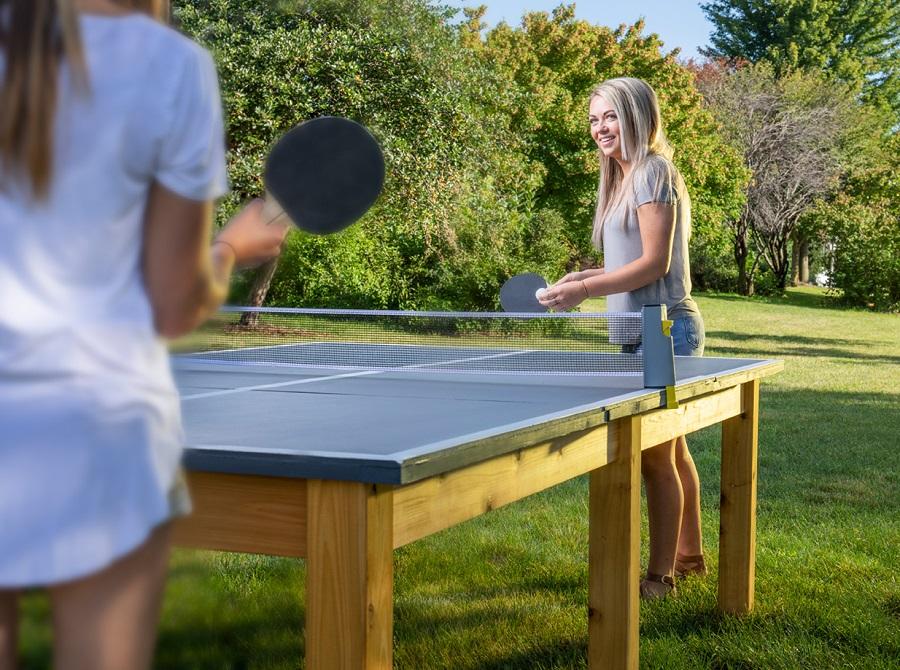
By Kreg ToolTake your backyard fun to a new level with this cool outdoor ping-pong table. With a cedar base and a top made from cement board (usually used for tile underlayment), this table will hold up for years of fun outside. You can build one for yourself with a few tools and a Heavy-Duty Kreg Jig.
Directions
-
Cut the Corner Legs
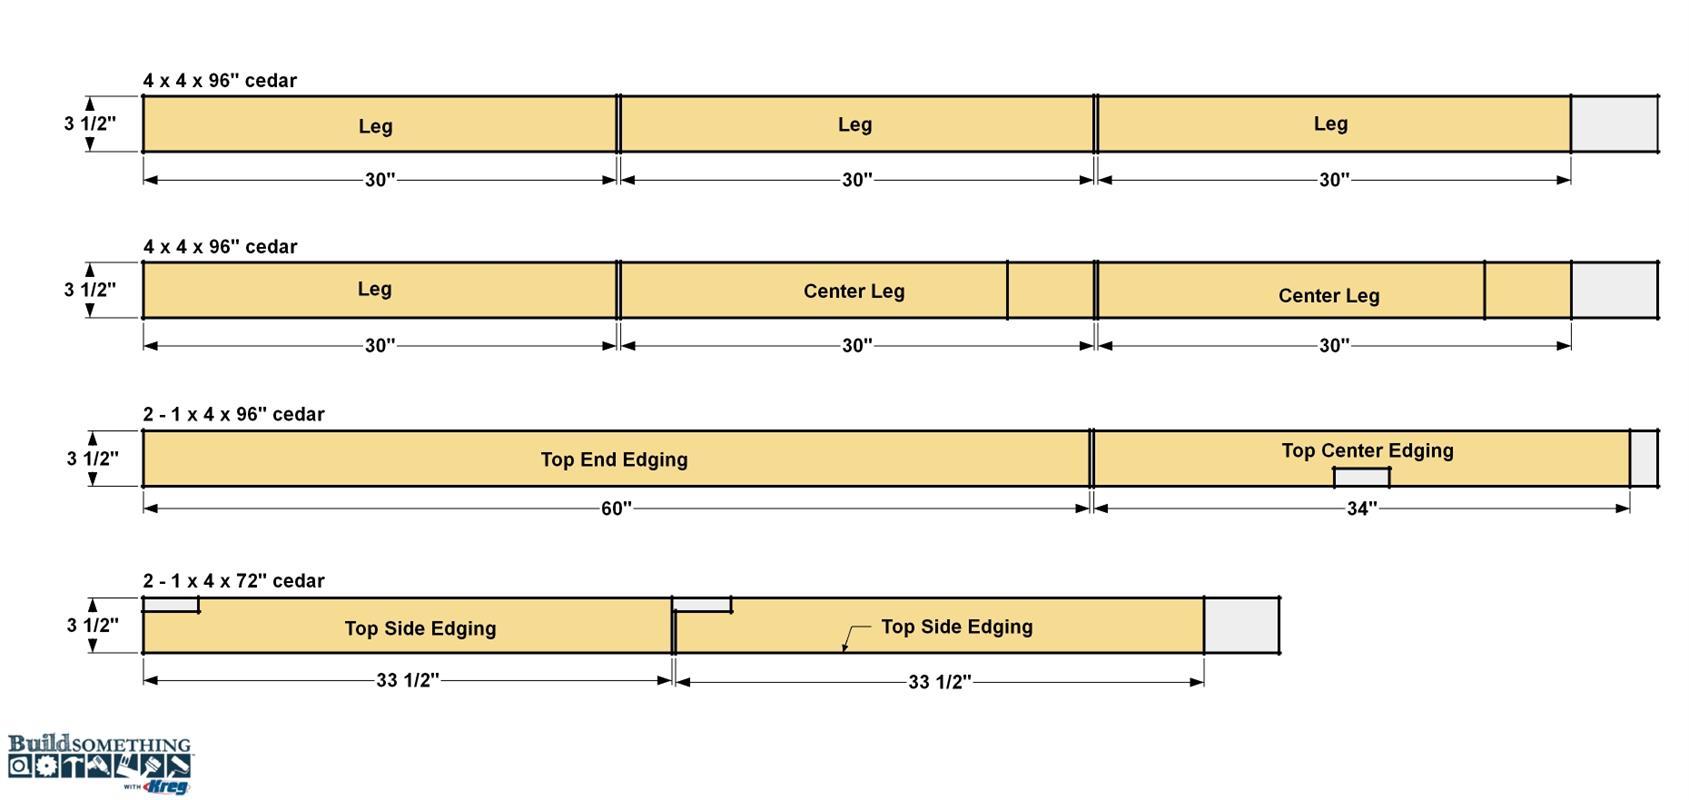
Start by cutting the four Corner Legs to length from 4x4 boards, as shown in the cutting diagram. Then sand the Legs smooth.
-
Make the Rails
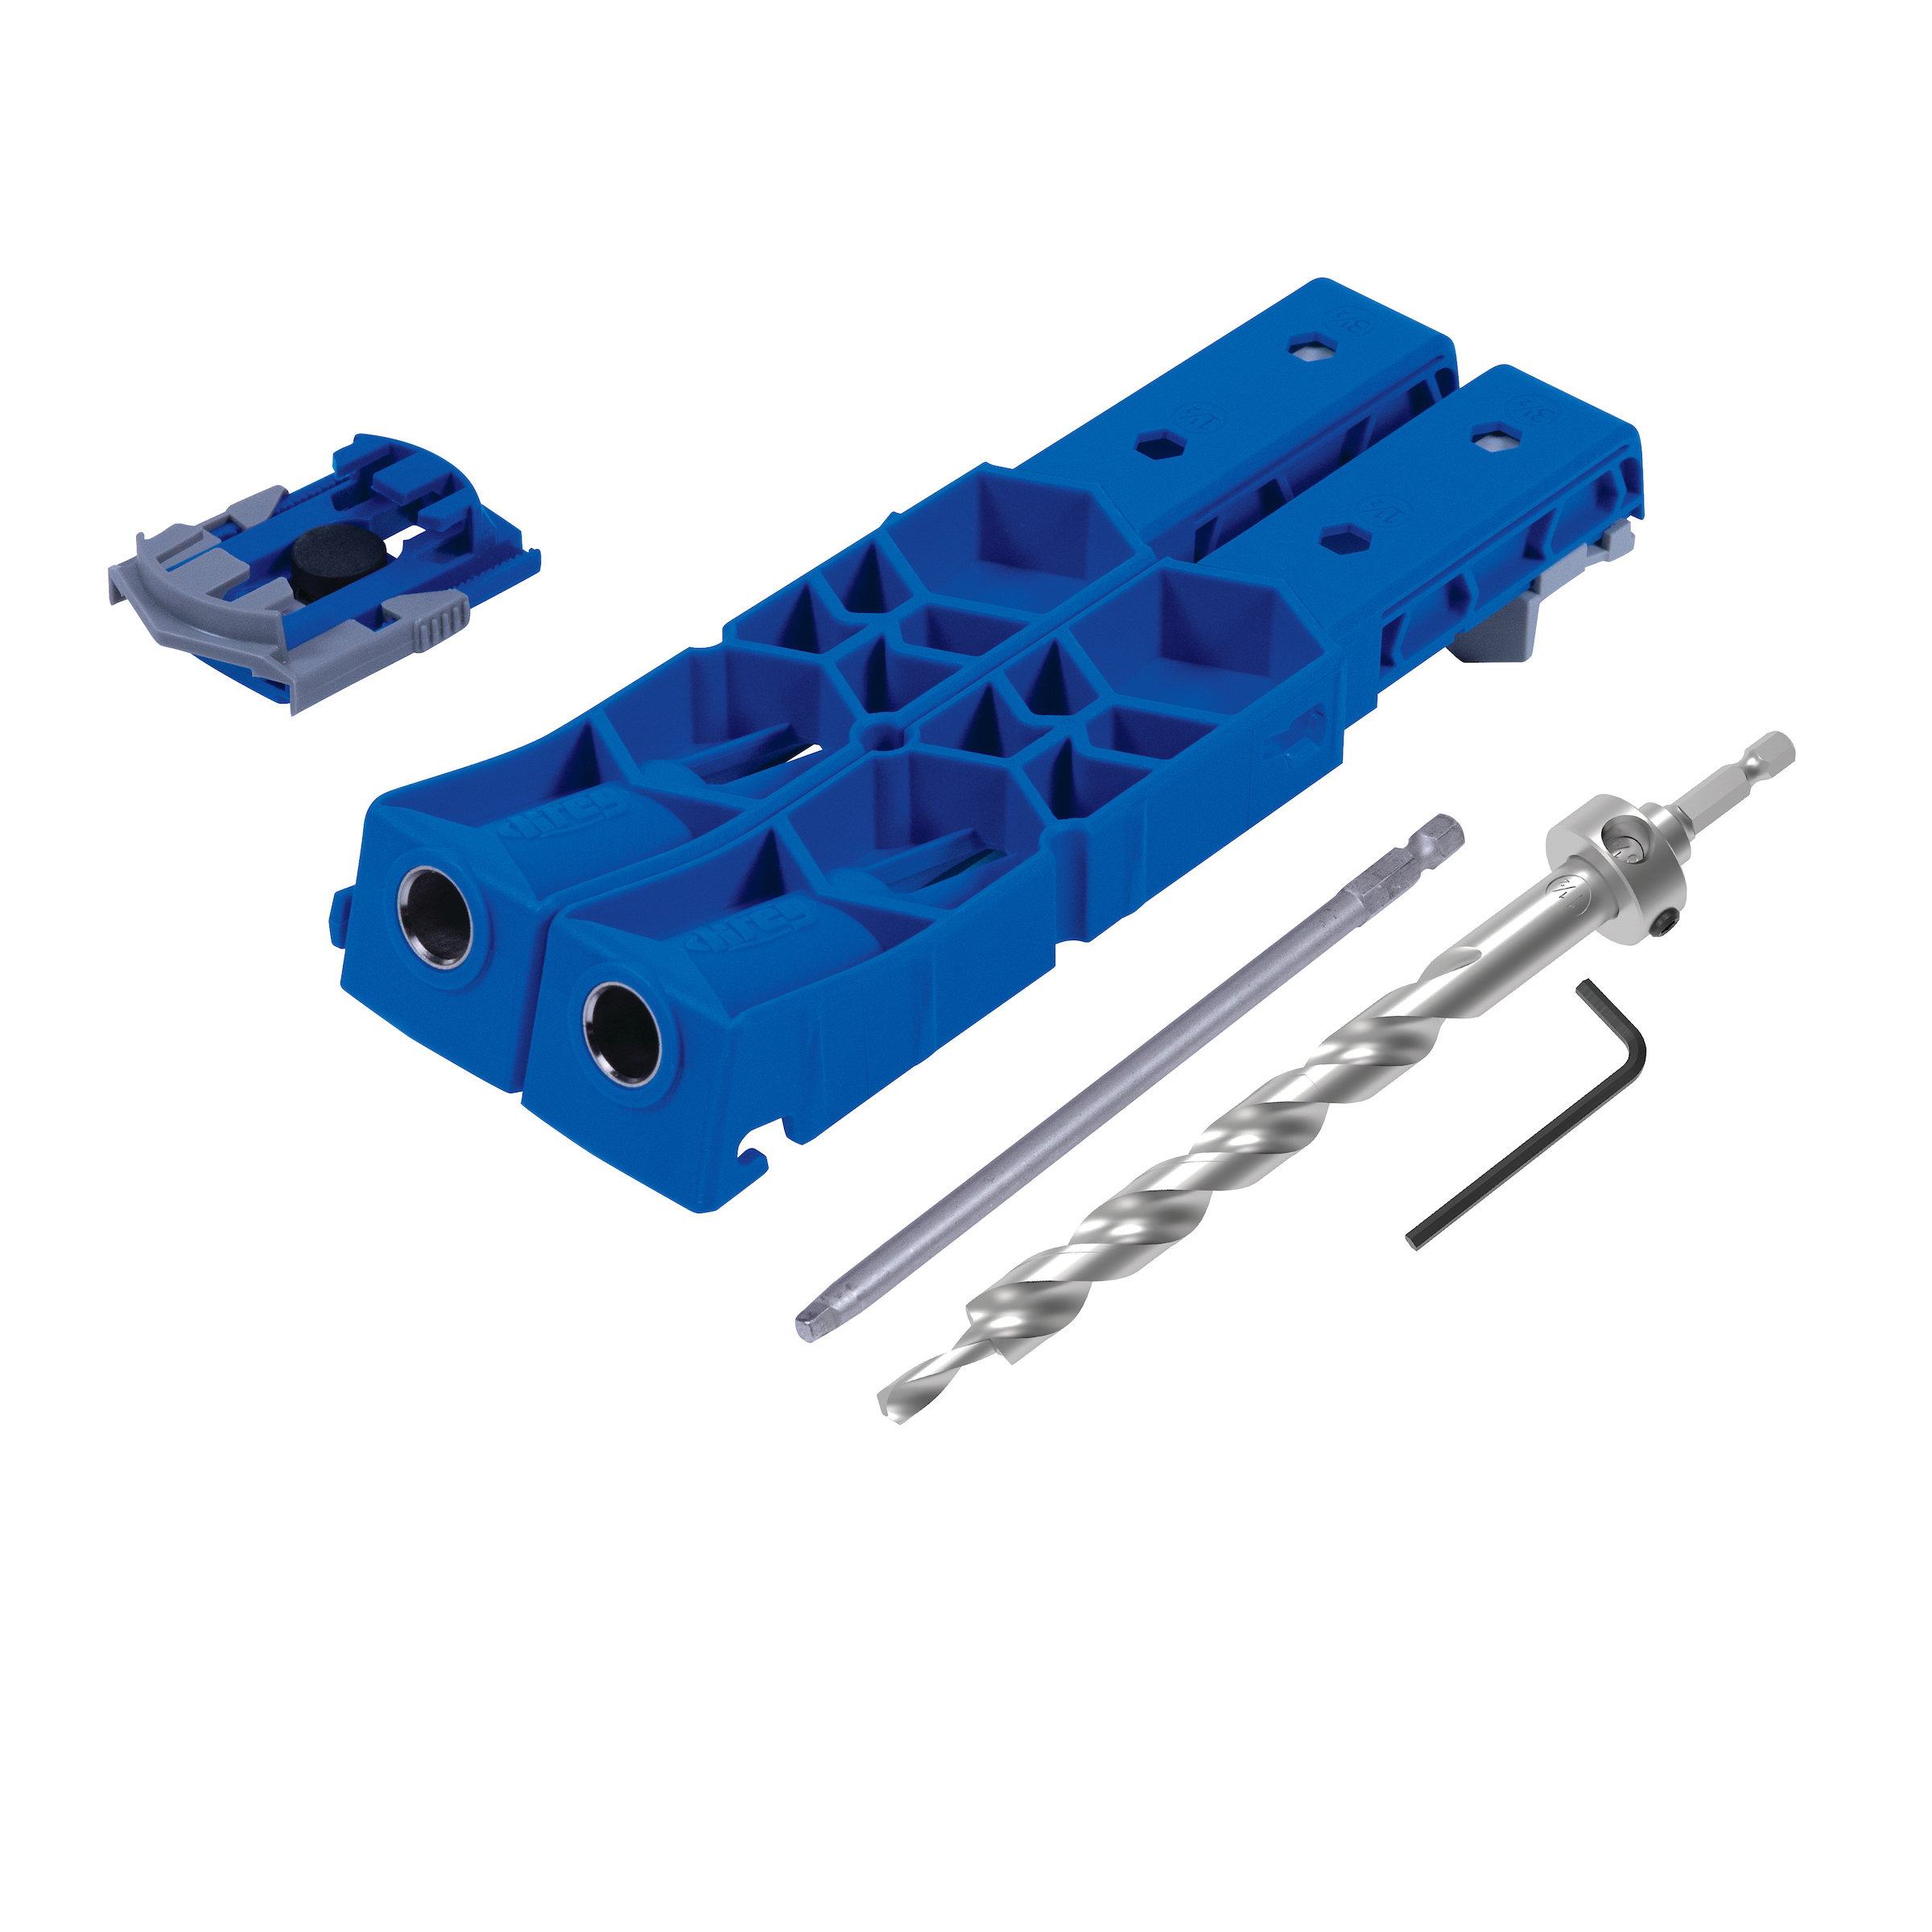
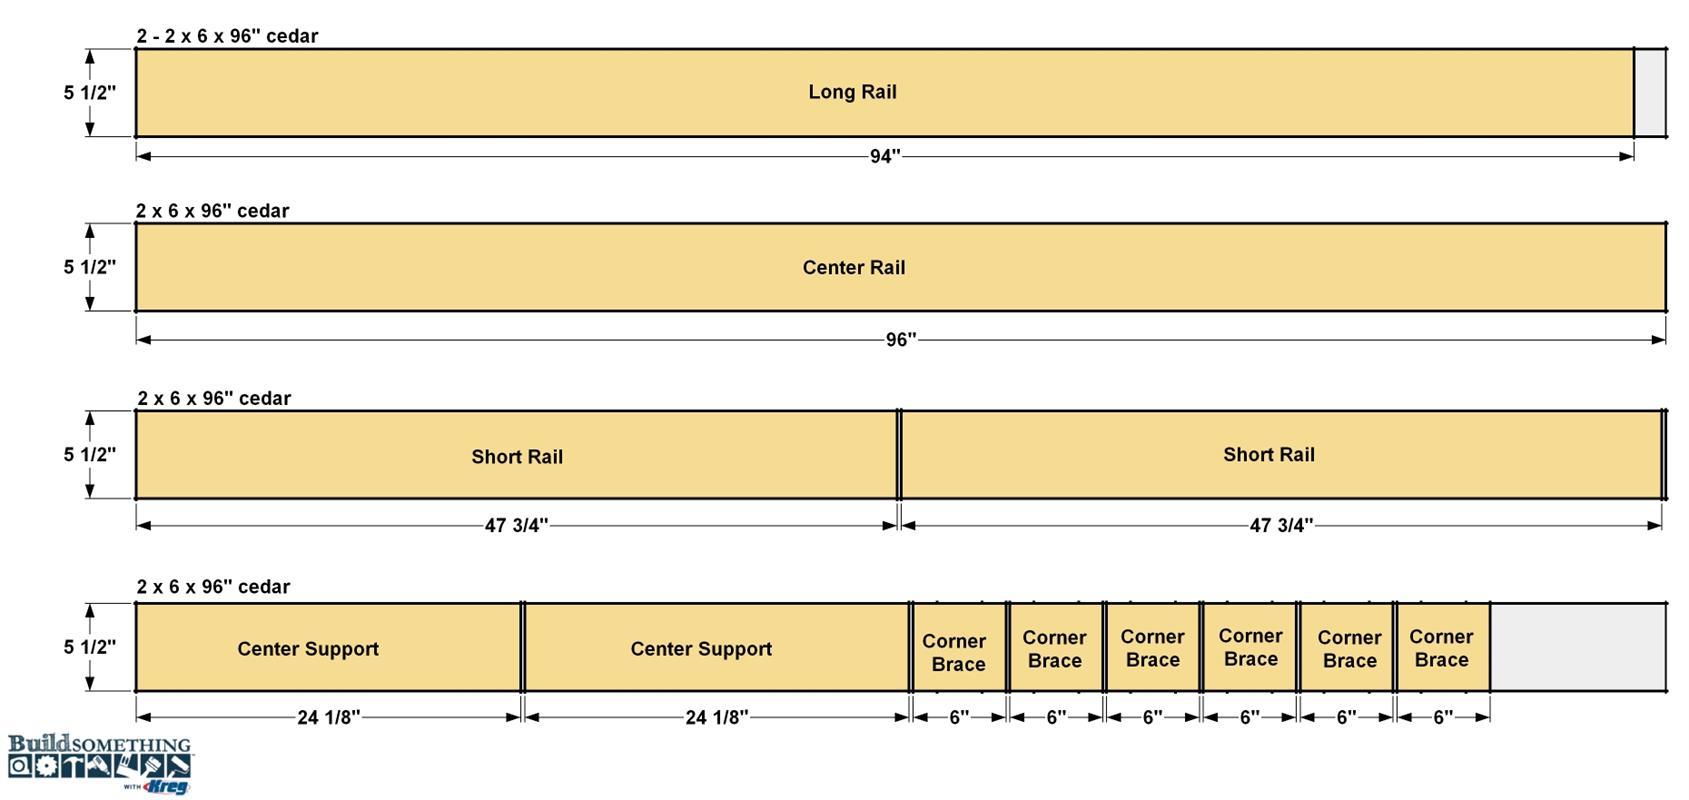
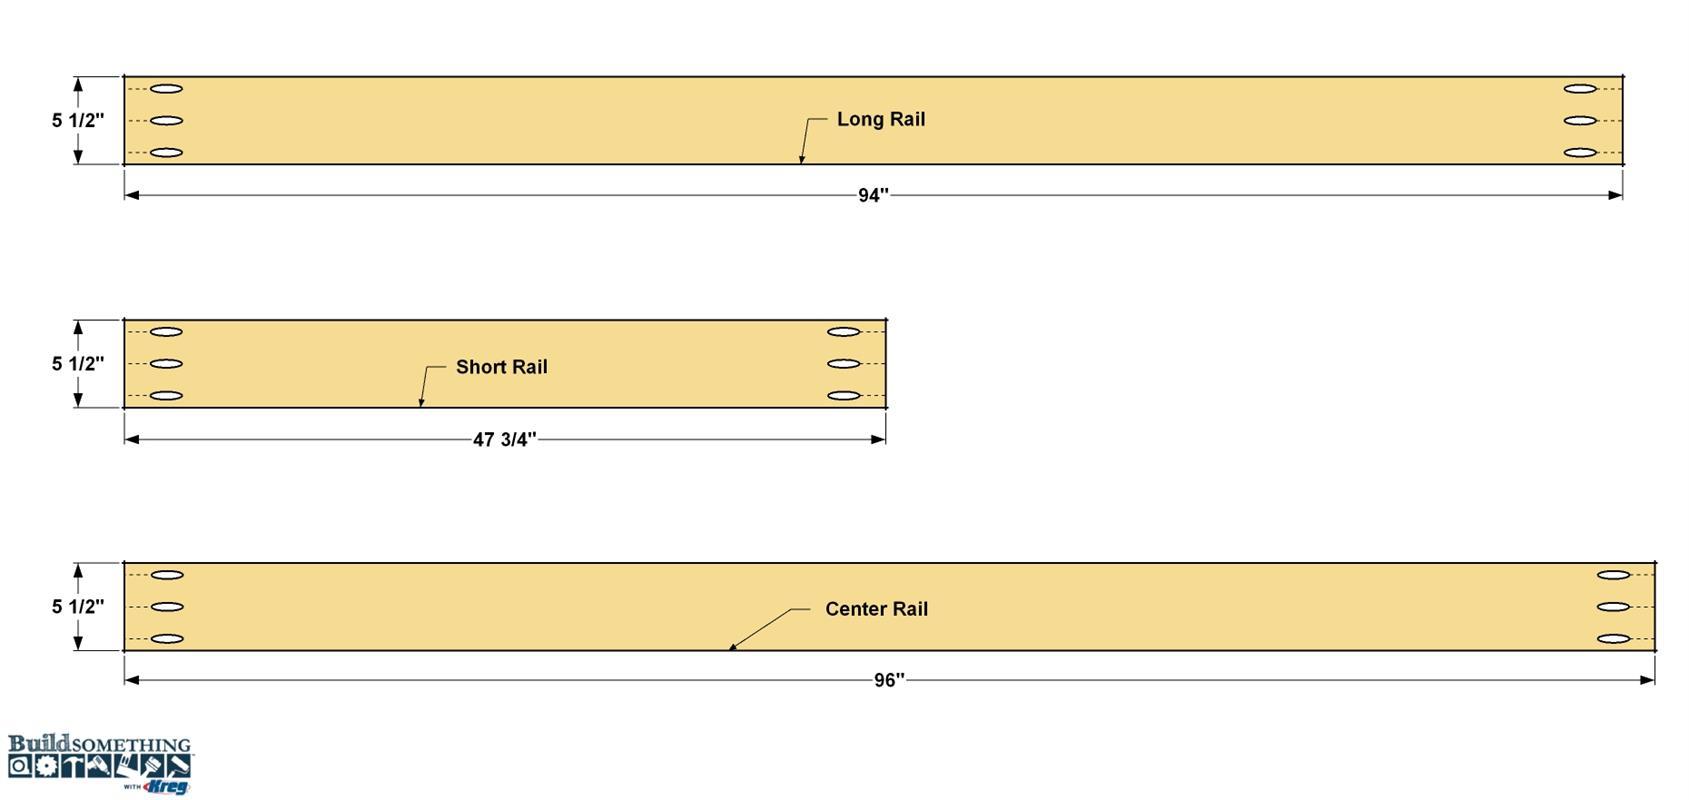
From 2x6 boards, cut two End Rails, two Long Rails and one Center Rail to length. Now you can drill pocket holes. For this project, we chose the Kreg® Pocket-Hole Jig XL. It drills a larger pocket hole to accept bigger screws that are made for building with 2x4 and 4x4 boards. Set the Pocket-Hole Jig XL and drill bit for 1 1/2"-thick material, and then drill pocket holes on each board at the locations shown. Sand the Rails smooth after you drill the pocket holes.
-
Assemble the Ends
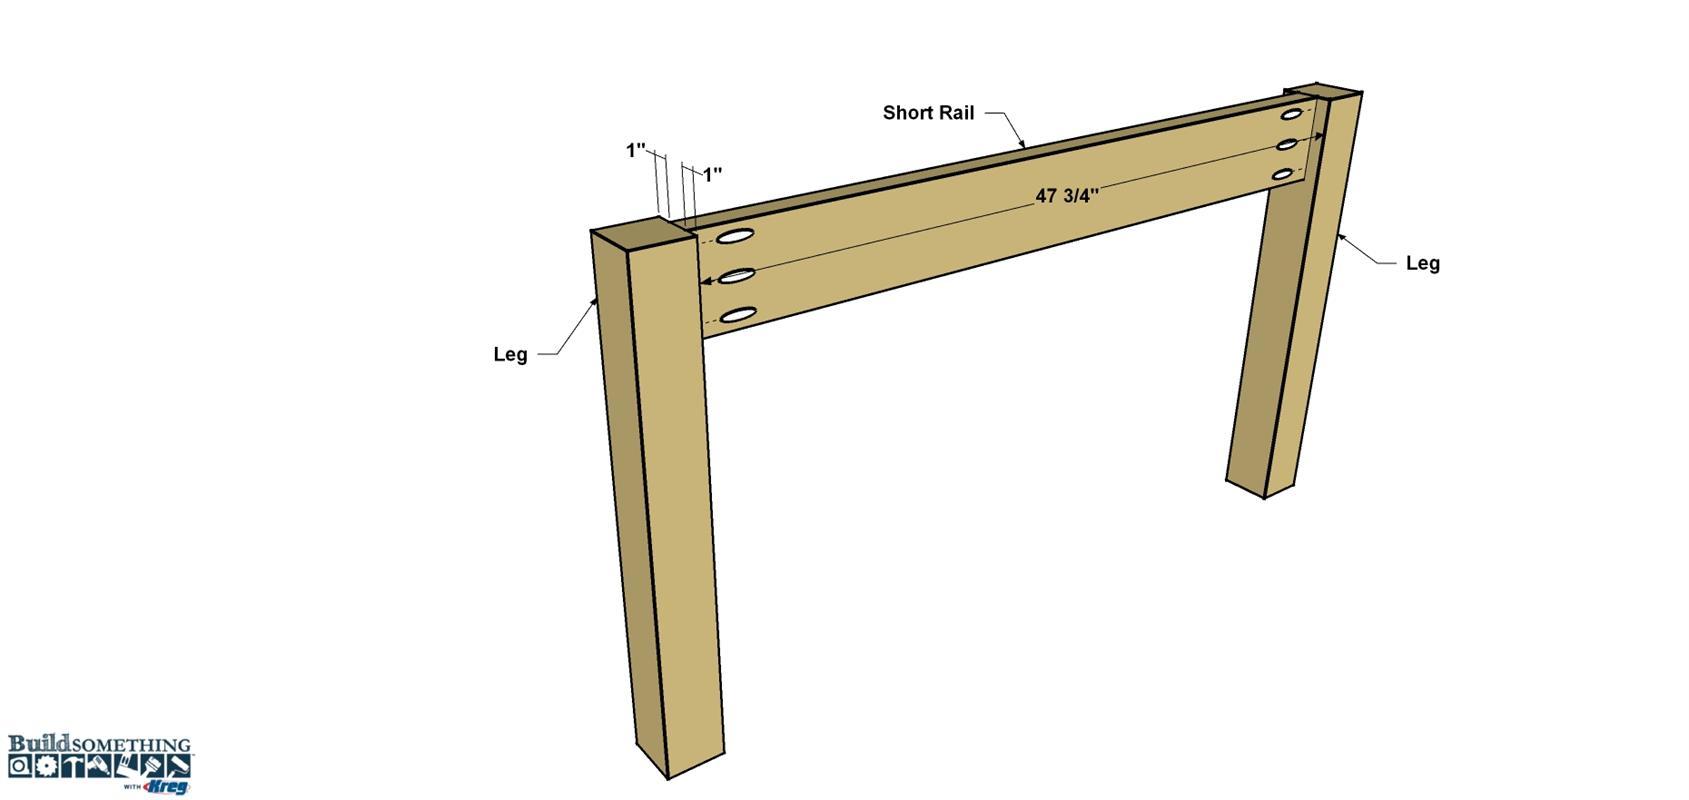
Now you can start assembly with two Legs and one Short Rail. Apply exterior glue to the pocket-hole ends of the End Rails. And then position the End Rail so it is centered on the width of each Leg and flush at the top, as shown. Secure the Short Rail with 2 1/2" XL Pocket-Hole Screws as shown. Repeat the process to assemble the other end section.
-
Attach the Remaining Rails
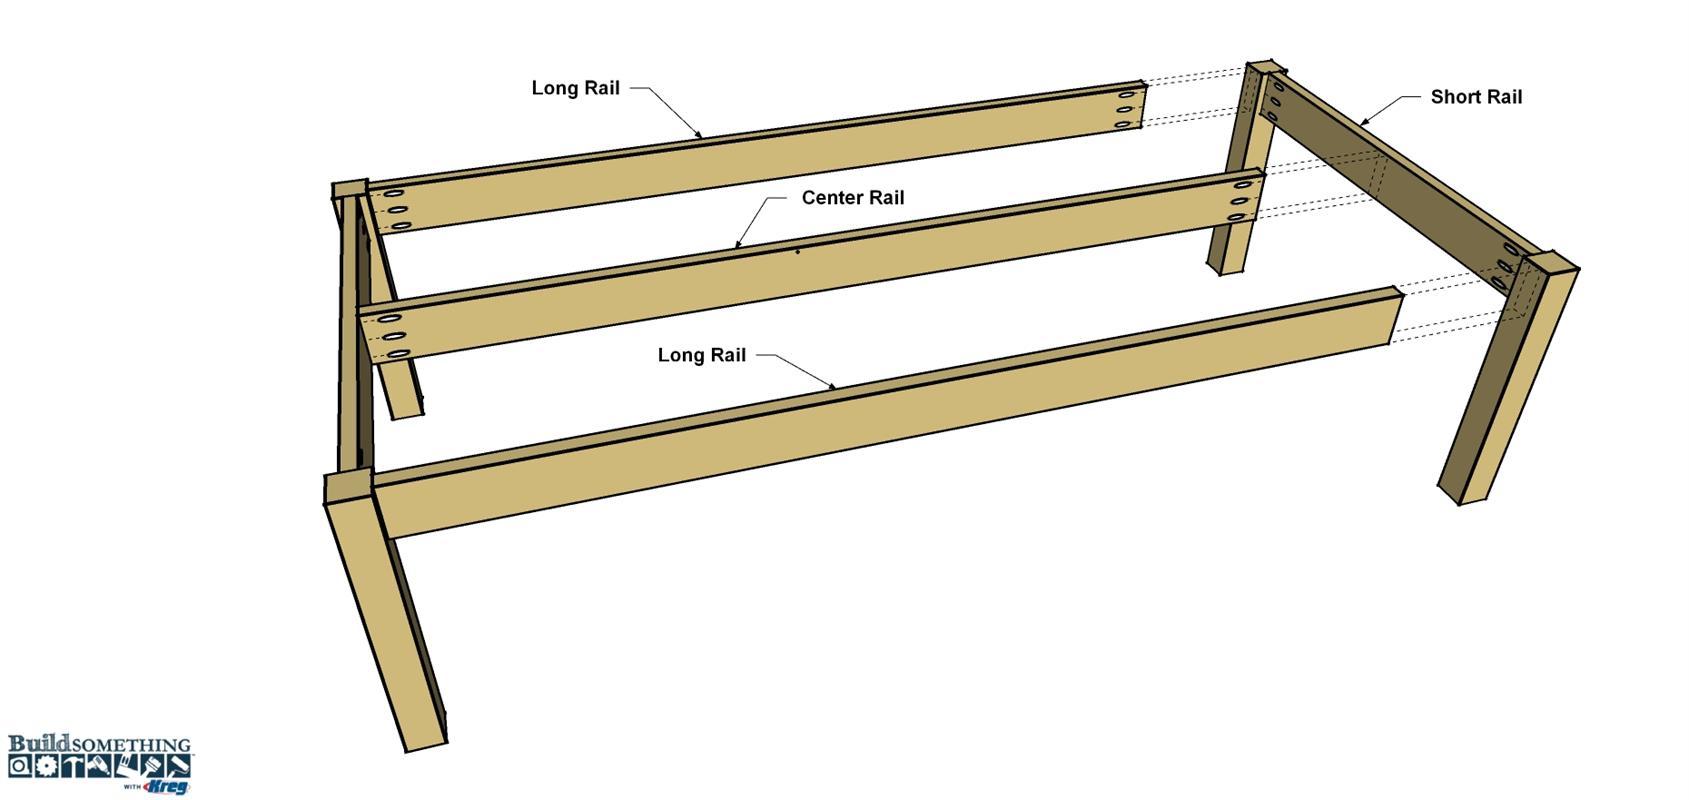
Apply glue to the pocket-hole ends of one Long Rail, and then position it between tow end assemblies, as shown. Make sure the Long Rail is centered on the width of each Leg and flush at the top edge. Secure the Long Rail using 2 1/2" XL Pocket-Hole Screws. Do the same for the second Long Rail. Next, position the Center Rail so it is centered on the Short Rail and flush at the top as well. Secure it with Kreg 2 1/2" XL Pocket-Hole Screws. Finally, Add the other end assembly so the base will stand on its own.
-
Make the Center Legs
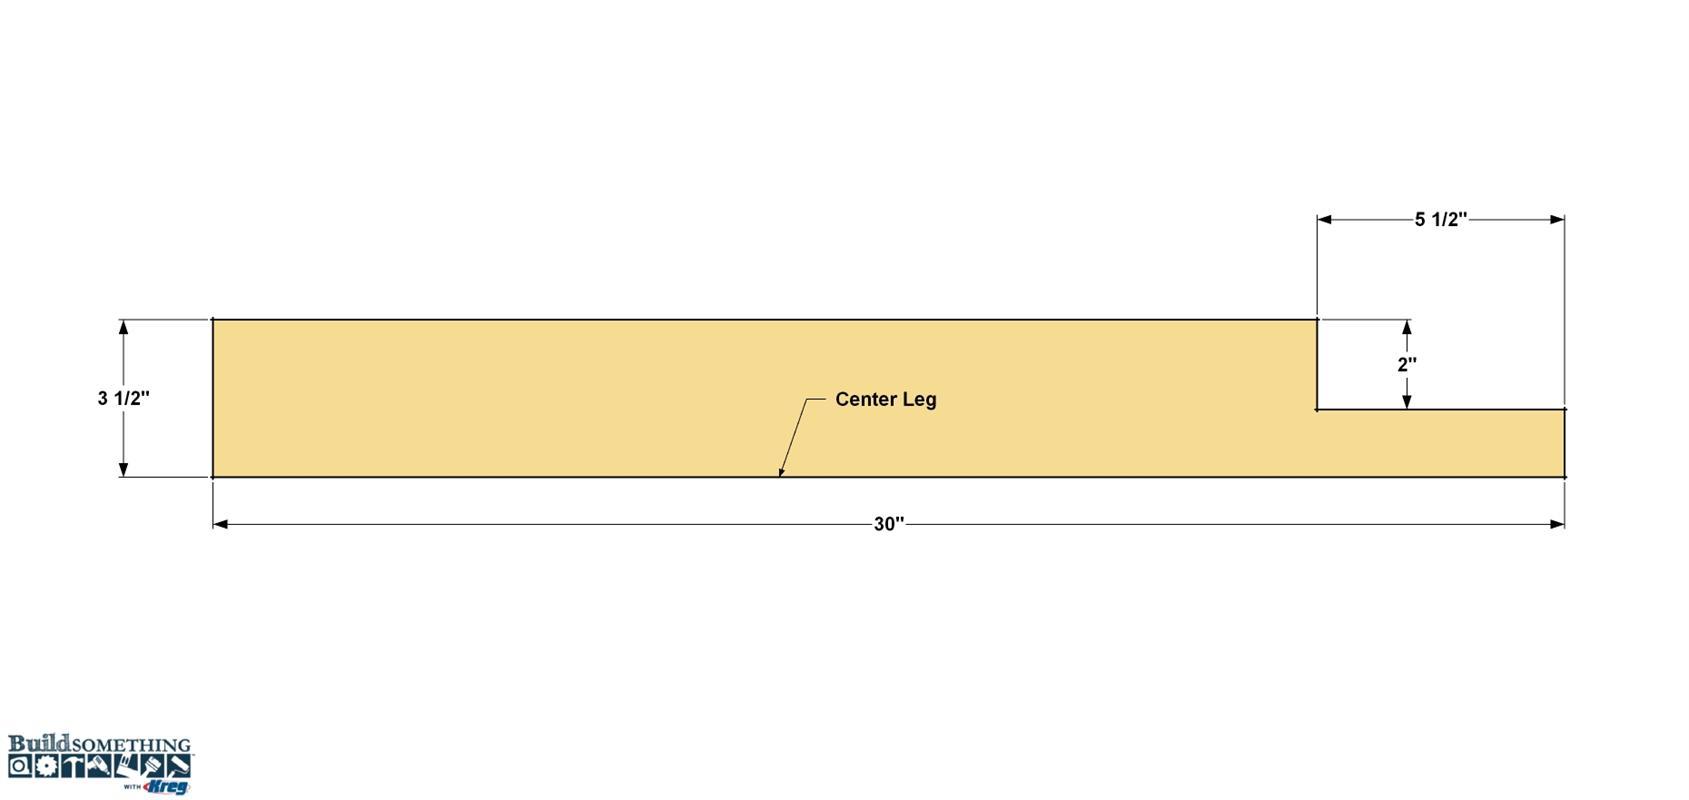
From a 4x4 board, cut two Center Legs to length, as shown in the cut diagram. Now lay out the notch on each Leg. Set your circular saw blade to the 2" depth of the notch, and then make a cut across the Leg at the 5 1/2" mark. Make consecutive cuts close to one another, working your way toward the upper end of the Leg, as shown in the link below.
-
Install the Center Legs
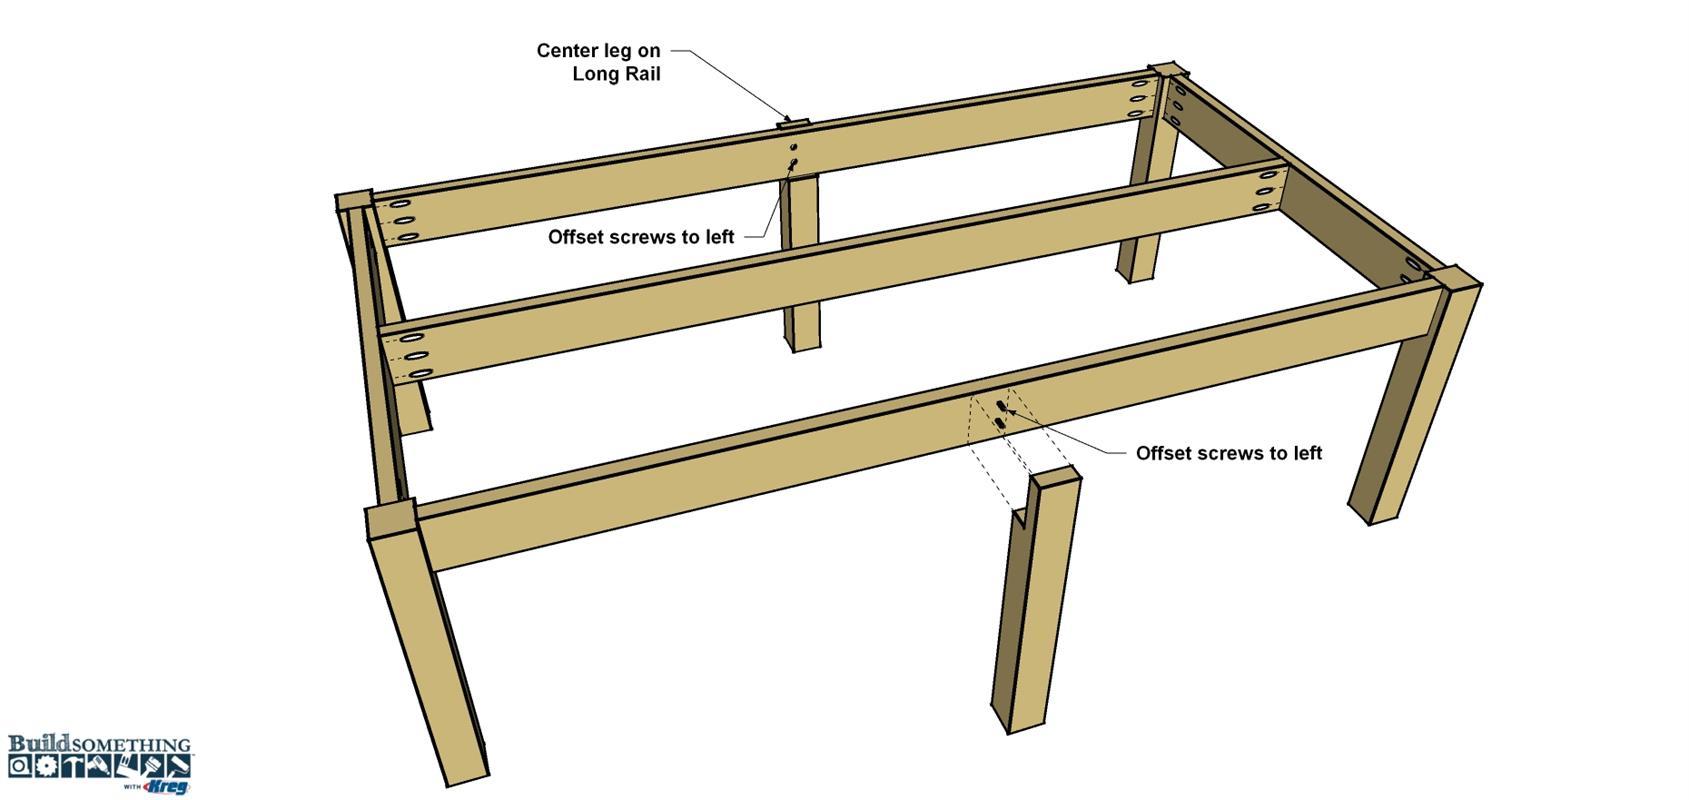
Position the Center Legs so they are centered on the length of the Long Rails. Apply exterior wood glue on the Leg notch and clamp it into position. Make sure the Leg is perpendicular to the Rail. Secure the Leg to the Rail with two Kreg HD screws, as shown. Though you’re not using pocket holes here, the XL Pocket-Hole Screws work great. The self-tapping tips make it easy to drive in the screws without splitting the wood. Note the locations of the screws. They should be offset to the left side of the Leg as you face it. That way, they won’t interfere with mounting the Center Supports in the next step. Repeat this process to attach the other Center Leg.
-
Make the Center Supports
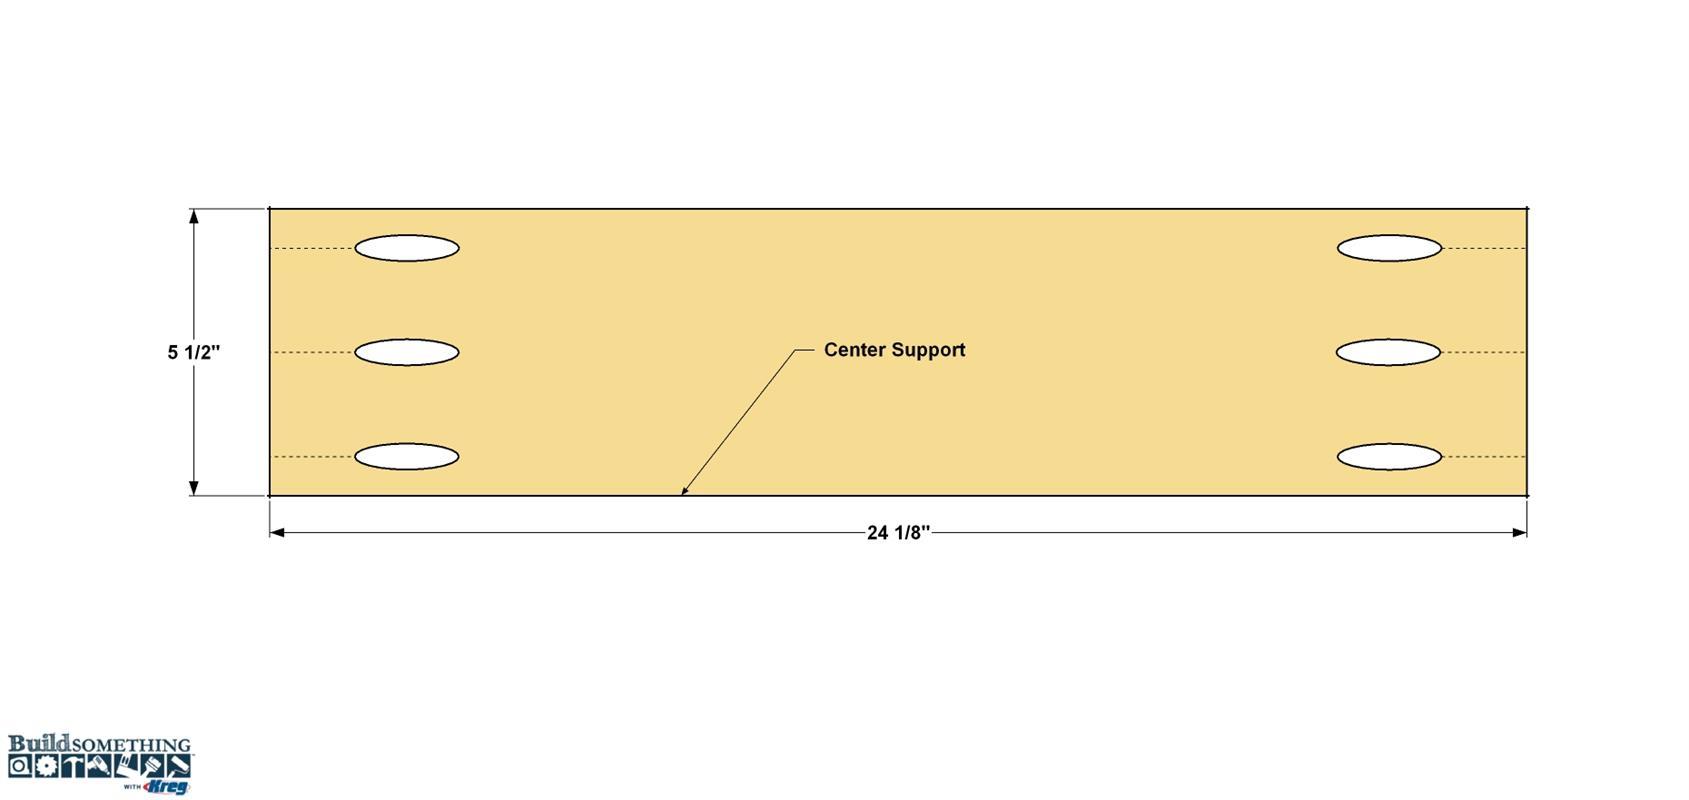
Cut two Center Supports to length from a 2x6 board as shown in the cutting diagram. Using the Pocket-Hole Jig XL, drill pocket holes at the locations shown. Sand the Supports.
-
Install the Supports
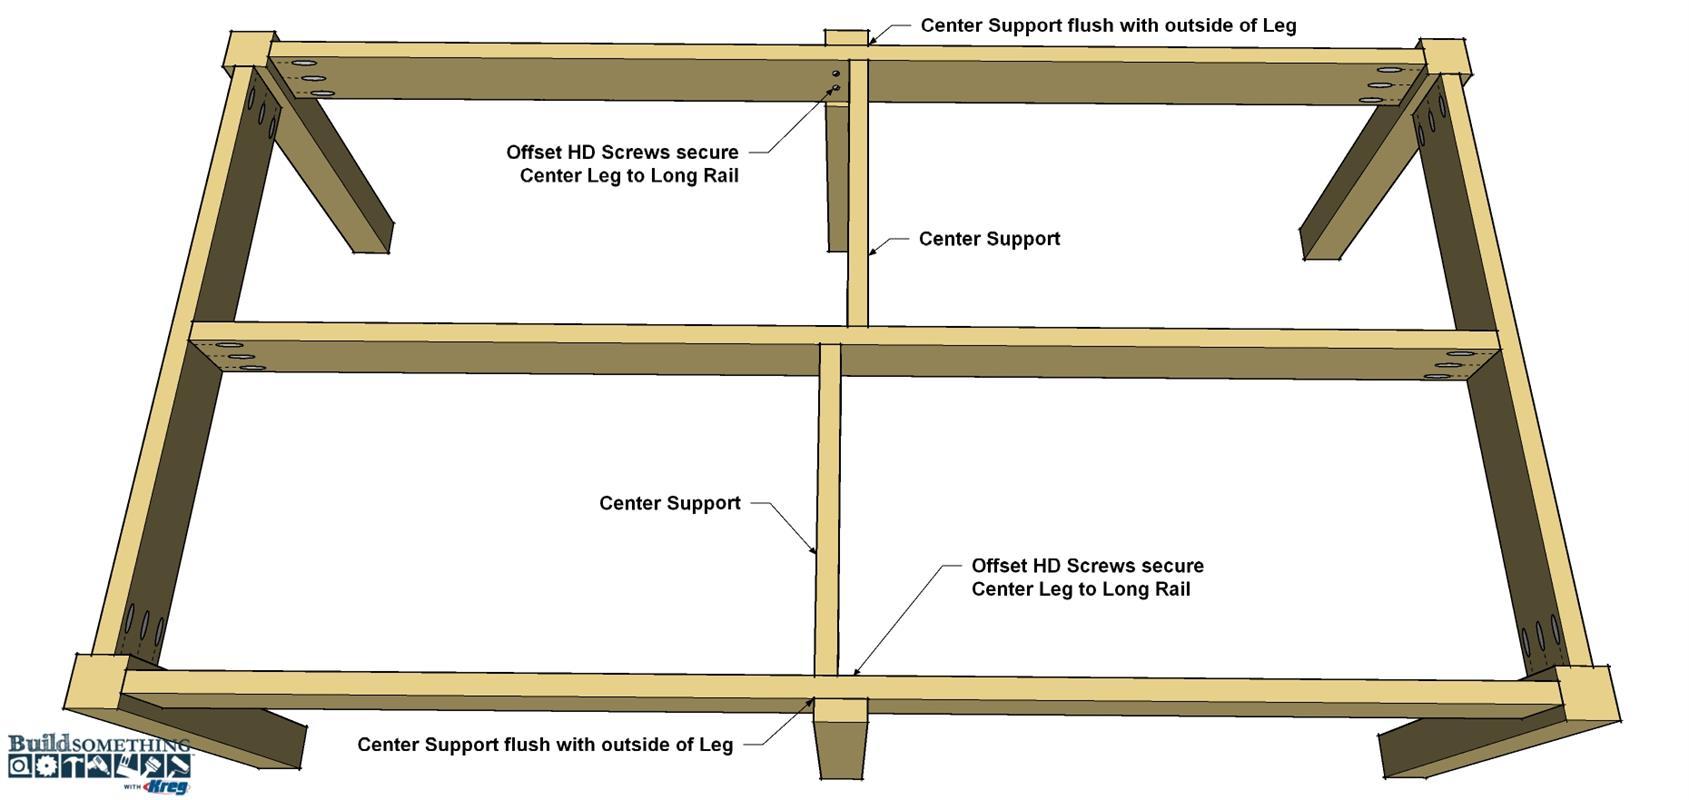
Apply glue to the ends of the first Center Support, and then position it so it’s offset to the right side of the Center Leg, as shown. Secure it with 2 1/2" XL Pocket-Hole Screws. Then attach the second Center Support in the same way.
-
Make the Braces
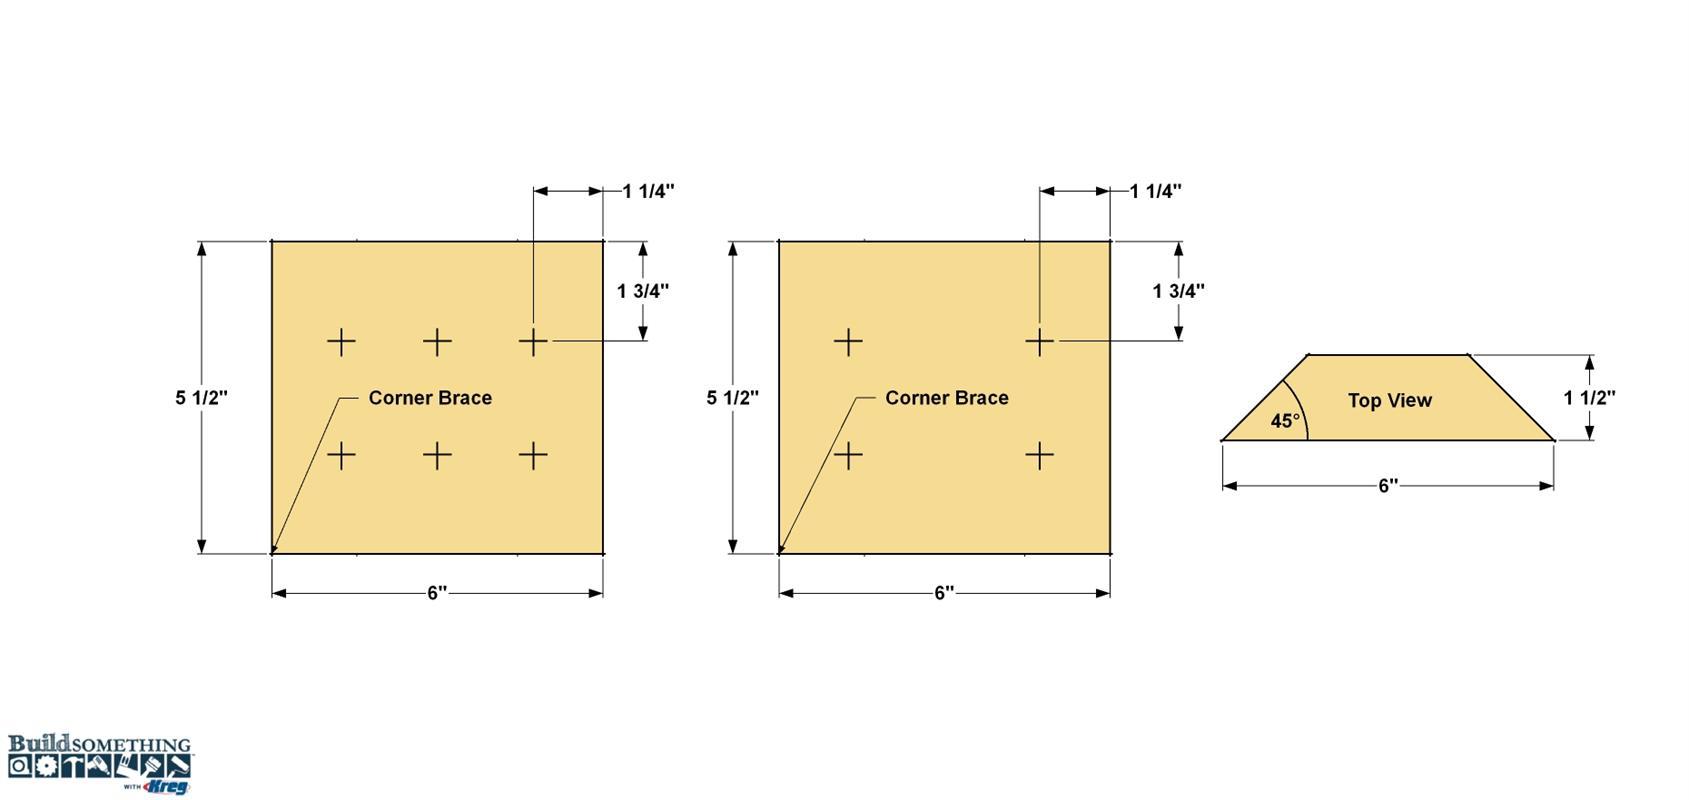
From 2x6 material, cut six Corner Braces to length by beveling each end at 45°, as shown in the cut diagram. In four of the braces, drill six pilot holes at the locations show. In the other two Braces, drill four pilot holes.
-
Install the Braces
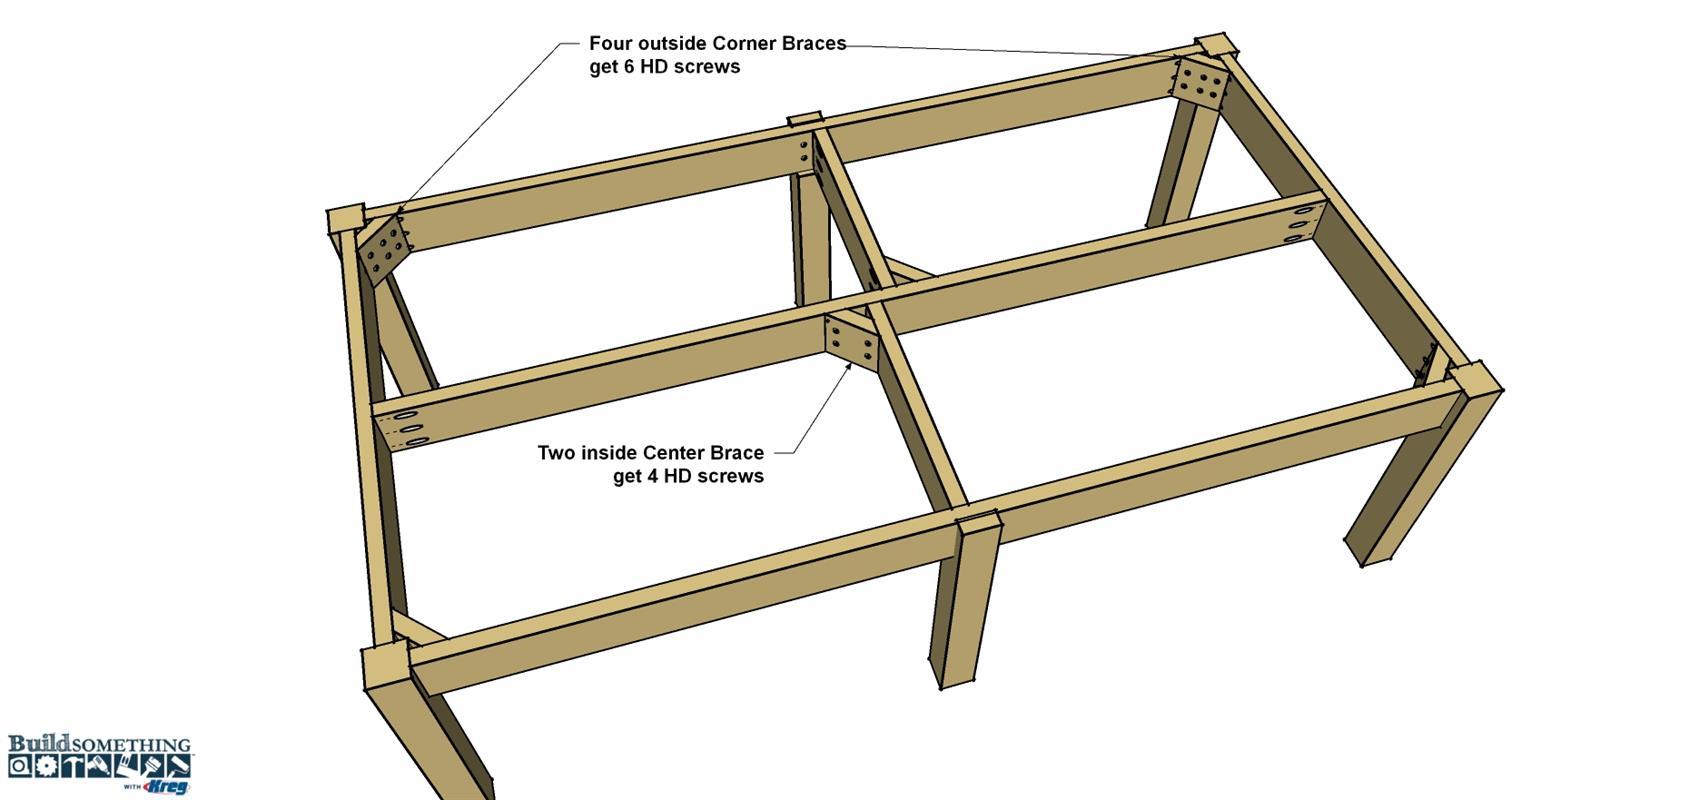
Apply exterior wood glue to the beveled ends of each Brace, and then position them where shown. The braces with six holes go at the outside corners, while the braces with four holes sit against the Center Supports and Long Rail. secure them where shown using 2 1/2" XL Pocket-Hole Screws.
-
Set the Top in Place
Set the cement-board Top Panels on the frame and adjust them so they overhang the base equally. Make sur ethe smooth face of each panel is facing up. Handle the panels gently until you have the edging installed (in the next steps) because flexing the cement board too much can cause it to snap.
-
Cut the Edging to Length
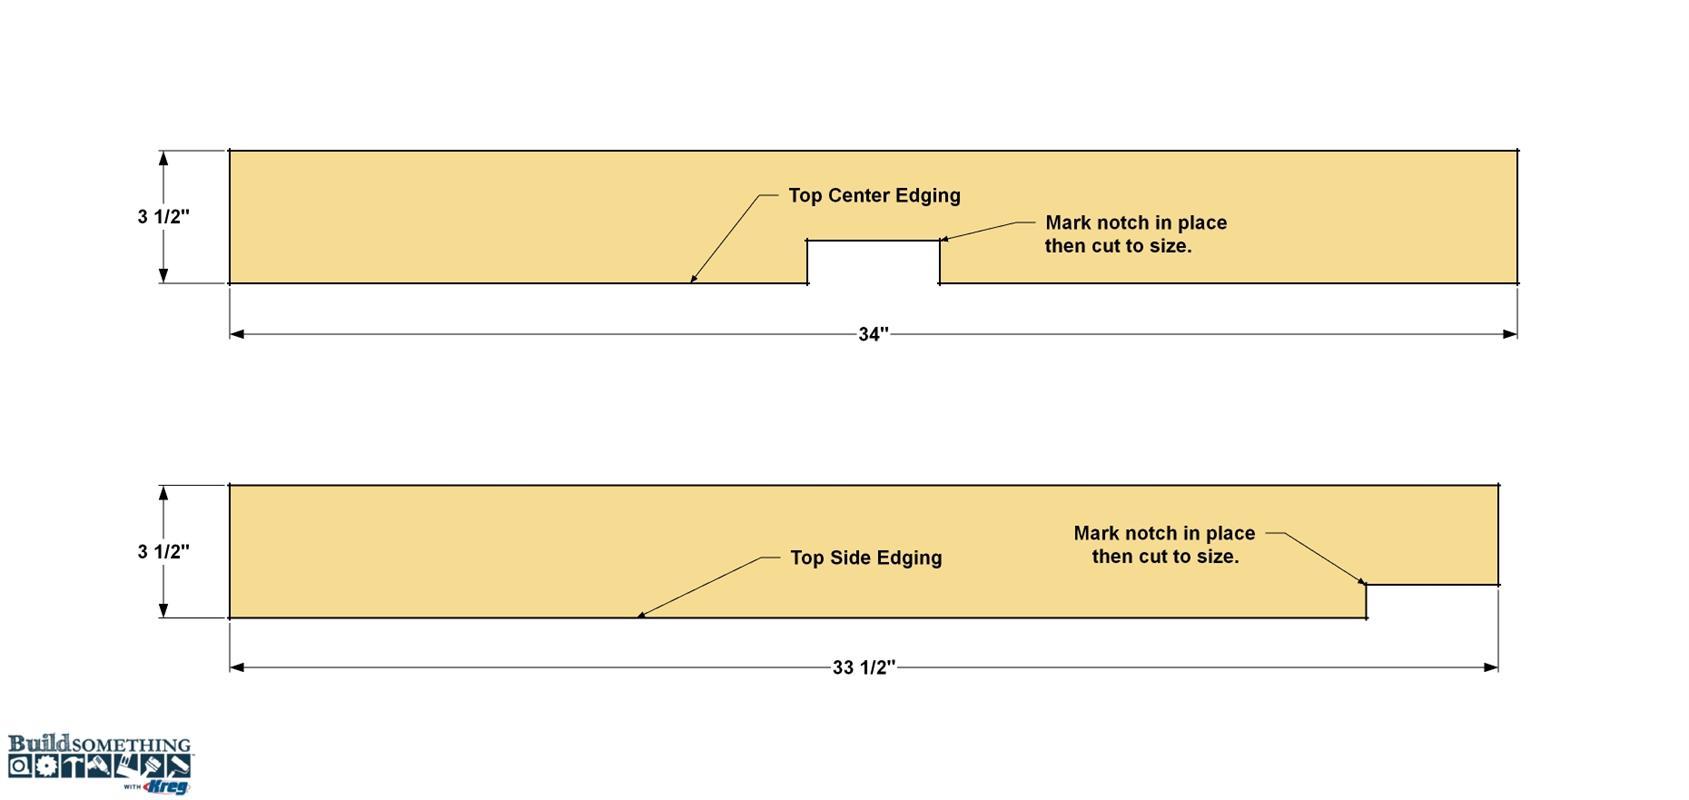
To strengthen the top panels, you’ll want to add edging. It’s made from 1x4 boards, and gets attached to the underside of the Top Panels using construction adhesive. Start by cutting two End Edges, four Side Edges, and two Center Edges to length from 1x4 boards, as shown in the cutting diagram. Don’t cut the notches yet. You’ll do that in the next step.
-
Install the Edging
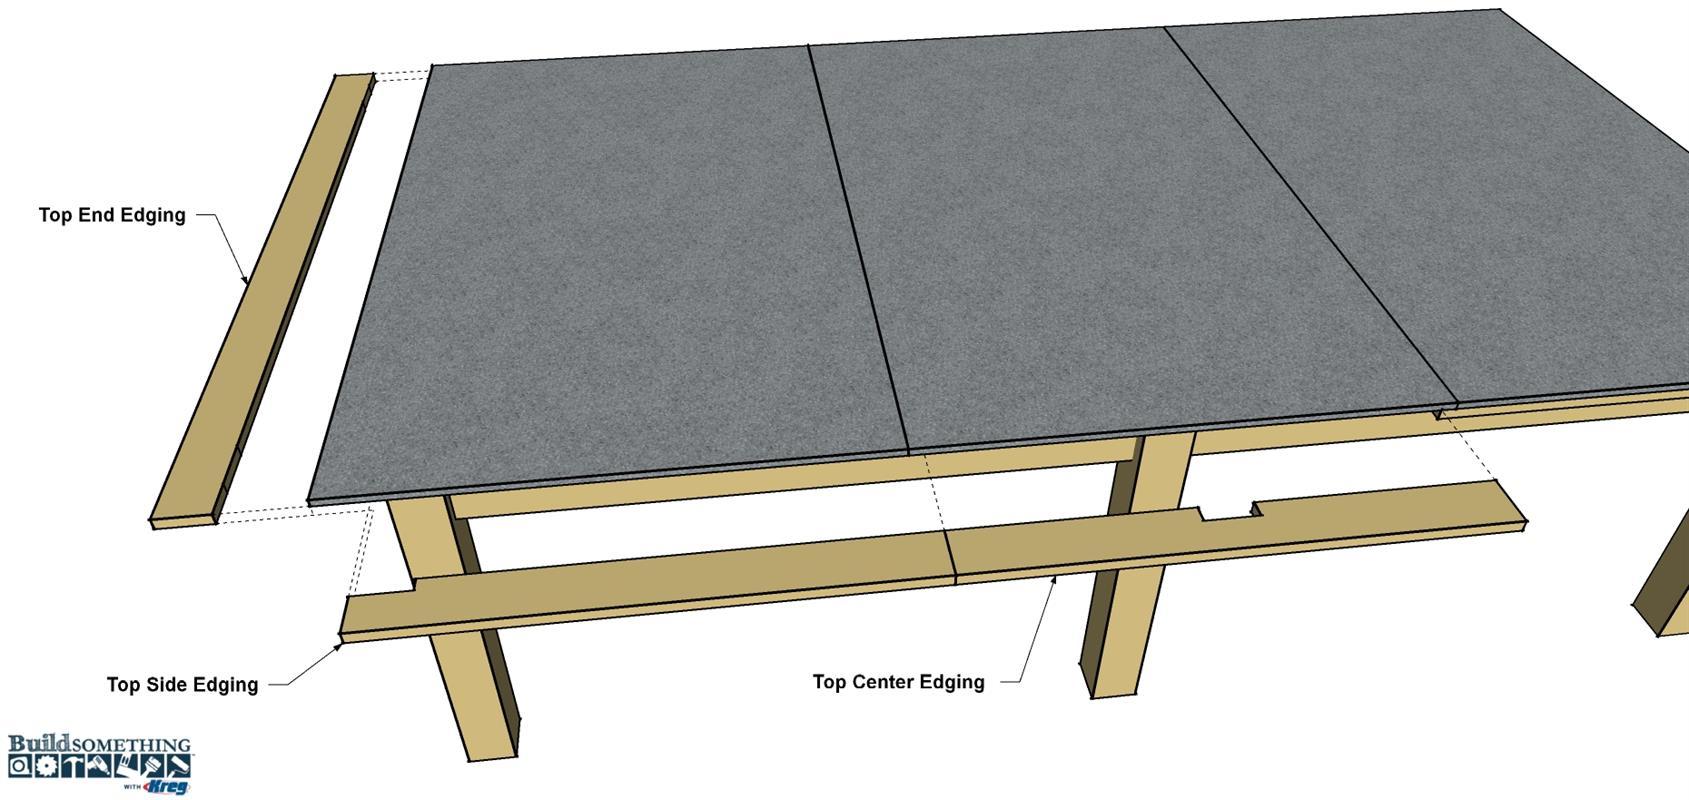
Start edging installation at the ends. Apply a bead of construction adhesive to one face of each piece of End Edging. Then clamp it in position, as shown, so it sits flush with the end of the table top, and the ends align with the top edges.
Next, place the First Side Edging in general position so it’s butted against the End Edging. Mark the location where you need to notch for the Corner Leg. Remove the Edging, cut the notch out with a jigsaw, and then reposition it to check the fit. If it fits properly, apply construction adhesive and clamp it in its final position. Do the same with each piece of Corner Edging—test fitting, cutting, and attaching each one. Finally, notch and attach the Center Edging. -
Apply Paint and Finish
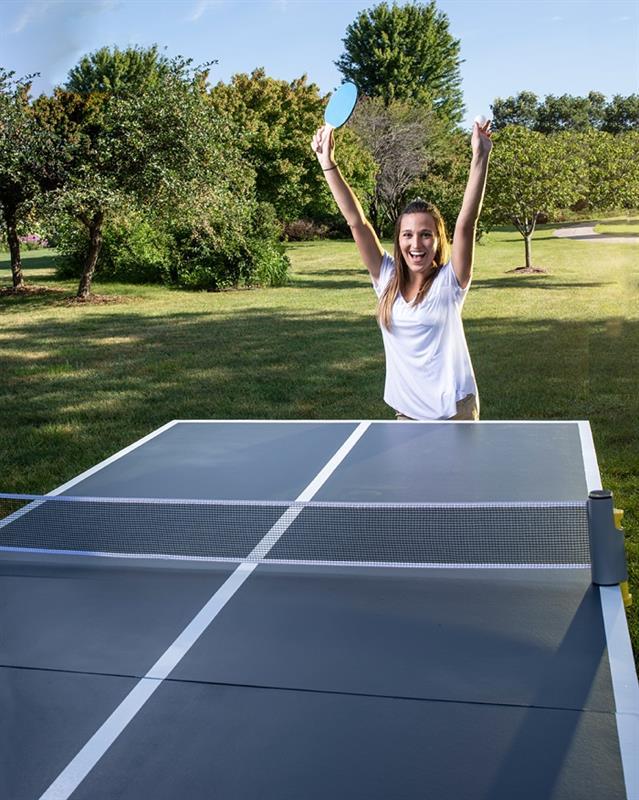
After the construction adhesive has had time to cure, you can paint the table top and apply finish to the base. Before you remove the remove the Top Panels, use a permanent marker to trace the position of the base rails on the underside of the table top panels. That way you’ll be able to easily reposition them on the base. Clean dust off he panels and wipe them down with a damp rag. Then paint both face of each panel to seal them. We used a porch and patio paint tinted to a dark grey. After the paint dries, mask off the edge and a line down the center and paint the lines white or a lighter contrasting color. Finally, apply an exterior oil finish to the base.


