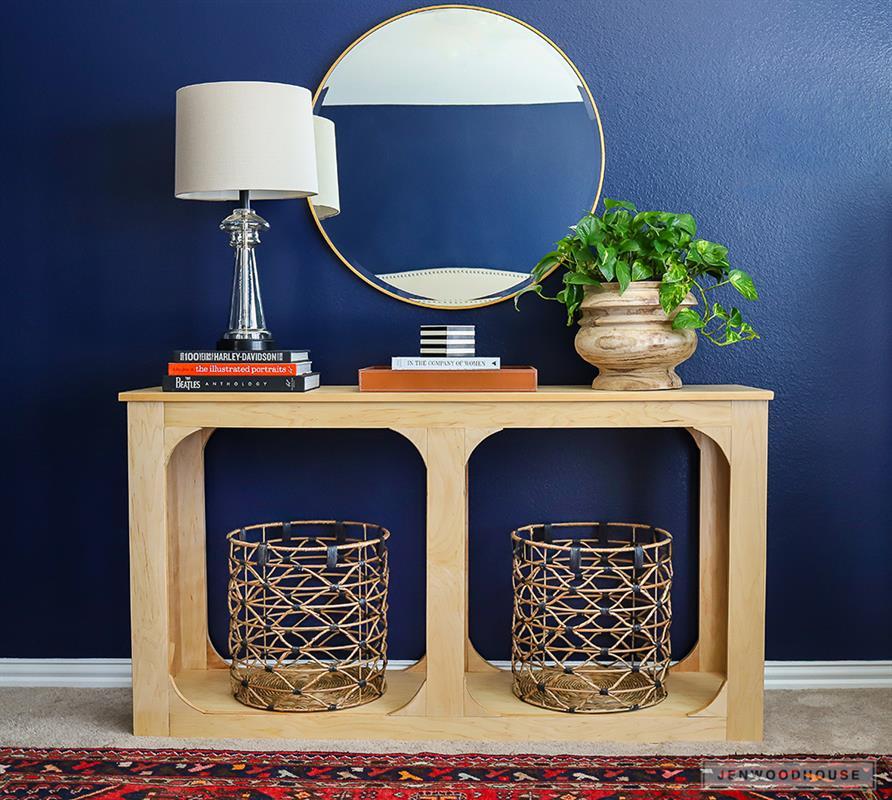
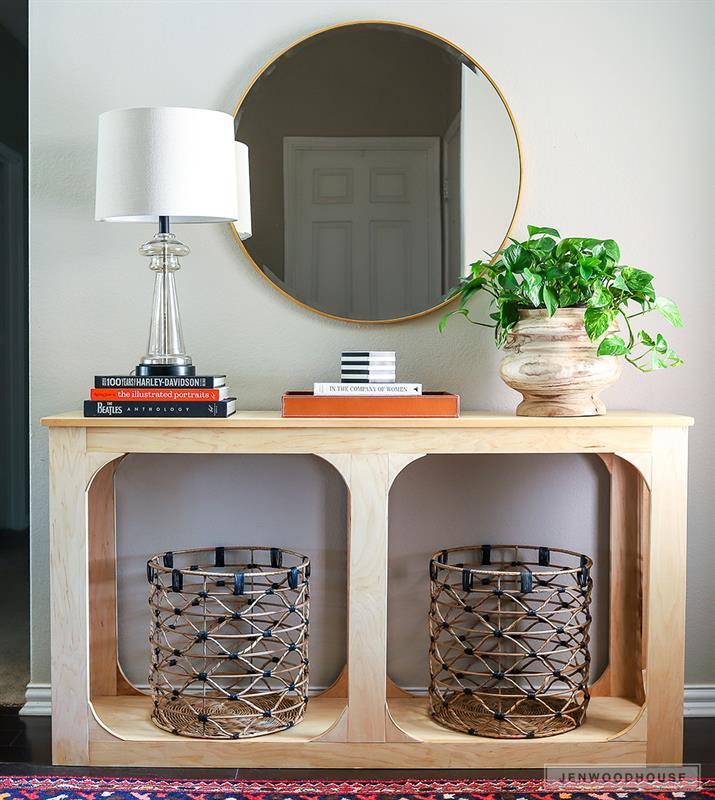


Build this stylish console table out of a single sheet of plywood! Its minimalist yet chic design makes it a versatile piece that will look stunning anywhere in your home.
Tools
Kreg Tools


Other Tools
-
Scroll Saw

-
Square
-
Table Saw
-
Tape Measure
-
Nail Gun
Materials
Wood Products
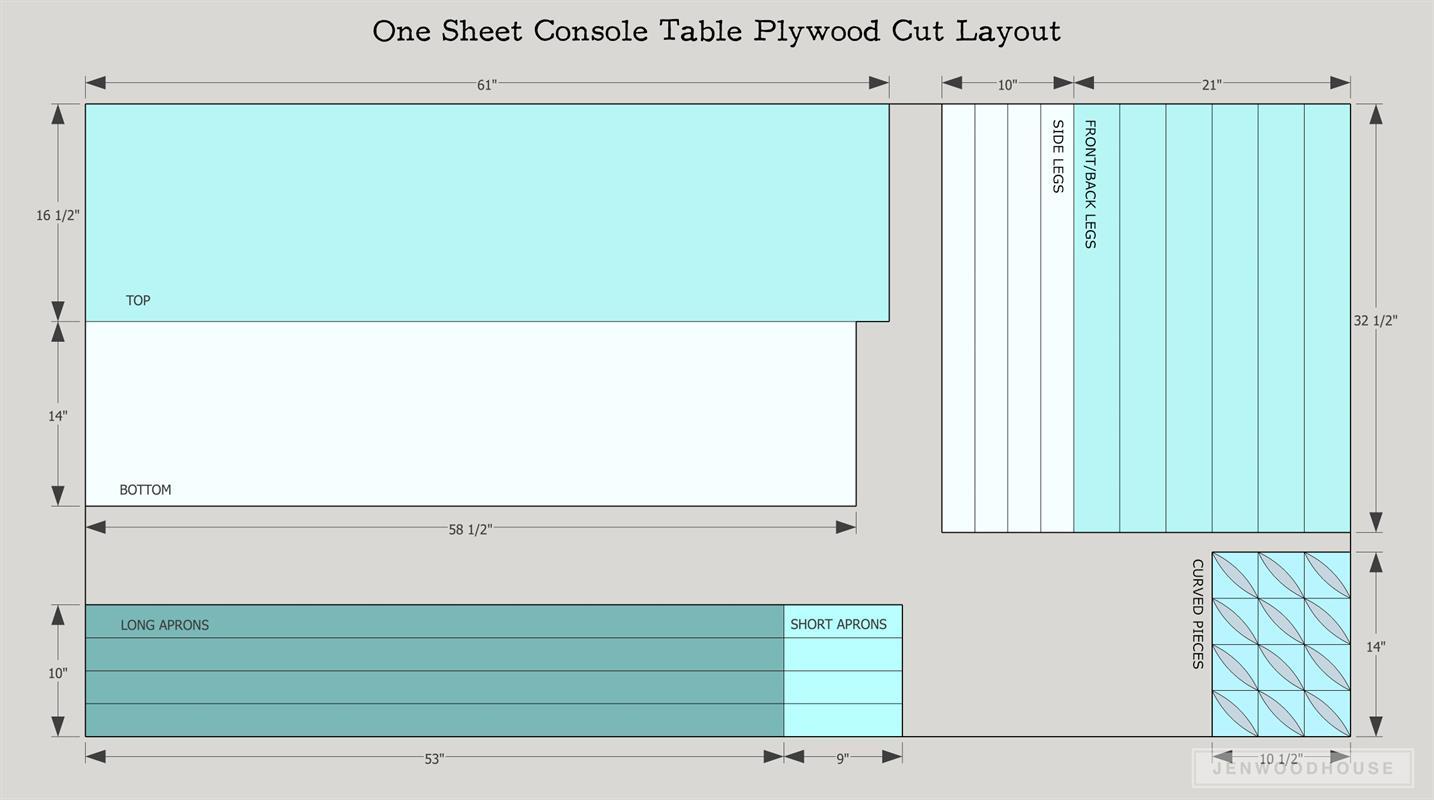
- 1 Plywood , 3/4" Thick , Full Sheet
Hardware & Supplies
- 1 3/4-inch Wood Veneer Edge Banding
- 1 1 1/4-inch Pocket Screws
- 1 1 1/4-inch Brad Nails
- 1 1 inch Brad Nails
- 1 Wood Glue
Cut List & Parts
- 1 Top , 3/4" x 61" x 16-1/2"
- 1 Bottom , 3/4" x 58-1/2" x 14"
- 4 Long Aprons , 3/4" x 53" x 2-1/2"
- 4 Short Aprons , 3/4" x 9" x 2-1/2"
- 6 Front, Back, Middle Legs , 3/4" x 32-1/2" x 3-1/2"
- 4 Side Legs , 3/4" x 32-1/2" x 2-1/2"
- 24 Curved Pieces , 3/4" x 3-1/2" x 3-1/2"
Directions
-
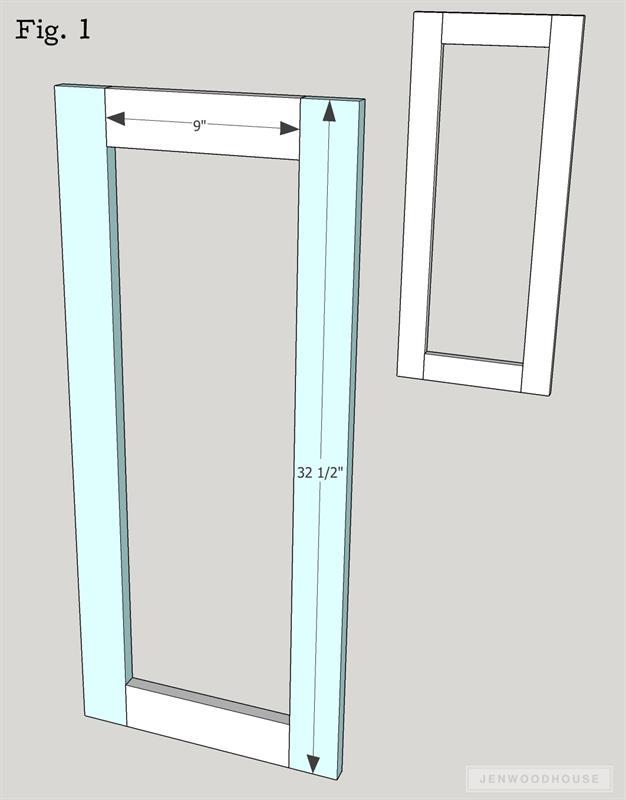
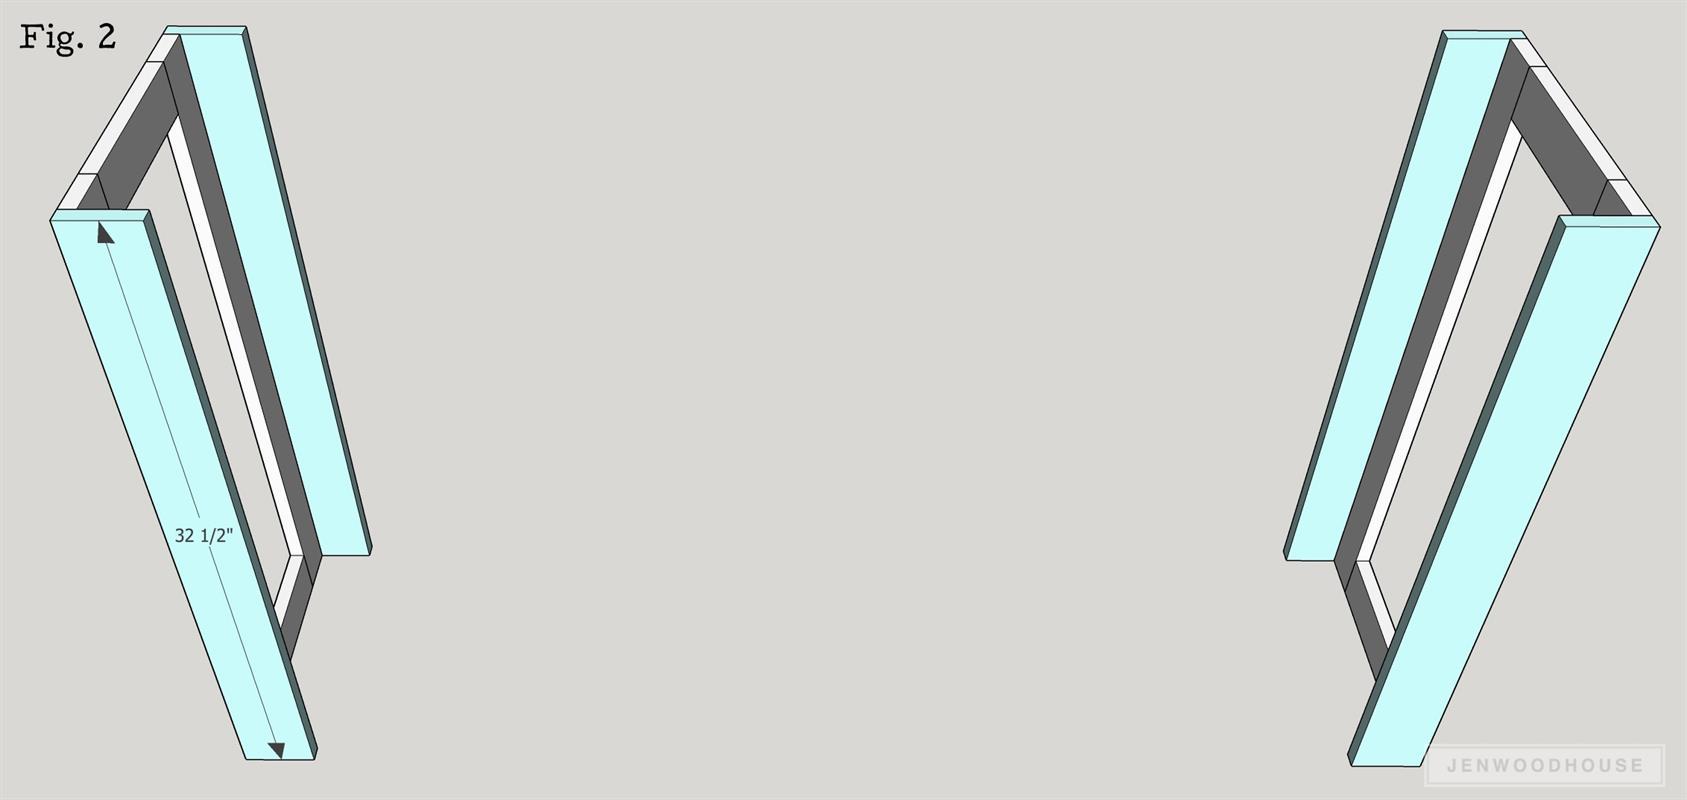
Build the Two Sides
Measure, mark, and cut side legs and short aprons to size. Drill 3/4-inch pocket holes into the ends of the short aprons and attach to the side legs with 1 1/4-inch pocket screws. Be sure to drill 3/4-inch pocket holes facing up in the side legs to attach the top in later steps.
-
Add the Front and Back Legs
Measure, mark, and cut the front and back legs to size. Attach the front and back legs to the side legs with 1 1/4-inch brad nails and wood glue.
-
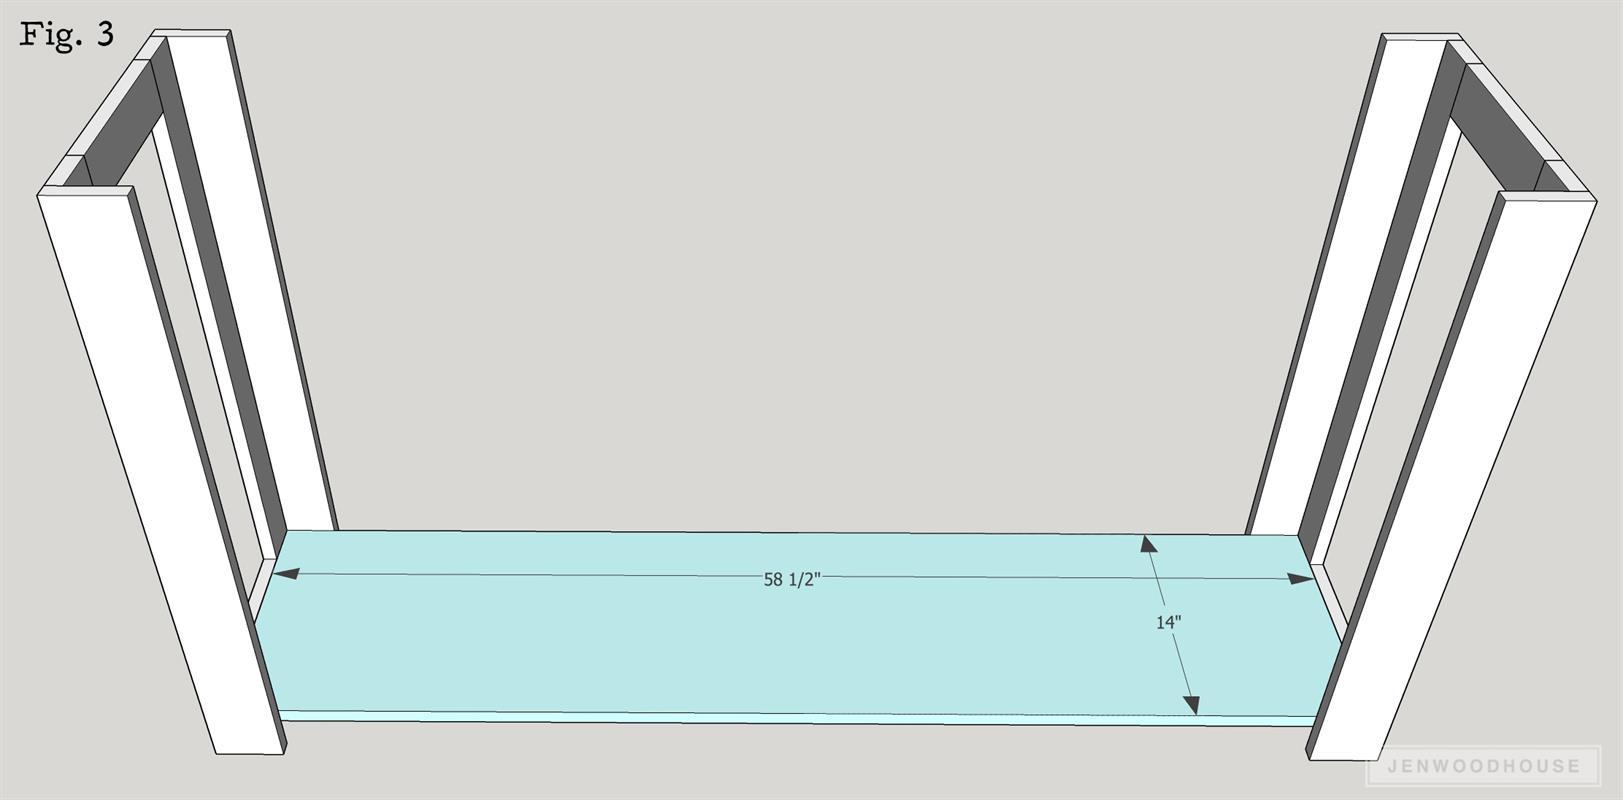
Attach the Bottom Shelf
Measure, mark, and cut bottom shelf to size. Drill 3/4-inch pocket holes into the ends and attach to the sides with 1 1/4-inch pocket screws.
-
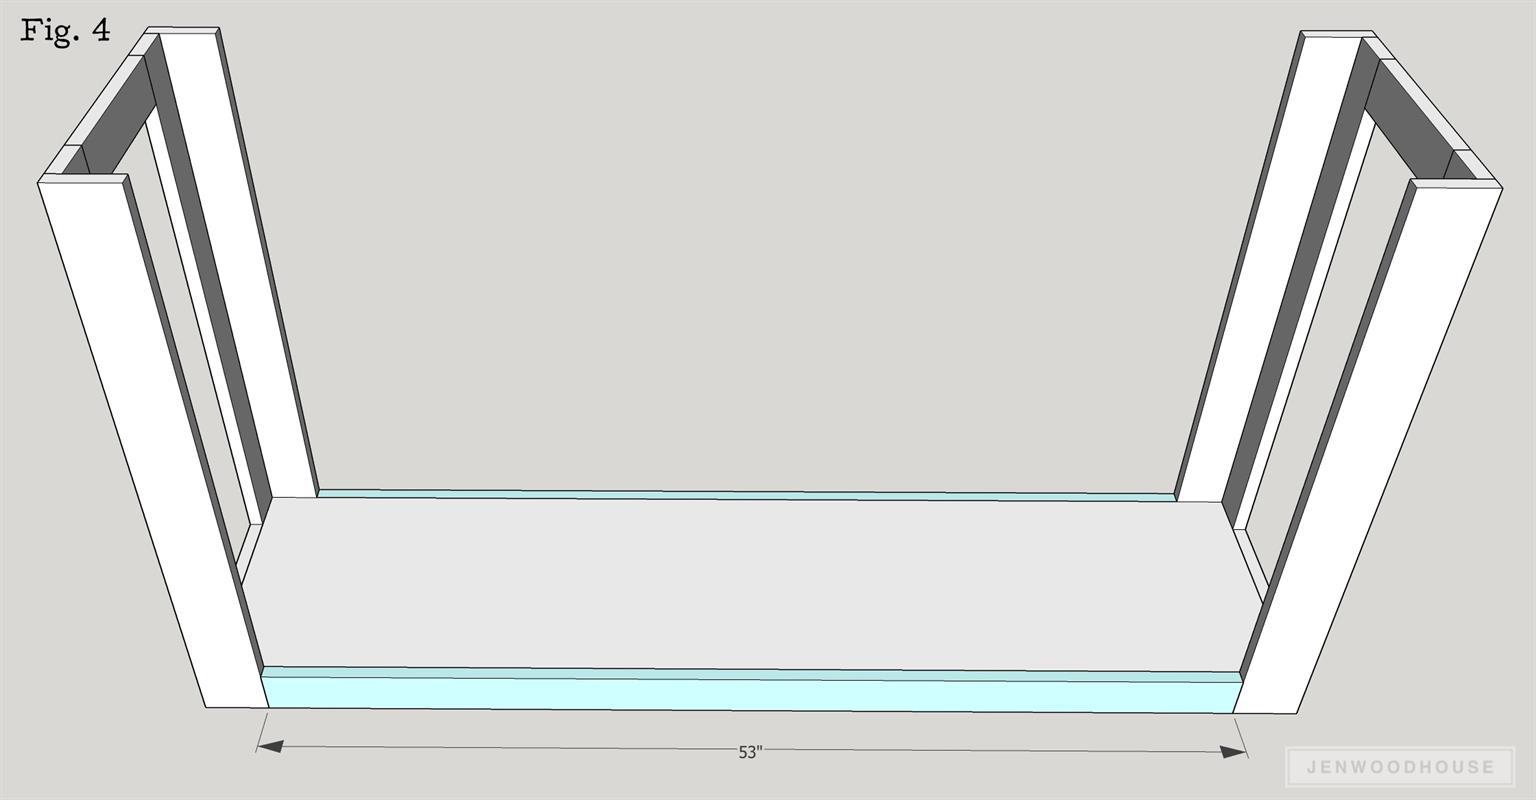
Add the Long Aprons To the Bottom
Measure, mark, and cut long aprons to size. Attach to carcass as shown with 1 1/4-inch brad nails and wood glue.
-
Add the Long Aprons To the Top
Measure, mark, and cut long aprons to size. Drill 3/4-inch pocket holes into the ends and attach to carcass with 1 1/4-inch pocket screws. Be sure to drill 3/4-inch pocket holes facing up to attach the top in later steps.

-
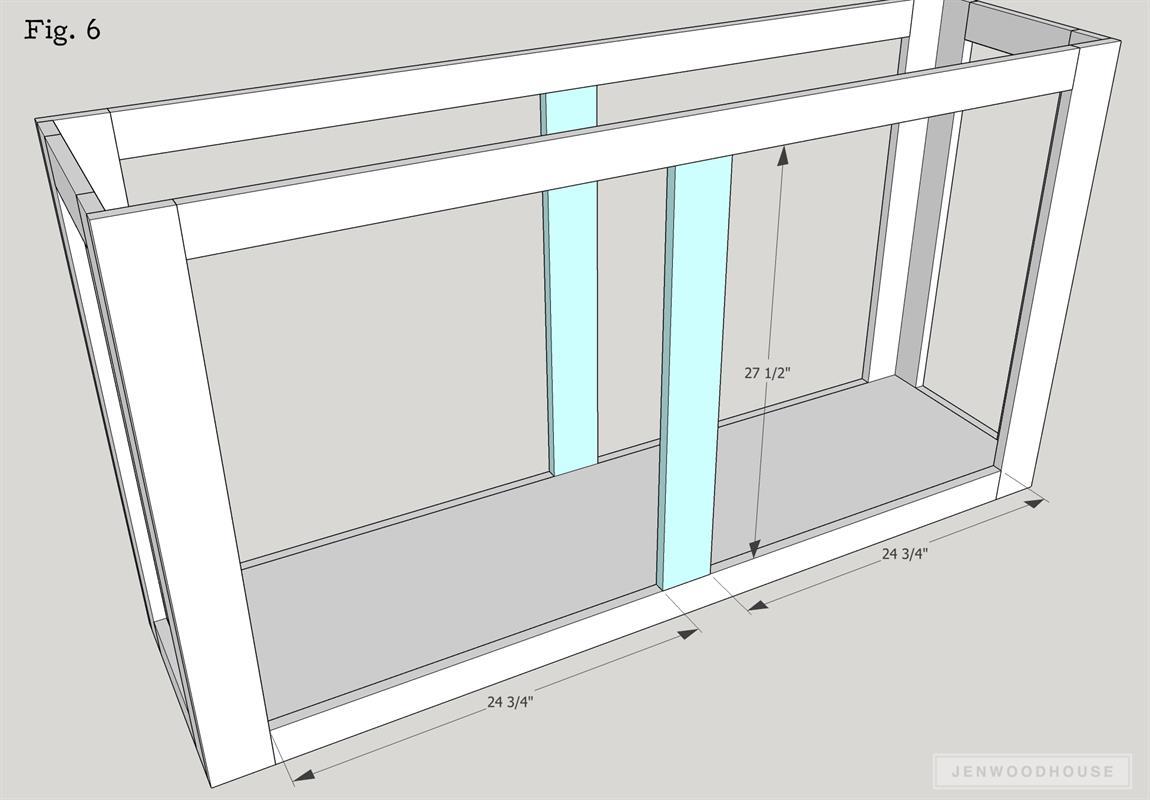
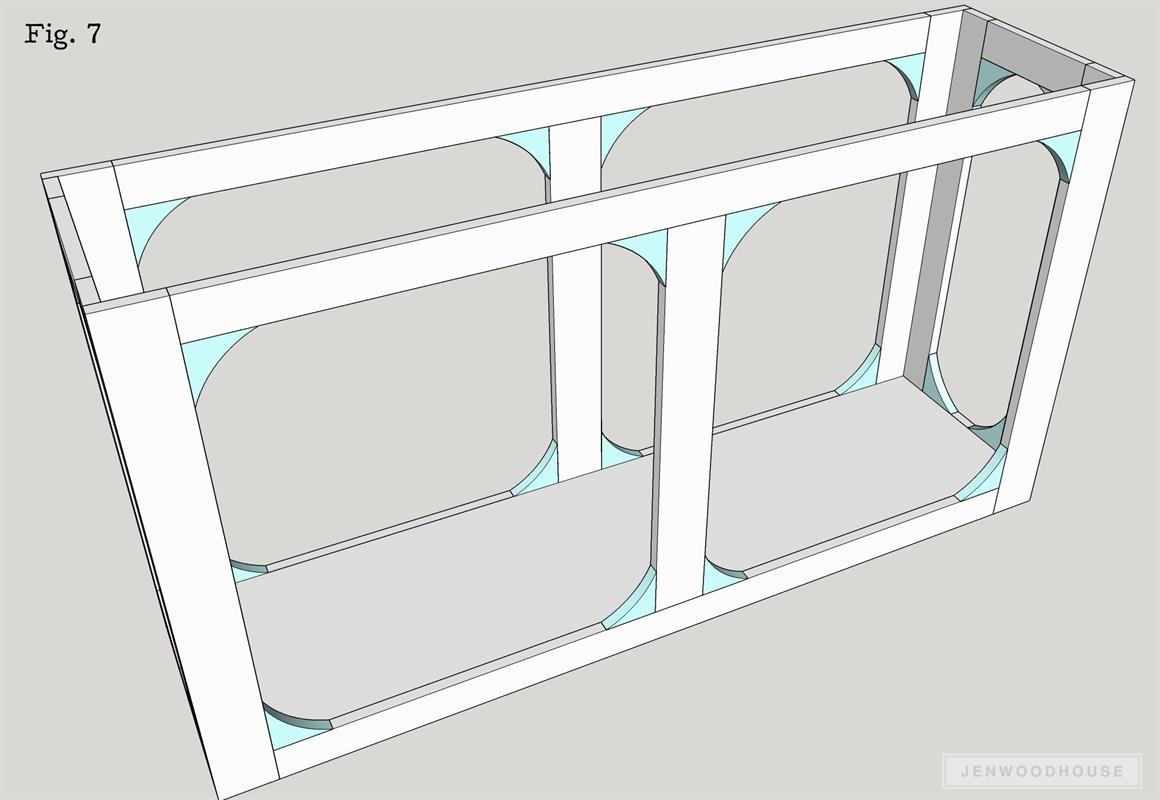
Attach the Middle Legs
Measure, mark, and cut middle legs to size. Drill 3/4-inch pocket holes into the ends, find the midpoint in the carcass and attach middle legs with 1 1/4-inch pocket screws.
-
Add the Curved Details
Measure, mark, and cut curved pieces out with a jigsaw, bandsaw, or scroll saw. Attach as shown with wood glue and 1 inch brad nails.
-
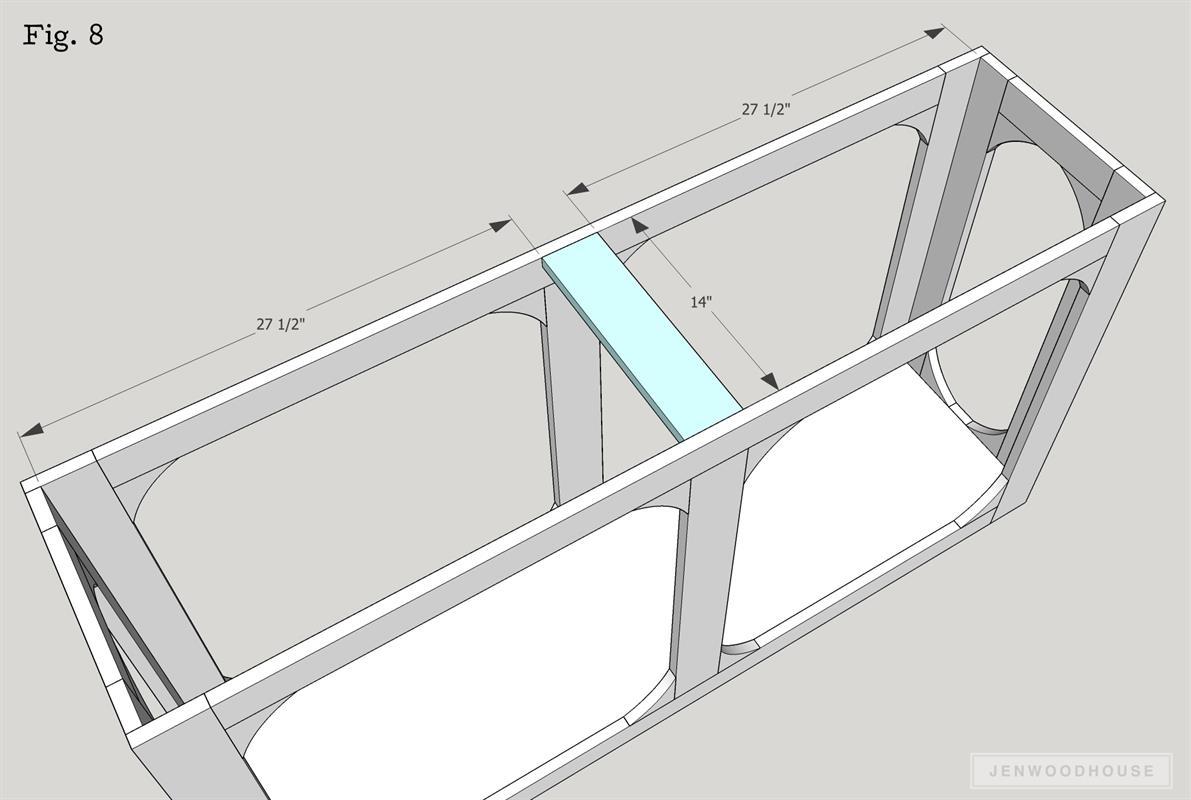
Add the Underside Support
Measure, mark, and cut middle support to size. Drill 3/4-inch pocket holes into ends and attach as shown with 1 1/4-inch pocket screws.
-
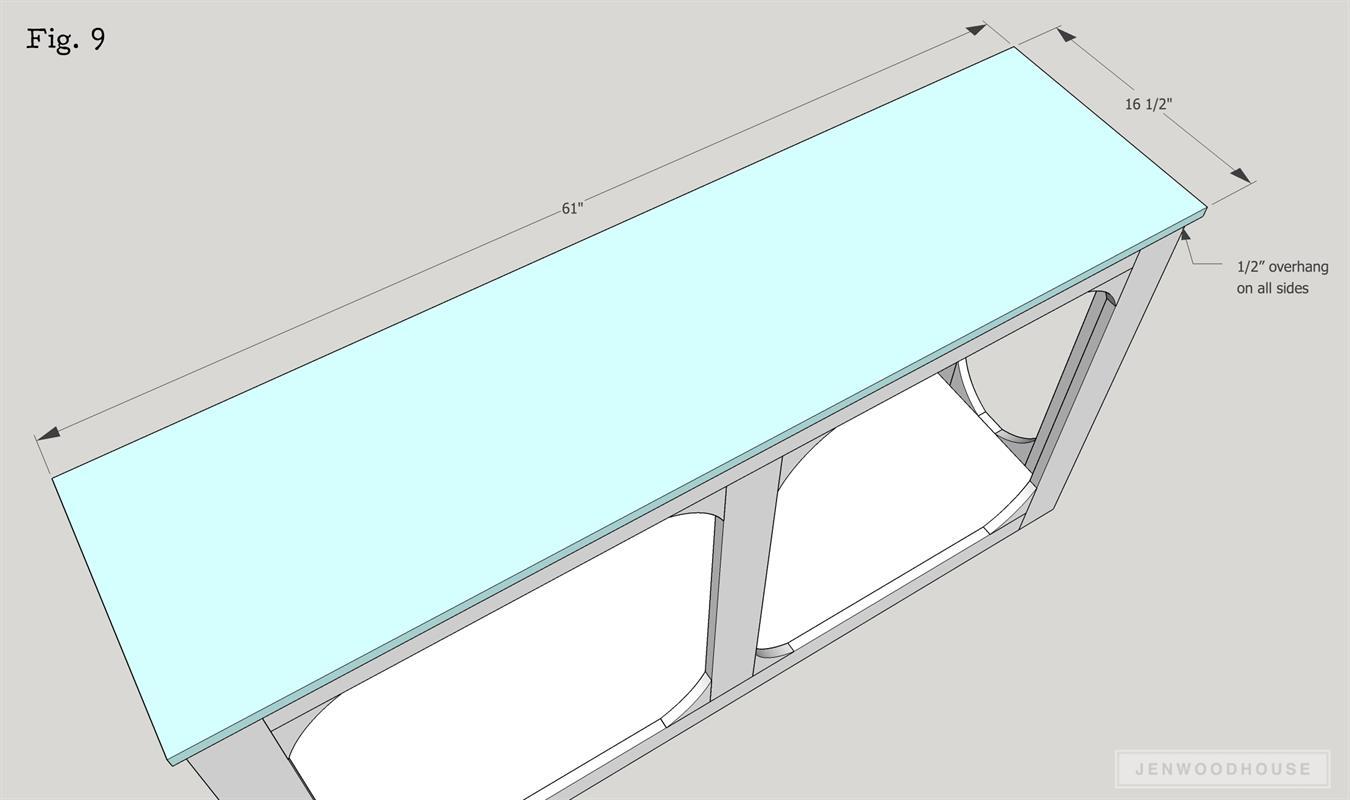
Attach the Top
Measure, mark, and cut top to size. Position over the carcass with a 1/2-inch overhang on all sides. Attach with 1 1/4-inch pocket screws driven from the aprons underneath.
-
Visit JenWoodhouse.com
Visit JenWoodhouse.com for more information, DIY project ideas, and building plans.